Inventory Setup
Inventory >Configuration> Inventory Setup
In Inventory setup search, you will see two search tabs
| Search | Allows you to search for an existing item, Creditor or Debtor based on system fields and which module you are in. |
| Custom | If you have setup custom fields in your inventory, you can search for the items using the custom fields linked. |
Note: If you leave the fields blank it will bring back all Inventory codes which will be sorted in inventory code order alphabetically.
If you click on the column heads they will sort A-Z or Z-A
Navigation Ribbon

| Search | Allows you to search for an existing item, Creditor or Debtor based on system fields and the module you are in. |
| Add | Allows you to create a new Inventory item, Creditor or Debtor depending on the Module you are in. |
| Edit | Allows you to edit an existing Inventory Item, Creditor or Debtor depending on the module you are in |
| Clone | Allows you to Clone an existing Inventory Item, Creditor or Debtor depending on the module you are in |
| Delete | Allows you to Delete an existing Inventory Item, Creditor or Debtor depending on the module you are in, you will not be able to delete an Inventory Item, Creditor or Debtor if they have transactions against the. |
| Inventory Overview | Allows you to view an overview of all movements for the selected Inventory Code. |
| View Image | If you have uploaded an image of your Inventory item, you will be able to view it here |
| Serial No. Options | When you select a product that has serial numbers recorded, you can either view them here or you can print them from here as well. |
| Functions | Allows you to update various settings on the items selected |
| Prints the selected Inventory Code details | |
| Import & Export | Export General Details of Inventory Code to Excel |
Search options
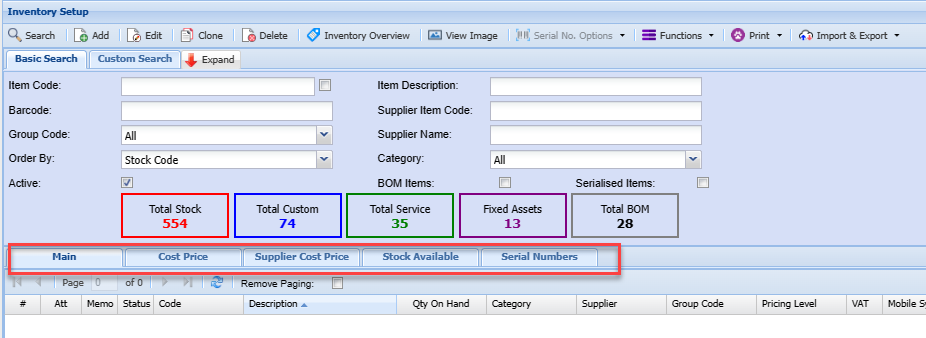
Enter any of the fields, such as the item code or part of the item description to limit your search to a specific item or range of items.
| Main | Displays basic information of the item within the grid |
| Cost Price | Shows the item cost and selling price information of a selected item |
| Supplier Cost Price | Shows various supplier cost prices of a selected item, including historic cost prices. |
| Stock Available | Shows stock quantity levels of the item in various warehouses. |
| Serial Number | Shows serial numbers for the selected item. This tab is only active if the item code is flagged for serial number tracking |
To create a new inventory item, click on the Add button
Fill in all the relevant information on the inventory item.
You will have to fill in the category type example, stock, service or custom.
| Stock |
Physical items such as a ruler. Inventory items work with costing methods a. Latest cost or b. Average Cost. This is setup under the System Configuration Module- Administration – Reference Values. |
| Service | Labor can be termed a service item. This does not track inventory. Service items cannot be used in the Goods Received Vouchers. |
| Custom | Works the same as Service type. You can put sub-contractors work under this. This will appear in Goods Received Vouchers. |
| Fixed Assets | This type of inventory is only used to insert your fixed assets. You can put a cost value to it and run a report which will list all fixed assets with their cost value. |
The inventory code can be changed at any time.
The Inventory category cannot be changed after it is saved
Inventory Details Tab
In the General Details tab fill in the static information.
| Inventory Code | This is a unique code that identifies the Inventory Item. The Code field can be Alpha Numeric and over 200 Characters long. |
| Category | Select the type of inventory item that is being created. There are four options, stock, service, custom and fixed asset. |
| Description | This is the name of the inventory item. The Description field can be Alfa Numeric and over 500 Characters long. |
| Long Description | This is extra information on the inventory item. You can have a very descriptive note on the item. This can be automatically copy when doing your lines in the document. |
| Primary Image | This is a drop down and only shows Images which have being uploaded as attachments. You can select a default image against the customer to show on the right-hand side. |
| Priority Level | Select a priority level form the drop-down menu |
| Group Code | Select a group code from the drop-down menu |
| Active | Select if this item is active or not. To make an item inactive the item must have zero inventory on hand in all warehouses |
| POS Item | Tick if inventory item is a POS item |
| Internal Ref ID | Customer reference number for item |
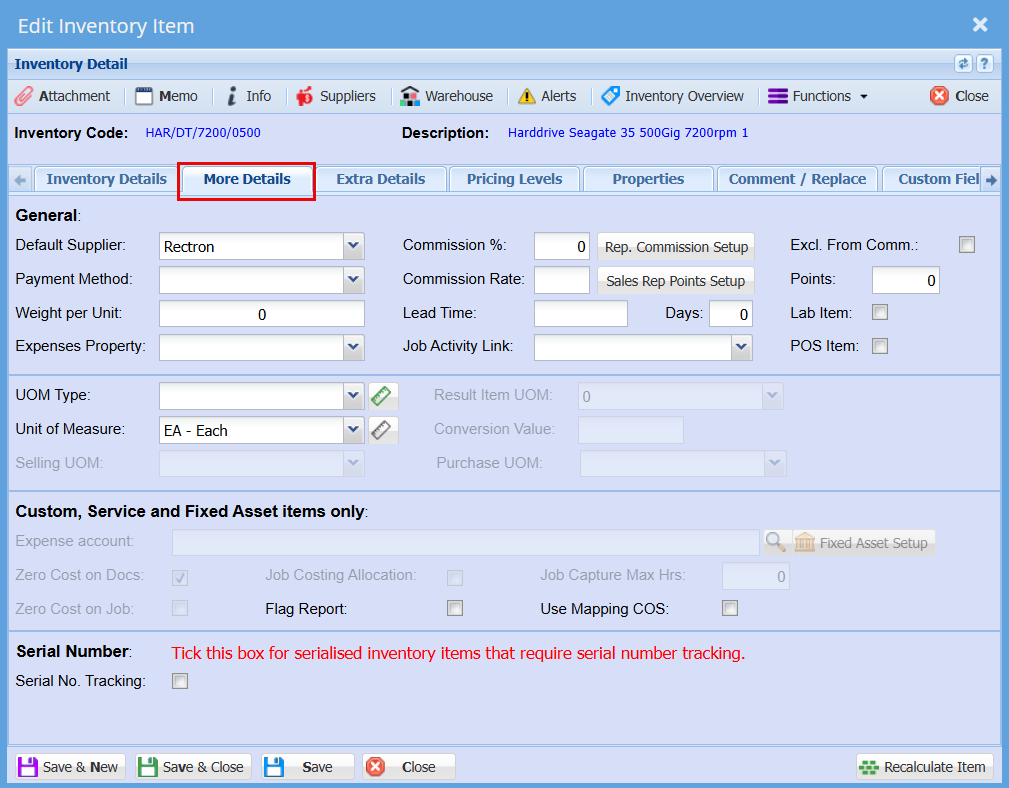
| More Details Tab Unit of Measurement | This indicates the unit of measure of items. Case Lots uses this for its multiplication. |
| Default Supplier | Set this drop down which is populated by the supplier’s button to your most commonly used supplier. |
| Tax Type | Set a default tax type for this inventory item. |
| Account Type | Only used in Custom and Service type items. This account replaces the inventory account and puts costs to the ledger account set here. Do not use inventory account when setting up your custom and service items. |
| Bar Code | Insert a Bar Code for the item |
| Bin | Bin Location – Put in a note of the location of your inventory |
| Weight per unit | Setup your weight per unit. You can select the stationery layout with weights column which will multiple the quantity by the weight and give you the total weight per line product. |
| Default Supplier Cost | Tick this if you want to default your costing methods on the supplier cost. |
| Pricing Override | You can choose a pricing override for an item if you wish to run a special on this product. You will need to specify the start and end date of the special. |

The system will automatically revert back to the default pricing structure when the date of the special has come to an end.
| Serial No Tracking | Tick if item code must be serial number tracked |
More Details Tab
Pricing Levels tab
You will have to setup a Pricing level for this item before closing. To setup a pricing level click on the Add button.
In this area, the cost price is important if it is an inventory type, if you do not put in a value of cost, you will only be able to change this cost price via an Inventory Value Adjustment. This cost price is affected by your costing methods setup in System Configuration under Reference Values.
You will have to put in a Tax Type for this item before saving. In order to see the other tabs you will have to save this item.
| Cost Price | This is the cost price of the item. |
| Stock | This is grayed out because it is governed by accounting costing methods found in the setting Reference Values under System Configuration. There are two types of costing methods Average costing or latest costing methods. The average costing method is the most commonly used. |
| Service | This cost is open and the user can put in a cost value there which will be carried across when doing invoices. Use costing in service only if you are an advanced accounting user. Instead leave the cost at zero. |
| Custom | This cost is open and the user can put in this cost is open and the user can put in a cost value there which will be carried across when doing invoices. This cost works on latest costing method and will be updated when this custom type item is used in a Goods Received Voucher. |
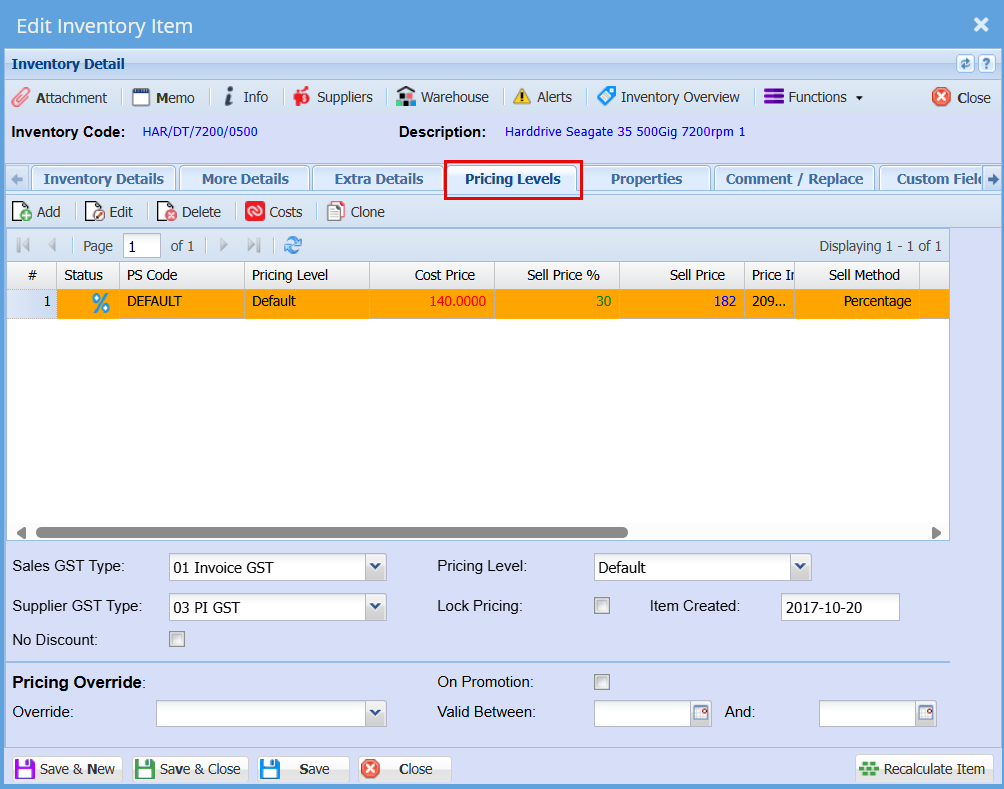
In this area you can setup two ways to work out your end selling price
| Amount | Put in the amount you wish to sell the product at on an exclusive basis. The system will always bring up this selling price when selling irrespective of your cost price. |
| Percentage | You can create a percentage markup from your cost price. This percentage will change the selling price dependent on your cost price. |
The difference between the two above is that should you chose Percentage this is good when a product is governed by currency rates and you do not want to lose profits.
.png)
Once you have selected your pricing level you will need to select a Default pricing level for this item.
| Sales Tax Type | Set the default sales tax type for this item, generally sales invoice VAT / GST tax type |
| Supplier Tax Type | Set the default supplier tax type for this item, generally GRV VAT / GST tax type |
| Pricing Level | Default pricing level to apply pricing if multiple pricing structures have been assigned to item. Usually best to set to the highest price. |
| Lock Pricing | Lock the sell price so that it is not affected by discount structures from customer |
| Item Created | The date the item was first created |
| No discount | Ensure that this item is excluded from discount from Customer default discount structures |
| Exclude Margin Enforce | Exclude the item from been checked for margin enforce (View Manual) |
| Pricing Override | Section for setting up an override to standard pricing structures |
| Overriding Level | What pricing structure must be applied |
| On Promotion | Set that this is an active promotion to apply the pricing override |
| Valid From / To | Set the date from and date to that the promotion special pricing must be applied. Once the date to has expired the system will revert back to default pricing structure |
Custom Fields tab
If configured, you are able to select from drop down option
.png)
Spec tab
To add the specifications of the item
The user can also have options to activate other fields by ticking the boxes on the right hand page
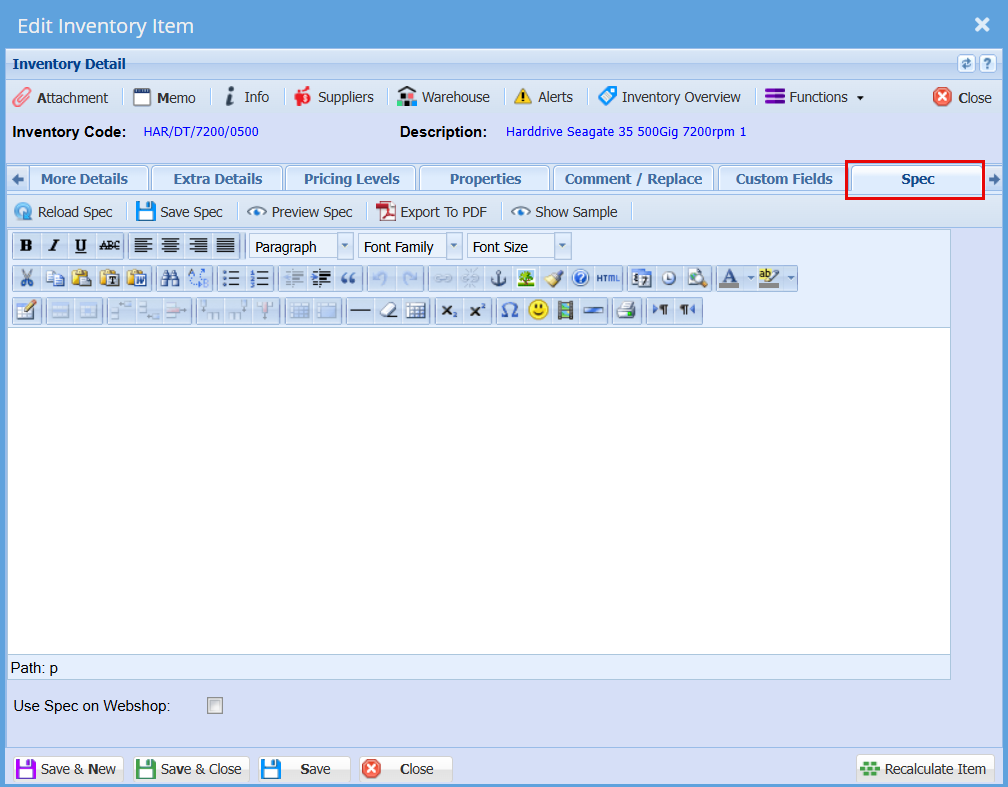
| Reload Spec | To reload the spec |
| Save Spec | To save specs |
| Preview Spec | Allows the user to preview the spec |
| Export to PDF | To export the spec onto a PDF file |
| Show Sample | Shows the sample of the text |
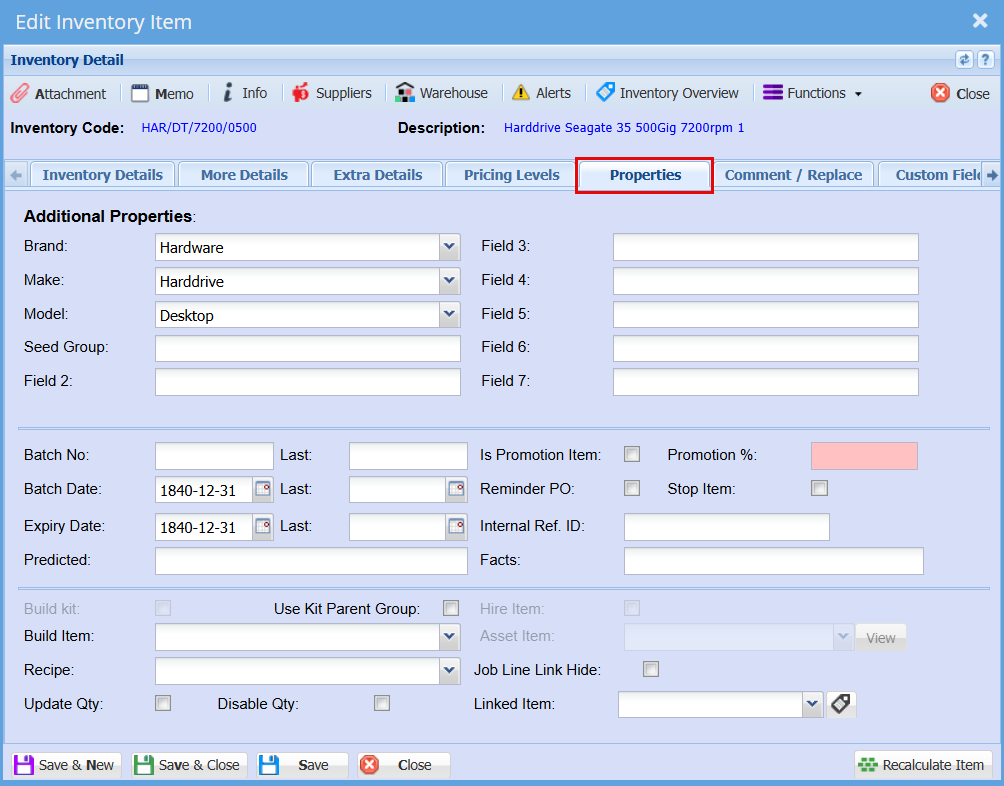
Properties tab
Add the dimensions of the inventory item
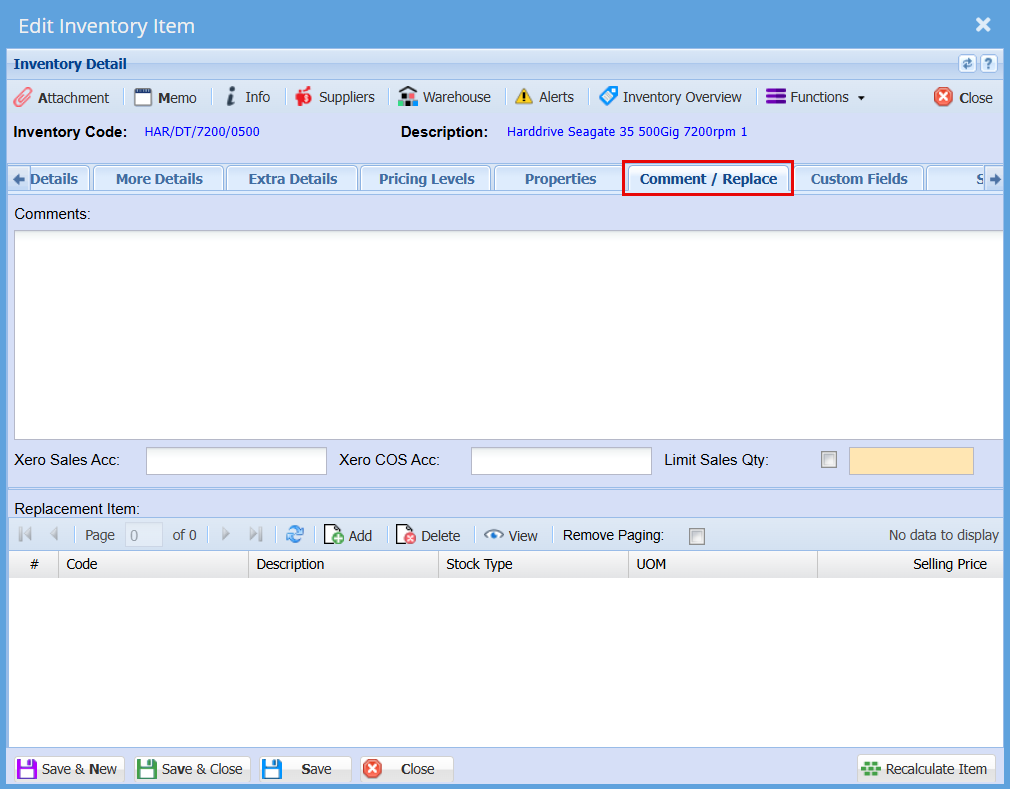
Comments/Replace Item Tab
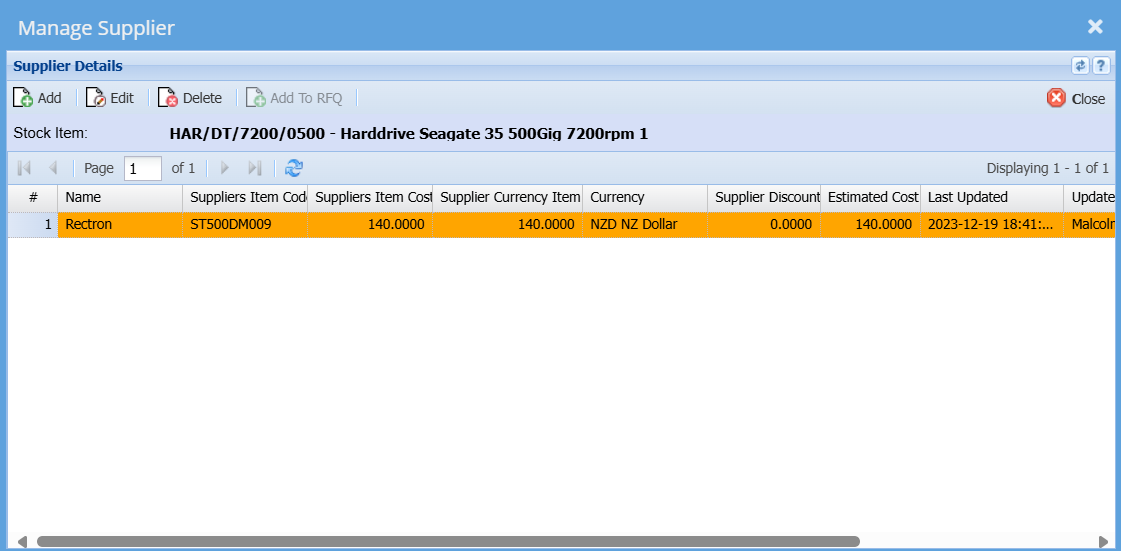
Supplier’s Button
On the inventory items you will need to select the various suppliers where you purchase this item from.
In this area we cater for multiple suppliers to one inventory item. This is handy so you can see what the cost price is that you purchase this item from the various suppliers. You will also be able to see the supplier item code and when the last time any changes done to this supplier was made.
Last Updated field is changed in two ways:
| 1 | When a Goods Received Note comes in and updates the price and date |
| 2 | When the user manually changes the details. |
This price has nothing to do with the cost price of the item, these prices have to do with the actual supplier price which he will give the item to you at.
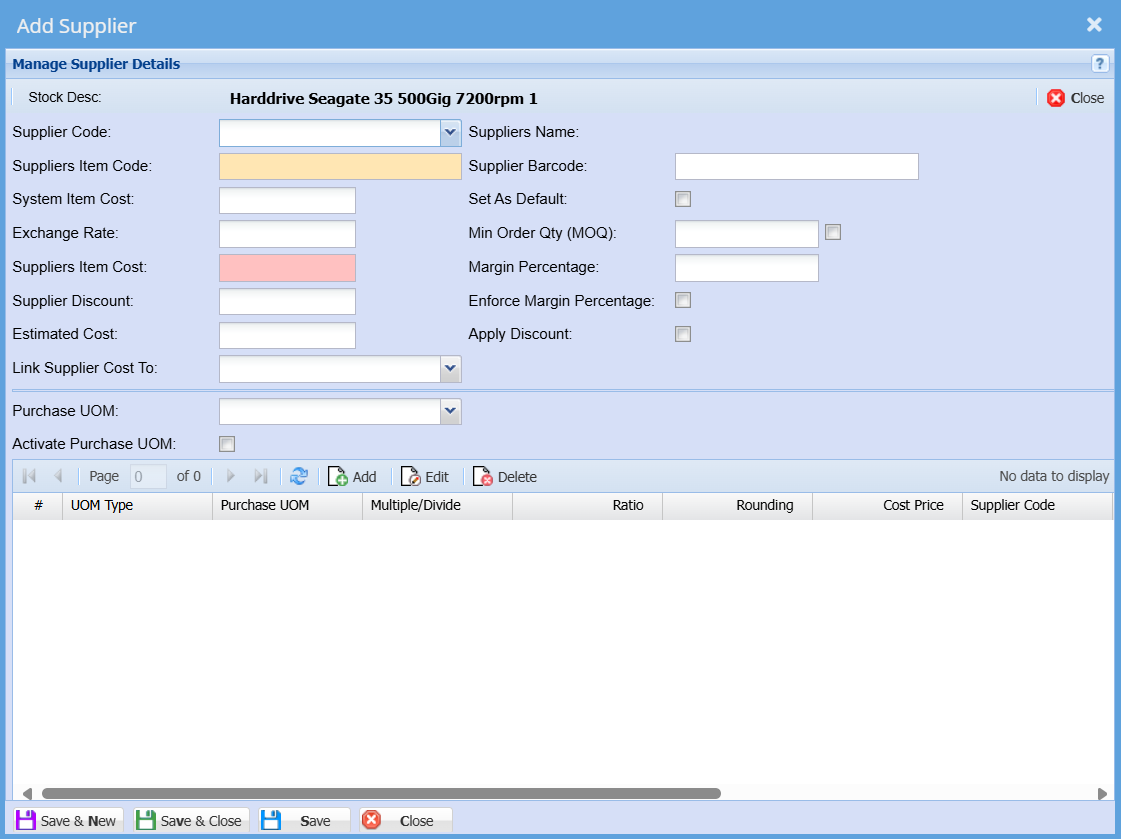
To create a new supplier, click on the Add button
Fill in the Supplier item code, select the unit of measure and put in the price of the item that your supplier will sell it to you at.
Prices are exclusive.
Warehouses Tab
If you have the Warehouse Module you will be able to select multiple warehouses that this item belongs to.

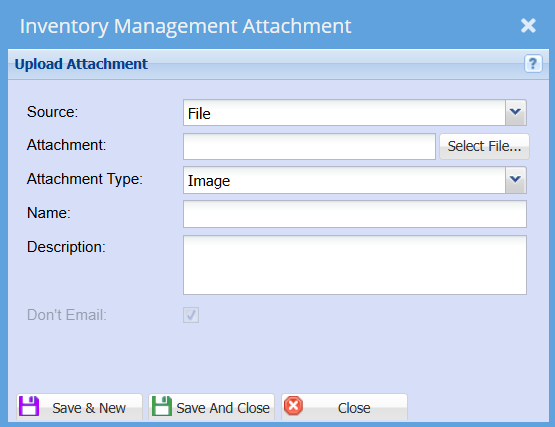
Attachments
In this window we allow for unlimited number of uploads of documents to be attached to the Inventory item. You can attach pictures, Excel sheets, Word Documents and any file you wish.
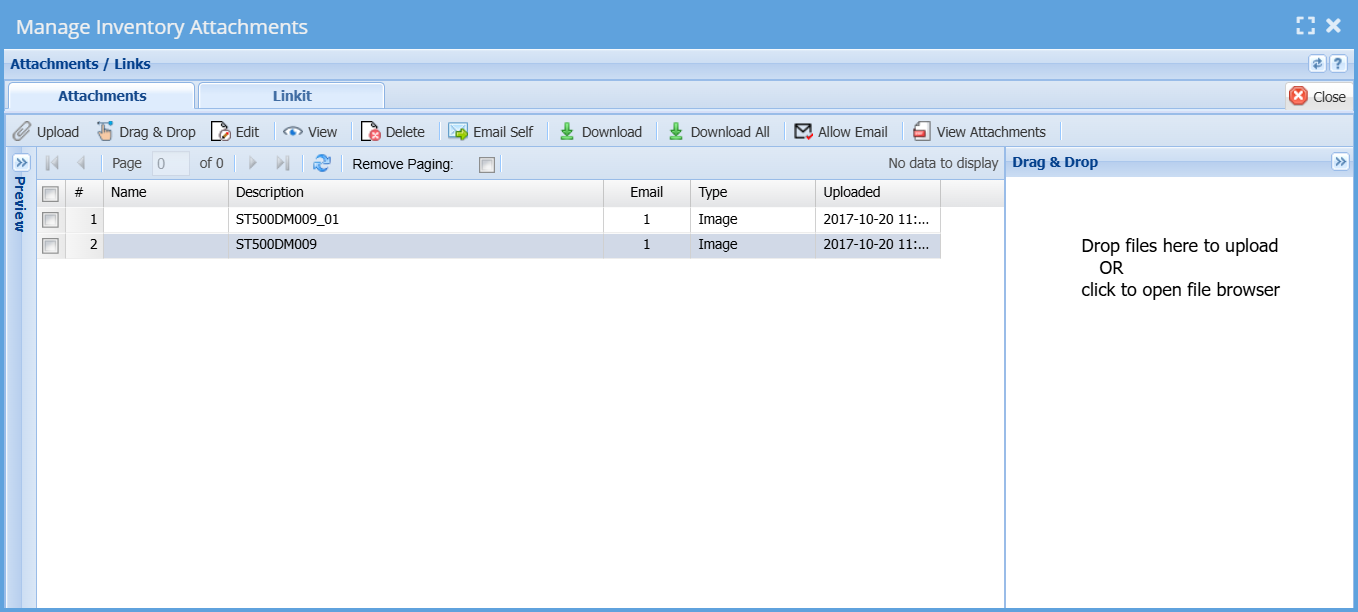
When you click on the Upload button Attachments Button the following will come up.
In this area we allow you to categorize your documents, name the file and then chose the file.
Once you click on the upload button it will take a copy of your file to the server. This means whenever you are in Huge ERP you will be able to view the file anywhere.
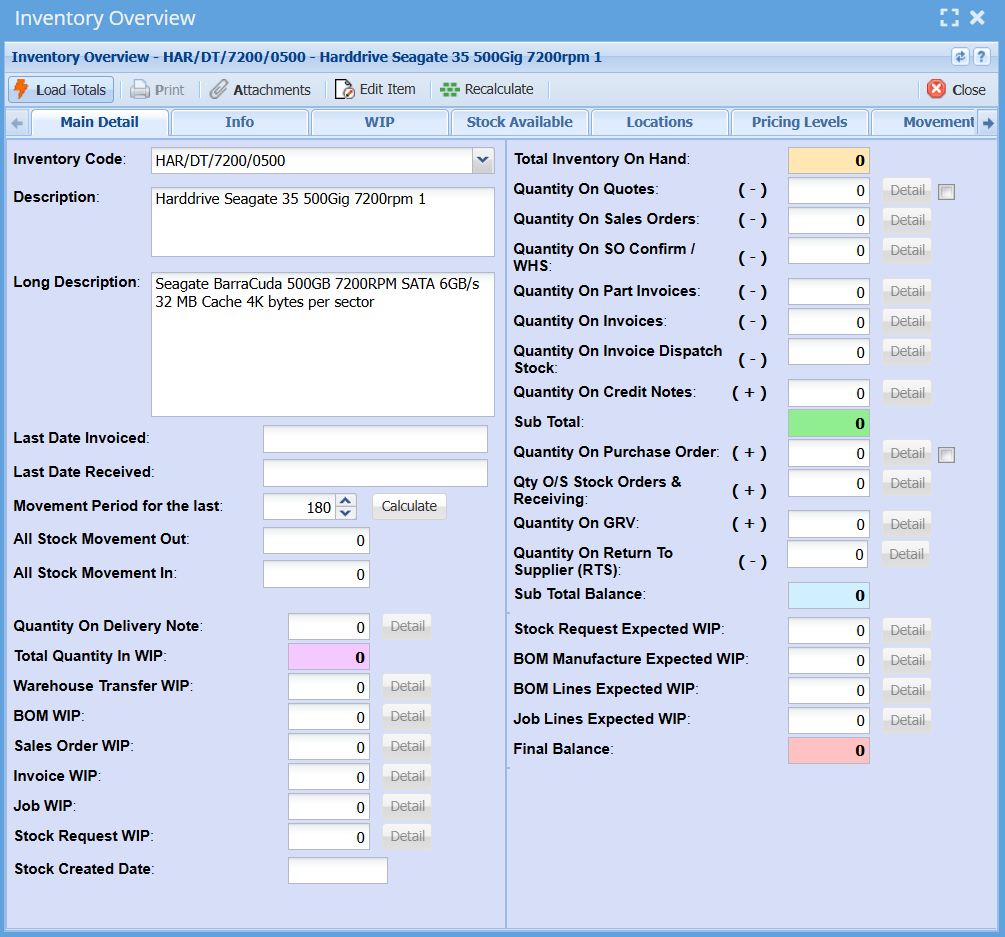
Inventory Overview button
The inventory overview window allows a quick access to view information on an item.
The icon that represents it is a blue item.
|
|
Inventory Overview icon |

It is accessed in most windows where stock items are present
| Load Totals | Loads the item information on the main details tab |
| Edit Item | Here you can amend an inventory item |
| Main Detail | Shows summary of movements for select item code |
| WIP- Work in Progress | Run the count for work still currently progress items, On Shelf, All, Invoice, Sales Orders, Jobs and Bill of Materials. Most counts are done on the on-shelf option. |
| Movement | Shows all movements for the item code selected |
| Document Analysis | Search to view all document for the item code |
No Comments