Inventory Item Search
Inventory > Configuration > Inventory Setup
In Inventory setup search, you will see two search tabs
| Search | Allows you to search for an existing item, Creditor or Debtor based on system fields and which module you are in. |
| Custom Search | If you have setup custom fields in your inventory, you can search for the items using the custom fields linked. |
Note: If you leave the fields blank it will bring back all Inventory codes which will be sorted in inventory code order alphabetically.
If you click on the column heads they will sort A-Z or Z-A.
Navigation Ribbon

| Search | Allows you to search for an existing item, Creditor or Debtor based on system fields and the module you are in. |
| Add | Allows you to create a new Inventory item, Creditor or Debtor depending on the Module you are in. |
| Edit | Allows you to edit an existing Inventory Item, Creditor or Debtor depending on the module you are in. |
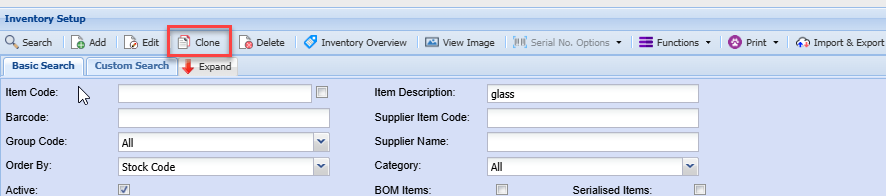
| Clone | Allows you to Clone an existing Inventory Item, Creditor or Debtor depending on the module you are in. |
| Delete | Allows you to Delete an existing Inventory Item, Creditor or Debtor depending on the module you are in, you will not be able to delete an Inventory Item, Creditor or Debtor if they have transactions against the. |
| Inventory Overview | Allows you to have a wide overview of all movements for the selected Inventory Code, from Stock coming in and going out and stock take figures. |
| View Image | If you have uploaded an image of your Inventory item, you will be able to view it here |
| Serial No. Options | When you select a product that has serial numbers recorded, you can either view them here or you can print them from here as well. |
| Functions | Allows you to update various settings on the items selected |
| Prints the selected Inventory Code details | |
| Import & Export | Export General Details of Inventory Code to Excel |
Search options
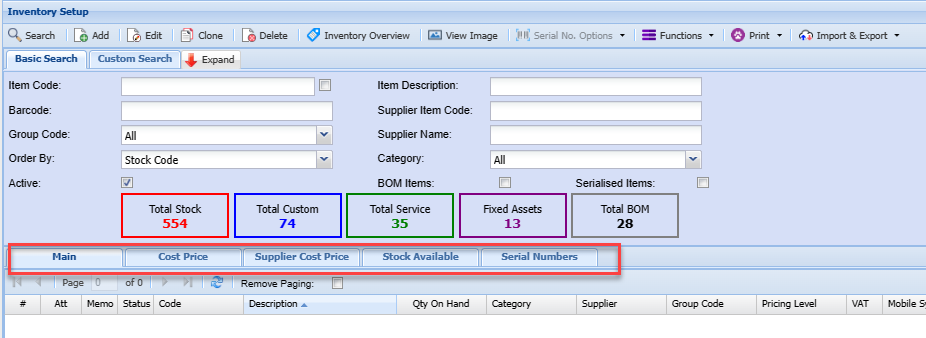
Enter any of the fields, such as the item code or part of the item description to limit your search to a specific item or range of items.
| Main | Displays basic information of the item within the grid which could include Item Code, Description, Quantity on hand, Supplier, Pricing level, etc. |
| Cost Price | Shows the item cost and selling price information of a selected item |
| Supplier Cost Price | Shows various supplier cost prices of a selected item, including historic cost prices. |
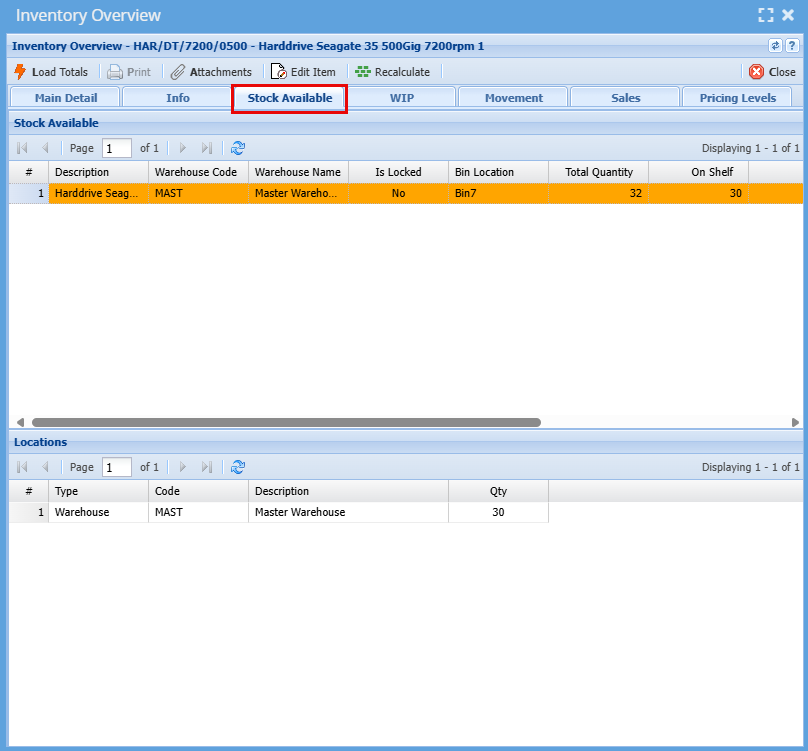
| Stock Available | Shows stock quantity levels of the item in various warehouses. |
| Serial Number | Shows serial numbers for the selected item. This tab is only active if the item code is flagged for serial number tracking |
Inventory Clone
The clone feature allows one to create a new inventory item that is similar to an existing item without having to capture all the same details, such as group codes, additional properties, etc.
This feature is a quick and convenient way to add a new item to the system.

Inventory Overview Button

This is where one can view movement’s summary of the selected inventory code.
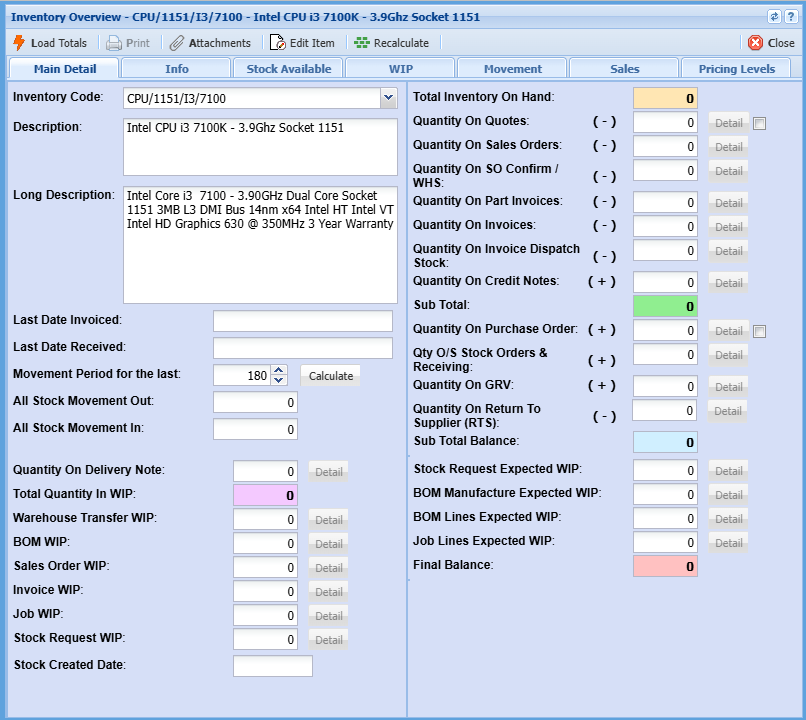
This is where one can view movement of an inventory code.
| Load Totals | Loads the item information on the main details tab |
| Attachments | Here you can attach any info, photo or document that is associated with this inventory item. |
| Edit Item | Here you can amend an inventory item basic information. |
| Recalculate | If changes have been made to your data before the end of day backup your Inventory may be a little out, if you hit the recalculate button this will bring your inventory back in line. |
| Main Detail | Shows summary of available stock as well as all movements for select item code as well as where they are currently in a WIP workflow. |
| WIP- Work in Progress | Run the count for working still currently progress items, On Shelf, All, Invoice, Sales Orders, Jobs and Bill of Materials. Most counts are done on the on-shelf option. |
| Movement | Shows all in and out movement of a specific item code specific to sales to customers and purchases from suppliers. |
| Document Analysis | Search to view all document for the item code |
Stock Available
Displays the stock availability information
View Image

Allows the user to view an image of the inventory item provided an image has been uploaded.
On the left of the panel is a grid displaying all the attachments that have been uploaded for this stock item.
If the Primary Image is set up on the inventory item, then that item will be displayed in bold blue in the grid.
By clicking in the icon in the View column the user can view the attachment.

Add To Document
- This functionality allows the user to add all or selected attachments to the original document i.e. Quote, Invoice.
- Either click the check box in the column header above the check boxes to Select All or Unselect All attachments.
- Alternately specific attachments can be selected by clicking the specific attachment’s check box.
Once the selection has been made click the Add To Document button and the selected attachments will be added as attachments to the original document, i.e. Quote, Invoice
Email Self
- In the event of the Email Self button being disabled this will be as a result of the logged in user not having an email address entered in the user setup detail.
- Once the selection of attachments has been completed same method as in Add To Document above click on the Email Self button and the selected attachments will be emailed to the email address as setup for the
- login user in Huge ERP.
- Click the Close button to close this window.
Please Note:
- To load an image of an inventory item, go to Inventory Module -> Configuration -> Inventory Setup.
- Enter and search for the desired inventory item. Edit the item, go to attachments and upload an image file (typically a JPG file).
- Select the image name in the Primary Image drop down and click on Save.
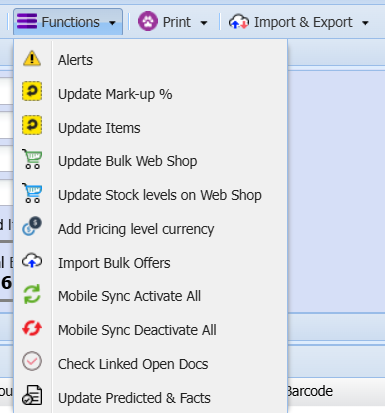
Functions Dropdown

Functions for inventory setup has many options that allows you to update multiple areas of your Inventory item.
Update Mark-up %
Inventory> Configuration> Inventory Setup>Functions
Update Mark-up button: Updates the mark-up of the selected Inventory Item.
.png)
| Group Codes | If you have set up Group Codes for your inventory you can select a group code from the drop-down menu to define your percentage mark up by a selected Group Code or All Group Codes. |
| Price Levels | Filter the update of the percentage mark up by a selected Price Level. |
| New Percentage | Enter the new percentage value. |
- Click Update to perform the Markup Percentage change.
- Click Close to exit the window without performing the update.

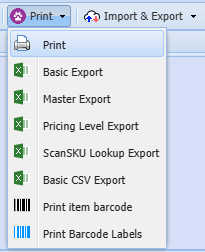
The print function will allow you to Export information and print barcodes for you inventory items.
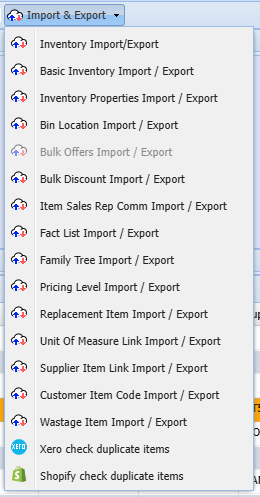
Import & Export

Import & Export give you many options to choose from to import or export specific information for your inventory with the use of an excel spreadsheet.
Note: There is a specific format that your data needs to be in to be able to import data, you can do an export first to get the correct format.
Keyboard quick keys
Quick keys help access functions using the keyboard
Used with Alt + Letter

| Search | Alt + s | Search for Stock Item |
| Add | Alt + a | Add a new Stock Item |
| Edit | Alt + e | Edits the Stock Item that is highlighted |
| Delete | Alt + d | Deletes the Stock Item that is highlighted |
| Clone | Alt + c | Clones the highlighted Stock Item |
| Inventory Overview |
Alt + i | Opens the Inventory Overview window |
| View Image | Alt _ v | Opens a window to view the image associated with the Stock Item |
| Serial No. Options | Alt + o | Activate split button to view listed options |
|
Functions |
Alt + f | Activate split button to view listed options |
| Expand / Contract | Alt + n | Expands / Contracts the header section of the window |
| Tab Basic Search | Alt + 1 | Basic Search |
| Tab Custom Search | Alt + 2 | Custom Search |
| Tab Main | Alt + 3 | Main Search Grid |
| Alt + 4 | Pressing Alt + 4 repeatedly will step through all the tabs e.g. Detail, Statutory etc. |
No Comments