Customer Access
There are a few areas to take note of when setting up customer access into the package:
| 1 | Branch setup |
| 2 | Branch links to Accounts |
| 3 | Security setup on form |
| 4 | Security form access |
Branch Setup
Create a Branch for the customer so that the customer’s name is the branch.
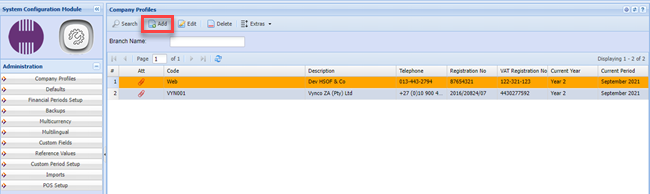
System Configuration> Administration >Company Profile
Click on the Add button and create a code and Description for the customer branch
Code: - CUST001
Description - Customer A (name)
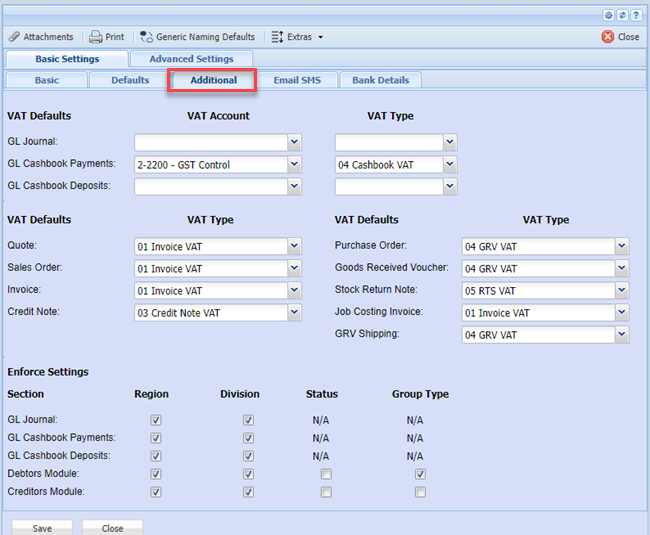
Fill in all the information relevant for the Customer A, you will also have to fill in the details under the “Additional” Button.
Remember to fill in all the information under the Defaults Tab.

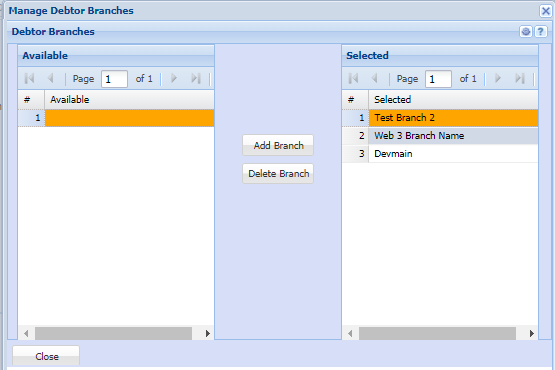
After you have created the branch (Customer Branch), you will notice all setup areas have a button called Branch.
When clicking on that button the following window will appear:
Select which items the customer has access to see by moving the branch from the left column to the right column.
No Comments