
Manage Job Functions Tab Explained - Detailed
Functions Tab

| Manage All |
The Manage All button is used to manage all lines on the job at once. |
| Import |
The Import button is used to upload job lines from a file into the job. |
| New Stock Request |
The New Stock Request button is used to create a request for stock items required for a job. |
| Create PO | The Create PO screen is used to generate purchase orders for items required on a job. |
| Create BOM |
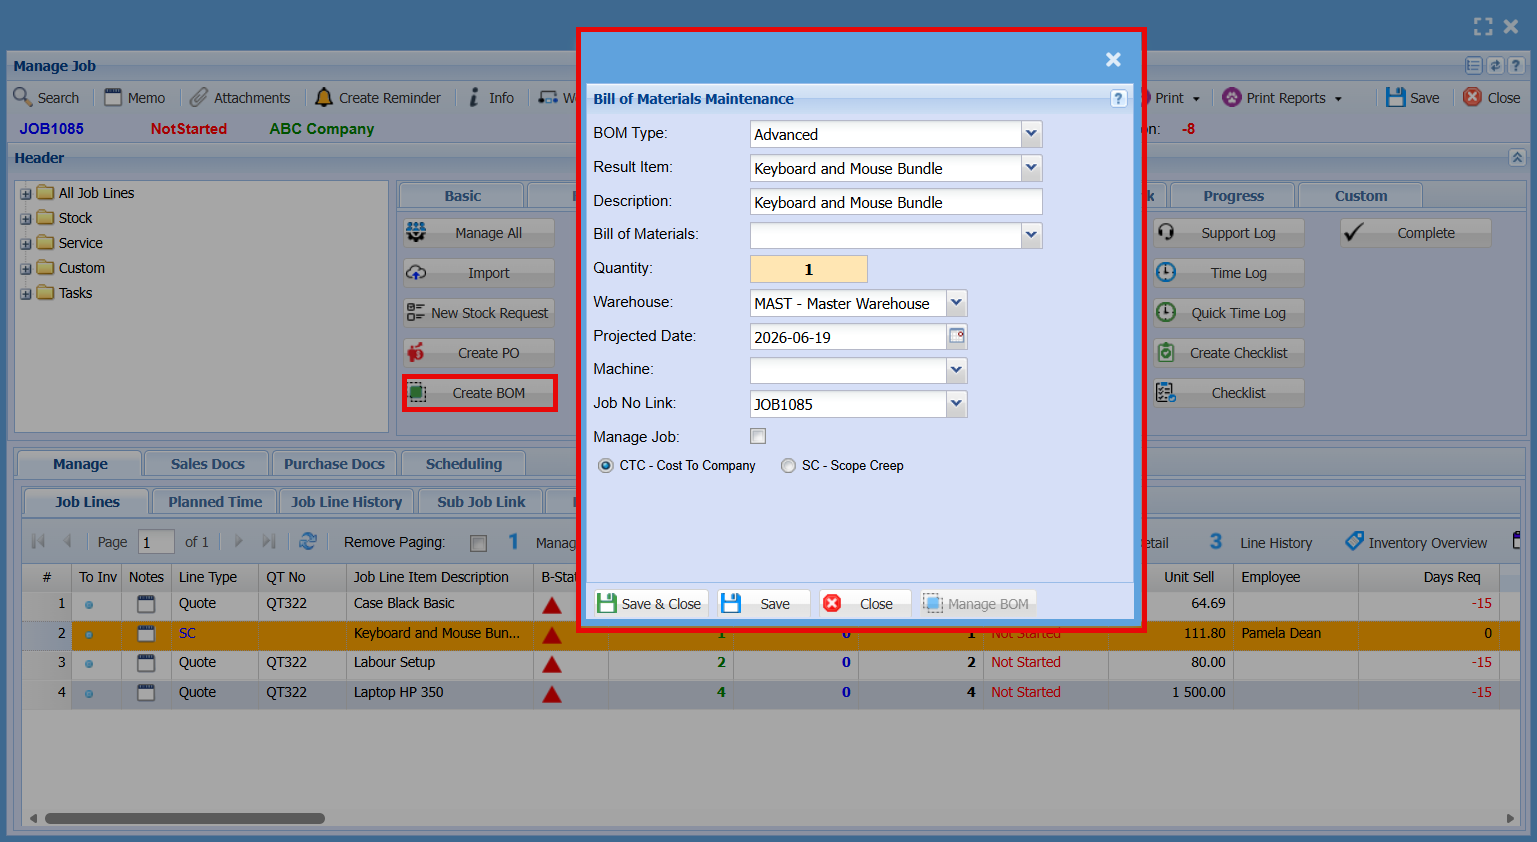
The Create BOM screen is used to add a Bill of Materials to a job, bringing in a predefined set of items. |
| Verify task stock | |
| Task Stock Request | |
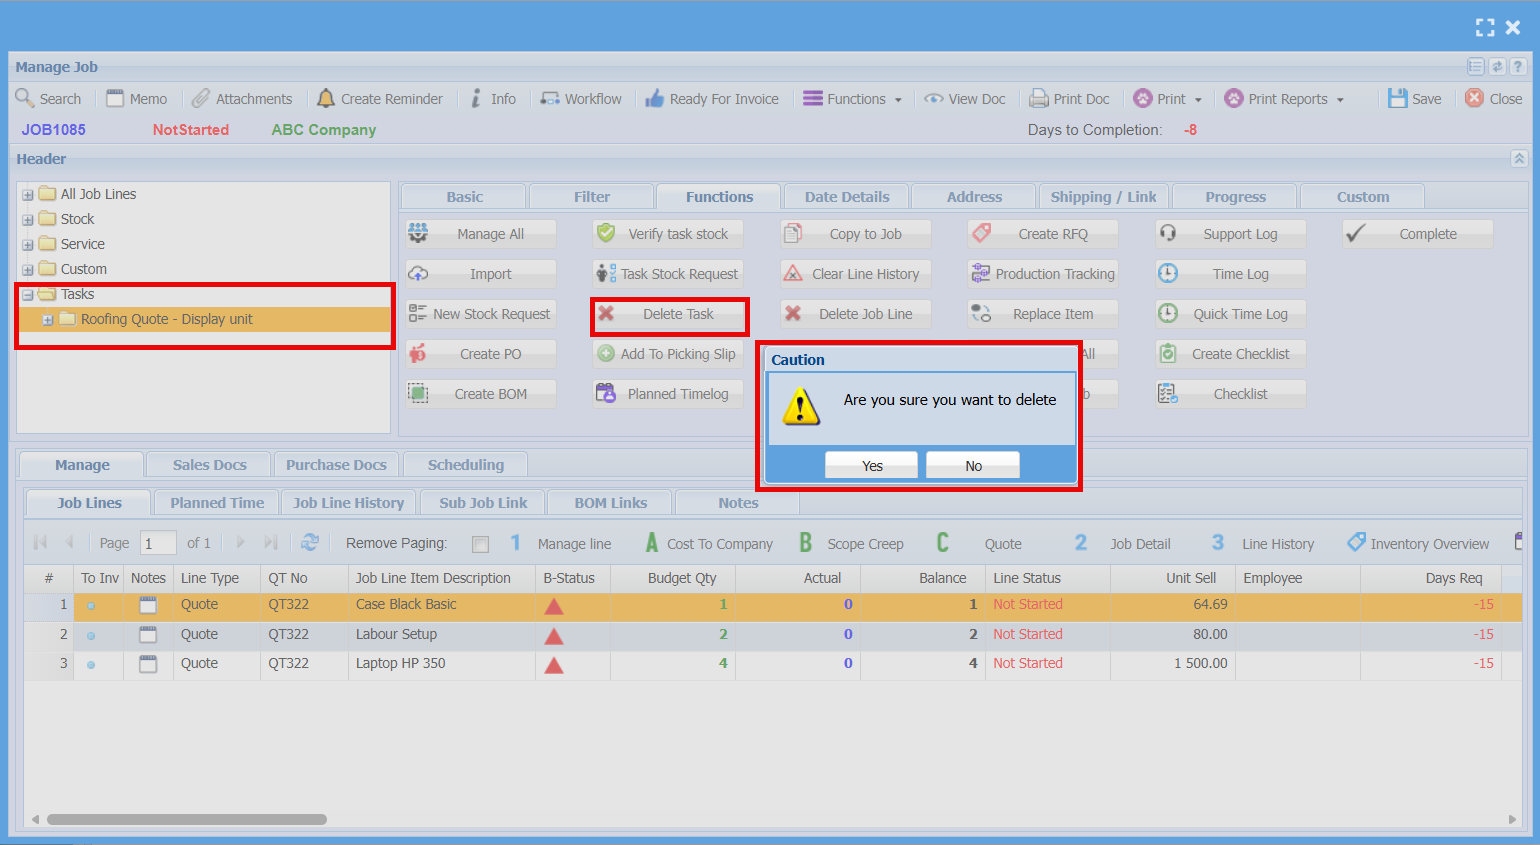
| Delete Task |
The Delete Task button is used to remove a task from the job. |
| Add to Picking Slip |
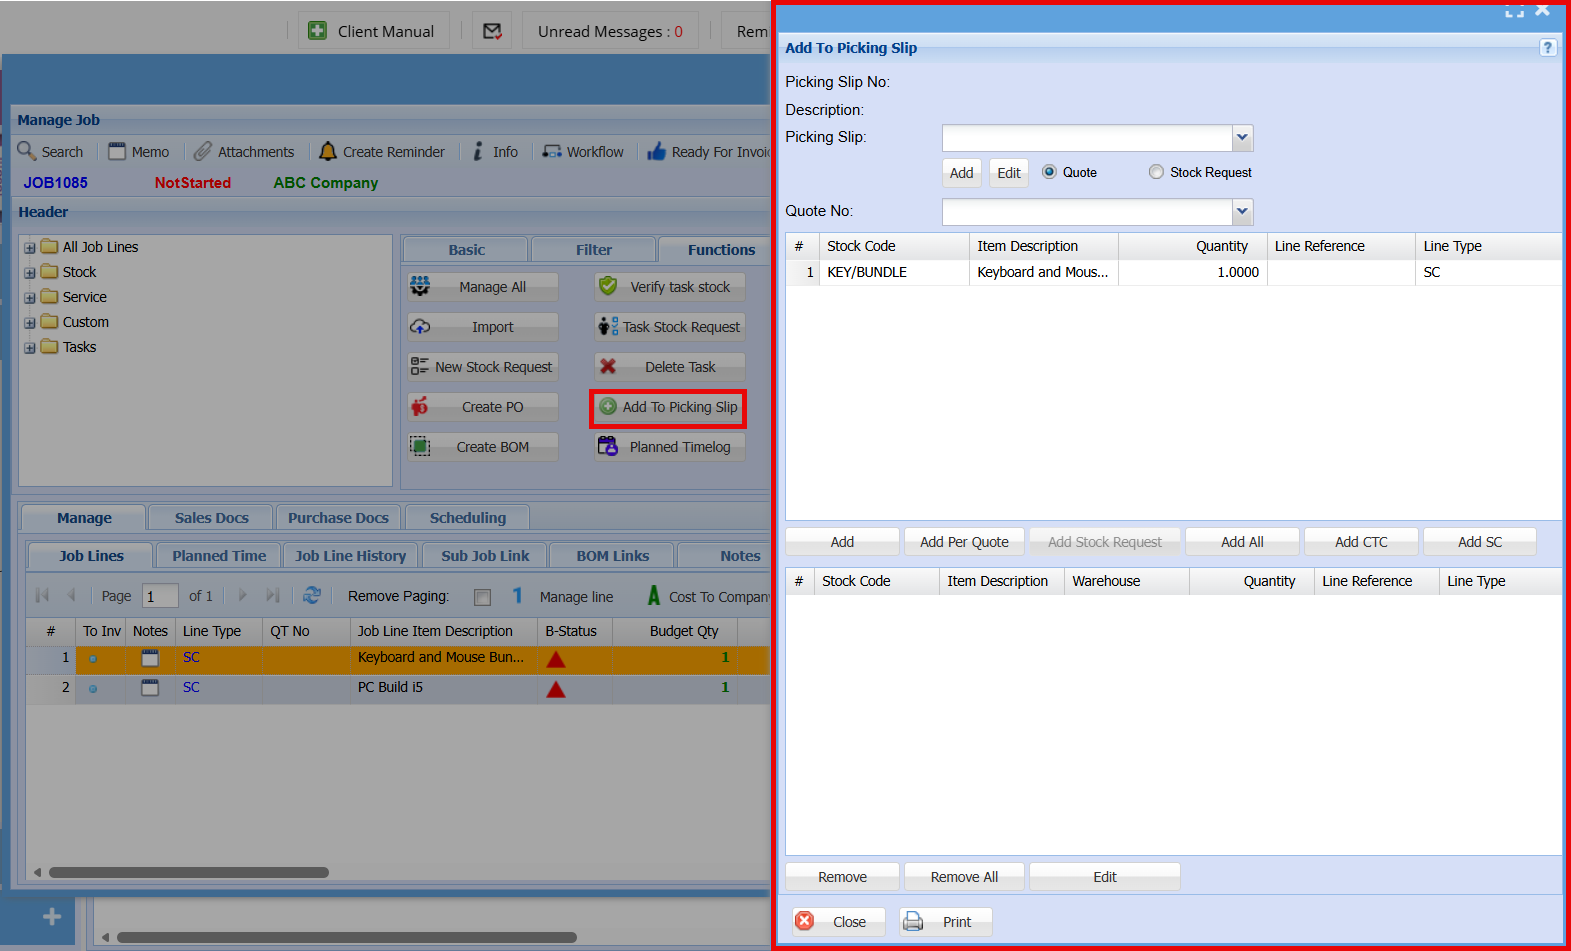
The Add to Picking Slip button is used to assign selected job lines to a picking slip for warehouse processing. |
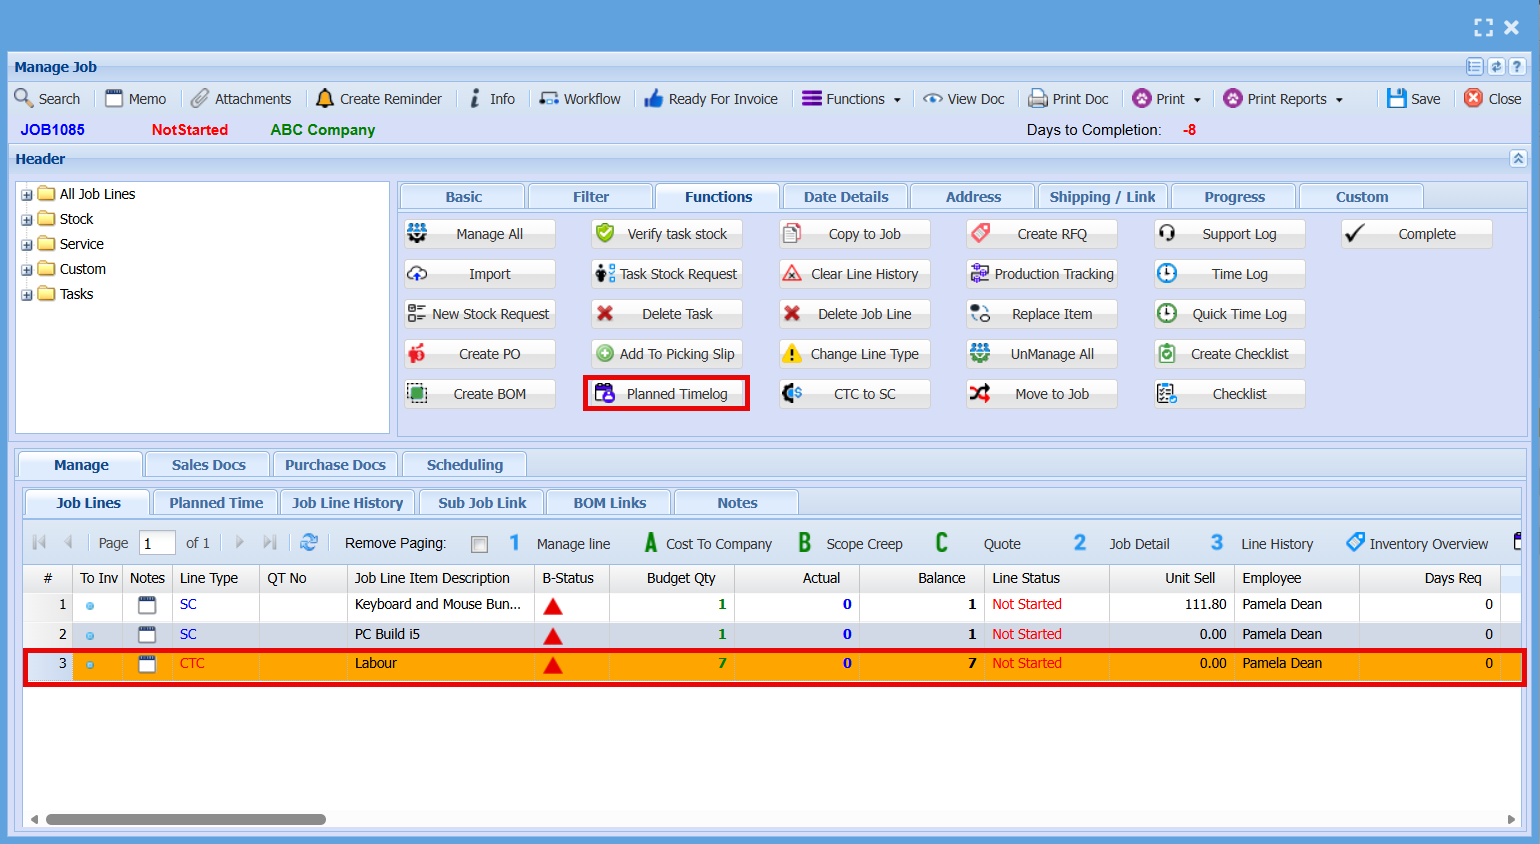
| Planned Timelog |
Allows you to Generate a planned time logs for each employee based on the entries in the Job Line tab, allowing future work to be scheduled and tracked effectively.
|
| Copy to Job |
The Copy to Job button allows you to copy selected job line(s) to another job. |
| Clear Line History | |
| Delete Job Line | |
| Change Line Type | |
| CTC to SC | |
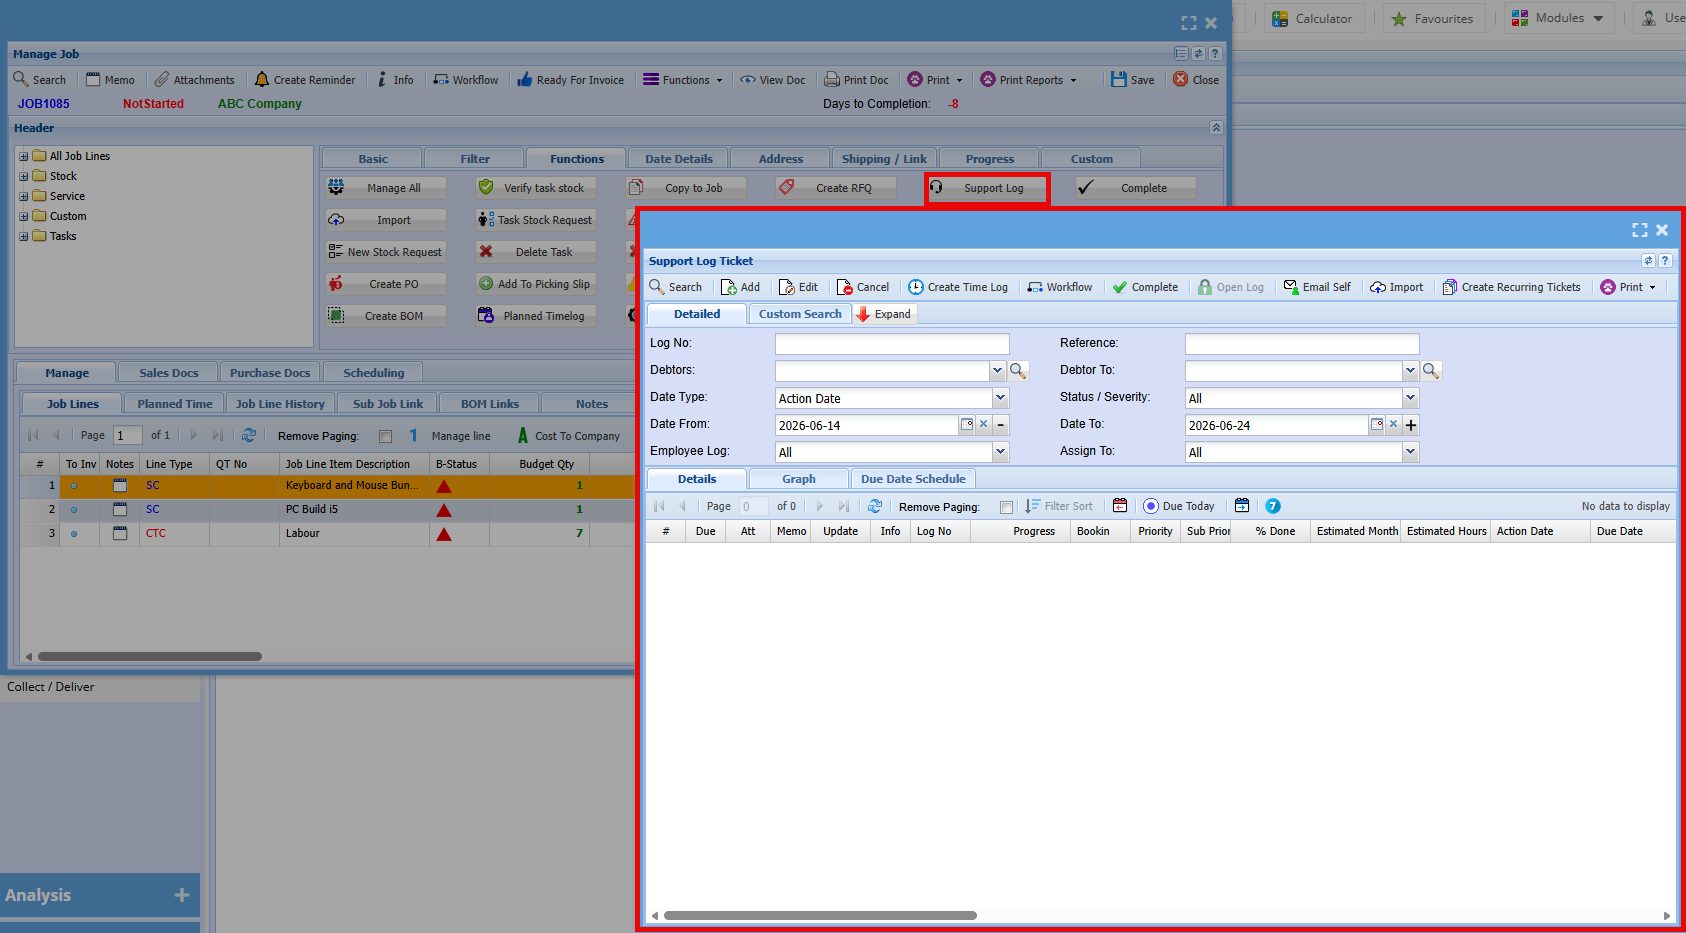
| Support Log | |
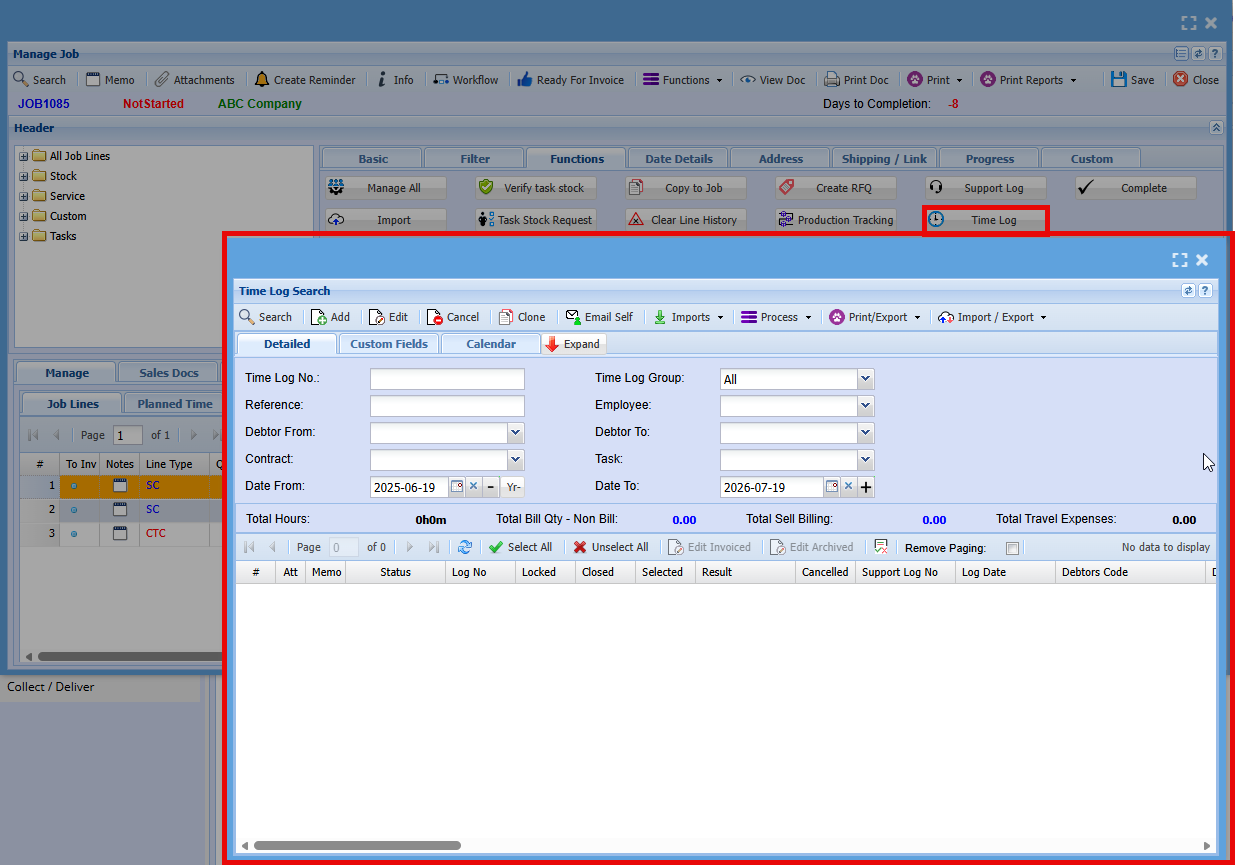
| Time Log | |
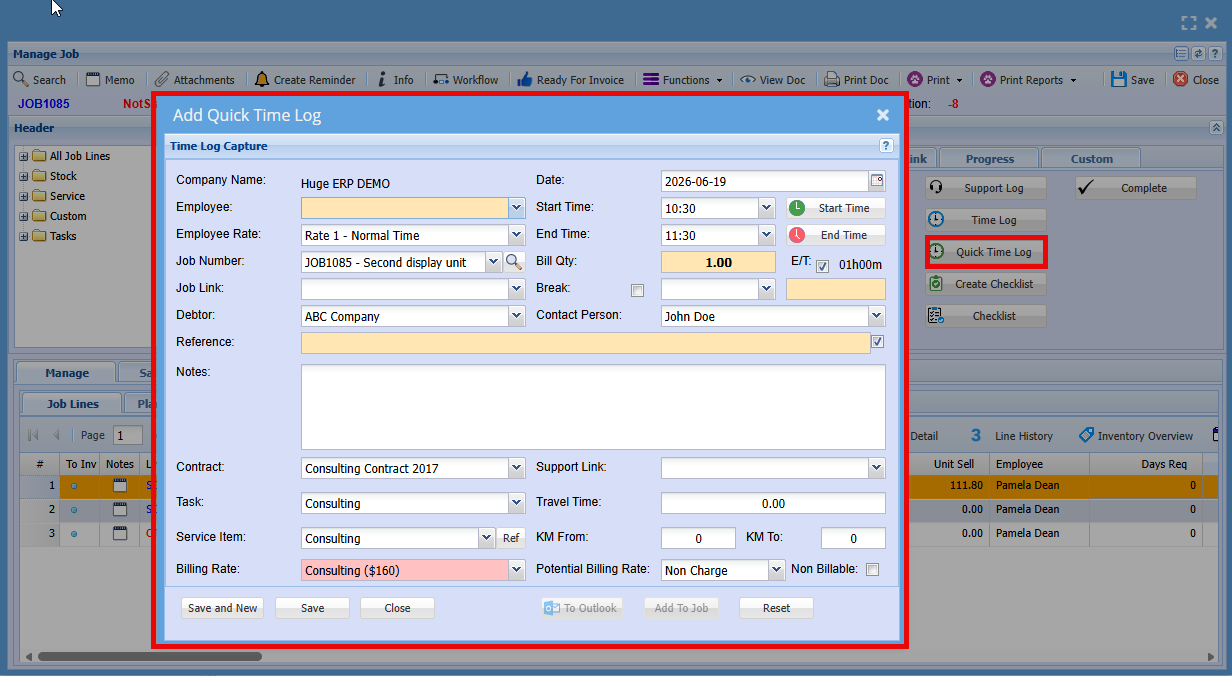
| Quick Time Log | |
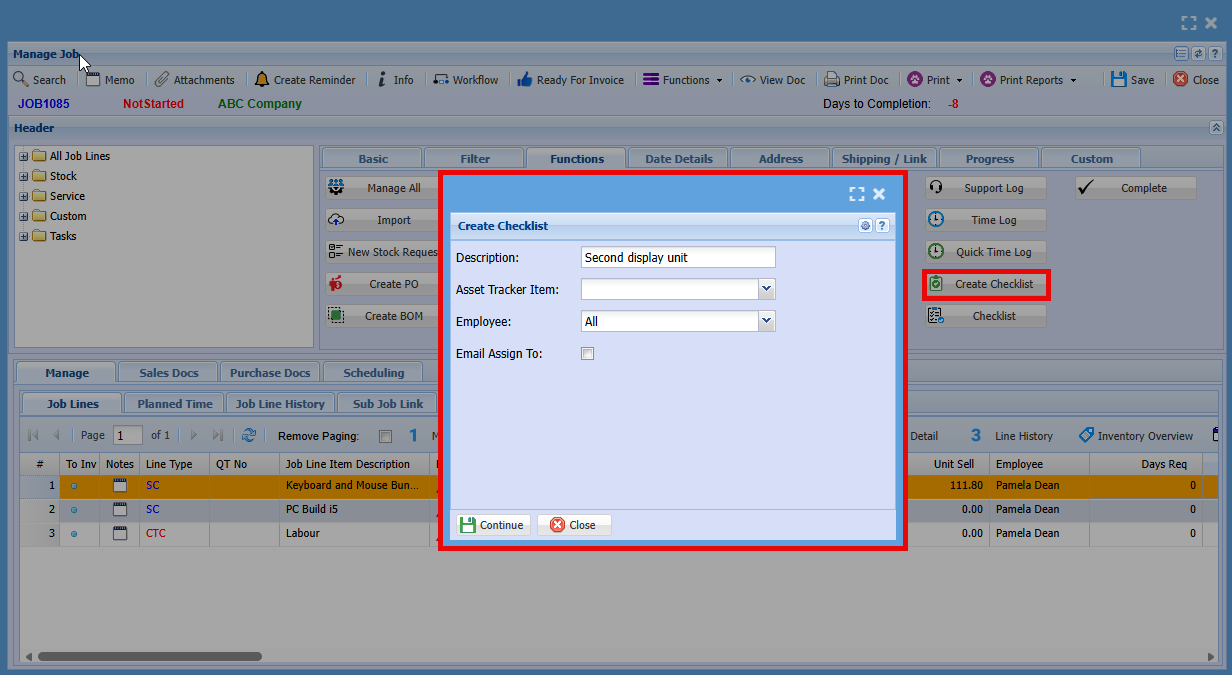
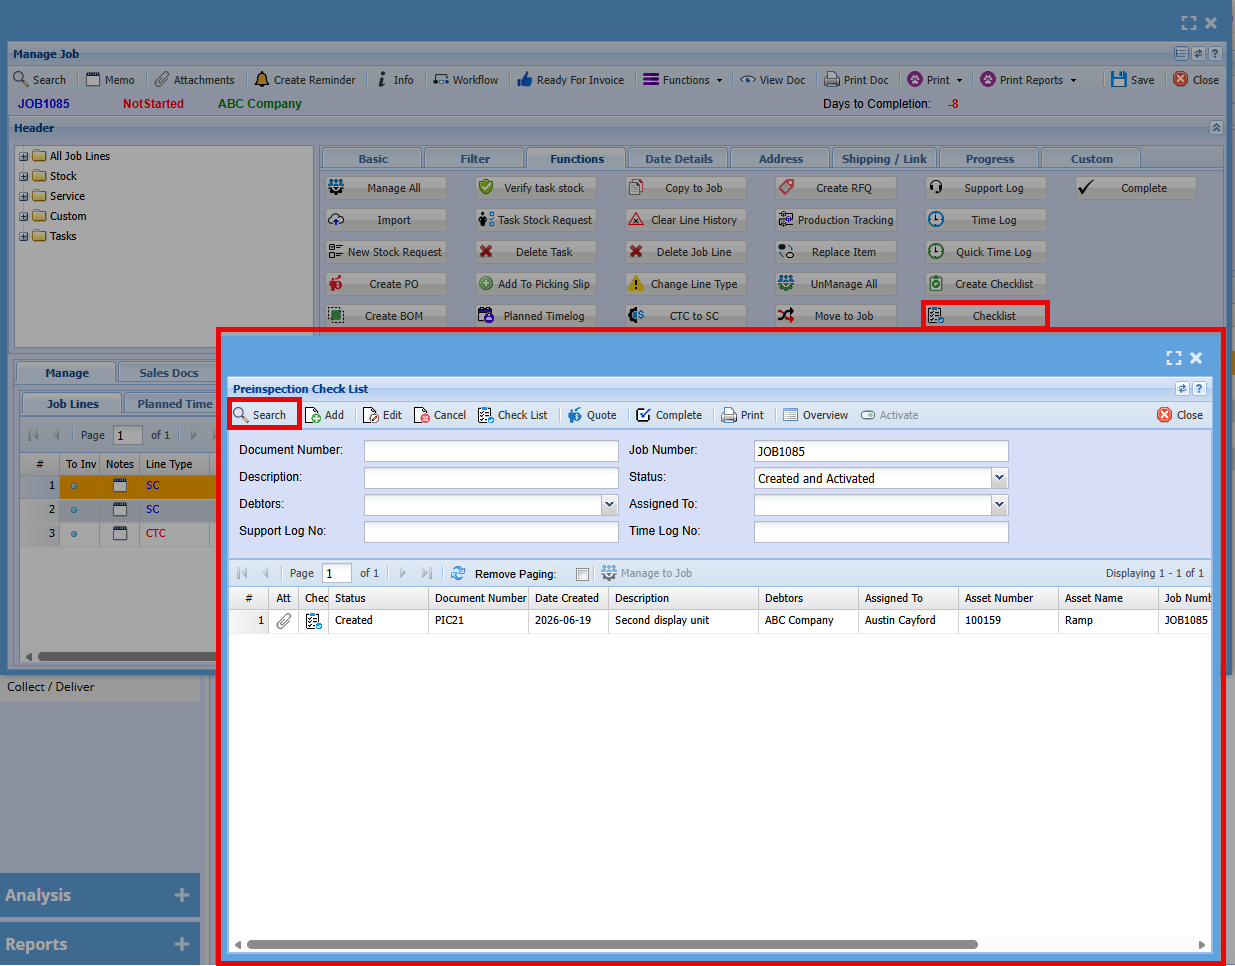
| Checklist | |
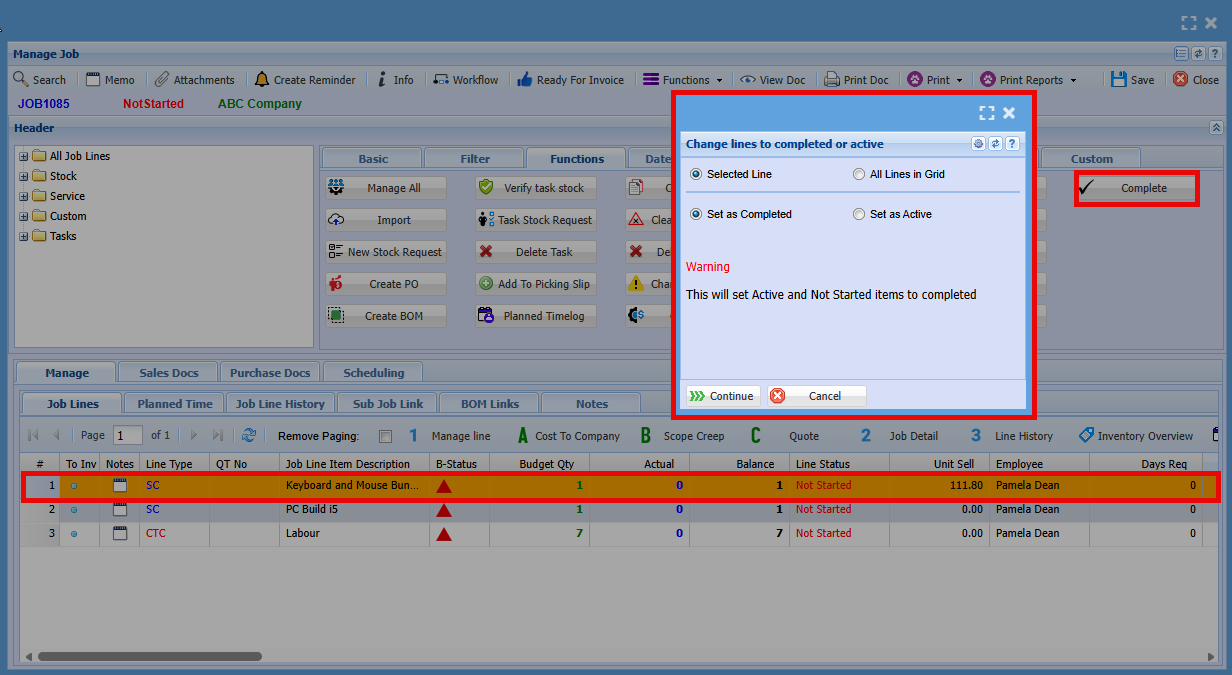
| Complete |
Manage All
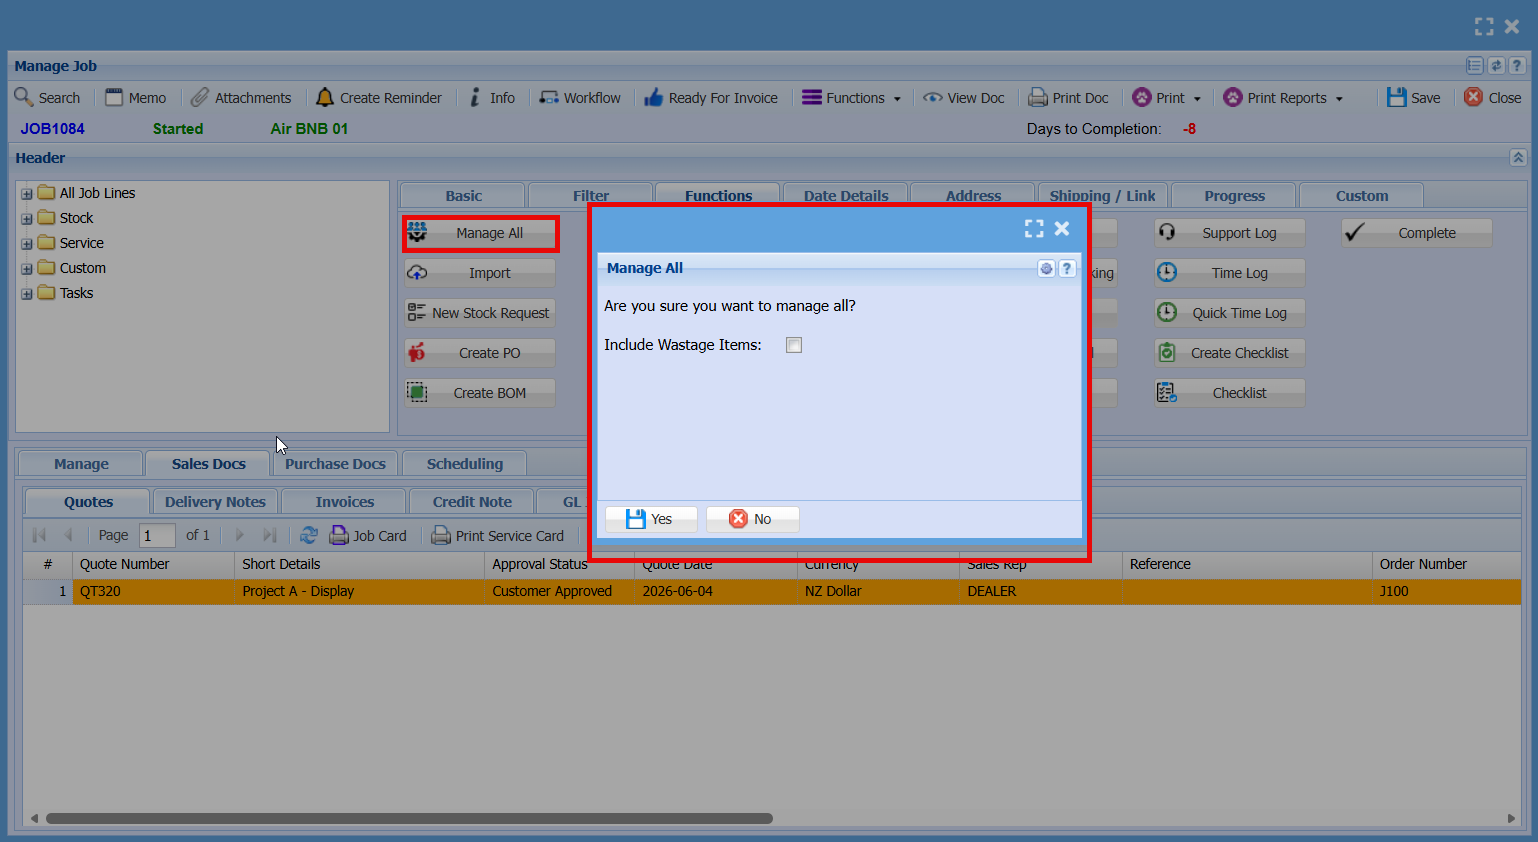
The Manage All button is used to manage all lines on the job at once.
When selected, a confirmation window will appear asking if you want to proceed. You can also choose to include wastage items.
Click Yes to continue and apply actions to all job lines, or No to cancel.
Import Button - Line Import
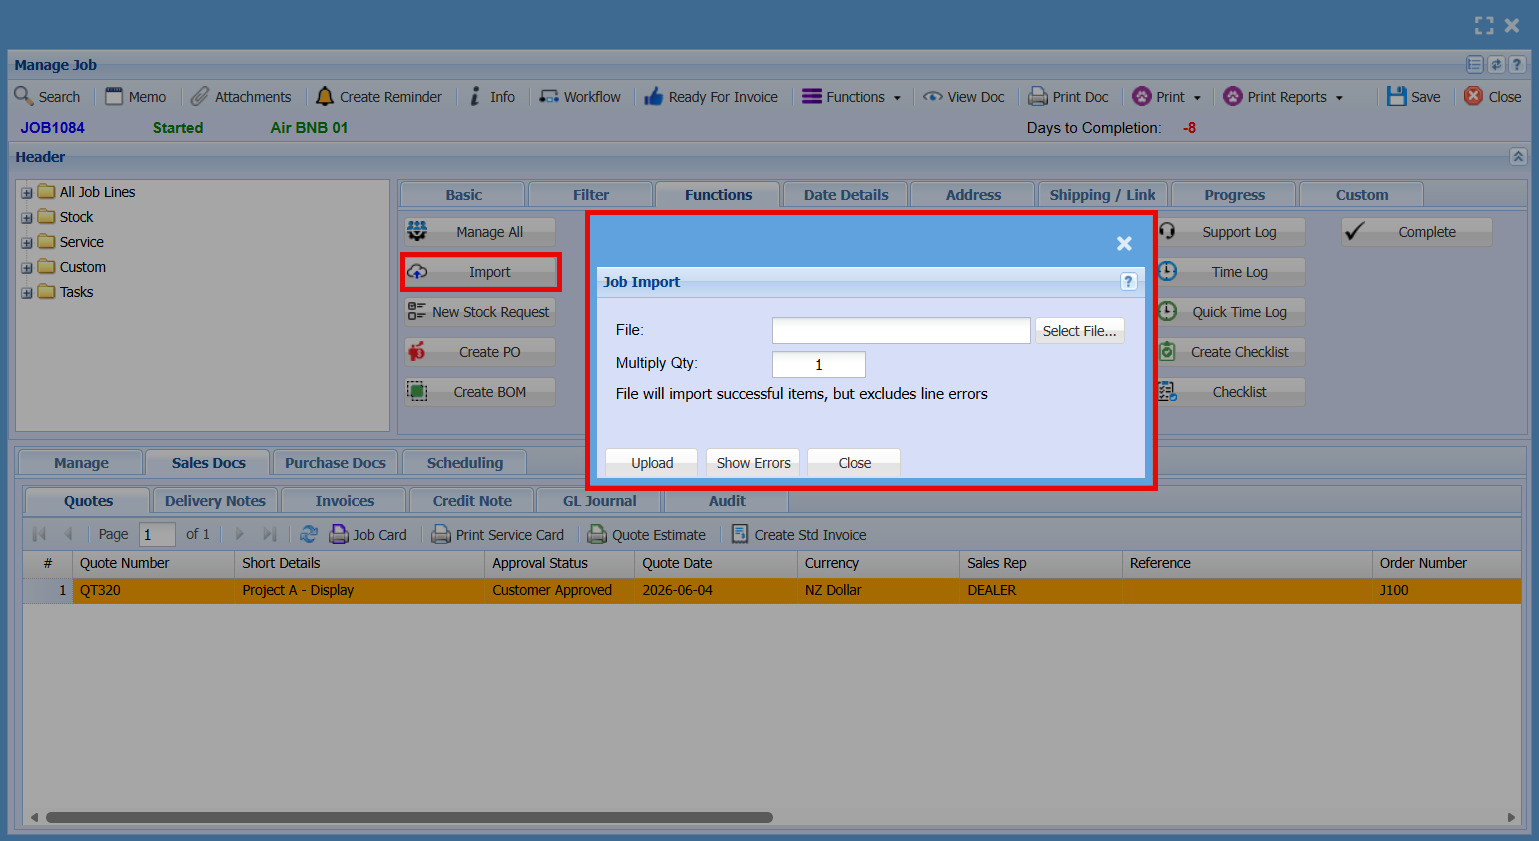
This feature is ideal when importing a recipe or BOM set up for a single unit. The multiplier allows you to scale the quantities automatically during import, saving time and ensuring accuracy.
When selected, the Job Import screen will open where you can:
- Choose a file to import
- Set a quantity multiplier (if required)
- Click Upload to import the lines
Only valid items will be imported, and any errors can be reviewed using Show Errors.
File Upload & Import Process
-
Click the Select File button to open the file browser and locate the file you want to import.
-
Click Upload to send the file to the server and start the import process.
Quantity Multiplier Option
-
You have the option to multiply quantities during import. This will adjust both the budget quantity and the managed quantity.
-
The default value is 1, but this can be changed before uploading the file.
Please Note
- The file must be in .CSV format using semi-colon (;) separation
- The file must include headers, however these will be ignored during import
- If any errors occur, they will be recorded in the log
- Please correct the errors and restart the import process
Import Rules
- The CSV file must use semi-colon (;) separation
- Stock items take cost from the item setup, regardless of any cost entered in the file
- Stock items take the selling price from the Excel file
- If the stock item selling price is blank, it defaults to the item setup value
- Custom and Service items take both cost and selling price from Excel
- If cost and selling are blank for Custom or Service items, values default to item setup
- If a Service item uses time allocation and an employee rate is set, cost is taken from user setup rates (1, 2, or 3)
- If cost is set to zero (0), it will be imported as zero
- If Managed Qty is blank, the line is added as Not Started
- If Managed Qty has a value, the line is added as Active
- If there is no stock on hand, the line will be added but not managed
- If the Required Date is blank, the system uses the current date
- Dates must be in the format: YYYY-MM-DD (e.g. 2020-04-05)
- If the Employee field is blank, it will remain blank
- The Employee field uses the login ID
- If the Rate field is blank (with an employee), it remains blank
- Set Rate to 1, 2, or 3 to use the corresponding user setup rate
- If both Employee and Rate are set for a Service item, cost is taken from the user setup rate
- Description is imported from Excel
- If Description is blank, it defaults from item setup
- Set Is Complete = 1 to mark the line as complete
- For stock items, the correct Warehouse Code must be provided
- Drawing is a free text field
- Comment is a free text field
CSV File Template
|
Field Header |
Example |
Required or Not |
|
Type |
CTC or SC |
Required |
|
ItemCode |
MGPEN001 |
Required |
|
Description |
Pen with Red and Yellow dots |
|
|
Budgetqty |
5 |
Required |
|
Cost |
10 |
|
|
Selling |
20 |
|
|
WarehouseCode |
MAST |
Required if a stock item |
|
LineRef |
Line Reference |
|
|
Required Date |
2020-04-06 |
|
|
Employee Login |
Malcolm |
|
|
Rate |
1 or 2 or 3 |
|
|
Is Complete |
1 |
|
|
Drawing |
1170-780-112-456 |
|
|
Comment |
Check the pen colours |
|
New Stock Request
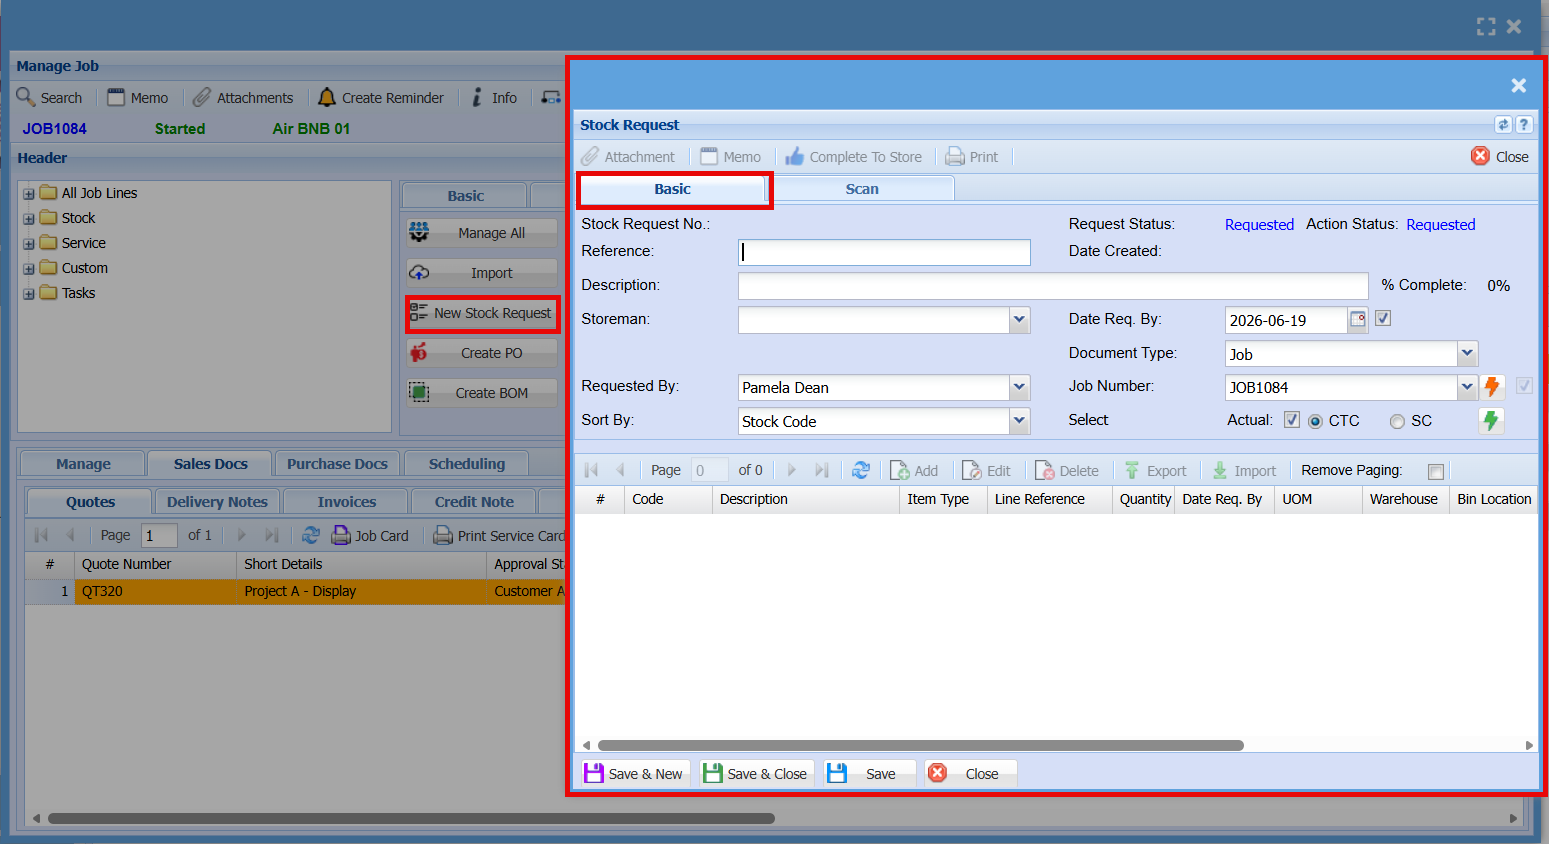
The New Stock Request button is used to create a request for stock items required for a job.
This screen allows you to:
- Enter a reference and description for the request
- Select the requested by user and required date
- Add the stock items and quantities needed
- Link the request to the job number
Once completed, the request can be saved and sent for processing, allowing the store team to supply the required items for the job.
- Basic Tab
| Stock Request No |
System-generated number for the request
|
| Reference |
Optional reference for internal tracking
|
| Description |
Brief details about the stock request
|
| Storeman |
Select the staff member responsible for the request
|
| Requested By |
Shows the current status of the request (e.g. Requested)
|
| Sort By |
How items are arranged (e.g. Stock Code)
|
|
Date Created
|
When the request was created
|
|
% Complete
|
Progress of the request
|
| Date Req. By |
Required date for the items
|
| Document Type |
Type of record (e.g. Job)
|
| Job Number |
Links the request to a specific job
|
| Select |
(Actual / CTC / SC): Determines costing/selection method
|
- Item Grid (Botton Section)
This screen ensures all required stock for a job is formally requested, tracked, and supplied by the store team.
|
Code
|
Item Code |
| Description |
Item details
|
|
Item Type
|
Type of item (e.g. stock, service)
|
|
Line Reference
|
Reference per line
|
|
Quantity
|
Number of items requested
|
|
Date Req. By
|
Required date per item
|
|
UOM
|
Unit of measure |
|
Warehouse / Bin Location
|
Where the item is stored
|
- Scan Tab
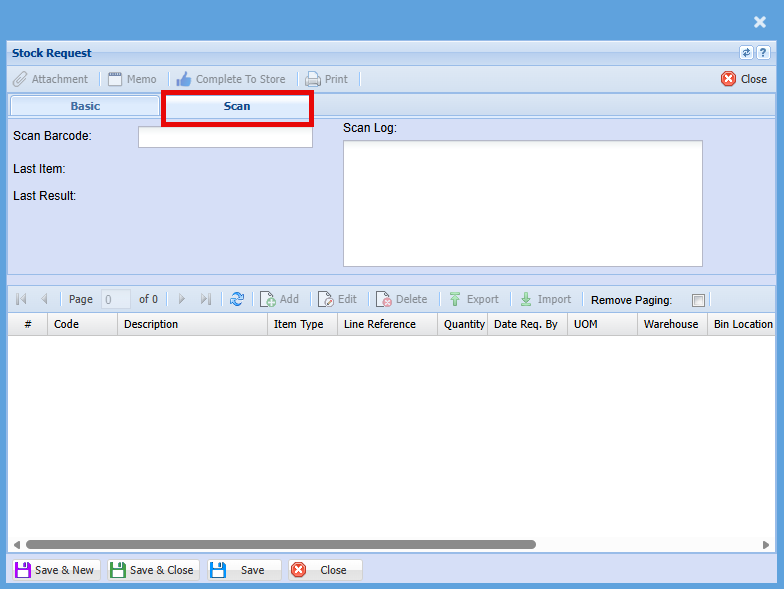
The Scan tab works the same as the Basic tab but is designed for barcode scanning.
- Scan Barcode: Scan or enter the item barcode to quickly add it to the request
- Last Item / Last Result: Displays the most recently scanned item and result
- Scan Log: Shows a history of scanned items
Items scanned are automatically added to the item grid below, removing the need to manually search and enter stock codes.
Purpose: Speeds up stock requests by allowing items to be added using a barcode scanner.
Create PO
The Create PO screen is used to generate purchase orders for items required on a job.
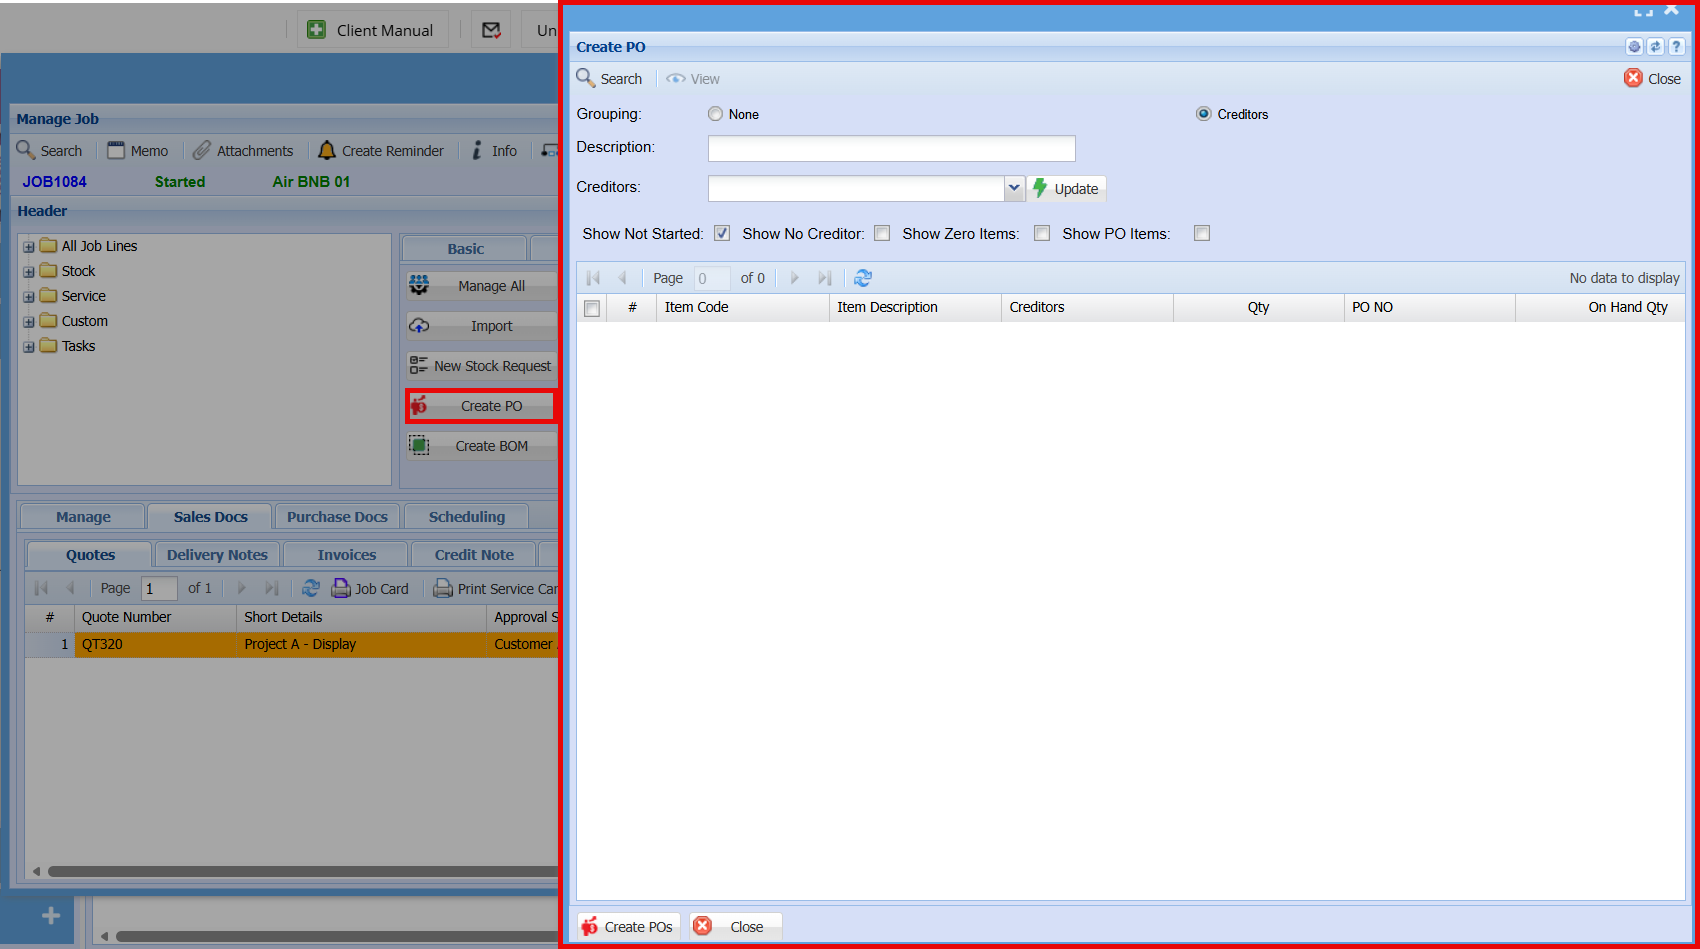
| Grouping |
Choose how items are grouped when creating POs:
|
| Description |
Enter a description for the purchase order(s)
|
| Creditor |
Select or update the supplier for the items |
| Show Not Started |
Displays items not yet processed
|
| Show No Creditor | Shows items without a supplier assigned |
| Show Zero Items | Includes items with zero quantity |
| Show PO Items | Shows items already linked to a PO |
|
Create POs/ Close |
Select the required items from the grid
Click Create POs to generate purchase order(s)
Close to exit the screen
|
Create BOM
This screen allows you to quickly add multiple predefined items to a job using a selected BOM, saving time and ensuring consistency.
|
BOM Type
|
Choose Basic or Advanced, which determines which BOM list is available
|
|
Result Item
|
Select the BOM item you want to apply (based on the chosen BOM type)
|
|
Description
|
Displays or allows entry of the BOM description
|
|
Bill of Materials
|
Select the specific BOM record if multiple exist |
|
Quantity
|
Number of times the BOM will be applied
|
|
Warehouse
|
Select the warehouse the items will be drawn from
|
|
Projected Date
|
Expected date for the BOM items
|
|
Machine
|
Optional field for linking to a machine
|
|
Job No Link
|
Confirms the job the BOM will be added to |
|
Manage Job
|
Apply the BOM and manage the lines immediately
|
|
CTC / SC
|
Choose how the BOM is costed (Cost to Company or Scope Creep) |
|
Actions
|
Save & Close: Apply the BOM and exit
Save: Save without closing
Close: Exit without saving
Manage BOM: Open BOM management (if available)
|
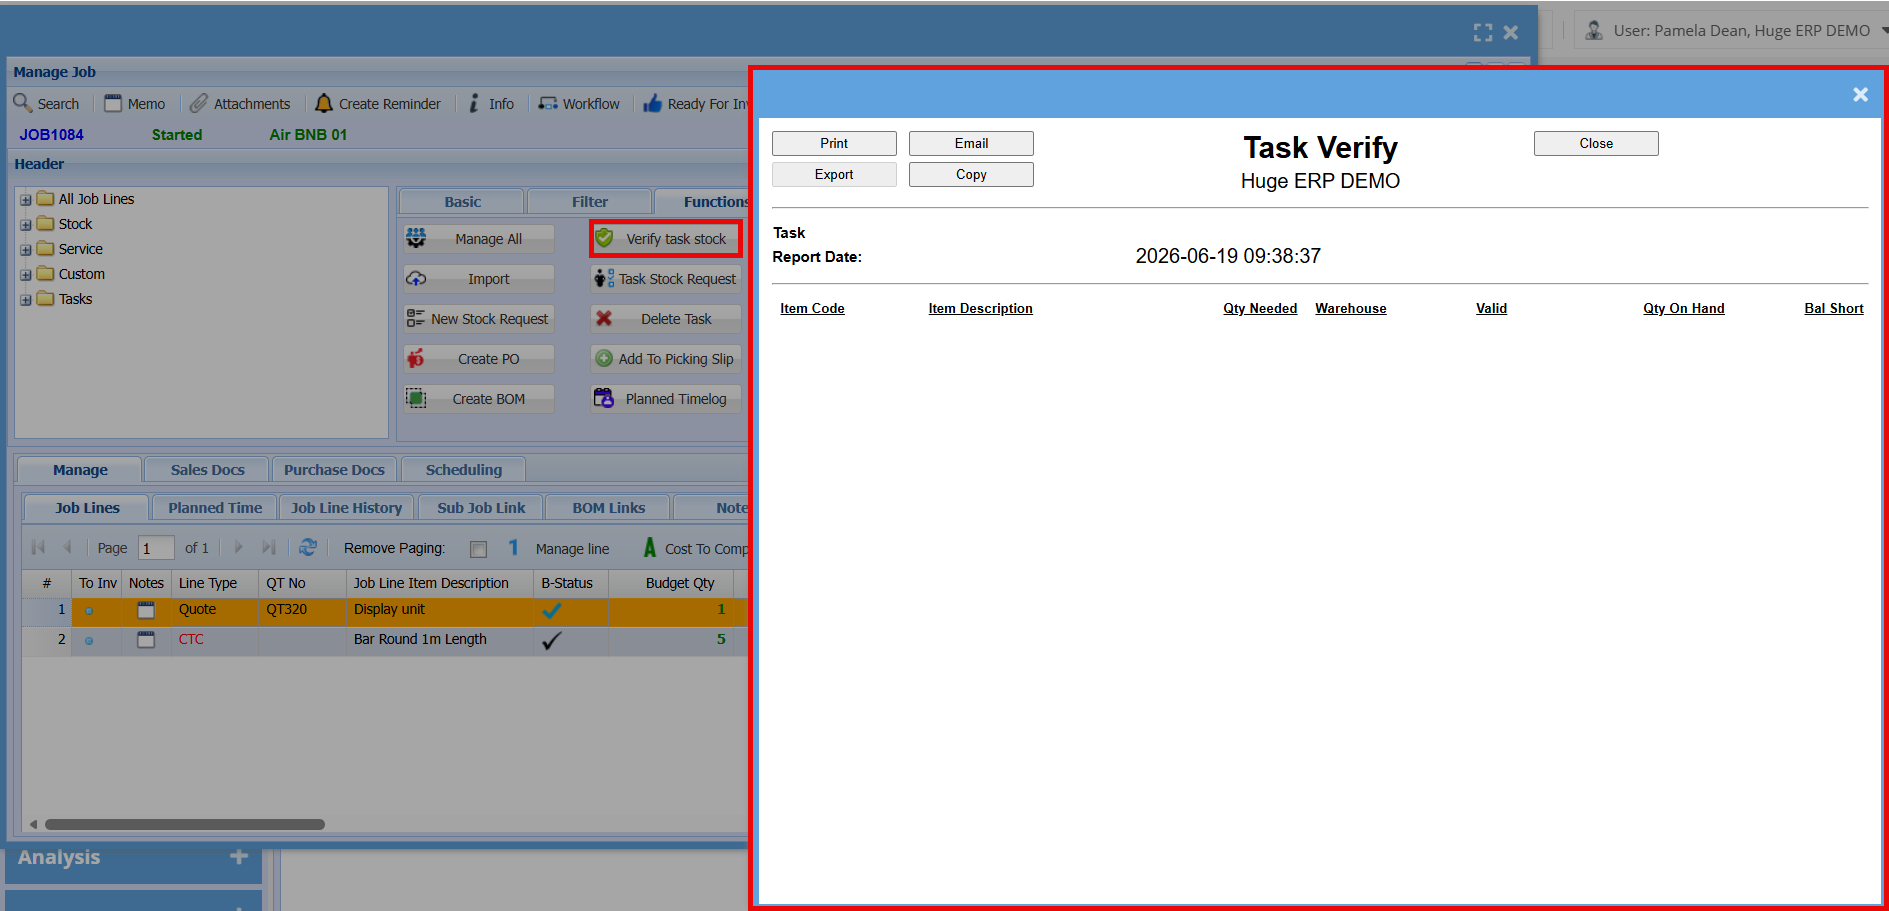
Verify Task Stock
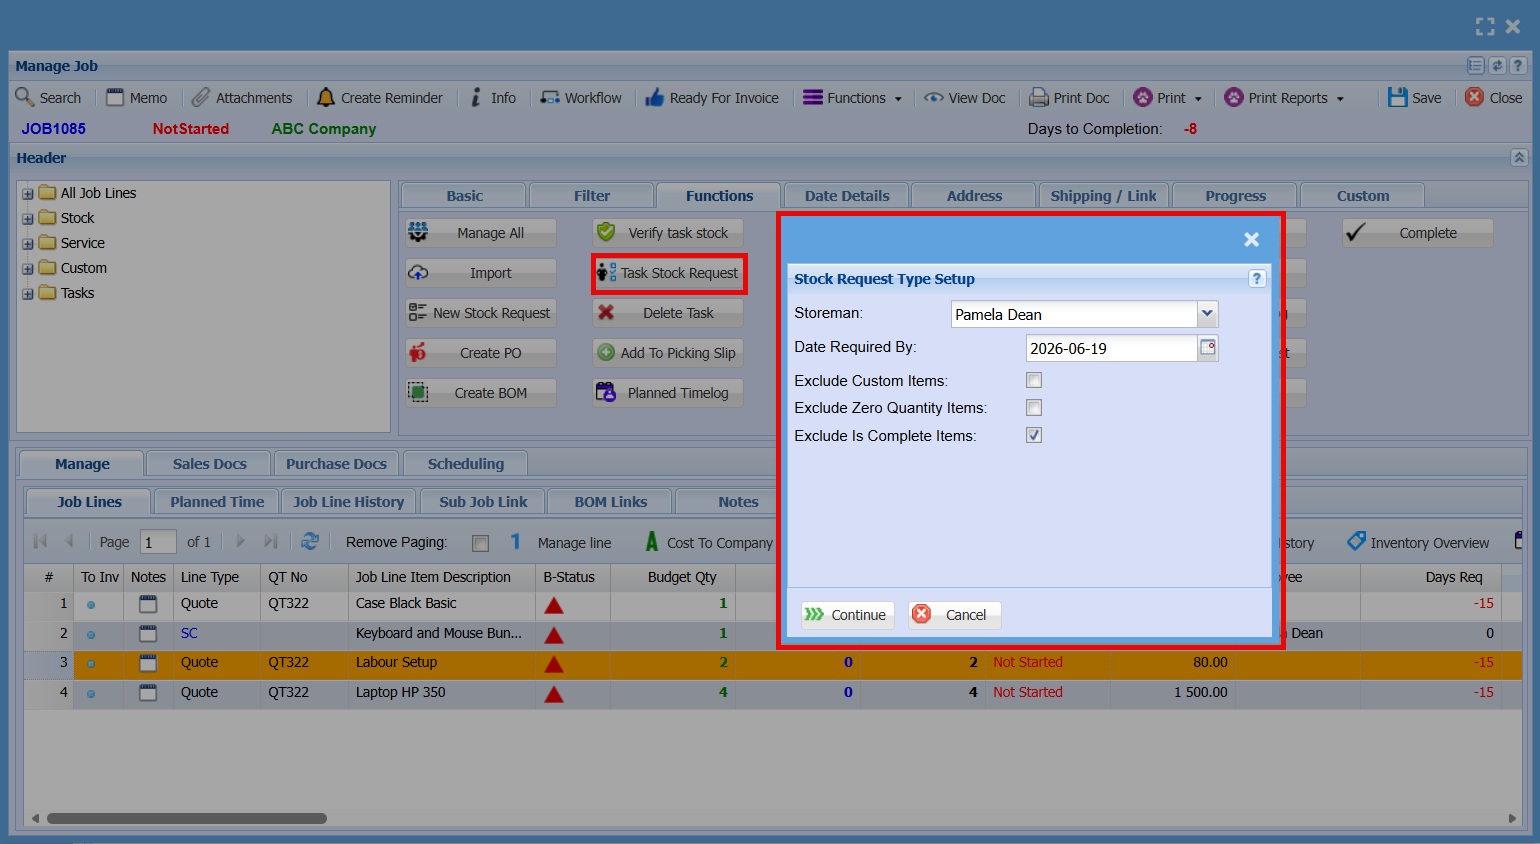
Task Stock Request
Delete Task
The Delete Task button is used to remove a task from the job.
- You must first select a task from the Tasks section (left panel)
- The button will only work when a task is highlighted/selected
When clicked, a confirmation message will appear:
- Click Yes to delete the task
- Click No to cancel
Note: Only tasks (not standard job lines) can be deleted using this button.
Add a Picking Slip
This function allows you to send selected job items to the warehouse so they can be picked and prepared for the job.
- You must first highlight the job line(s) you want to add
- Clicking the button opens the Add To Picking Slip screen
On this screen you can:
- Select an existing Picking Slip or create a new one
- Choose whether to add items from a Quote or Stock Request
- View the selected items in the top grid
- Add items to the picking slip using Add / Add All / Add Per Quote
The bottom grid shows the items that have been added to the picking slip.
Actions:
- Remove / Remove All: Remove items from the picking slip
- Edit: Modify selected lines
- Print: Print the picking slip
- Close: Exit the screen
Planned Time Log
Copy to Job
This function lets you reuse job lines across different jobs, saving time and ensuring consistency.
- You must first highlight the line item(s) you want to copy
- Clicking the button opens the Copy Job lines to other job screen
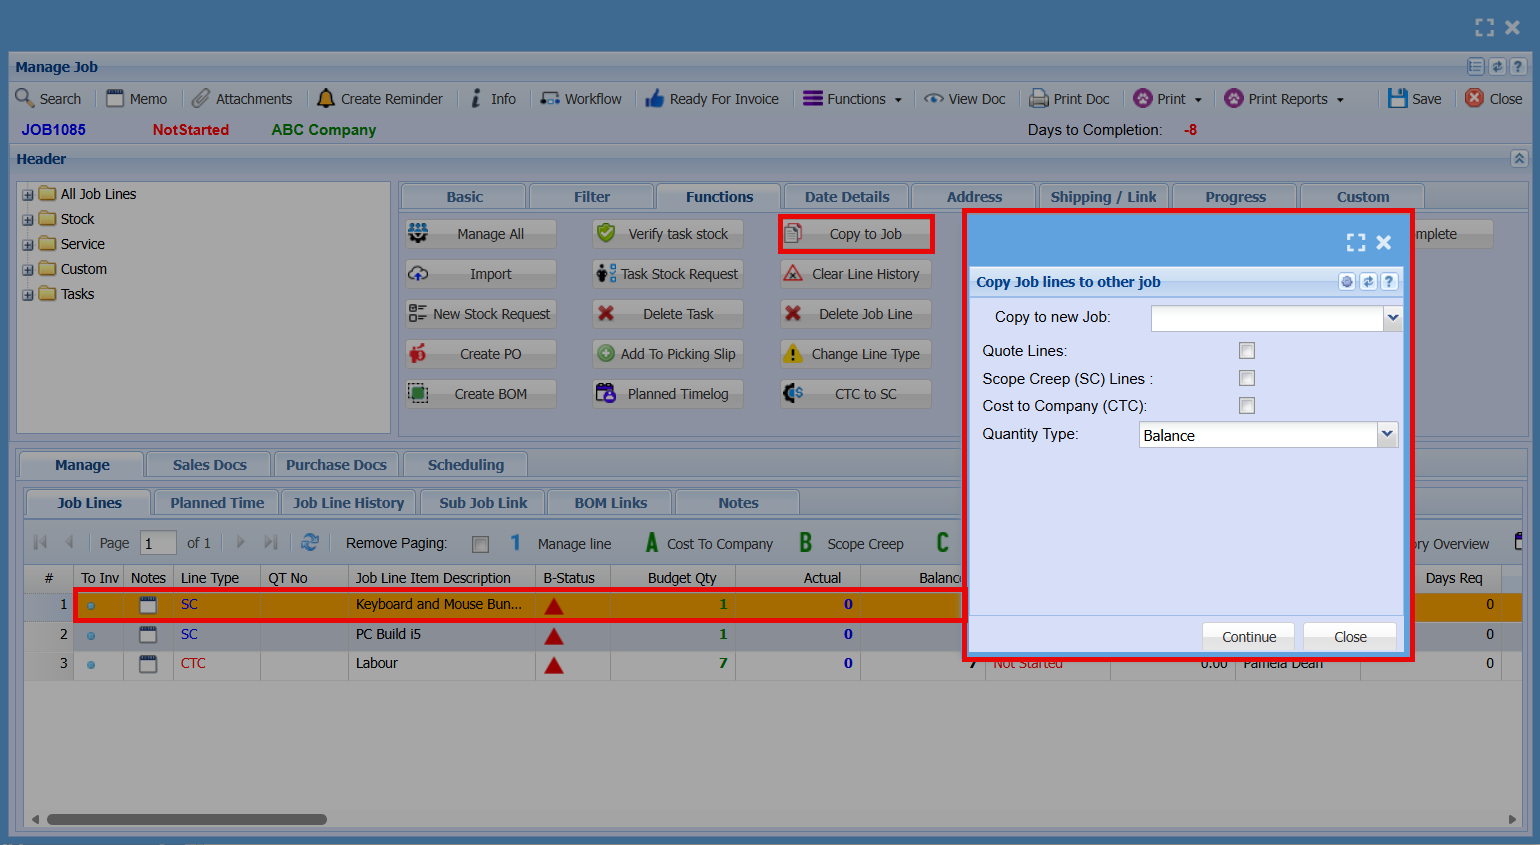
| Copy to new Job: | Select the job you want to copy the line(s) to |
| Quote Lines: | Tick to copy as quote lines |
| Scope Creep (SC) Lines: | Tick to copy as scope creep lines |
| Cost to Company (CTC): | Tick to copy as cost to company lines |
| Quantity Type: |
Choose how the quantity is copied: - For example, Balance will copy only the remaining quantity |
| Actions |
|
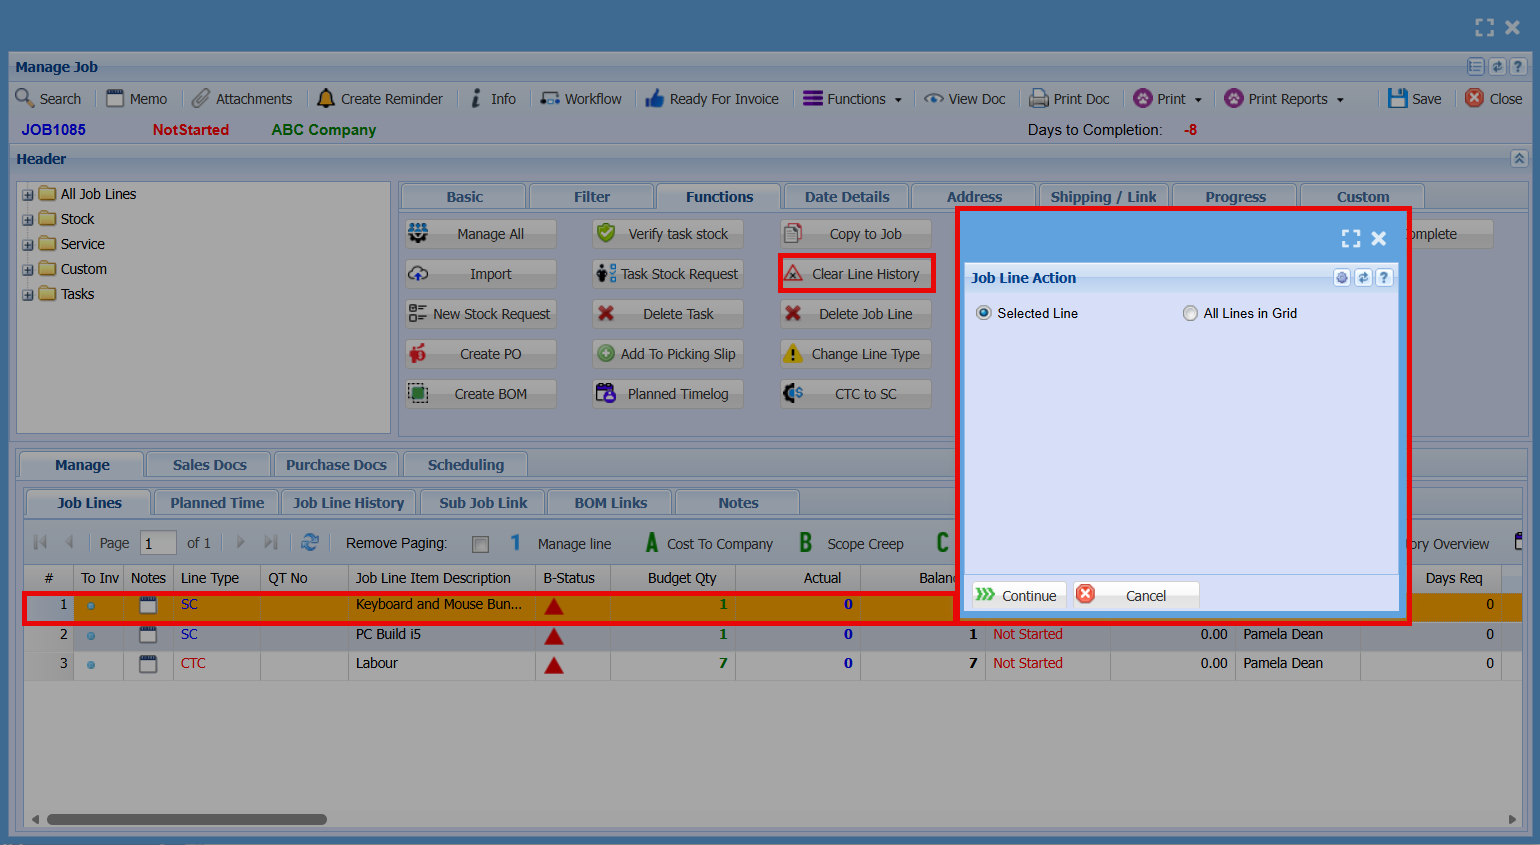
Clear Line History
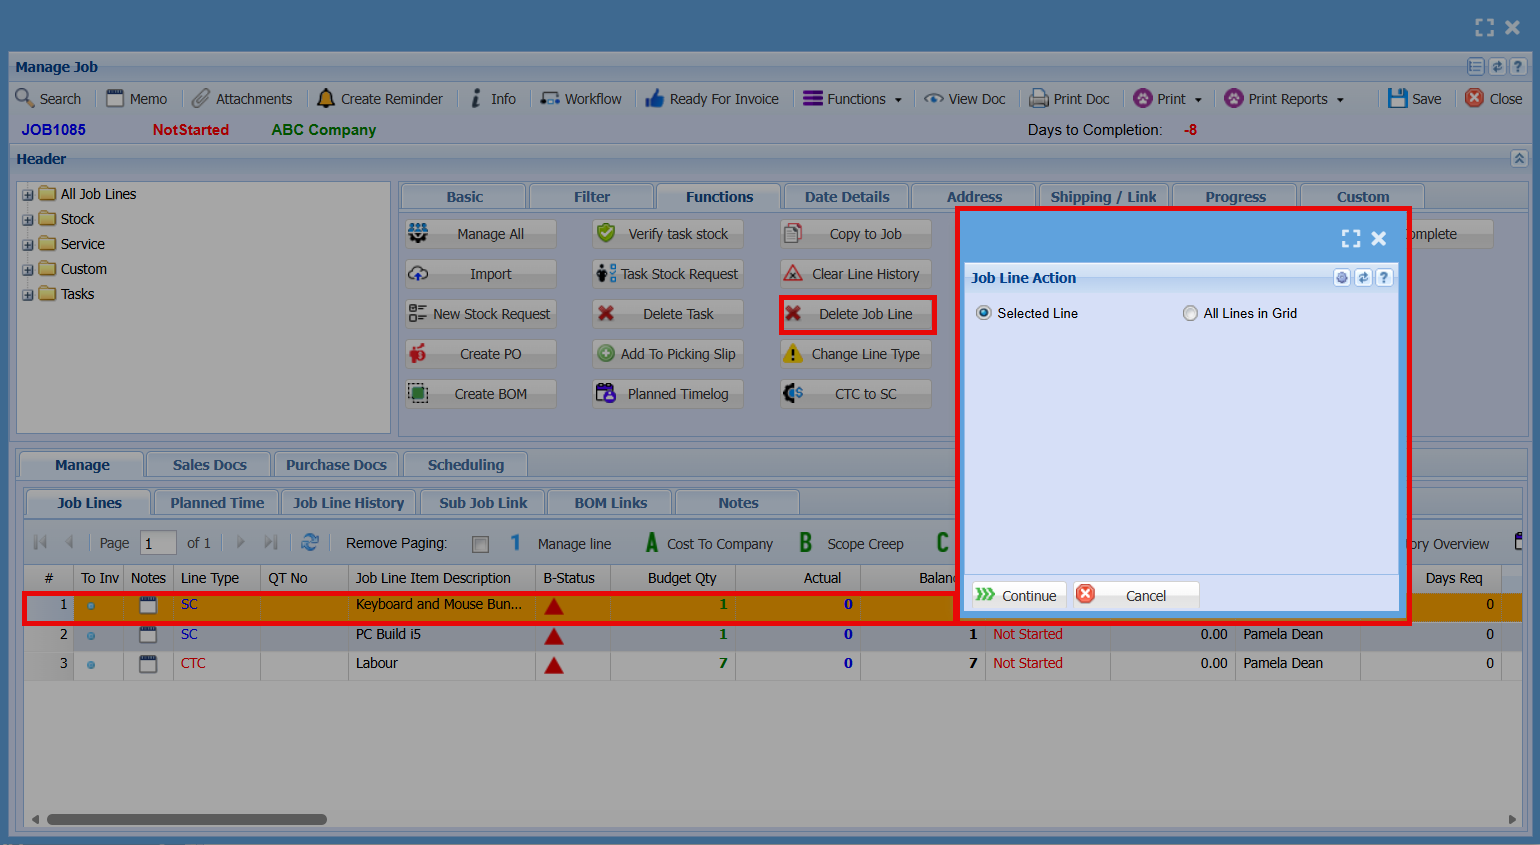
Delete Job Line
Change Line Type
?????
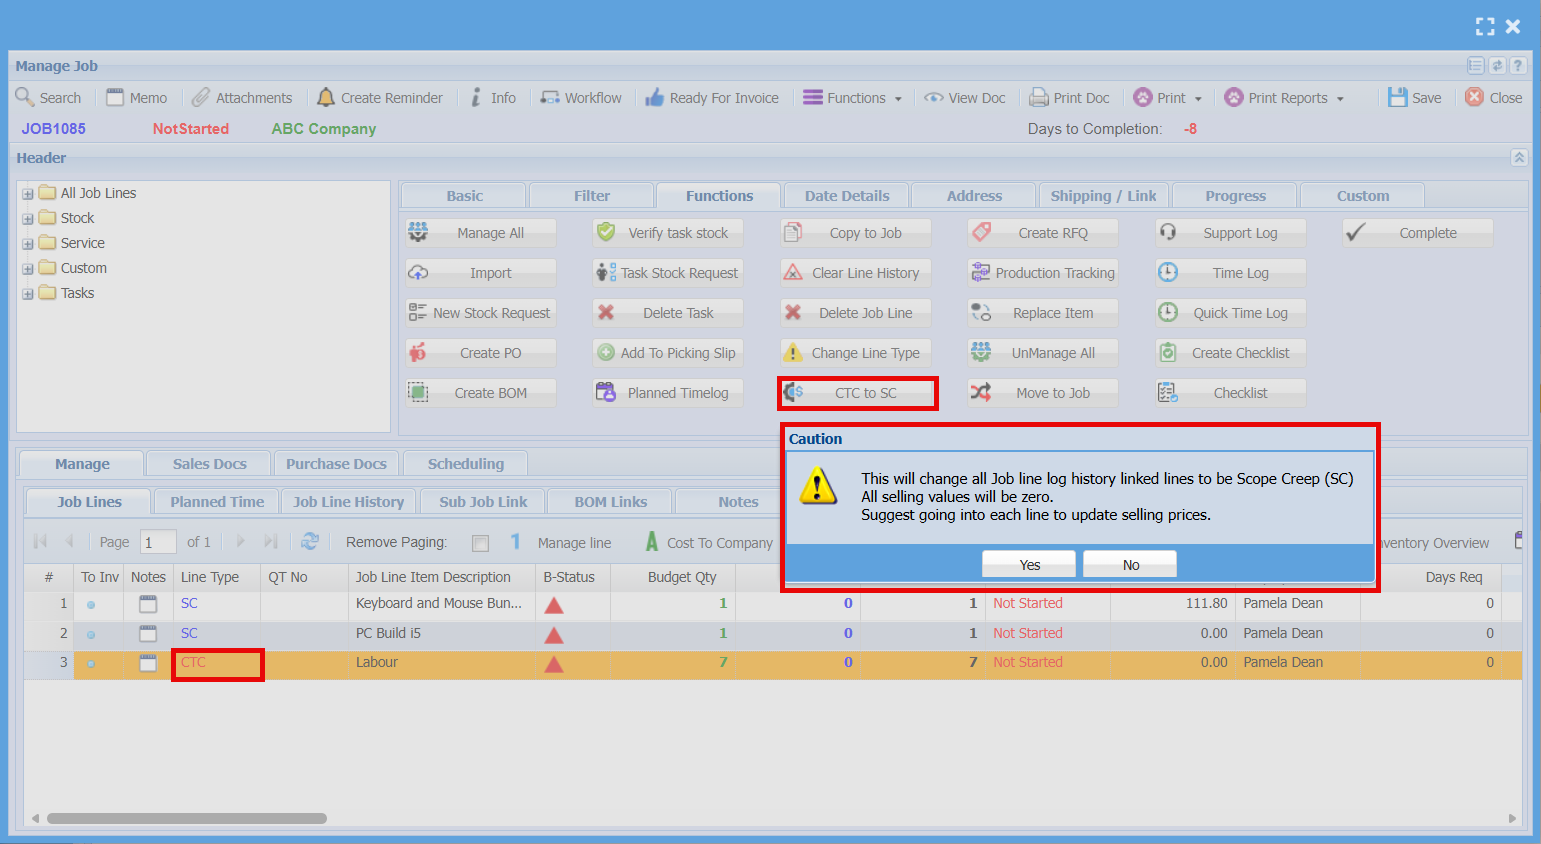
CTC to SC
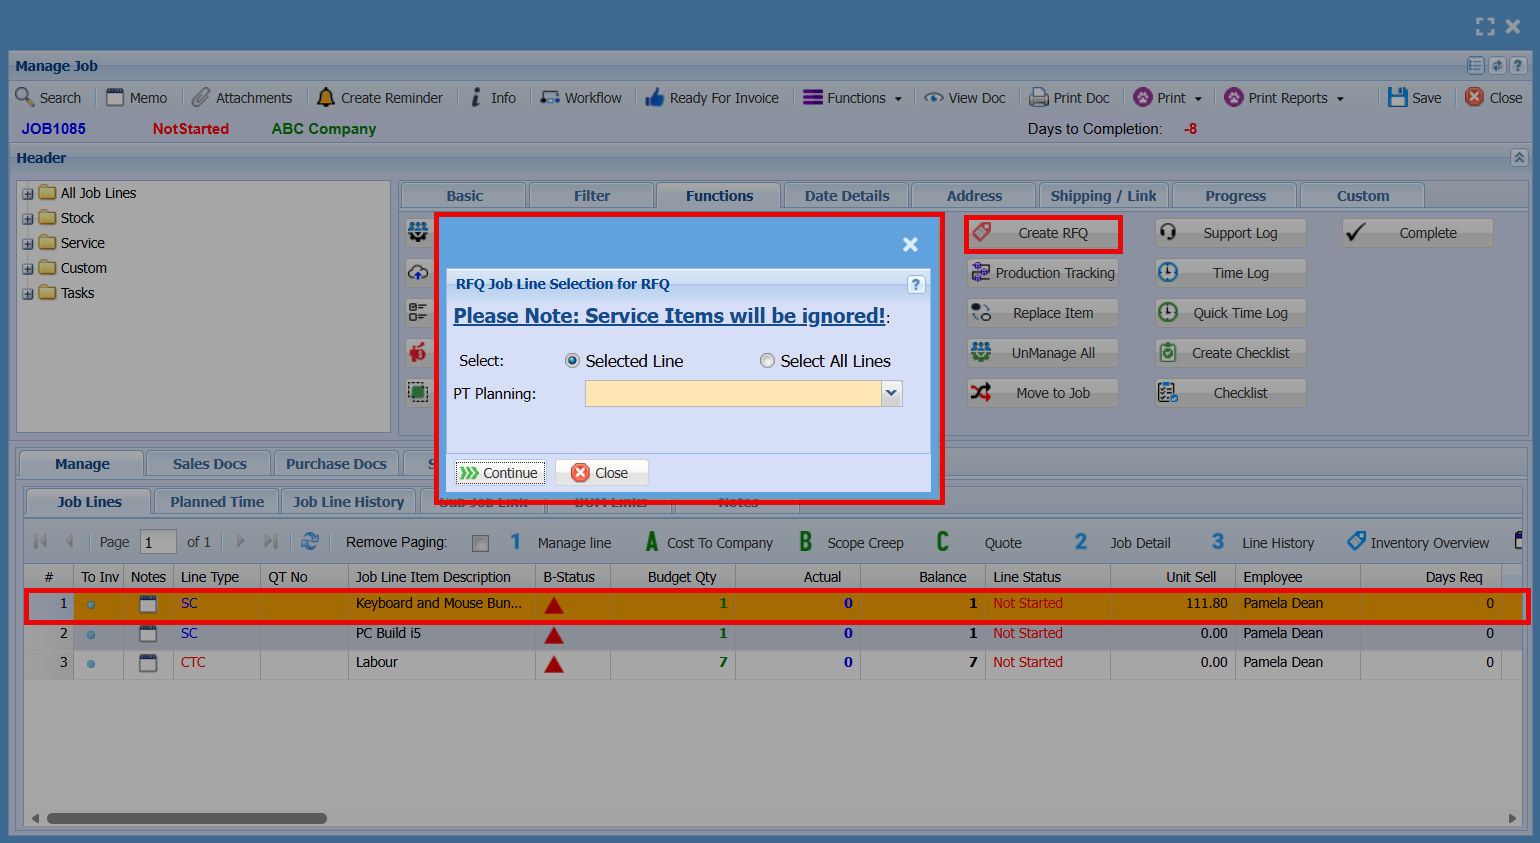
Create RFQ
Production Tracking
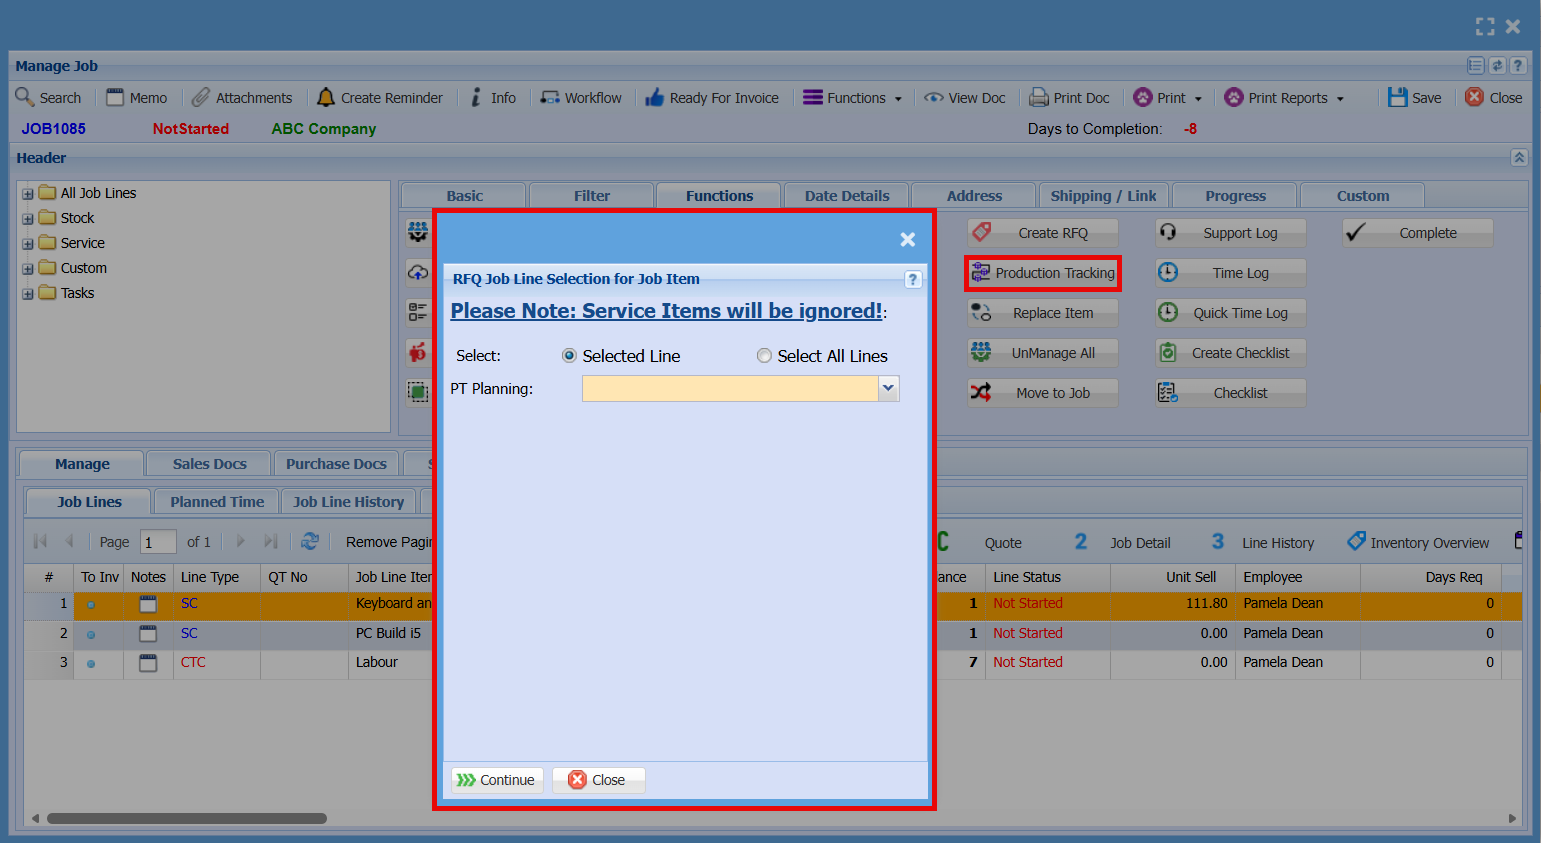
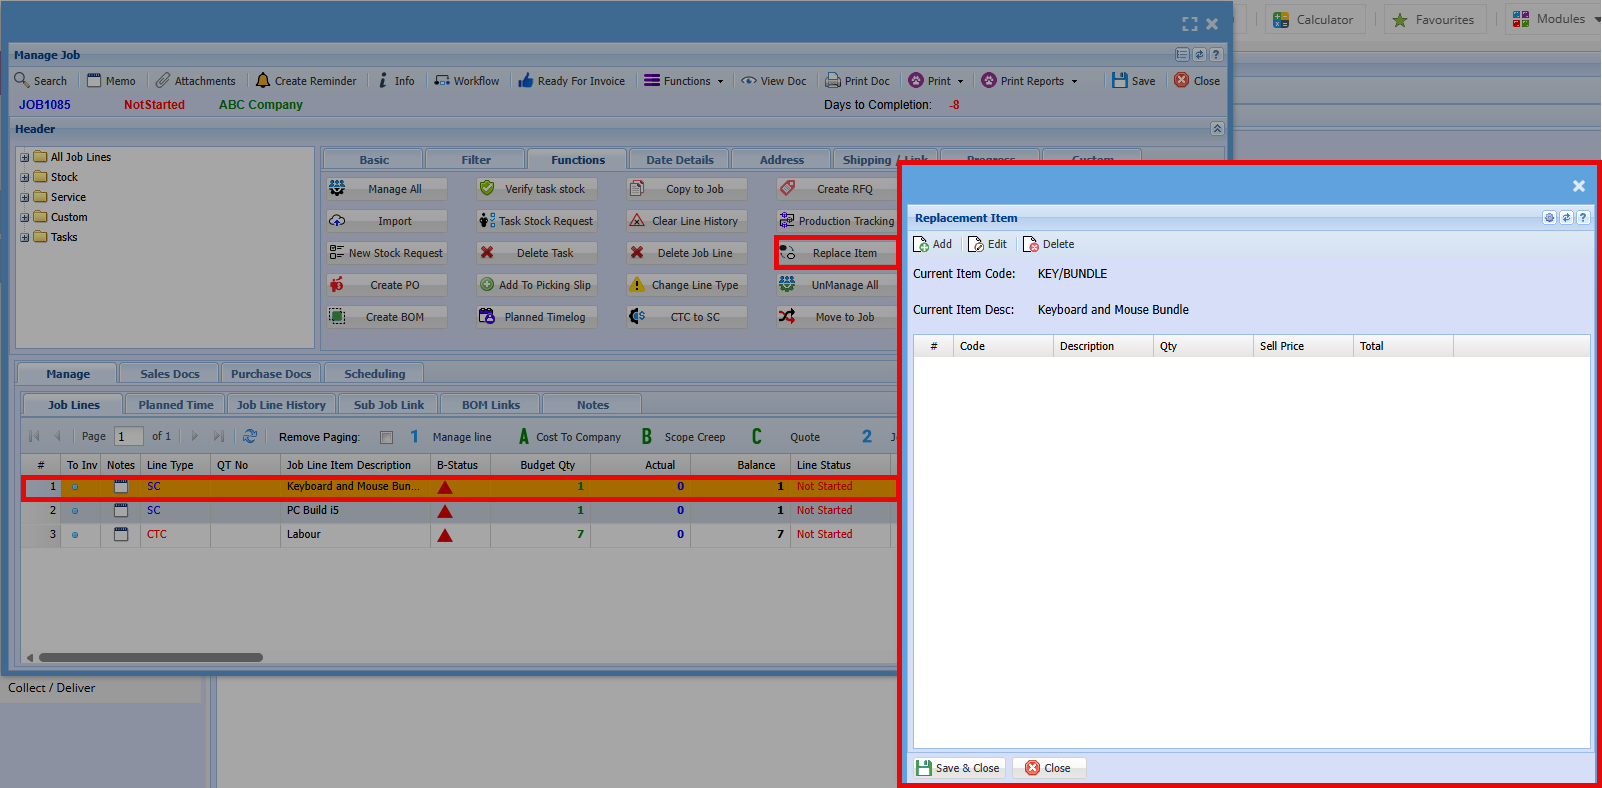
Replace Item
Manage All
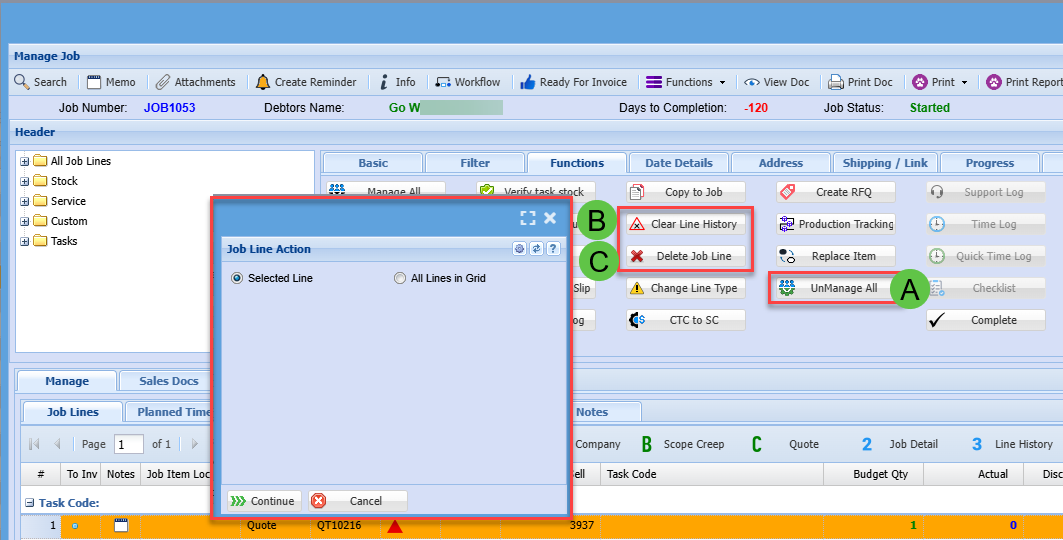
The “Unmanage All” function will reverse any managed quantities on job lines, reducing them back to an unmanaged state based on what has not yet been invoiced.
| A | UnManage All items on a job |
| B |
Clear Line History Only works if the Managed Actual quantity equals zero |
| C |
Delete Job Line Only works if there are no Line History entries |
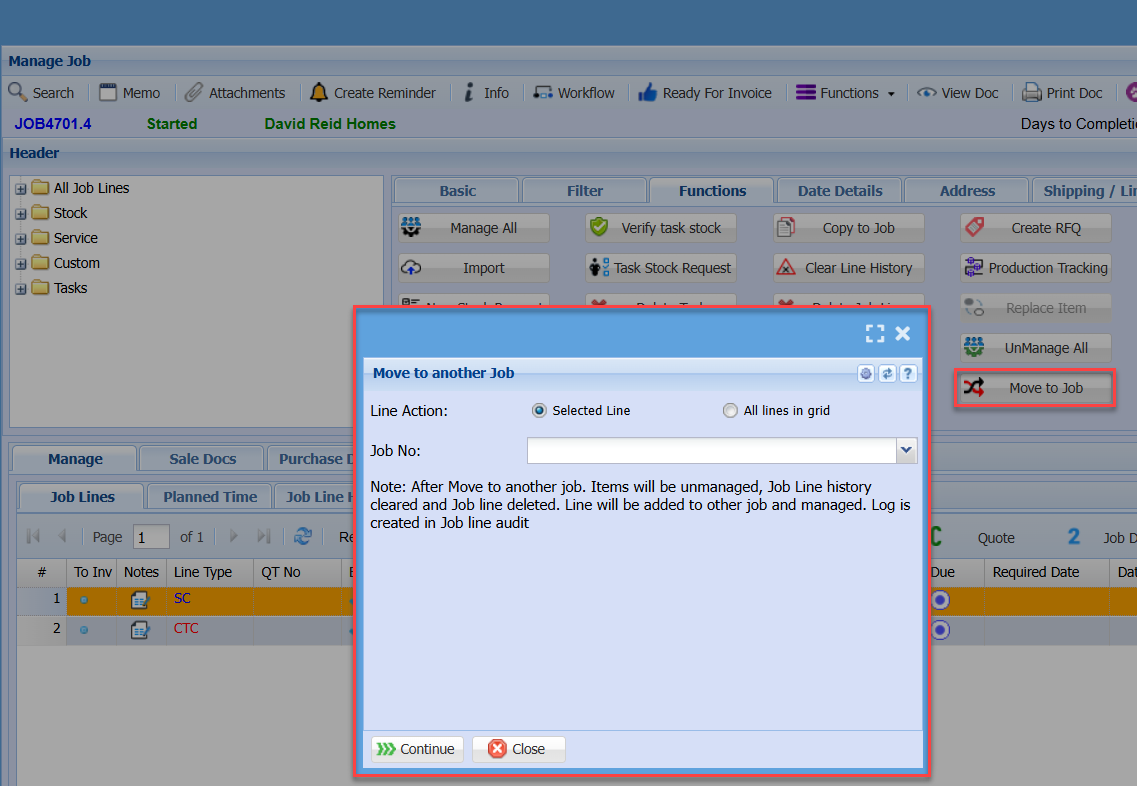
Move to Job
Support Log
Time Log
Quick Time Log
Create Checklist
Checklist
Complete
No Comments