General Ledger Journals
General Ledger>Activity>GL Journals
Journals are posted for:
| 1. | Opening Balances |
| 2. | Corrections |
| 3. | Payroll |
Huge ERP allows users to create Journals on the fly. Journal batches are kept in this section until they are processed to the books where they are moved to the Journal History section of the package.
This can be found under General Ledger > Analysis > Journal History.
All Journals processed are saved in Journal History and can be reprinted at any stage.

All processed Journals are allocated a number which is collected from the Reference table in the system under System Configuration >Administration >Reference Values.
These values consist of a prefix followed by a number – JNL305 which when broken up is JNL = General Ledger Journal batch number 305.
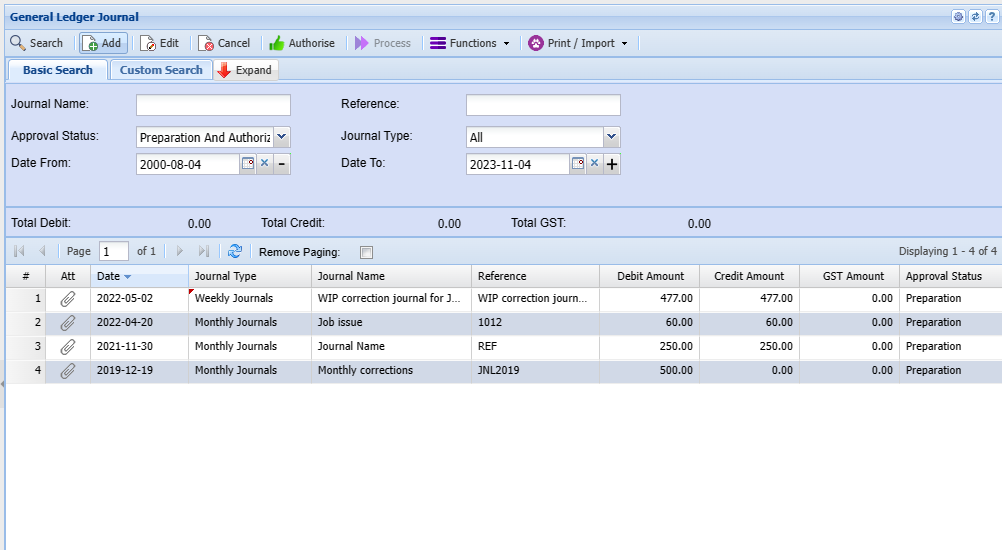
To search for saved Journals which have not being processed you click on the Search Button.
A User can search for saved Journals three different ways:
| 1 | Name of Journal |
| 2 | Date Created |
| 3 | Approval Status |
If any of the search criteria fields are left blank, the system will search for all saved Journals.
New Journal
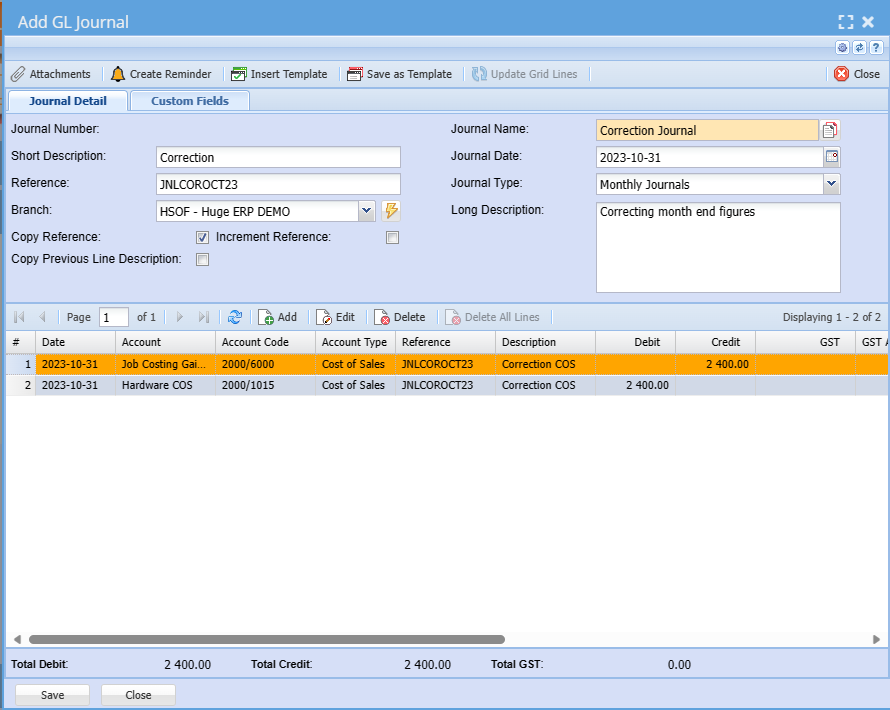
To Add a new Journal click on the Add button.
Fill in the information required for the Batch Header, the minimum requirement is the Journal Name. When you click on the Save button the batch Header information and the batch is saved, this also opens up the insert button.
| Journal Number | Allocated after the Journal is posted |
| Journal Name | A required field to describe the Journal. |
| Reference | Enter a Reference number, Also note that when there is a tick active then the reference will be copied to each line inserted. Should the tick be off no reference is inserted per line. |
| Short Description | Quick description of the Journal |
| Description | A Long description of the journal. |
Journal Line
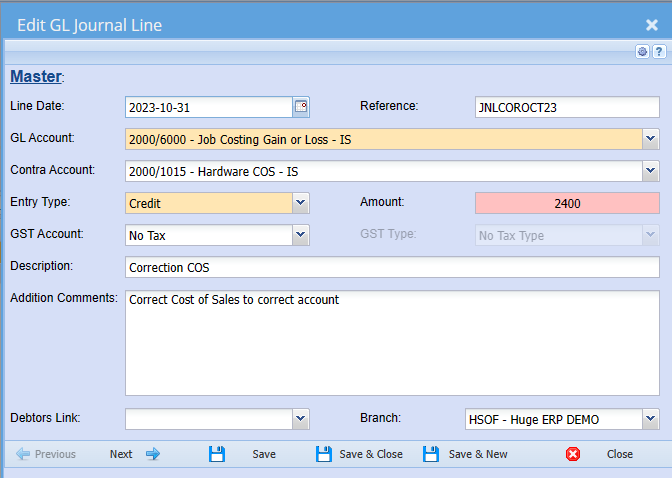
To insert a line, click on the Add button after you have saved the Journal batch.
| Date | The date the journal entry will reflect and in which period it will be posted to. |
| Reference | The reference of the journal line. |
| Account Code | Select which Ledger account is to be affected, ledger accounts can be selected in three ways |
To select an account, select the account dropdown and click on the enter button on your keyboard. Notice that there is no accounts when you first open the drop down but after clicking on the enter button the drop down is populated with the ledger accounts. It is sorted by account code. One can also use your down arrow keys on the keyboard to scroll down to the desired ledger account
NOTE: The reason that this drop down is done in this manner is to increase speed, if the company has a lot of ledger accounts then the drop down takes a long period to populate and the user might want to use the long search method to find an account which is much faster.
| Post Dated Cheque | Tick this option to show that this entry is post dated |
| Entry Type | Debit or Credit |
| Entry Amount | The amount that is to be posted on this line. It is not necessary to enter a .00 after 500.00 as the system will automatically assume that when an amount is entered there is no decimals. |
| Tax Account | Select the tax account |
| Tax Type | If the Tax Account is entered a tax type needs to be filled in. |
| Description | Short description of what this line is about. |
| Additional Comments | A long description that is used to describe why this entry is being done. |
| Job | This is used to allocated the amount to a job – it is relevant when using the Job Costing Module. |
| Projects | Add this amount to a project |
Journals will not be posted if they do not balance with the Debit and Credit amounts equal. The journal must balance in the relevant periods that are being changed.
To Amend any changes highlight the line that needs changing and click on the Amend button or double click on the line in the grid.
A debit and a credit line is required to balance the journal, in this example I have only made one entry but one journal batch can have as many lines as you want.
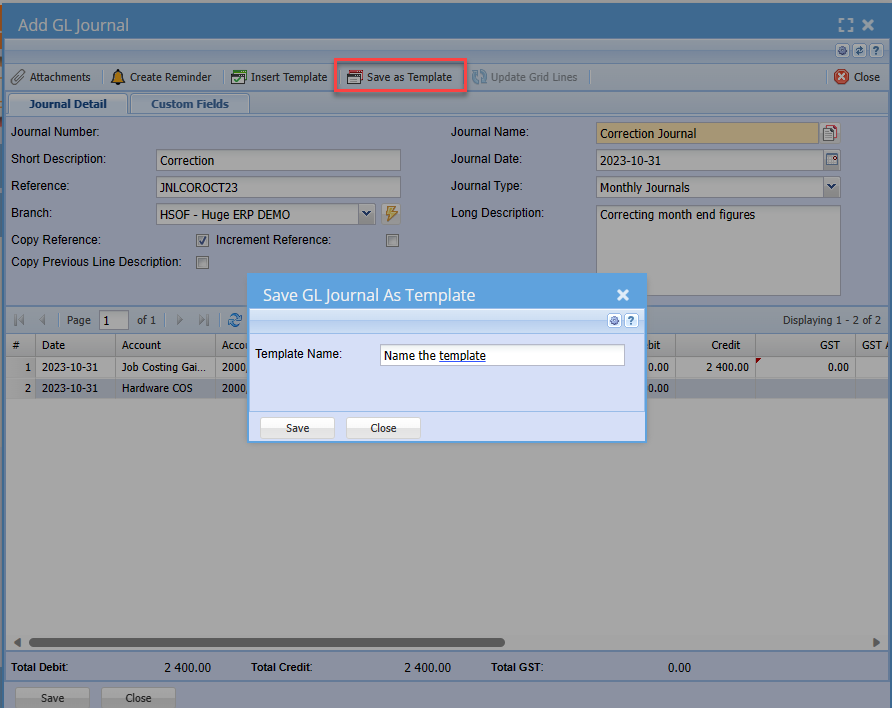
Journal Templates
Journal templates are useful to save repetitive Journals each month, instead of capturing all the lines every month. Create the initial Journal and then click on the Template Tab and click on the “Save as Template”. Insert a Name for the template so you can recall it at anytime.
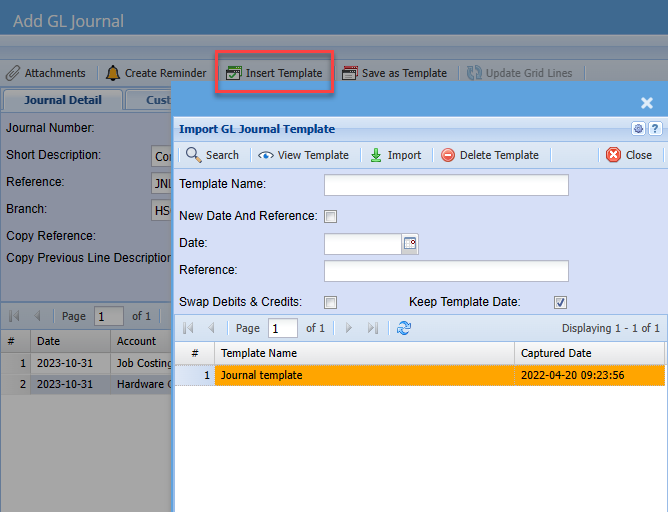
Inserting of a saved journal is simple, create a new Journal batch and save your Journal Headers. Click on the Template Tab and click on the Insert Template button. Select the Journal that you have saved and click on the Import button. Your saved journal template will now be put into the current Journal batch. The Dates of the lines will be inserted with today’s date.
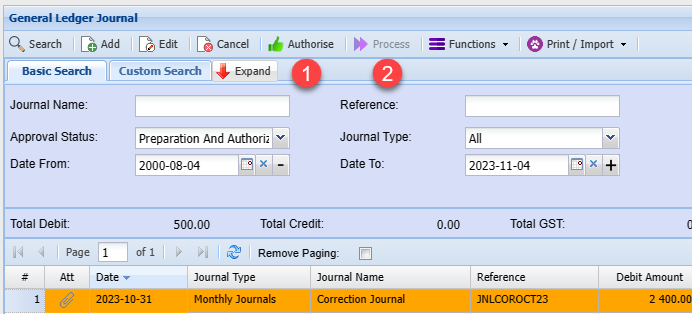
To process a journal click on the Process tab, a journal cannot be processed without being authorized first. Highlight the Journal and click on the Authorise Button and you will notice that the journal has changed statuses from Preparation to Authorised. The Process button now becomes active and you can process the journal.
NOTE: The reason for authorize and then process is to eliminate mistakes in your books as well as running a workflow procedure. A clerk can capture and a manager can release to the books.
Once the journal has been posted to your books it will disappear off this search screen and will be transferred to the Journal history section.
General Ledger > Analysis > Journal History
NOTE: If you cancel the journal it will be moved to the Journal History window
Update Grid Lines
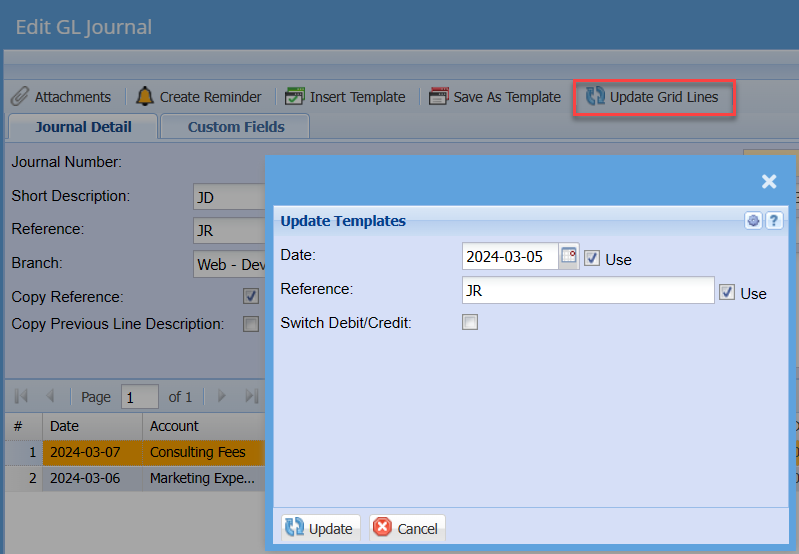
| Date | |
| Reference | |
| Switch Debit/Credit Tick | |
| Use Tick |
Printing of Journal
This can be done in the Activity – Journal screen or in the Analysis – Journal History screen.
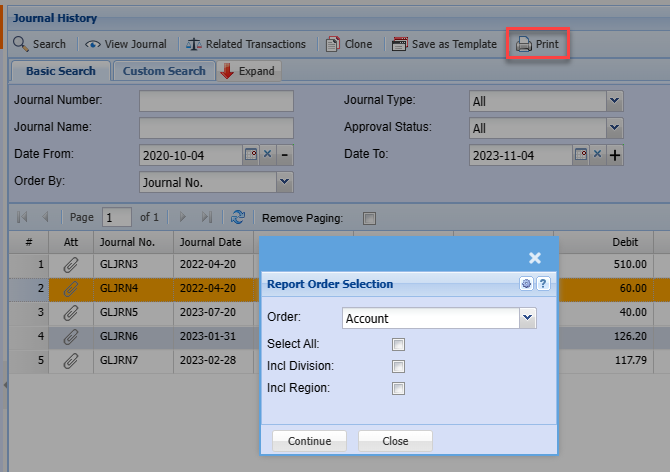
Click on the Print tab at the bottom of the page and highlight the Journal you want to print and click on the Print button. A criteria screen comes up to allow the general ledger journal to be sort by a. Account b. Account Code c. Date d. Description e. Reference
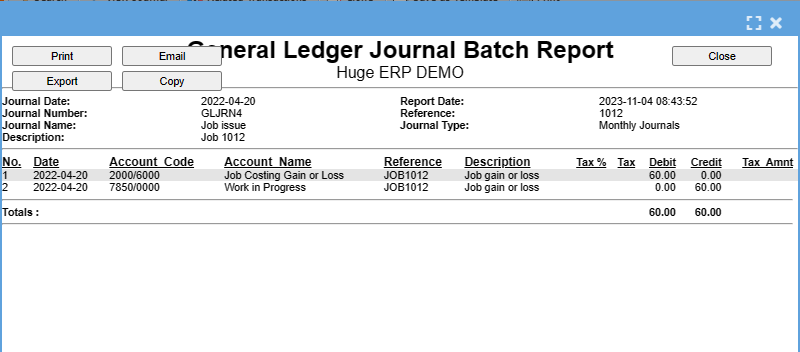
A Journal can either be printed, Emailed or copy to Clipboard where it can be taken to programs like Excel.
Post Status
Question- What happens if I cannot find my Journal in Activity – Journal or in Analysis Journal History after I have processed the Journal? It has just disappeared.
First thing to check is that you are searching in the correct DATE Range OR
The missing journal can be found in the Post Status screen where it lies between saved and posted status, almost like a Journal WIP (Work In Progress). The accounting package will not process any Journals which could have a problem when posting – some examples are:
| 1 | Journal not in balance |
| 2 | Journal not in balance for specific period |
| 3 | Ledger account on hold |
| 4 | Period blocked |
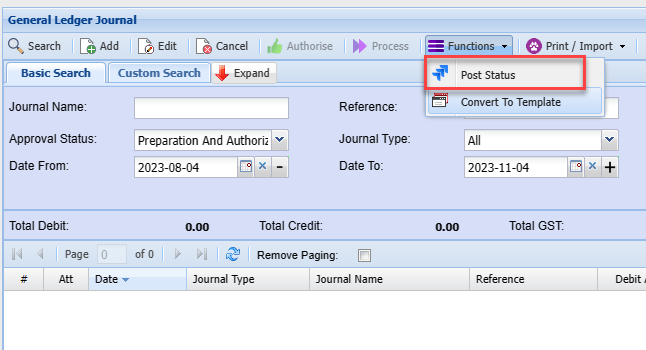
Go to General Ledger > Activity > Journal, click on the bottom tab called Process and click on the button called “Post Status”
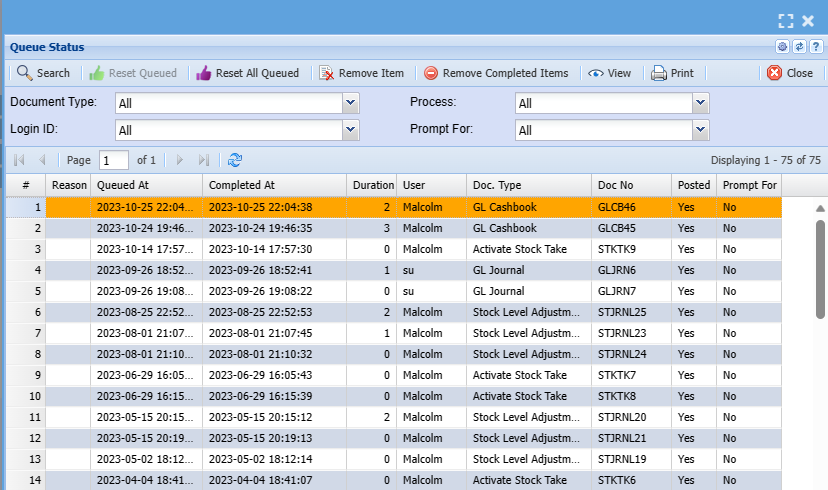
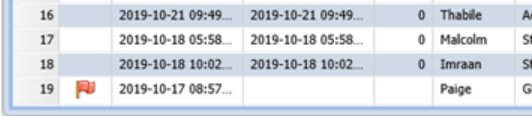
In the above screen one can find your Journal, check the column called Posted and see if there is a Yes, if so then the journal was successfully posted. If the answer is no, then the button with the red flag should be highlighted and when you click on this button it will give you the reason why the journal failed.
To take the Journal out of Journal WIP highlight the line and click on the “Reset Item / Queued” button. This will delete the Journal in WIP and put it back into Activity – Journal screen where you can edit it and fix the problem. Once the problem is fixed you can process again.
No Comments