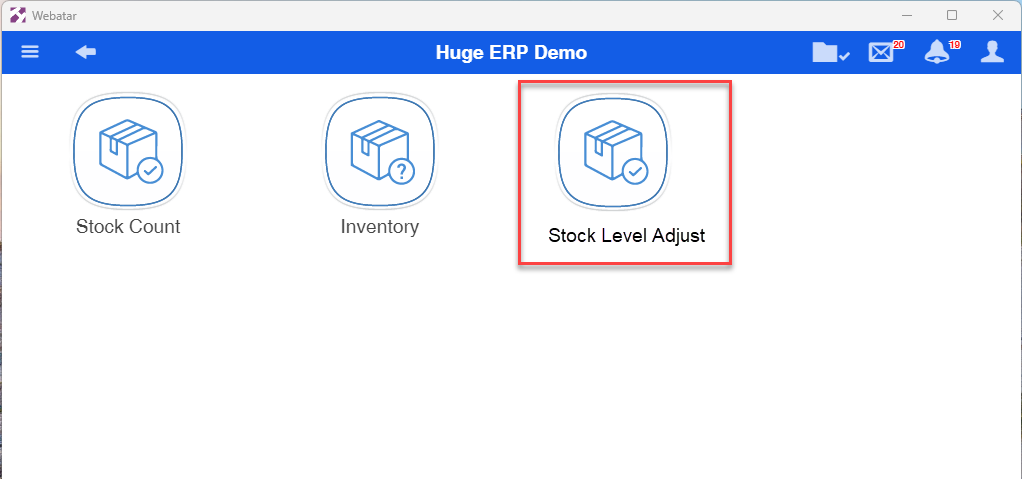
Stock Level Adjust
Increasing or decreasing stock levels from Webatar App
Module access setup
New module falls under the Stock Group
System Configuration > General > User Setup
- Go to the "Module Access" tab
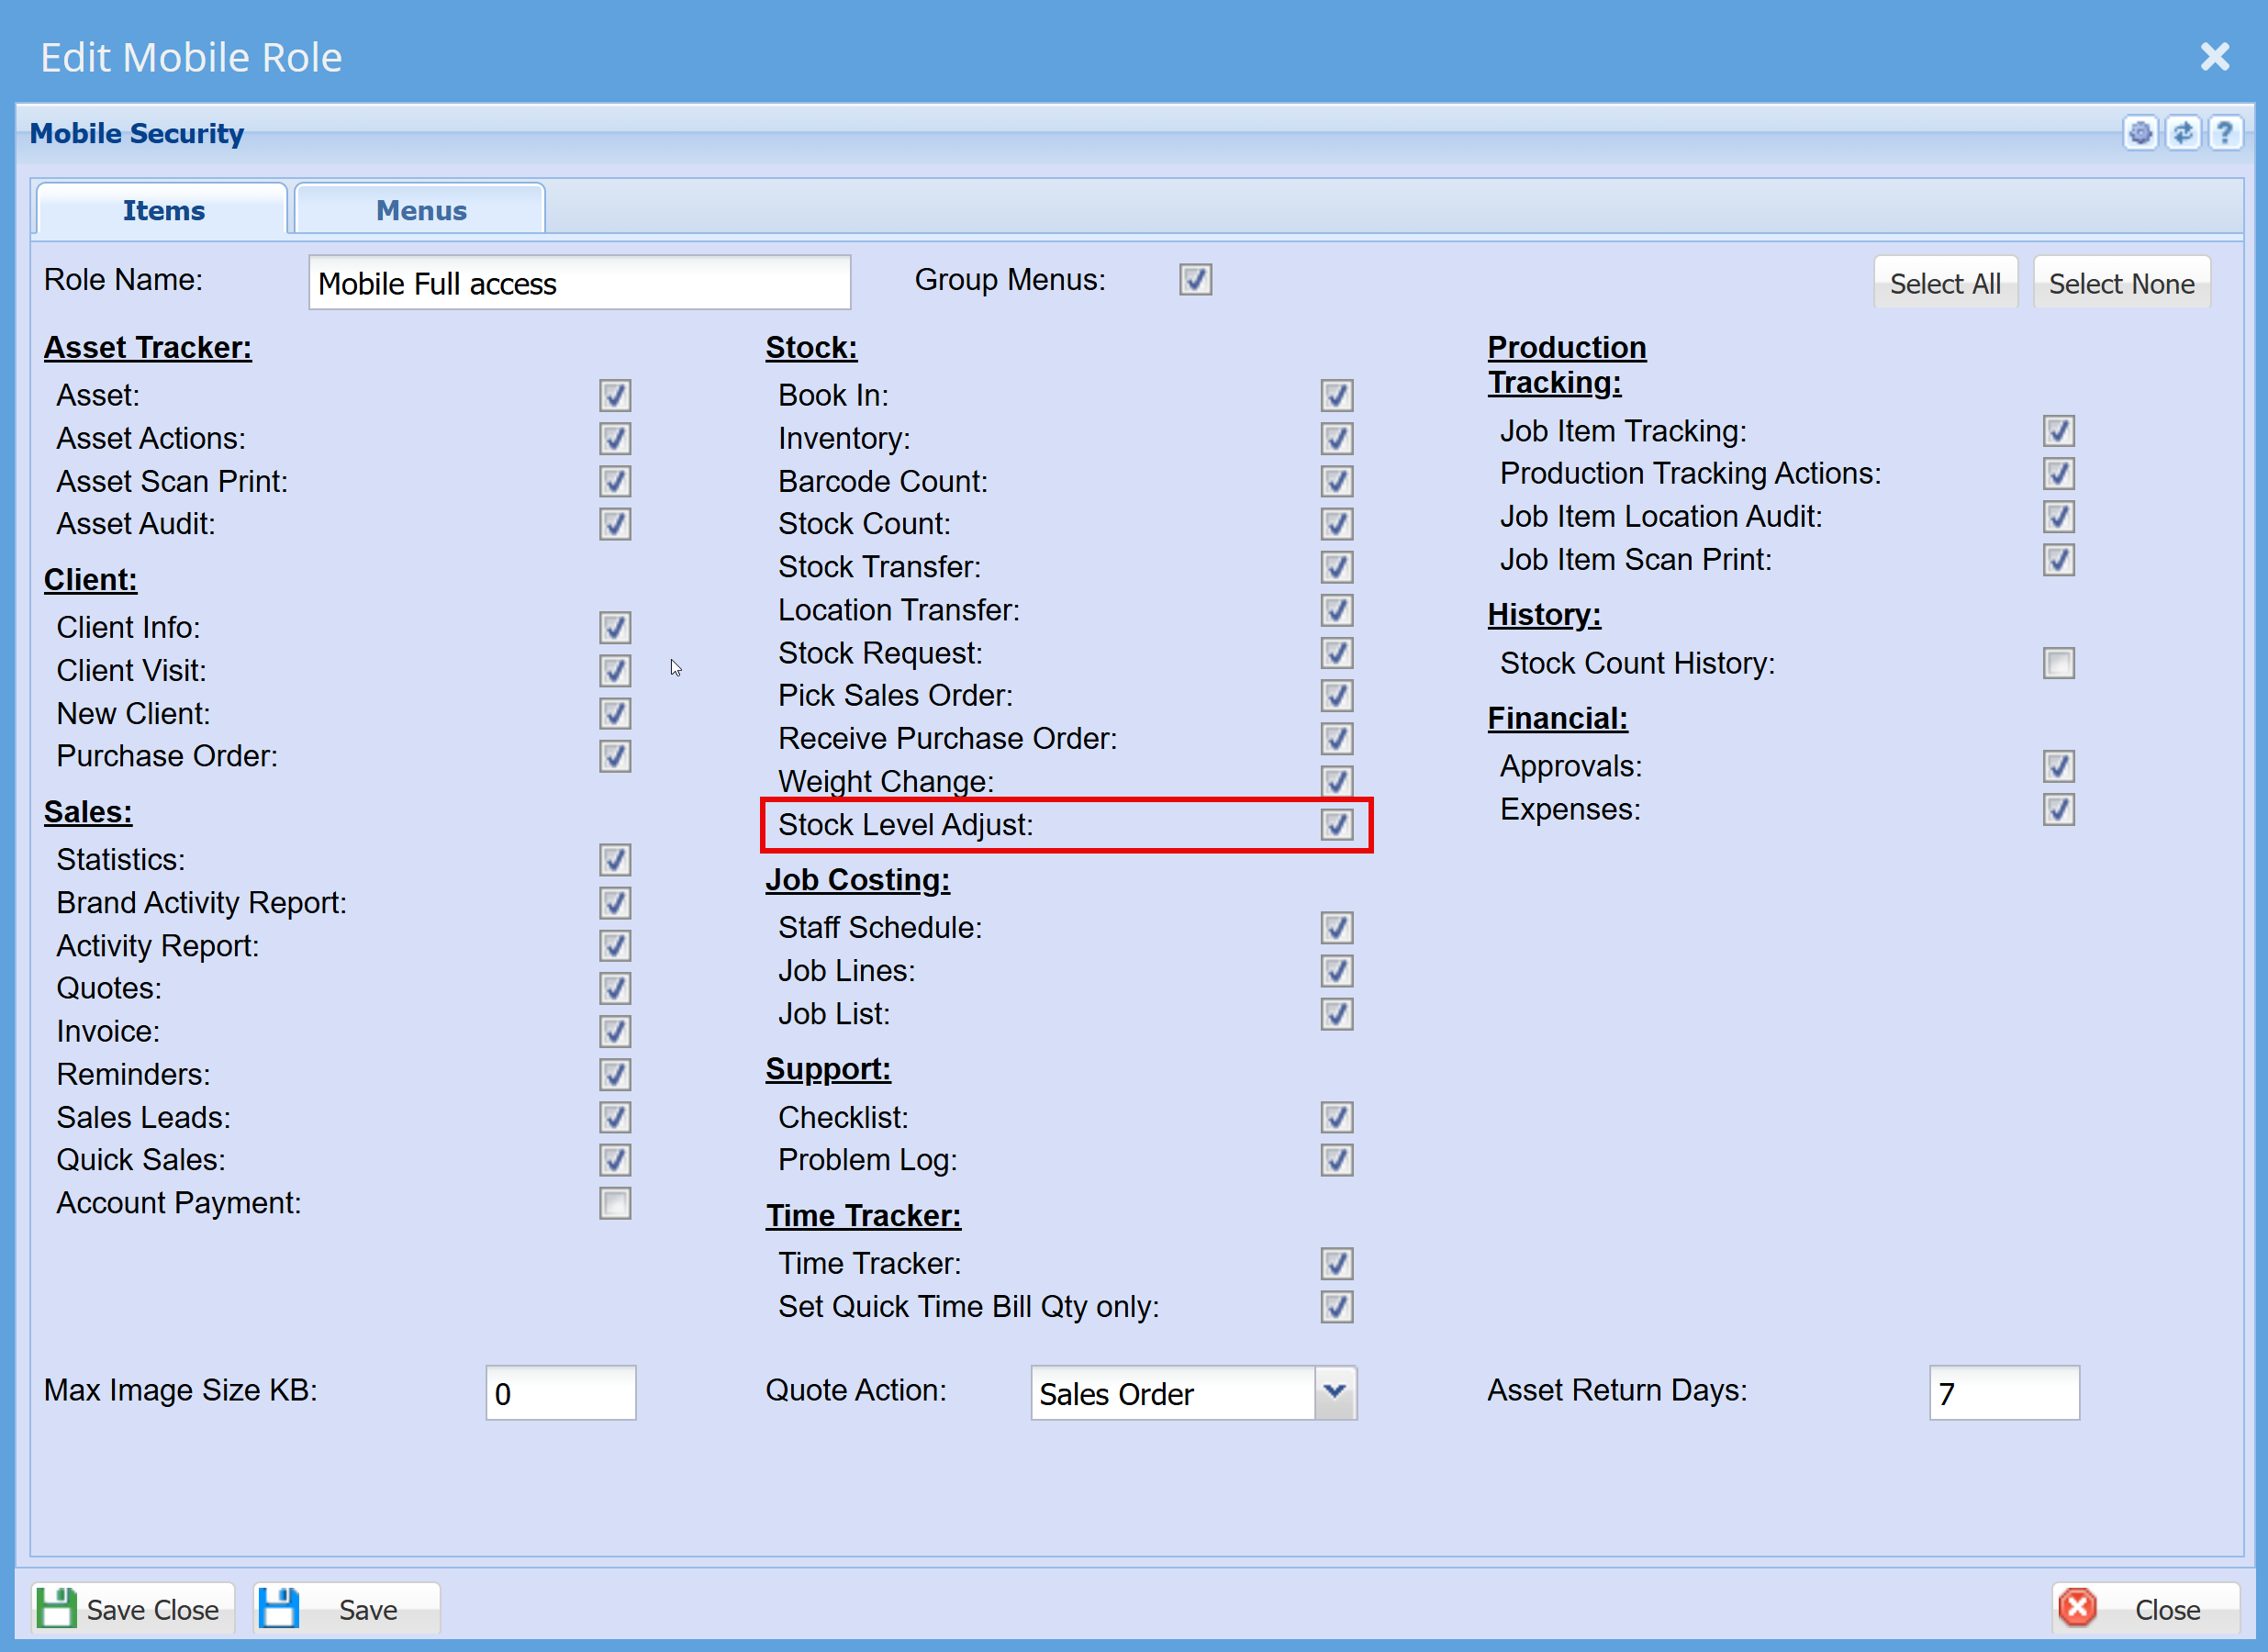
- Click on "Edit" at the mobile Role
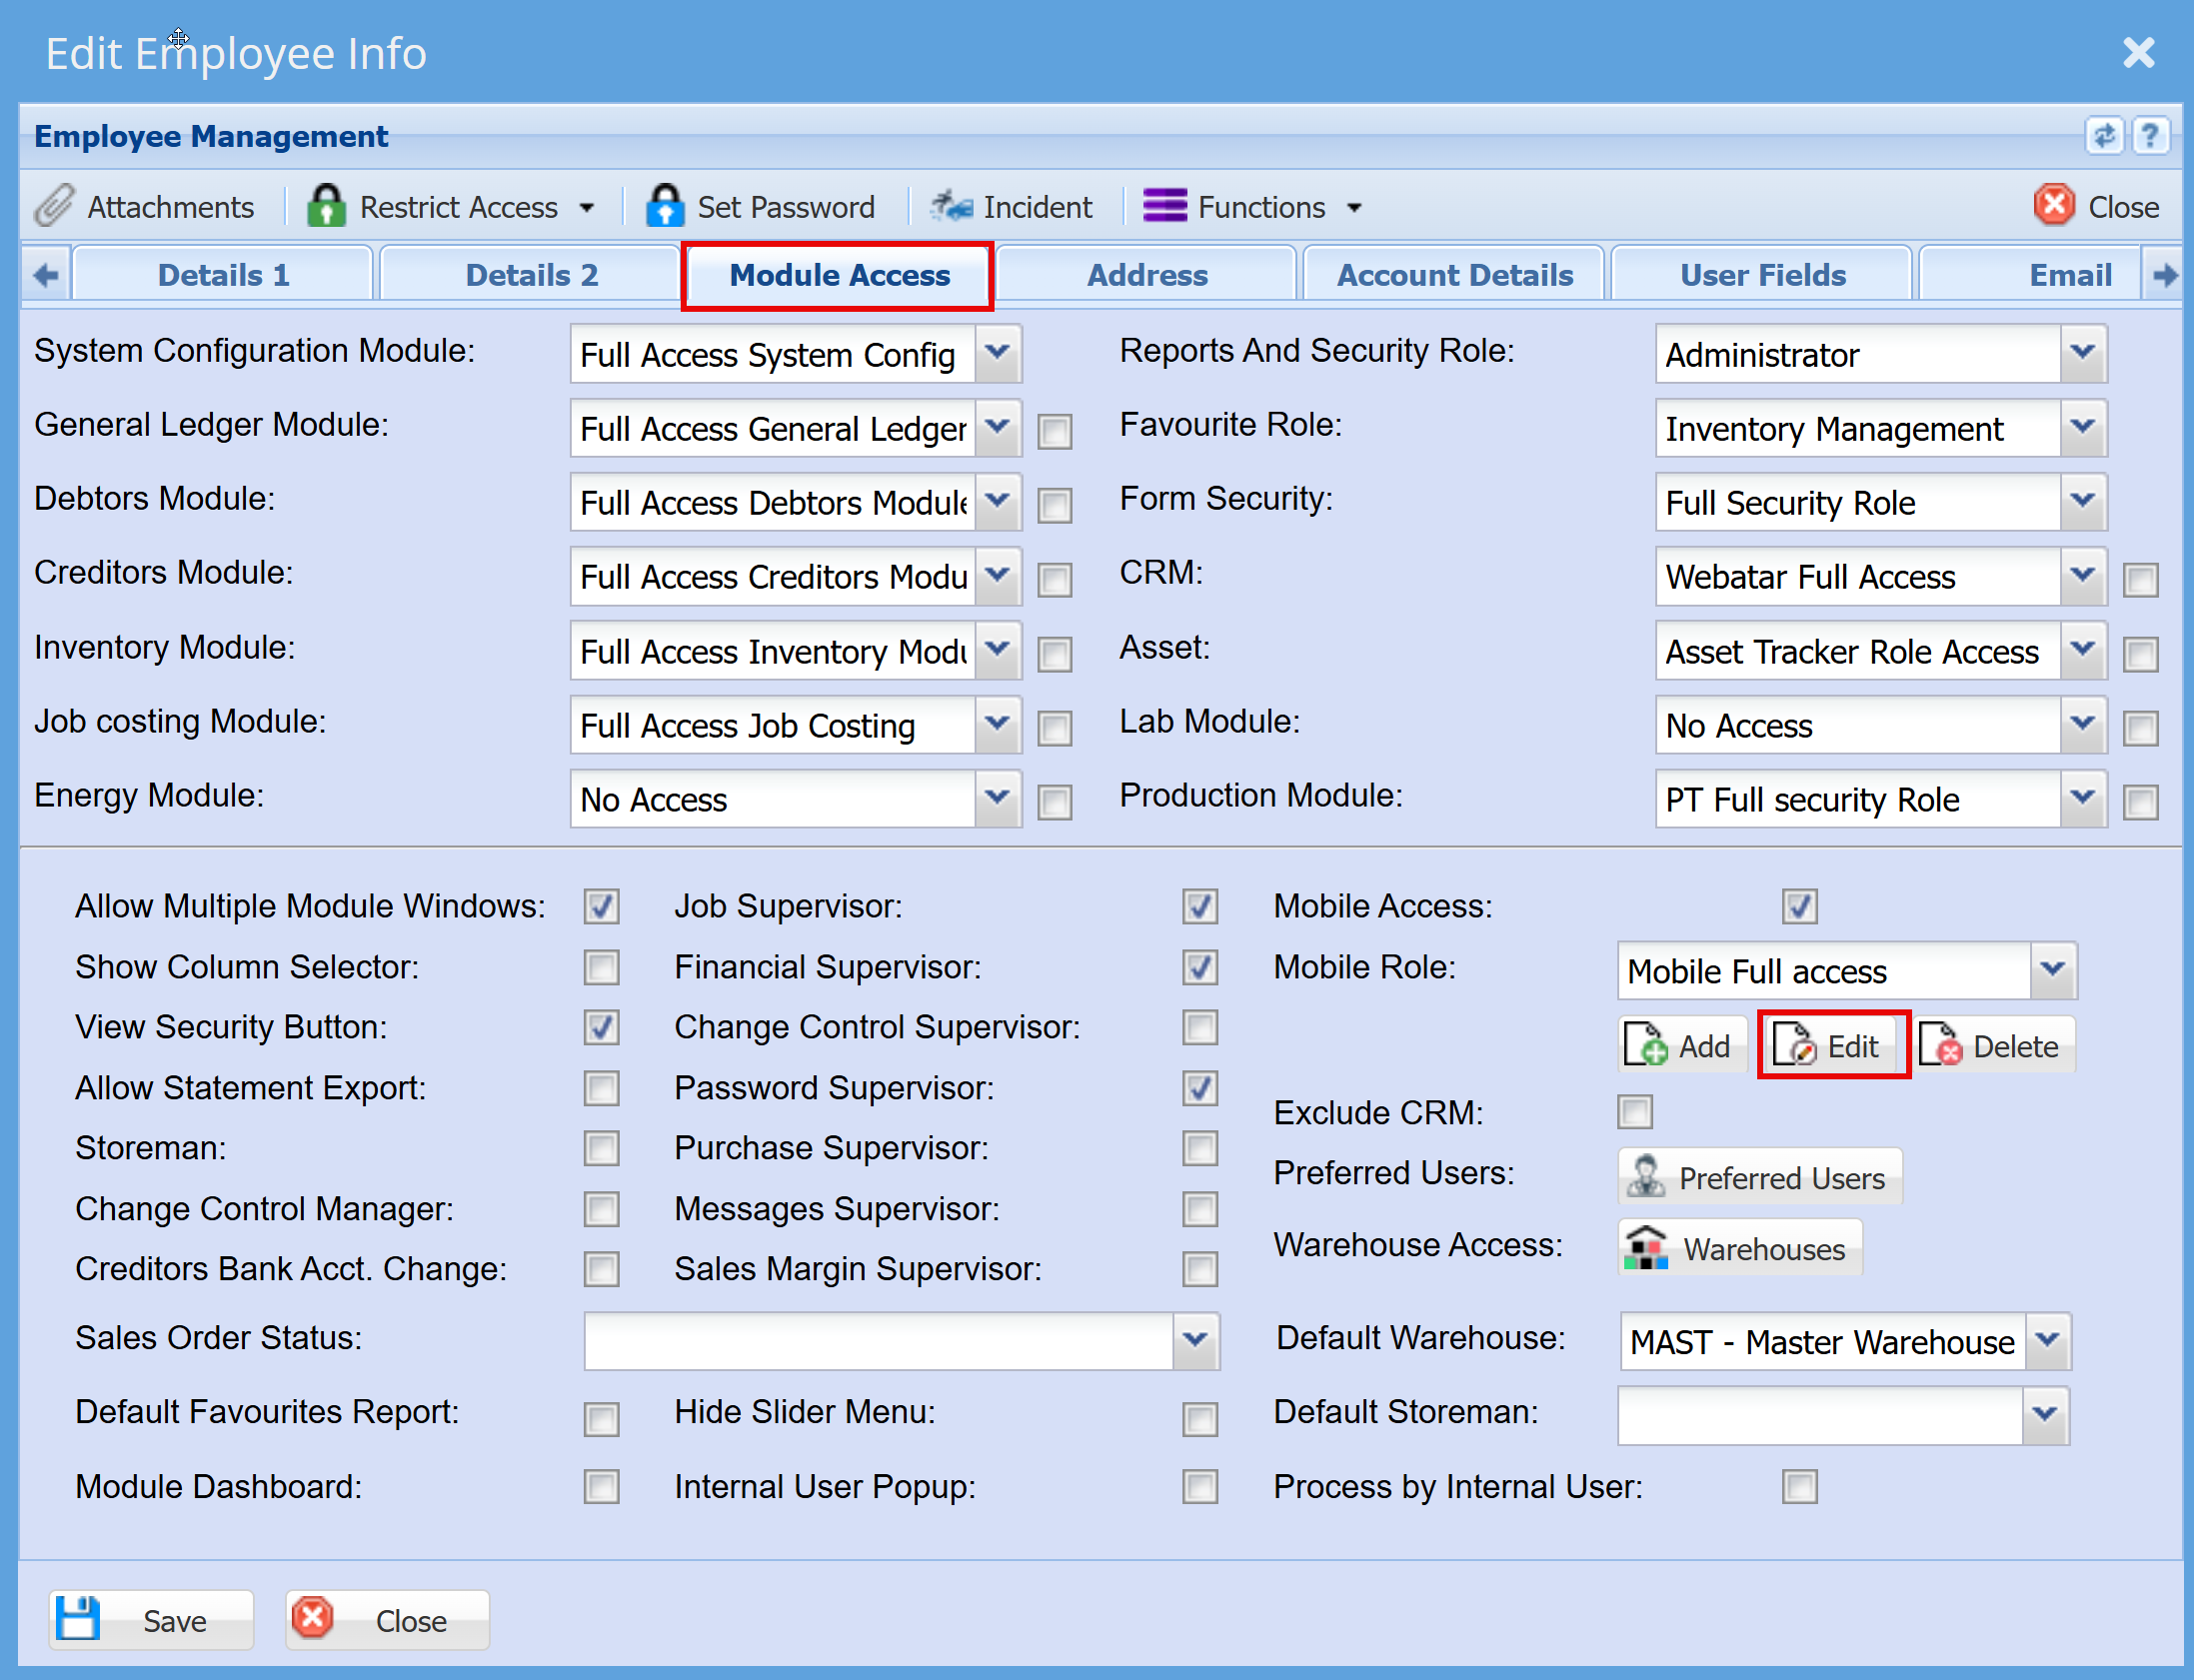
- Tick the "Stock Level Adjustment" box
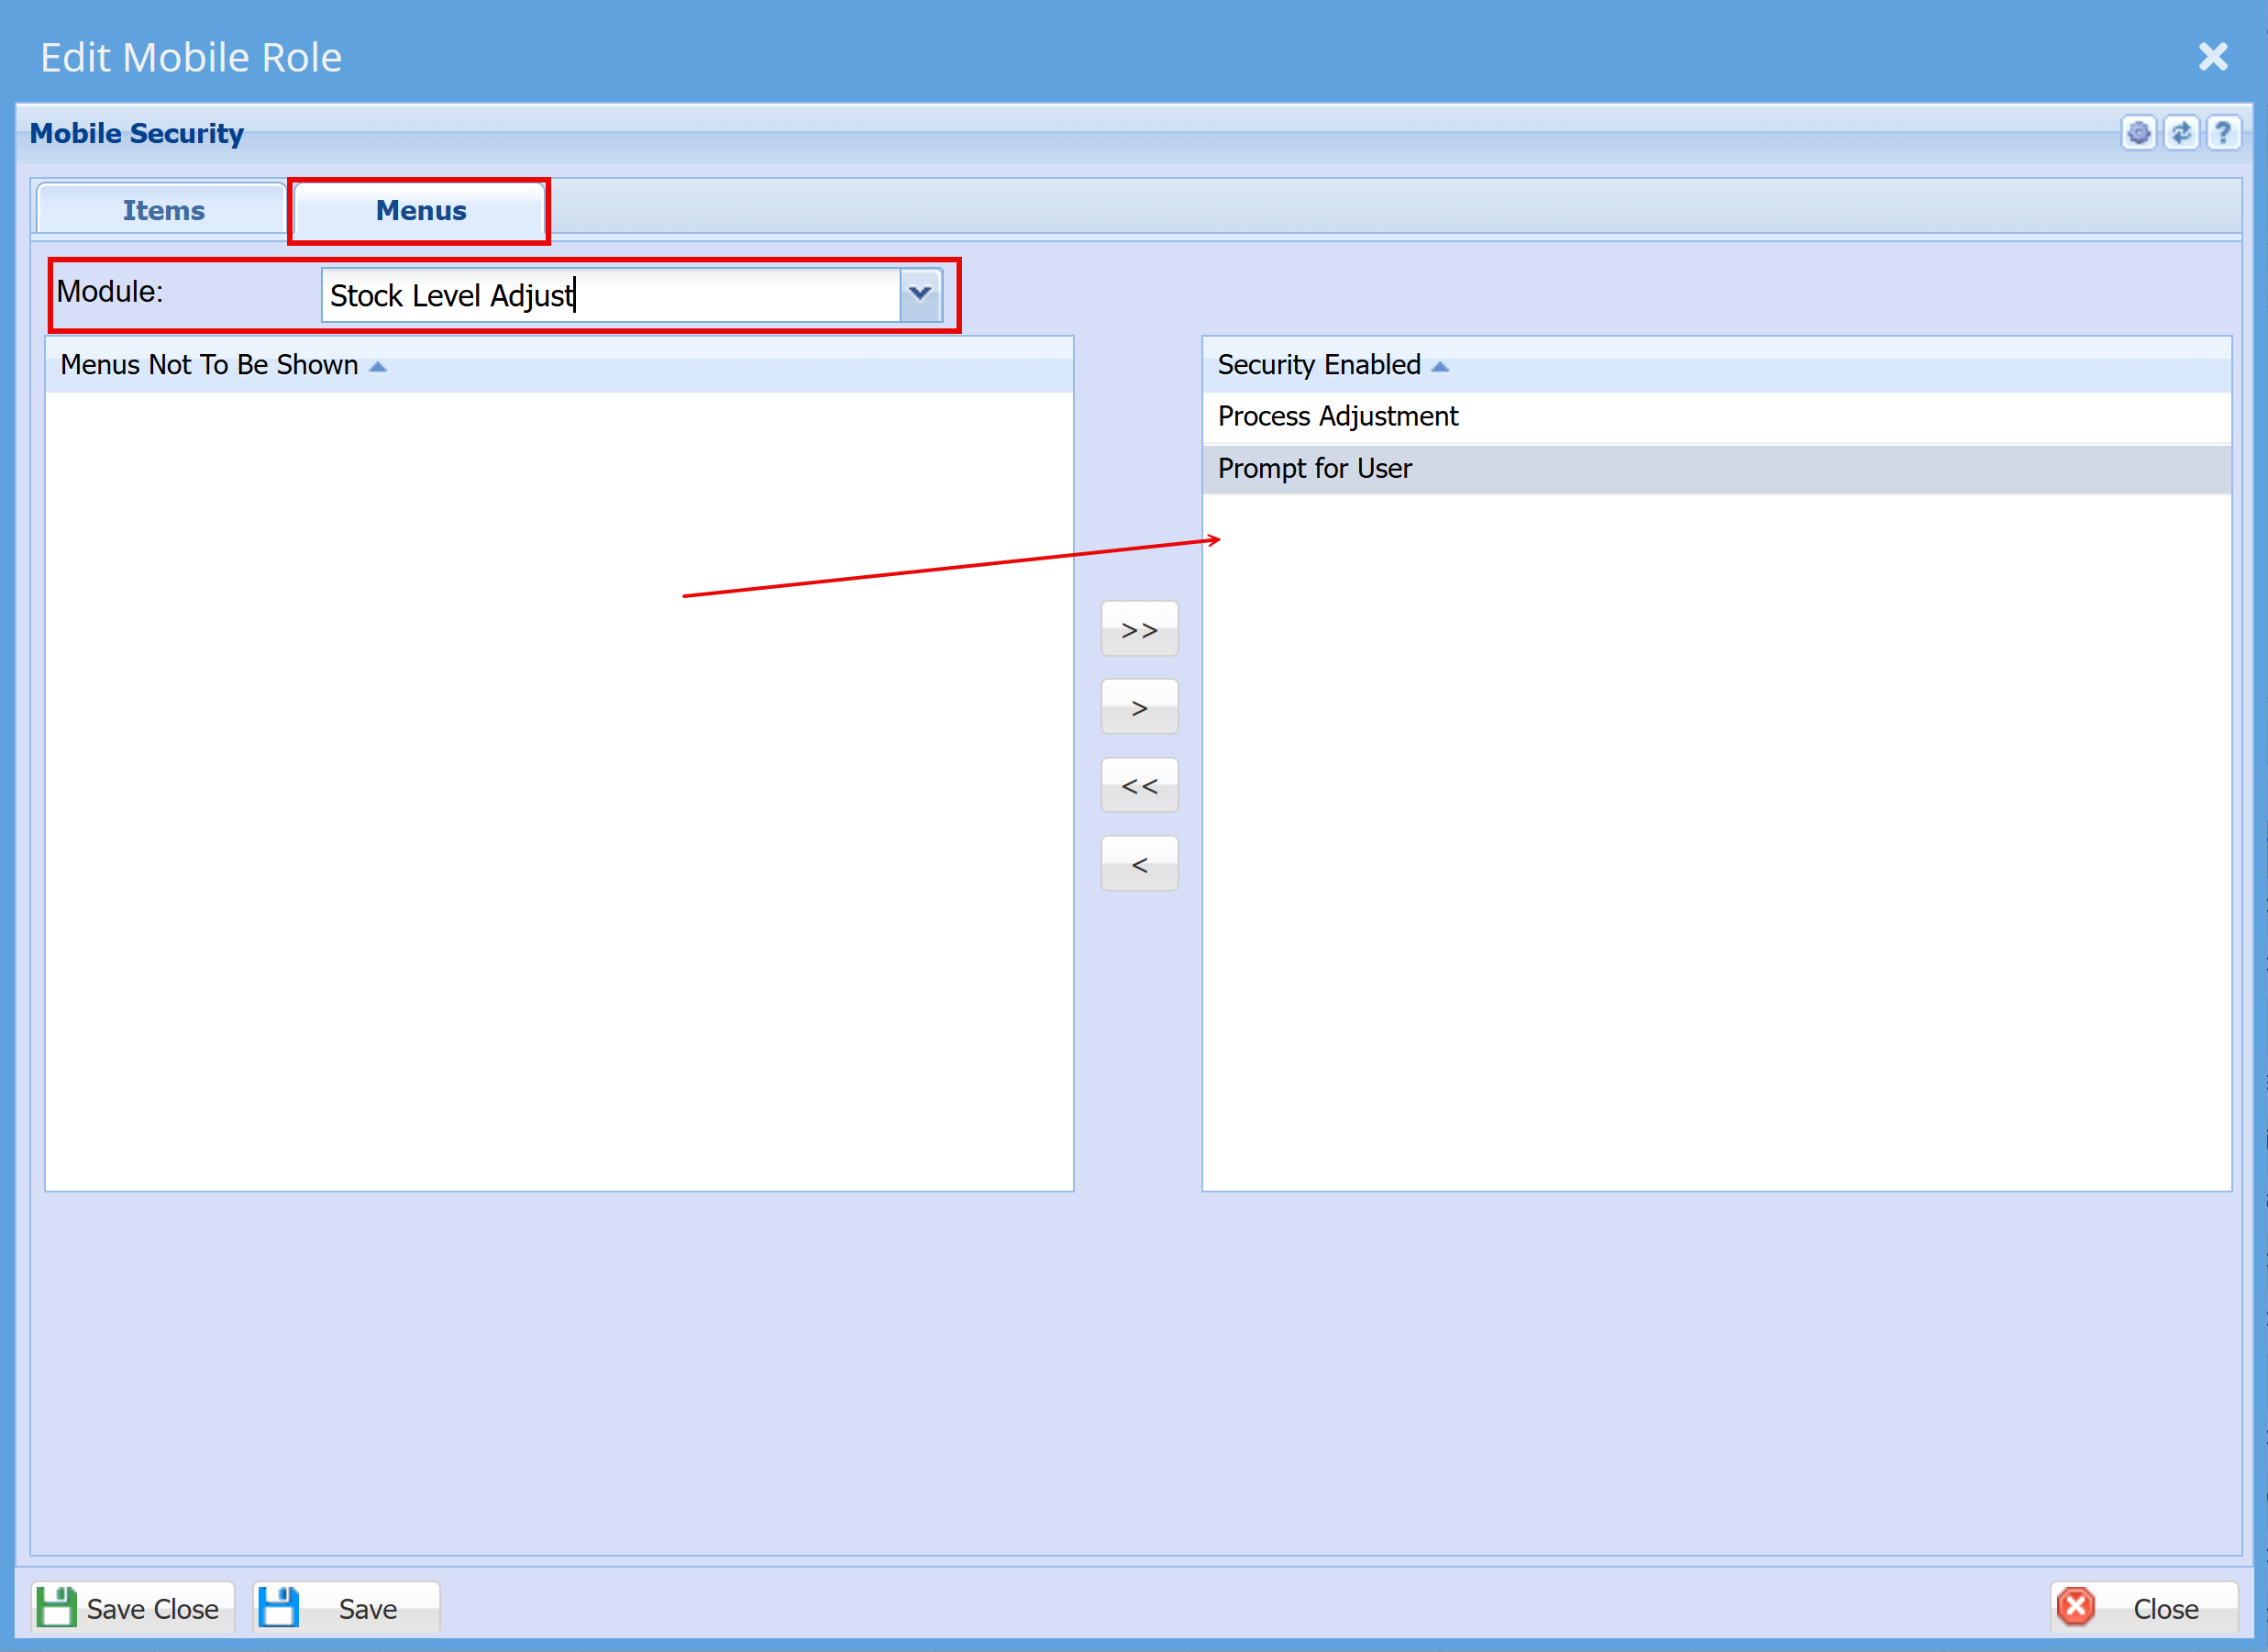
| Prompt for User | Logs which user captured the stock level and processes this user as the posted user |
| Process adjustment |
Means that when we sync to server you process the adjustment at the same time
It processes adjustment is off, then only save the adjustment.
|
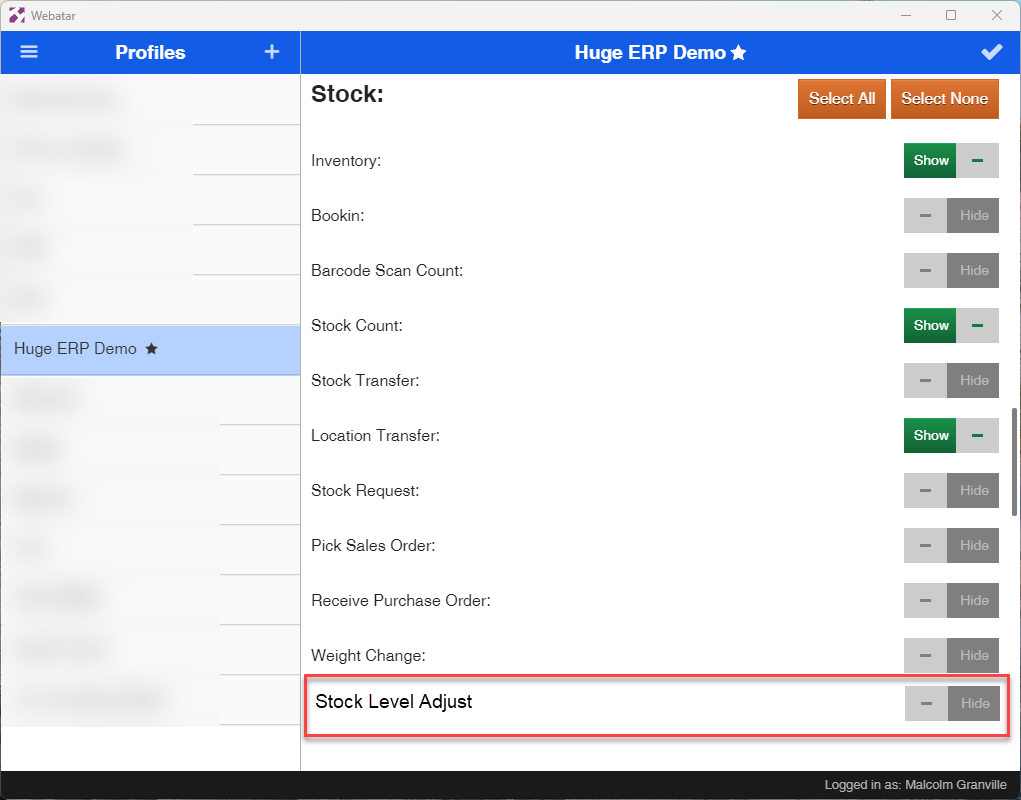
Webatar Security setup
- Login to the Webatar App
- Click on "Manage Profile"

- Scroll down to "Stock"
- Toggle the "Stock Level Adjustment" to "Show" to activate the Stock level adjustment
- Tap the "Tick" at the top right of the page to save the changes
Main system stock level adjustment
The main system used is the stock level adjustment journal
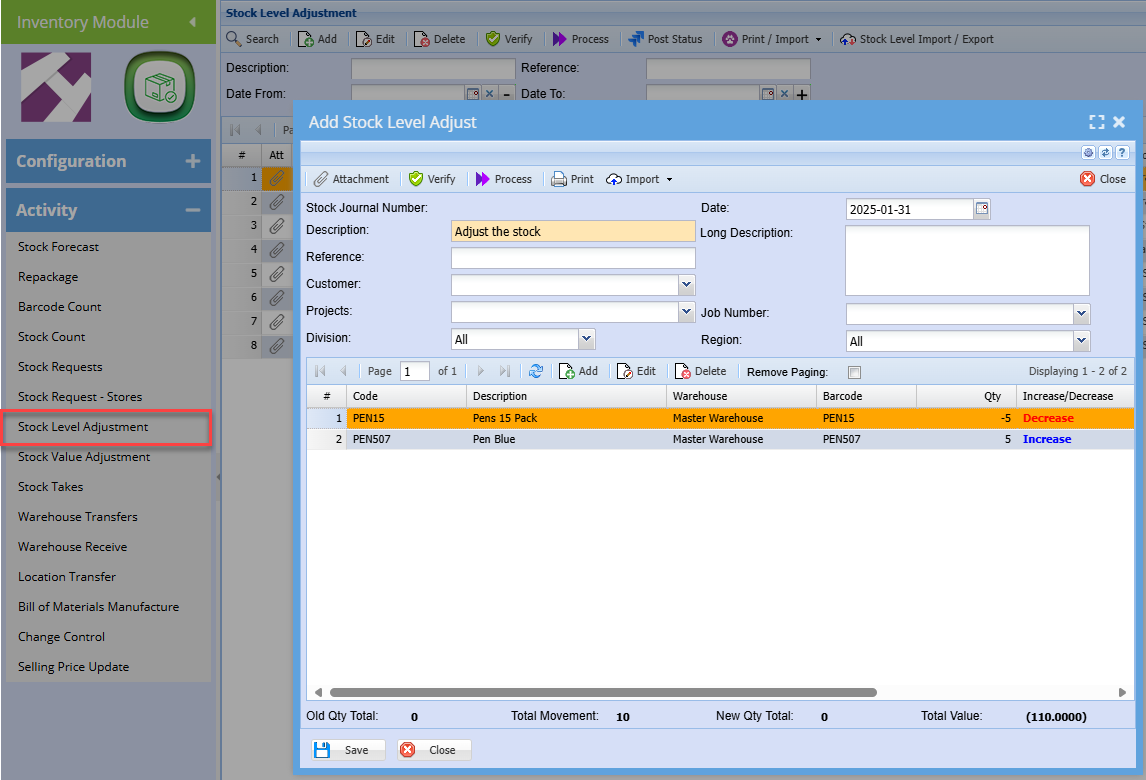
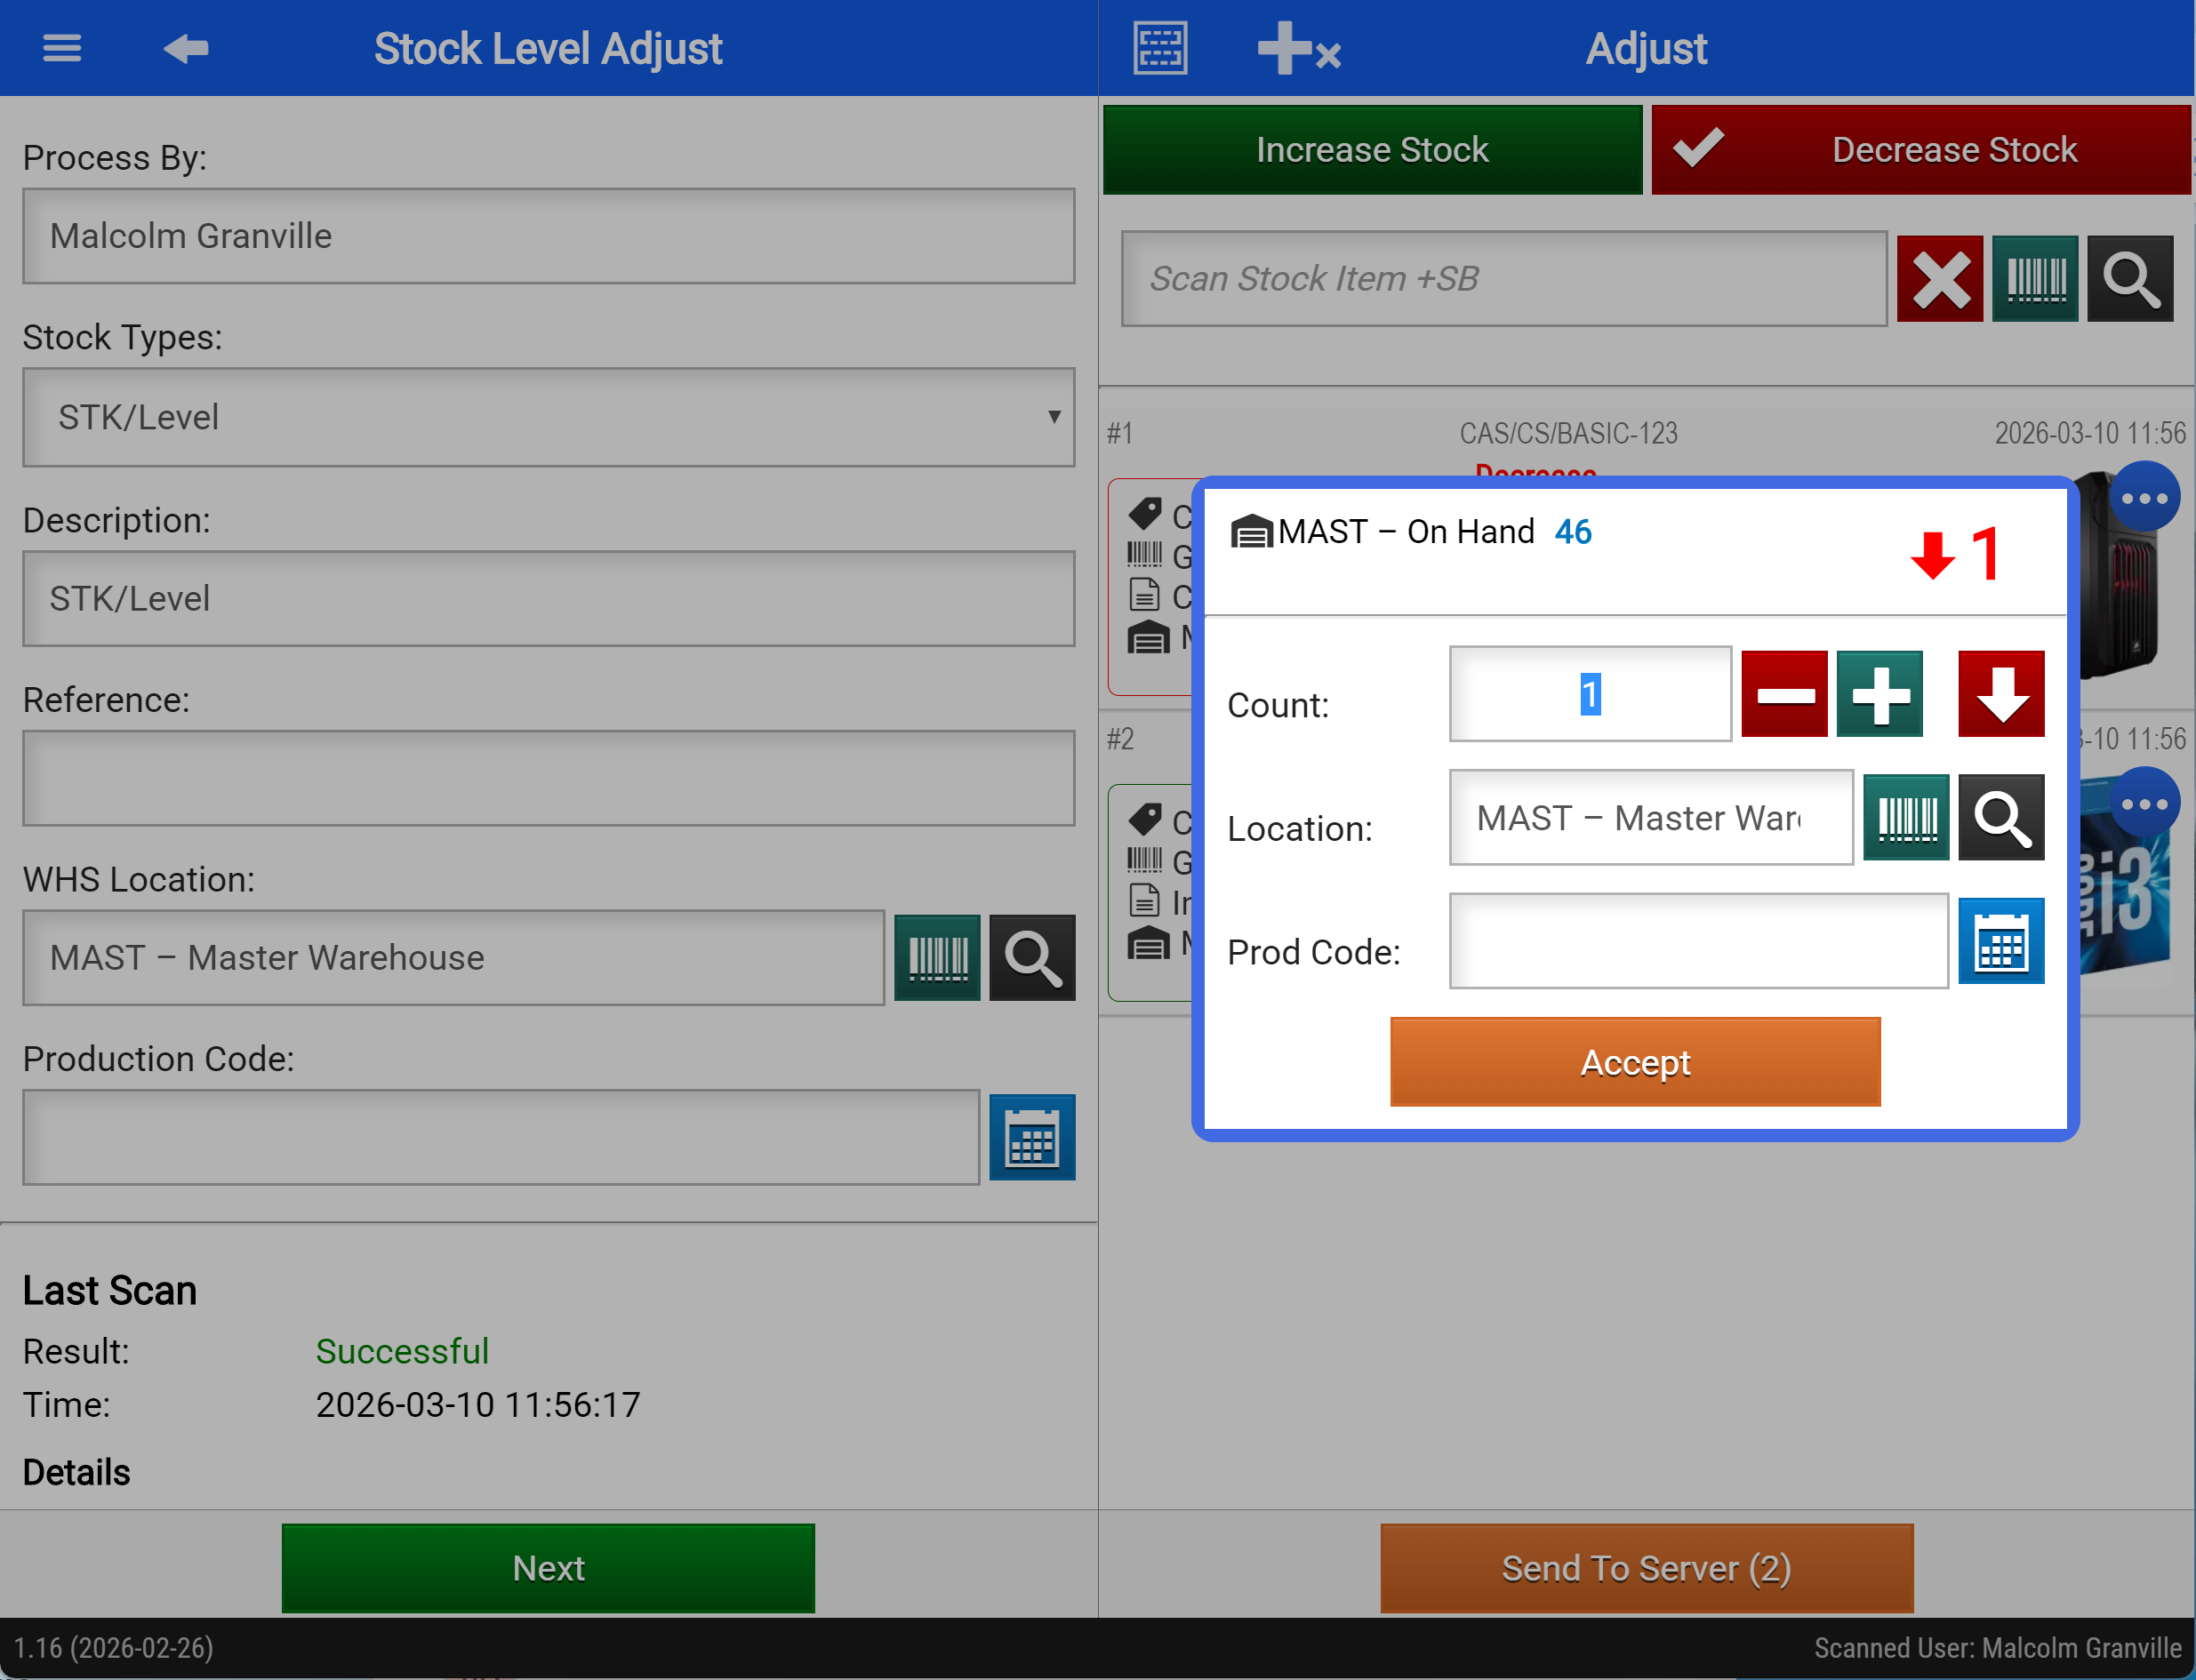
Webatar stock adjust document
| Increase stock button | This is the default setting, when this is active all scanned stock is assigned Increase |
| Decrease stock button | When clicking on Decrease stock and it is active, any stock scanned will be marked as decrease |
| Warehouse | When switching warehouses, it will apply the warehouse to the new scanned items |
| Send to Server | This will either save the stock level or process the stock level adjustment based on the security setup |

Editing an item
| Increase / Decrease | Click on the button to change increase or decrease of item |
| Count | Set the count by manually entering a number or using the + and - button to change count |
| Location | Change the warehouse of the item |
| Accept | Accept the changes |
| Send to Server | Sync your stock level adjustment to the main system |
Main system
The stock level adjustment will create a document in the main system with stock level adjustment
Inventory > Activity > Stock Level Adjustment
- Click search to see your stock level adjustment after clicking "Send to Server"

No Comments