Webatar Setup
First Time Installation
Setup of Webatar Mobile app
Video training manual 2023 - 01-Webatar_app_setup.mp4
(Old Video training manual 2019 - Click Here )
After you have installed the app from the Play store or App store.

Add new profile
Go into app to create a new Profile
Click on Add (+) to create a new profile
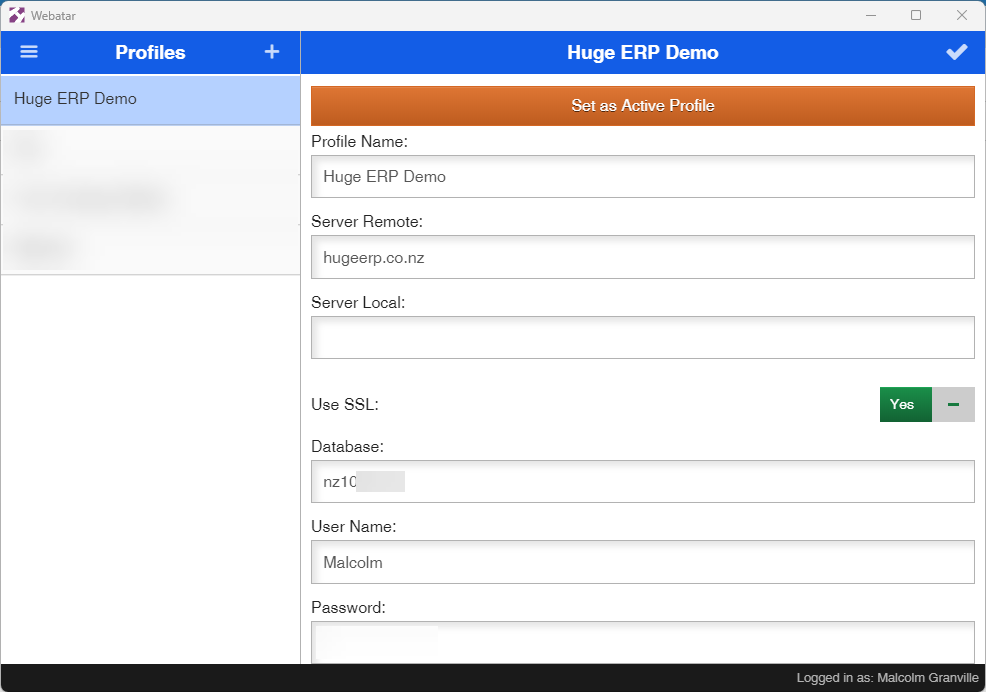
Enter the basic information for your company
Click on Tick to save changes
| Profile Name | Your company name |
| Server Remote |
The server where your data resides This information is given on an email to you |
| Server Local |
The local area network if you have a local server setup Usually this is left blank |
| Use SSL | This must be on Yes |
| Database | The database number given to you for your company |
| User Name |
Your user name to access the system This is case sensitive |
| Password |
Your password to access the system This is case sensitive |
Set Active profile
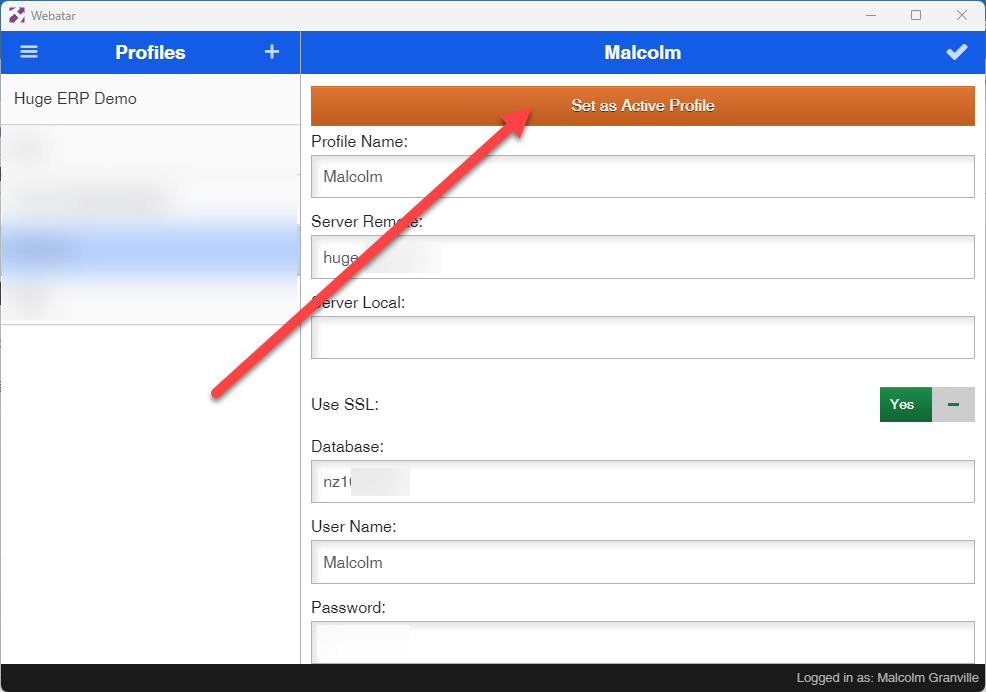
Once all the basic information has been inputted, click on the tick to save all changes.
Set the profile to be the active profile by clicking on the orange button called Set as Active Profile
Force close app
Force close the app, watch the videos on how to do this for IOS and Android
Android close app
Click here to watch how to close app on Android
IOS close app
Click here to watch how to close app on IOS phone or tablet
Reopen App
Find the icon for the app and click to open
Sync the app to the server to update
Original Content - Click Here
Webatar Sync
Synchronising the information to the mobile app
Click on the hamburger menu and click on Sync menu item
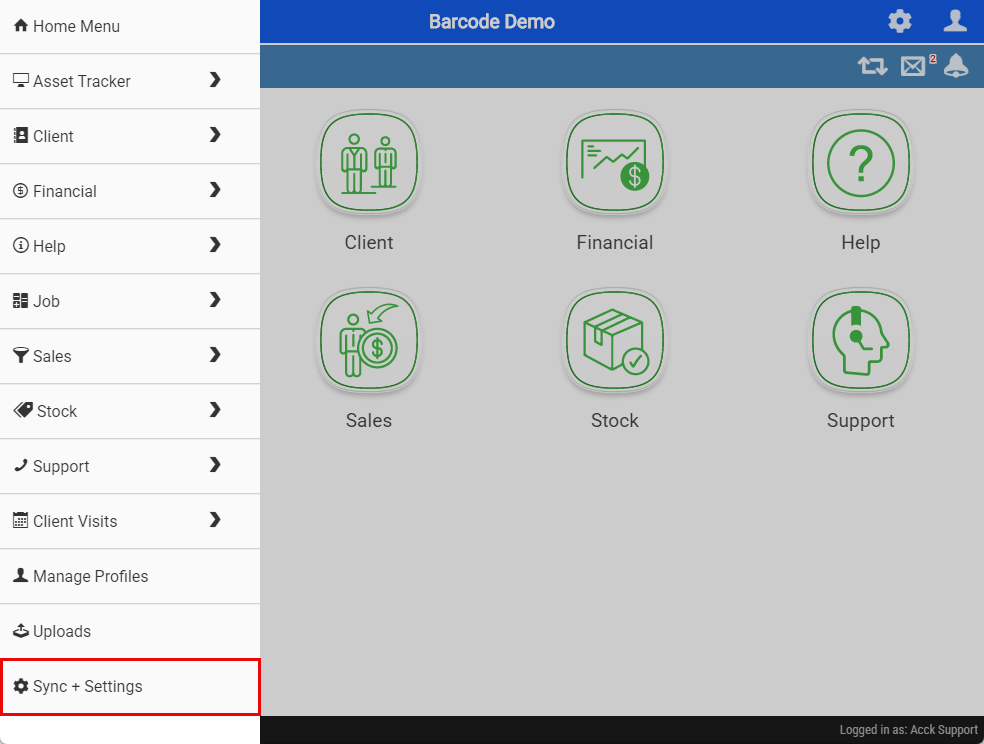
This will take you to the window to sync the data
There is several bits of information the app needs to work correctly
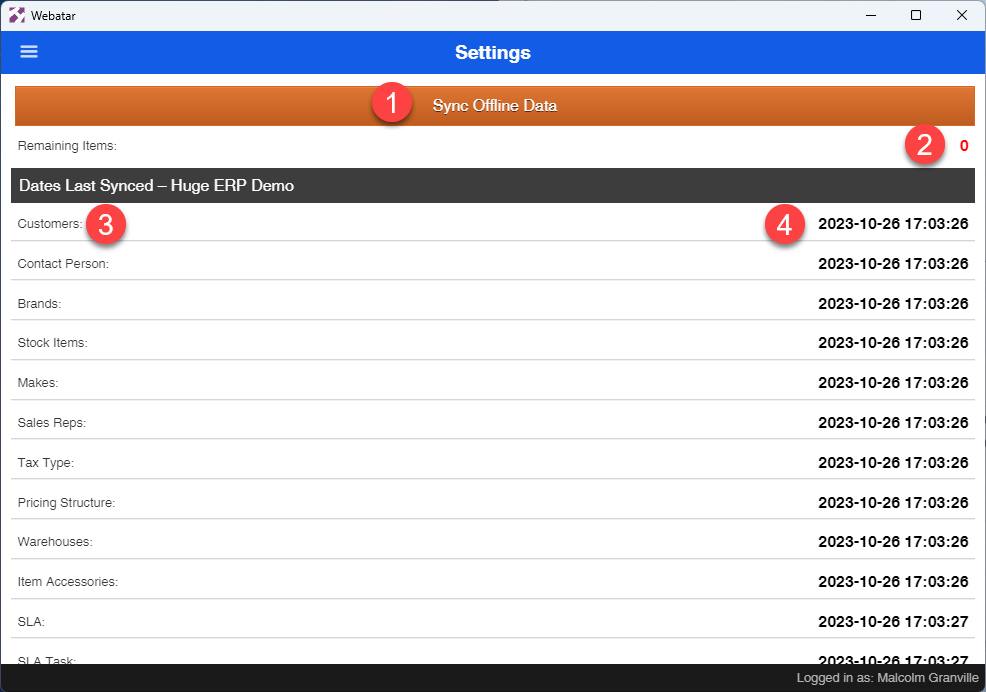
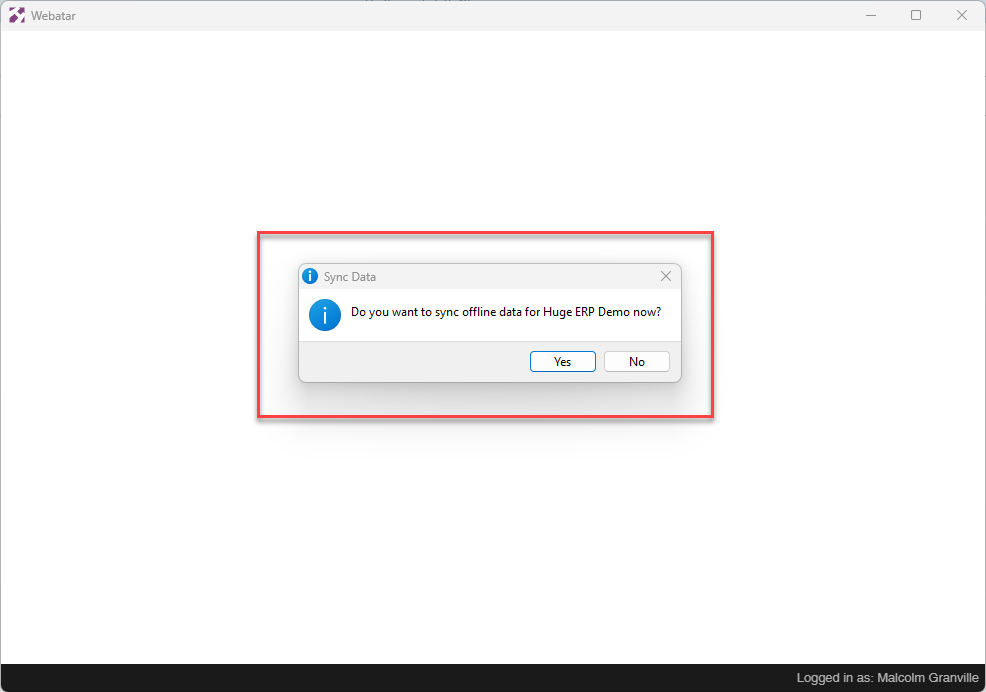
Sync Data
Click on the Sync Offline Data button to start sync
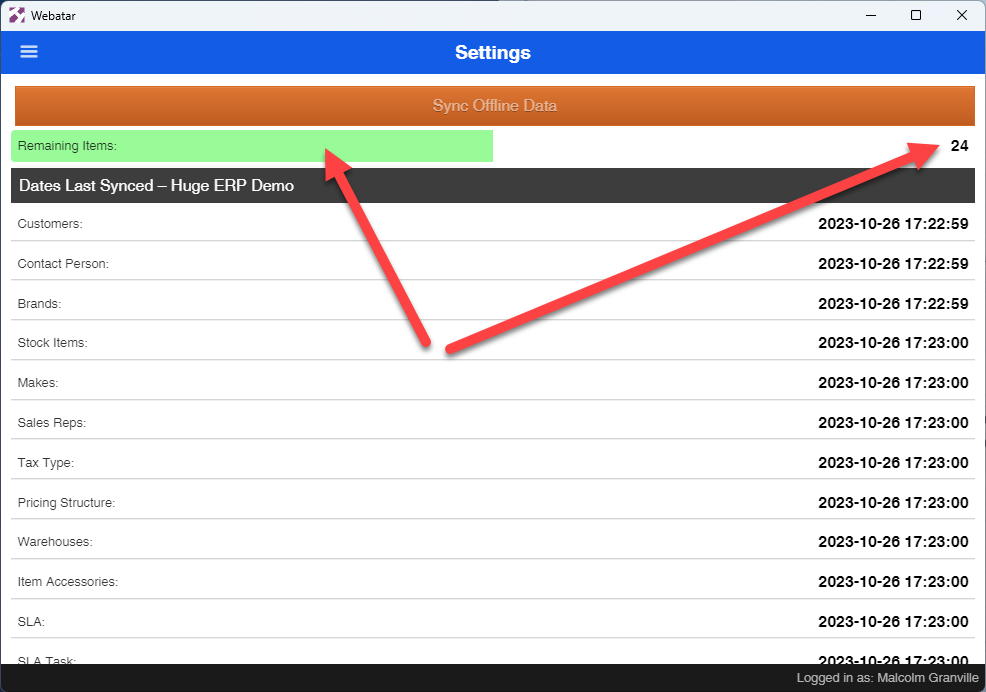
The data will start a count down and process bar
If everything is successful, then a date and time will appear next to each data group.
If you get an error, check on what the error reports
Sync Errors
Most common errors
| Http error 400 |
This error means that the company setup has not been configured for Webatar access. This can only be fixed by your consultant on the server |
| Error |
Issue with spelling of Server Remote Issue with company number wrong |
| SSL Error | SSL is not active on profile |
| Wrong Username or password |
Wrong username or password Both username and password are case sensitive |
Original Content - Click Here
Webatar security
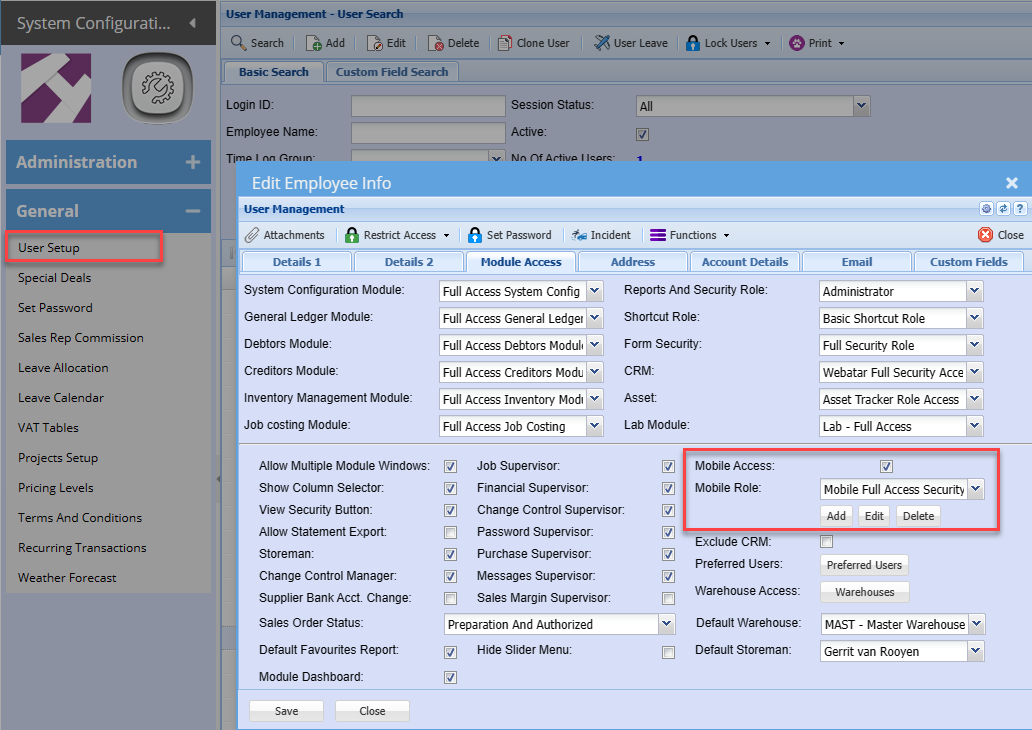
To allow Webatar business application to work, the user has to be activated on the main system
This setting is controlled in Huge ERP security in the user setup menu.
System Configuration Module > General > User Setup > Edit User > Module Access tab
Put the tick on for Mobile access - this will check if you have enough licenses
Mobile role - set the role for the user
Mobile Menus
Setup what access the user will have to various menu items
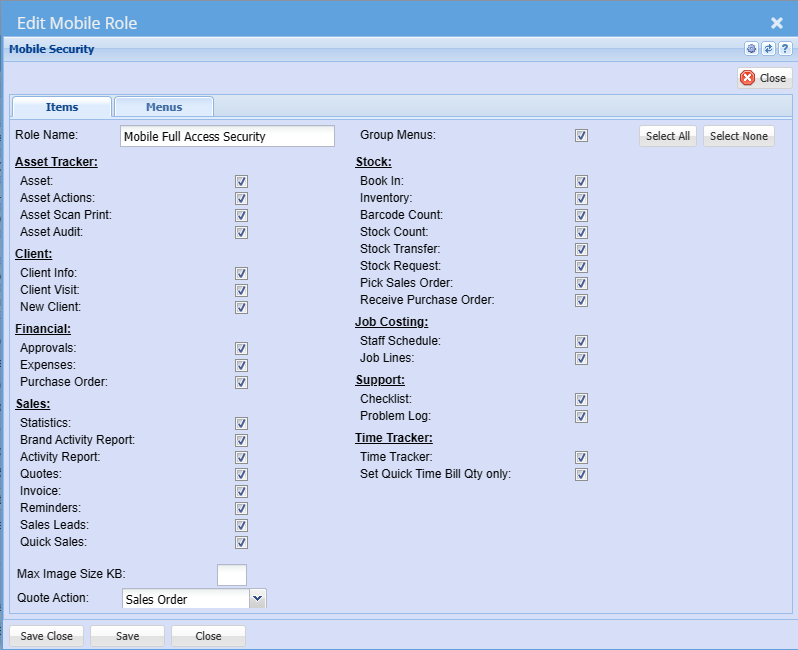
| Role Name | Enter a role name |
| Group Menus | This is discontinued, user can group or ungroup on the app |
| Asset Tracker Group | |
| Asset |
Allows you to search for Assets and view information on the asset |
| Asset Actions |
Create an action on multiple assets |
| Asset Scan Print |
Create an action on an asset by scanning the barcode. The system will automatically print the label of information of that asset Used in a manufacturing process |
| Asset Audit |
Action a standard audit or blind audit on location |
| Client Group | |
| Client Info | |
| Client Visit |
Client visit allows you to capture the following for a client/ customer you are visiting: |
| New Client |
Add a new customer on the mobile app |
Additional security
Setup additional security per menu item
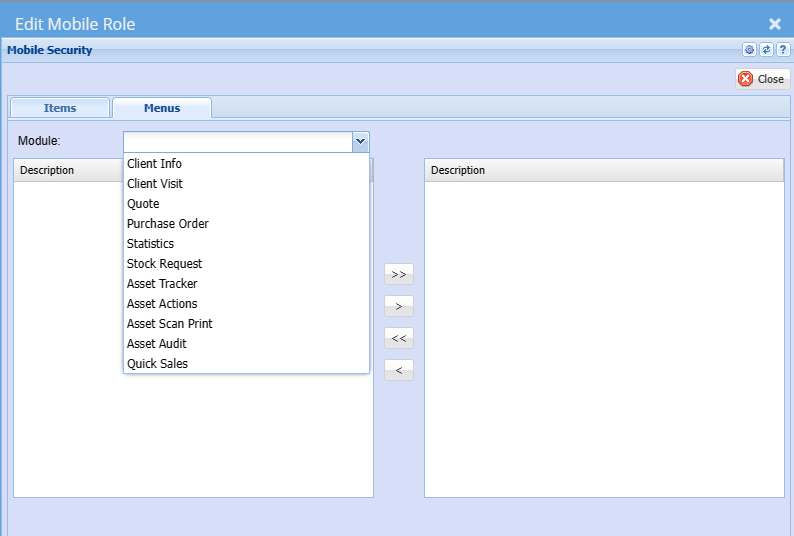
| Client Info | This will allow you to search for client information |
| Client Visit | Client visit allows you to capture the following for a client/ customer you are visiting: |
| Quote |
Create new quotes for customer using the Webatar App |
| Purchase Order | Create a new Purchase order for a customer or job using the Webatar App |
| Statistics |
This will allow you to search for information on sales |
| Stock Request | This will allow you to do a stock request from your warehouse. |
| Asset Tracker |
Asset Track streamlines manufacturing by allowing users to search, action, audit, and scan assets, with automatic label printing to keep asset information accurate and up to date.
|
| Asset Actions | Create an action on multiple assets |
| Asset Scan Print |
Create an action on an asset by scanning the barcode. The system will automatically print the label of information of that asset Used in a manufacturing process |
| Asset Audit | Action a standard audit or blind audit on location |
| Quick Sales |
Webatar Quick Sales app is used as a basic POS system. |
Setup the warehouse access and the preferred users
.png)
Warehouse access
Set the warehouse access for the user
View only selected warehouse tick box if you only want to view selected warehouses.
Unticked allows user to see all warehouses
.png)
Preferred users
Set the default user
This is used to send notifications to the user that a quote is ordered
.png)
Original Content - Click Here
Webatar Activate
To allow Webatar business application to work, the user has to be activated on the main system
This setting is controlled in Huge ERP security in the user setup menu.
System Configuration Module > General > User Setup > Edit User > Module Access tab
Put the tick on for Mobile access - this will check if you have enough licenses
Mobile role - set the role for the user
.png)
Setup the warehouse access and the preferred users
.png)
Warehouse access
Set the warehouse access for the user
View only selected warehouse tick box if you only want to view selected warehouses.
Unticked allows user to see all warehouses
.png)
Preferred users
Set the default user
This is used to send notifications to the user that a quote is ordered
.png)
Original Content - Click Here
No Comments