GoDex WebPrint installation
Installing WebPrint
Here is the link to download WebPrint
https://godex.s3-accelerate.amazonaws.com/SqBgbx1wwi5G4r1uHKzruw.file?v01
When it has downloaded, unzip the folder and open GoDEX_Setup.msi. 
Work through the Wizard until Web Print is installed.
It should have created a shortcut in the start menu and the desktop. It installs by default to C:\Program Files (x86)\GoDEX\Web Print.
A PDF manual with the file name WebPrint_UM_en.pdf is also included in the install folder in GoDEX\Web Print\Sample
Start the application by opening the shortcut or opening C:\Program Files (x86)\GoDEX\Web Print\WebApiCtr.exe
You can leave the defaults or change the Http Port to 8080, which I have also tried, if the default is already used.
Click “Install Service”, it should automatically start the service. You can then close the window.
A port number that is unlikely to be used by other applications and services should be used if port 8080 is already in use. An example of such a port number is 16327. A list of assigned port numbers that can be searched for free port numbers can be found at https://www.iana.org/assignments/service-names-port-numbers/service-names-port-numbers.xhtml.
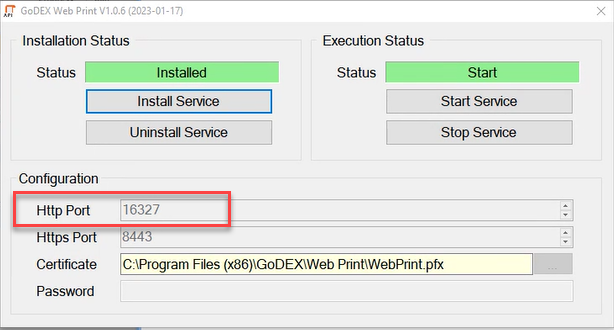
It should have created a windows service that will start automatically when Windows starts. You can check if it is active by opening the application again.
Configuring the Firewall
If the firewall is blocking traffic to the local WebPrint server it will need to be configured to allow it.
ESET Endpoint Security
Creating a new firewall rule
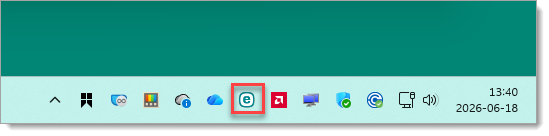
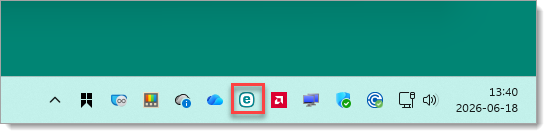
- Open ESET, it can be found in thet Start menu by typing in "eset", or by clicking its icon in the system tray in the taskbar.
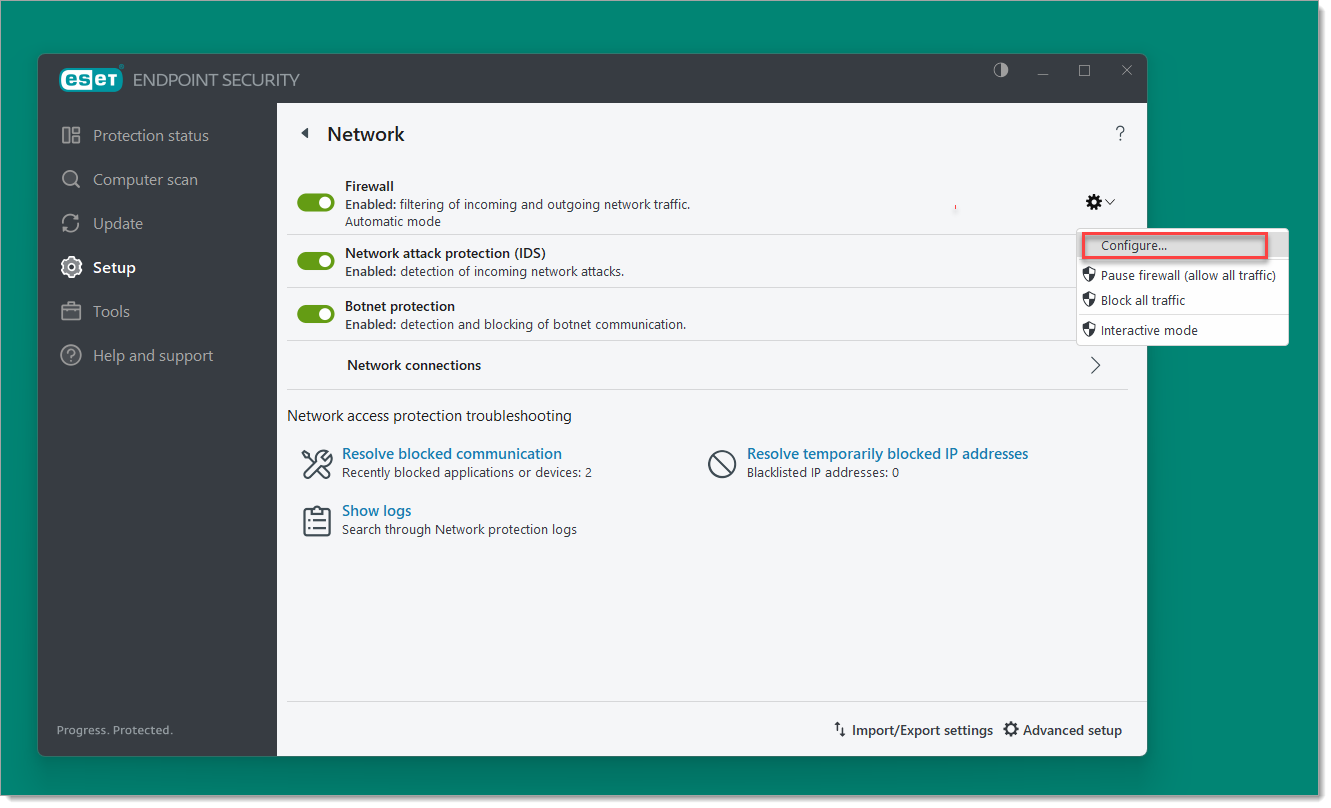
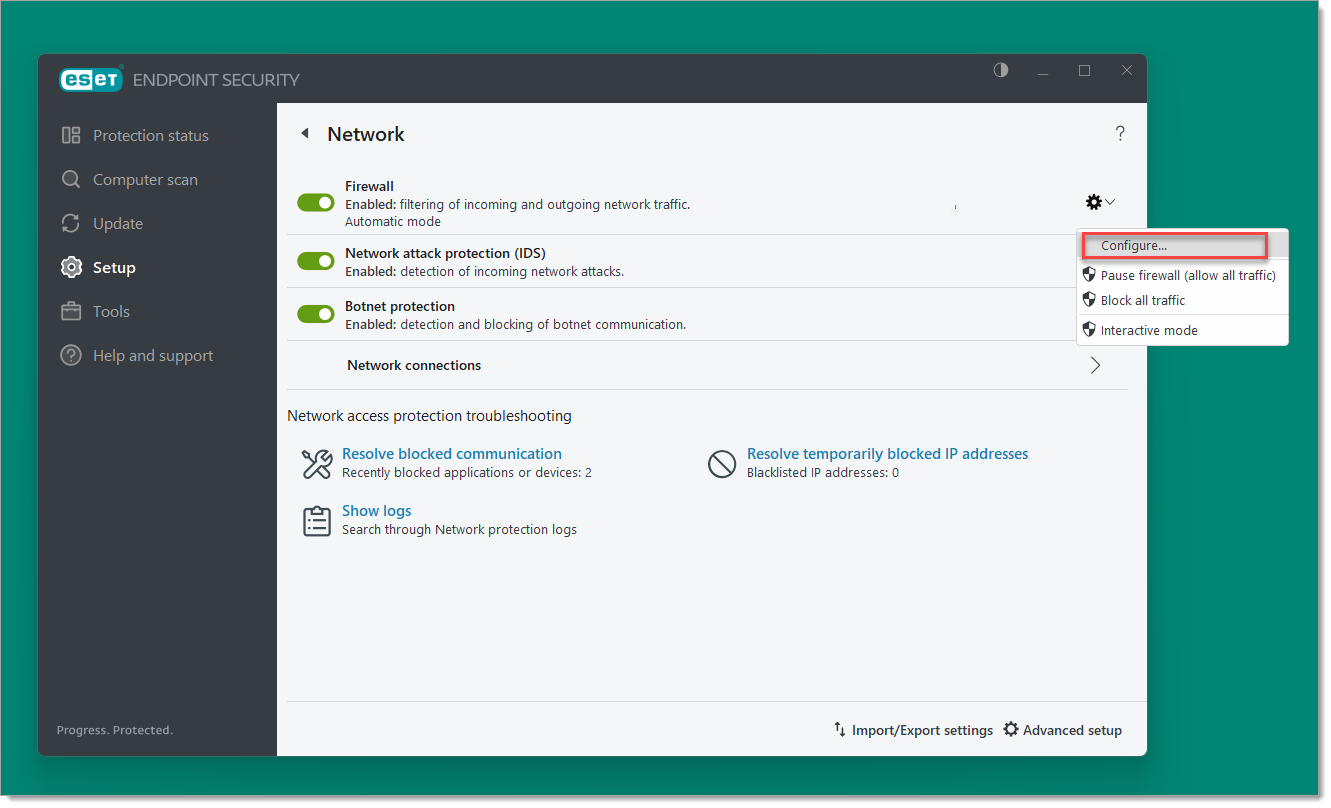
- Click Setup in the navigation menu, then Network, then the gear symbol in the Firewall section, and then click Configure in the context menu.
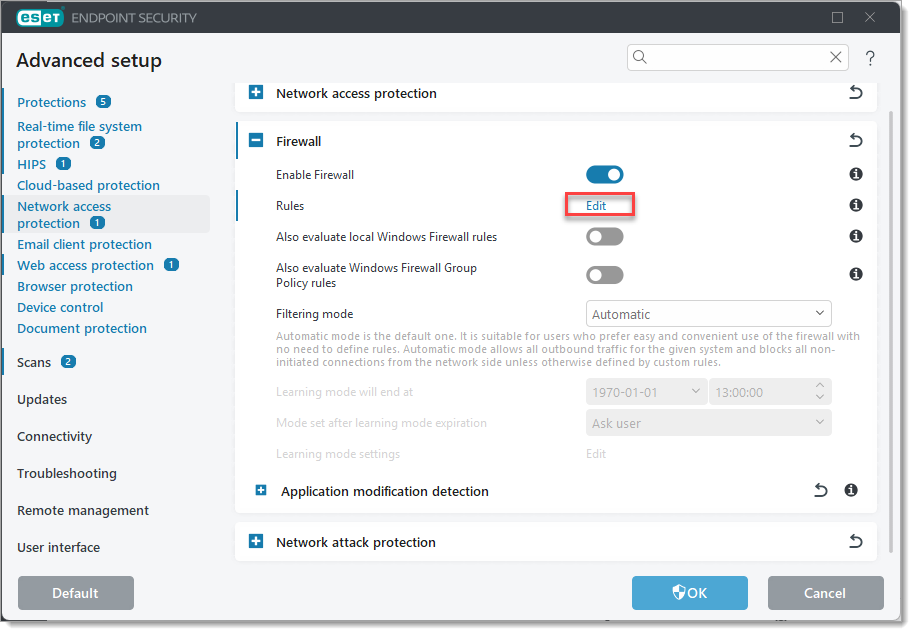
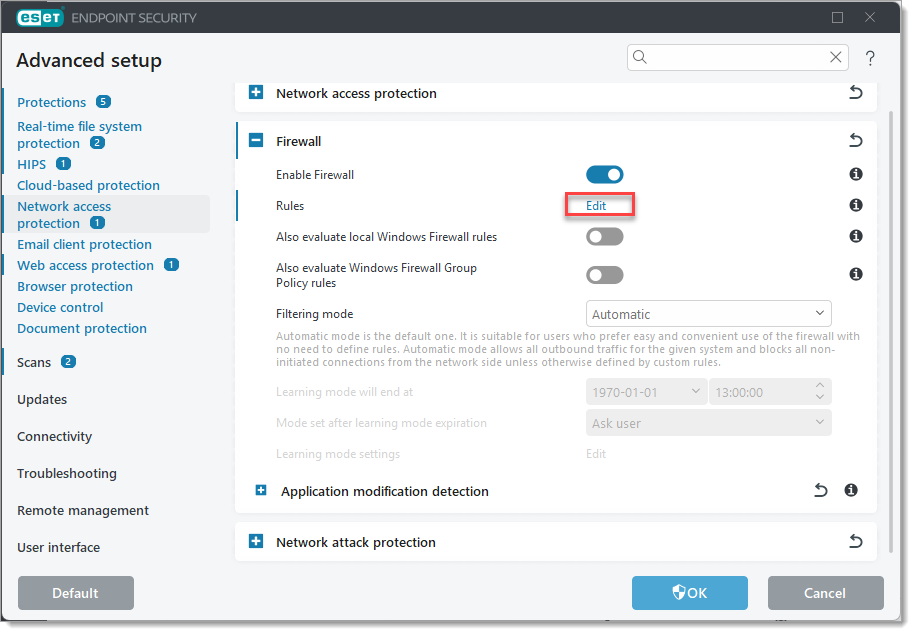
- Click Edit next to Rules under Firewall in the window that opens.
- In the Rules window that opens click the Add button in the lower left.
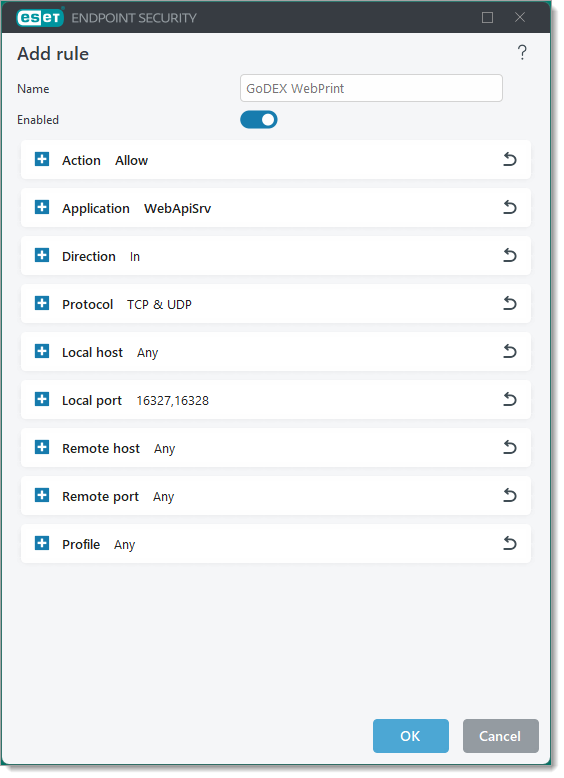
- In the Add rule window:
- Set Name to something like "GoDEX WebPrint"
- Under Action, change Block to Allow
- Under Application, set Application path to
C:\Program Files (x86)\GoDEX\Web Print\WebApiSrv.exe - Under Local port, set as Port
16237,16328(without spaces) or the port numbers used by WebPrint. - The other settings can be left with their default values.
- The settings should look like this:
Click OK, then click OK in the Rules window.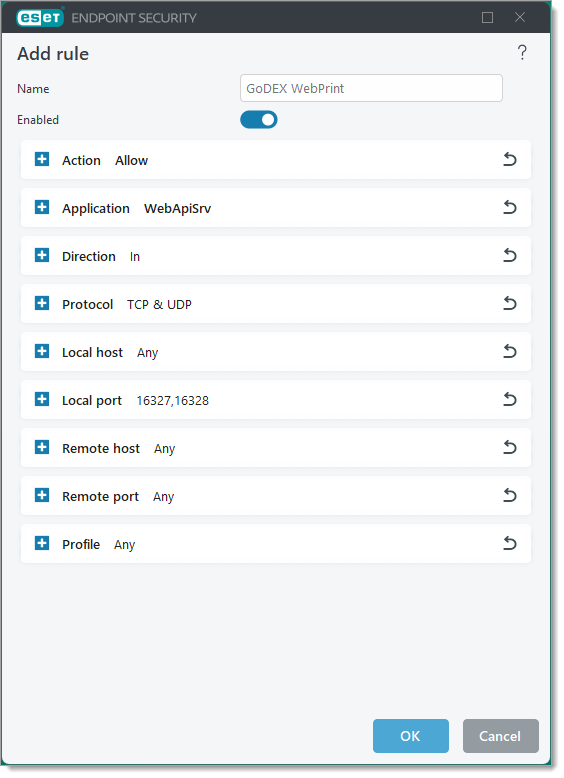
- Set Name to something like "GoDEX WebPrint"
- Click OK in the Advanced setup window to apply the changes.
SCM Setup
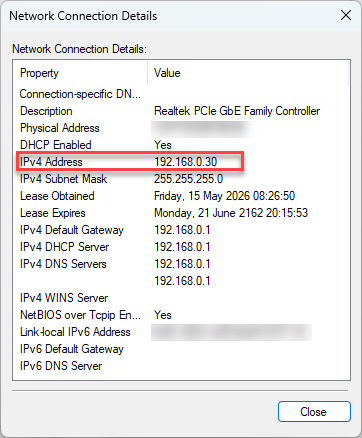
To set up WebPrint for the app, the IP address of the computer it is installed to needs to be saved in SCM of the main system. You can also use 127.0.0.1 or localhost but this will prevent Web Print working from other devices on the network.
You can find the IP address of the computer in Control Panel, Network Connections by finding the adapter for the local network, clicking Status in the context menu, and then clicking Details in the general tab.
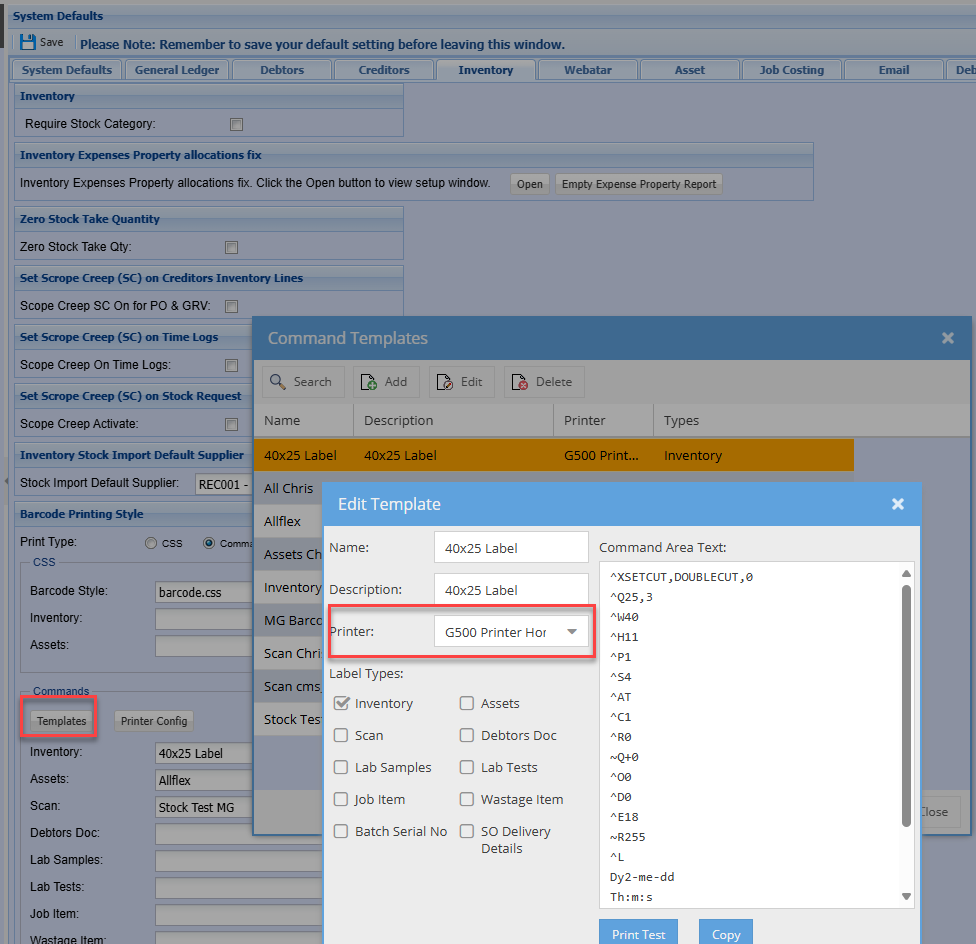
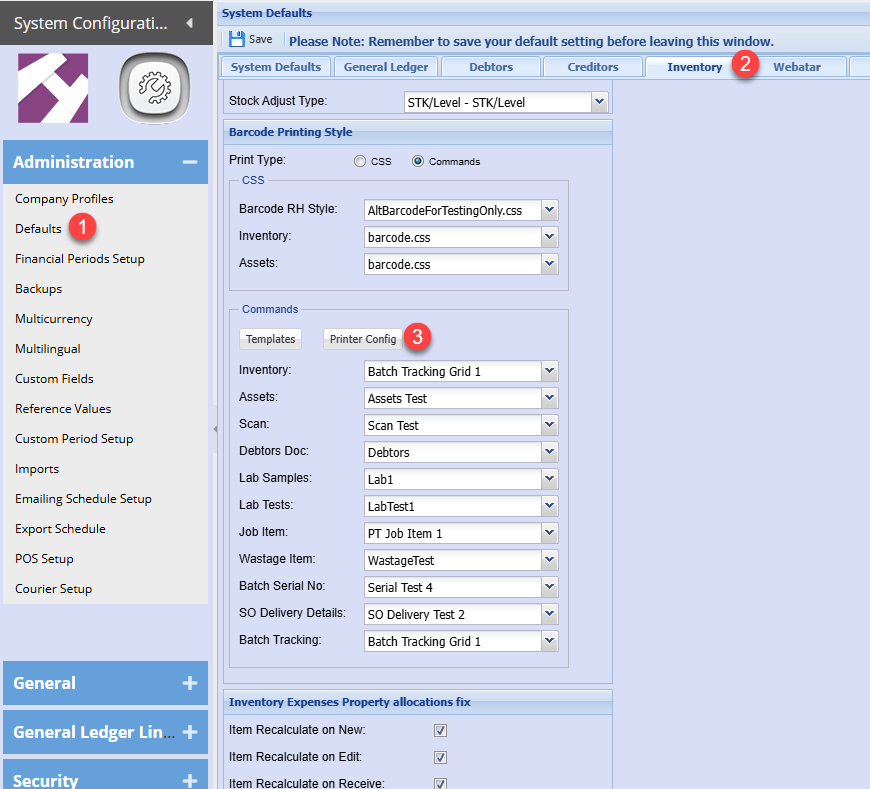
In SCM the IP address is saved in Printer Config form in Defaults, Inventory, Barcode Printing Style
In the dialog, select WebPrint and then enter the IP address followed by a colon and the port number used by WebPrint. You can also include “http://” but this should be assumed by default in Webatar.
Setting the Print Mode to WebPrint will also affect barcode printing in the main system currently.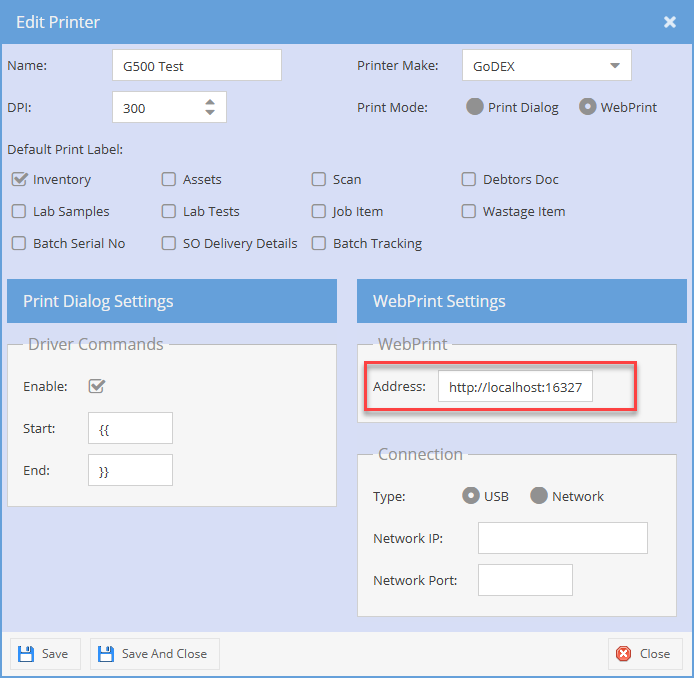
Before closing the dialog, click the save button.
Testing WebPrint with its sample page
To test if WebPrint is working on the PC it is installed on (which is connected to the printer by USB):
- If the HTTP or HTTPS ports were changed from the default in WebPrint then the next two steps are required, otherwise go to step X.
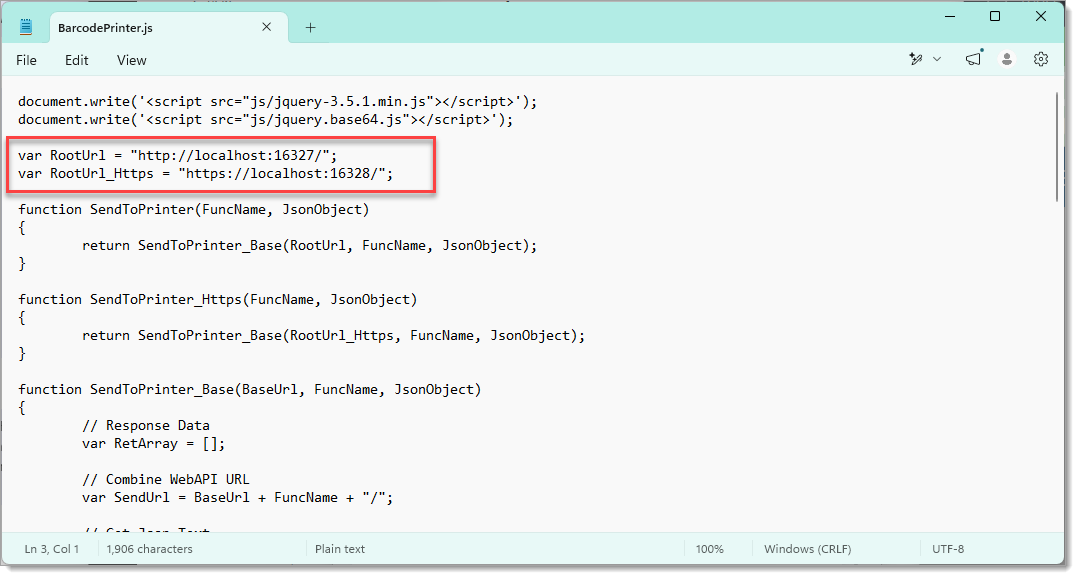
- Open the JavaScript file in Notepad:
PressWin + Rto open the Run dialog, type the following command, and press enter:
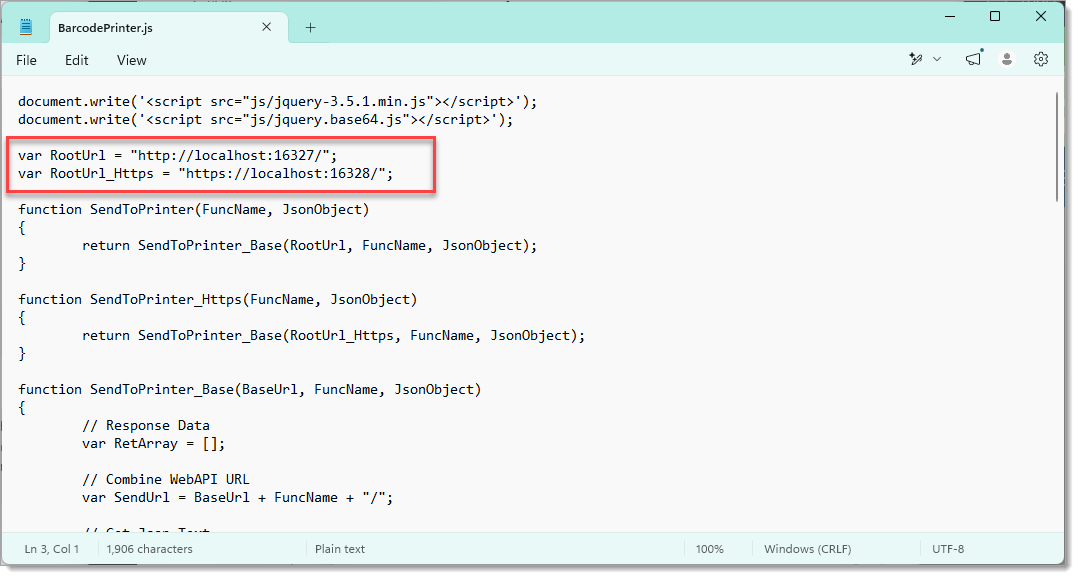
notepad C:\Program Files (x86)\GoDEX\Web Print\Sample\js\BarcodePrinter.js - Change the port numbers in the lines indicated in the screenshot to the port numbers set from the WebPrint application (e.g. 16327 and 16328).
- Select the USB interface, click Refresh, then select the printer.
- Optionally set the label width and label height to the dimensions of the printer's labels although for printing a small amount of text it should be OK to leave it.
- Click Print Text 1
[SCREENSHOT - shows settings]
If successful a label should be printed.
Testing WebPrint from SCM
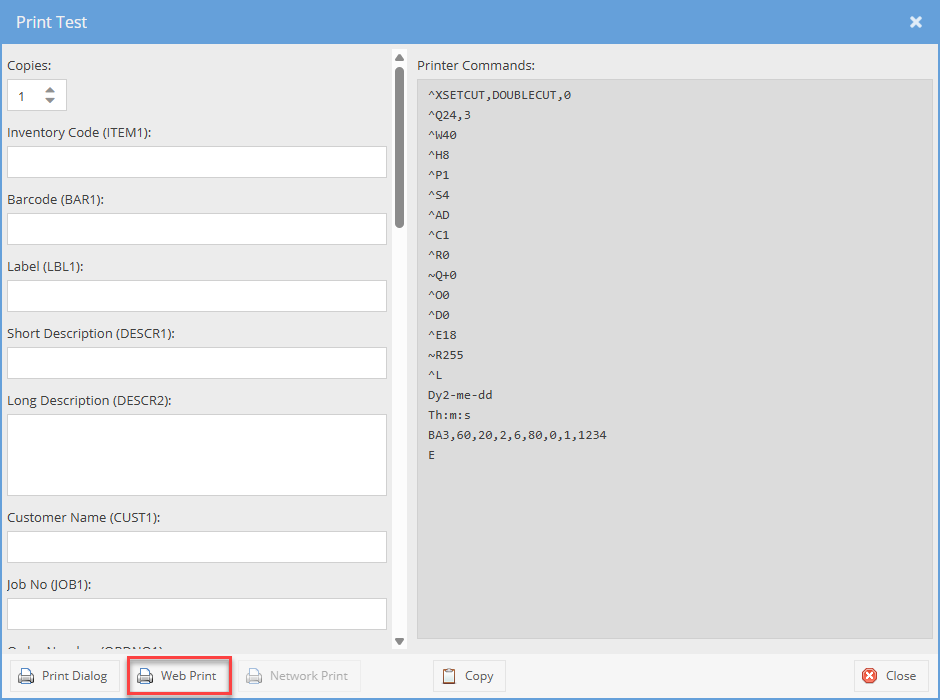
To check if WebPrint is working from the main system, you can use Print Test dialog, accessed by opening a Command Template to edit.
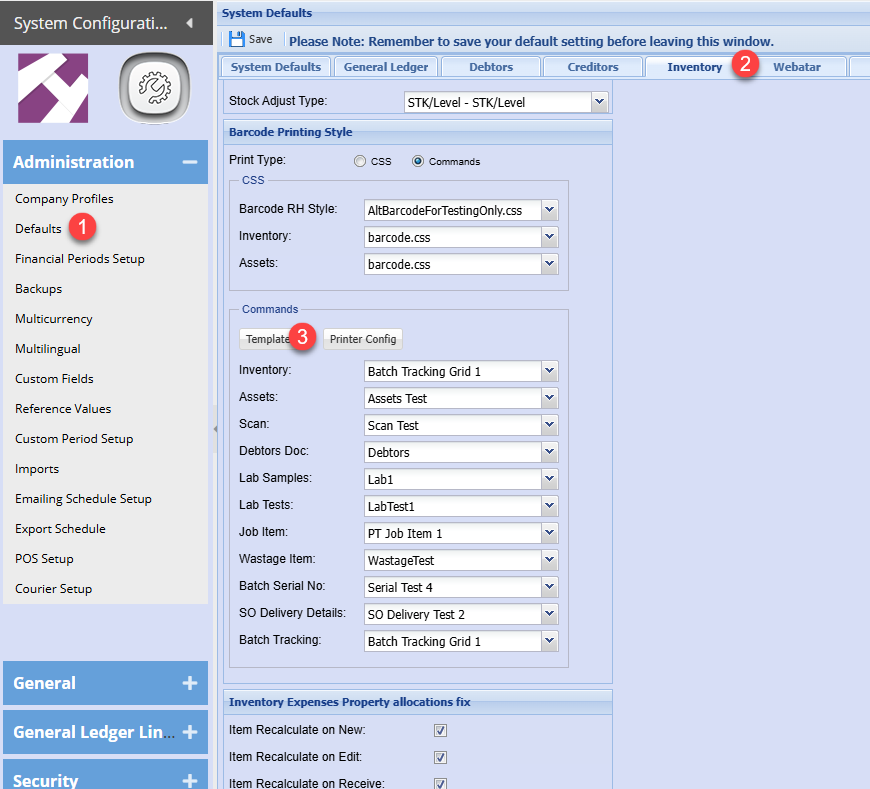
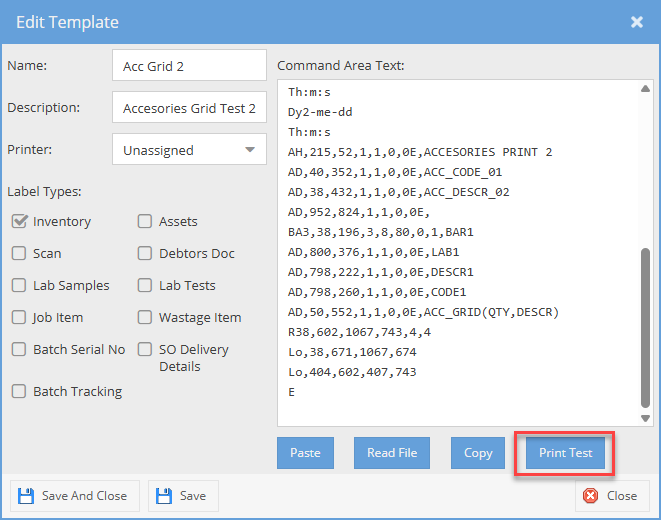
A Command Template needs to be created and saved first with the placeholder values in GoLabel II.
If Web Print is working, then clicking the Web Print button should result in the same barcode as you would get in GoLabel II but with the placeholder values replaced with the values in the fields of the Print Test form.
Network printing setup
When printing to a network printer, ensure that a printer is setup with IP address
See below settings
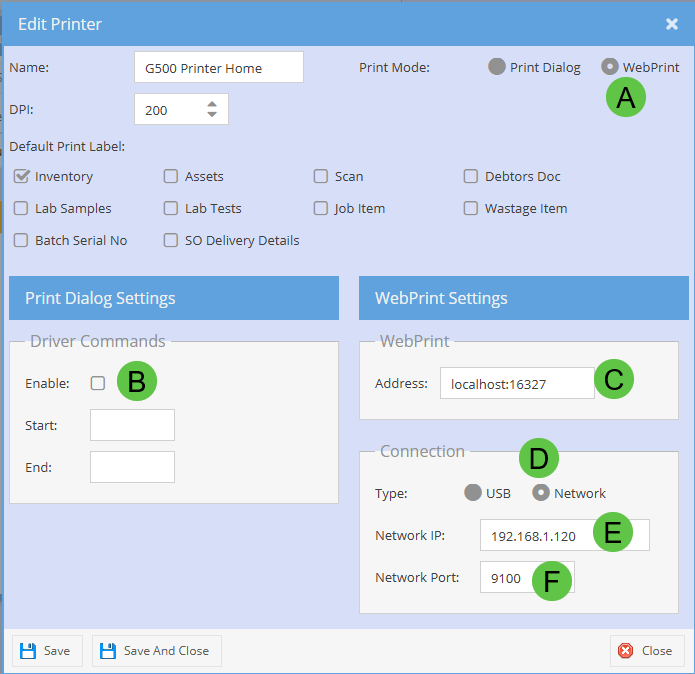

Once the new printer is setup for network, link the label to the printer