Inventory Item Search
Inventory > Configuration > Inventory Setup
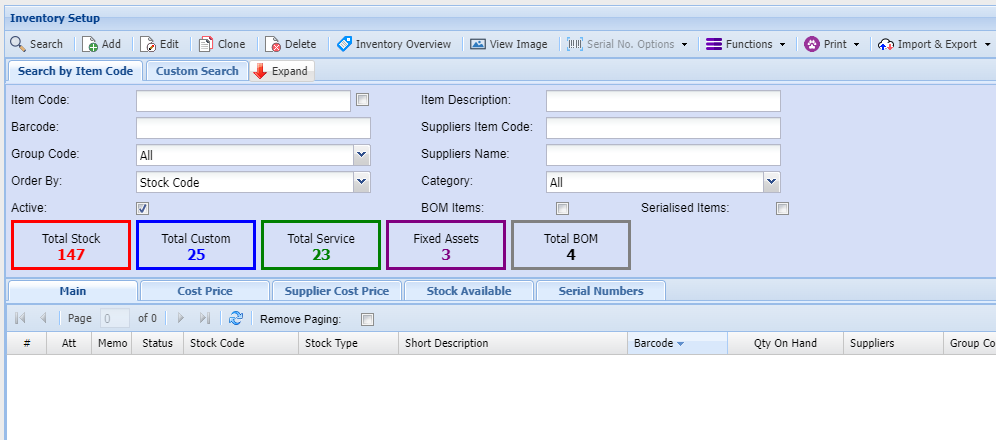
In Inventory setup search, you will see two search tabs
| Basic Search tab | searches for existing items based on system fields. |
| Custom Search tab | if you have setup custom fields in your inventory, you can search for the items using the custom fields linked. |
Note: If you leave the fields blank it will bring back all Inventory codes which will be sorted in inventory code order alphabetically.
If you click on the column heads they will sort A-Z or Z-A.
| Search Button | the search function will return Inventory Code records based on the search criteria entered. |
| Add Button | allows you to create an new Inventory item |
| Edit Button | allows you to edit an existing Inventory Code |
| Clone | clone an existing inventory code |
| Delete Button | allows you to delete an existing Inventory Code subject to certain rules |
| Inventory Overview button | provides an overview of all open transactions and quantity balances pertaining to the selected Inventory item |
| View Image | Displays an image of the item if one was uploaded |
| Functions drop down | allows you to update various settings on the items selected |
| Print Drop down | Allows you to print or export details of the items displayed in the grid based on search criteria selected. |
| Import & Export | allows you to import and export various item details, including master data, properties, bin locations. |
Search options
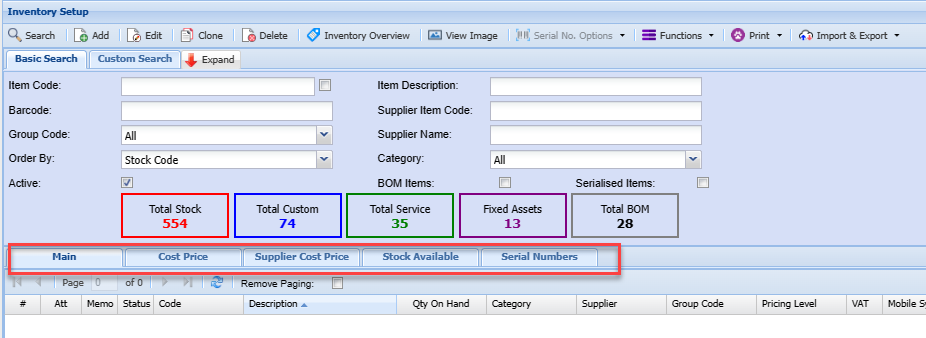
Enter any of the fields, such as the item code or part of the item description to limit your search to a specific item or range of items.
| Main tab | Displays basic information of the item within the grid |
| Cost Price tab | shows the item cost and selling price information of a selected item |
| Supplier Cost Price tab | shows various supplier cost prices of a selected item, including historic cost prices. |
| Stock Available tab | shows stock quantity levels of the item in various warehouses. |
| Serial Number tab | shows serial numbers for the selected item. This tab is only active if the item code is flagged for serial number tracking |
Adding an item
To create a new inventory item, click on the Add button
Fill in all the relevant information on the inventory item.
You will have to fill in the category type example, stock, service or custom.
| |
Note: The inventory code can be changed at any time.
General Details Tab
In the General Details tab fill in the static information.
.png)
More Details Tab
.png)
|
Pricing Levels tab
You will have to setup a Pricing level for this item before closing. To setup a pricing level click on the Add button.
In this area, the cost price is important if it is an inventory type, if you do not put in a value of cost you will only be able to change this cost price via an Inventory Value Adjustment. This cost price is affect by your costing methods setup in System Configuration under Reference Values.
You will have to put in a Tax Type for this item before saving. In order to see the other tabs you will have to save this item.
.png)
Average costing or latest costing methods. The average costing method is the most commonly used?
In this area you can setup two ways to work out your end selling price
.png)
The difference between the two above is that should you chose Percentage this is good when a product is governed by currency rates and you do not want to lose profits.
Once you have select your pricing level you will need to select a Default pricing level for this item.
Custom Fields tab
If configured you are able to select from drop down option
.png)
Bill of Materials tab
Activate bill of material - Please Note; only tick the Bill of Material box if this inventory item will be the result of a manufacturing process. However this item can be a contributing item (recipe item) to another Bill of Material and in itself be a Bill of Material item.
.png)
Properties Tab
Add the dimensions of the inventory item
.png)
Replacement Item Tab
.png)
The user can also have options to activate other fields by ticking the boxes on the right hand page
Spec tab
To add the specifications of the item
.png)
Supplier’s button
On the inventory items you will need to select the various suppliers where you purchase this item from.
.png)
In this area we cater for multiple suppliers to one inventory item. This is handy so you can see what the cost price is that you purchase this item from the various suppliers. You will also be able to see the supplier item code and when the last time any changes done to this supplier was made.
Last Updated field is changed in two ways:
Note: This price has nothing to do with the cost price of the item, these prices have to do with the actual supplier price which he will give the item to you at.
To create a new supplier click on the Add button
Fill in the Supplier item code, select the unit of measure and put in the price of the item that your supplier will sell it to you at.
Note: Prices are exclusive.
.png)
Warehouses button
If you have the Warehouse Module you will be able to select multiple warehouses that this item belongs to.
.png)
In this window we allow for unlimited amount of uploads of documents to be attached to the Inventory item. You can attach pictures, Excel sheets, Word Documents and any file you wish.
.png)
When you click on the Upload button Attachments Button the following will come up.
In this area we allow you to categorize your documents, name the file and then chose the file.
Once you click on the upload button it will take a copy of your file to the server. This means whenever you are in Huge ERP you will be able to view the file anywhere
.png)