Add Stock Item - Basic Setup
Adding an Item
To create a new inventory item go to:
Inventory Module>Configuration>Inventory setup
Click Add

After clicking Add you will see the screen below:
If your codes consist of only numbers, it is not advisable to start the code with a zero. This will create complications when doing bulk updates and exporting the item master into excel, where the "0" will be dropped. When you upload the updated import file, it can potentially result in a duplicate item being created.
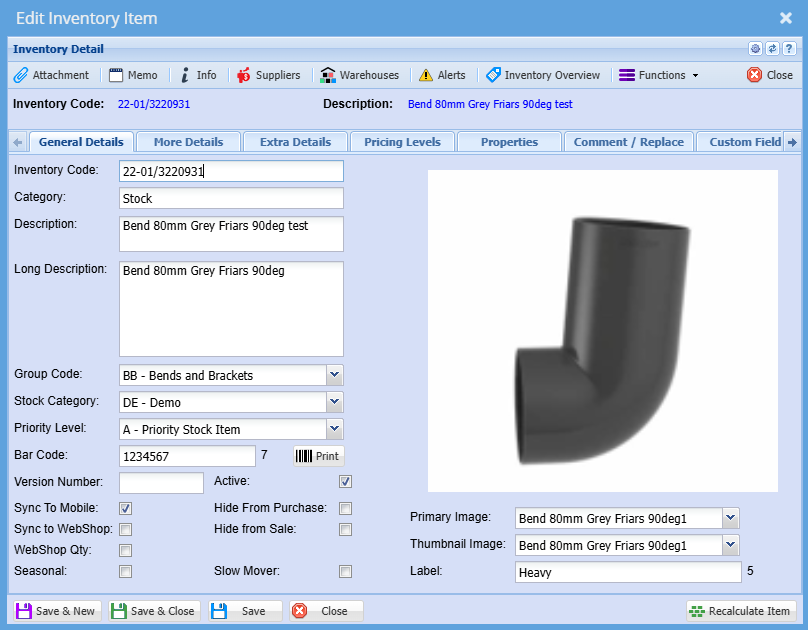
| Code | Enter a code for the item; codes can be alpha or numeric or a combination. |
| Category |
Select the right category for the item that you are creating
|
| Description |
Enter an Item description By default description is what is displayed on the documents |
| Long Description |
Allows you to enter additional item description detail Unless you have customized stationery, the long description will not be displayed on the documents |
Group Code |
Select the relevant group code if applicable |
Tick
If there are items that are vital for production or fast fast-moving items, you can use the Prioritypriortity Levellevel field.field
This can then be used in stock procurement, forecasting and even automated exception reports to notify the procurement department of priority items with low stock levels.
Refer to advanced item setup
SelectTick the relevantbox Groupsync codeto (ifMobile. applicable)This will allow the item to be added to the mobile application
Click Save
Item Cost Price - Pop up window
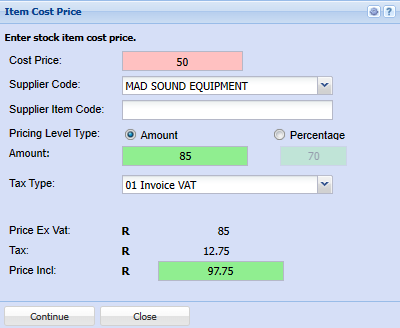
| Cost Price |
Enter the Item cost NB: |
| Supplier Code | Select the |
| Pricing Level Type |
Select the pricing type Enter either the
|
Once you click the save,save button, the additional Tabstabs will be activated
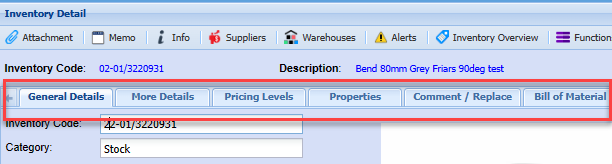
Additional Tabs
Click the More detailsDetails tabTab to add additional infoinformation if applicable
Such as Unit of Measure, weight ,weight, etc
ifIf the item ishas serial numbers or the items serial numbers have to be serial number tracked, tick the serialSerial noNo trackingTracking box
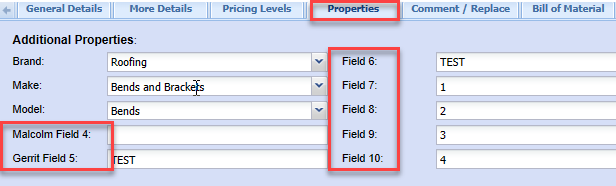
Properties Tab
This window has additional filtering and categorisation options such as Brand, Make and Model
These filters work in conjunctionconjuction with each other
Refer to Brand Make Model setupSetup
There are also 7 additional customizable fields which can be renamed to descriptionsdescription of your choice and used accordingly for purposes specific to your business.business
Bill of Material Tab
If the product being added is a product that you manufacture, you will need to tick the Activate Bill of Material Box.Box
Refer to BilBill of materialMaterial Manual for further details
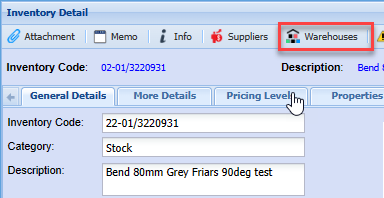
Warehouse Link
You will need to link the warehouse(s) this item is associated to
To do this,this click the WarehouseWarehouses Buttonbutton
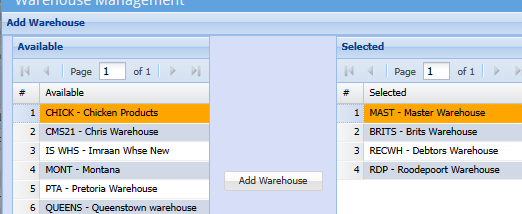
Click addAdd
Move the required warehouse(s) to be associated towith thisthe productitem to the Right right-hand column
To move a warehouse to the selected column, doubleDouble click the requiredwarehouse you wish to select or highlight the warehouse and click on Add Warehouse
Attachments
Attachments
Should you wish to add an image of the productitem or any other details or spec sheets relating to the product, you can add thesethem as attachments
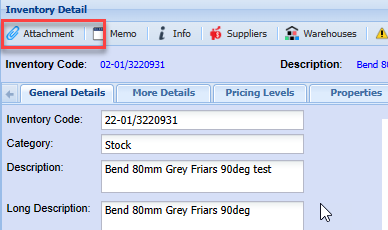
To uploadadd an image,image clickview thethis manual - Attachment button
Click Upload to Select a saved file on your PC and Upload
Alternatively, Click Drag and Drop button
and simply drag the file from a saved folder on your PC to the drop files box

Click Close
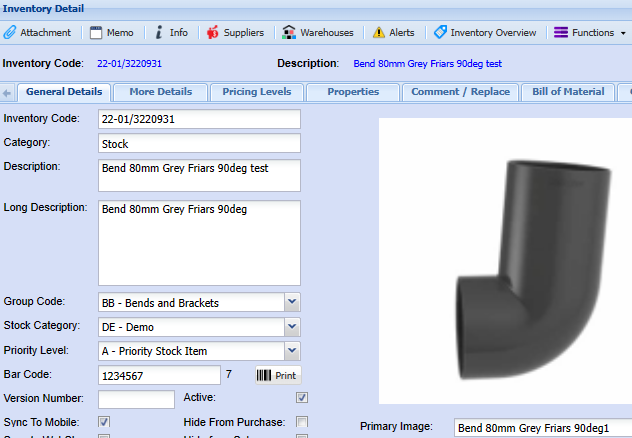
OnGo back to the General Details tab,Tab, select the attachment name from the drop drop-down on the Primaryprimary image field as the image to be displayed
Click Save

This will thenthe be displayed in the image window
This completes the basic item setup and the item can now be selected on various documents across the system