Account Data Analysis
Log into the General Ledger Module > Reports > Financial Position
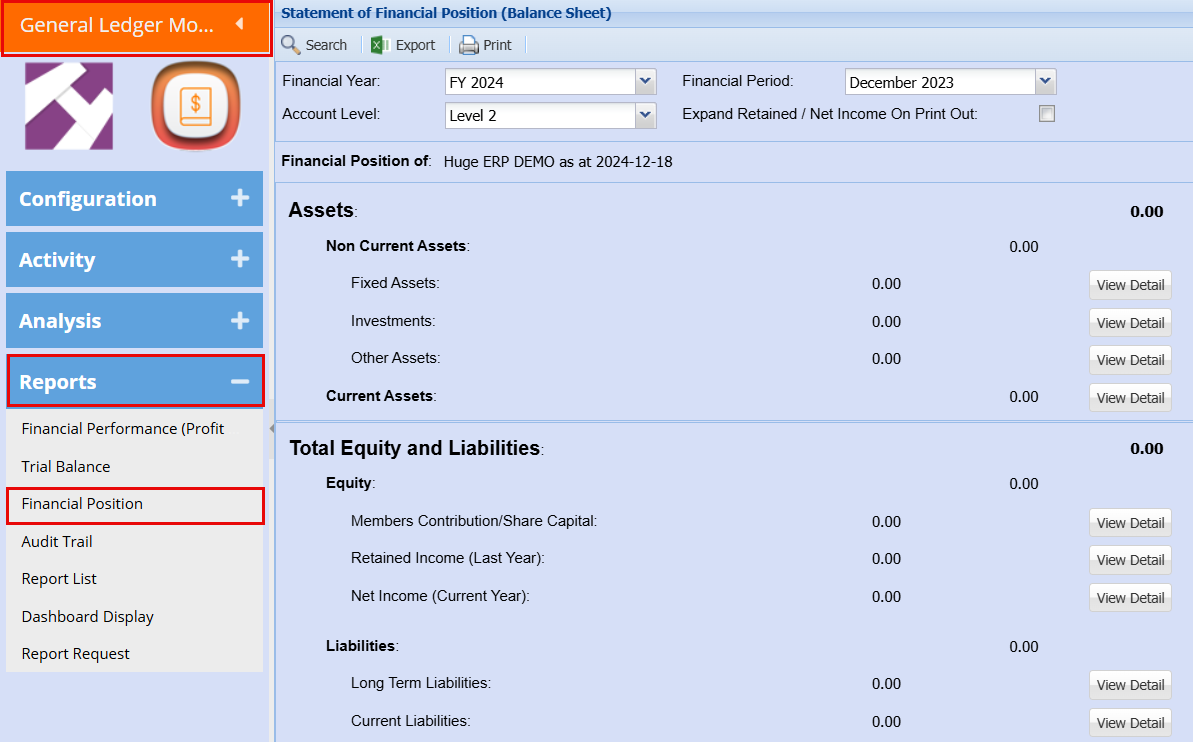
Search Tab
| Financial Year | Select the financial year you would like to pull the report for |
| Financial Period | Select the months you would like to pull the report for |
| Account Level | These levels each have more or less information in the report |
| Expand Retain / Net Income on Print Out | Put this tick on it you would like to include Net Income on Print Out |

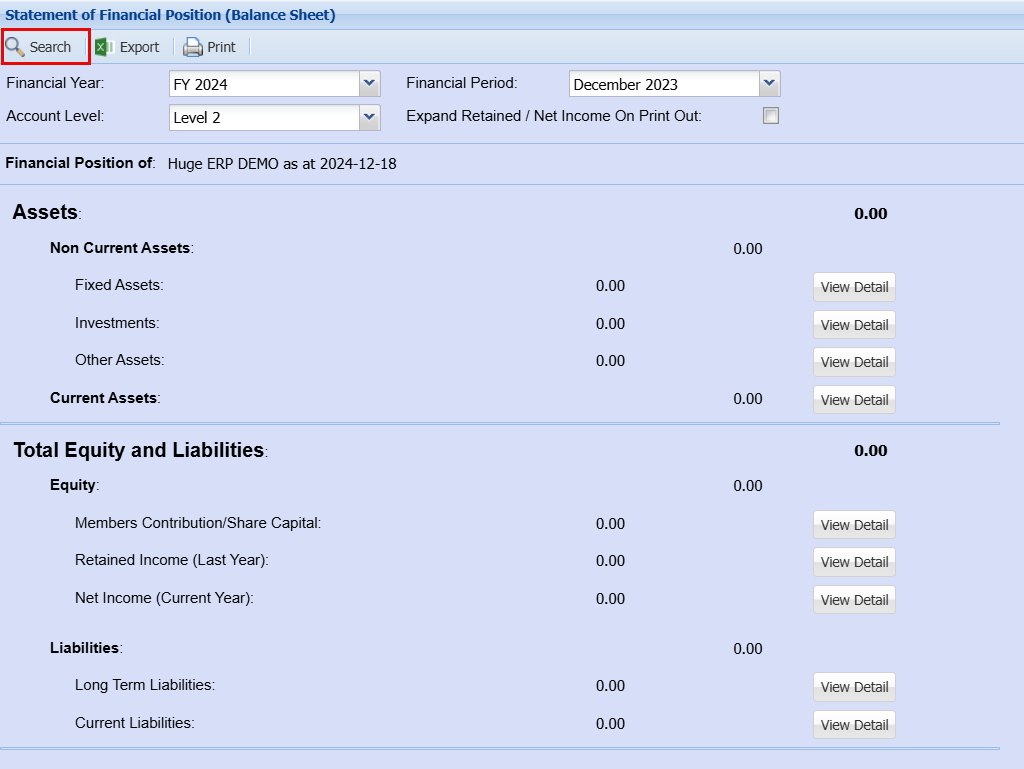
Click Search once you are happy with your select criteria, this will populate the figures as shown below.
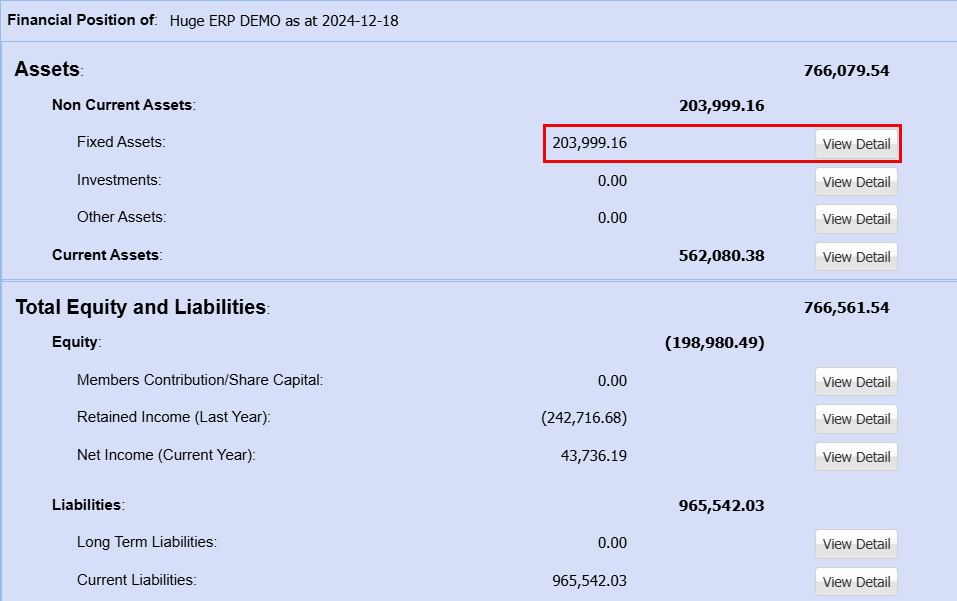
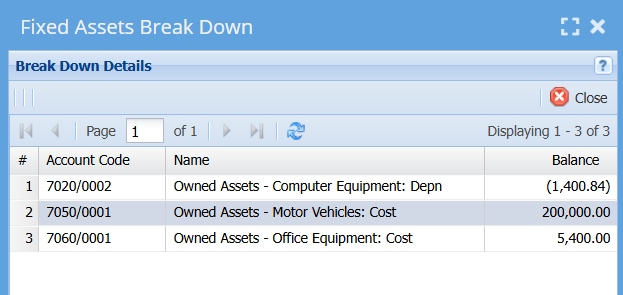
By clicking on "View Details" this will open a new window which will show you a breakdown of what these amounts are made up of.
Print Tab

You can Print your Statement of Financial Position
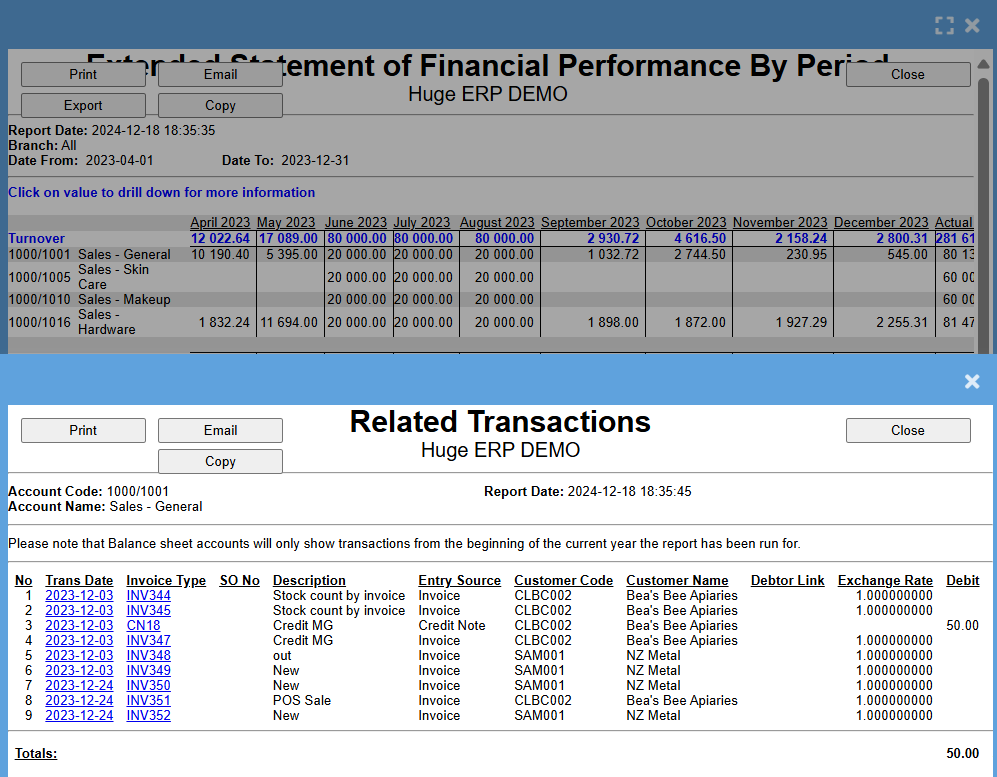
- Click Print - This will open another window showing a further breakdown of the initial screen
- If you click on any of the transaction this will open another window that will expand on the information for all transactions associated with this amount.
- You can then click on the individual Invoice Type to see each transaction in details.

Account Analysis
General Ledger Module > Analysis> Account Analysis
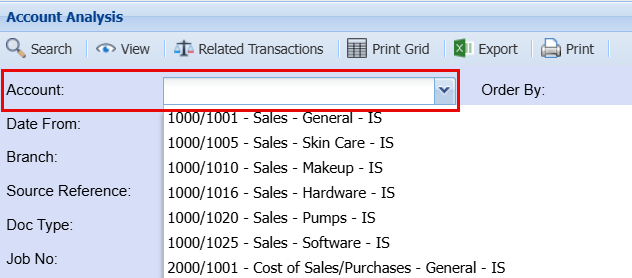
Select an account from the drop-down Menu
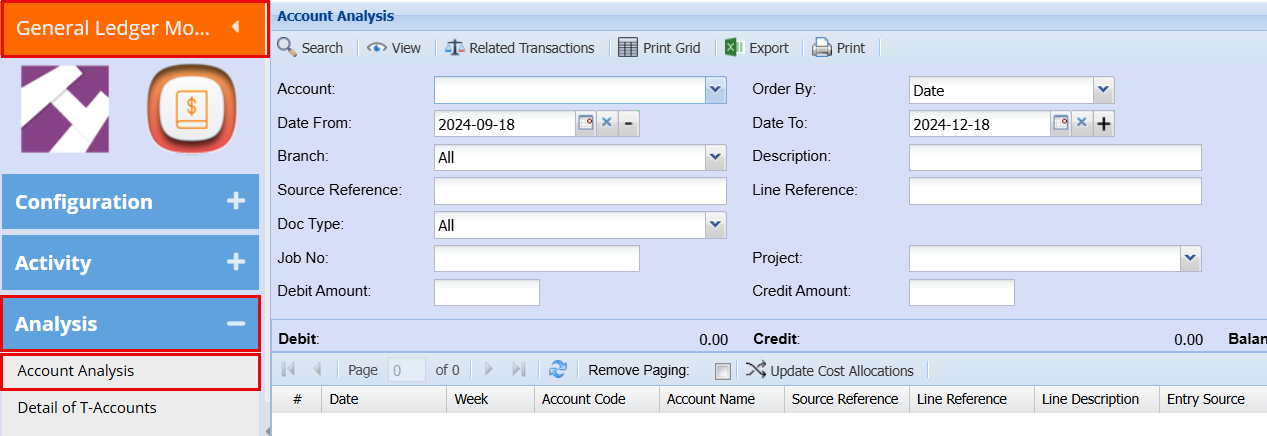
Refine your search using the filters
| Account | Select an account from the drop-down menu that you would like to pull the report for |
| Date From / Date To | Select the date range you would like to pull the report for |
| Branch | When working with multiple branches this drop-down allows the user to select a specific branch to pull a report for. |
| Source Reference | |
| Doc Type | Select a specific document type from the drop-down menu that you would like to pull the report for, Default would be All Document Types. |
| Job No | If there is a specific Job number that you would like to pull a report for, you can add this to refine your search |
| Debit Amount | If you are searching for a specific amount, you can add this to refine your report search |
| Order By | Select an option from the drop-down menu that you would like your report to be ordered by |
| Description | If there is a specific Description you are searching for you can add this to refine your report search |
| Line Reference | If there is a specific Line Reference you are searching for you can add this to refine your report search |
| Project | If there is a specific Project that you are searching for you can add this to refine your report search |
| Credit Amount | If you are searching for a specific amount, you can add this to refine your report search |
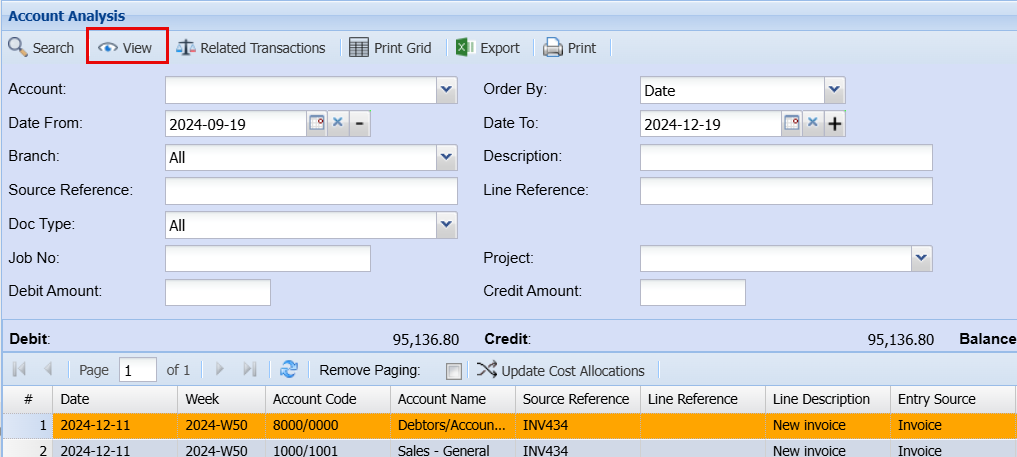
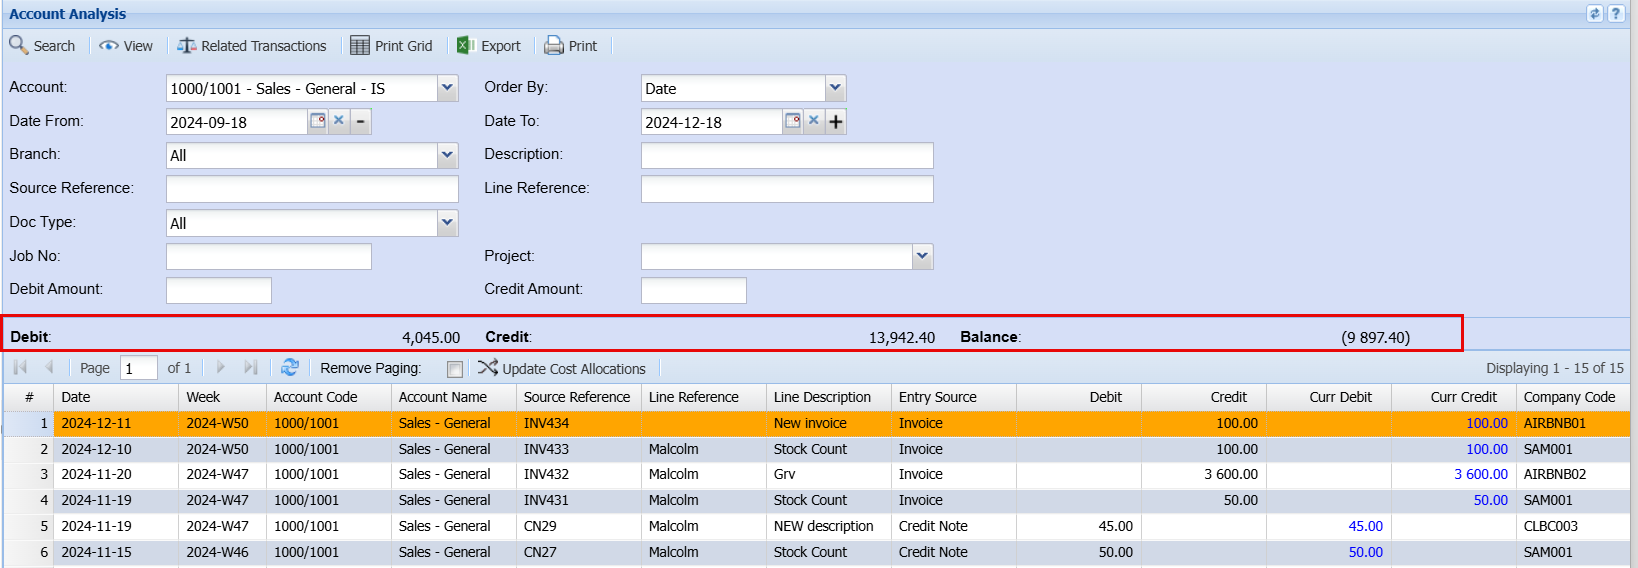
Click Search - This will bring up all the transactions with your chosen criteria.
To get more information for a specific transaction line highlight the Transaction line and click the View button.
Here you can also see your Debit, Credit and total balance.
Profit and Loss by Period
General Ledger Module > Reports> Report List
Select General Ledger as your Category
Click Search
Select the Profit and Loss b Period Report from the report list

| Budget Type | Select what Budget Type you would like to pull a report for, your options here are Budget or Revised Estimate |
|
Cost Centre |
Select a Cost Centre to pull the report for, your options are Division or Region or Both. Select one or the other will open the field for you to choose a specific Division or Region or all. |
| Division | If you have set up divisions for your debtors, you can pull the report for all your debtors or you can select a specific Division from the drop-down menu. |
| Region | You can pull the report for all your debtors, or you can select a specific Region from the drop-down menu if you have set up Regions for your debtors. |
| Year From / Year To | Select the year From and Year To Dates from the drop-down menus will show results specific to the period you have selected. |
| Period From / Period To | Select the period From and the Period To from the drop-down menus |
| Account Level | These levels each have more or less information in the report |
| Period Name | |
| Sort By | Choose from the drop-down menu how you would like your report sorted, your options are by Code or Name |
| Branch | Select the brand from the drop-down menu to refine your search for your report. |
| Tick boxes | By ticking the tick boxes, you will have an extra column in your report with this added information |
| Generate | Click the "Generate" button to open the report. You will have options to copy, email, or print the report. To view the report in an Excel document, copy the report and paste it into an Excel file. |
| Close | Clicking close will close this window |
| Export | This allows you to export the report to an Excel file |
When you click Generate, the Extended Statement of Financial Performance By Period Report will open, here you will also be able to click on individual amount to see which transactions related with that amount.
Debtor
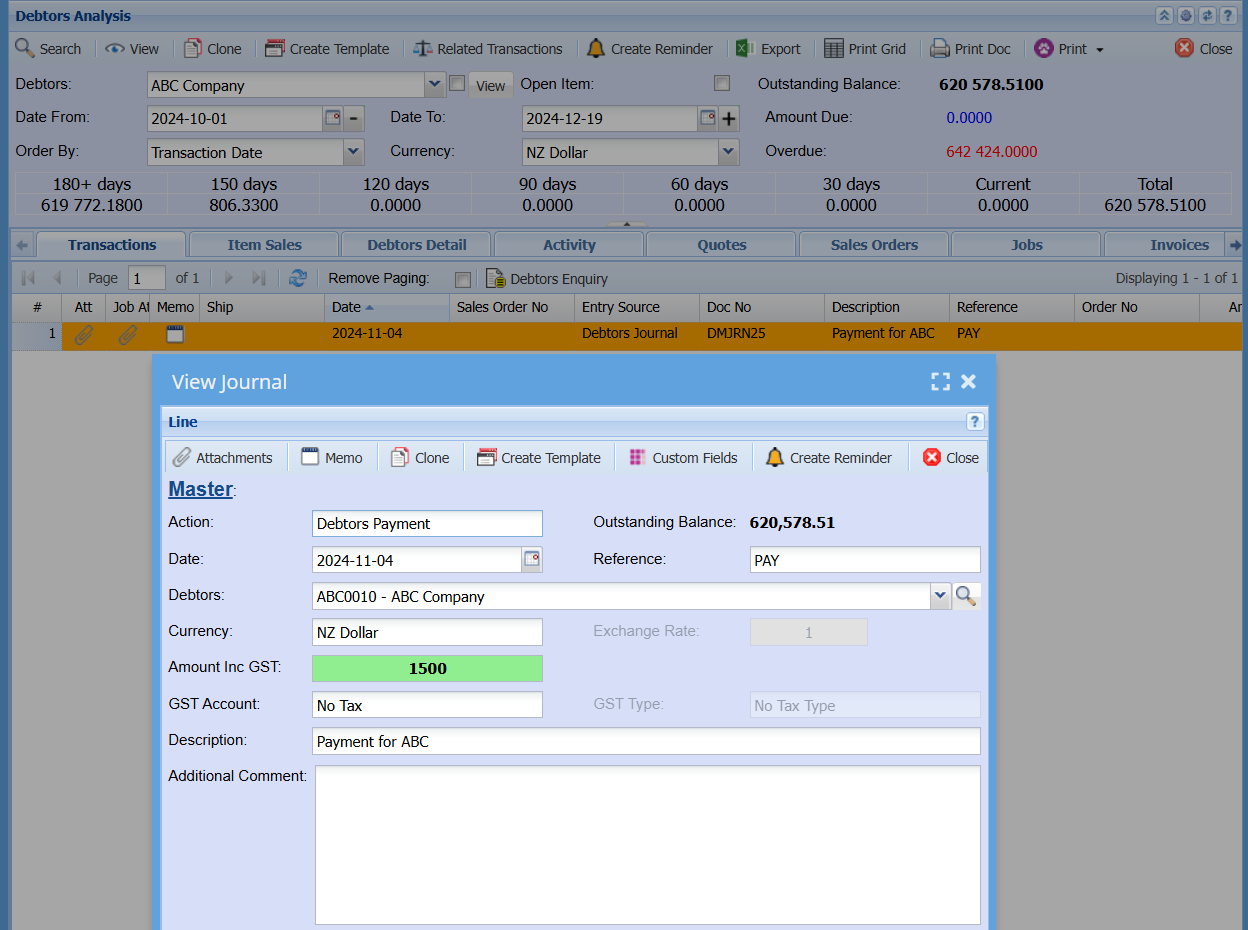
Debtors Analysis
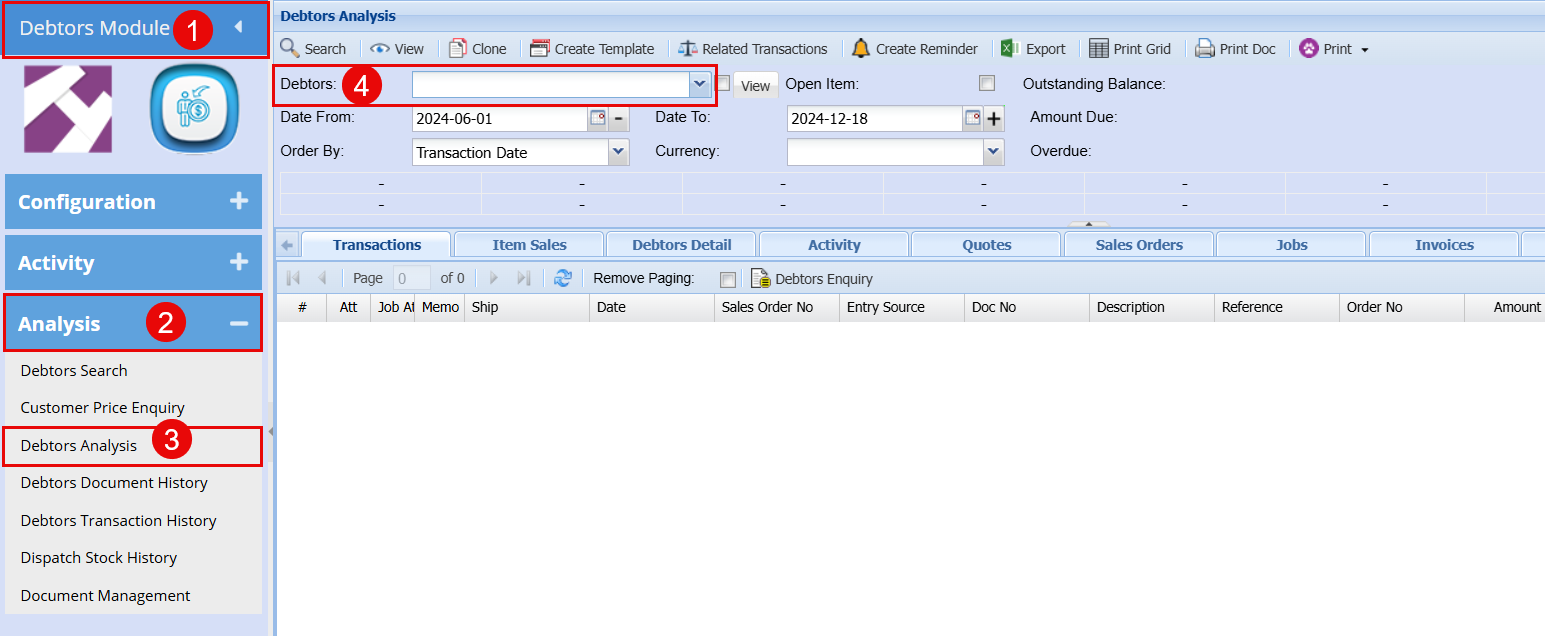
Debtors Module > Analysis> Debtor Analysis
| Debtors | This is where you enter the details of your customer. |
| Outstanding Balances | This is the monies owed to you by this client; by ticking this box it will add a column to your report with money owing |
| Date From / date to | Choose the date range for which you want to view the report from / Select a date range of when you want to see up to on the report. |
| Order By | This is the directive in which you want the information to be displayed. |
| Currency | This is the currency used for this debtor as setup in the debtor’s setup. |
| Total, current, 30 days etc. | This displays the total monies due and at certain periods 4 |
Select the Debtor from the drop-down menu
Select your criteria from the filter options
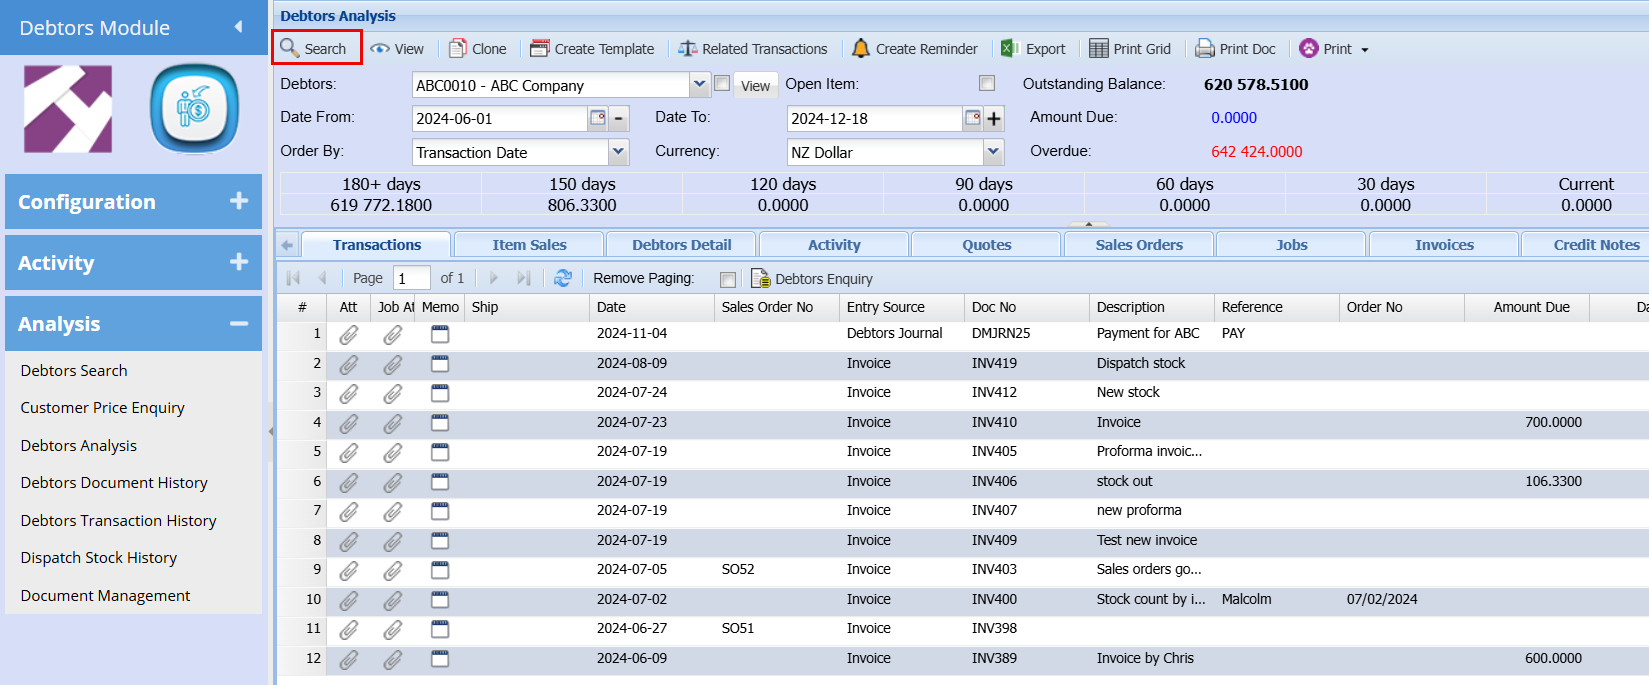
Click Search - This will show your all the related transactions
Double click on the individual transaction to see more information
Debtor Age Analysis
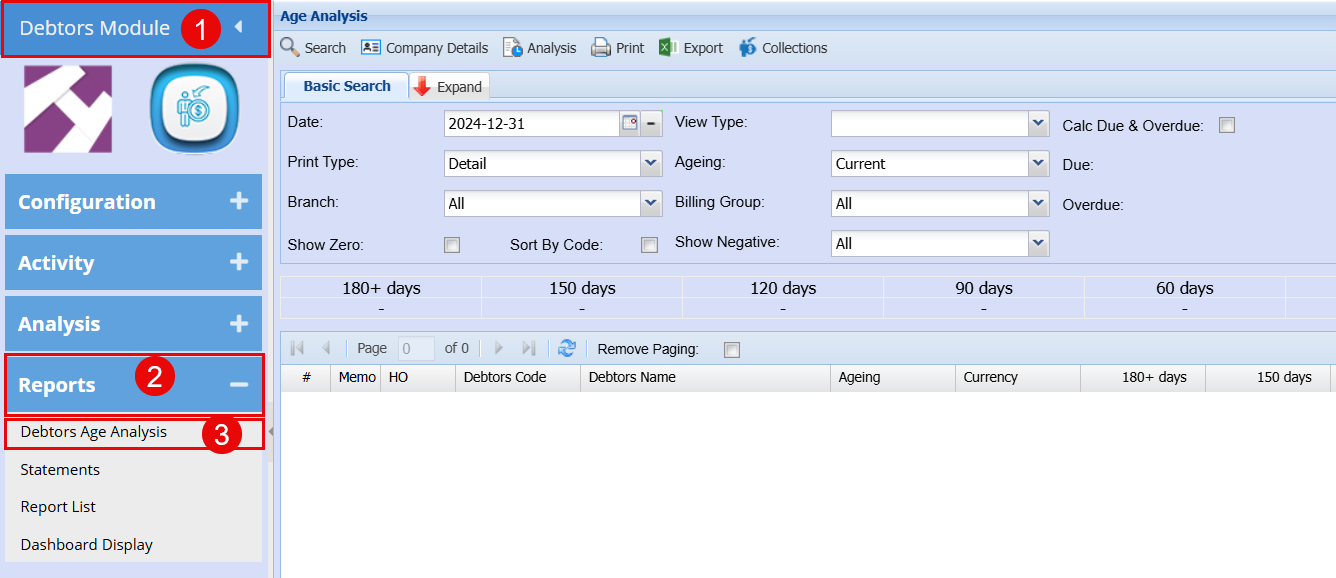
Debtors Module > Report> Debtor Age Analysis
Basic Tab Search
| Date | Select the date for generating age analysis |
| Print Type | Select the print type from the drop-down menu |
| Branch | When working with multiple branches this drop-down allows the user to select a specific branch to pull a report for. |
| Show Zero | If the box is ticked, the age analysis run will include debtors with zero balances |
| Sort By Code | By ticking this box there will be an extra column added to your report with the Debtors Code |
| View Type | To select print columns from the drop-down menu. There are three types of view types in the age analysis, the default is the standard view. |
| Aging | The process of investigating a company's accounts receivable according to how long individual invoices have been outstanding |
| Billing Group | If you have billing groups like, Subscriptions, you can pull a report for these specific groups, or you can pull a report that will include all transactions. |
| Show Negative | Select from the drop-down menu if you would like to add or exclude negative balances in your report or pull a report for creditors with only negative balances. |
Select your criteria from the filter options for your report
Click Search - This will show your all the related transactions
Double click on the individual Debtors to see more information
Creditor
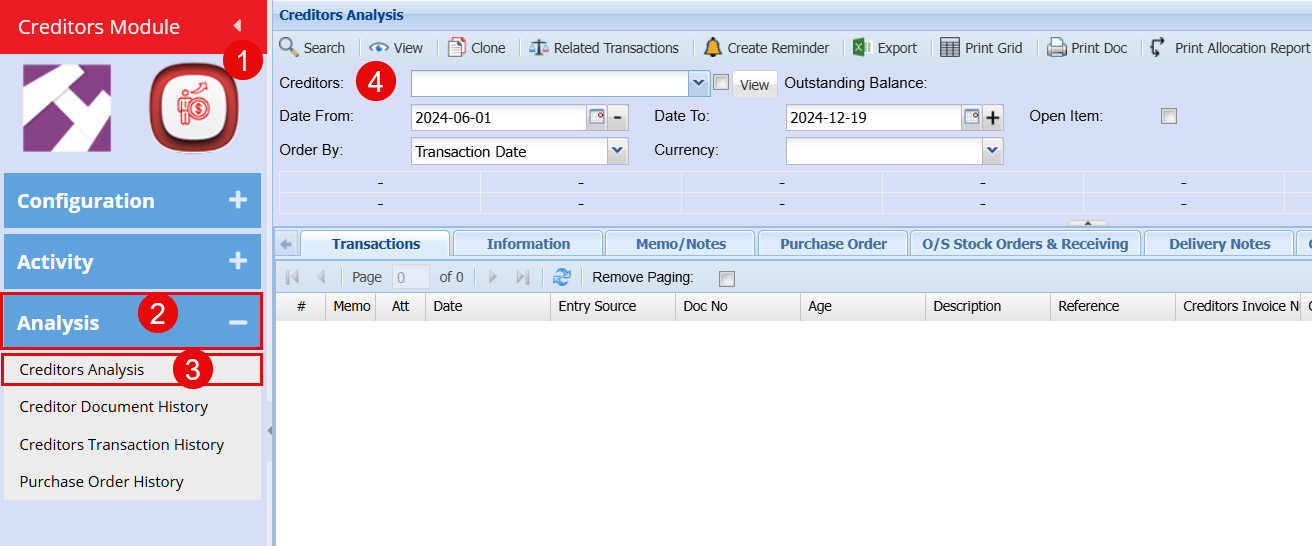
Creditor Analysis
Creditor Module > Analysis> Creditor Analysis
| Creditors | This is where you enter the details of your supplier. |
| Outstanding Balance | creditor’s outstanding balance and comes up automatically as soon as the creditor is selected |
| Date From / Date To | Choose the date range for which you want to view the report from / Select a date range of when you want to see up to on the report. |
| Order By | Search by selecting order by from the drop-down menu |
| Currency | Currency used by the creditor |
Select the Creditor from the drop-down menu
Select your criteria from the filter options
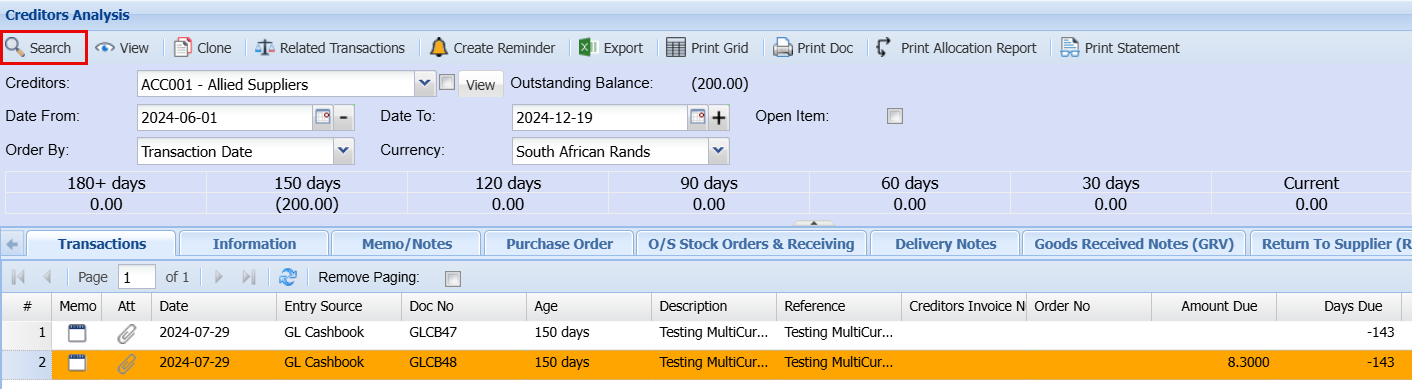
Click Search - This will show your all the related transactions
Double click on the individual transaction to see more information
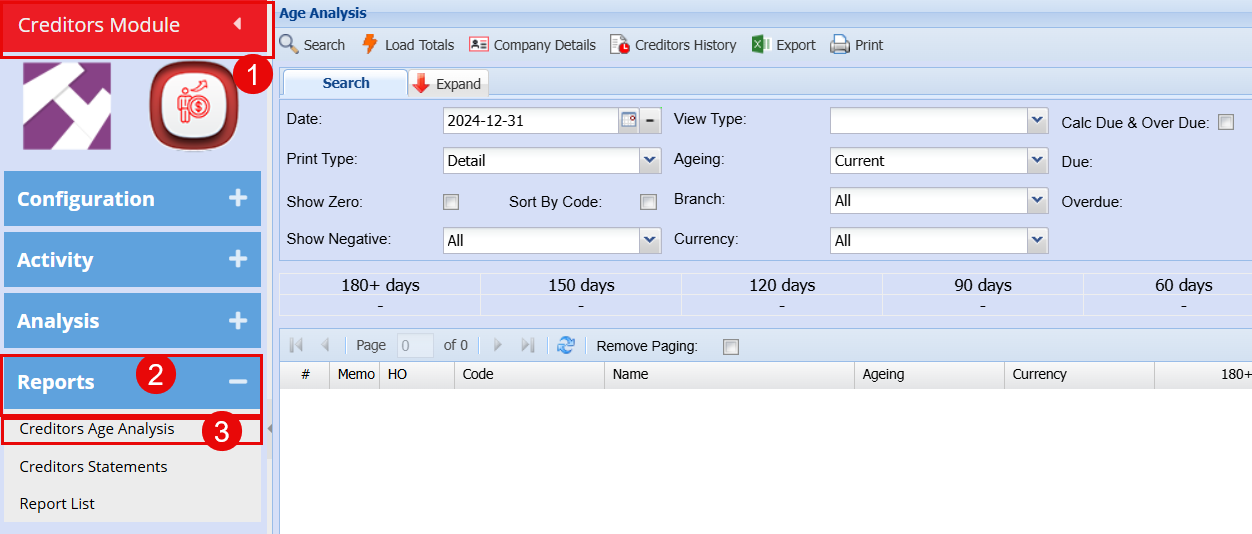
Creditor Age Analysis
Creditor Module > Report> Creditor Age Analysis
Basic Tab Search
| Date | Select the date for generating age analysis report for. |
| Print Type | Select the print type from the drop-down menu, your options would be Detailed, Basic or Summary. |
| Show Zero | If the box is ticked, the age analysis run will include debtors with zero balances |
| Sort By Code | By ticking this box there will be an extra column added to your report with the Debtors Code |
| Show Negative | Select from the drop-down menu if you would like to add or exclude negative balances in your report or pull a report for creditors with only negative balances. |
| View Type | To select print columns from the drop-down menu. There are three types of view types in the age analysis, the default is the standard view. |
| Aging | The process of investigating a company's accounts receivable according to how long individual invoices have been outstanding |
| Branch | When working with multiple branches this drop-down allows the user to select a specific branch to pull a report for. |
| Currency | Select the currency from the drop-down menu that you would like to run the report for |
Select your criteria from the filter options for your report
Click Search - This will show your all the related transactions
Double click on the individual Creditors to see more information

No Comments