User Setup Process
System Configuration Module >General >User Setup
To setup Users to access the system, go to System Configuration Module >General >User Setup and the following screen will appear.
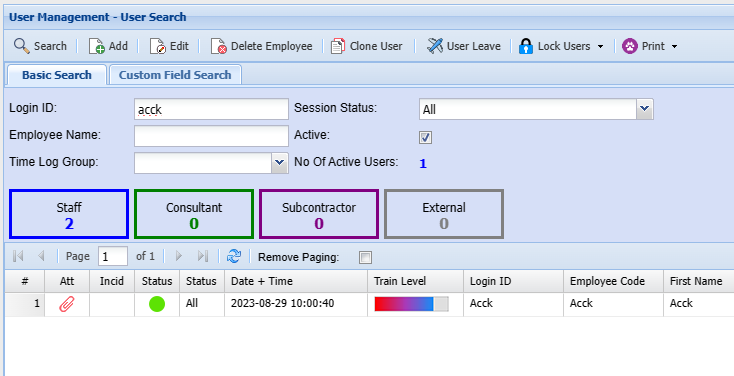
To add a new User, click on the Add.
Details 1
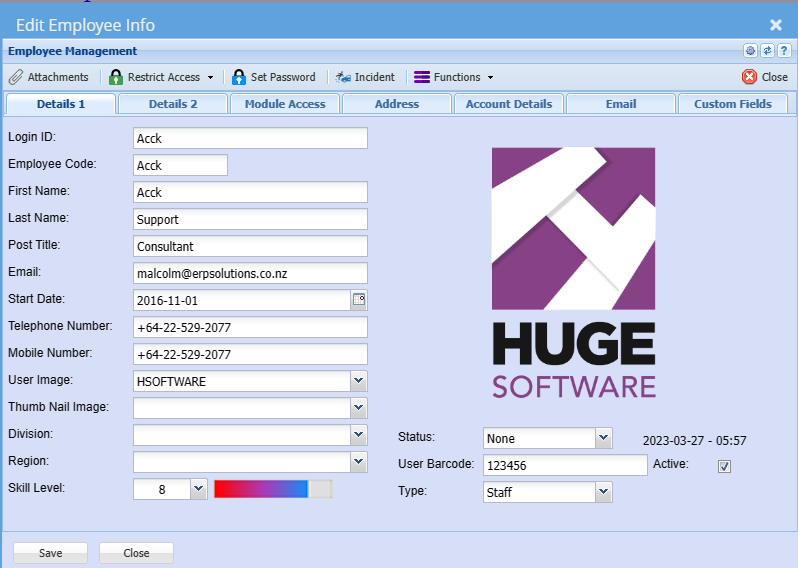
| Login ID: | This is case sensitive when the user logs in. This will be the name which is used when the user logs in. |
| Employee Code: | The users code of the company, usually the payroll code |
| First Name: | First name of the User |
| Last Name: | The Surname of the User |
| Post Title: | |
| Email: | |
| Start Date: | |
| Telephone Number: | |
| Mobile Number: | |
| User Image: | This is a drop down and only shows Images which have being uploaded as attachments. You can select a default image against the user to show on the right-hand side |
| Thumb Nail Image: | |
| Division: | |
| Region: | |
| Skill Level: | |
| Status: | |
| User Barcode: | |
| Type: | |
| Active: | User is active when ticked, should you take the tick off then the user will no longer have access to the system |
Details 2
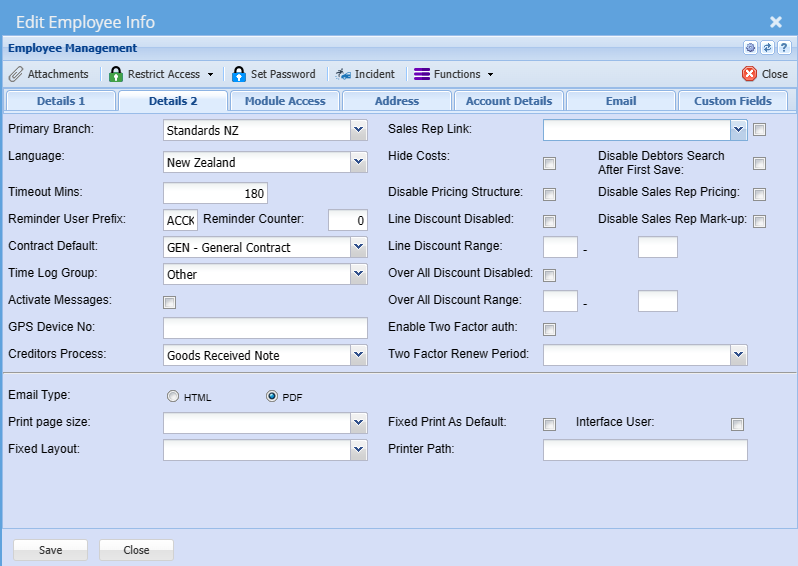
| Primary Branch: | |
| Language: | |
| Timeout Mins: | |
| Reminder User Prefix: | |
| Reminder Counter: | |
| Contract Default: | |
| Time Log Group: | |
| Activate Messages: | |
| GPS Device No: | |
| Creditors Process: |
| Sales Rep Link: | |
| Sales Rep Link Tick Box: | |
| Hide Costs: | |
| Disable Debtors search after first save: | |
| Disable pricing Structure: | |
| Disable Sales rep pricing: | |
| Line Discount Disabled: | |
| Disable Sales Rep Mark-Up: | |
| Line Discount Range: | |
| Over All Discount Disabled: | |
| Over All Discount Range: | |
| Enable Two Factor auth: | |
| Two Factor Renew Period: |
| Email Type: | |
| Print Page size: | |
| Fixed Layout: | |
| Fixed Print as Default: | |
| Interface User: | |
| Printer Path: |
Module Access
