Managing a Job
Job Management
DoubleClickJob Costing > Activity > Manage Job
- Type in your Job number
Click Search
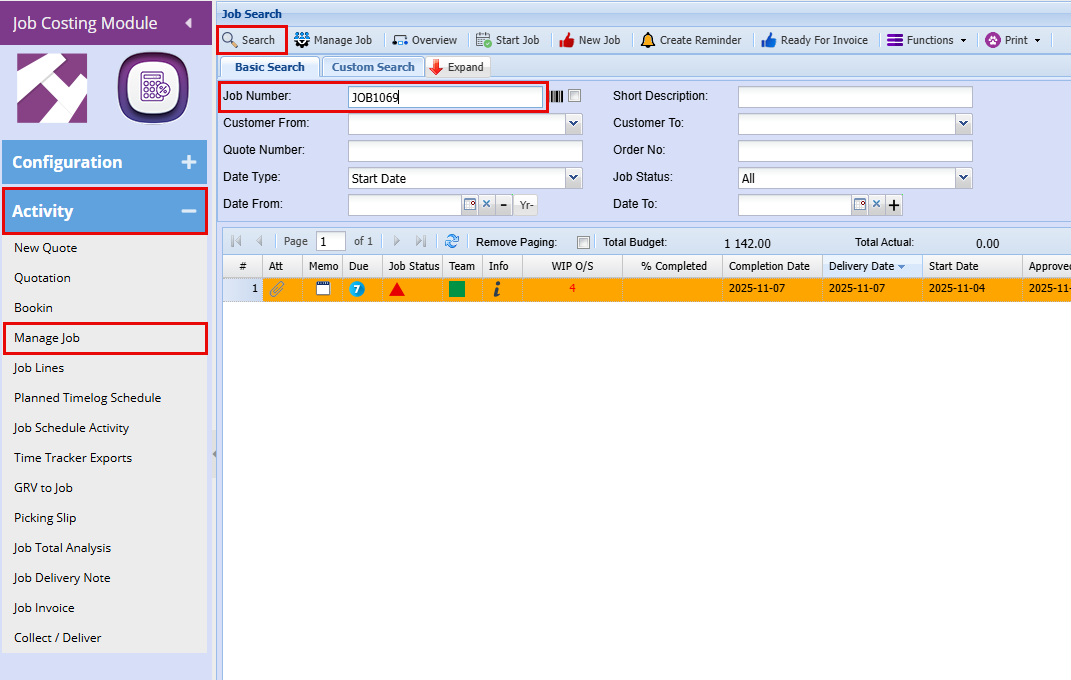
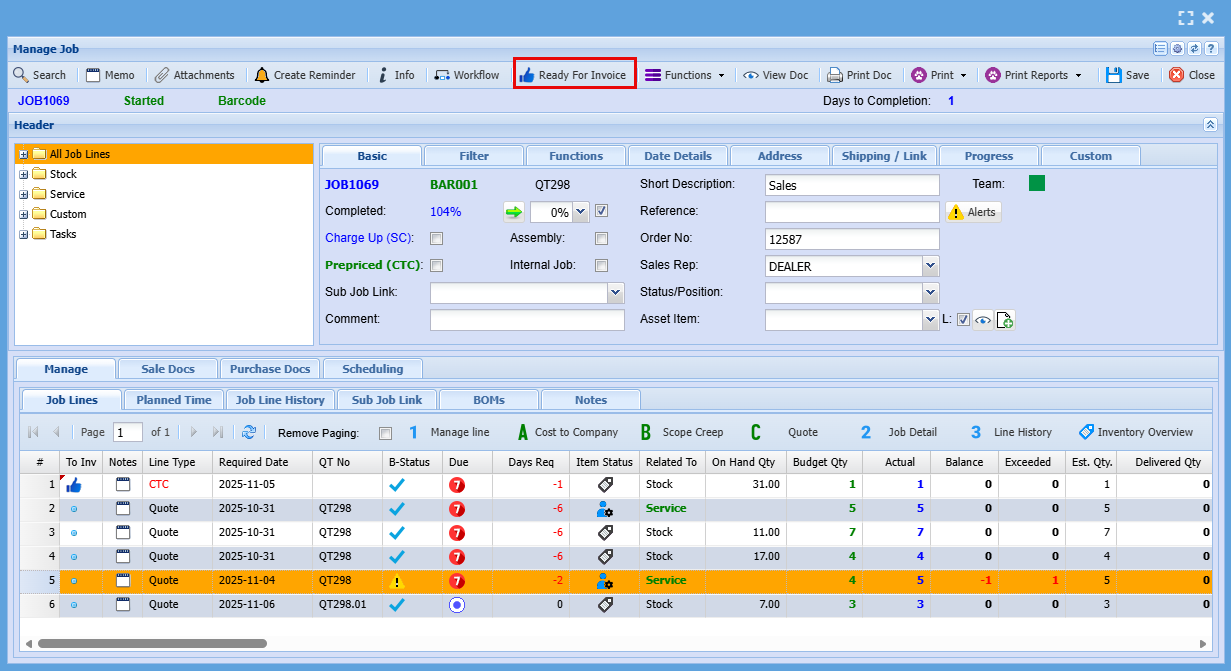
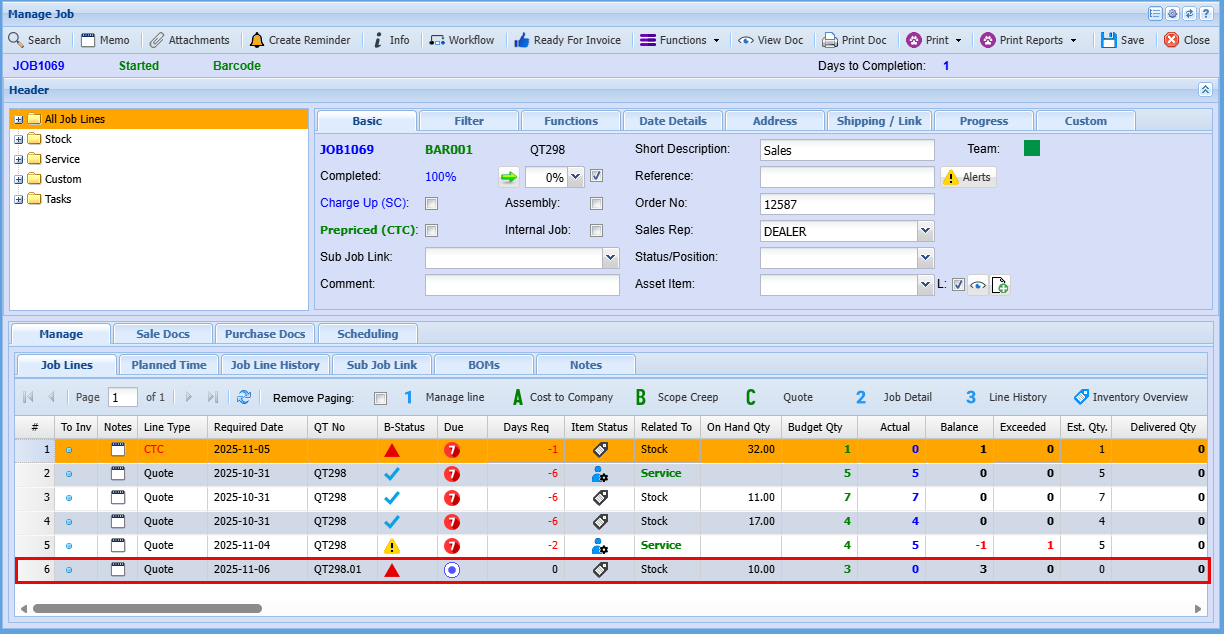
Each job line consists of multiple columns, with each column providing specific details about the job.
You can rearrange the columns in the order that the information is most relevant to you by simply dragging and dropping them into your preferred order as shown below.
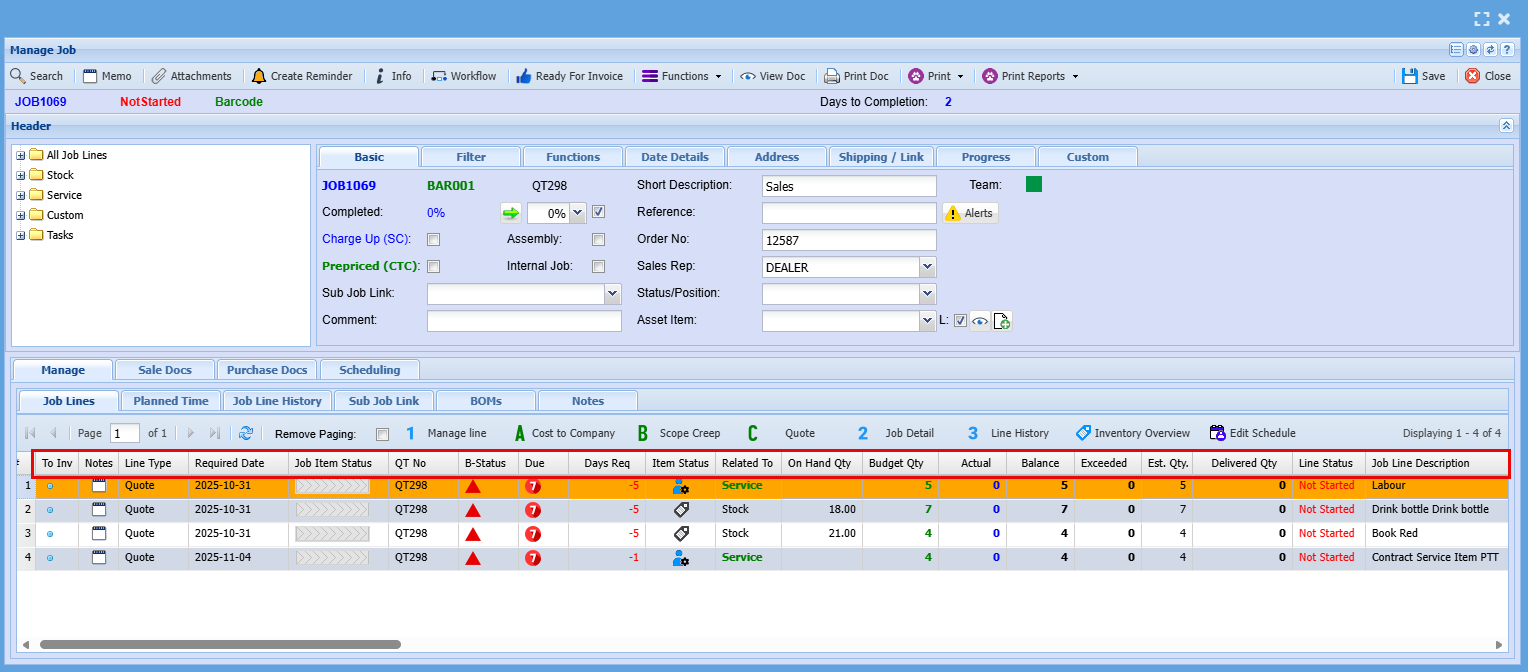
| To Invoice | You can click on the dot to change the icon to a thumbs up to send this line for invoicing |
| Notes | You can add notes for internal records. |
| Line Type | This refers to where the line came from, the example above is from a Quote but can come from a CTC (Cost to Company) or a SC (Scope Creep) |
| Required Date | This is the date the Job is to be completed by |
| Job Item Progress | This is used for Production Tracking |
| QT No. | This is the Quote number the line was added from |
| B-Status | This will show a different icon to show whether the Job has been started, in progress or completed |
| Due | Will show you how many days are given to complete Job |
| Days Required | This will show you have may days is needed to complete this Job Line Item |
| Item Status | This will show if the line is a Stock, Service or Custom Item using Icons |
| Related To | This will show if the line is a Stock, Service or Custom Item |
| On Hand Qty | This will show you how many of the specific item you have on hand to do the job, it will highlight if you do not have enough stock to complete the job |
| Budget Qty | This shows you what you had initially quoted |
| Actual | This Quantity indicates the quantity used for the job |
| Balance | This is the Quantity that is left over from the Budget Quantity |
| Exceeded | This will show you the quantity you have exceeded over the Budget Quantity |
| Est Qty | This is usually the same as tour Budget Qty |
| Delivered Qty | This is how many of this line item has been completed and actually dispatched to the customer |
| Line Status | This speaks to the Job Item Status and B-Status which shows job progress |
| Job Line Description | This is the description form the quote detailing what the line item is |
Manage Job by Line
Managing one line at a time within a workflow keeps you in control by ensuring each task is handled deliberately and accurately. This method reduces errors, simplifies troubleshooting, and creates a clear audit trail. It’s the recommended approach for maintaining consistency, accountability, and professional standards across every job.
- Double click on a job line
- Update your usage amount for this item
As shown below the main things you will be looking at is the following
| Available Stock Qty | Shows you all available stock |
| Budget Qty | This is what was Quoted |
| Actual Qty | This is how many have been used |
| Balance Qty | This is how many you have left to use from your Quote amount |
| Usage | This is an open field where you will put in the quantity being used |
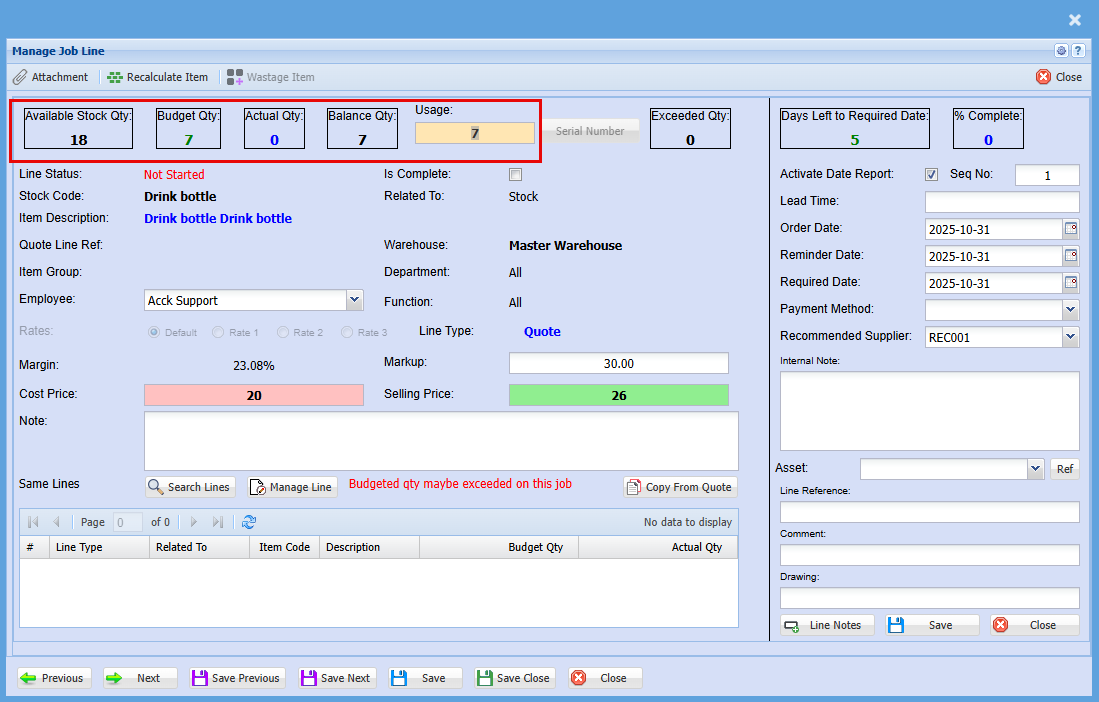
- Click Save and Close
You can now see that the line is active, and you’ll notice updated quantities and statuses reflecting the latest changes.
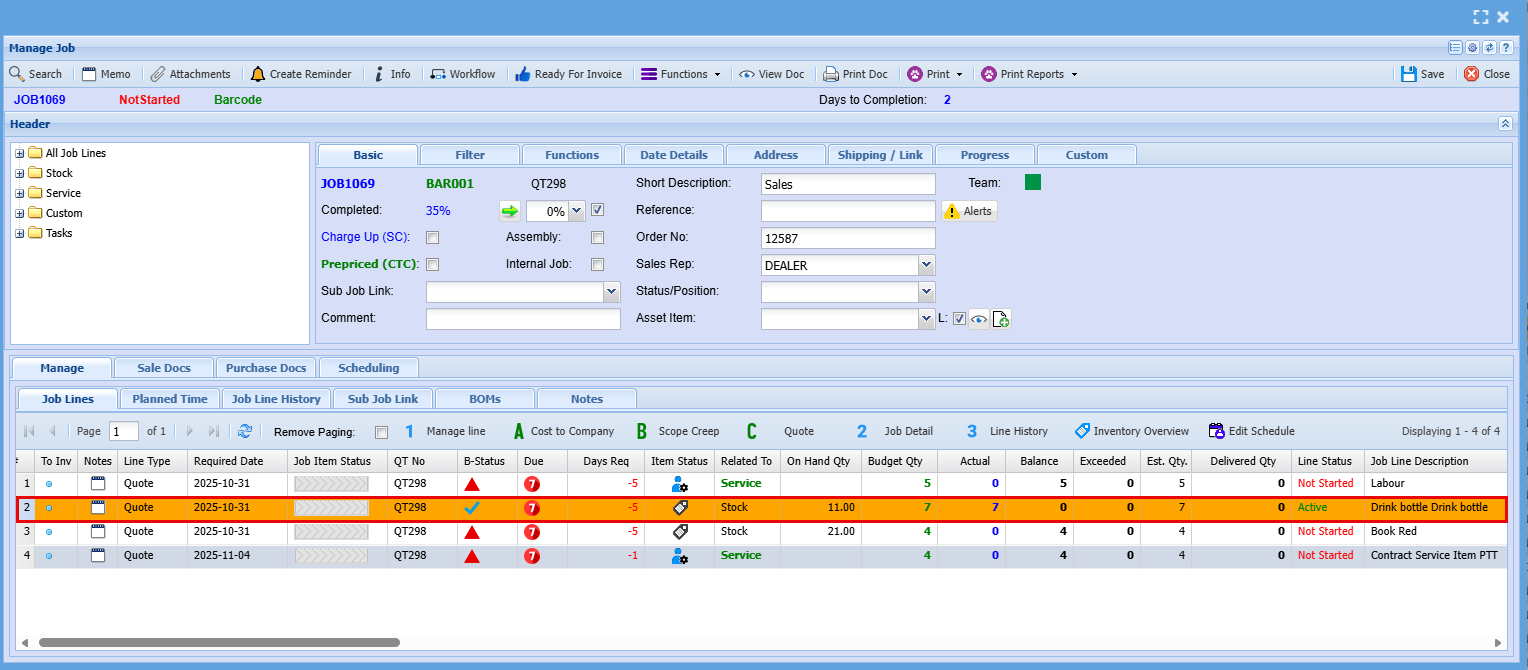
If you've made an error and need to adjust the quantity, simply double-click the Job Line again. To decrease the quantity, enter a minus sign (–) in front of the amount you're reducing, as shown below.

UnManage Line/All
| A | Unmanage All items on a job |
| B |
Clear Line History Only works if the Managed Actual quantity equals zero |
| C |
Delete Job Line Only works if there are no Line History entries |
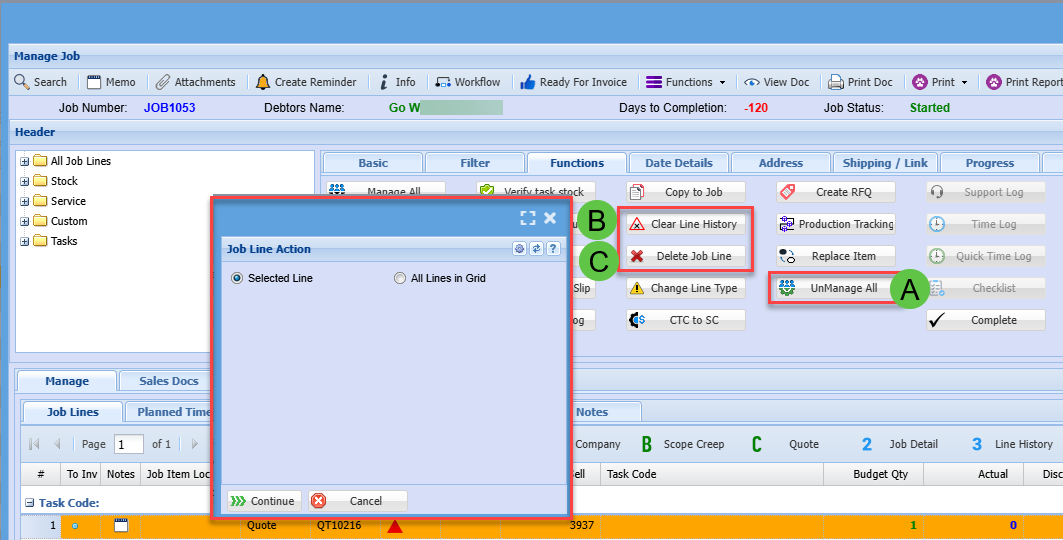
- Actions can be applied to either a selected line or all lines in the grid.
- “All lines in grid” will operate based on the currently filtered data.
- If a line cannot be processed, it will be skipped and the system will continue with the next line.
Adding a New Line to a Job
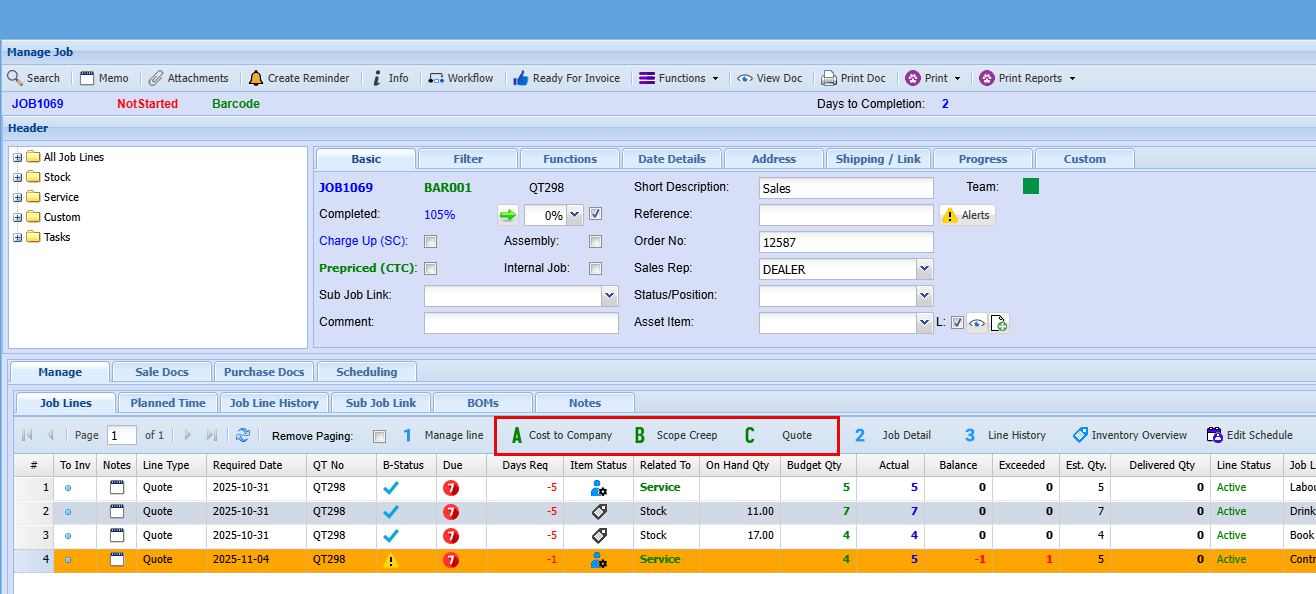
To add a new item to a job, you have three options:
- Scope Creep – This can be added manually and will be charged to the customer. It’s recorded as a cost to company and included in the overall job cost.
- Cost to Company – Also added manually, this option absorbs the cost internally without charging the customer. It’s useful for goodwill gestures or internal adjustments.
- Quote – If the customer has accepted a quote for the additional work, it follows the same process as the initial quote but is linked to the existing job rather than creating a new one.
See below where you will find these options.
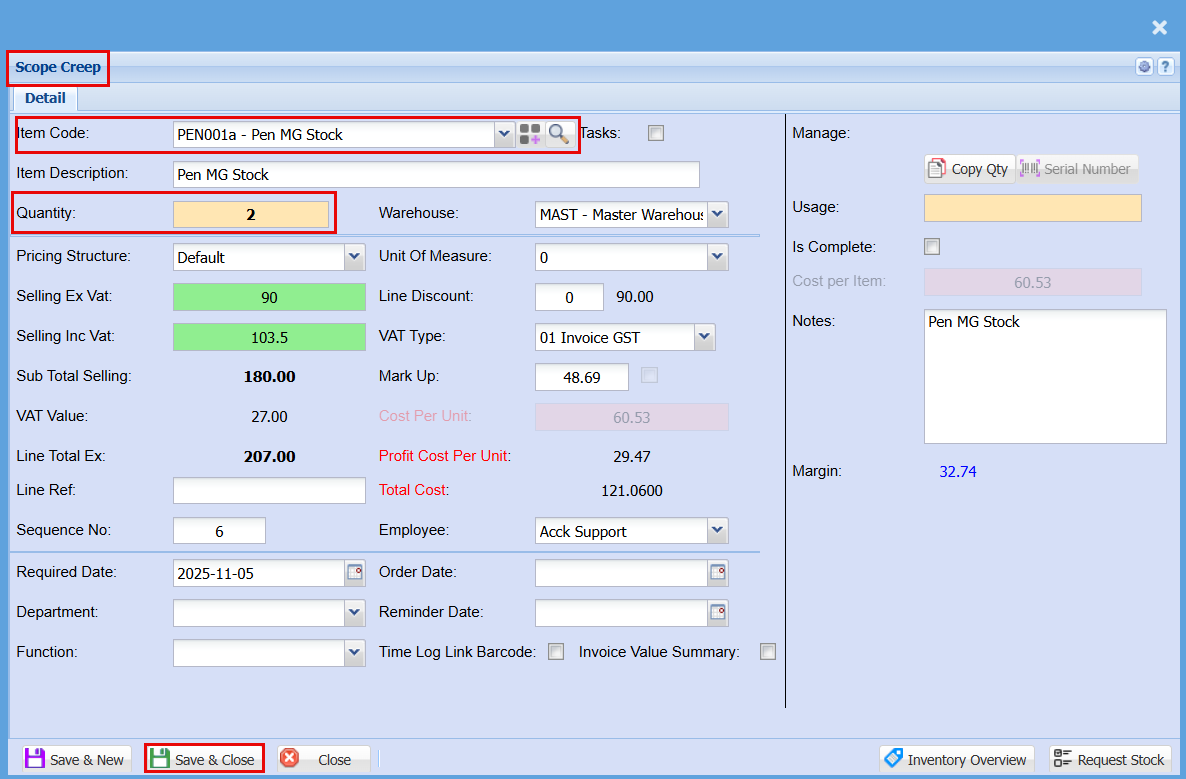
The screen to add Scope Creep or Cost to Company looks the same and essentially works the same.
- Click on Scope Creep or Cost to Company

- Select your Item from the dropdown menu
- Add your Quantity
- Click Save & Close

To add a new line to the job from Quote:
- Click on Quote

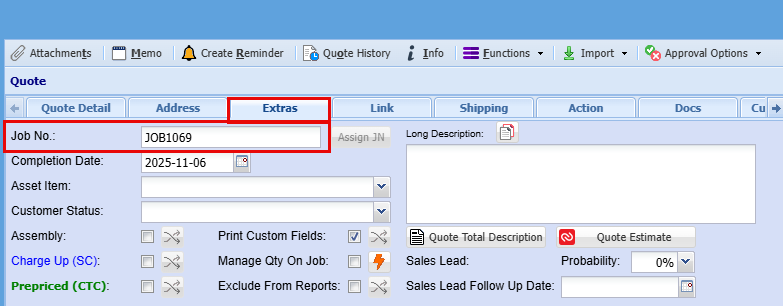
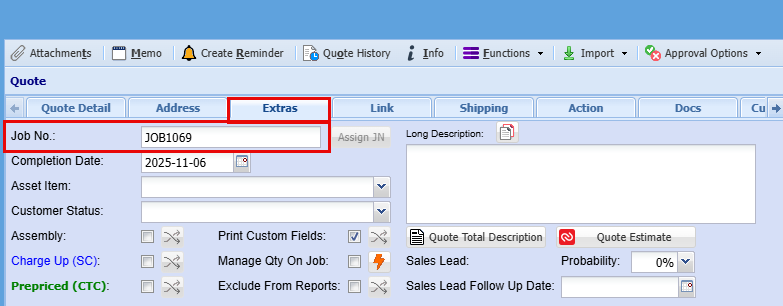
Creating a quote from within a Job similarly to starting one via Job Costing > Activity > Quote in the main menu. However, because it originates from a job, it will automatically be linked to that job. This connection is visible in the Extras tab.
Quotes created this way will also include a “.1” suffix after the original quote number, this indicates that the quote is an extension or variation of the original, tied directly to the job.
If you create a quote from the main menu instead, it will generate a new quote number. You can still manually link it to a job by entering the job number, but creating it from within the job acts as a convenient shortcut.
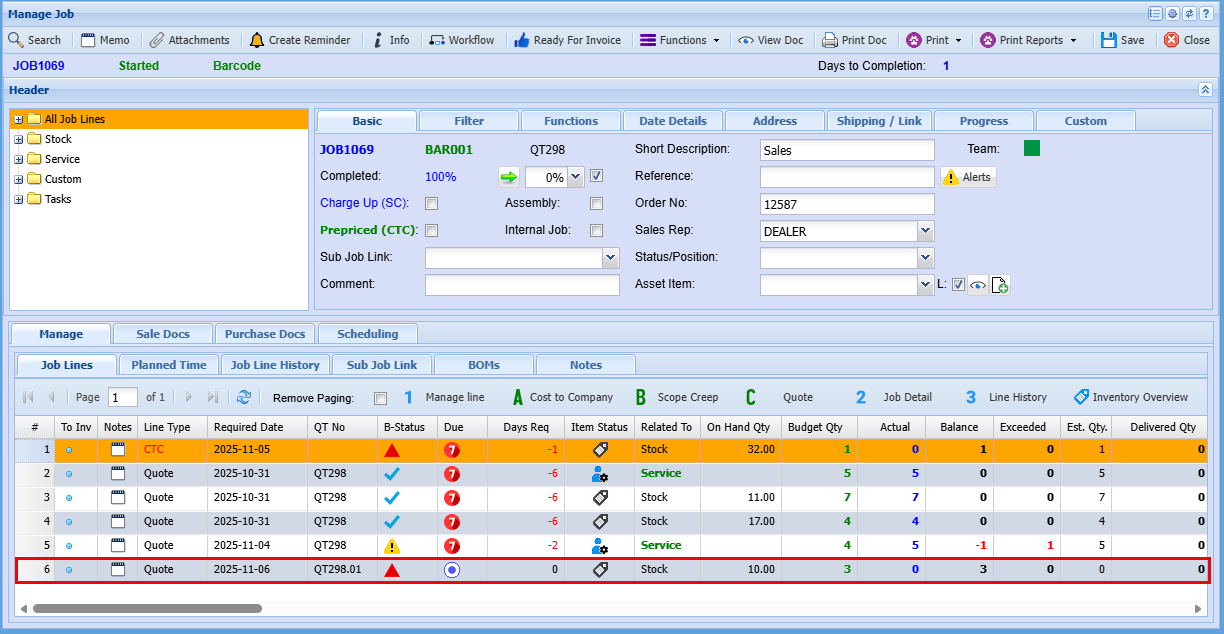
Once
customerUnmanageapproval is received and the quote is approved to the job, the corresponding line will be added to the job record. The quote number will appear with a “.1” suffix appended to the original quote number, this provides a quick visual cue that the item represents additional work beyond the original quote.
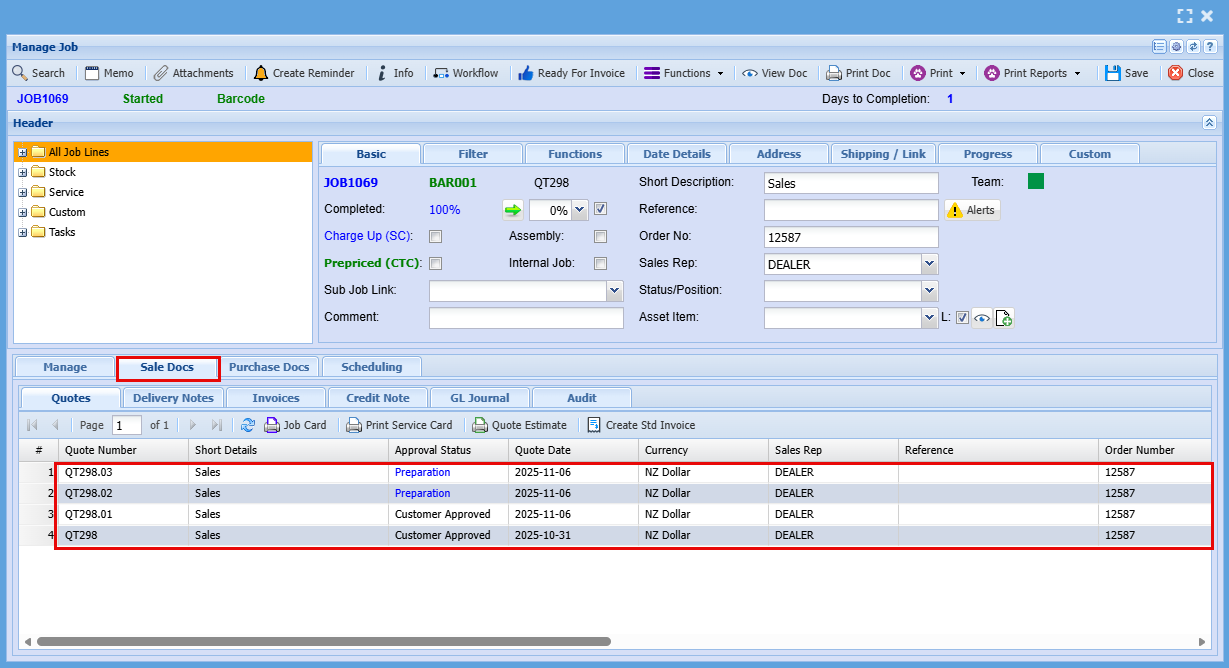
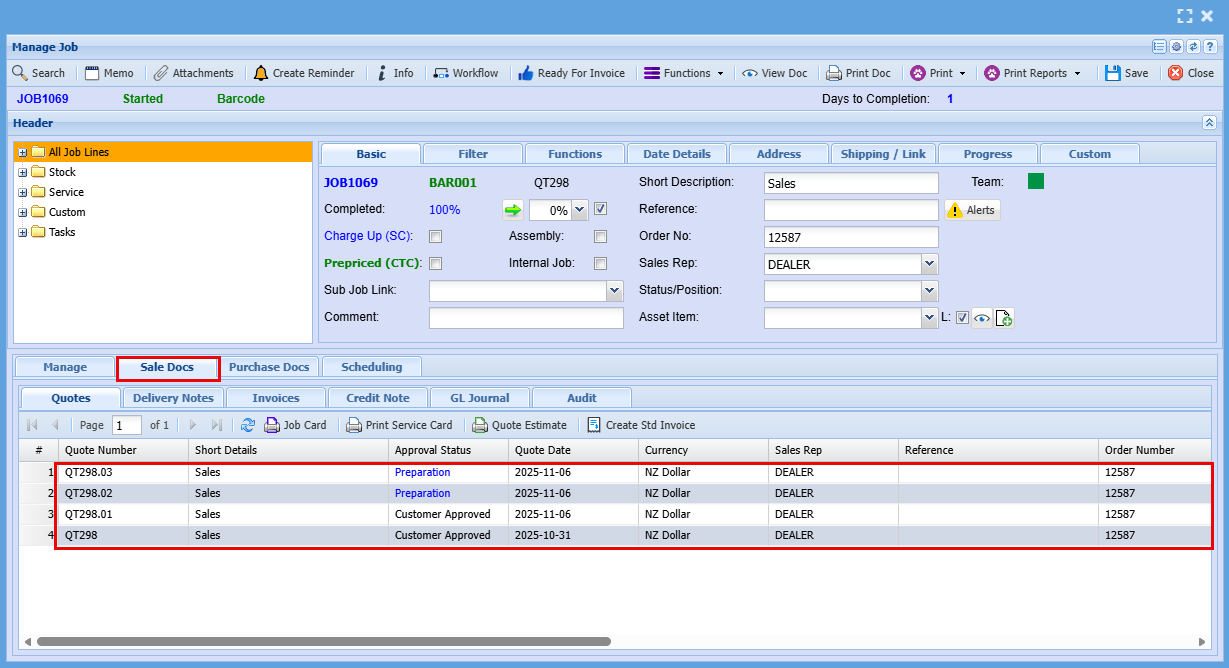
Viewing the Quotes on a Job
To view all quotes on a job clock on the "Sales Docs" tab. Here you will see any outstanding quote as well as quotes that have been approved.
Move Job to Invoice
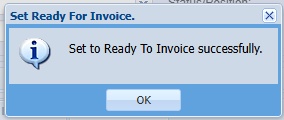
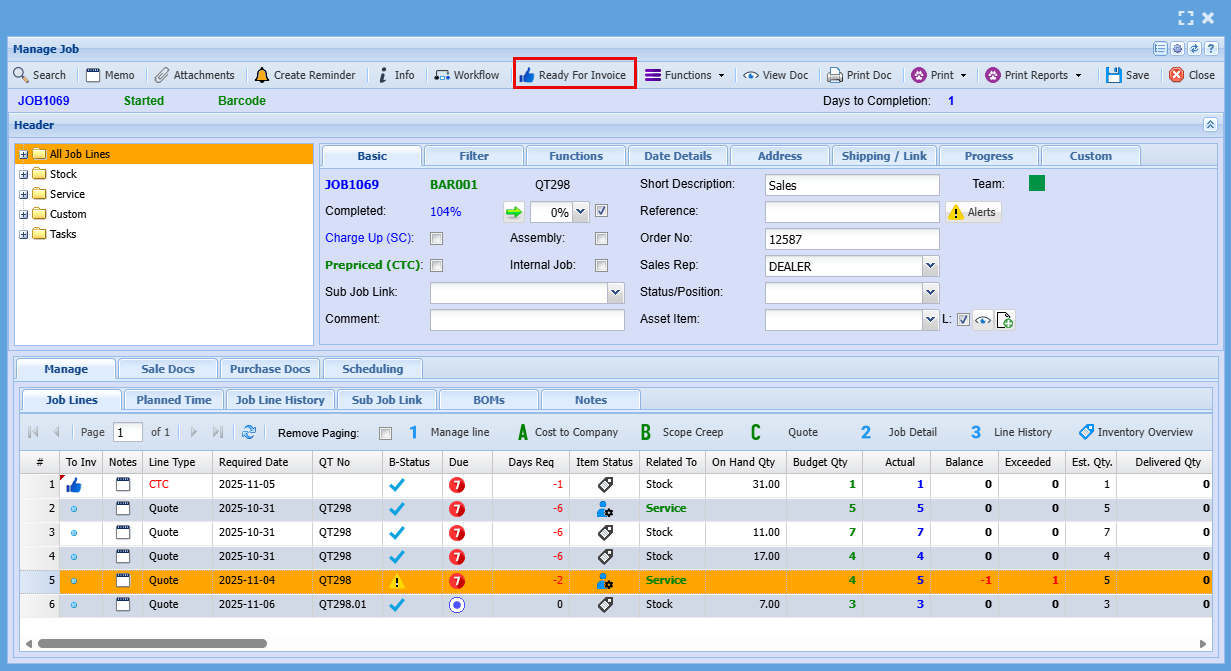
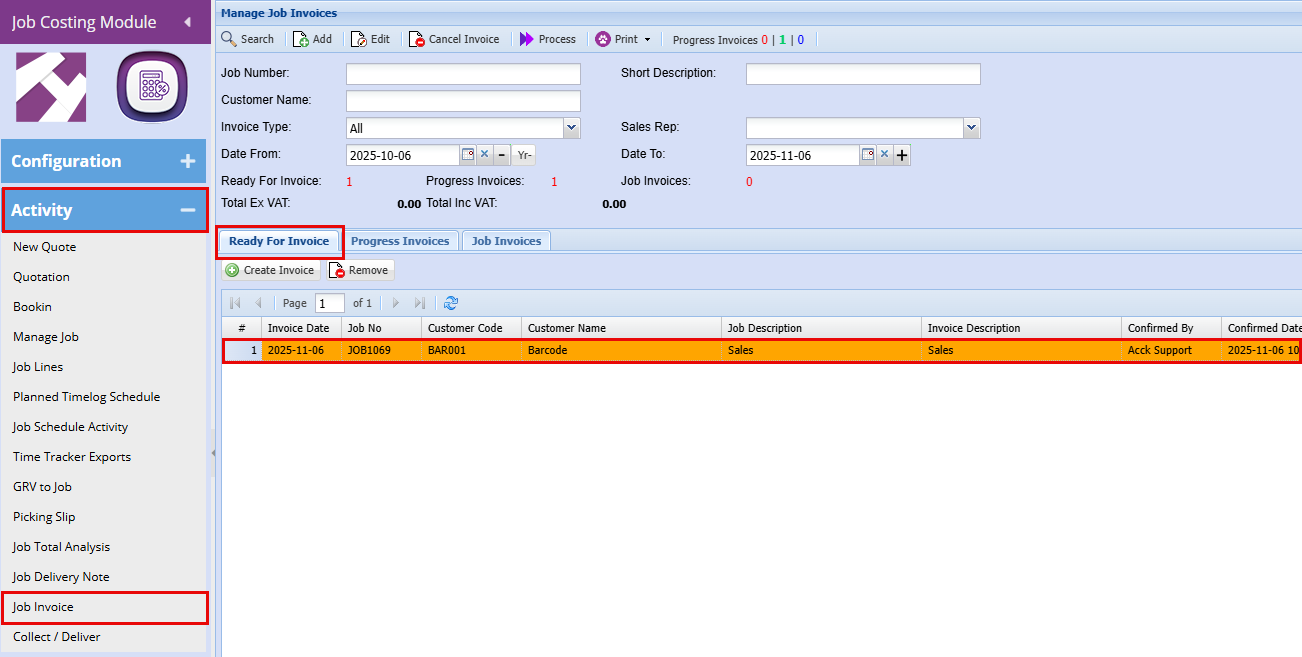
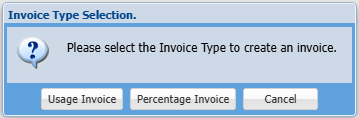
Once the job is fully completed and all line items have been managed, you can click the “Thumbs Up” icon at the top tabs, labeled “Ready to Invoice.”