Advanced Add Sales Order
Adding a new Sales order
.png)
Sales order window
.png)
Sales Order
Choose The Debtor by entering a customer Code
Detail Tab
.png)
| Short Details | Short Details Of the sales Order Item |
| Reference | Give it A Reference |
| Order Number | Enter an Order Number |
| Sales Rep | Select a Sales Rep |
Address Tab
.png)
.png)
| Details | Add Extra Details Regarding this Sales Order |
| TrackIt Item | Link a trackit item to this sales Order |
| Job Number | Add this sales Order to A job |
| Print Custom fields | Add a Tick If you want the Custom Field to reflect when printing The Sales Order |
Sales Order Lines
Details tab
.png)
Category select the category from the drop down arrow
Item Code to select an item code by hitting enter or using the”? “Long search button
| Item Description | comes up when the code is selected but can be edited |
| Order quantity | quantity of Items Needed |
Reserve Quantity this is the allocated quantity Company:
Selling Including Vat
If the Selling price including vat is not ticked
The Selling Including Vat will Be Greyed Out Company:
Authorise Sales Order
Changes The sales order Status to Authorized
.png)
Unauthorize Sales Order
.png)
Change Warehouse
The change warehouse allows the user to change the warehouse selected on the items lines to another warehouse that has the stock available.
.png)
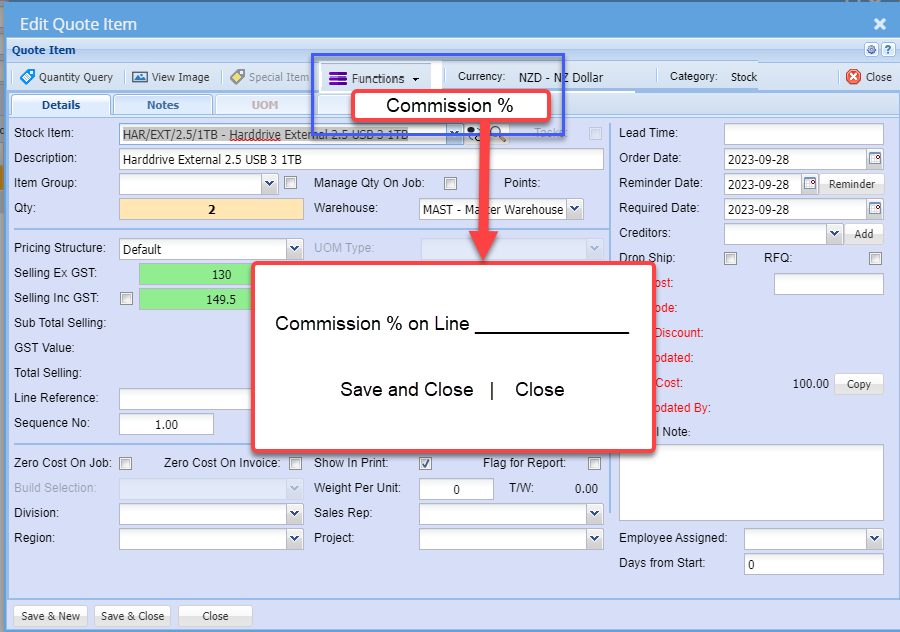
Commission line item percentage update
Commission line item percentage will be updated to documents at the time it adds the line.
There is a new field on each document line to handle the line percentage.
All documents to contain this line percentage
- Quote
- Sales Order
- Invoice
- Credit Note
When promoting the document, the original percentage will be copied between the documents.
When the Sales order is promoted from Sales order to commercial invoice, the percentage will be worked out on the percentage saved on the line.
If the commission line is blank, then the commission % will be gotten from the item line
Import sales order items
Debtors>Activity> Sales Order> Import Items
Importing items in the system is the quickest way to bring in large data at once and this can be done for a sales order items
- Click on Import items
- Select your file to upload
- Import
- and close.
.png)
The file to be imported must be in a CSV format.
Click on the Select Files… button to open the navigate window allowing the user to navigate to the file to be imported.
Once the desired file has been located either double click on the file or click the Open button.
Now click on the Upload button. If the upload was successful a window will appear confirming that the upload was successful. Click Ok.
An Import Report will open displaying any errors in the import or displaying the successful sales order items import.
Please Note: All successful records will be imported, and errors will be skipped. The column headings can be left in the import file providing that the heading is as per the sample below.
Confirmation Type
The 3 types to be used are:
| Confirmation |
| Invoice |
| Invoice & Process |
Import File Layout
|
No. |
Heading |
Value |
|
1 |
ItemCode |
PEN001 |
|
2 |
Description |
Red Pen |
|
3 |
OrderQTY |
2 |
|
4 |
ReserveQty |
0 |
|
5 |
ConfirmationType |
Confirmation |
|
6 |
SellingExVAT |
100 |
|
7 |
CostExVAT |
75 |
|
8 |
Warehouse |
Master |
|
9 |
LineDiscount |
|
|
10 |
LineRef |
|
|
11 |
Notes |
|
|
12 |
ItemGroup |
|
|
13 |
Points |
15 |
Buttons Defined
Create Stock Request
Debtors>Activity> Edit Sales Order
.png)
Storeman > Select your name from the Drop down List
Add date required by
And Click Continue
The three options in the dropdown,
Request for Purchase Order
Request for Quote
Request Create Job Picking Slip
are simply a suggestion from the Stock Request originator to the recipient of what action must be taken when processing the Stock Request.