Add Invoice
Video training manual 2016 - Click Here
Debtors Module> Activity>Invoice
Detail Tab
Click Add to capture a new Invoice

Select the customer you want to create the invoice to and enter invoice header details as shown in the table below this image.
Once complete click save so all the created out buttons can open
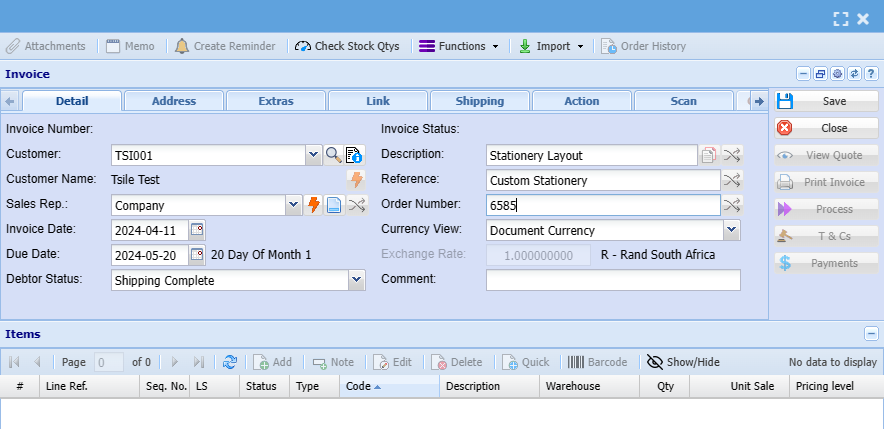
| Customer | Select the customer that has to be invoiced. |
| Customer Name | This field will automatically be filled in when the customer is selected. |
| Date | This is the invoice date which defaults on the current date. |
| Short Details | A short description of the items on the invoice. |
| Reference | Any reference for example the person you talked to. |
| Order No | The clients order number. |
| Sales Rep | If you have sales reps set up then you select the sales rep here. |
Address Tab
The information under the address tab will pull through from the debtor set up
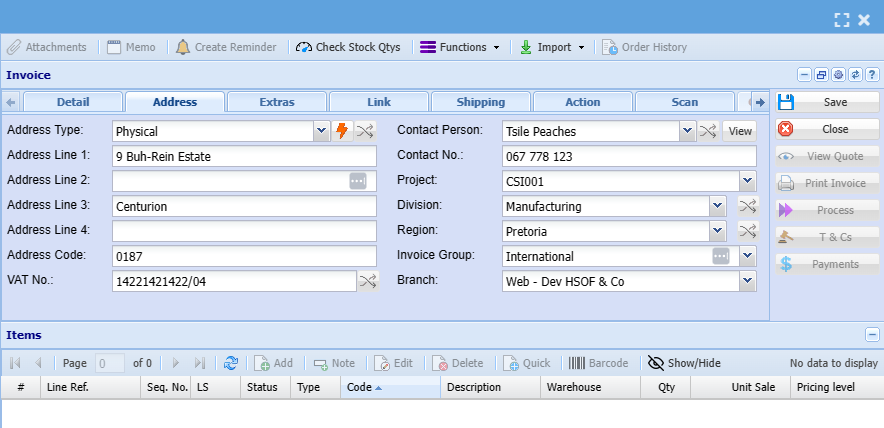
| Address Type |
Select the default address from the drop-down |
| Contact Person | Select the correct contact person from the drop down |
| Project | Link a project to the invoice if applicable |
| Division | Select the division from the drop down if required for reporting purposes |
| Region | Select the region from the drop down or this will populate from the debtor set up |
| Invoice Group | Select the invoice group from the drop down |
| Branch | Select branch from the drop down if applicable |
Extras Tab

| Job No | |
| Asset Item | |
| Attach Spec To Email | |
| Time Log Invoice | |
| Assembly | |
| Pre Invoice | |
| Print Custom Fields | |
| Time Log Budget | |
| Deposit Doc | |
| Retention | |
| Long Description | |
| Update Time Log No | |
| Invoice Total Invoice | |
| Invoice Estimate | |
| Job Link Estimate |
Link Tab
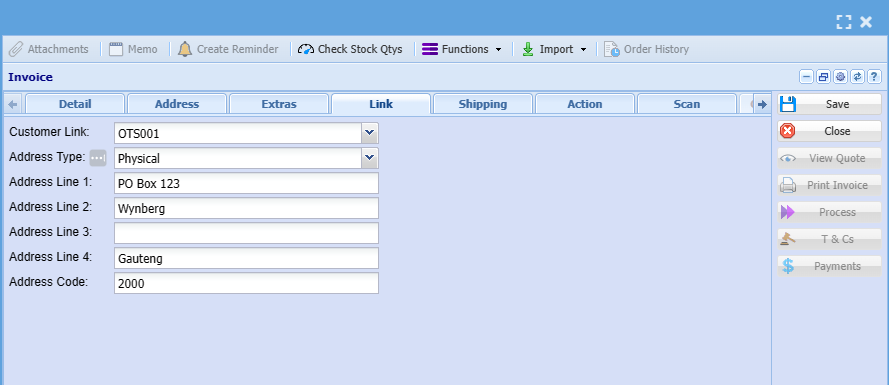
| Customer Link | |
| Address Type |
Shipping Tab
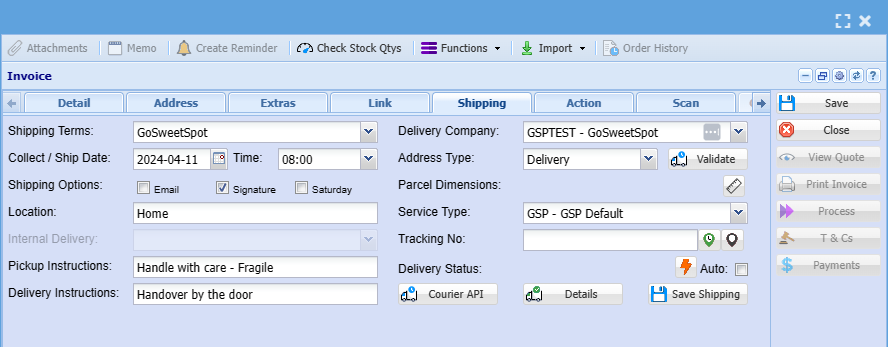
| Shipping Terms | |
| Collect/ Ship Date | |
| Shipping Options | |
| Location | |
| Internal Delivery | |
| Pickup Instructions | |
| Delivery Instructions | |
| Delivery Company | |
| Address Type | |
| Parcel Dimensions | |
| Service Type | |
| Tracking No | |
| Delivery Status |
Action Tab
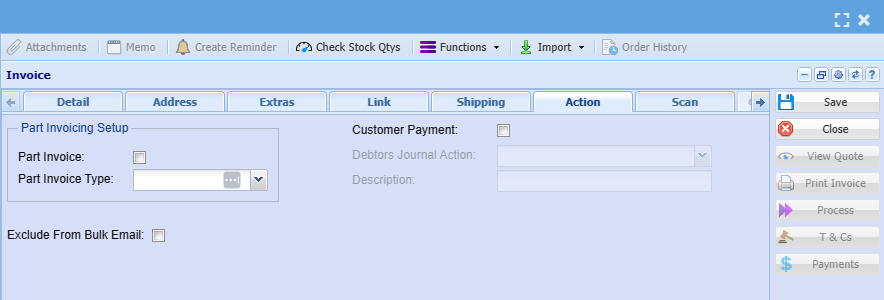
| Part Invoice | |
| Part Invoice Type | |
| Exclude From Bulk Email | |
| Customer Payment | |
| Debtors Journal Action | |
| Description |
Scan Tab
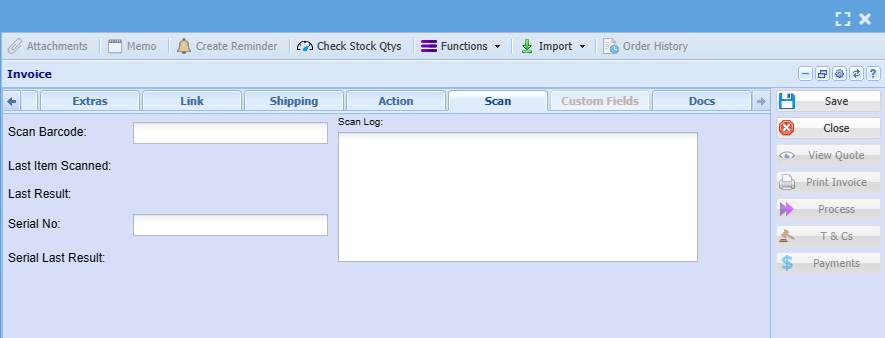
| Scan Barcode | |
| Serial No | |
| Scan Log |
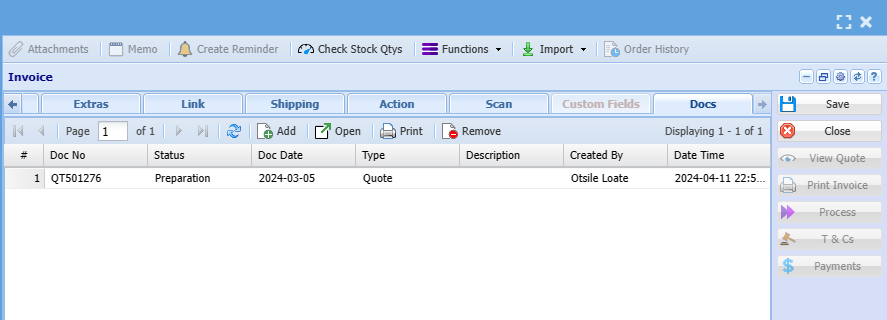
Docs Tab
After all the details have been entered click on Save
.png)
Invoice Lines
Click on Add to insert new inventory item
.png)
This screen is where the invoice line items are going to be selected and where the prices are entered.
| Category | From this drop down you select whether you want a Stock, Service or Custom item. |
| Item Code | Search for the item you want either by code or description. |
| Item Description | This will automatically be filled in once the item is selected. |
| Quantity | The quantity of the specified item you want on the invoice. |
| Warehouse | Select the warehouse you want the item to come out of from this drop down. |
| Selling Including Vat | If you want to enter the selling price including Vat then the block on top needs to be flagged and this will then open up the Selling Including Vat block. |
| Selling Excluding Vat | Enter the price excluding Vat here. If you entered the selling price including vat then this will be calculated automatically. Same goes for entering the selling price excluding vat. Then the selling price including vat will be calculated. |
| Line Discount | If you want to give discount on this specific item. |
| Vat | Select the type of Vat for this transaction. |
| Notes | If you want to add notes about this specific item. This will also appear on the printed invoice. |
After all details have been entered click on Save and Close.
This will take you back to the main invoice screen.
.png)
Invoice Payment
Invoice payment allows one to capture a payment at the point of creating the invoice.
It acts similar to a Point of Sale (POS) system.
There is a setup that is required in order for this to work correctly
See both videos on Payment options
Payment invoice intro - Invoice_Payment.mp4
Payment invoice setup requirements - Invoice_Payment_setups.mp4
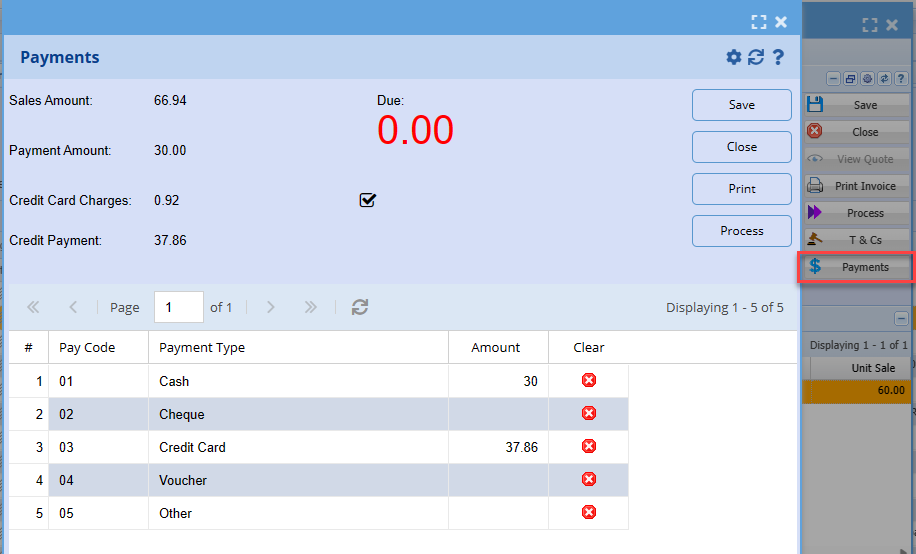
When all details have been inserted click Save
The next step is to generate an invoice number by processing this invoice and e-mail to the client.
Click on process invoice
.png)
.png)
When you click continue the Invoice will print to screen.
you can then email or print you invoice
Once you have clicked process invoice, this will complete the invoice and move it into Document History under Analysis. Remember that after this is done no changes can be made to the invoice and the only way to correct mistakes is by making an opposite entry into the system.