Add Debtors Cashbook
DebtorsAdding Cashbook Search New
Debtors Cashbook is where we capture Debtors payment entries in WebAccounting
Debtors Module> Activity> Debtorsa Cash Book
SearchTo New
create a cashbook you first need to capture details below regarding a cashbook
SearchCashbook Number |
SearchThis foris anthe alreadyNumber createdthat cashbookis Generated in the system when a Cashbook is saved. |
AddCash book Date |
AddThe aSystem newdefaults cashbookto today’s date the user can adjust the date of the cashbook. |
EditBank Accounts |
editThis existingis Linesa functionlist of company bank accounts for transactions. |
CanceCash Book Namel |
cancelThis awill cashbookbe the way the Cashbook is identified in the company books |
VerifyCashbook CashbookType |
verifyThis thewill cashbookbe lineseither beforeDaily postingCashbook or Weekly or Monthly. |
AuthorizeReference |
AuthorizeThis cashbookwill beforebe processingthe reference for this activates the process buttoncashbook. |
ProcessShort CashbookDescription |
postThe toGiven Short Description for the ledger accountCashbook. |
PostLong StatusDescription |
CheckThe Long Description for the posted statusCashbook. |
PIncrement Referencerint/Import |
printIt Increases the cashbooknumber gridby orone importexample dataif fromthe exceluser Reference is CB 1 and the tick is added on the ‘increment reference’, when you add a new line, it will add one to the number. |
| Copy Reference |
It Copies the reference. |
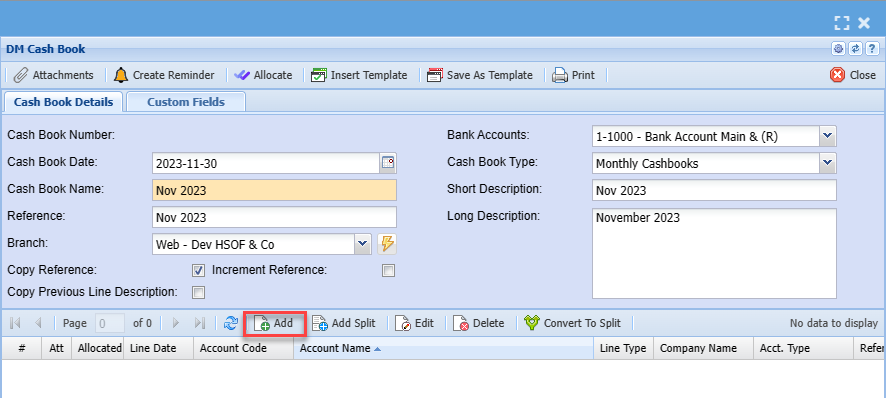
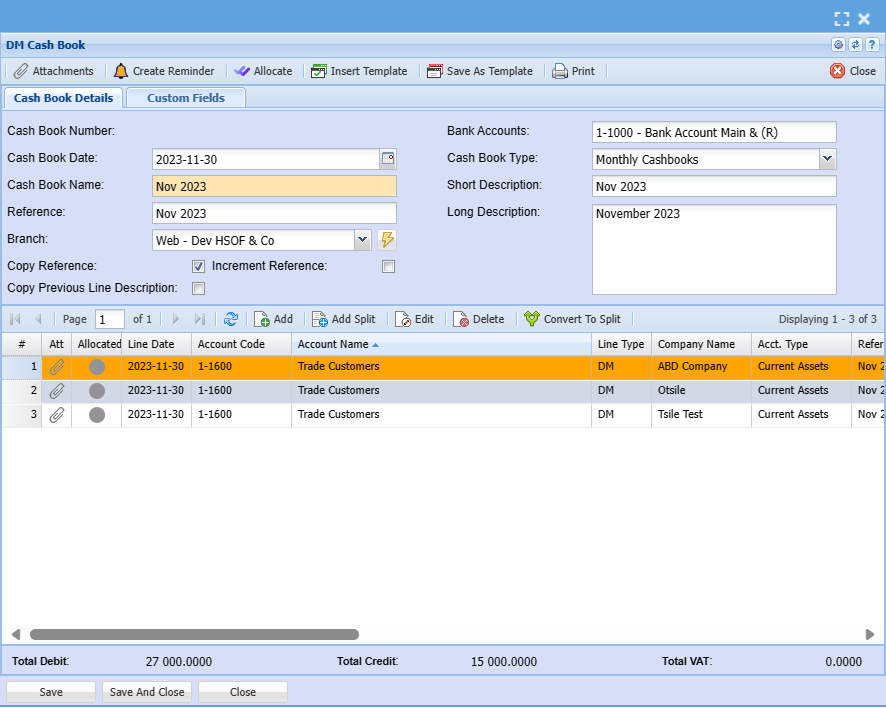
Add Cashbook Items
ClickTo add cash book items you need to click on the middle Add tobelow create
a
cashbookAfter fillclicking inon the cashbookmiddle detailsadd headeryou andwill Save.see the screen below:
.png)
Click Add to enter Cashbook Lines 2
.png)
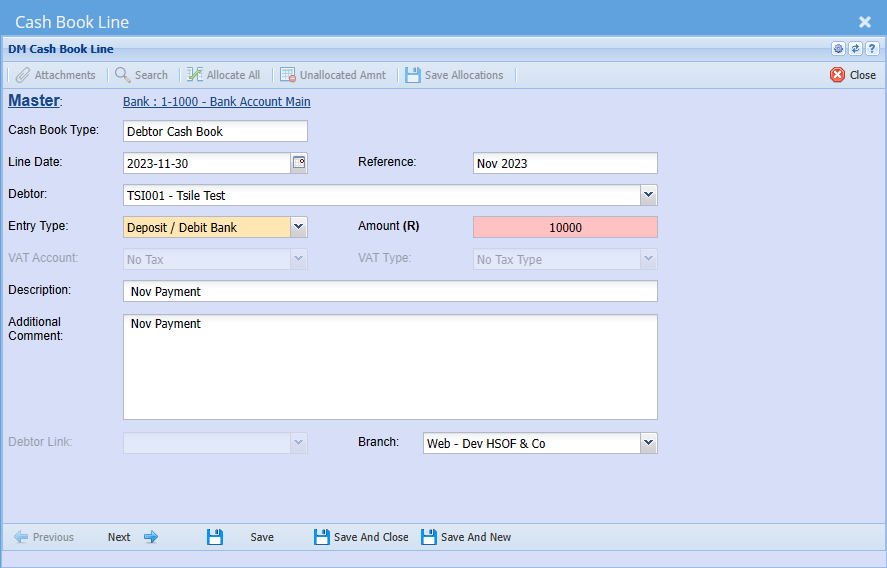
Enter cashbook line entries
1Cash Book Type |
EnterCash referencebook type should be debtor/ customer cash book |
2Line Date |
Add a date the payment was received |
| Reference |
Add appropriate reference |
| Debtor/ Customer |
Enter debtor name |
3Entry Type |
ChooseSelect Depositentry type on the entry typedropdown |
4Amount |
Enter Value (it will be in the currencyamount shownreflecting inon brackets)the payment |
5VAT/ GST Account |
EnterSelect DescriptionVAT/GST Account on the drop down |
6VAT/ GST Type |
EnterSelect VAT/GST type on the drop down selection |
| Description |
Add description for cash book |
Additional commentsComment |
Add additional comment if any |
| Debtor Link |
|
| Branch |
The default branch will show, they you want to change the branch then select the right on on the drop down selection |
Click
save and next 3
.png)
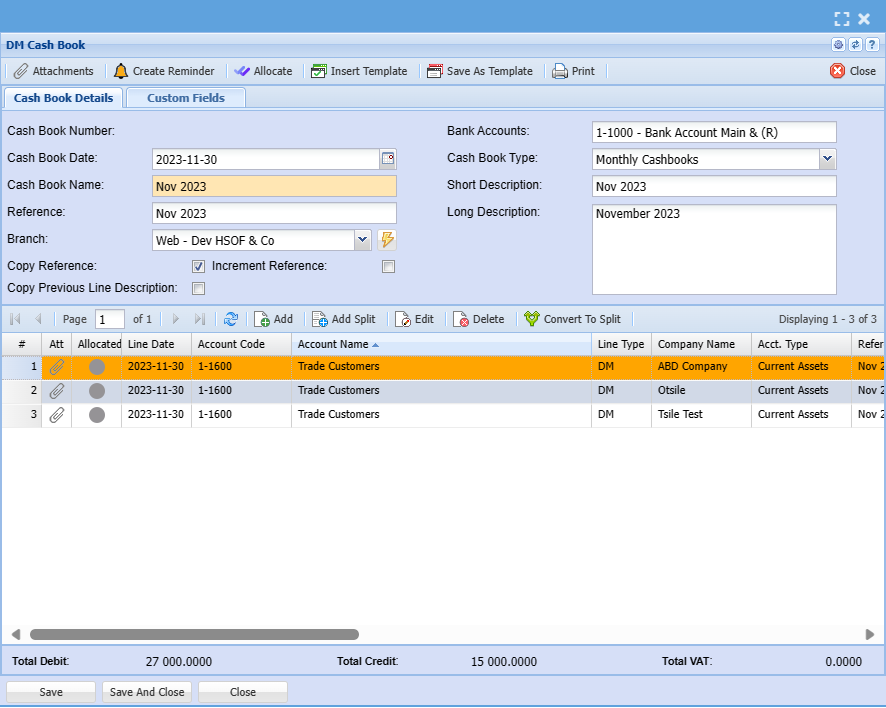
Enter relevant information for the Below screen and save and close
.png)
The Cashbook can then be authorized and processed
Click on Authorize button the message below will show click ok
.png)
Once Authorised the option to process cashbook will be available and you can click on the process button to process the Cashbook
Once processed you can find the document under Analysis menu 4
.png)