Fixed Asset Depreciation Setup
Depreciation Transactions
Depreciation transactions require the following setup:
| Financial Period | Block Period Fixed Asset |
| Schedule Setup | Activate Fixed Asset Depreciation Schedule |
Block Period Fixed Asset
System Configuration> Administration>Financial Periods Setup
Select the year then click on the periods tab to display all the Financial Periods that have been set up for the selected year
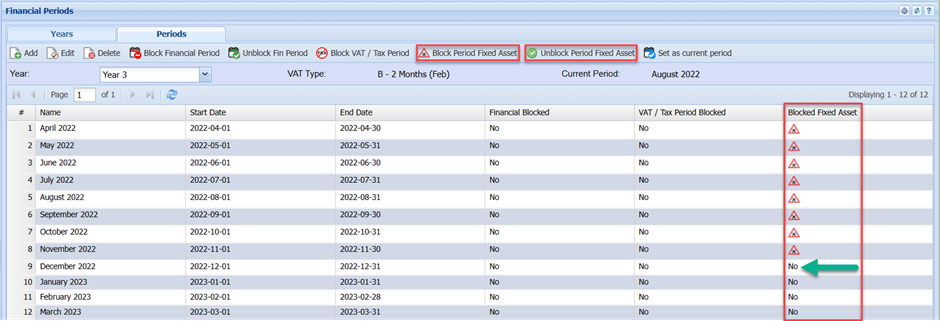
The Block Fixed Asset column : Select the period and then click the Block Period Fixed Asset. The system works as follows, when the Fixed Asset Depreciation Schedule runs the system will search for the first unblocked period it will then use the dates for this period e.g. 2022-12-01 to 2022-12-31 for the date range for calculating the depreciation amount for the Month/Year for each fixed asset selected in the process. In the case of the first depreciation transaction, the system will calculate the number of days from the Brought Into Use Date to the end of the Month/Year and calculate the depreciation accordingly. As soon as the system detects a different Blocked Fixed Asset period e.g. the next month the system will calculate depreciation for all the selected Fixed Assets for the next month.
In the event of bringing in a new asset with a back dated Brought Into Use Date it will be necessary to select the period corresponding to the date range of the period and then click the Unblock Period Fixed Asset. When the Fixed Asset Depreciation Schedule next runs the system will create the necessary depreciation transaction for the period for the Fixed Asset. It might be necessary torepeat this a number of times if the backdated Brought Into Use Date was a number of periods before the last blocked period.
NB : Remember to block all the periods again to get back to the original blocked fixed asset status in the Blocked Fixed Asset column.
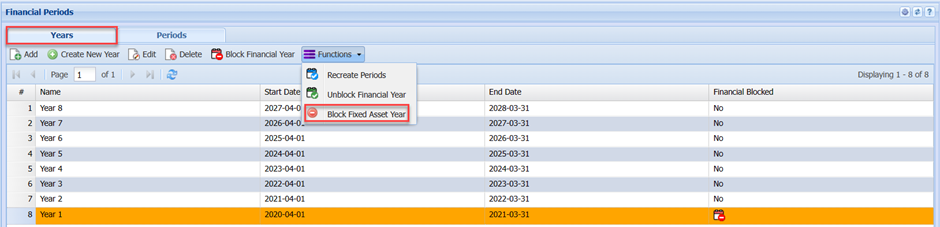
To aid in blocking previous year’s Fixed Asset Periods. Select the Year on the Year Tab then click on the Block Fixed Asset Year to block an entire year.
Activate Fixed Asset Depreciation Schedule
System Configuration -> Administration -> Company Profile
Select the company on the grid and click on the Edit button.
Click on the Advanced Settings and then on the Schedule Setup button.
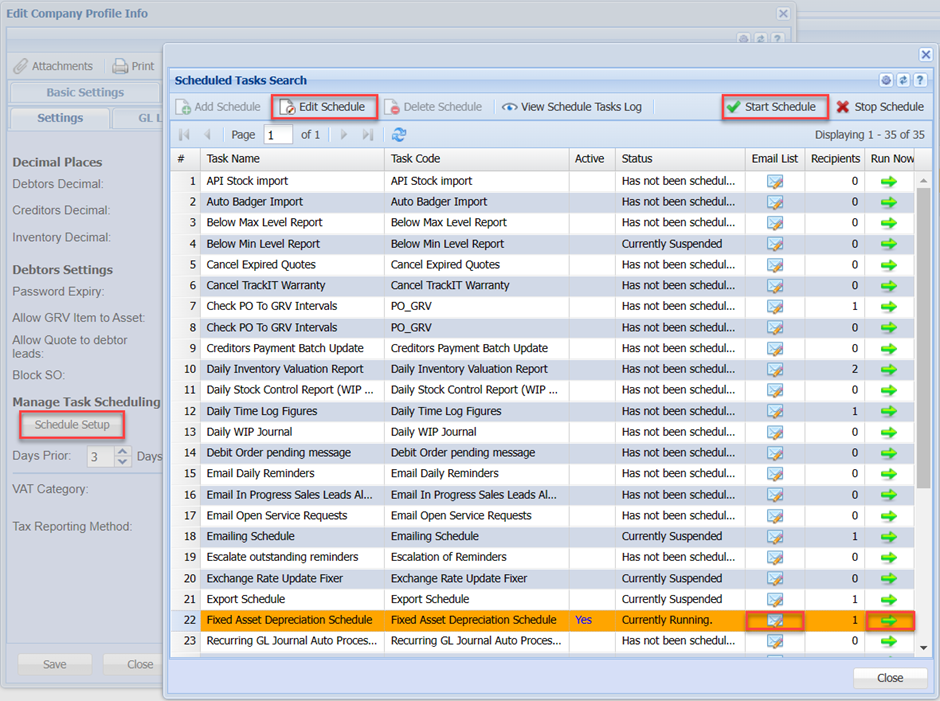
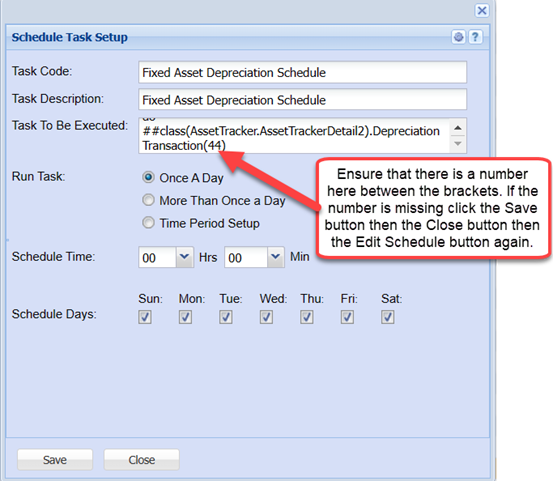
Select Fixed Asset Depreciation Schedule then click on the Edit Schedule button.
This is a typical Schedule Task Setup. Task will run Once a Day at Midnight every day of the week.
Status Column
Ensure on the selected scheduled task that the Status column is set to Currently Running. If the not click on the Start Schedule button. The status should now read Currently Running.
Recipients Column
This column indicated the number of users that have been selected to receive the generated email report when the schedule has been run.
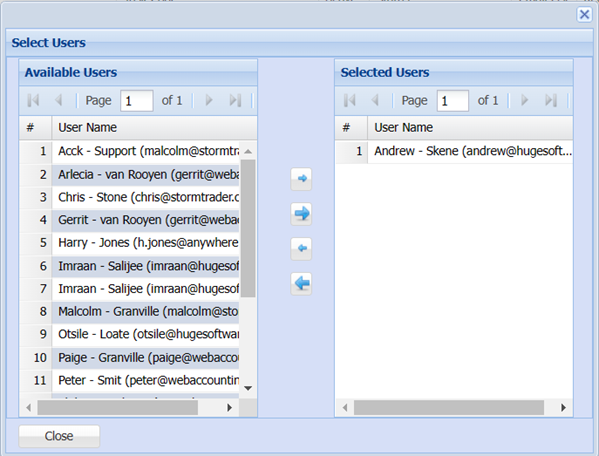
To add or remove Email recipients click on the Email icon in the Email List column.
Run Now Column
To run the Schedule manually select the Fixed Asset Depreciation Schedule entry and then click on the green arrow icon.
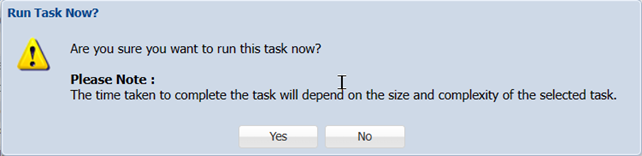
And respond accordingly.