Zebra ZD611R Setup Guide
Steps
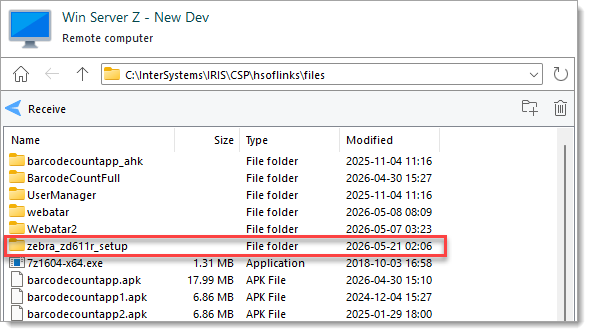
- Download the folder
zebra_zd611r_setupfromC:\InterSystems\IRIS\CSP\hsoflinks\fileson the dev server.
- Turn the printer on but do not yet connect it the computer.
- Install the printer driver.
- Unzip
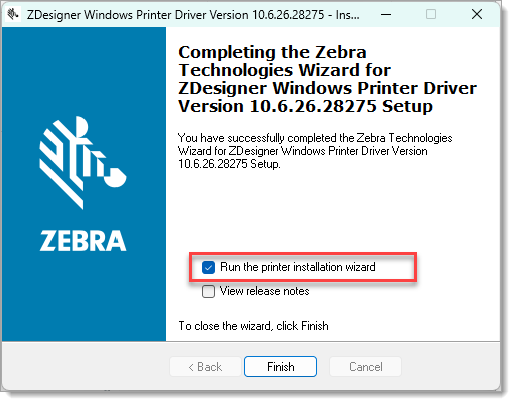
zddriver-v1062628275-certified.zipfromzebra_zd611r\installers\and run the exe. - Complete the first part of the installer wizard, then check the box for "Run the printer installation wizard", and then click the Finish button.
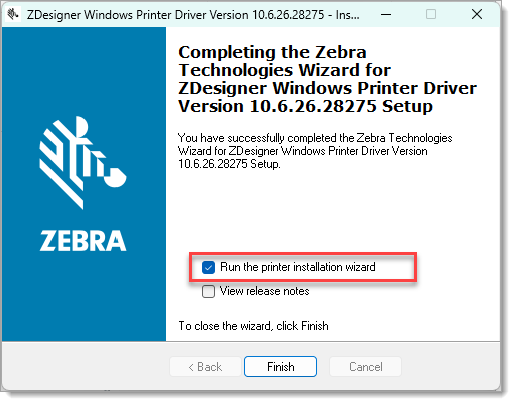
- In the Installation Options step, select Install Printer Driver.
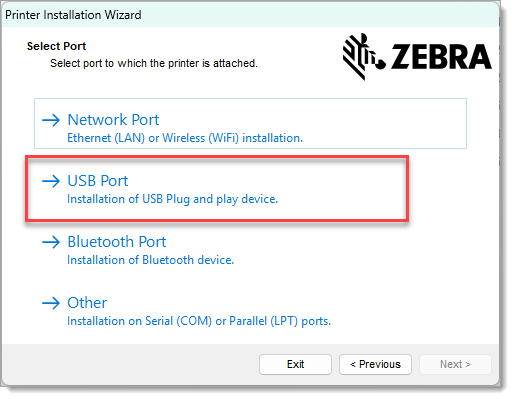
- In the Select Port step, select USB Port.
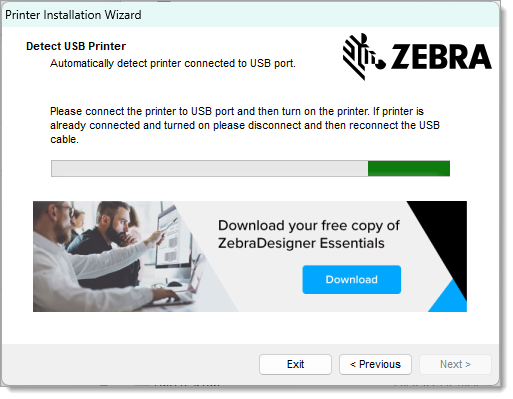
- Connect the printer by USB when requested.
- Complete the remainder of the wizard.
- Unzip
- Install Zebra Setup Utilities
- Unzip
zsu-1191327.zip. - Run the extracted exe and complete the installation wizard.
- Unzip
- Configure the printer with Zebra Setup Utilities
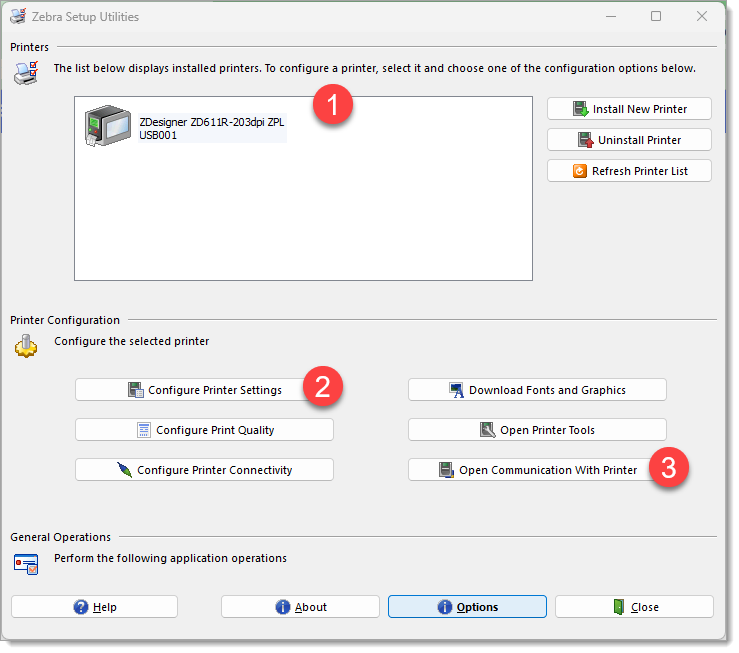
- Open Zebra Setup Utilities
- Select the printer from the list
- Start the "Printer Settings Wizard" by clicking the "Configure Printer Settings" buttons.
- Use these settings:
Step Setting Value Note Label Parameters Units mm Width 45 Height 18 Speed and Darkness Darkness 20 Optional Media No changes Advanced settings No changes Real Time Clock
- Install Zebra Browser Print
- Unzip
zebra-browser-print-windows-v132489.zipand run the exe. - Complete the installation wizard.
- Open Zebra Browser Print
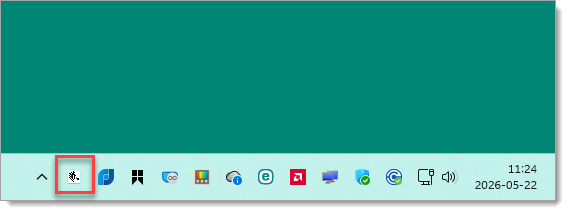
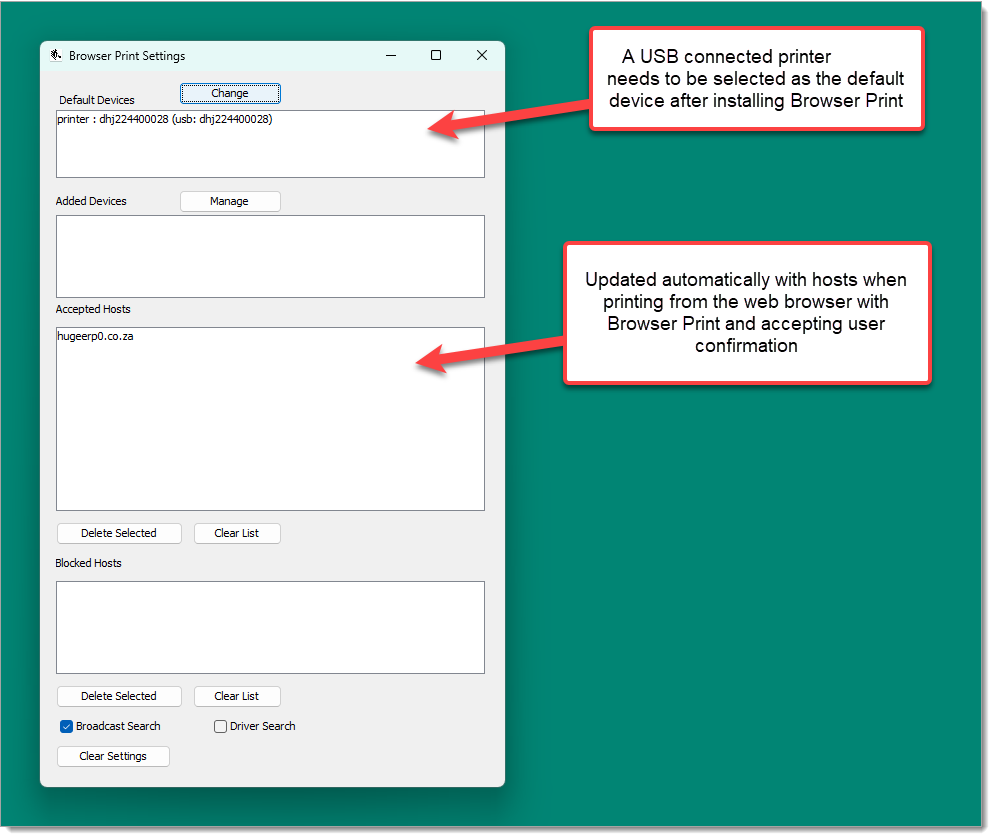
- Right-click the Zebra logo icon in the System Tray in the bottom right corner of the screen and select Settings from the context menu.
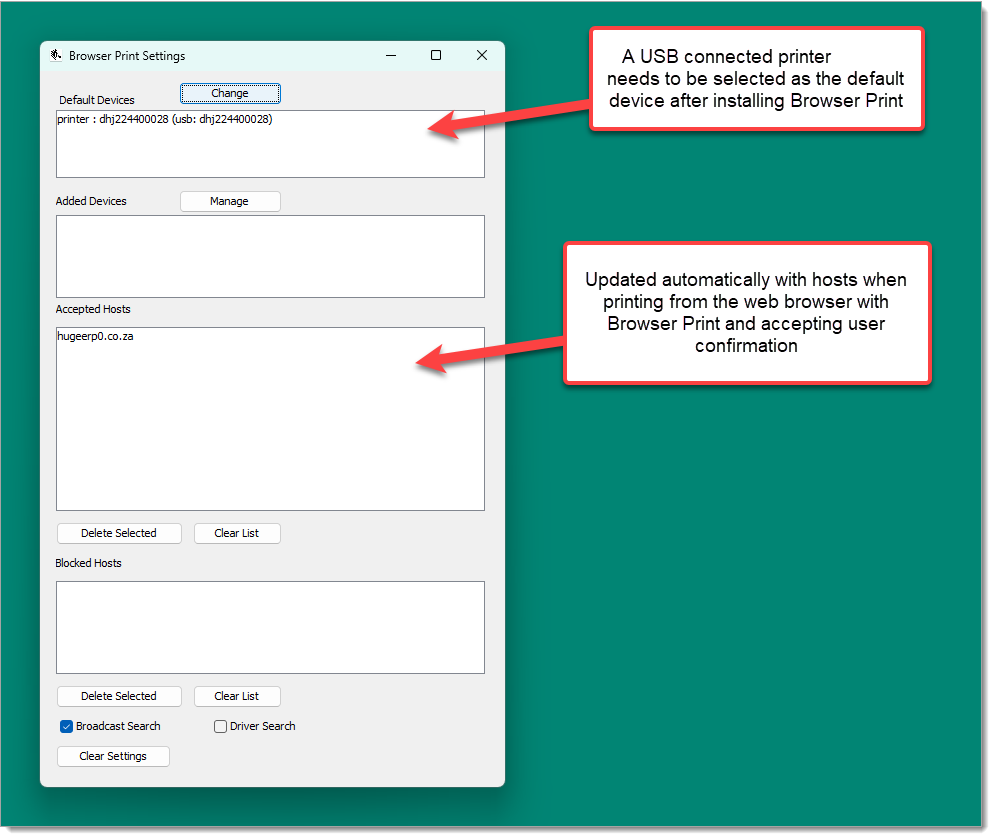
- Click the Change button next to "Default Devices" label at the top of the "Browser Print Settings" window that opens, and select the first available USB printer.
- Unzip
- Adding the printer to Huge ERP
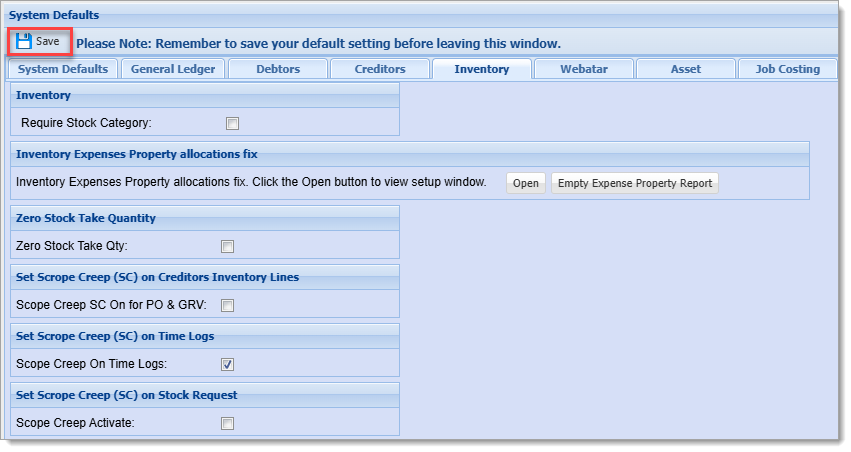
- Go to the System Configuration Module > Defaults (side menu) > Inventory (tab)
- In the Barcode Printing Style section under Commands, click the Printer Config button.
- In the window that opens click the the Add button in the toolbar.
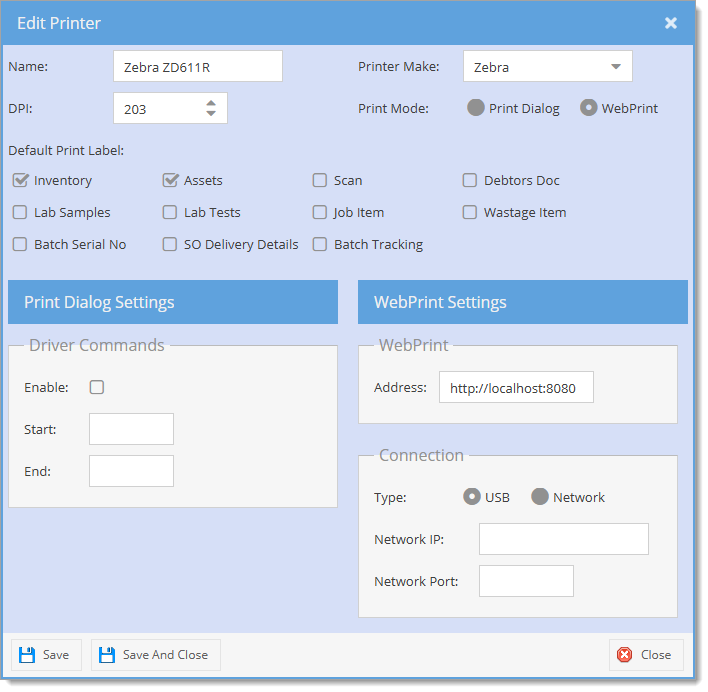
- In the Edit Printer window that opens complete the form:
Field Value Note Name Zebra ZD611R Example, should be distinct DPI 203 Printer Make Zebra Print Mode WebPrint Default Printer Inventory At least Inventory should be checked Address http://localhost:8008 Unused, but is still required to save the form - The form should look like this:
Click the "Save And Close" button.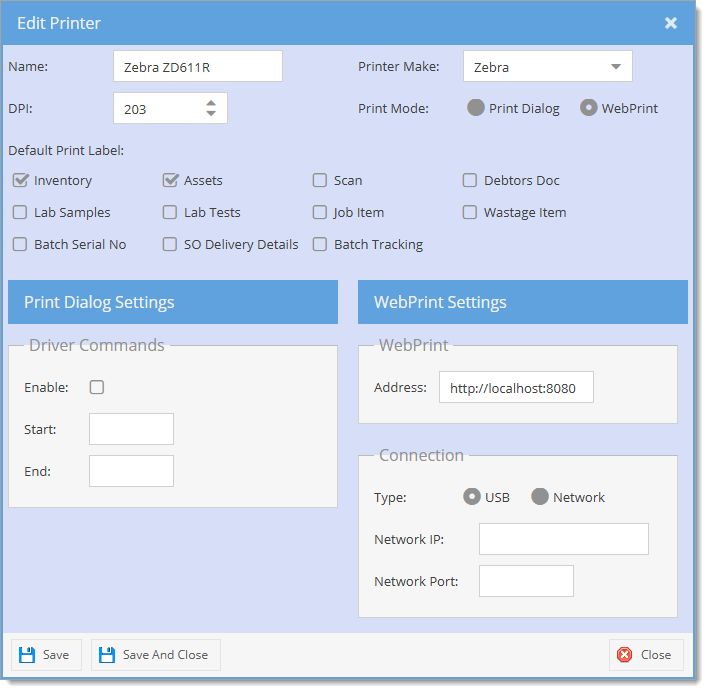
- Adding a label to Huge ERP
- Go to the System Configuration Module > Defaults (side menu) > Inventory (tab)
- In the Barcode Printing Style section under Commands, click the Templates button.
- In the Command Templates window that opens, click the Add button
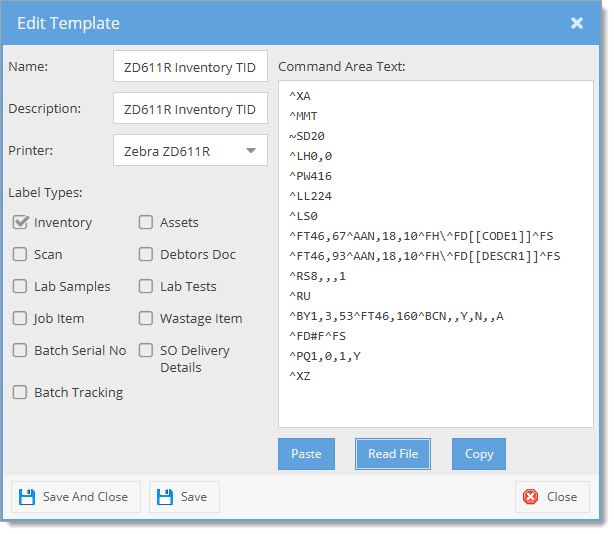
- In the New Templates window that opens complete the form:
Field Value Note Name ZD611R Inventory TID Example, should be distinct Description ZD611R Inventory TID Example, optional Printer Zebra ZD611R Name of Printer added before Label Types Inventory At least Inventory should be checked - Click the Save button.
- Click the Read File button under the Command Area Text field, then from the file picker select
zd611r_inventory_tid.txt. - The form should look like this:
Click the "Save And Close" button.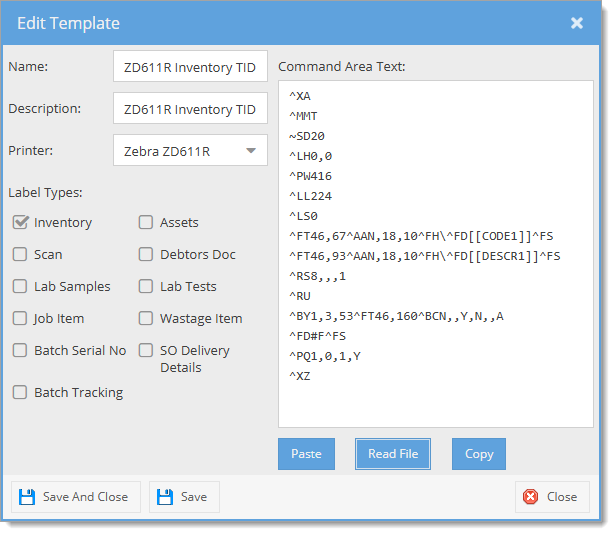
- To check the printer and template are correct, reopen the Command Templates window by clicking the Templates button and view the grid. If added correctly, the template should be included in the grid and "ZPL" should be in the language column (hidden by default).
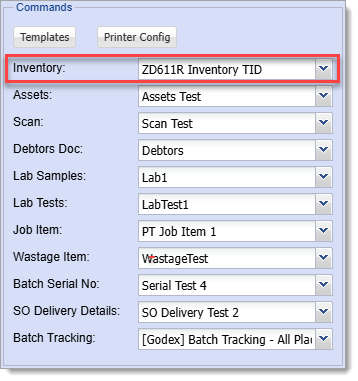
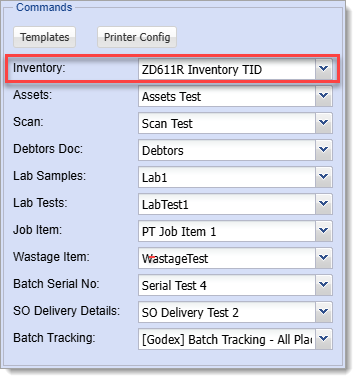
- In the Inventory tab of the Defaults page, in the Barcode Printing Style section under Commands, select the name of the new template in the Inventory dropdown field.
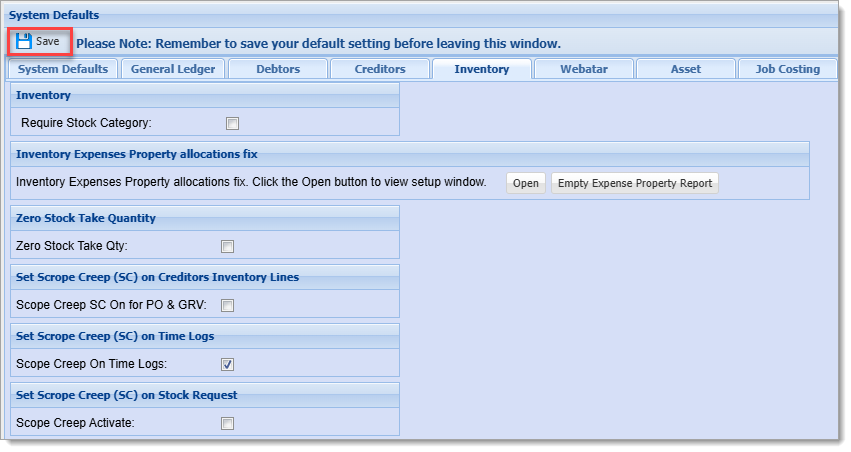
- Click the Save button at the top of the page on the left to save the Defaults.
WIP Images