Branch More Details
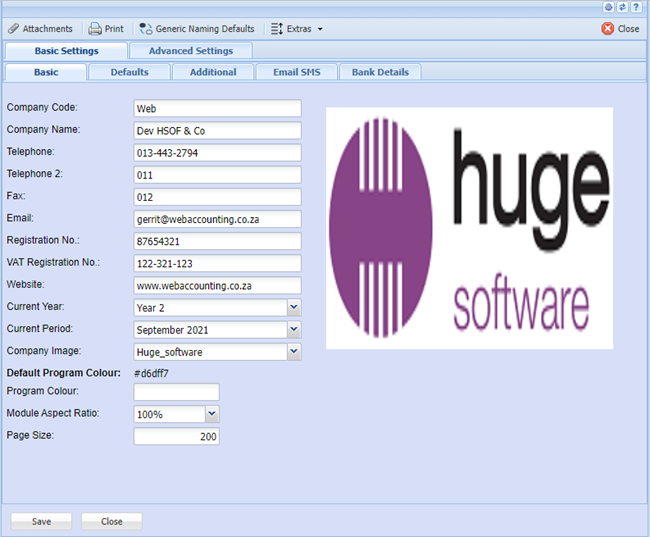
COMPANY DETAILS
In the company profiles you will find the basic information required to input your company information. This is also the section where the logo appears on the company details will be printed in your documents like invoice.
System Configuration>Administration>Company Profiles
Branch Details Tab
In this tab of company details, fill in all your information on your company. You will notice that there is no logo present and when you click on the Company Image drop down arrow it is blank. This will show when you go to the attachments tab to upload a logo.
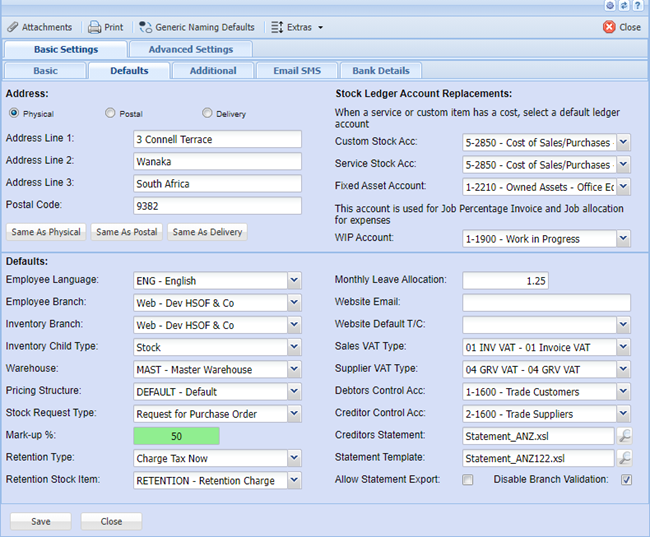
Addresses Tab
Under the Addresses tab you should fill in all your address information of your company.
Buttons
As Physical - Will copy the details of information under the Physical
As Postal - Will copy the details of information under the Postal
As Delivery - Will copy the details of information under the Delivery

Bank Details Tab
Under the Bank Details tab please fill in your company Bank Details.
Note: This will appear on your documents, for example invoice.
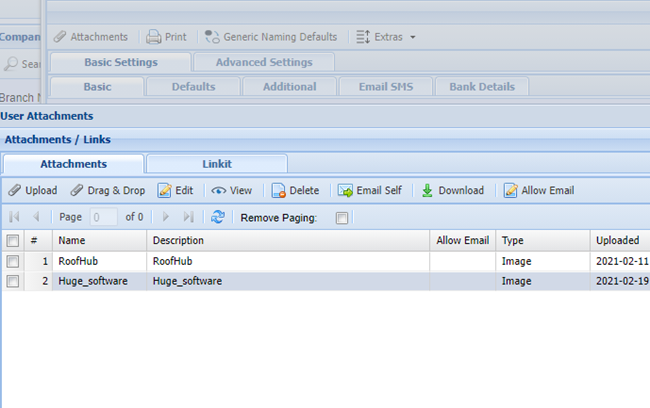
To view the attachment, you highlight the file you wish to view and click on View Attachments button.
This will download and open the file up in your browser and specific program it was saved in.
To remove attachments from the list, highlight the file in the list and click on the Remove Attachments button.
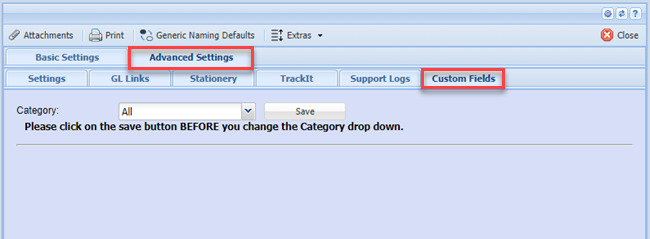
Custom Fields Tab
Under the Custom Fields tab, this is where you can insert predefined user fields. Add as many custom fields as you require for additional information.
Defaults Tab
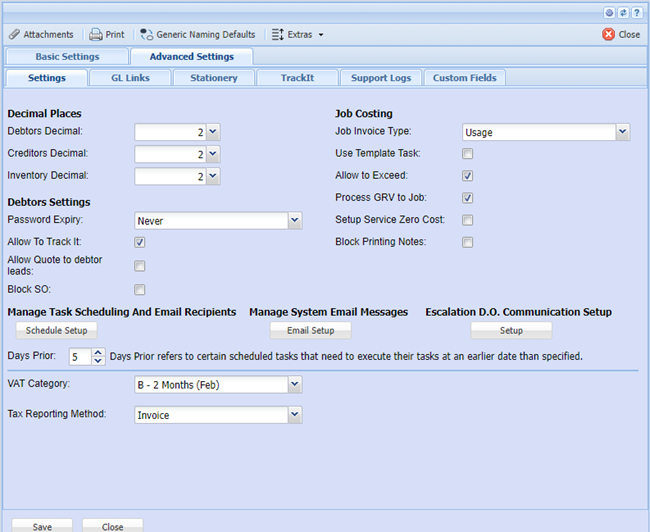
Under the Default Values tab, these are very important values to take note of:
Inventory Branch - If the User is part of the branch selected, this will mean that when new inventory items are created the default branch will be the one selected. This enables the system to sort inventory by branch and only allow users to see those inventory codes linked to the branch selected.
Employee Branch - If the User is part of the branch selected, this will mean that when this employee creates a new employee the default branch will be the one selected.
Tax Type - The tax type selected here for the branch will mean that when new inventory items are created the default tax type will be the one selected.
System Currency - Once you have set your default System Currency all conversions will be based off this Currency. When setting up Multi-currency rates your System Currency should have a rate of 1 (one). The system currency is setup when you first install the accounting package. It cannot be changed afterwards.
Markup % - The mark up percentage selected here for the branch will mean that when new inventory items are created the default mark up for inventory will be the percentage number entered.
Employee Language - If the User is part of the branch selected, this will mean that when this employee creates a new employee the default Language will be the one selected.
Pricing Structure - The pricing structure selected here for the branch will mean that when new inventory items are created the default pricing structure will be the one selected.
Inventory Child Type - The inventory child type assists the user entering line inventory items to default to this inventory category. Example – If your business is mostly stock – select stock category, If your business is mostly in the service industry and your inventory setup is mostly service – select service category.
Current Year - Select the year to which reports will default to, normally current. It is suggested to change this on an annual basis so your report defaults will read current.
Current Period - Select the period to which reports will default to, normally current. It is suggested to change this on a monthly basis so your report defaults will read current.
Default Warehouse - This is the default warehouse that the system will use when entering documents example invoice stock lines. We assume it to be master warehouse where all stock is received.
Note: If you do not have multi-warehouse module all stock will come in and out of Master warehouse.
Auto Resize Picture - Should your picture in Company Details be too big for the size of the block. You can tick this option to force a resize according to our specified width and height.
Custom Stock Acc - Select a ledger account here. This is where your custom type inventory has a cost attached to it. The ledger account updated cannot be stock control ledger account as this is not a stock item. Only stock items should update the stock control account. The account select here will replace the stock control ledger account and assign the costs to that account. This default account will automatically be inserted when you created a custom inventory item. You can however override the account at the inventory setup level.
Service Stock Acc - Select a ledger account here. This is where your Service type inventory has a cost attached to it. The ledger account updated cannot be stock control ledger account as this is not a stock item. Only stock items should update the stock control account. The account select here will replace the stock control ledger account and assign the costs to that account. This default account will automatically be inserted when you created a service inventory item. You can however override the account at the inventory setup level.
DM Terms & Cond - Stands for Debtors Module Terms and Conditions – The item selected here means that when creating a quote, sales order, invoice or credit note it will insert your standard terms and conditions. You can however override the account at the creation of the document level.
CM Terms & Cond - Stands for Creditors Module Terms and Conditions – The item selected here means that when creating a Purchase Order, Goods Received notes or Goods Returned notes it will insert your standard terms and conditions. You can however override the account at the creation of the document level.
Help Name Space - There is a separate installation of a full online help file which contains movie files of the manual. Enter the namespace that the installation was created in. You only need to install one help file and setup all new companies to point to the 1 help install.
Job Invoice Type - When using job costing module and you are creating an invoice for the job you can automatically setup the default invoice type. This can be percentage or usage, set the default that your business mostly uses. You can however override the invoice type at the creation of the job invoice.
Use Template Task -When using job costing module and you are authorizing a quote to job status. This setting will automatically be set for you. You can however override the choice at the authorization process.
Allow to Exceed - When using job costing module and you are authorizing a quote to job status. This setting will automatically be set for you. You can however override the choice at the authorization process.
Details 2 Tab
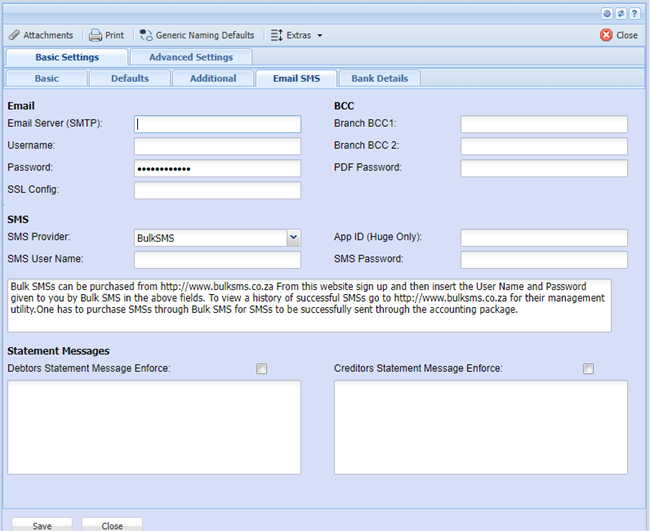
Under the Details 2 tab, this is where you can setup you outgoing pop3 mail box settings.
Note: This only works if you are on a network with a mail box setup, does not work if you are a dial up client with mail. You will have to insert your service providers pop3 setting and your user name and password
Enter all the information relevant, we also accommodate 2 blind copies of all email sent from accounting package with in the company to a specific person who would want access to this. Normally the Managing Director and or Financial Director.
Debtor Statement Msg - Stands for Debtor Statement Message, if the tick box is ticked and a message inserted it will mean that a message will be added to all Debtors statements going out
Note: An Individual message for a specific debtor can be setup at the debtor level. If this is done and you also have selected a global message, that debtor will have both messages on it.
Creditor Statement Msg - Stands for Creditor Statement Message, if the tick box is ticked and a message inserted it will mean that a message will be added to all Creditors statements going out.
Note: An Individual message for a specific Creditor can be setup at the Creditor level. If this is done and you also have selected a global message, that Creditor will have both messages on it.
Decimals Tab
Decimal Places - You can set your decimal places to read up to 9 digits long.
Note: When you Process anything into your books the system will retain the original decimal places you specified.
Decimal Places – affects General Ledger, Debtors and Job costing Modules
CM Decimal Places - Affects the Creditors Module only
IM Decimal Places - Affects the Inventory Module only

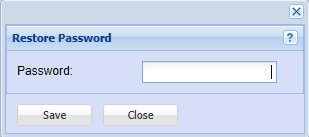
Type in your password and click on Save and then on close