Standard Drop Down
Standard Drop Down
Debtors Module> Configuration> Debtors Setup >Edit Debtor> Standard
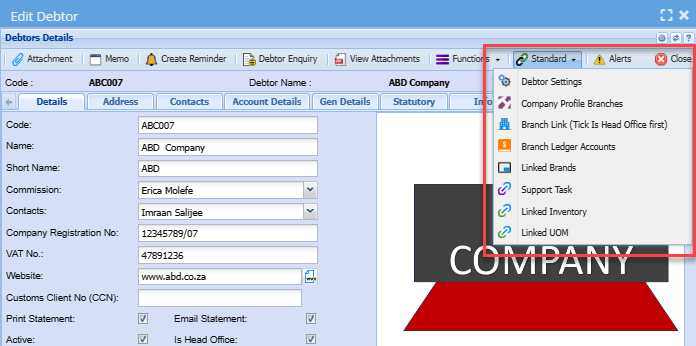
| Debtor Settings | Allows a user to tick a tick to suppress the autoload of allocations line on GL cash book |
| Company Profile Branches | Allows you to select branches to be attached to the debtor/ customer |
| Branch Link (Tick Is Head Office First) | Allows you to group debtors/ customers under their head office company |
| Branch Ledger Accounts | Allows you to manage branch setup |
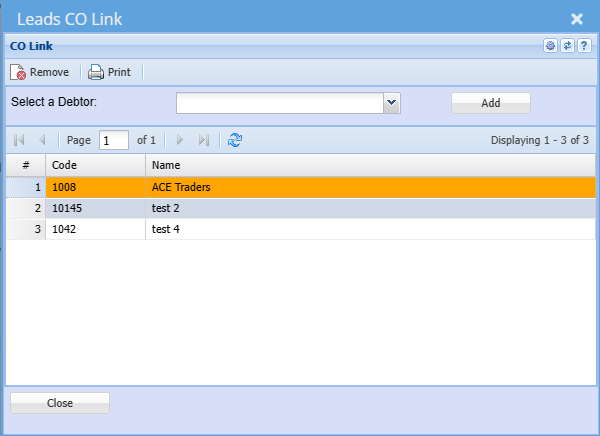
| Linked Brands | Allows you to link brands to a debtor/ customer |
| Support Task | Allows you to link support tasks to a debtor/ customer |
| Linked Inventory | Allows you to link inventory items to a debtor/ customer |
| Linked UOM | Allows you to link unit of measure to a debtor/ customer |
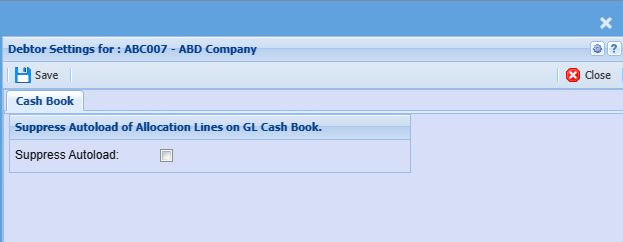
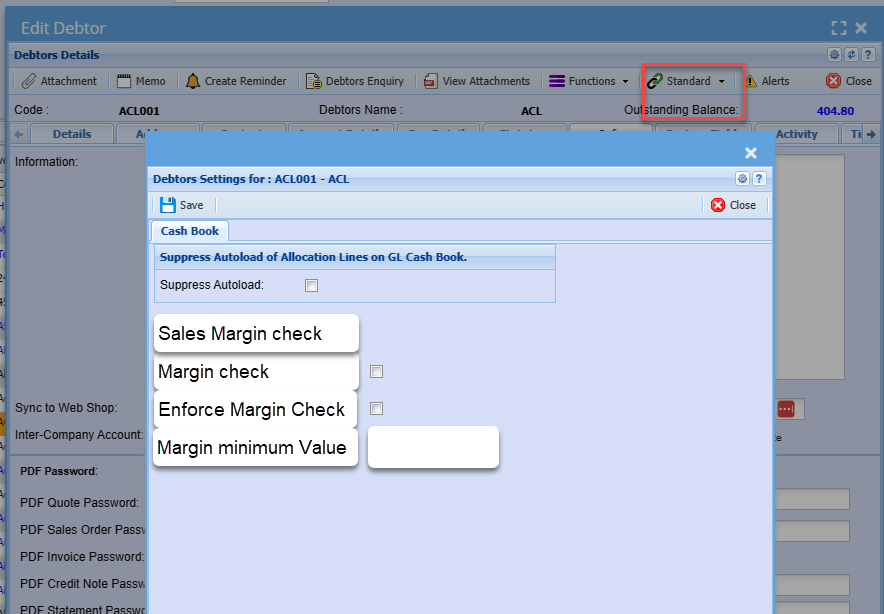
Debtor Settings
Suppress Autoload of Allocation Lines on GL Cashbook
Put a tick to suppress autoload of allocation lines on the general ledger cash book
Leave a tick off if you do not wish to suppress autoload of allocation lines on the general ledger cash book
Margin check and enforce
Margin check and enforce checks sales documents for minimum margin on overall sales document
- Invoice
- Quote
- Sales Order
- Job Usage invoice
- Job Percentage invoice
Margin check
Margin check is per debtor, but set at the system configuration
Margin check, is on Save and process with warning message
| Save | brings up a warning message to say that this document is trading under margin |
| Process | brings up a warning message to say that this document is trading under margin but with a Continue or Cancel |
Enforce Margin
Authorised Sales Margin users are setup at the user setup
| Process | brings up a warning message to say that this document is trading under margin, but with a continue or cancel |
| Continue |
requires that an additional supervisor must authorises the invoice |
Company Profile Branches
This part shows debtors branches.
On the left you will see a list of available Braches and to be able to select a branch you need to move it to the right.
To move branch to the right you need to highlight it and click on add branch or double click on it
Buttons
| Add Branch |
First, highlight the branch you want to move to the right or want to activate then click add branch If you don't want to click add branch you can double-click the branch you want to select or move across |
| Delete Branch |
Removes branch from the right column to the left column or double click on the selected branch to deactivate it |
Branch Link (Tick Is Head Office First)
Tick on denotes - Head office
Links Branches to the head office
| Add Button |
To add debtors/customers associated with the branch you need to click on the select a debtor/ customer drop down Click on the debtor/ customer that you want to add then click add |
| Grid | A list of branches associated with the head office will appear on the grid |
Branch Ledger Accounts
It’s where debtor’s internal branches are setup for movement of transactions.
.png)
| Branch | Select a branch |
| Is a Branch | If it’s a branch the box will be ticked |
| Sales Account | Sales account should be selected for the movement of transactions between the branches |
| Cost of Sales Account | Cost of Sales account should be selected for the movement of transactions between the branches |
Support Task

| Small Arrow Pointing Right | Highlight a support task you want to move across and click the small arrow to do so |
| Big Arrow Pointing Right | Move all support tasks from available to the selected side |
| Small Arrow Pointing Left | Deactivate one support task by highlighting it and moving it across to the available side |
| Big Arrow Pointing Left | Deactivate all support tasks by moving them across to the available side |
Linked Inventory
Click on the dropdown to select the inventory items you want to link to a debtor/ customer
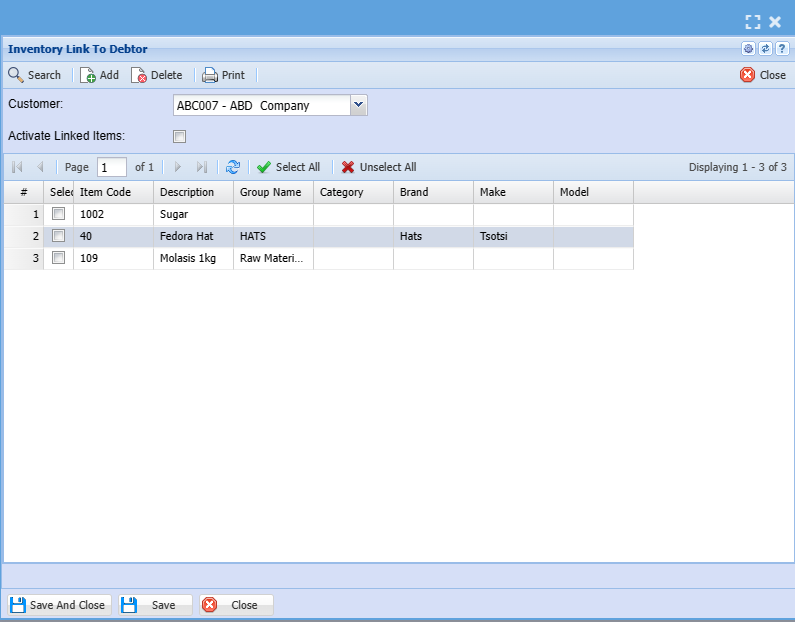
| Add | Select the inventory items you want to link to a debtor/ customer then click add |
| Delete | To delete a inventory item linked to a debtor/ customer, select a debtor/ customer then click delete button |
Linked UOM
This is where you link a unit of measure associated with a client

| Small Arrow Pointing Right | Highlight unit of measure you want to move across and click the small arrow to do so |
| Big Arrow Pointing Right | Move all unit of measures from available to the selected side |
| Small Arrow Pointing Left | Deactivate one unit of measure by highlighting it and moving it across to the available side |
| Big Arrow Pointing Left | Deactivate all unit of measures by moving them across to the available side |