Debtor Setup
The Debtors or Customer setup is essential and serves as a centralised repository for all relevant debtor or customer data.
Debtors module> Configuration> Debtors Setup
Details Tab.
Debtors/ Customer details contain information about the debtor.
The user has to enter all essential information of a debtor or customer on this tab
After adding all information about a debtor or customer always remember to click save.
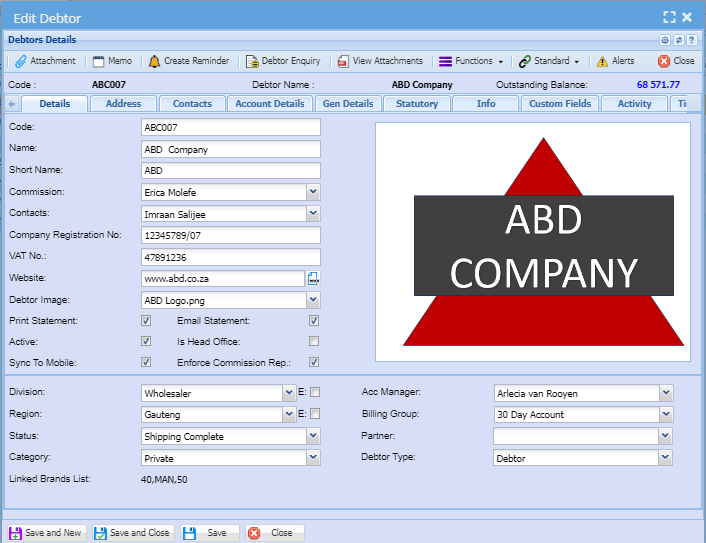
| Debtors Code |
This is a unique code that identifies the debtor This code needs to be filled in or the customers/ debtors information will give you an error when trying to save. The code is also used for exports. |
| Name | Enter a legal customer or debtor name that will appear on all documents. |
| Short Name | Short name that the company uses for a client |
| Commission | This is a dropdown and only shows commission structures set up under System Configuration Module |
| Contacts | This is a drop-down and only shows contact names that have been entered from the contacts tab. |
| Company Registration No | This is the company registration number |
| VAT / GST No | This is the tax number for the customer if the company is VAT / GST vendor |
| Customs Client No (CCN) | The Import / Export code |
| Website | Enter the website of the company |
| Debtor Image | This is the image that has been added under the attachment e.g company logo |
| Division | The down arrow allows a selection according to the division the debtor is categorized into |
| Status | Shows the debtor or customer status |
| Region |
The dropdown arrow facilitates the selection process based on the debtor's categorization within their respective region. |
| Category | This dropdown arrow facilitates the selection process based on the debtor's or customer category based on the categories that that have been added to the dropdown. |
| Acc Manager | The dropdown shows a list of accounts managers and only the account manager for the customer or debtor needs to be selected. |
| Billing Group |
The dropdown shows the types of billing groups within the organization and only the right billing group should be selected for the debtor or customer. For example, billing groups can be categorized as monthly or annually |
| Partner | Select the business partner for the debtor or customer on the dropdown. |
| Debtor type |
The dropdown shows different debtor types whether it is a debtor/ customer or a prospect. Select the correct debtor type on the dropdown. |
Details tab tick boxes explained
Tick boxes are pretty simple to use. If the box is ticked this means yes and if a box is not ticked this means no.
| Print Statement | Put a tick if the statements will be printed |
| Active | Put a tick if a debtor is active |
| Sync to Mobile | Put a tick if you want the customer to be synced to your Webatar App (Mobile App) |
| Email Statement | Put a tick if the email Statement |
| Is Head Office | Put a tick if Consolidate Branch Statements at Head Office Level is required |
| Enforce Commission Rep | Put a tick if you want to enforce sales rep commission against a customer or debtor |
Address Tab
The designated area for debtor address information facilitates the input of data and provides the user with convenient options to replicate the address, including the use of buttons labeled "Same as Physical," "Same as Postal," and "Same as Delivery."
A user can add multiple addresses on the debtor's or customer grid if they have multiple locations.
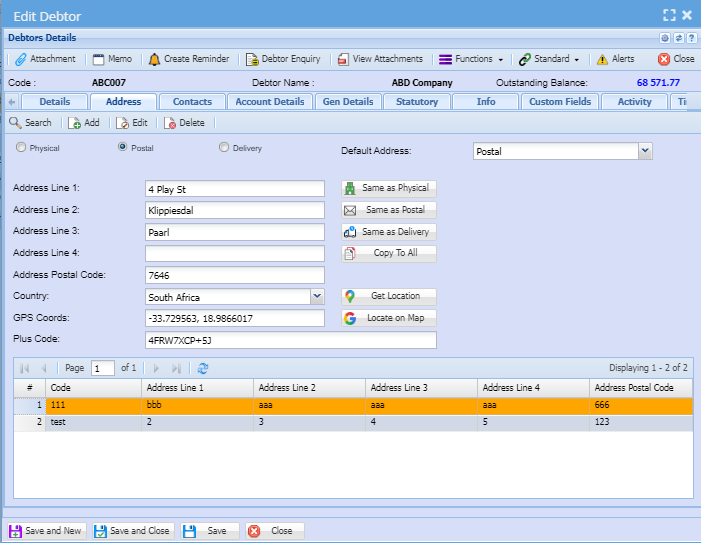
| Add | |
| Edit | Used to edit customer address on the grid debtor/ customer has multiple addresses |
| Used to | grid |
or customer has multiple addresses |
|
Physical |
Enter the physical address or legal entity address for a debtor/ customer |
| Postal | Enter the postal address for a debtor/customer |
| Delivery | Enter the delivery address for the debtor/ customer |
| Default Address | This is the address that will populate on all debtor/customer documents |
| Address Line 1 | This can be a street name or the name of the business park |
| Address Line 2 | Suburb or street if line 1 consists of a business park name or estate |
| Address Line 3 | Enter the city name for a debtor/customer |
| Address Line 4 | Enter the province name for a debtor/ customer |
| Address Postal Code | Enter the postal code for a debtor/customer |
| Country | Select the country that the debtor or customer is in |
| GPS Coords |
Enter the GPS coordinates for the debtor/customer One can use the button for locate on map, however this needs to be set up first |
| Plus Code | Enter the plus code for the debtor/ customer which can be found on Google map search |
| User defined Address grid | This is where you will a list of addresses if a debtor/customer has multiple addresses |
| Same as Physical Address | When in an address section, use this button to copy the physical address |
| Same as Postal | When in an address section, use this button to copy the postal address |
| Same as Delivery | When in an address section, use this button to copy the delivery address |
| Copy to All | This button is used to copy addresses to be the same as all three addresses (Postal, physical and delivery address) |
| Get Location |
Use this button to get your GPS location and plus code This needs to be set up first |
| Locate on Map | Click on this button to open up Google Maps to view the location of the company |
Contact Tab
In this Field you will insert the customers Contact Tabdetails
these could be the generic company information.
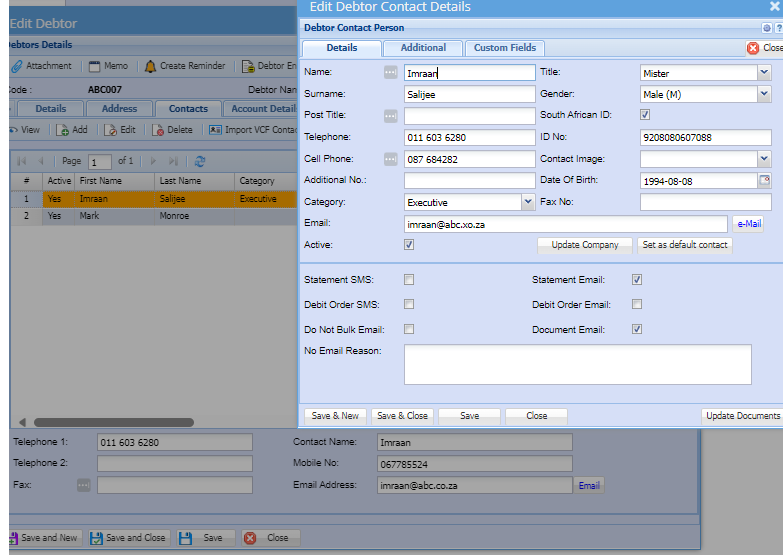
In this Field you will insert the customers Contact details
these could be the generic company information.
| Telephones | debtors telephone numbers, fax, and mobile number |
| Statement | email address of the person the statements will be emailed to |
| Website | Debtor’s website |
Account Details Tab
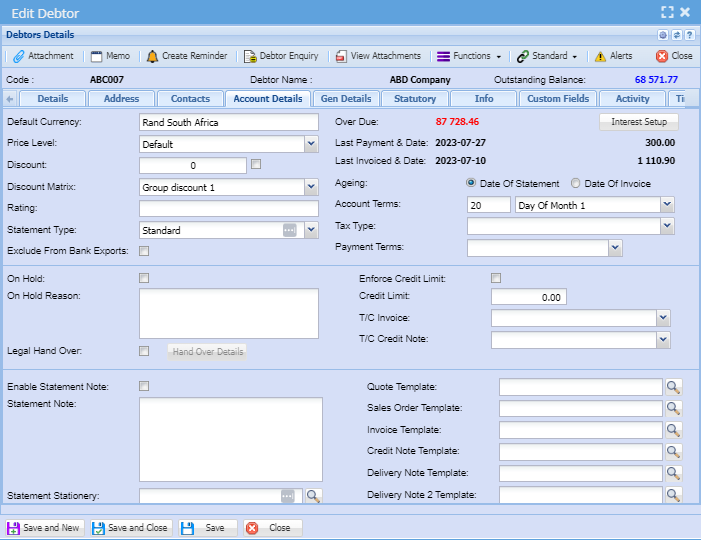
This is the account details information of the Debtor Because of our security you may want to lock down this tab to users if they do not have security access to the debtor.
| Default Currency | If you are working with multi-currency customers, this allows you to select the default currency to work with on that customer. Note: Once the first transaction has being posted against the currency you cannot change the currency |
| Pricing Level | this is a drop-down and only shows pricing structures setup under System Configuration Module |
| Account terms | Select the terms of your customer in the drop-down |
| Discount | this field is only used as an information indicator of what discount rate you would discount the customer for |
| Ageing | this is selecting on date of statement or date of invoice |
| Exclude from Bank Exports | If the box is ticked |
| Interest Setup button | where the interest against the customer is setup |
| Statement type | the user selects from the drop-down arrow as to when the statement will be |
| Credit Limit | this is a field to enter the credit limit of a customer.. This field is only used as an information indicator of what interest rate you would charge the customer for overdue accounts |
| Enforce Credit Limit | by putting a tick in, will be enforcing a credit limit or it could be just an indicator |
| On Hold Reason | it’s the reason the customer is put on hold. |
| On Hold Tick | to put the customer account on hold |
| Enable Statement Note | This will allow a user to put a note by putting a tick in a box |
| Statement Note | this is a note that a user can add onto the debtors statement |
| Invoice Template | it’s a copy of a completed invoice |
| Credit Note Template | Its copy of a completed credit note |
| Quote Template | It’s a copy of a completed quote |
General Details Tab
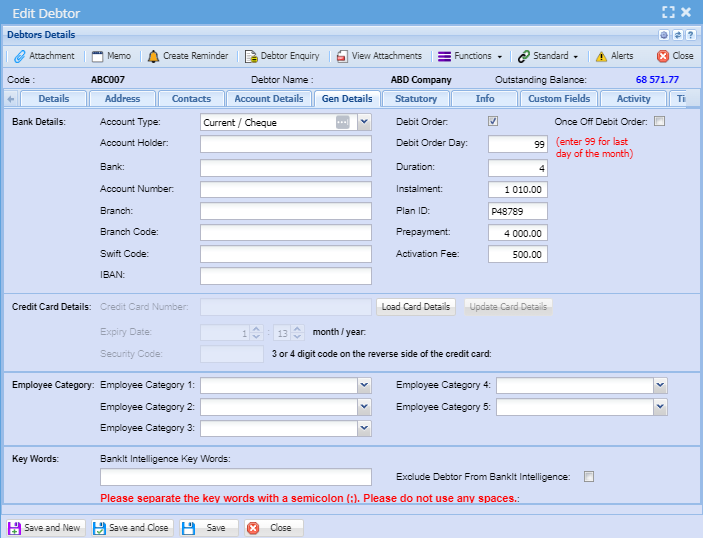
This is the debtor’s bank details section
Bank Debtors bank
| Account Number |
Debtors account number Account Type of account that the debtor holds i.e. Current account |
| Branch | Name of the bank |
| Branch Code | Branch code of that particular bank |
| Debit Order | When putting a tick in the box, allows a debit order |
| Debit order Day |
The day the money will be debited from a customer’s account Once Off Debit Order the debit order can be done once or by putting the tick in the box or continuously without a tick |
| PDF Passwords | passwords for different documents |
SMS Invoices total can be send via sms or the emailed
Credit Card Details
.png)
This is the debtor’s credit card details section
| Credit Card Number | Debtors Credit Card Number |
| Expiry Date | Input the credit cards expiry date MM: YY can use the arrow navigation keys to select numbers |
| Security Code | This is 3 or 4 digit code found on the reverse side of the credit card |
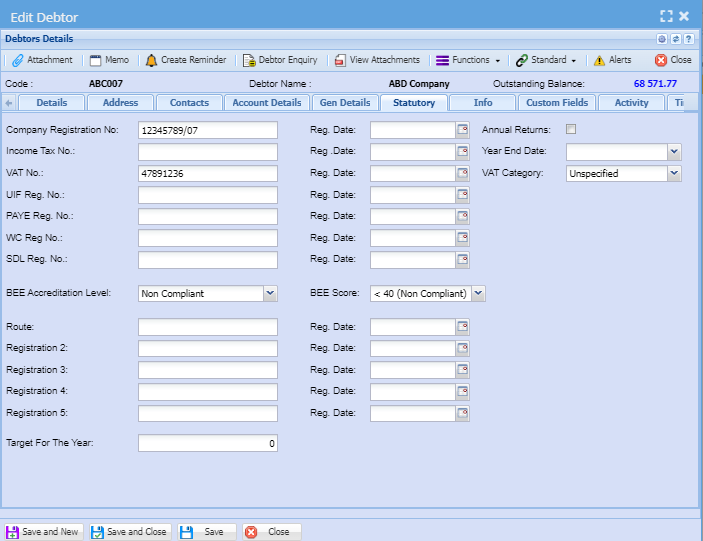
Statutory Tab
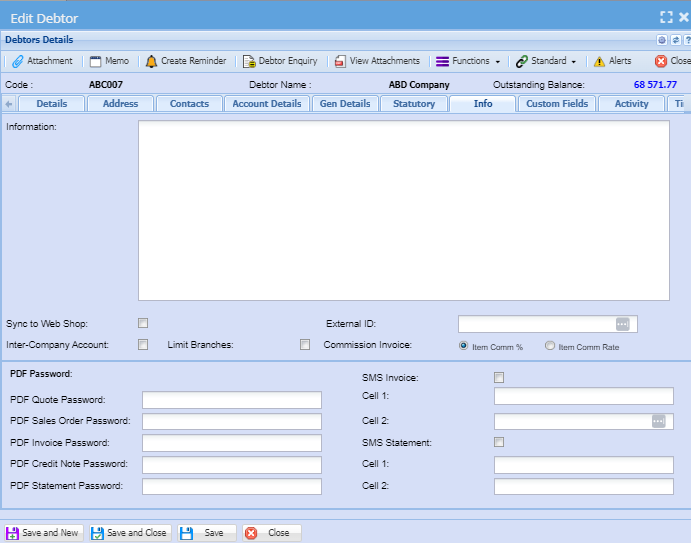
Info Tab
Custom Fields

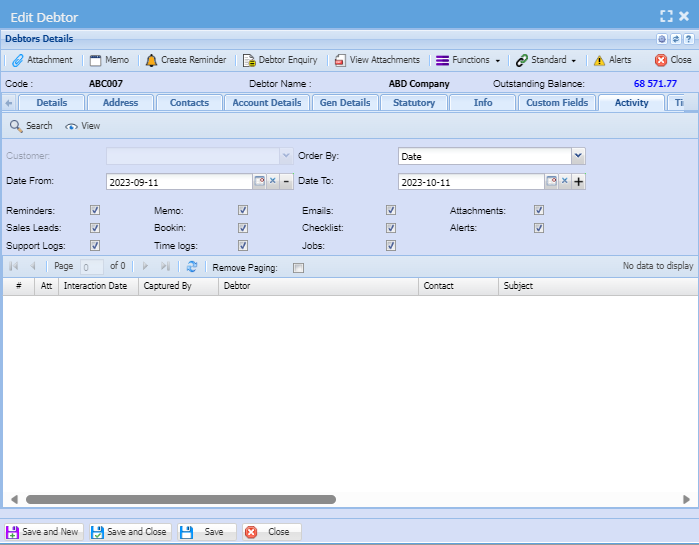
Activity Tab
Time Logging Tab