Stock Management
Stock Value Adjustment
Stock Value Adjustment capture
The stock Value Adjustment function is used to amend the current cost price of an item.
Inventory Module> Activity> Stock Value Adjustment
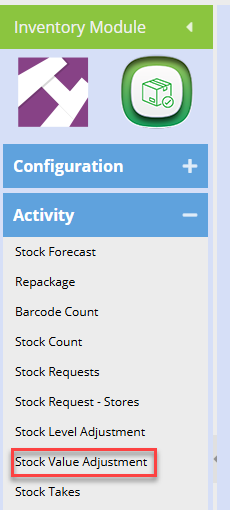
.png)
Click Add to create a new value adjustment
Date – The date will pre-populate to current date. Since stock entries are live, one cannot back date or forward date adjustments
Description – to enter brief description for stock value adjustment
Reference – to enter the reference for stock value adjustment
Division – to select the division from the drop down if applicable
Long Description – to enter detailed description for stock value adjustment
Religion – to select – to select religion from the drop down arrow if applicable
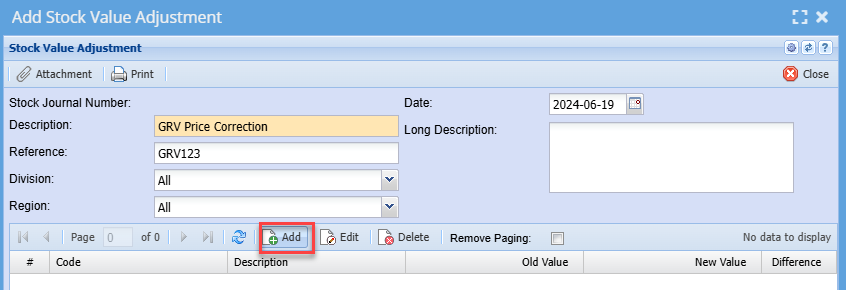
Click Add in the centre of the window to begin adding items
Item Code – select an item code you wish to adjust the price of.
Description - Will auto populate once code is selected
New Value – Enter the new or correct unit cost price
Reason – Enter reason for changing the price
Save And Close button – Saves and closes the form
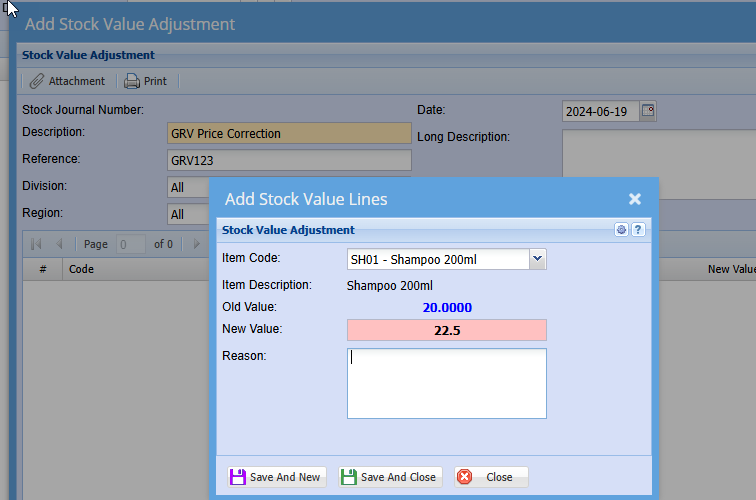
.png)
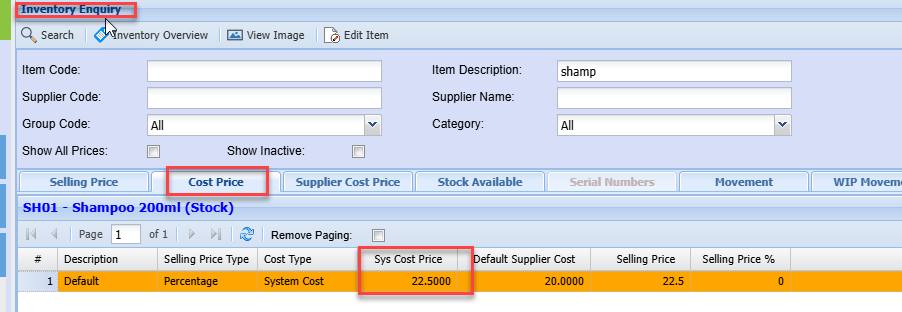
Once the adjustment has been successfully processed, you will note the unit cost price of the item has changed to the new price you entered.
This new cost price will now be used on all new documents created going forward.
Original Content -Click Here
Stock Level Adjustment In and Out
After working through this manual you should be able to do a stock level adjustment to convert paper reams into paper sheets.
Open the Inventory module.
Click on activity and then stock level adjustment.
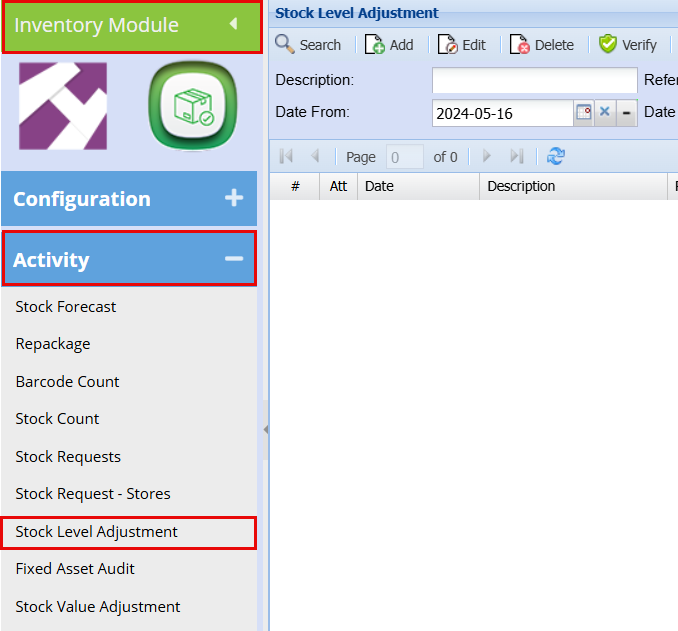
This will open up the stock level adjustment screen. From here you can search for all existing stock level adjustments or create a new one. To create a new stock level adjustment click on Add.
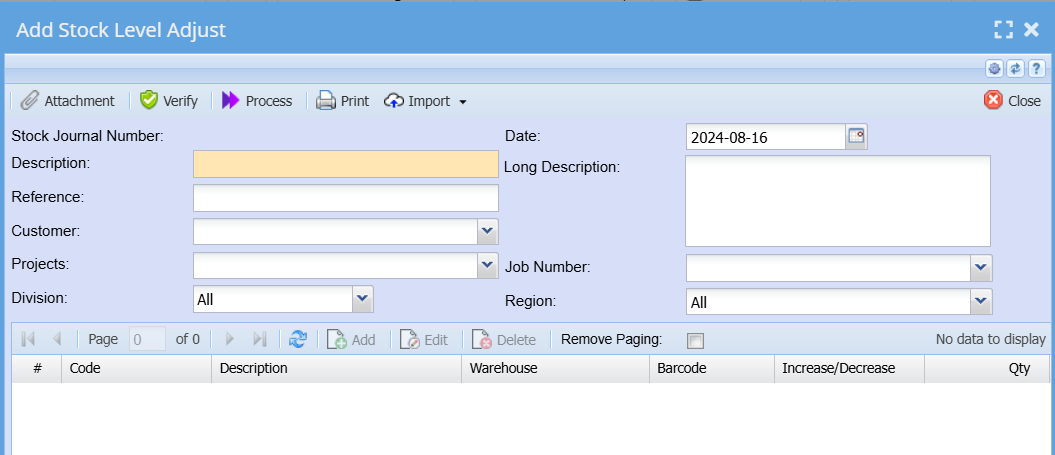
| Description | A description for the specific stock level adjustment. |
| Reference | A reference for this specific stock level adjustment. An example could be “Convert paper reams to paper sheets” |
| Date | This should be the date on which the stock level adjustment is done. |
| Long Description | This is an optional field and does not have to be completed. |
| Job No | Search for the job number if this stock level adjustment is for a specific job. |
Once all the fields have been completed click on save.
Notice that the greyed-out buttons (Add, Edit, Delete) in the middle of the screen now opens up. To add an item
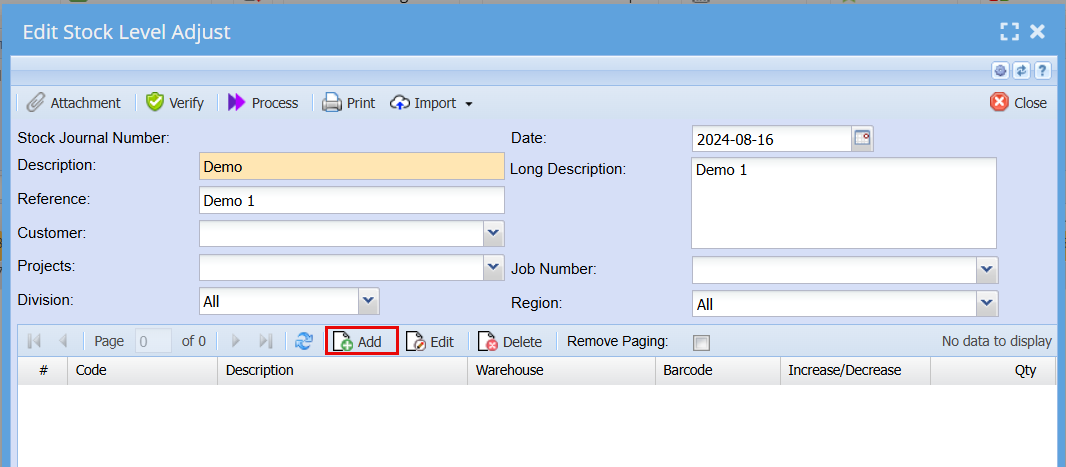
This will take you to the stock level adjustment click on Add.
This will open the stock level adjustment.
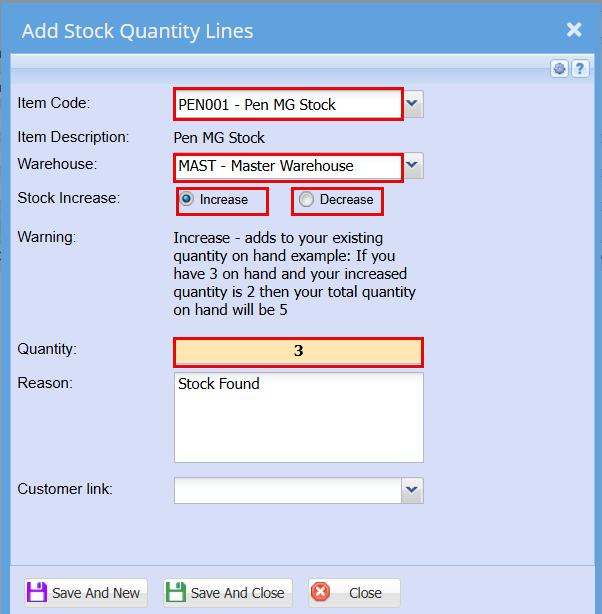
| Item Code | Search for the item by description or code. In this case we want to decrease the paper reams and increase the paper sheets so for the first one selects paper reams. |
| Warehouse | Select Master Warehouse. |
| Increase/Decrease | Select decrease for paper reams. |
| Quantity | Type the number of paper reams to be decreased. |
| Reason | Convert paper reams into paper sheets. |
Here you can adjustment one or more items at the same time.
Click save and close or close when you are done.
This will take you back to the stock level adjustment screen will be able to see all your adjustments on individual itema.
When you are happy with your list, click process at the top of your page.
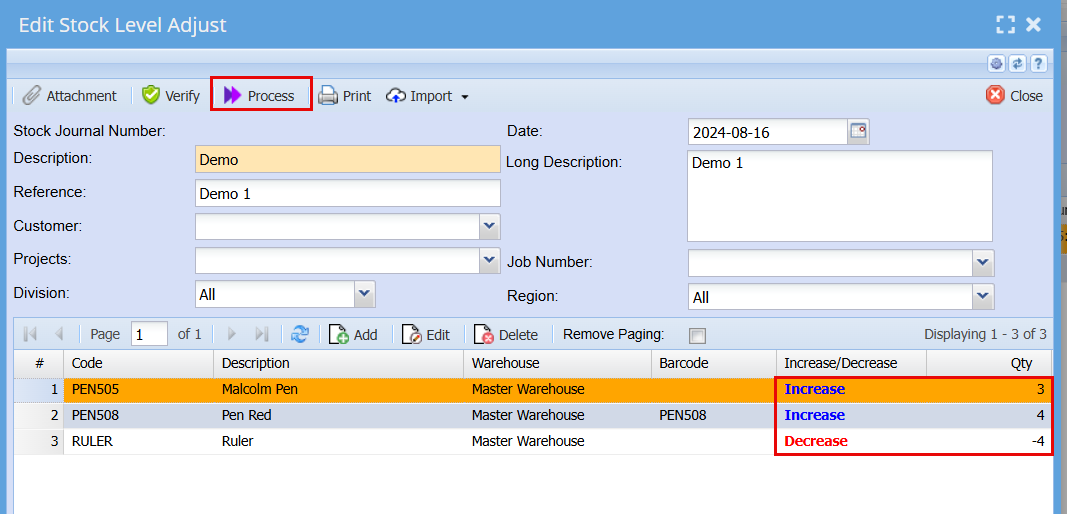
A processing screen will pop up, click Refresh status and then close.

This completes your stock level adjustment
Import
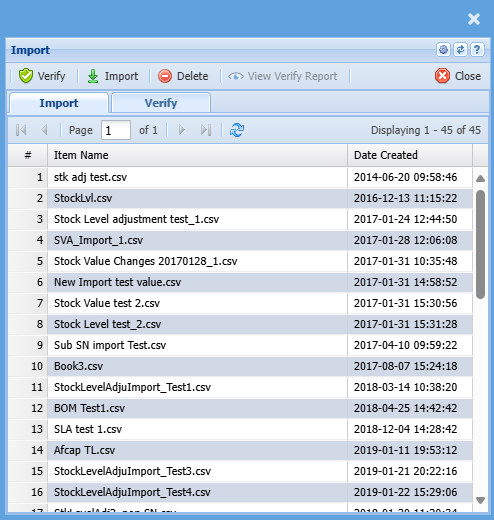
Import S/N
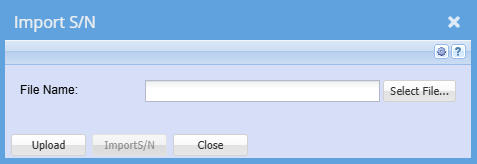
Upload & Import Serial Numbers Help
Click on Browse to navigate to the CSV source document to import the serial numbers.
Click Upload to upload the CSV file into the system.
Once the Upload has been completed successfully click on Import S/N.
A report stating any errors encountered while importing will be automatically generated.
All errors encountered will need to be corrected before the import will be completed successfully.
CSV File format
Stock Level Adjustment Line level (i.e. Stock Item)

Bulk Serial Numbers
Stock Level Adjustment Header Level

NB : Please remember to delete Line 1 from the file.
Original Content - Click Here
Stock Take
Running a Stock Take with the Webatar app
Video training manual 202311 - Stock_Take_Webatar.mp4
Some basic steps are required
- Create and activate a stock take
- Open up the Webatar app and sync
- Scan and count stock
- Complete stock take
- Close and Open the Webatar app and sync
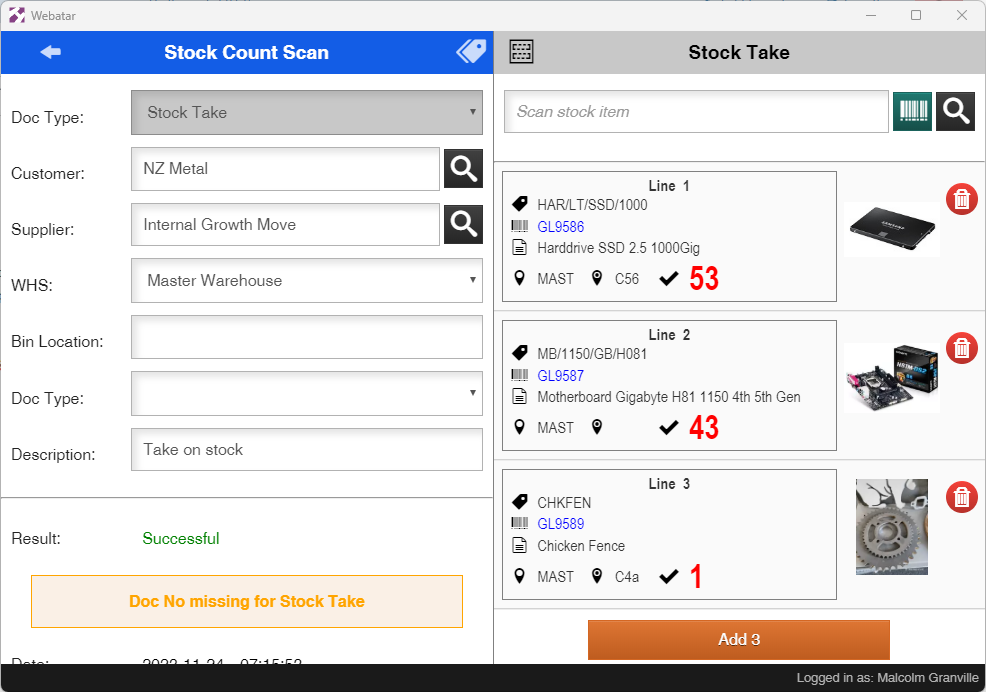
Create and activate a stock take
Go to main system to activate stock take
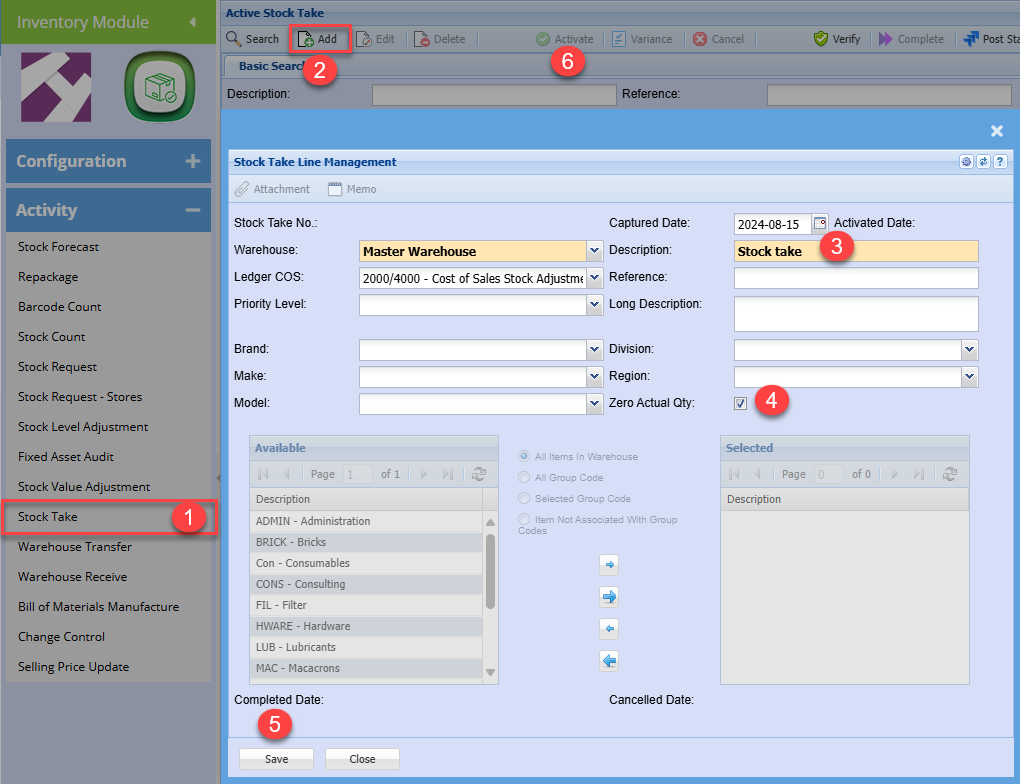
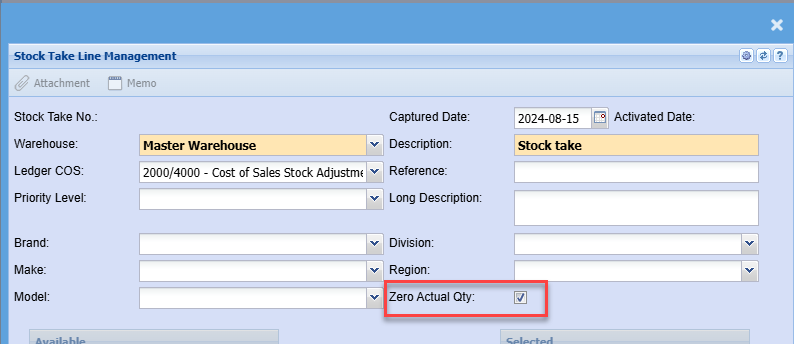
When activating the stock take in main system, it is recommended to tick the zero actual Qty.
Zero actual quantity sets all stock to zero quantity forcing one to count all stock
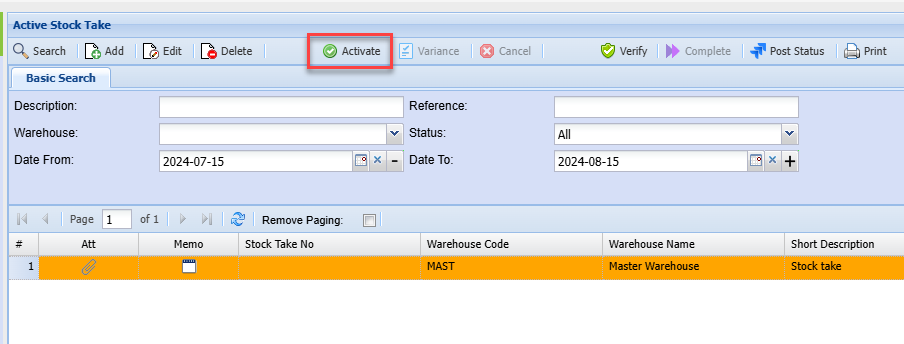
Activate the stock take
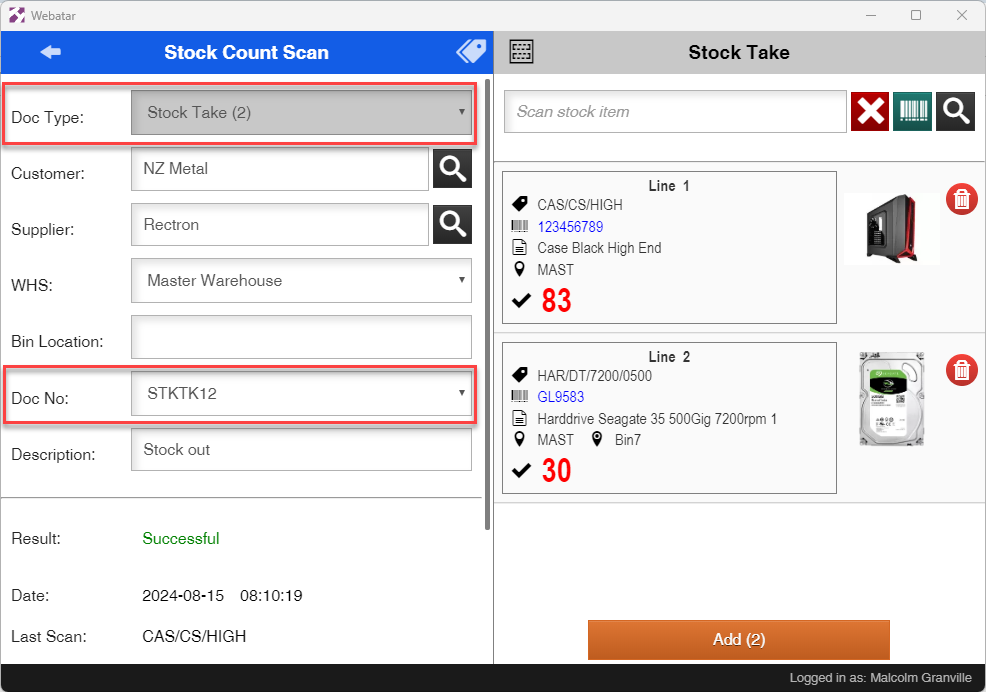
On the Webatar app, sync to server to retrieve the stock take active number
Setting a document number for stock take allows the count to update the stock take directly after sync.
stock take counts will always increment quantities on the stock take.
View counts in stock take
To view counts, click on show countered tick box.
By default counted items will disappear off the list.
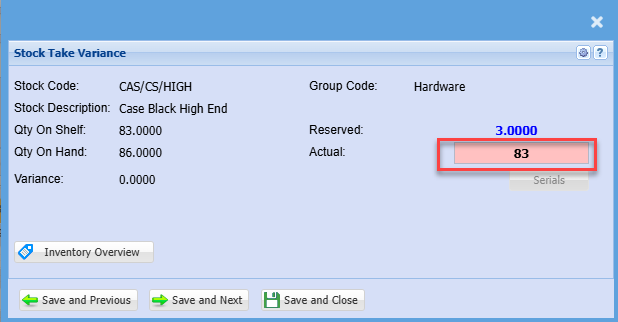
If a count is incorrect corrected in the stock take by double clicking on the line.
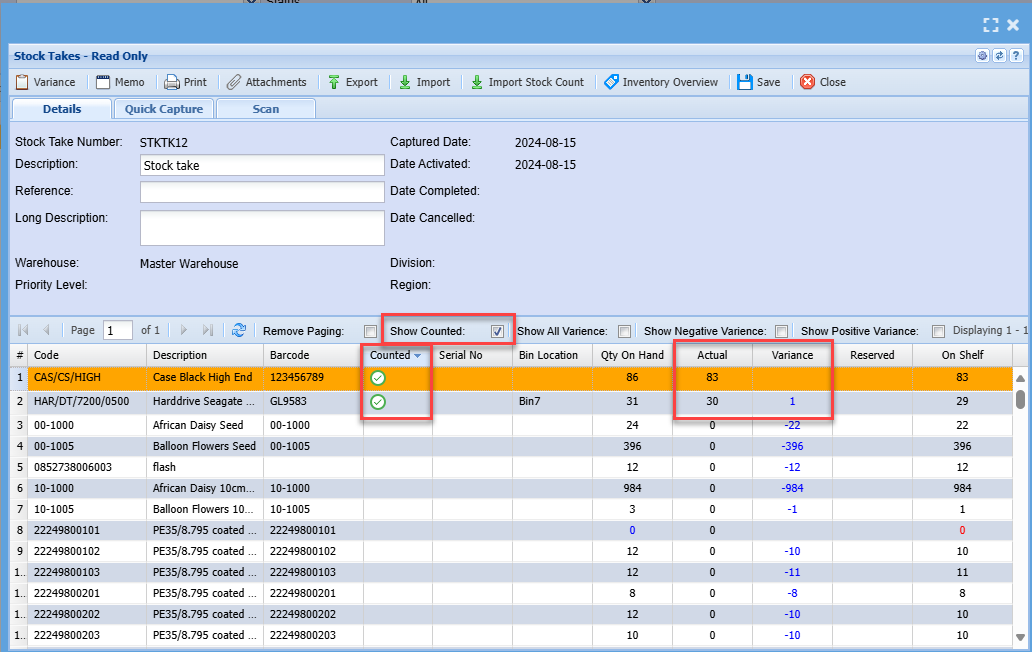
Correcting a count
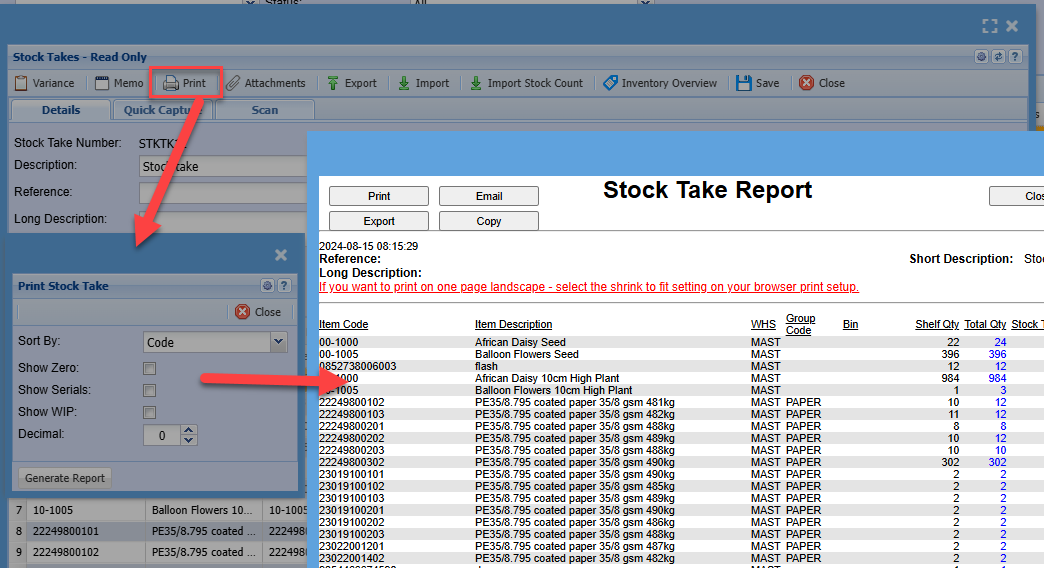
Print out the count to view what has changed
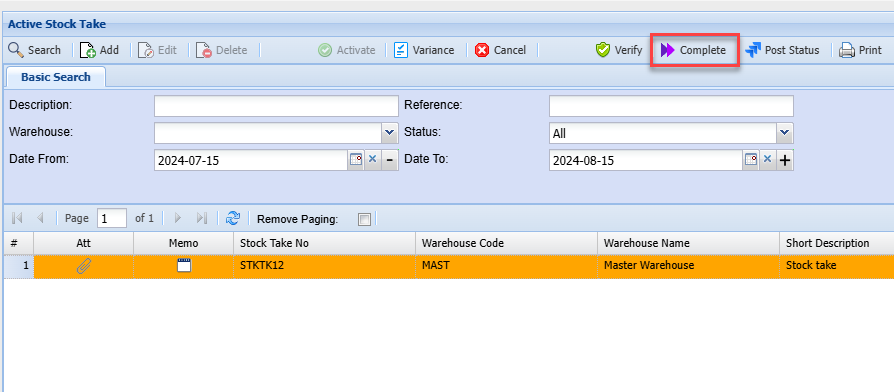
Complete the stock take by clicking on process
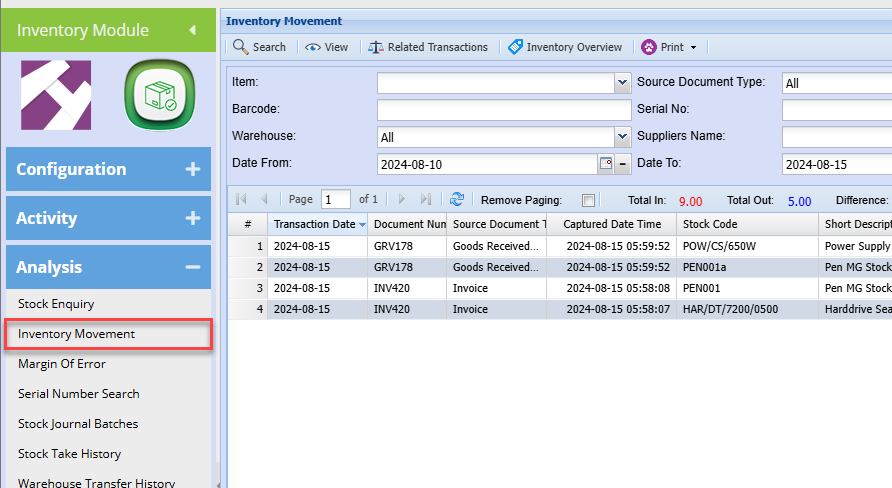
View all movement taken place
Original content - Click Here