# New Expense

<span class="ts0">Adding new expenses</span>

<span class="ts0">Please see the steps below to successfully add a new expense</span>

1. <span class="ts0">Click + icon to add a new expense</span>
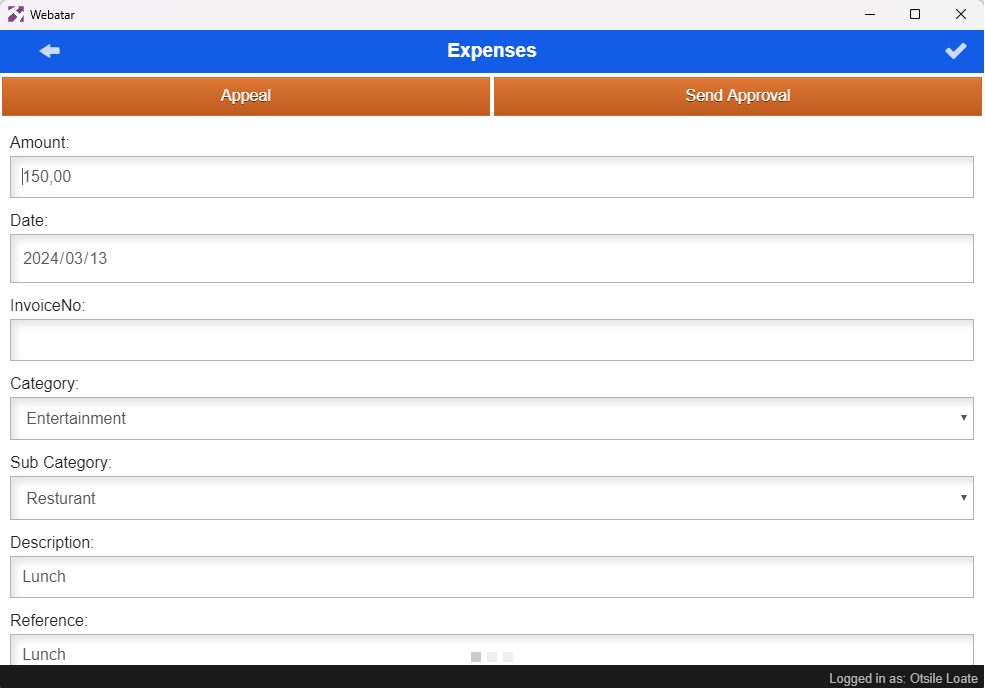
2. <span class="ts0">Capture all information as explained in this manual</span>
3. <span class="ts0">Click on the tick on the top right to save the expense</span>
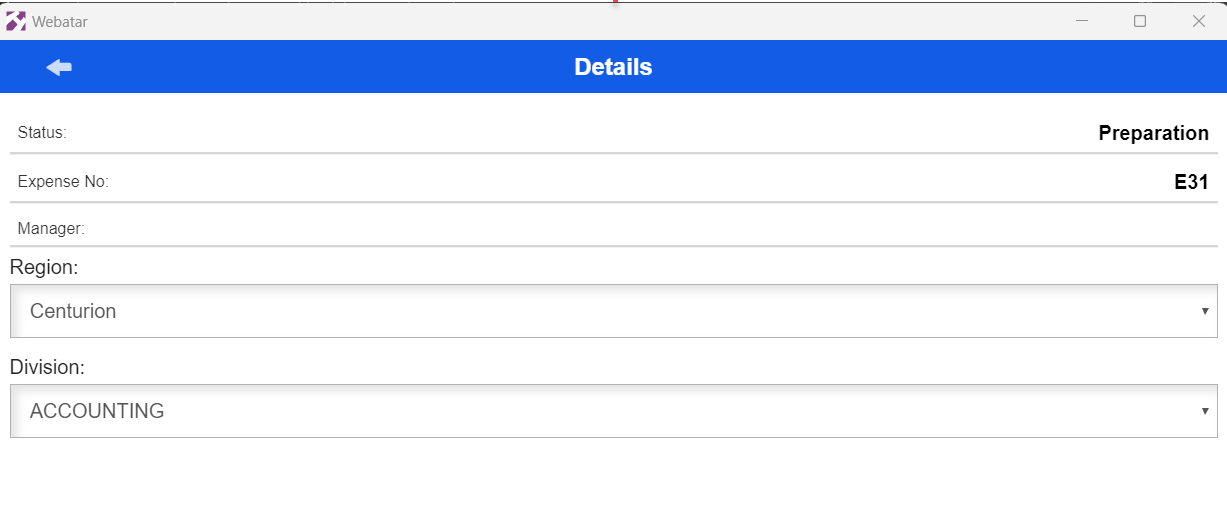
4. <span class="ts0">Scroll left to update division and region and all details</span>
5. <span class="ts0">Scroll left again to attach a slip or invoice</span>
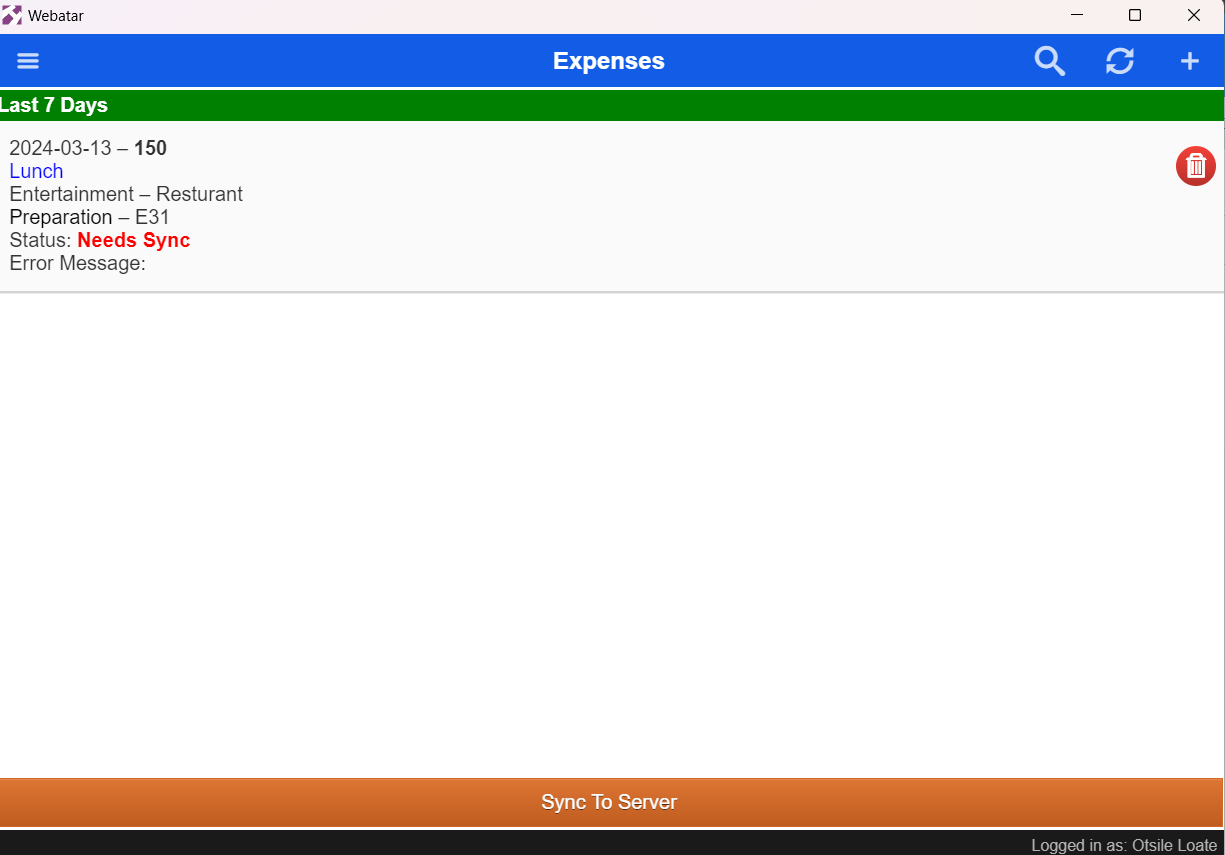
6. <span class="ts0">Once you have completed all the stages you need to click on the back arrow to a screen that will inform you to sync your expense</span>

<span class="ts0">Click on the </span><span class="ts11">Plus + button</span><span class="ts0"> to add a new expense</span>

<p class="callout info"><span class="ts0">Always click on the tick box to save the expense before moving on to the other menus</span></p>

<p class="callout info"><span class="ts0">After attaching a document or image click on the back arrow so you only sync the expense once if you sync the attachment on its own and send the document for approval the system does not send the correct link to the approver and it will not allow the approver to open the document</span></p>

[![image.png](https://hugeerp10.co.za/hsofmanual/uploads/images/gallery/2024-03/scaled-1680-/yfeimage.png)](https://hugeerp10.co.za/hsofmanual/uploads/images/gallery/2024-03/yfeimage.png)

<table border="1" id="bkmrk-amount%C2%A0-enter-an-amo" style="border-collapse: collapse; width: 100%; height: 413.925px;"><colgroup><col style="width: 26.9402%;"></col><col style="width: 73.0351%;"></col></colgroup><tbody><tr style="height: 29.6px;"><td style="height: 29.6px;">**Amount**</td><td style="height: 29.6px;">Enter the expense amount</td></tr><tr style="height: 29.6px;"><td style="height: 29.6px;">**Expense Date**</td><td style="height: 29.6px;">Enter the correct date for the claim</td></tr><tr><td style="height: 57.6px;">**Invoice No**</td><td style="height: 57.6px;">Enter the supporting document number if you have

This is not compulsory

</td></tr><tr><td style="height: 29.7875px;">**Category**</td><td style="height: 29.7875px;">Select Category from the drop-down selection</td></tr><tr><td style="height: 29.7875px;">**Sub Category**</td><td style="height: 29.7875px;">Select the correct sub-category if there is more than one</td></tr><tr style="height: 29.7875px;"><td style="height: 29.7875px;">**Description**</td><td style="height: 29.7875px;">Enter claim description</td></tr><tr style="height: 29.7875px;"><td style="height: 29.7875px;">**Reference**</td><td style="height: 29.7875px;">Enter Claim reference</td></tr><tr style="height: 29.7875px;"><td style="height: 29.6px;">**Notes**</td><td style="height: 29.6px;">Add detailed additional notes if applicable </td></tr></tbody></table>

Once complete

[![image.png](https://hugeerp10.co.za/hsofmanual/uploads/images/gallery/2024-03/scaled-1680-/6ywimage.png)](https://hugeerp10.co.za/hsofmanual/uploads/images/gallery/2024-03/6ywimage.png)

<table border="1" id="bkmrk-division-enter-divis" style="border-collapse: collapse; width: 100%; height: 413.925px;"><colgroup><col style="width: 26.9402%;"></col><col style="width: 73.0351%;"></col></colgroup><tbody><tr style="height: 29.7875px;"><td style="height: 29.7875px;">**Division**</td><td style="height: 29.7875px;">Enter division</td></tr><tr style="height: 29.6px;"><td style="height: 29.6px;">**Region**</td><td style="height: 29.6px;">Enter region</td></tr></tbody></table>

After adding division and region scroll left again to add your till slip or invoice

Once done adding an image

Click on the back arrow

[![image.png](https://hugeerp10.co.za/hsofmanual/uploads/images/gallery/2024-03/scaled-1680-/IZUimage.png)](https://hugeerp10.co.za/hsofmanual/uploads/images/gallery/2024-03/IZUimage.png)
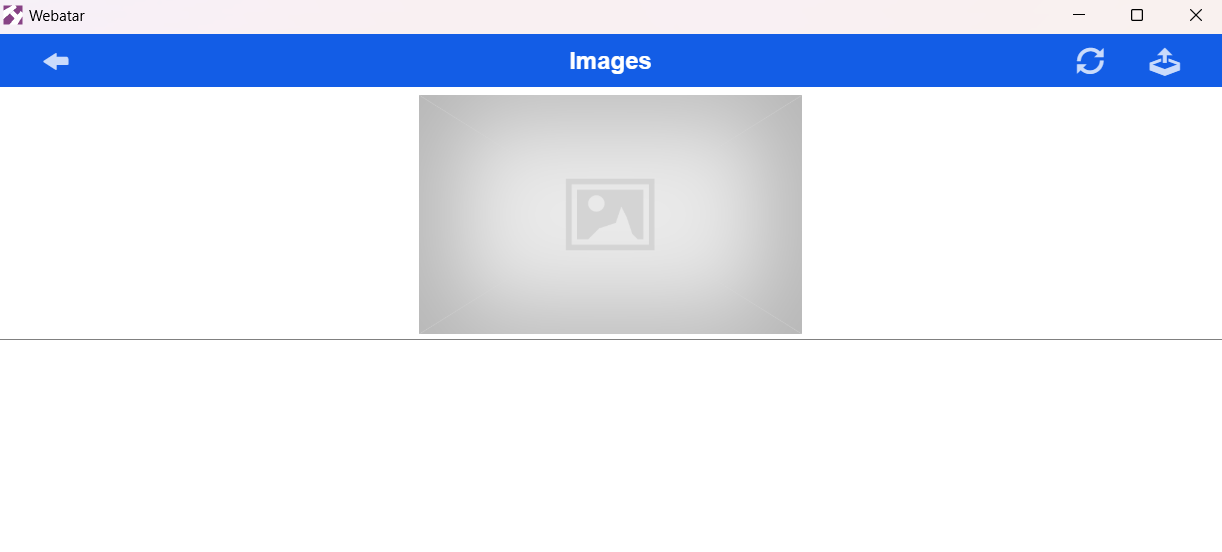
The back arrow which shows the screen below will allow you to sync.

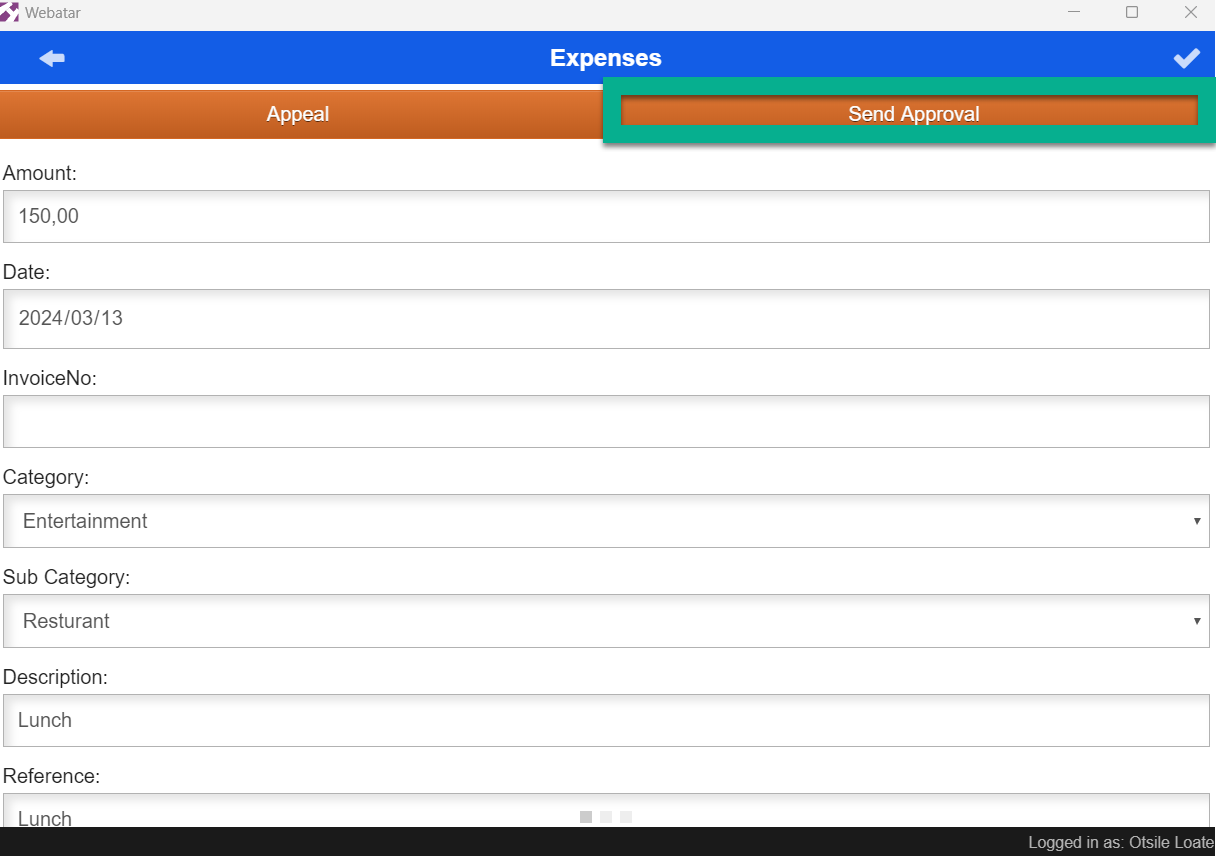
After, syncing your expense go back into your expense then send it for approval

[![image.png](https://hugeerp10.co.za/hsofmanual/uploads/images/gallery/2024-03/scaled-1680-/4G0image.png)](https://hugeerp10.co.za/hsofmanual/uploads/images/gallery/2024-03/4G0image.png)
After, syncing click on it to send for approval as shown below:

[![image.png](https://hugeerp10.co.za/hsofmanual/uploads/images/gallery/2024-03/scaled-1680-/Lv9image.png)](https://hugeerp10.co.za/hsofmanual/uploads/images/gallery/2024-03/Lv9image.png)