Client
Client Module
- New Client
- Client Info
- Time Logs
- Time Logs
- New Time Log
- Time Log Contract
- Time Log Billing
- Travel Expense
- Visit Items
- Time Log Attachment
- Time Log Menus
- Sync to Server
- Quick Time Log
- Client Visit Split Time
- Client Calendar
- Time Tracker
- Client Visit
New Client
New Client
Add a new customer on the mobile app
.png)
.png)
Click on the Plus symbol on the top right corner to add a new client
Fill in the information for the client.
Make sure that the tick is clicked in order to save the information before moving to the other menus.
Once saved, there will be a green menu notification that the record has saved.
Scroll to the right to see the next menu
.png)
Fill in the address information and then click on the tick to save your information
Scroll to the right to add any attachments
.png)
Attachments
After clicking on the Plus + button to add a new image
Enter a description and decide whether to capture a new image or add an existing image
.png)
Go back to the search window and sync to server
Looking at the status it says Needs Sync. This means that the record is still on the phone but not on the server.
Syncing to the server will take the record from the phone to the server.
.png)
Client Info
Client Information
Security setup
Video Training Manual 2016 - Click Here
Search and read information on a customer
- General Details
- Contacts
- Dashboard
- Quotes
- Sales Orders
- Last 15 Invoices
- Units by Month
- Invoice graph
- Attachments
- Navigate to client
.png)
.png)
This setting is controlled in Huge ERP security in the user setup menu.
System Configuration Module > General > User Setup > Edit User > Module Access tab
.png)
Time Logs
Time Logs
Capture time against clients
New version
.png)
New Time Log
Click on the Plus + button to add a new record
Search for the customer.
Enter the contact person you are working with (this will default the contact at the debtor/customer setup)
Enter a short reference and summary of what has been done at the client
Check date (will default today's date)
Start time (when first adding the time log the log will assume the current time)
Change the time
Clicking on the Start Time button will set the time now
End time (the system will automatically enter one hour later)
Bill quantity - this will be based on the start and end time
.png)
Information on general details when scrolling down
| Not billable |
activate if this time log is not billable |
| Status |
select a status for this time log (default is set in the main system) |
| Notes |
enter detailed notes for the time log |
| Copy to memo |
use this button to add the notes to a memo note |
| Copy to support log note |
if this time log is linked to a support log, you can copy notes to the support log problem section |
.png)
NOTE: Click on the tick to save changes before moving on to the next sub menus
Time Log Contract
| Contract | this links the time log to a contract (a default is automatically set) |
| Task | the task is linked to a contract |
| Service item | the service item is linked to a task (the service item is what is shown on the invoice) |
| Order number | enter a order number |
| Trackit | Link the time log to a Trackit item |
| Support log | Link the time log to a support log |
| Job | Link the time log to a Job |
| Employee rate | set the employee rate |
Three customized fields
| Rate 1 | (Normal time) |
| Rate 2 | (Time and half) |
| Rate 3 | (Double time) |
.png)
Time Log Billing
Select the billing rate
This rate is used for invoice and calculating the time log rate
Bill quantity on time X bill rate = Total bill rate
Original billing rate
This is a guide rate to what rate you would like to bill
It is only used for reporting.
.png)
Travel Expense
Activate to charge for Travel
Bill type
- Distance
- Time
- Both
.png)
Activate for toll fees
Charge toll fees or not
.png)
Visit Items
Add new items against the time log
Stock, service or custom type items
.png)
Multiple items can be attached
.png)
Time Log Attachment
Add images of work done as proof of progress
Click on the Plus + button to add a new image
After syncing the time log, go to Uploads menu to sync the images to the server
.png)
Time Log Menus
| Email to self | Email the time log to yourself |
| Open support log | if time log is linked to a support log you can open the support log |
| Create reminder | create a reminder on this time log |
| Clone log | make a copy of the time log |
| Create sales lead | create a sales lead from the time log |
| Memo | create a memo note on this time log |
| Custom fields | set the custom fields which are linked to this time log |
.png)
Sync to Server
After saved, sync the time log to server
.png)
Quick Time Log
Capture time without all the additional menus
Only the very basics are here.
.png)
.png)
Add in a new quick time with the Plus + button
| Employee | this will default to the user that is logged onto system |
| Client | add in the client that the log is against |
| Job | link to a job |
| Task | select the task |
| Employee rate | select the rate |
| Support log | link the time log to the support log |
| Reference | add a reference note, defaulted to the task description |
| Service item | service item linked to the task |
| Non billable | select if billable or not |
| Notes | add in notes for the time log |
.png)
Client Visit Split Time
Split time (this feature has been discontinued)
This time is used where you want to go into detail for every minute. Having a start stop button capturing time against a client.
Merge all time into one time log or individual times.
.png)
Add in a new time log
| Reference | enter a summary note |
| Notes | enter details of time log |
| Client | enter a client log is against |
| Start / Stop | Select button to start time |
| Start / Stop | Select button to stop time |
.png)
Stop time
This will add an entry to the right side.
Continue to add the next time
Use the delete button to delete incorrect entry
.png)
Client Calendar
View your time logs in a calendar format.
Go straight to the time log or the client information
.png)
.png)
Calendar view by Day, Week or Month
.png)
Clicking on the entry allows one to open up time log or client information
.png)
Time Tracker
Time tracker works with Clock in and Clock out
Use the Clock in to create a time log which is linked to a support log or job
.png)
Type:
- Check in
- Sick
- Leave
.png)
Client Visit
Visit
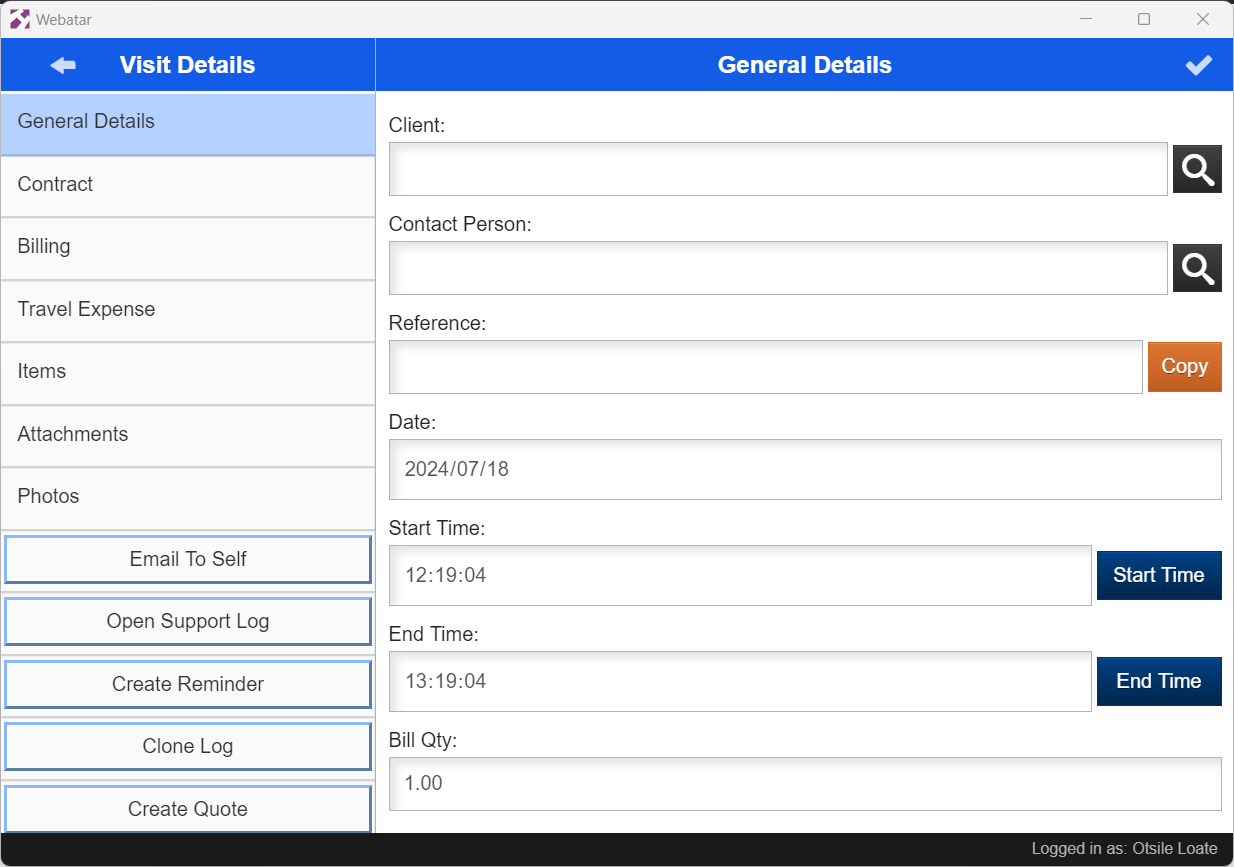
Client visit allows you to capture the following for a client/ customer you are visiting:
- Capture Timesheet
- Email Timesheet/ client visit to self
- Open support Log
- Create reminder
- Clone Log
- Clone Log
- Create Quote
- Create Sales Lead
- Add notes to the customer
- Create Quick Stock Count
Video Training Manual 2017 - Click Here
Old Video Training Manual 2016 - Click here
Client Visit Setup
Security setup
You can setup security access for client visit on the Huge ERP system.
This will allow you to control who sees what on their Webatar mobile
To be able to add security to users Webatar go to:
System Configuration Module > General > User Setup > Edit/Add User > Module Access tab
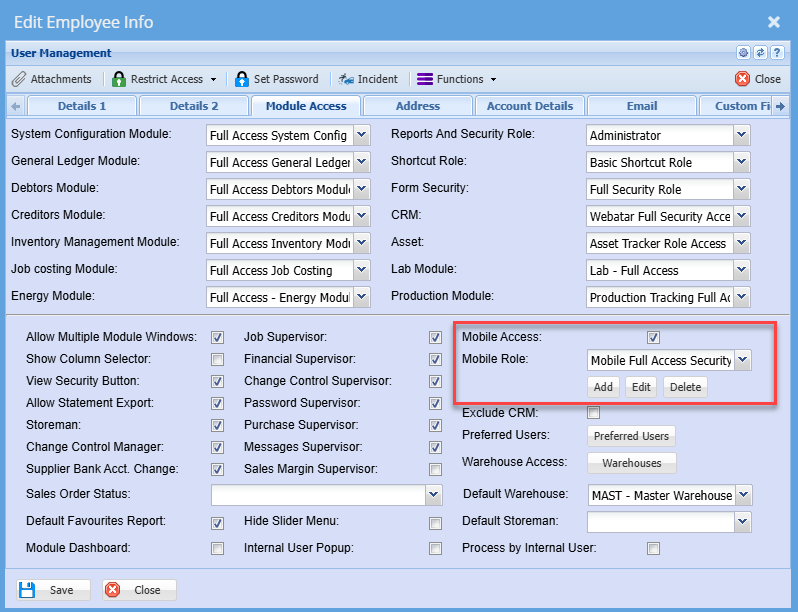
Click on Edit to edit the existing Webatar role or click Add to create a new Webatar mobile app role
This will lead you to the Items tab, add all put a tick on any items that a user will need access to
Once complete click on the Menu Tab
In this case, select Client Visit
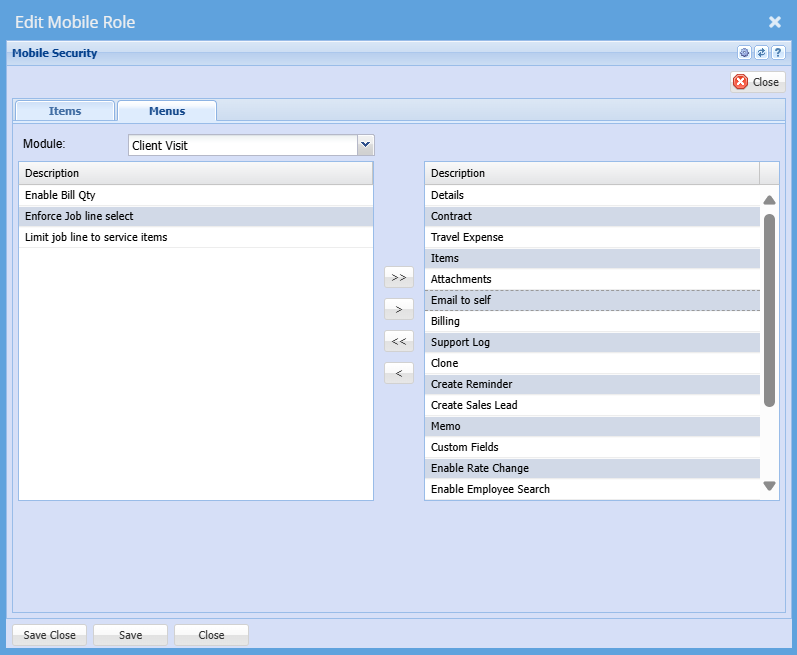
The user will only have access to the menus on the right and not the left
Click Save and Close
Make sure you put a tick on by Mobile Access
Then click save and close again
Webatar Security View
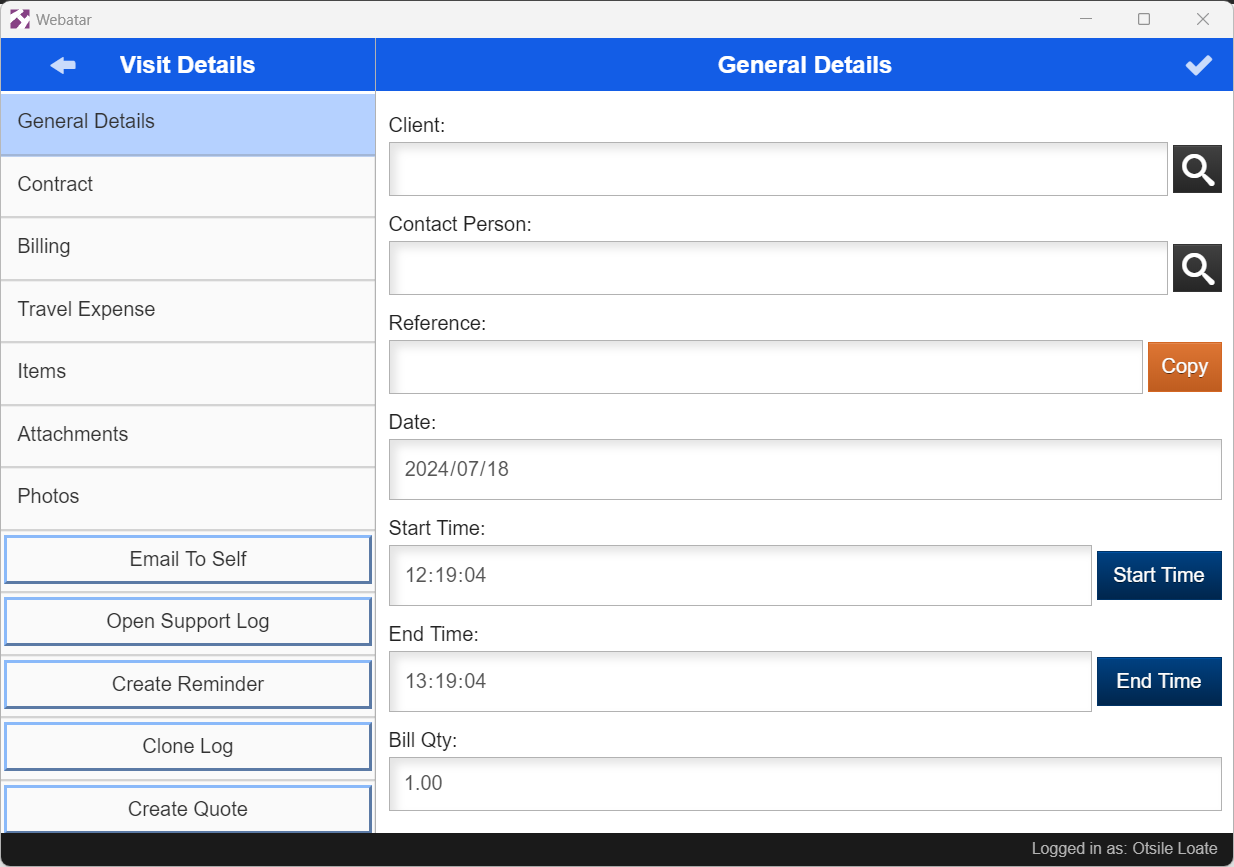
To view security changes, you need to open your Webatar to sync, so all changes can take effect.
Below is how security menus will be displayed on the Webatar App
Search Window
The search window has three main sections
| Search | Search for specific time logs |
| Refresh | Click on this button to see existing time logs |
| Add Button | Add a new time log |
.png)