User Setup
User Setup
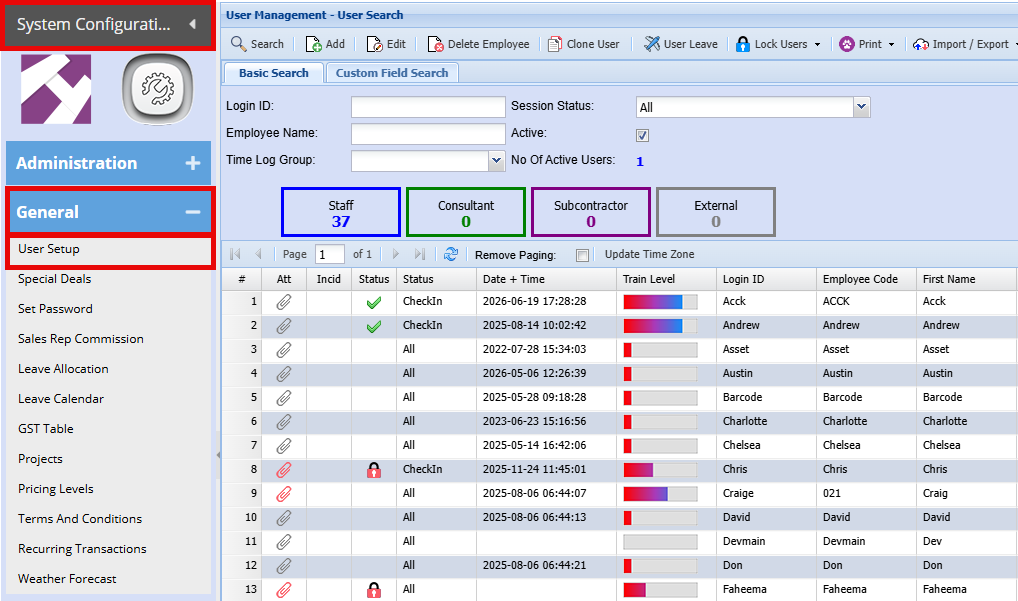
- User Management – User Search
- User Setup Process
- Module Access Tab
- Form Security
- GL Control Accounts Access
- User Inactive or Delete
- Messages
- Leave
- User Log Out
- User Password – Set Password Help
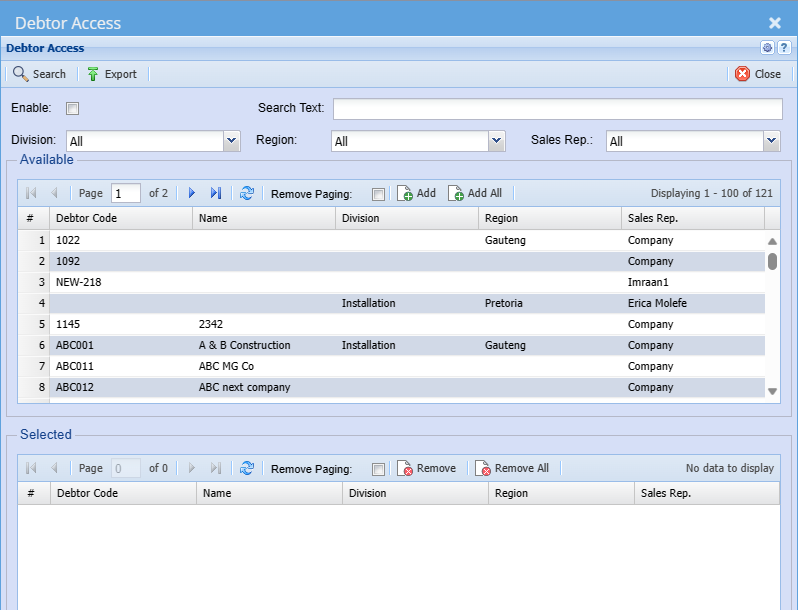
- Debtor Access
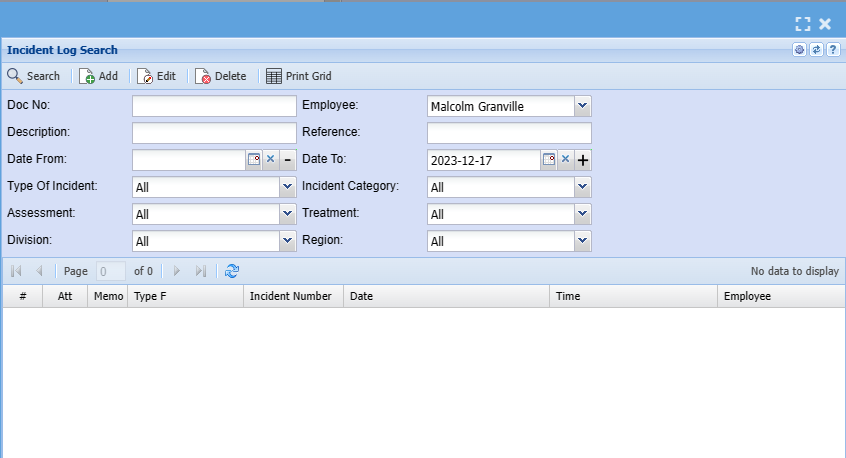
- Incident Log
- Basic User Setup
- Add User
- Multi-text Search
- Two Factor Authentication
- Daily sales rep email report
- Colour Hex Code - Memo Notes
User Management – User Search
Video Training Manual 2016 - Click Here
Systems Configuration Module> General> User Setup
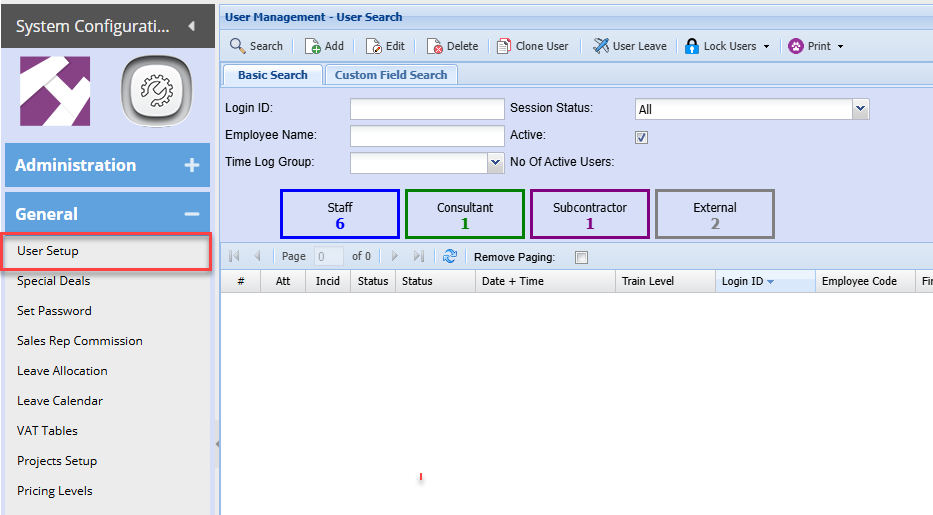
You can search for a user using the following criteria:
- Login Id
- Employee Name
- Time Log Group
- Session Status
- Or by active or inactive
User management - User search buttons explained
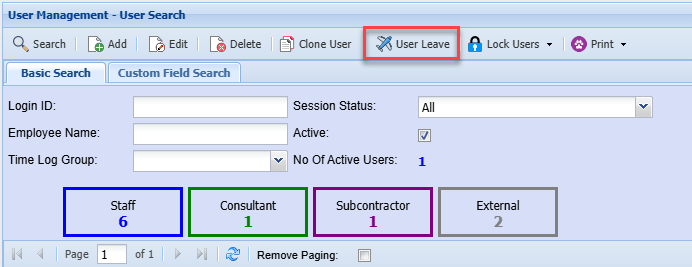
| User Leave | Shows the leave allocated to that specific User. |
| Log User Off | Logs the currently selected Employee out. |
| Lock User | Locks the currently selected Employee. |
| Unlock User | Unlocks the currently selected Employee. |
| Lock All Users | Locks all Employees. |
| Unlock All Users | Unlocks all Employees. |
Leave User
Huge ERP has a basic leave approval and tracking system
Staff can request leave and then email managers
Managers can then approve or deny the request
Leave is then tracked and can also be printed out if needed
Lock Users
Lock users allows you to lock and unlock a user from the system
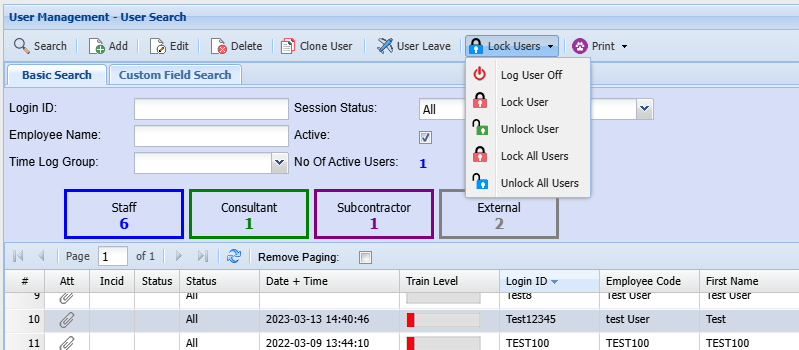
| Log User Off |
This allows the admin user to log out users who logged off abnormally or who forgot to log off |
| Lock User | This allows the admin user to lock out a user from entering the system |
| Unlock User |
This allows the admin user to unlock users locked out of the system or lock themselves from the system Sometimes users try to log onto the system multiple times and receive error code 7 Once a user has error code 7 this is where the admin user can unlock the user |
| Lock All Users | In case it is month end and staff is busy with stock counts or there is a major system update the users are not allowed to sign or log into the system we can lock all users here |
|
Unlock All Users |
Once done with the maintenance or stock takes you can unlock all users by clicking inlock all users |
User Setup Process
To setup new users to access the system, go to:
System Configuration Module >General >User Setup
The following screen will appear
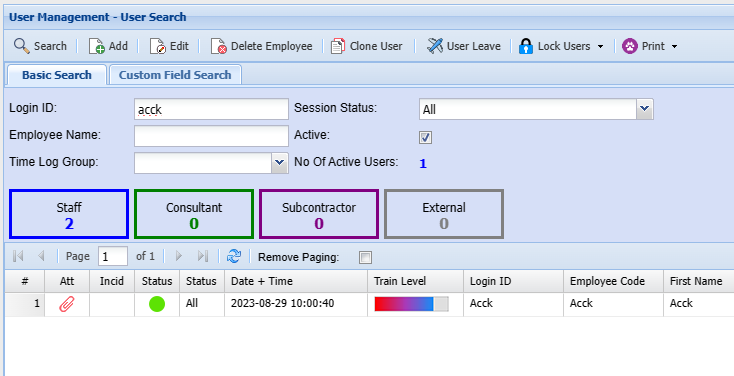
To add a new user, click on the Add button and the screen below will appear
This is where you add all necessary details about a user and setup their security
Functions Buttons
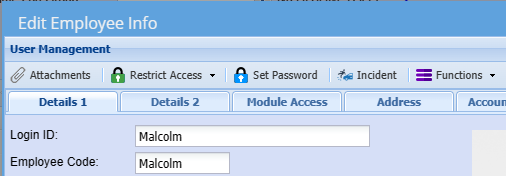
| Attachments | Here you can add any documentation or photos related to this user |
| Restrict Access | Manage the users access to certain modules |
| Debtor Access |
Restrict access to debtors |
| Asset Category Access | |
| CRM Customer Access | |
| Set Password | Set a login username and password for each user / Reset a password |
| Incident | |
| Functions Menu | |
| Branch | |
| Division | |
| Region | |
| Department | |
| Function | |
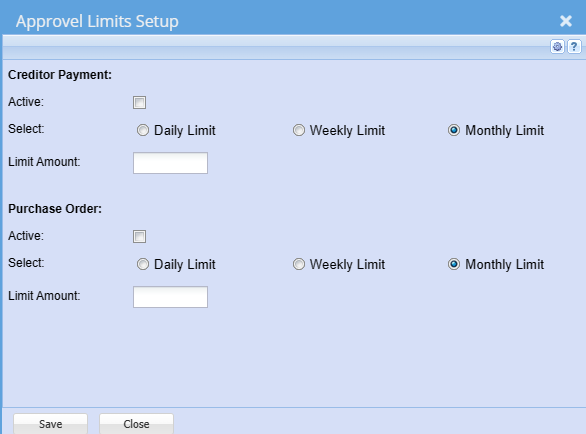
| Approval limits setup | Set approval limits per time period for user |
Approval limits
Setup approval limits by Day, Week or Month
Allowance for Creditor payment and Purchase Order
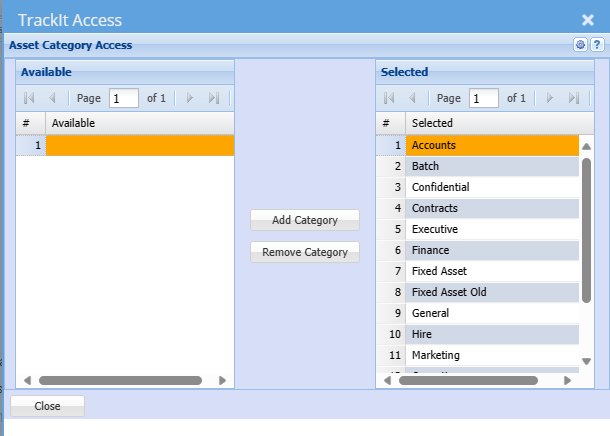
TrackIT Access
Select which categories the user will access to
Minimum should be General and Fixed Asset
CRM Customer Access
Restrict access to customers in the CRM module

Details 1 Tab
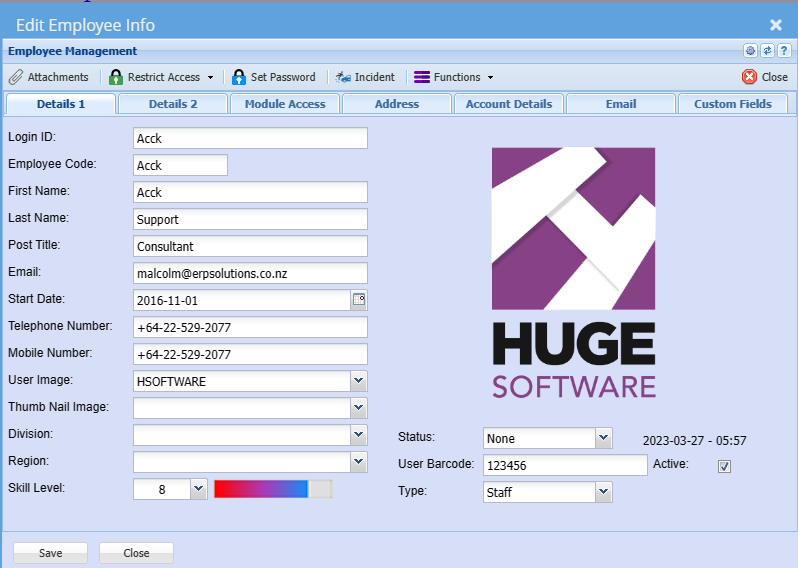
| Login ID: | This is case sensitive when the user logs in. This will be the name which is used when the user logs in. |
| Employee Code: | The users code of the company, usually the payroll code |
| First Name: | First name of the User |
| Last Name: | The Surname of the User |
| Post Title: | Enter the post title of the user |
| Email: |
Enter the work email address of the user This is used to send out emails from the user |
| Start Date: | |
| Telephone Number: | |
| Mobile Number: | |
| User Image: | This is a drop down and only shows Images which have being uploaded as attachments. You can select a default image against the user to show on the right-hand side |
| Thumb Nail Image: | |
| Division: | |
| Region: | |
| Skill Level: | |
| Status: | |
| User Barcode: | |
| Type: | |
| Active: | User is active when ticked, should you take the tick off then the user will no longer have access to the system |
Details 2 Tab
| Primary Branch: | This is the Users primary branch and branch settings will take affect based on the branch selected (see company profiles). Posting of documents will take the general ledger links of this branch. |
| Language: | The language selected here will determine what language profile the user will log onto. (default can be set at company profile level). |
| Timeout Mins: | Time out in Minutes – The default setting is 180 Minutes ( 3 hours). The timeout will log the user out after the period of 180 Minutes if he/she has not worked in the system. |
| Reminder User Prefix: | |
| Reminder Counter: | |
| Contract Default: | |
| Time Log Group: | |
| Activate Messages: | |
| GPS Device No: | |
| Creditors Process: |
| Sales Rep Link: | |
| Sales Rep Link Tick Box: | If ticked will indicate whether the user is a Sales Representative or not. |
| Hide Costs: | |
| Disable Debtors search after first save: | |
| Disable pricing Structure: | |
| Disable Sales rep pricing: | If this field is ticked then the user cannot change the selling prices when invoicing. |
| Line Discount Disabled: | |
| Disable Sales Rep Mark-Up: | If this field is ticked then the user cannot change the markup values when invoicing. |
| Line Discount Range: | |
| Over All Discount Disabled: | |
| Over All Discount Range: | |
| Enable Two Factor auth: | |
| Two Factor Renew Period: |
| Email Type: | |
| Print Page size: | |
| Fixed Layout: | |
| Fixed Print as Default: | |
| Interface User: | |
| Printer Path: |
Module Access Tab

| Allow Multiple Module Windows | When ticked this will allow the user to open multiple Module windows simultaneously for example 3 Debtors Module windows where the user is doing invoicing, adding a new debtor and doing a quote. The default is set to allow the user to open multiple module windows. |
| View Security Button | This button allows the user to set security on each form window in the system. This means you can lock down buttons and tabs per window. The default is set to not active as you do not want staff to change their security access. Only the Administrator should have this ticked. |
| Mobile Access | Tick to allow user to access Webatar mobile business app |
| Mobile Role |
Setup a mobile role for the user |
New Access
Preferred Users button
Select a preferred user, this is used in Webatar when confirming the order

Warehouse access
Setup which warehouses the user will have access to
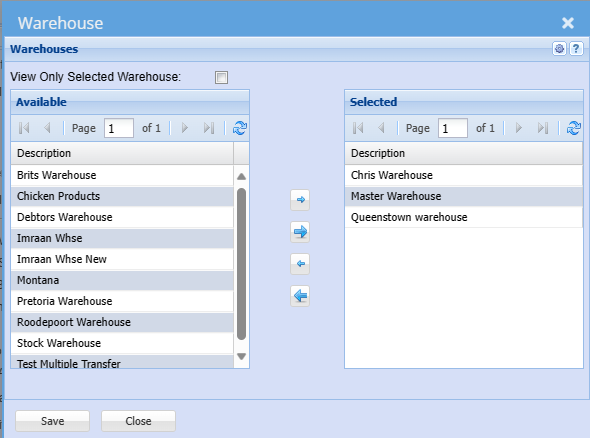
| View Only Selected Warehouse | When tick is on, warehouse searches and drop downs will be limited to selected warehouses |
| Available and Selected | View all available warehouses |
Address Tab
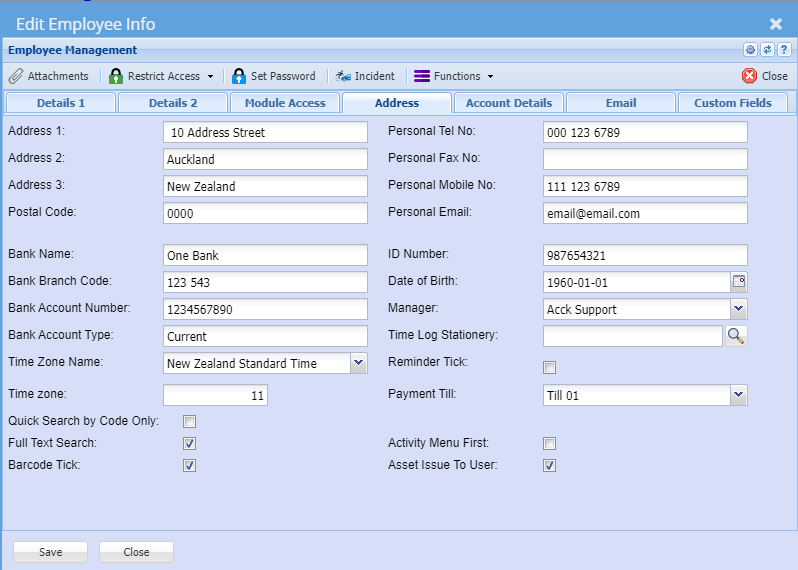
| ID Number | Identity Number of the User |
| Date of Birth | Date of Birthday of the User |
| Telephone Number | Contact Telephone number |
| Cellular Number | Contact Cellular number |
| Email Address | Email Address of the User, this email address is also used as a reply email to emails sent out of the system. |
| Primary Branch | This is the Users primary branch and branch settings will take affect based on the branch selected (see company profiles). Posting of documents will take the general ledger links of this branch. |
| Language | The language selected here will determine what language profile the user will log onto. (default can be set at company profile level). |
| Manager | Select the User’s Manager |
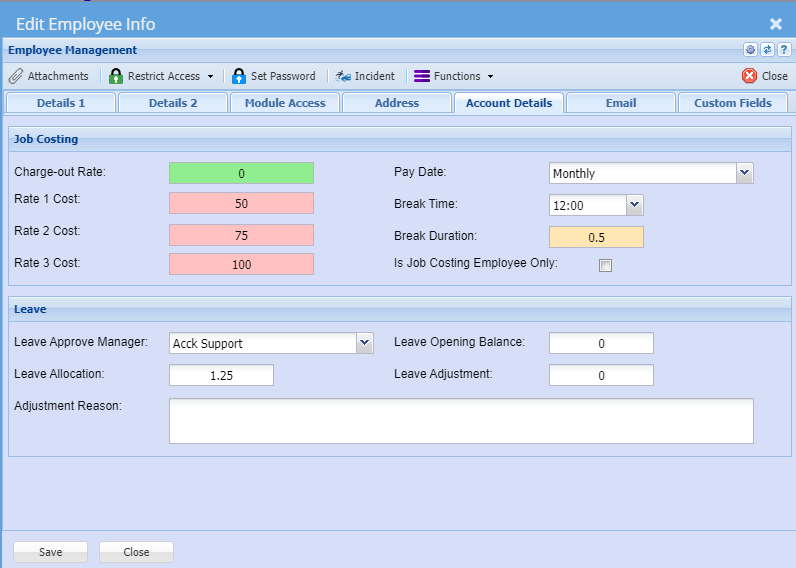
Account Details Tab
Email Tab
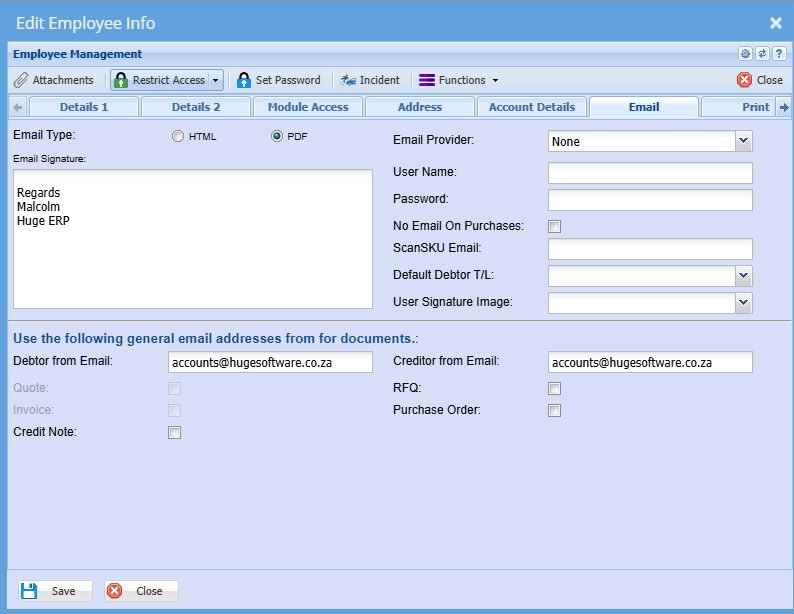
General email from address
Allow emails sent out for Credit Note, RFQ and Purchase order to be sent by a generic emails address
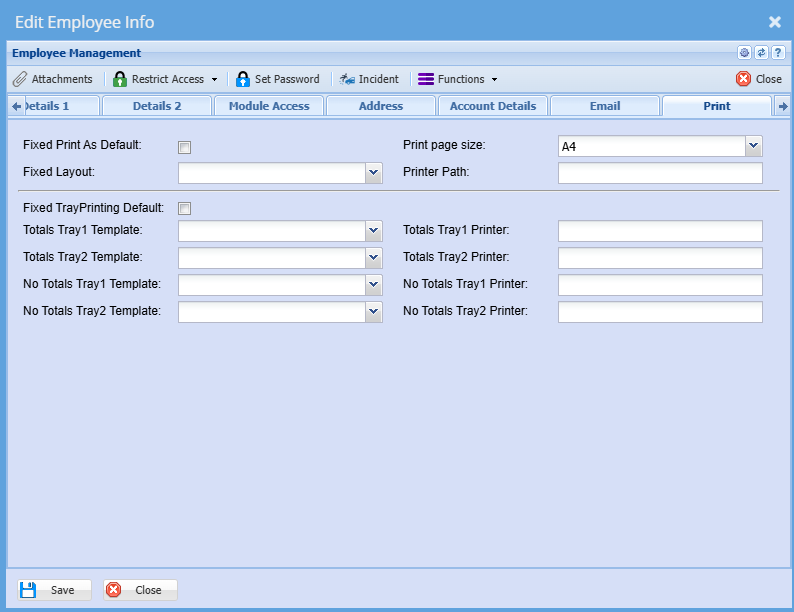
Print Tab
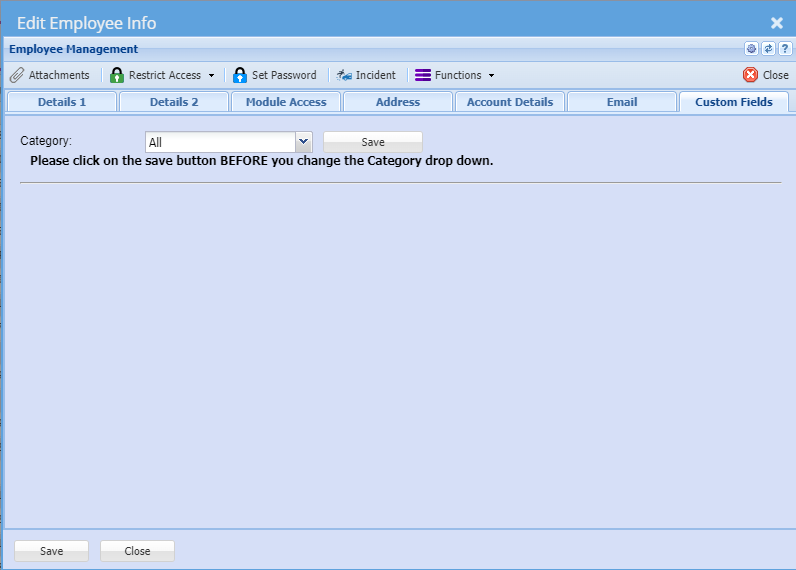
Custom Fields Tab
Module Access Tab
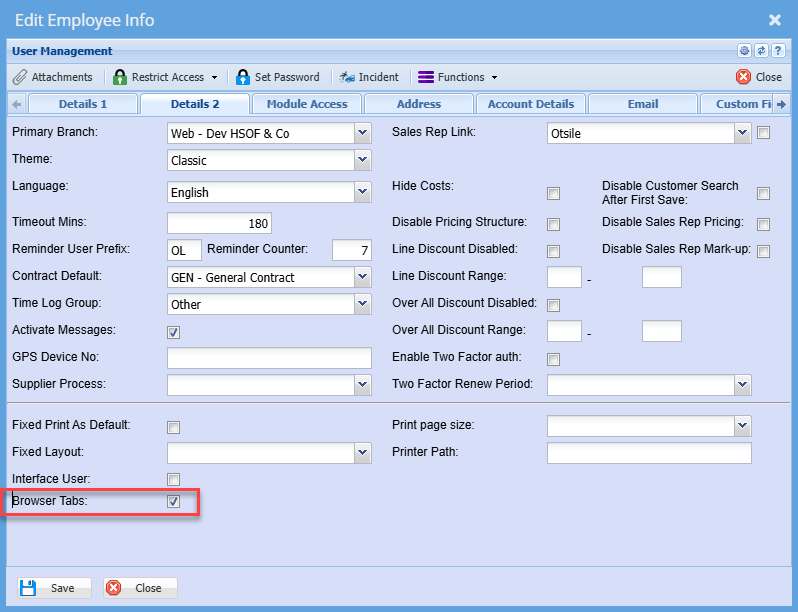
Details 2
Browser Tabs allows you to open modules and windows in tabs instead of a new window
Activity Menu first
To set the Activity menu first in some modules, put the tick on next to the Module security
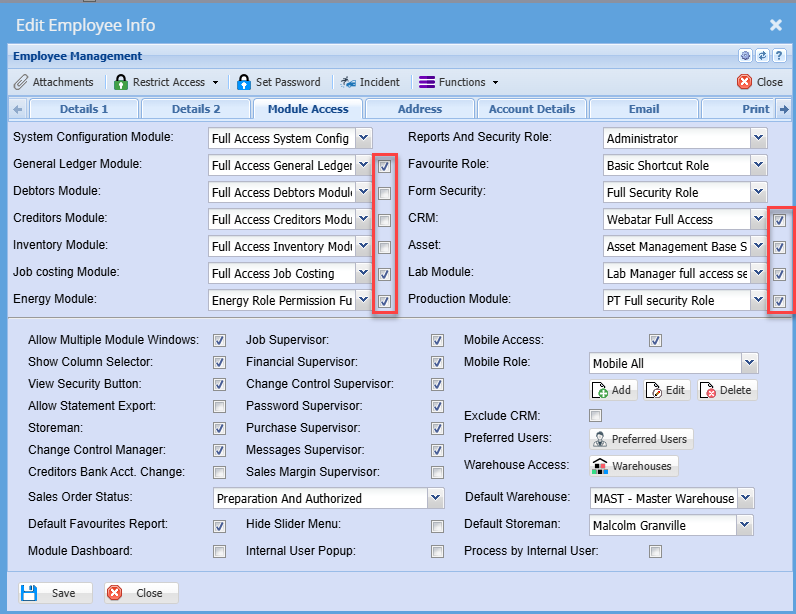
This will put the Activity menu first when going into the module
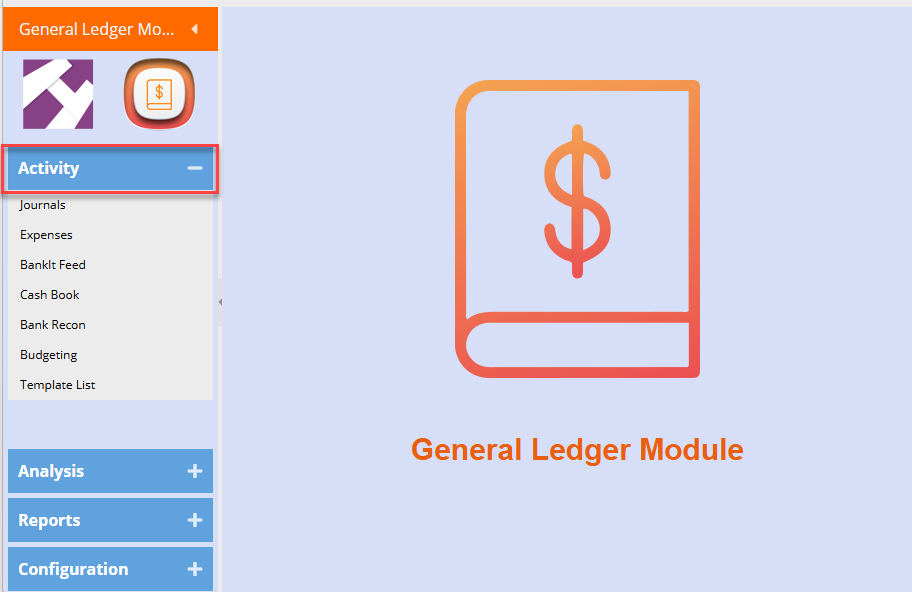
Module Access
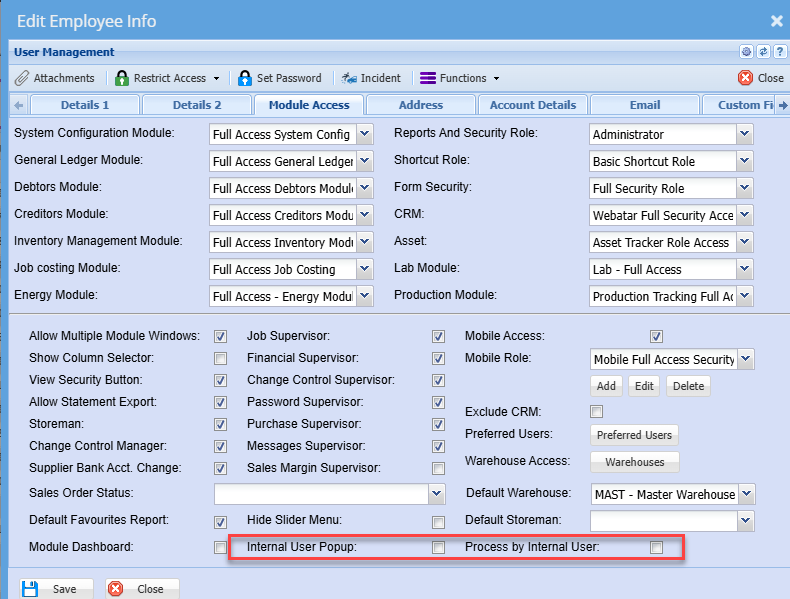
Form Security
Video training manual 2016 - Click Here
GL Control Accounts Access
The default security is off for users to view the General ledger control accounts.
These accounts are:
| 1 | Inventory / Stock Control Account |
| 2 | Customer / Debtors Control Account |
| 3 | Suppliers / Creditors Control Account |
| 4 | VAT / GST / Tax Control Account |
This affects the searches or posting to these control accounts.
Should you want the person to view or process to these accounts, enable the security tick box for financial supervisor.
.png)
User Inactive or Delete
When we make a user inactive or delete a user.
The following will occur:
| 1 | Webatar tick is off |
| 2 | Job costing module access is removed |
When the license is checked it ignores users that are deleted from the count.
.png)
Messages
Systems Configuration > General > User Setup> Tick to activate messages on a user.
| • Keep track of all tasks, reminders and items linked to jobs |
| • Provides notification updates in one place. |
| • Notifications can be used to create new reminders. |
| • Shows mail as "read by "specific users |
.png)
.png)
The number of messages for a user will be shown on the landing page. To access the messages, open any module in the system, right above, the messages notification will be displayed.
Double click on the message and view available messages.
.png)
.png)
| 1 | Search: Search for messages |
| 2 | Date from and date to: use the date criteria to filter messages |
| 3 | Read Type: unread or read messages will be displayed according to the type selected |
| 4 | Company name: Filter by company |
| 5 | Document name: Filter by document name |
.png)
Double click on the message, once viewed the message turns black or alternatively you can add a tick on the message tick box and mark it as read in the change status button and confirm by clicking yes to continue.
Leave
Huge ERP (Webaccounting) has a basic leave approval and tracking system.
Staff can request leave and then email managers.
Managers can then approve or deny the request.
Leave is then tracked and can also be printed out if needed.
.png)
User Log Out
This feature assists in logging a user off the system when a user has been abnormally logged off.
When a user logs into the system and a message comes up informing the user that the said user is already logged in. An administrator could be requested to log you off, or you can now log yourself off.
Select the Log off Users button.
.png)
Select the Search button which will display all users logged onto the Huge ERP system
.png)
Select the user you want to log off the Huge ERP
Press the Log off User button
.png)
User Password – Set Password Help
Video training manual 2016 - Click Here
System Configuration> General> Set Password
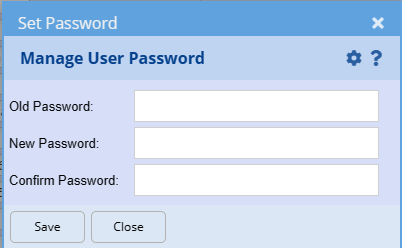
Passwords are a minimum of 8 characters with at least one capital letter and one number.
A user with Supervisor password tick on, can change a password without knowing what the existing password is.
Changing a password: Enter the new password in the “New password” and “Confirm Password” fields.
Debtor Access
Enable this function for additional security to limit access to customers
Incident Log
Log incidents with users
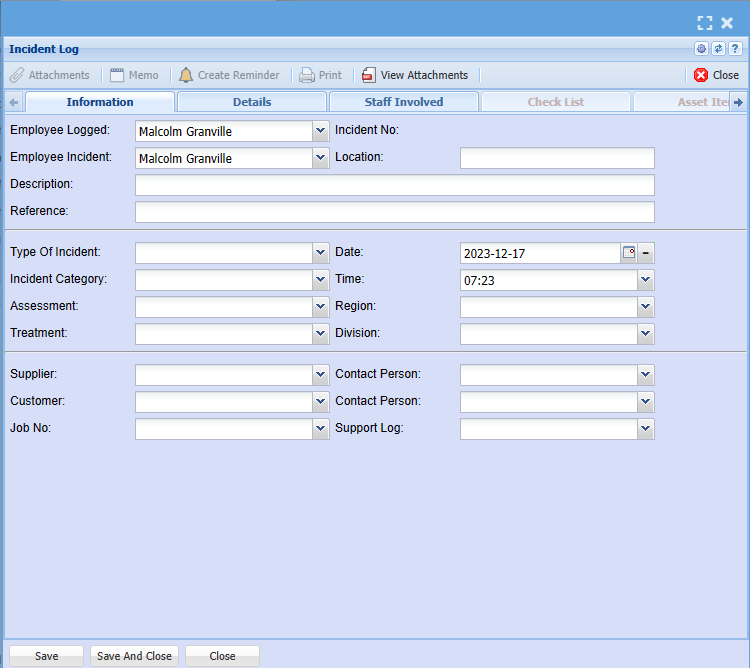
Add / Edit an incident
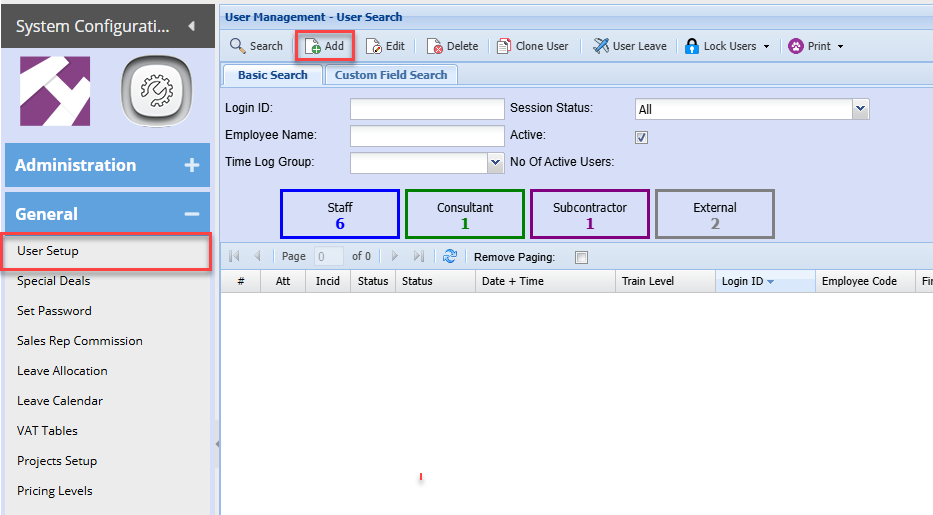
Basic User Setup
ideo Training Manual 2016 - Click Here
To add a new user go to
Systems Configuration Module> General> User Setup
To add a new user click Add
Once complete click save and then click on Details 2
Details 2
| User Leave | Shows the leave allocated to that specific User. |
| Log User Off | Logs the currently selected Employee out. |
| Lock User | Locks the currently selected Employee. |
| Unlock User | Unlocks the currently selected Employee. |
| Lock All Users | Locks all Employees. |
| Unlock All Users | Unlocks all Employees. |
Add User
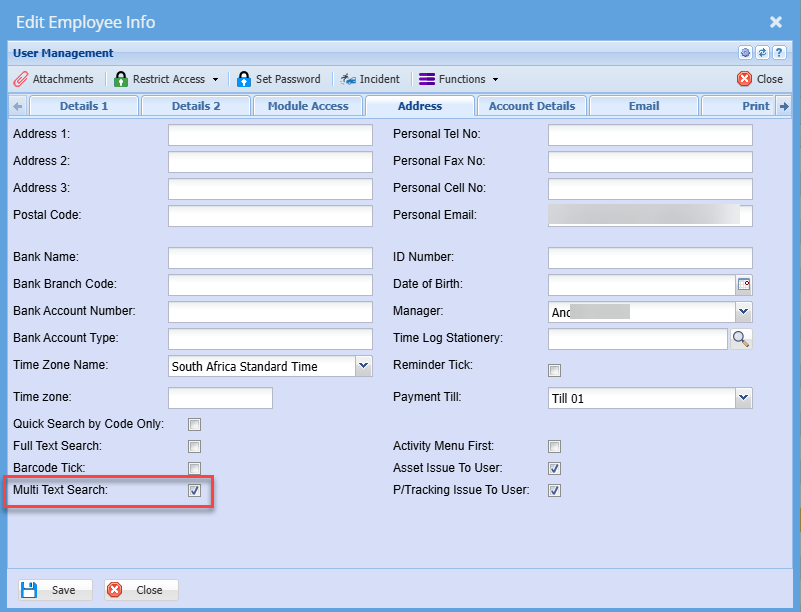
Multi-text Search
Multi text search allows one to search on individual names within the table
These are active on the following drop downs:
- Inventory item search on code and name
- Debtors search on code and name
- Creditors search on code and name
- Task builds on code and name
These are active on the following search windows
-
Inventory setup - description search
-
Debtors setup - description search
-
Creditors setup - description search
-
Job costing - Build task setup - Description search
-
Asset Tracker - Asset name search
-
Inventory Enquiry (Analysis) - Item Description search
-
Debtors Document History - Debtor Name and Short Description
-
Creditors Document History - Creditor Name and Short Description
-
GL Account Analysis - Description, Source Reference and Line Reference
-
Time Log Search - Reference
Two Factor Authentication
How Two-Factor Authentication Works
Two-factor authentication adds an extra layer of security by requiring not just your password, but also a unique code generated by an authentication app.
Time-Based One-Time Passwords
- The code you see in your authenticator app is time-based.
- It refreshes automatically every 30 seconds.
- You don’t need to request a new code manually, your app generates it continuously.
- Each code is valid for a short window and can only be used once.
Frequency of Use
Depending on how your Huge ERP account is configured, you may be prompted to enter a new code:
- Once per day/week/month
- Only when logging in from a new device or location
What You Need to Know
- Keep your authenticator app installed and accessible on your device.
- If you lose access to your app or device, you’ll need to contact support to reset your Two-Factor Authentication setup.
- The code is tied to your device and account, no one else can use it.
To activate the Two Factor Authentication on a user's login:
Systm configuration > General > User Setup
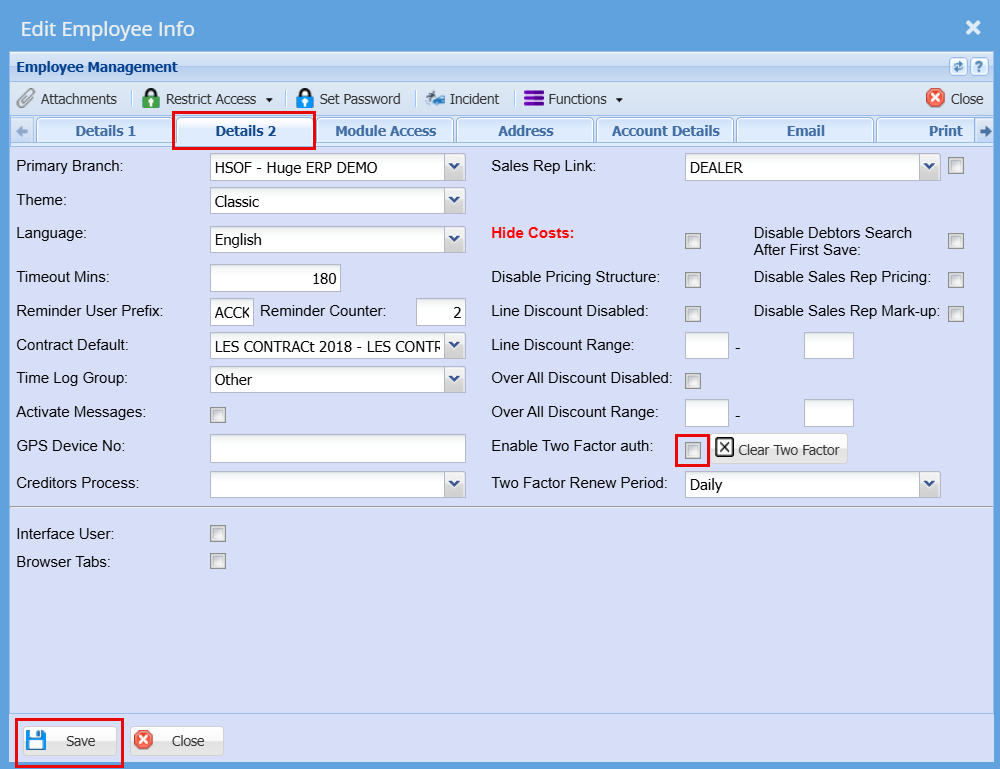
- Double-click on the user profile you wish to update.
- Navigate to the “Details 2” tab within the user profile.
- Select the checkbox labeled “Enable Two Factor Auth.”
- Click “Save” to apply the updated security settings.
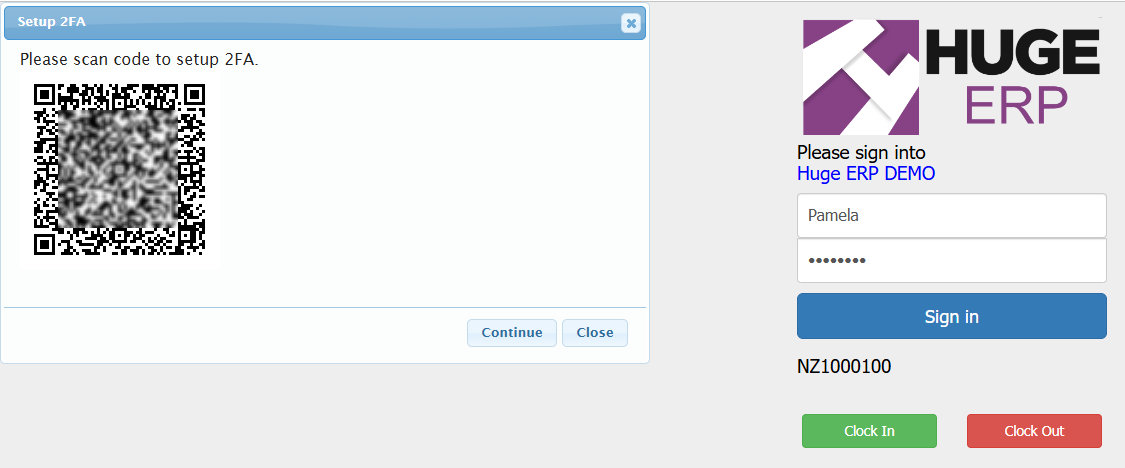
The user must close any active Huge ERP sessions and log in again. The following screen will be displayed.
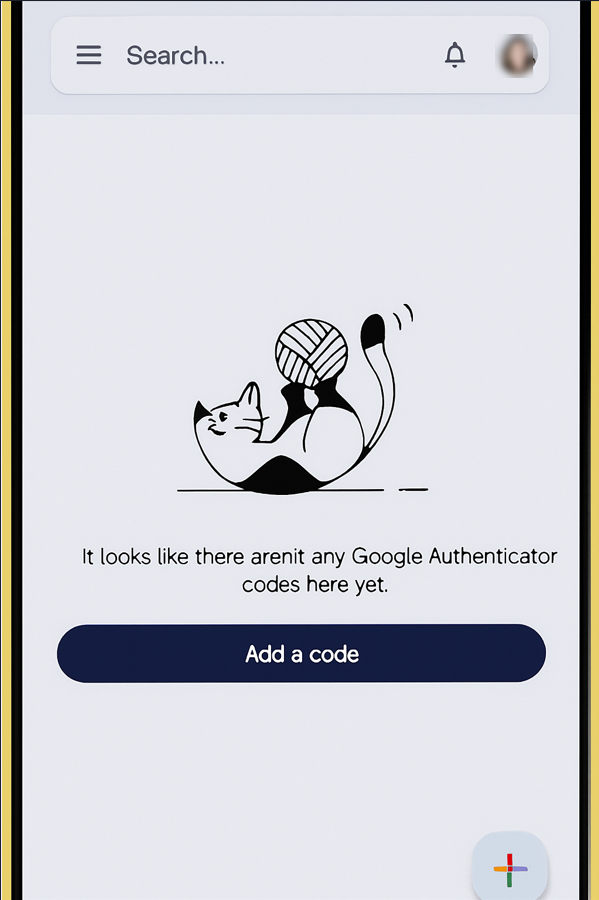
On your phone, open the Authenticator app.
Tap 'Add a code' or the '+' icon in the bottom-right corner, then scan the QR code displayed on your screen.
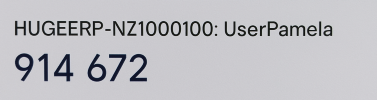
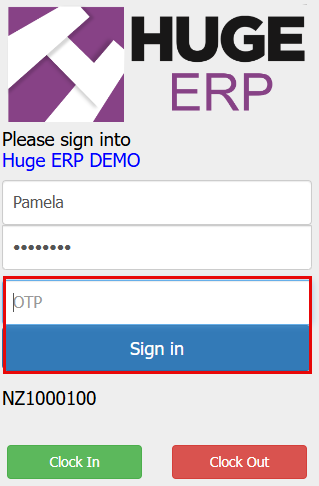
Once set up, you’ll receive a code similar to the one shown below which you will then add to the OTP block when you log in again.
Apon logging in you will need to insert your Password as well as the OTP number from the Authentication App.
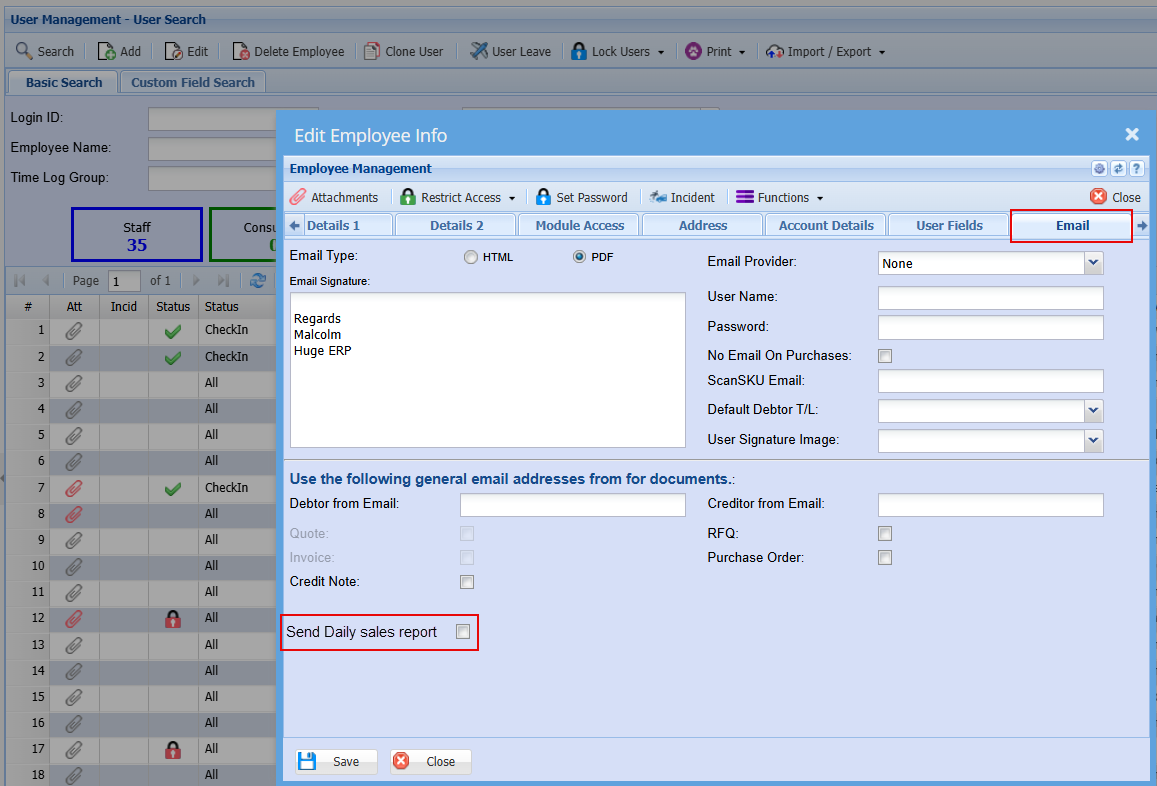
Daily sales rep email report
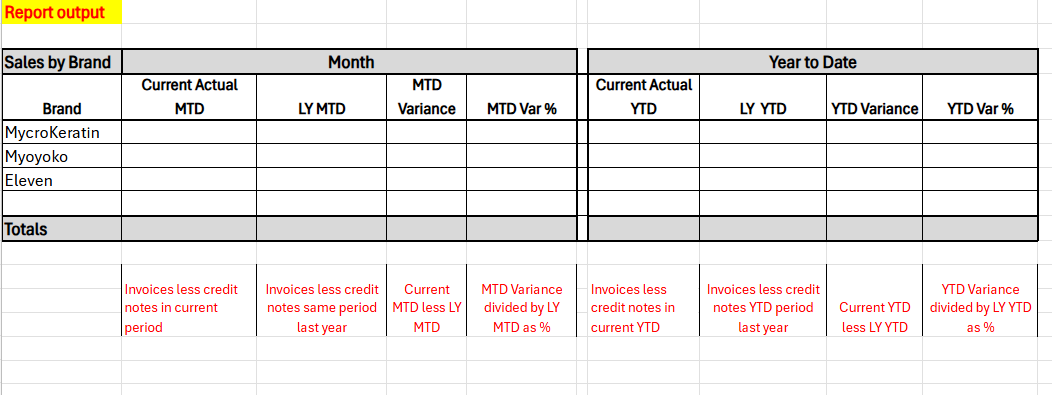
This function will allow a daily email to the user based on the default sales rep.
Daily email summary
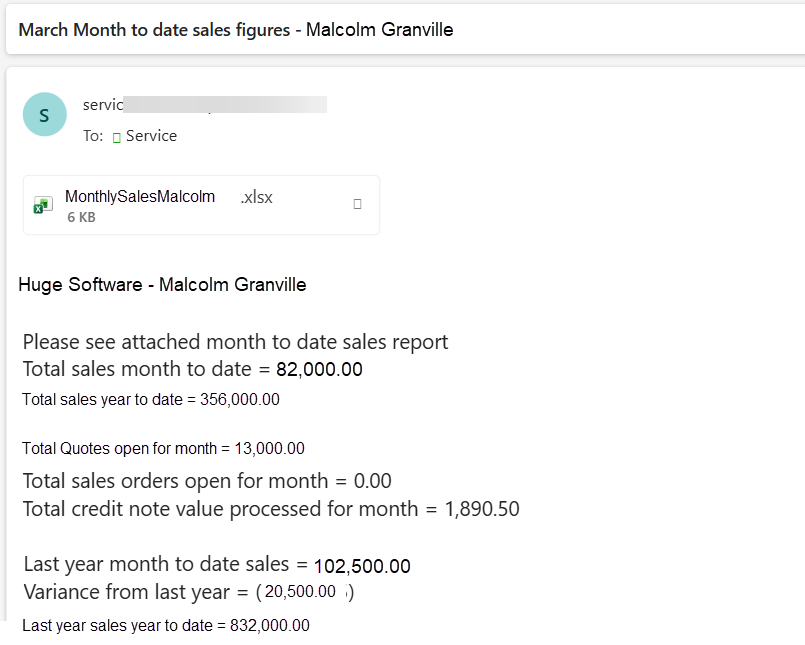
Report attached by Brand for Sales rep
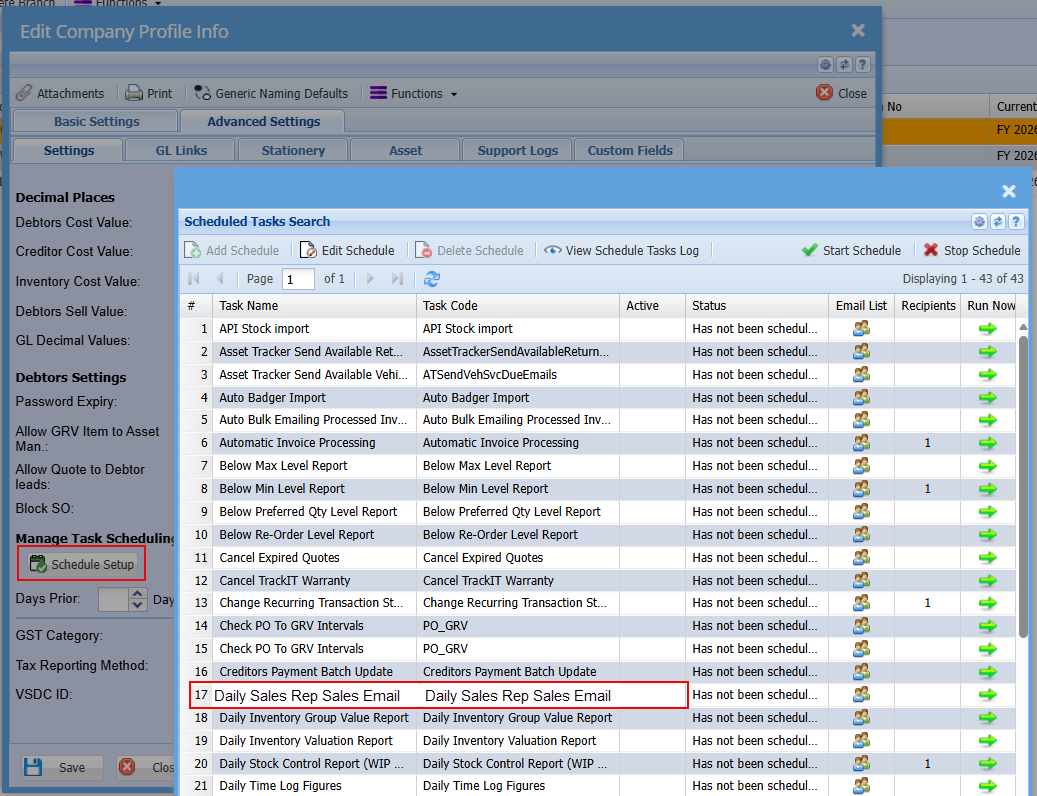
Enable the email schedule to check each user that has the tick activated
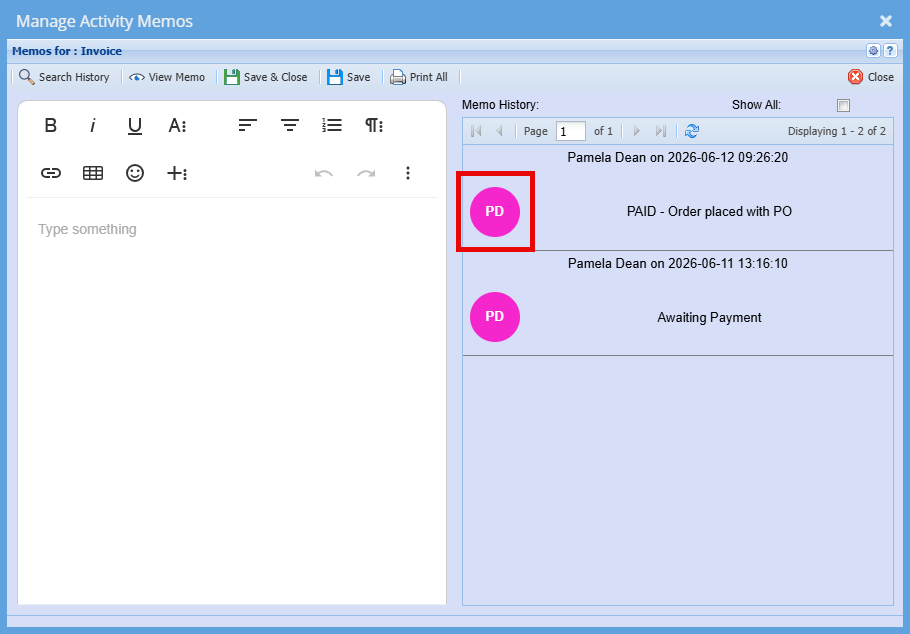
Colour Hex Code - Memo Notes
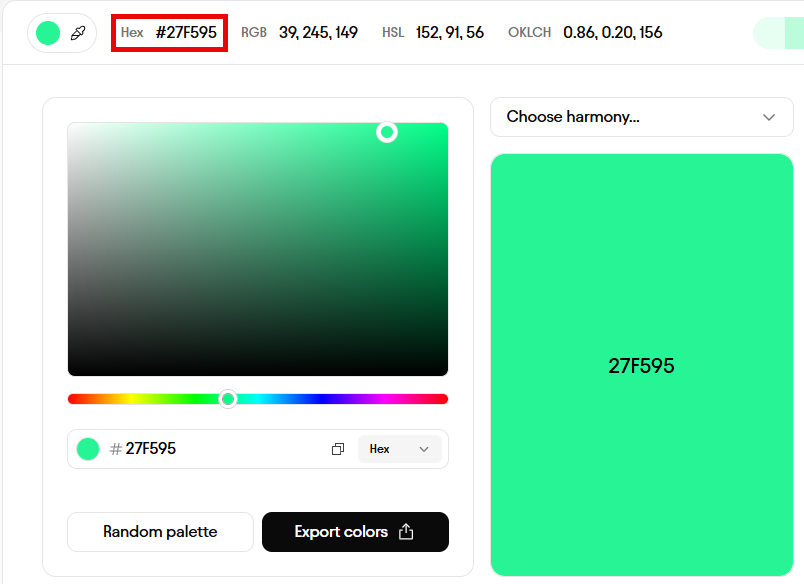
Setup:
Click on the below link to find the colour of your choice
Copy the Hex Number
In Huge ERP:
System Configuration > General > User Setup
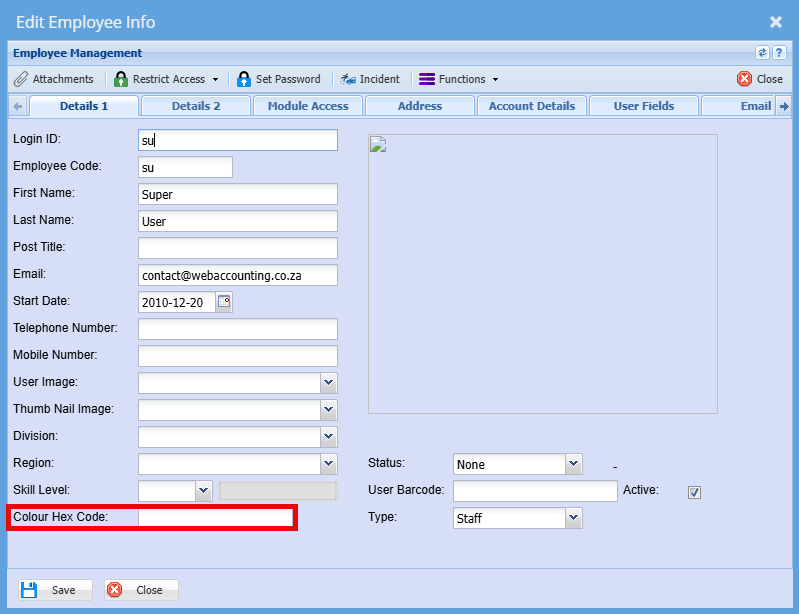
- Double click on the username of the person you want to set a colour for
- Paste the colour code into the "Colour Hex Code" field
- Click "Save"