Job Costing Invoicing
Invoicing
- As a fully Completed Job
- Line by Line
Invoicing a fully completed job
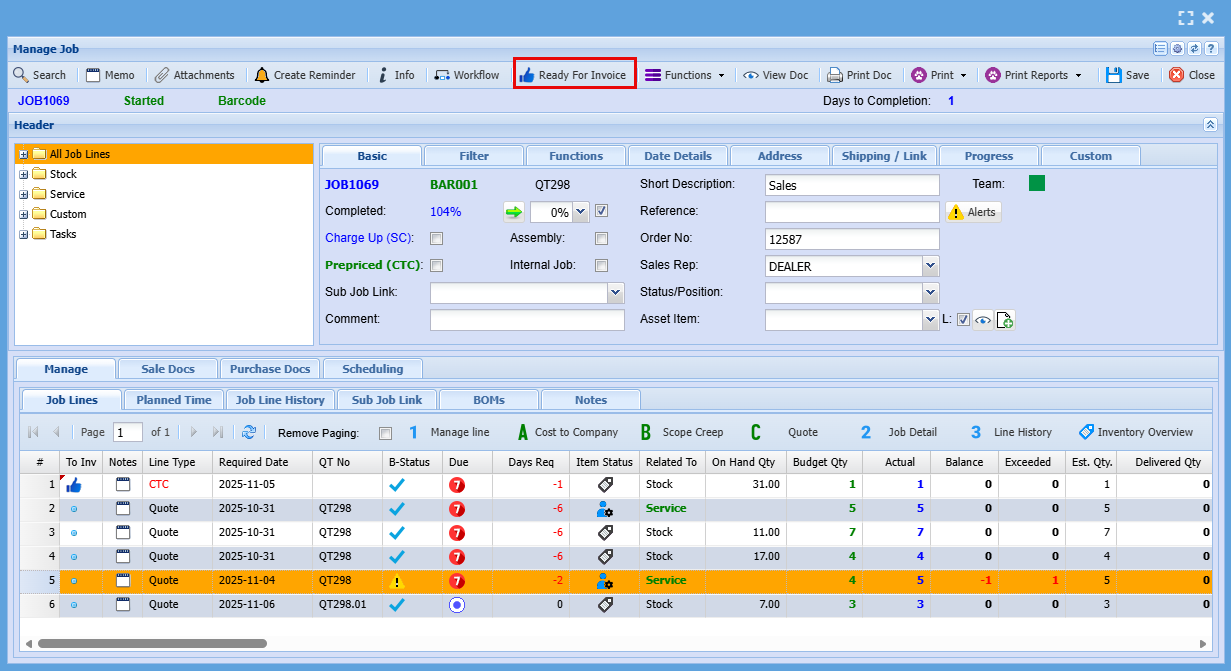
Once the job is fully completed and all line items have been managed, you can click the “Thumbs Up” icon at the top tabs, labeled “Ready to Invoice.”
Invoicing a Job by Line/s
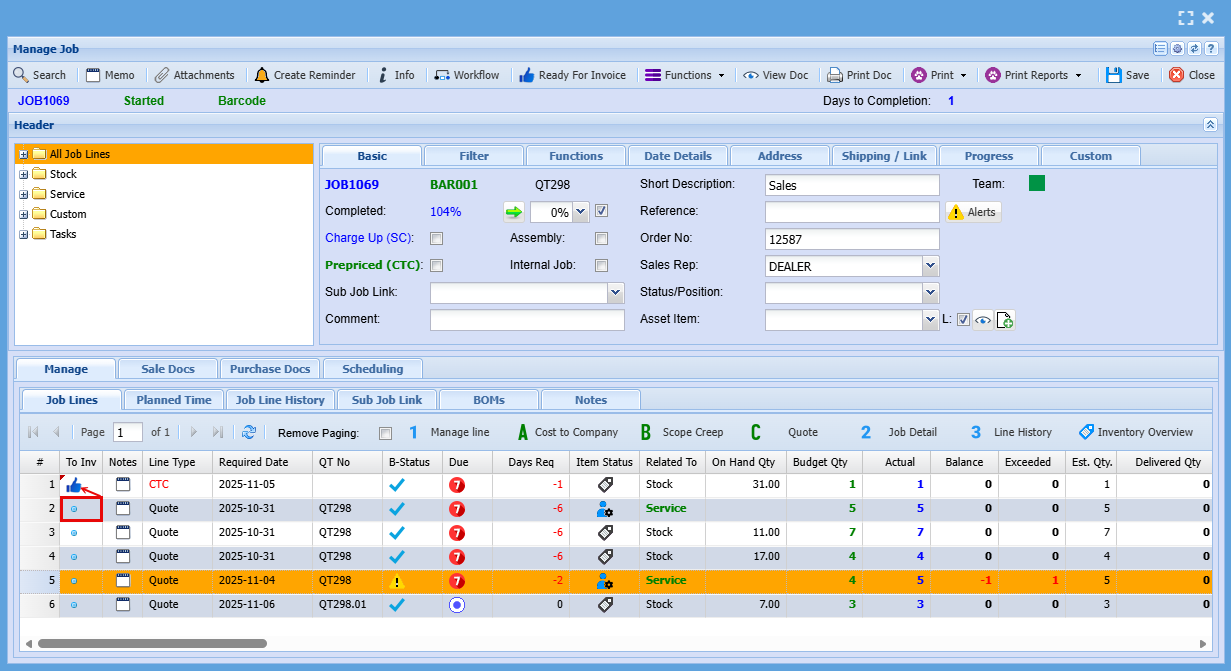
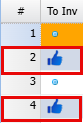
For line-by-line invoicing, each line item includes a dot under the “To Inv” column. Clicking this dot will change it to a “Thumbs Up” icon, indicating that the item is ready to be invoiced. Once selected, the line will be moved over to the invoice.
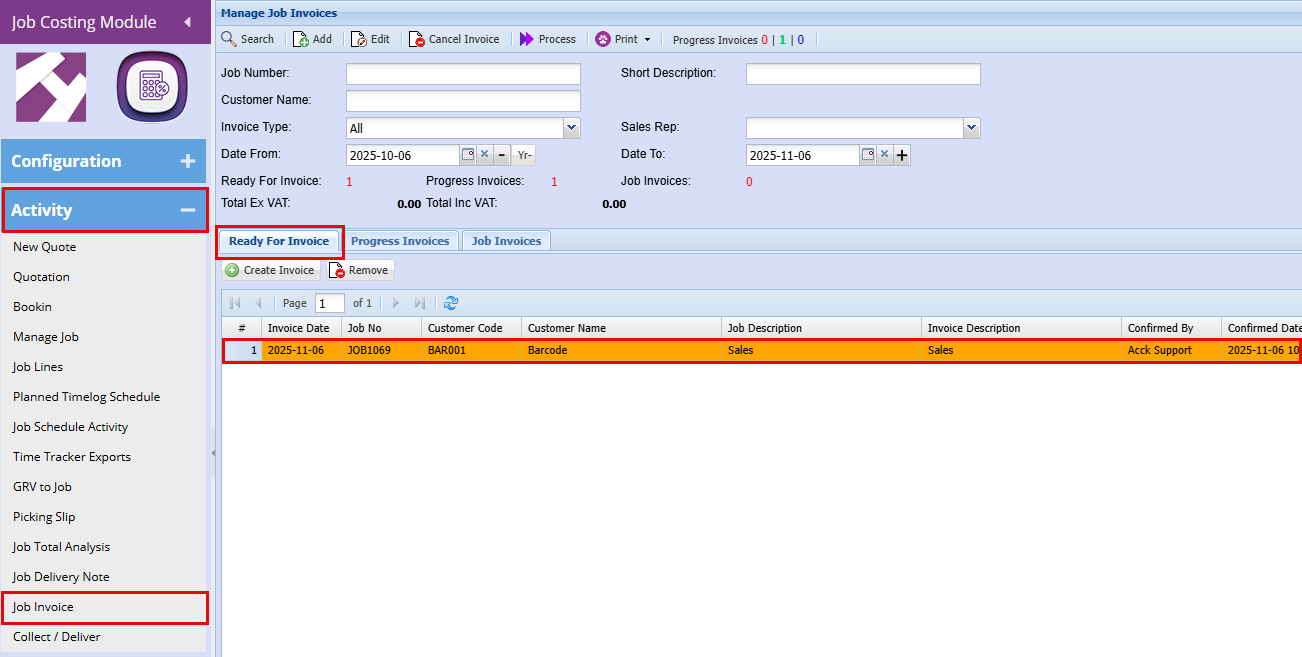
To invoice a Job go to Job Invoice
Job Costing > Activity > Job Invoice
You will see that your invoice is sitting in the "Ready For Invoice" tab
- Double click on the invoice line to open the invoice
You will then need to choose what type of Invoice you are creating
- Percentage-Based Invoicing - Percentage invoicing enables you to specify a billing amount and include a summary description, while concealing detailed line items. This approach facilitates progressive billing over the duration of a project: for example, when a client pays 25% upfront to initiate work, followed by three equal monthly payments covering the remaining 75%. This does not look at what has or has not been managed on a job.
- Usage/Actual Invoicing - Usage or Actual Invoicing allows you to bill based on real-time job progress, capturing actual hours worked, materials used, or completed tasks. It displays detailed line items and supports flexible billing as the job evolves—ideal for time-and-materials work or projects with variable scope and deliverables.
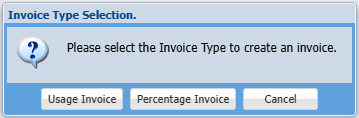
Once an invoice type, either Usage or Percentage, is selected for a job, it becomes fixed and cannot be changed. This selection determines how the job will be invoiced through to completion. After choosing the invoice type, the next screen will display the job number and confirm the selected invoicing method
Next, indicate whether this is the final invoice by ticking the Final Invoice box.
- If you do not tick "Final Invoice," the job will remain open. You will also be able to do multiple invoices on this job.
- If you do tick "Final Invoice" and all work is complete, the system will automatically check for any open documents related to the job and alert you. These documents must be closed or cancelled before the invoice can be processed.
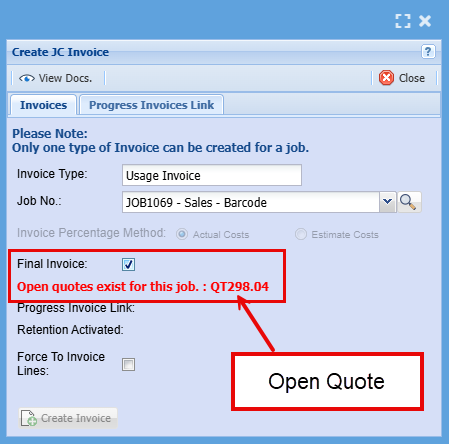

- Click Create Invoice
- Click Continue
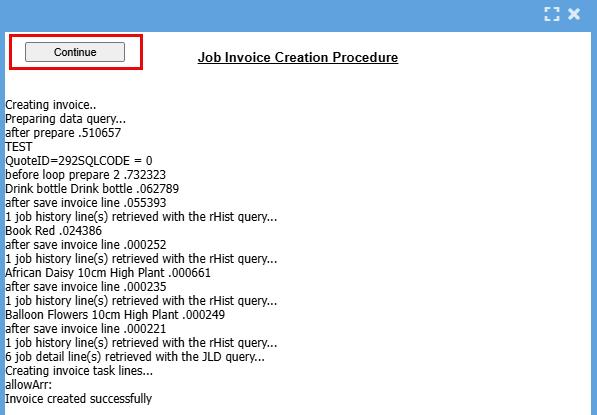
Once you create a final invoice you will not be able to open the Job in Manage Job
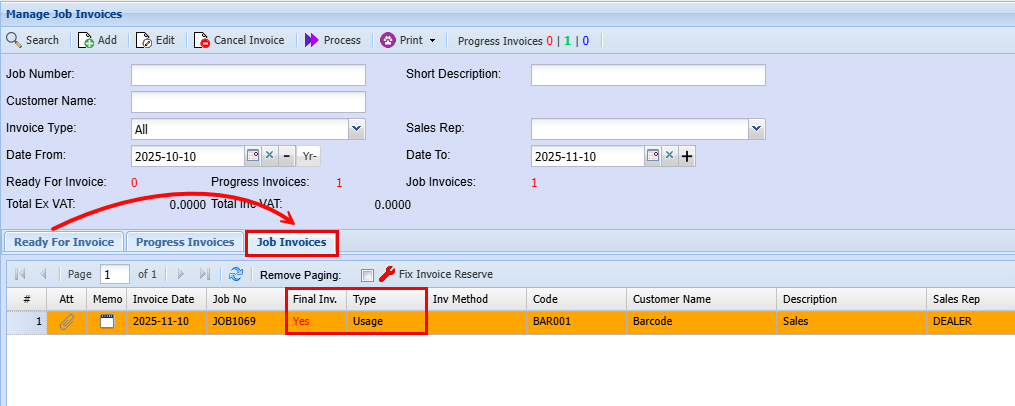
The invoice will now appear under the "Job Invoices" tab, having moved from the "Ready For Invoice" tab. In the "Final Inv." column, you'll see either "Yes" or "No" based on your earlier selection. This view also confirms the invoicing method chosen, either Usage or Percentage.
- Double Click on the Invoice line to open the invoice
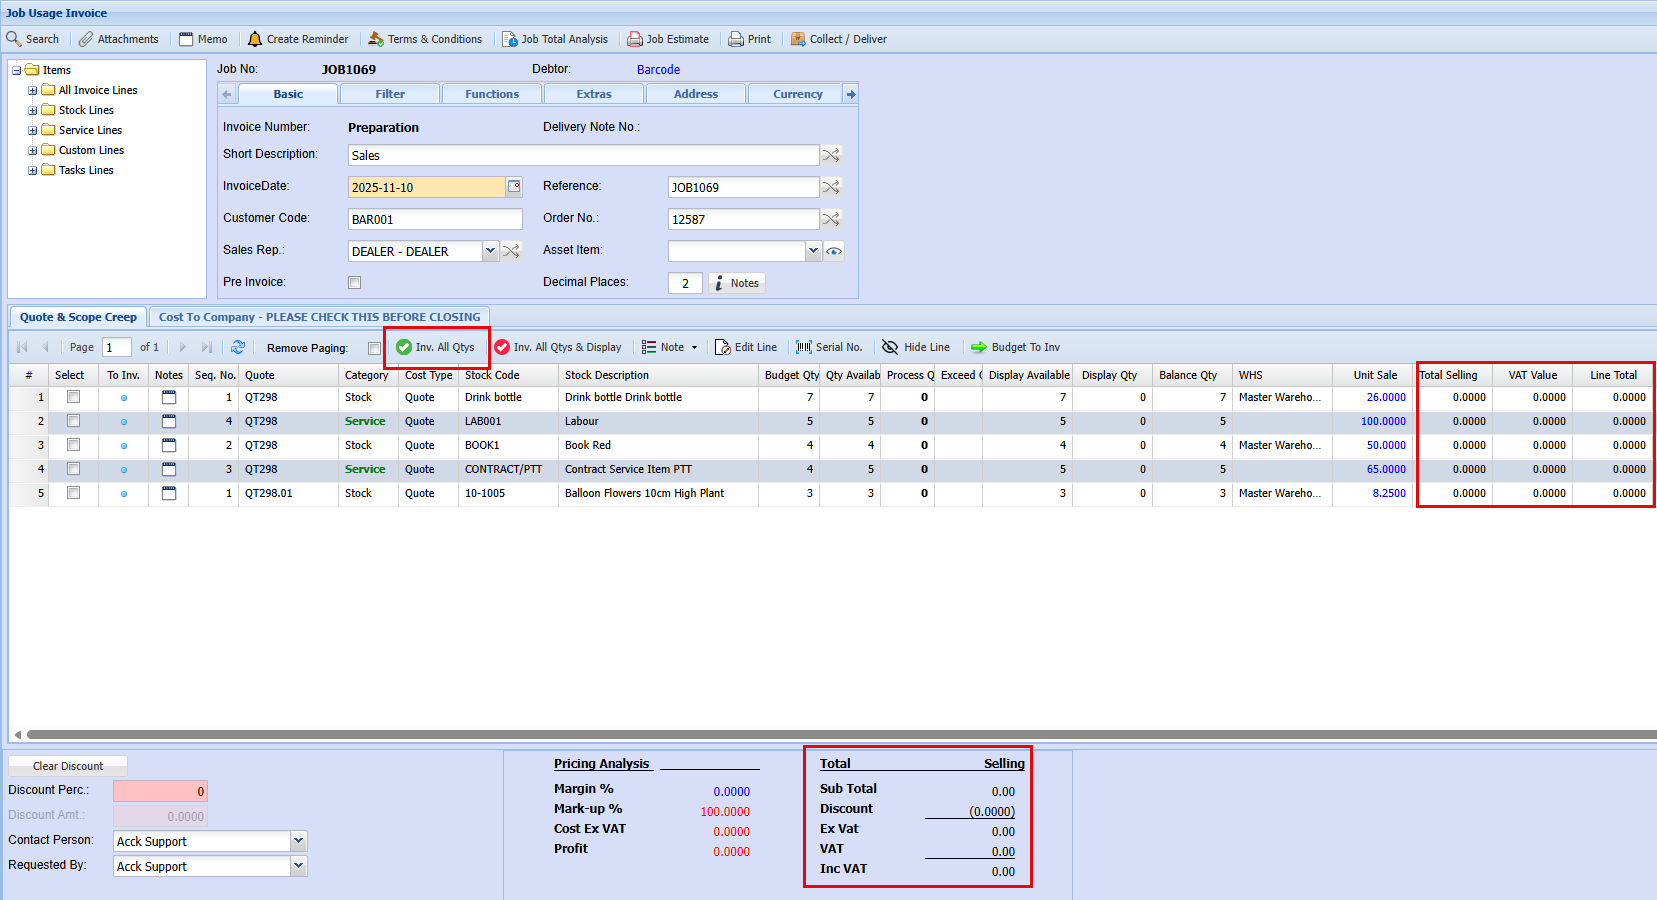
At this stage, all values are set to zero, prompting you to specify what you’d like to invoice. For a straightforward job, simply click the green "Invoice All Qtys" button to proceed as shown in the below screenshot.
|
|
By clicking "Inv. All Qtys" to add total to your invoice it will add all lines including all Cost to Company (CTC) Lines. These can be deleted in added accidently |
|
|
By selecting "Inv. All Qtys & Display," you’ll be able to choose which items appear on the invoice with or without a dollar value. To configure these display settings, click on the second tab labeled "Cost To Company." |
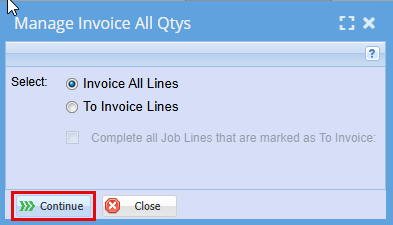
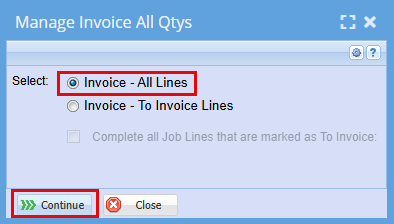
The below Manage Invoice All Qtys window will pop up:
- You will then select "Invoice - All Lines"
- Click Continue
|
Invoice - All Lines
|
You would select All Lines to be invoiced if you selected the be button to invoice your job |
|
Invoice - To Invoice Lines
|
If you’ve marked specific lines for invoicing using the thumbs-up icon in the "To Inv" column, proceed by selecting the "To Invoice Lines" option to generate an invoice for only those approved items. |

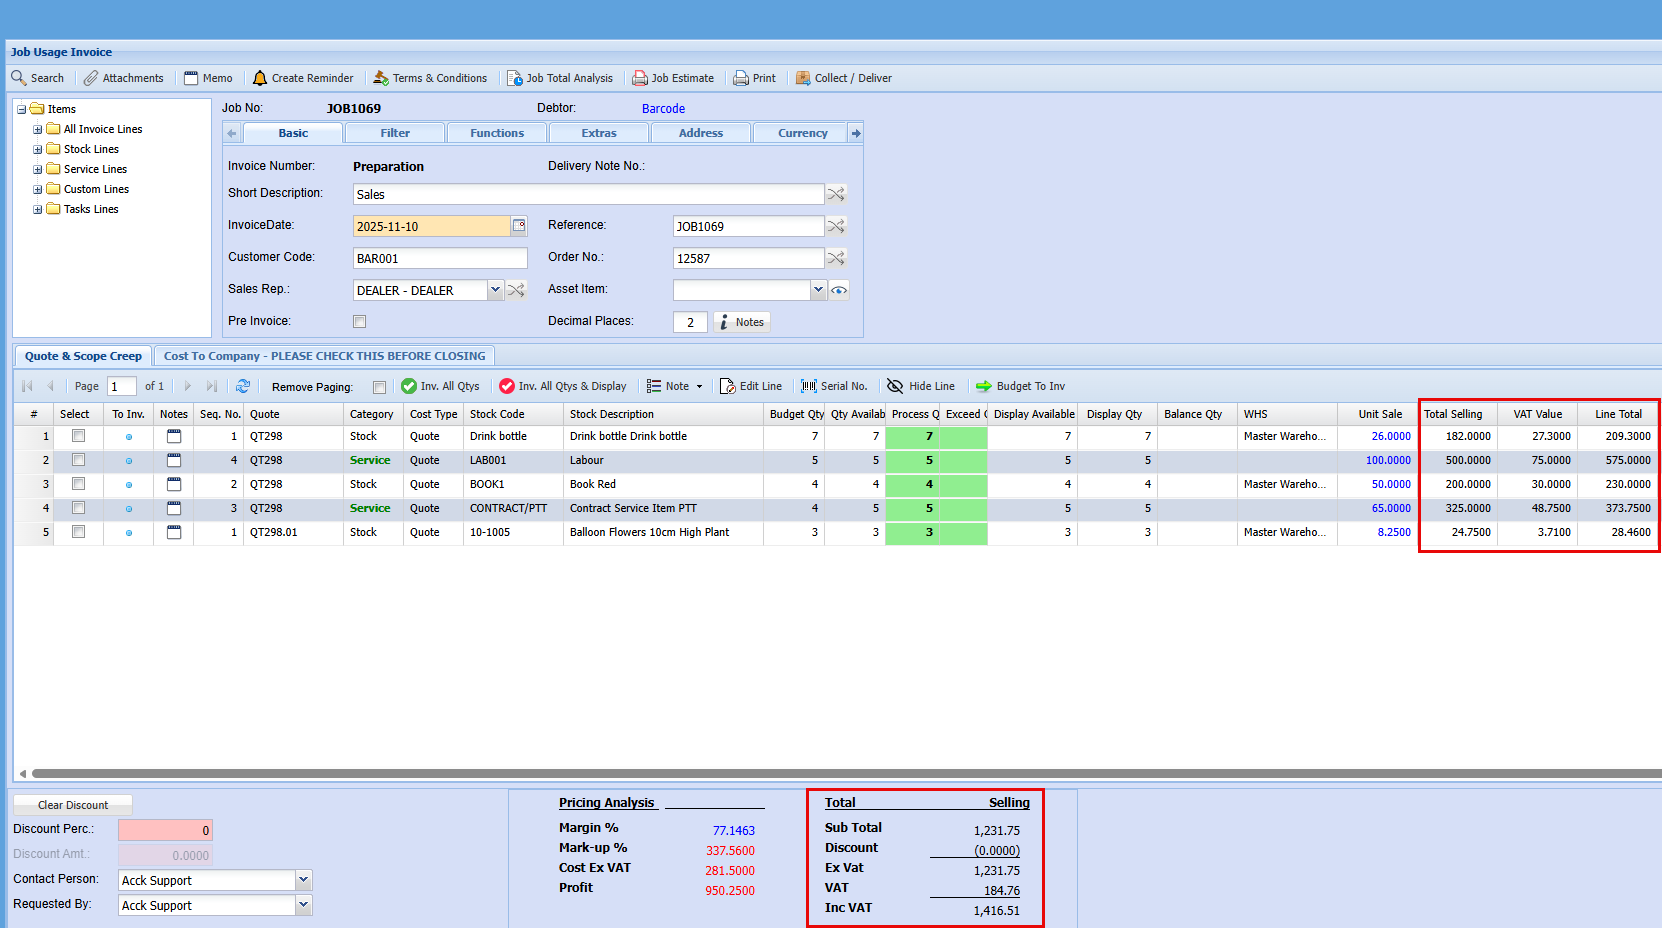
Once you have clicked "Continue" you will see that the values have pulled through from the Job.
At this point you can make any necessary changes to this invoice before finalizing it.
Reminder: If you've selected "Final Invoice," no further invoices can be generated for this job. Any managed lines that are not invoiced at this stage will be written off automatically by the system (CTC). However, if you've chosen to invoice only selected lines, you can adjust the quantities here, and any remaining balance will be available for invoicing at a later stage.
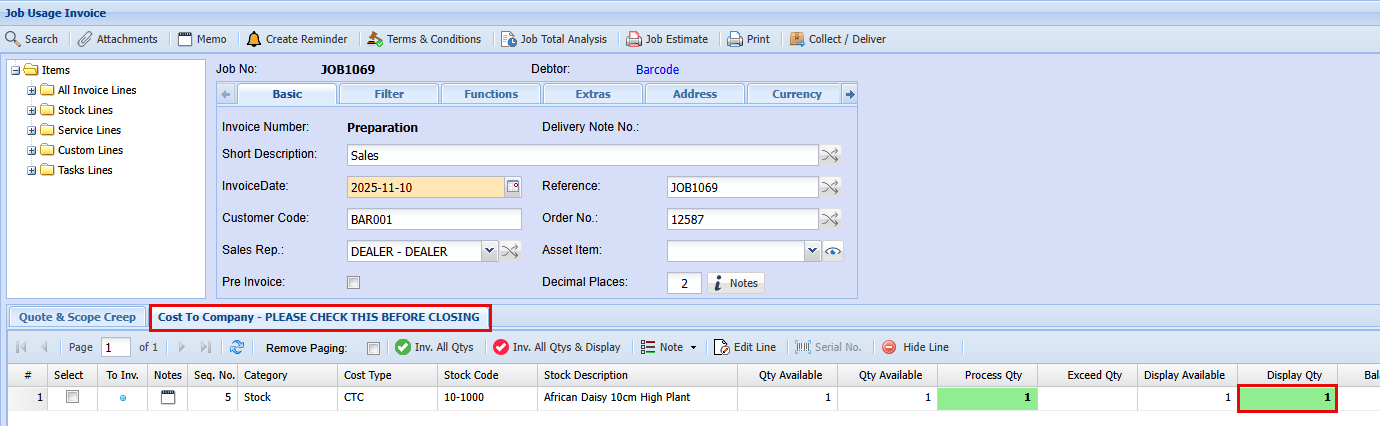
Before proceeding with this invoice, please review the Cost to Company (CTC) tab. To display specific lines on the invoice, enter a value in the corresponding "Display Qty" field. Note: this will show the line items without revealing any cost or sell price.
To view the invoice to check how it will be displaced
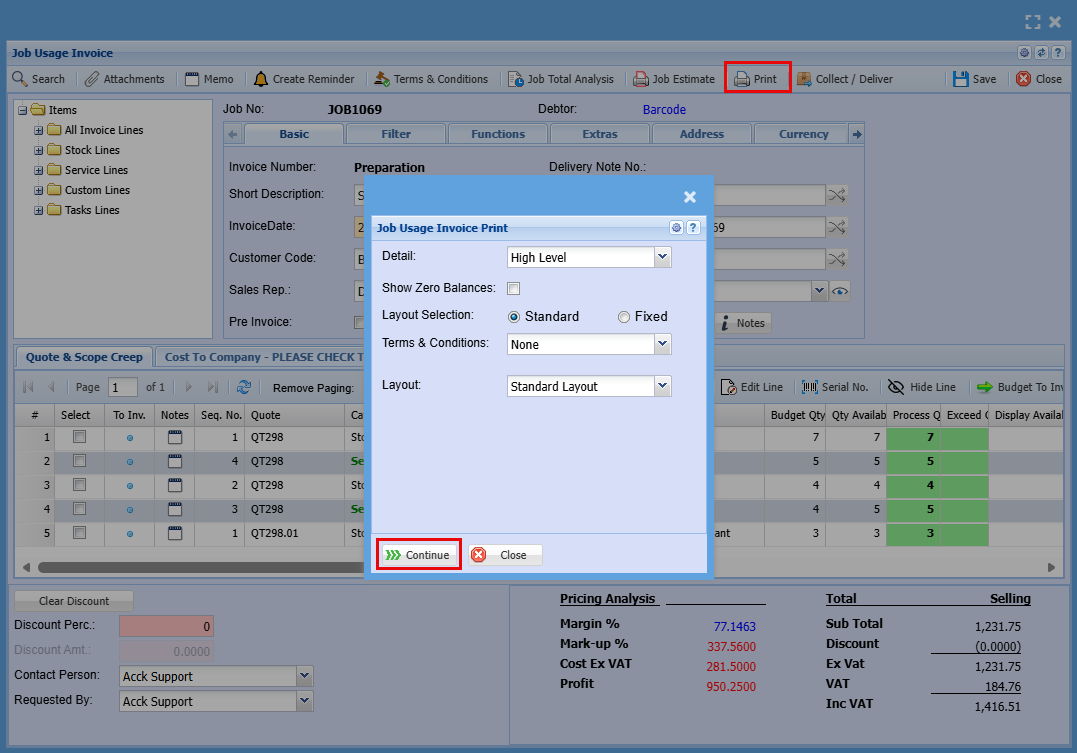
- Click the "Print" button at the top and
- Click "Continue" on the "Job Usage Invoice Print" Screen
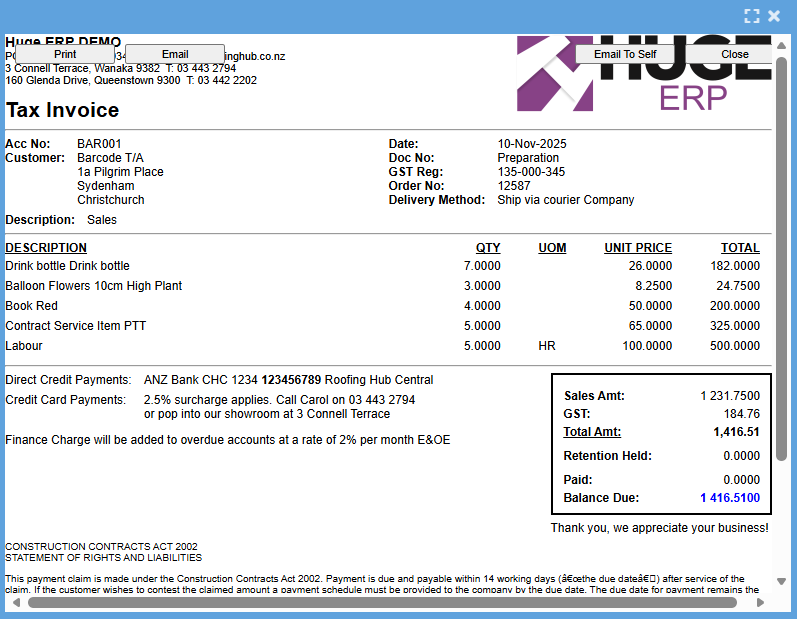
You will now be able to see as shown below what the invoice will look like when sent out.
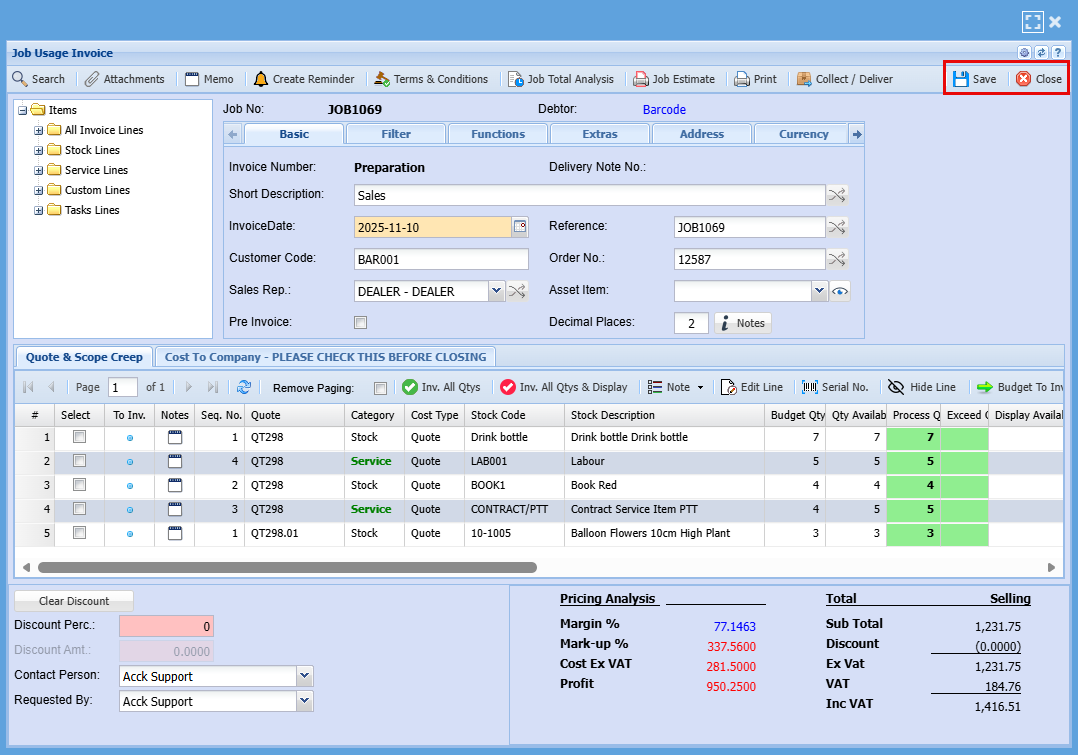
Once you are happy with it all
- Click "Save"
- Click "Close"
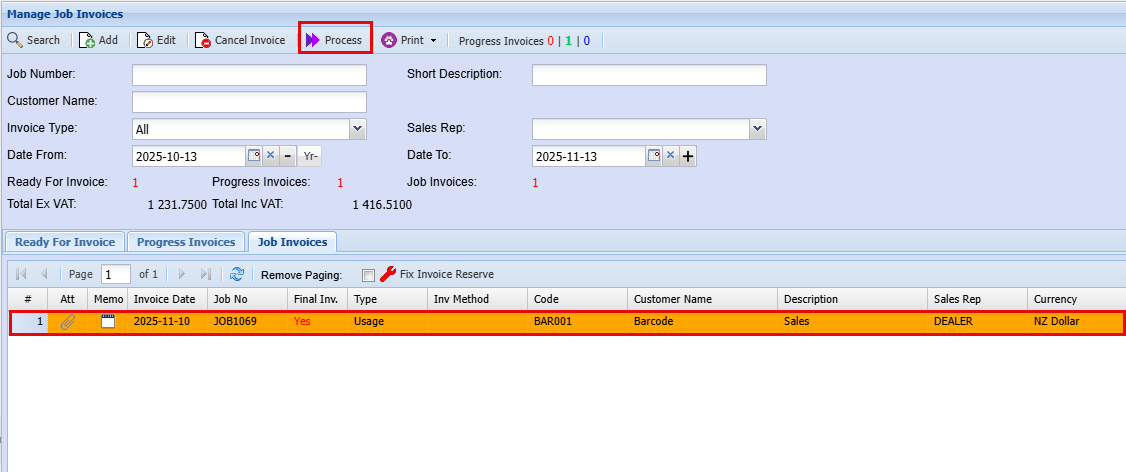
- Highlight the line of the invoice you want to process and send out.
- Click "Process" at the top of the screen
If an item on the invoice is marked as "Cost to Company"—meaning it's not charged to the customer—you’ll see the following prompt to confirm.
- Click "Yes"
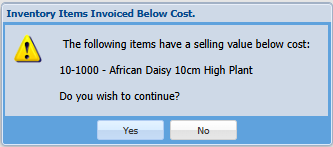
And then you will get the next screen
- Click "Continue"
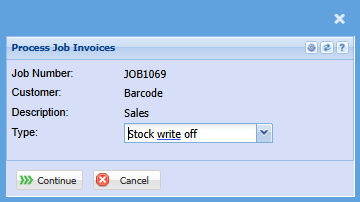
You'll see the screen below indicating that the system is compiling and processing all transactions related to this invoice.
- Click "Continue"
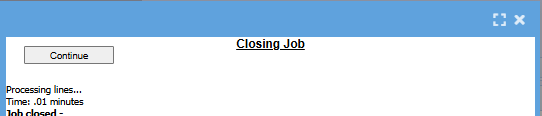
This is the final screen where you can make any last adjustments to your invoice.
- Click "Continue"
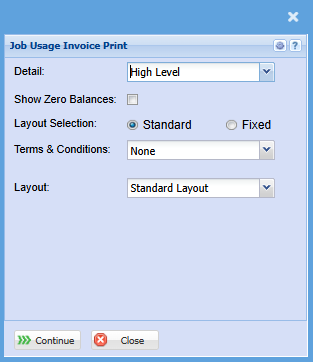
| Details | This changes the view of your invoice when clicking print |
| Show Zero Balances | |
| Layout Selection | |
| Terms & Conditions | |
| Layout |
The invoice is now finalized and ready to be sent to your customer for payment. Once issued, it will automatically close the associated job.
Click "Print" or "Email" to send this final invoice out to the customer
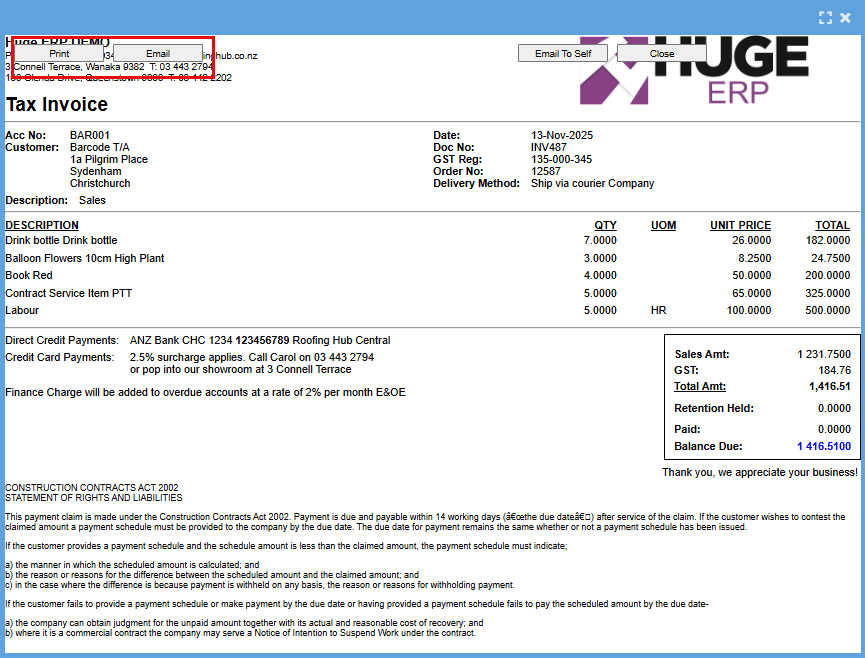
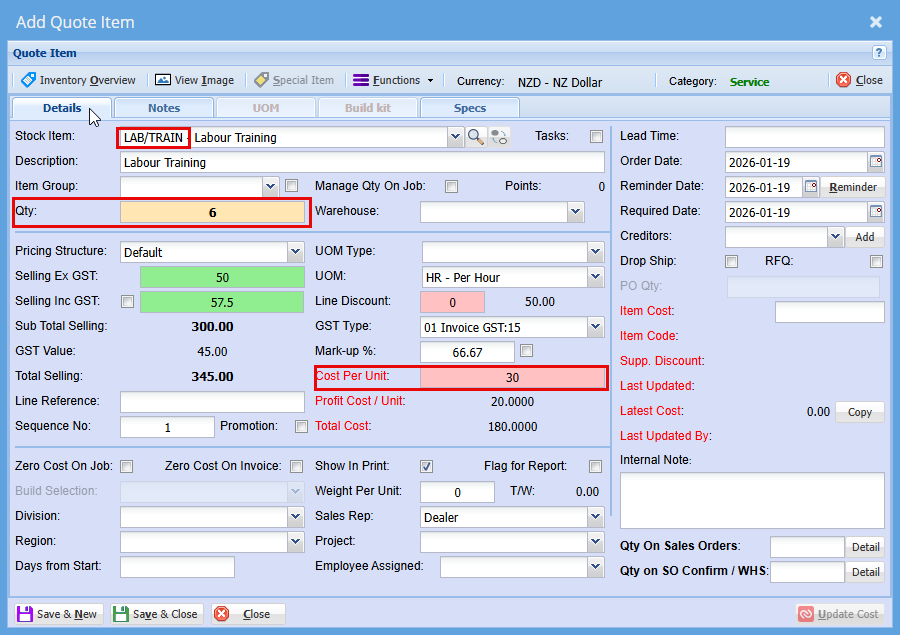
Job Invoice - Split by Employee

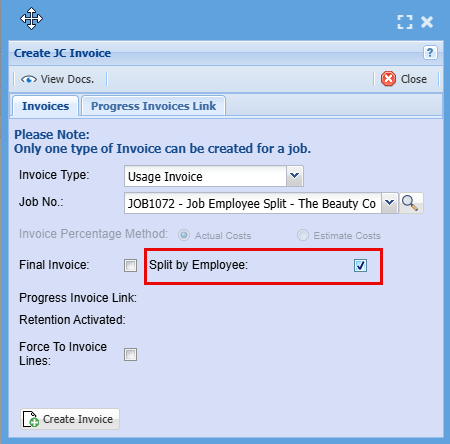
When invoicing you will get the below screen. Here you will need to tick the "Split by Employee" box which will then separate the employees on the invoice.
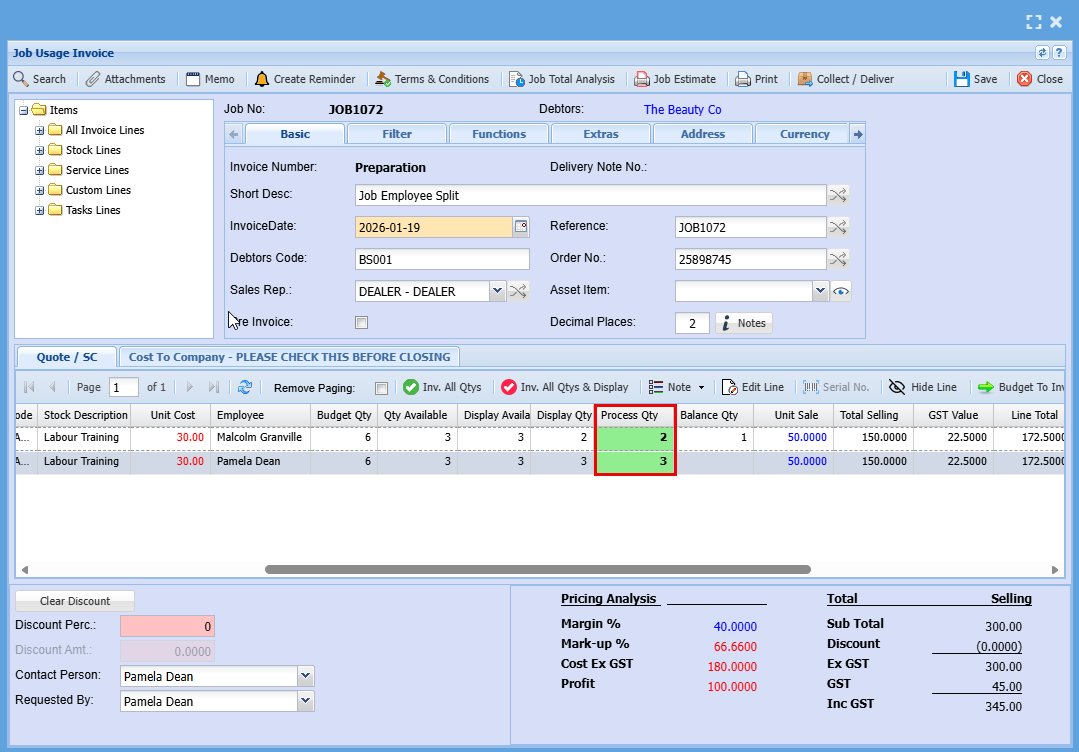
The invoice will have a column now that will show the name of the employees and how many hours they did on the job.
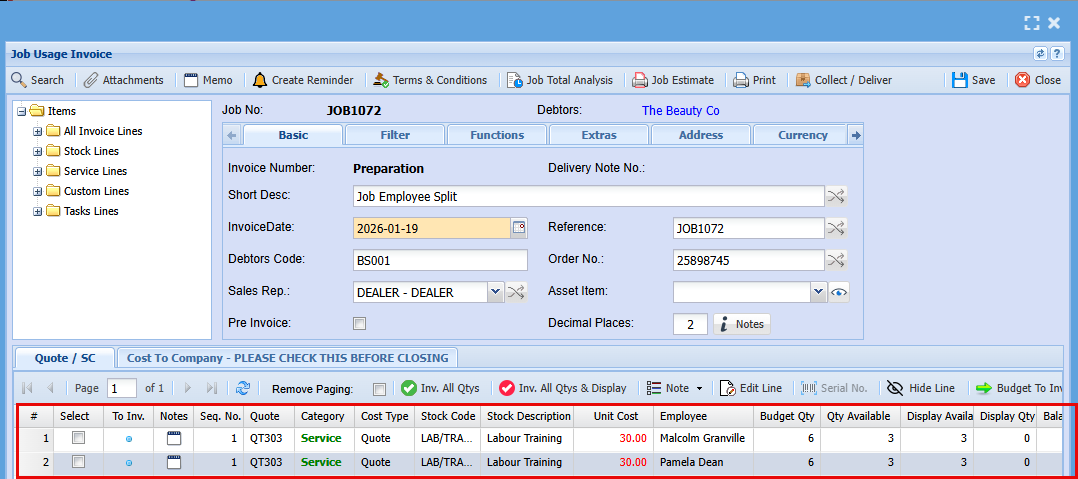
In order to discount the hours or change the hours for this invoice you will need to click Invoice All Quantities (Inv. All Qtys)
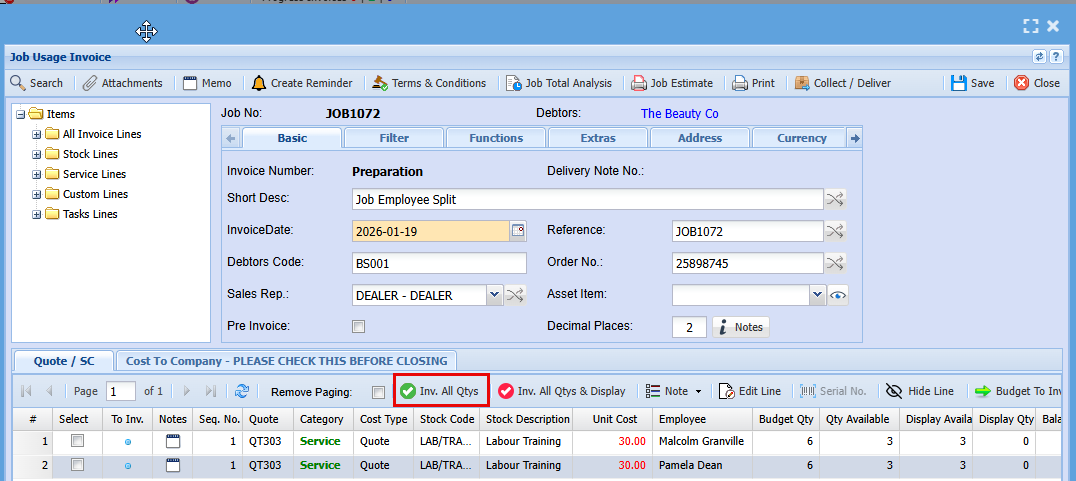
- Click Continue