Stock Level Adjustment Menu
- Stock Level Adjustment
- Stock level Adjustment Import
- Stock Level Adjustment Journal
- Stock level Adjustment In And Out
- Import Adjustment
Stock Level Adjustment
Inventory >Activity>Stock Level Adjustment
To create a stock level item click on the Add button
fill in the header information of the stock level adjustment and then click on Save.
.png)
Click on Add to insert lines.
.png)
In this window search for the stock item and select it, select your warehouse that you want to increase / decrease the stock in. Put in the quantity that you want the increase to go to and put in a reason. Click on Save and close to save changes.
Insert all the items that need a stock adjustment. Click on save and then close to take you back to the stock level adjustment screen.
Remember that we can also import stock level adjustments from an Excel Sheet.
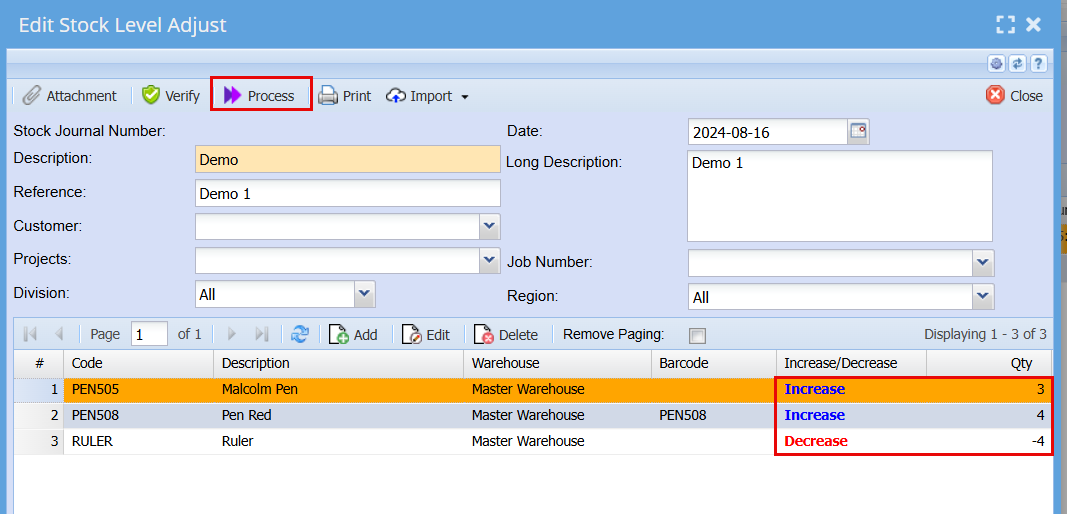
Once you are back to the window you will notice your stock level adjustment journal waiting to be processed.
.png)
|
Note that Stock Level Adjustments will only process on current dates, they will not be able to be back dated or forward dated. |
We allow only one time where you can back date the stock level adjustment and that is when one is doing the take on balances of stock.
The rule is that it has to be the VERY first transaction to be processed.
Now go to the tab below where it says process and click on the process button.
The stock level adjustment will process the stock and update your stock quantities.
Stock level Adjustment Import
Please keep the following in mind:
| 1 | Once you begin with this procedure no source documents can be processed. Only a Stock Take freezes the inventory module. |
| 2 | Do a backup. |
.png)
Print an Inventory Valuation Report before starting a Stock Take
IM – Report – Inventory Valuation
.png)
If you don’t use any of the add on modules or Sales Orders then run a consolidated Valuation report per warehouse. However if you have the Bill of Materials add on module you will need to run a minimum of two reports.
Example: A company is using Huge ERP and the Bill of Materials add on module.
.png)
This will give you a complete overview of all stock on hand and value
.png)
This report will give you all the stock that will appear in your BOM WIP account. Remember you can not affect this stock.
.png)
This is the stock that is to be counted.
.png)
GL – Reports - Trial Balance
Print a Trial Balance
.png)
Inventory – Reports – Inventory Count
Print an Inventory Count Report
.png)
Print and export to excel
Proceed with a manual stock take – See attachment ‘Counted Qty.csv’
.png)
Sort by Column Variance
.png)
Now copy and paste the negative values onto a new excel worksheet and do the same for the positive. See attachments ‘Positive Stock’ and ‘Negative Stock’.
Remember that if the System Qty and Counted Qty are identical there is no reason to do a Stock Journal for these items.
.png)
On the both import files create a new column called ‘Increase / Decrease’. This will allow the system to know whether the amount being import should increase or decrease the quantity on hand. To ‘Increase’ use a 1 and to ‘Decrease’ use a 0.
Things to remember:
| 1 | You cannot import a negative figure, so re-evaluate the equation that you were using. |
| 2 | The Variance column cannot have a 1000 comma separator. |
.png)
IM - Activity – Stock Level Adjustment
Click on the Upload button
.png)
Browse button
.png)
Browse for the first import file and click on ‘Open’
.png)
Upload’
.png)
.png)
.png)
Stock Level Adjustment Journal
Please keep the following in mind:
| 1 | Once you begin with this procedure no source documents can be processed. Only a Stock Take freezes the inventory module. |
| 2 | Do a backup. |
Print an Inventory Valuation Report before starting a Stock Take
IM – Report – Inventory Valuation
If you don’t use any of the add on modules or Sales Orders then run a consolidated Valuation report per warehouse. However if you have the Bill of Materials add on module you will need to run a minimum of two reports.
Example: A company is using Huge ERP and the Bill of Materials add on module.
Stock level Adjustment In And Out
After working through this manual you should be able to do a stock level adjustment to convert paper reams into paper sheets.
Open the Inventory module.
Click on activity and then stock level adjustment.
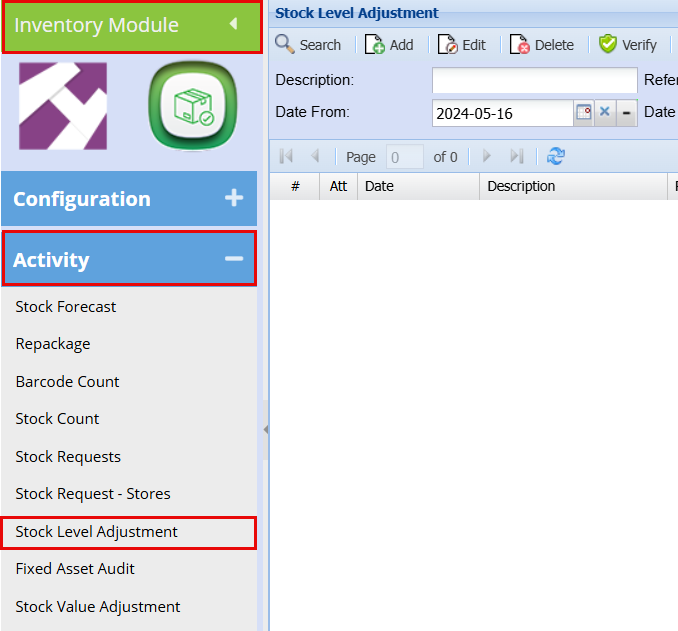
This will open up the stock level adjustment screen. From here you can search for all existing stock level adjustments or create a new one. To create a new stock level adjustment click on Add.
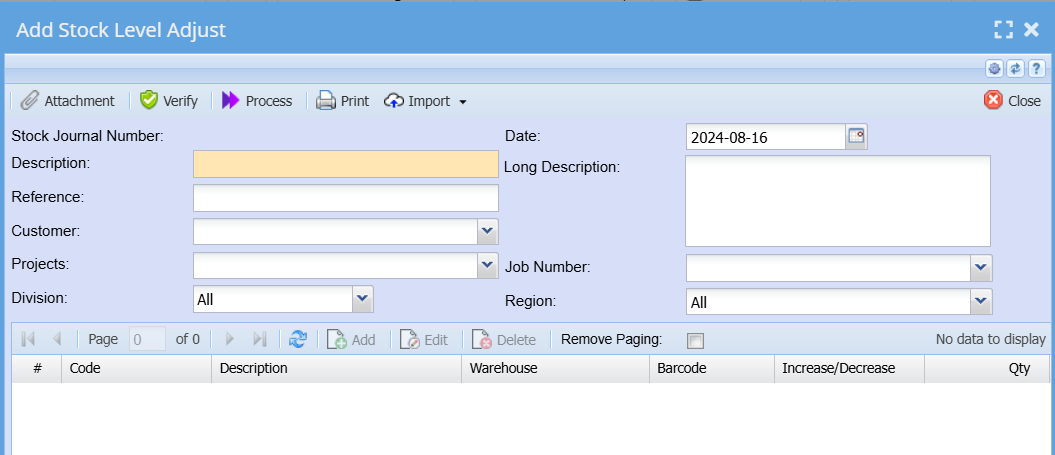
| Description | A description for the specific stock level adjustment. |
| Reference | A reference for this specific stock level adjustment. An example could be “Convert paper reams to paper sheets” |
| Date | This should be the date on which the stock level adjustment is done. |
| Long Description | This is an optional field and does not have to be completed. |
| Job No | Search for the job number if this stock level adjustment is for a specific job. |
Once all the fields have been completed click on save.
Notice that the greyed-out buttons (Add, Edit, Delete) in the middle of the screen now opens up. To add an item
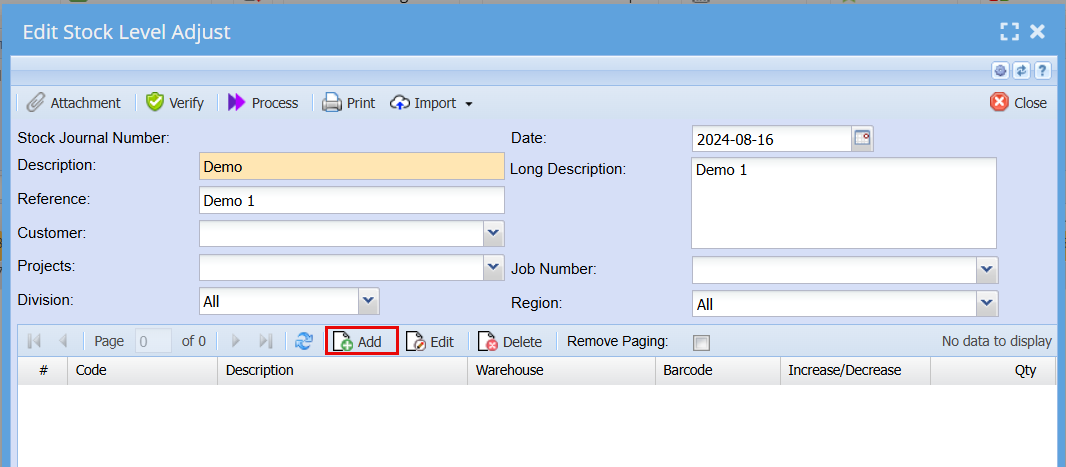
This will take you to the stock level adjustment click on Add.
This will open the stock level adjustment.
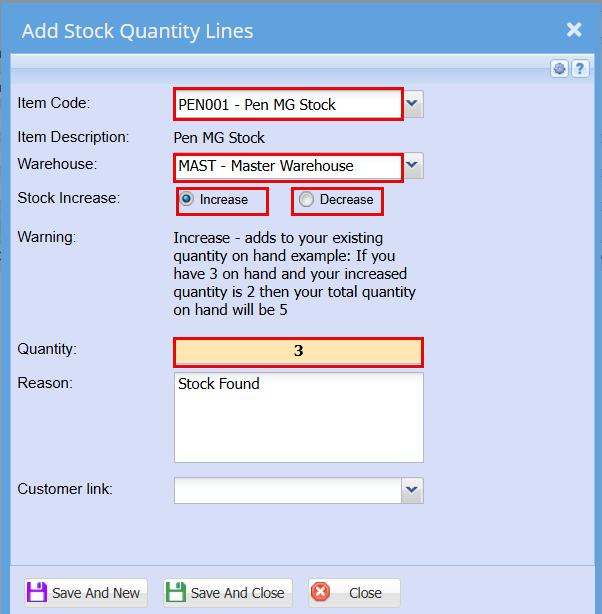
| Item Code | Search for the item by description or code. In this case we want to decrease the paper reams and increase the paper sheets so for the first one selects paper reams. |
| Warehouse | Select Master Warehouse. |
| Increase/Decrease | Select decrease for paper reams. |
| Quantity | Type the number of paper reams to be decreased. |
| Reason | Convert paper reams into paper sheets. |
Here you can adjustment one or more items at the same time.
Click save and close or close when you are done.
This will take you back to the stock level adjustment screen will be able to see all your adjustments on individual itema.
When you are happy with your list, click process at the top of your page.
A processing screen will pop up, click Refresh status and then close.

This completes your stock level adjustment
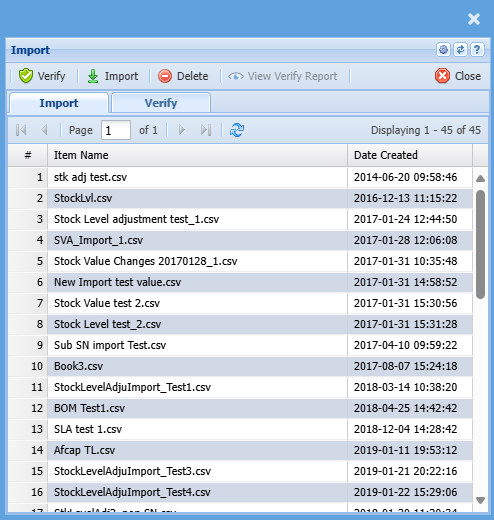
Import
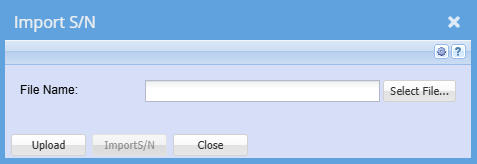
Import S/N
Upload & Import Serial Numbers Help
Click on Browse to navigate to the CSV source document to import the serial numbers.
Click Upload to upload the CSV file into the system.
Once the Upload has been completed successfully click on Import S/N.
A report stating any errors encountered while importing will be automatically generated.
All errors encountered will need to be corrected before the import will be completed successfully.
CSV File format
Stock Level Adjustment Line level (i.e. Stock Item)

Bulk Serial Numbers
Stock Level Adjustment Header Level

NB : Please remember to delete Line 1 from the file.
Import Adjustment
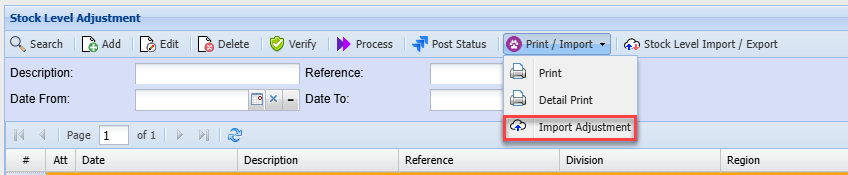
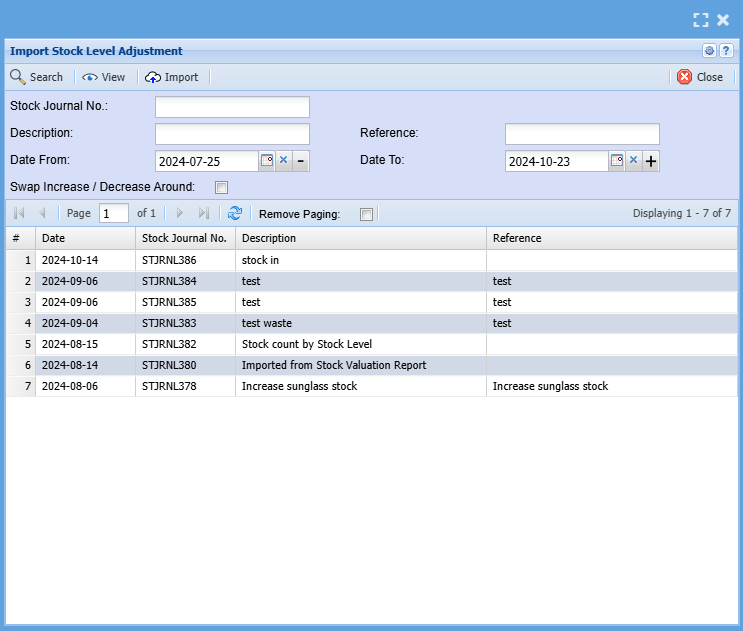
| Search | |
| View | |
| Import | |
| Stock Journal No. | |
| Description | |
| Reference | |
| Date From and To | |
| Swap Increase / Decrease Around Tick |
View Button
Clicking on the View button will bring up this screen
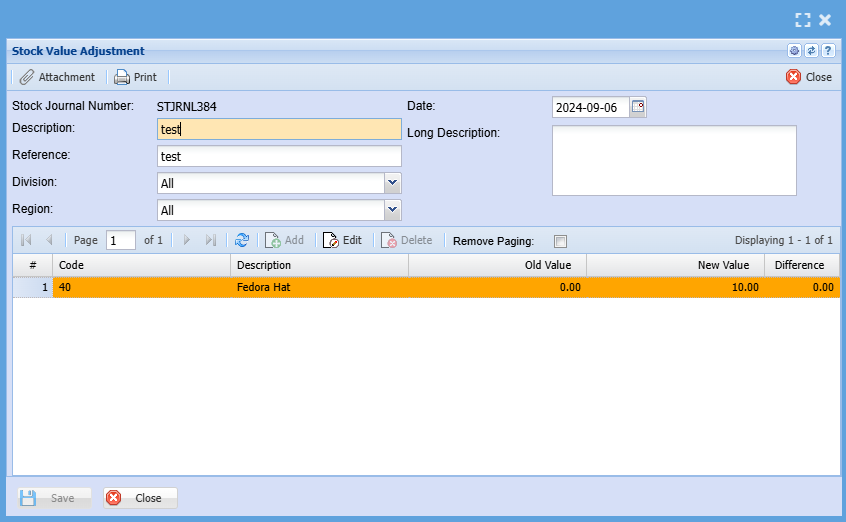
| Stock Journal Number | |
| Description | |
| Reference | |
| Division | |
| Region | |
| Date | |
| Long Description |
Adding Line