Stock Count Menu
- Stock Count
- Stock Count Process
- ScanSKU Count
- Count to Stock Take
- Barcode scanning using ScanSKU
- Add Stock Count
Stock Count
It is a function available on our webatar app that allows the user to count inventory using their mobile devices
this data is then synced to the main system.
Upon syncing the user will go to the main system
Inventory> Activity> Stock Count
.png)
Stock count process to stock take
.png)
Stock Count Process
The stock count function is a feature on the Webatar App that allows one to do stock takes or cycle counts. These counts can then be processed to various documents including stock takes.
On the Webatar App, go to Inventory, Stock Counts
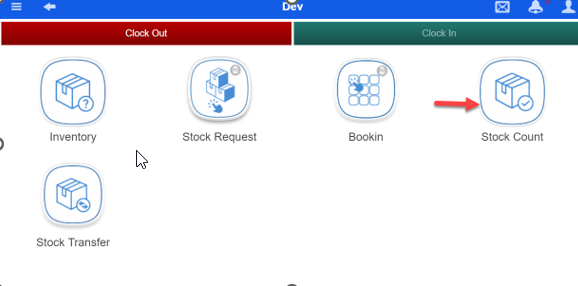
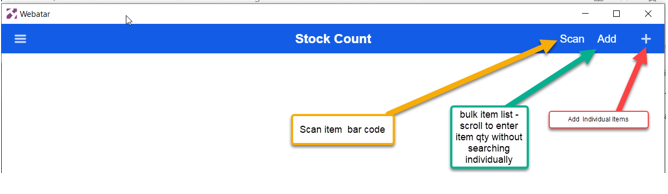
There are Multiple ways to add items to the count
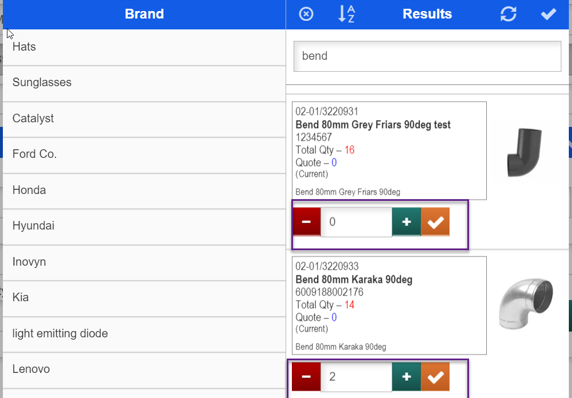
1. Add items to the count individually by filtering on Brand categorisation.
2. Quick Add: Call up multiple items and enter counts simply by scrolling to the required item
3. Search count item by bar code
4. Search items product code or description
5. Scan item bar code
Once the item is searched and returned on screen
Simply enter the actual count quantity
Warehouse is set to default to the user, thus saves time on having to select the warehouse on each count.
Click save
Search the next item and enter the count quantity.
Count and save multiple items and then sync.
Sync to sever either individually after each count, or bulk sync – after counted few / all items.
Enter any relevant notes related to queries/ discrepancies.
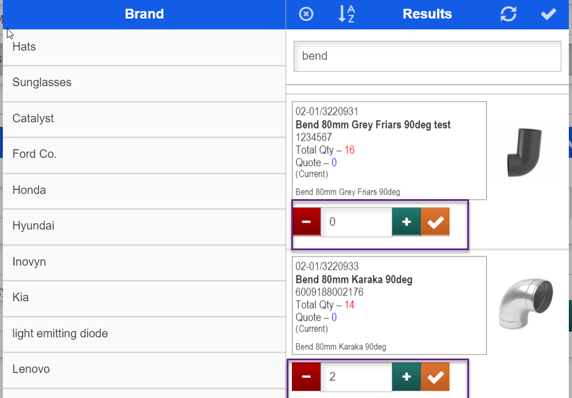
Counts not sync’d to server can be deleted or edited in the event of errors

once items are counted and ready to sync, click the sync bar to push counts to the server
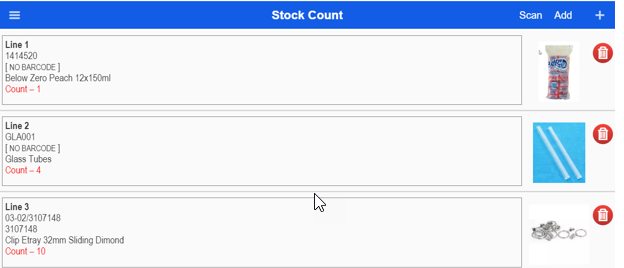
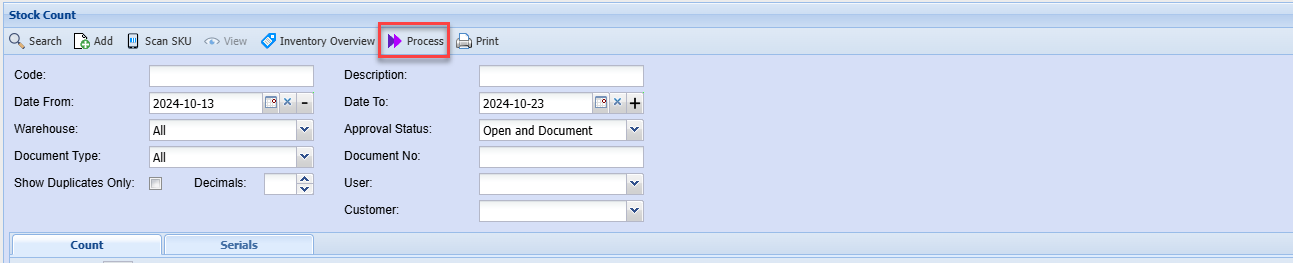
Items successfully sync’d from Webatar will be displayed on the main system as follows
Go to Inventory Module > Activity > Stock Count
Enter the required date range and warehouse.
Click Search

See variance as soon as counts are sync’d, resulting in fewer delays in resolving discrepancies.

You will notice the synced items are listed in the grid with the system quantity, counted quantity and variance or difference.
The supervisor can then opt to do second counts on items where necessary.
Any duplicated counts can be deleted / marked compete from the grid.
Once the counts have been completed, these can be processed to the stock take
The process to stock take
When clicking on the process, bring up a window
This window will have the option for document type.
Currently only Stock Take
Select stock take and then there is another option which looks at open stock takes.
Select on the stock take.
This stock take defines the warehouse and items
When clicking on next the following will happen
Filter all stock counts by the warehouse, meaning that if the count is of another warehouse, ignore it
If an item was counted multiple times, take the last count for the stock take
On the status, only look at Open status, ignore other statuses
If Document Type was not specified as StockTake but user selected it, use it for the stock take.
If a stock item was counted but the stock take does not have this item, ignore it.
When clicking on continue, produce an exception report with various headers
| Successful | Showing Items successfully updated to the stock take file |
| Duplicate items | Show items that were duplicated but was not taken to stock take |
| Items not in stock take | Show items that were in stock count but not in stock take |
After you have successfully updated the stock take file, do the following to the stock count items
| 1 | Change the status to completed |
| 2 | Insert the stock take document number into the Document no column. |
| 3 | For those items that did not have a Document type StockTake marked which was blank, mark it as StockTake |
.png)
ScanSKU Count
Video training manual 2021 - Click Here
This section of the system uses the ScanSKU device to scan for stock take and stock count and import into the stock count.
Open up the Scan SKU window from Scan SKU button.
Once window is open, drag your scanned CSV file from your email onto the window.
The system will automatically upload the file and import the data.
If there are any errors, a button will appear which you can print, that shows you all the errors.
.png)
Count to Stock Take
Video training manual 2021 - Click Here
Processing of stock counts to a stock take
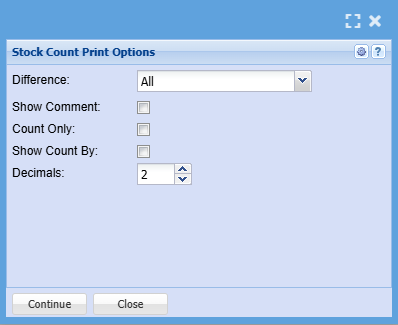
Functions
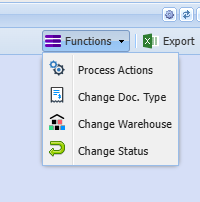
Process Actions

Barcode scanning using ScanSKU
Go to section ScanSKU for how to do
.png)
Add Stock Count
Adding a manual entry into stock count
Click on the Add button to add in an entry manually
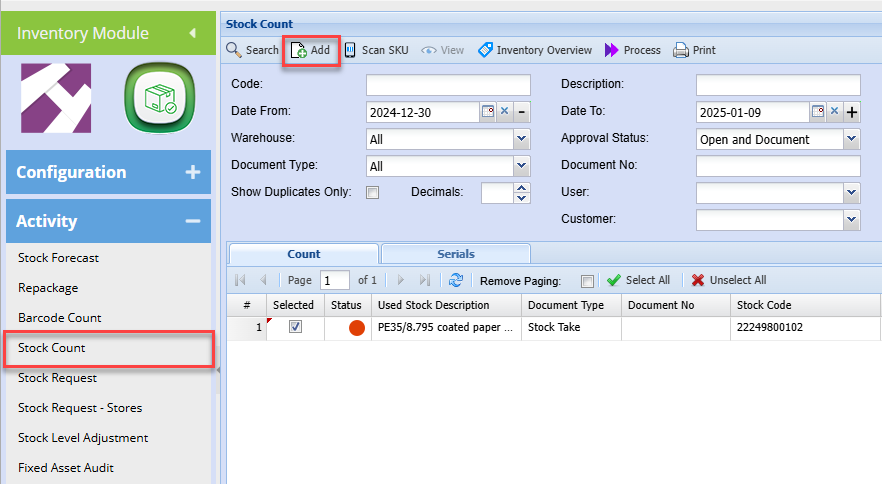
Clicking Add
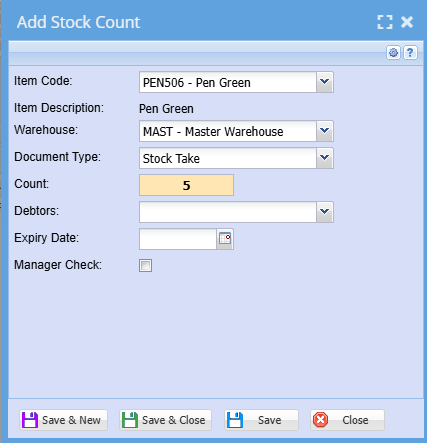
| Item Code | Search for the item by code or description |
| Item Description | Shows the description of the selected item |
| Warehouse | The default warehouse will appear |
| Document Type |
Specify the type of count Stock take, Stock Level, invoice, credit note, stock receive, stock return |
| Count | Add in the count |
| Debtors | Select the associated customer |
| Expiry Date | Enter the expiry date of the product |
| Manager Check | Activate tick if the product was checked by a manager |
Cancel a Count entry
Adding in a count but made a mistake.
One cannot edit or delete the loaded item, but you can cancel the entry.
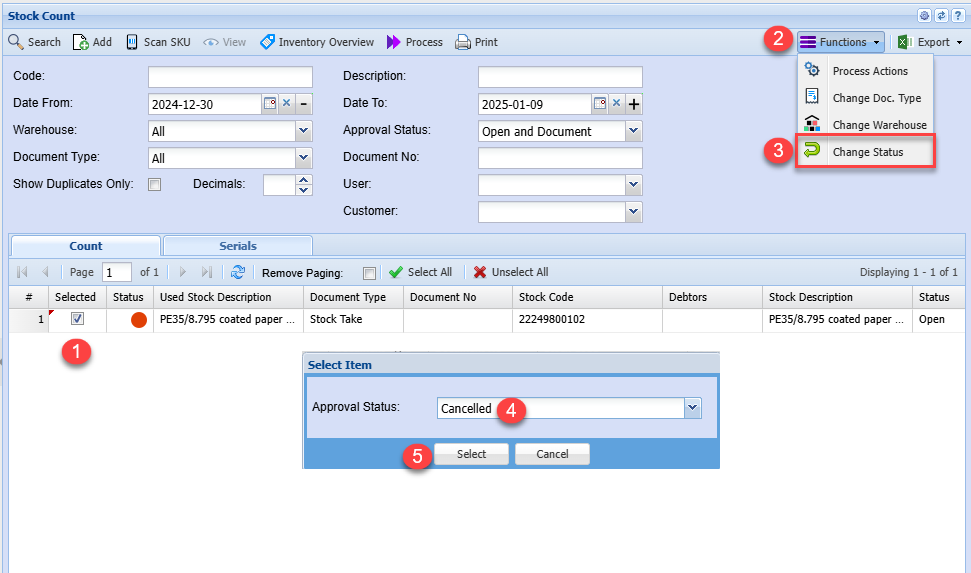
Follow the steps below