Sales Order Menu
- Sales Order Search
- Add Sales Order
- Advanced Add Sales Order
- Sales order default settings
- Sales Order Bypass WIP and Reserve stock
- Serial Number Import (Sales Order Confirm)
Sales Order Search
Debtors Module> Activity> Sales Order
Video training manual 2016 - Click Here
.png)
Sales Order processing occurs after receipt of a sales order from a customer.
.png)
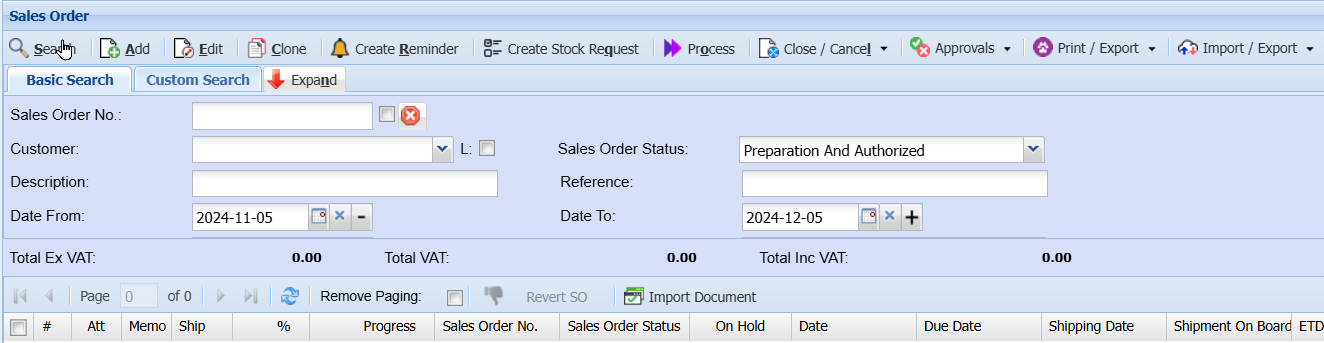
| Search | Search for an existing sales Order |
| Add | Add a new Sales Order |
| Edit | edit an existing sale Order |
| Cancel | Cancel a sales order |
| Close | Close a sales Order |
| Create reminder | Create a reminder for the sales order |
| Create Stock request | create a stock request |
| Actions | This button opens up action items that can authorize, unauthorize, confirm, confirm quantity, process a sales order |
| Print/Export | print sales order - or export sales order details to excel. |
Search options
| Customer Name | Allows a user to search by customer and the system will pull only the sales order for that selected customer |
| Date From | Select the date from which the sales order will be functional from |
| Sales Order Number | Search by selecting the sales order number |
| Sales Rep | Search by selecting the sales Rep from the drop-Down Menu |
| Date to | Search by selecting the date to |
Custom Fields Tab
.png)
Contract / Expand Tab
Search by Selecting from the category from the drop down arrow
.png)
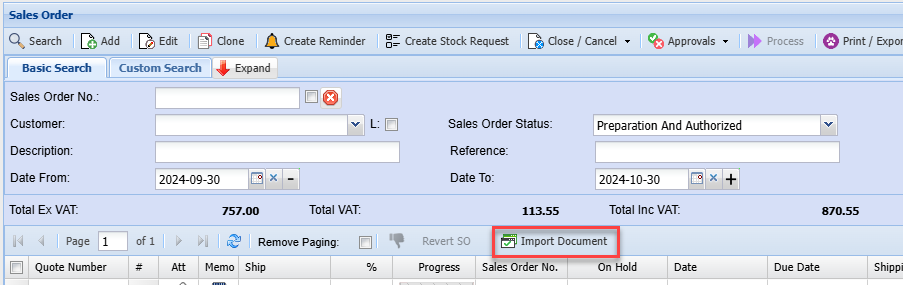
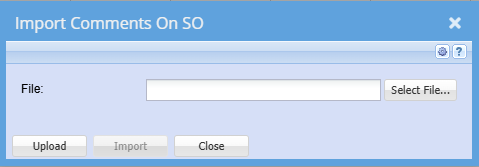
Import Document
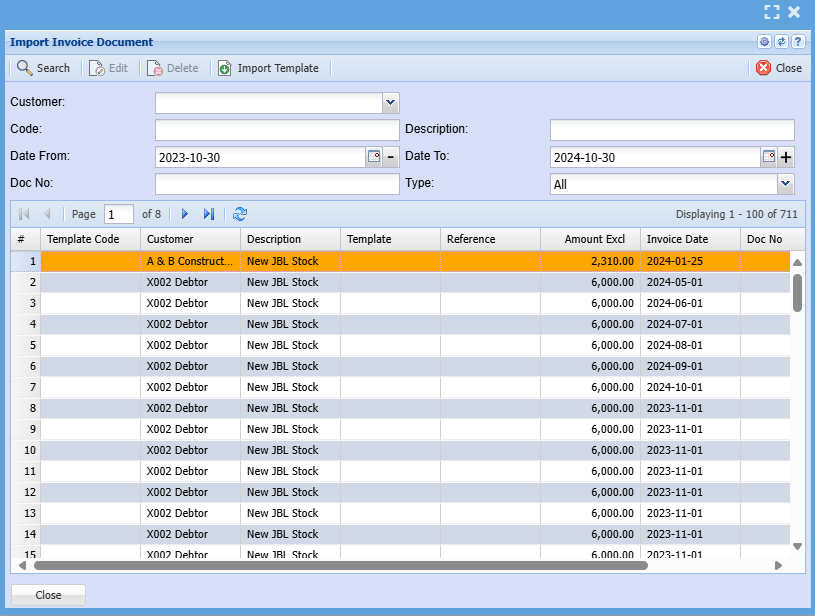
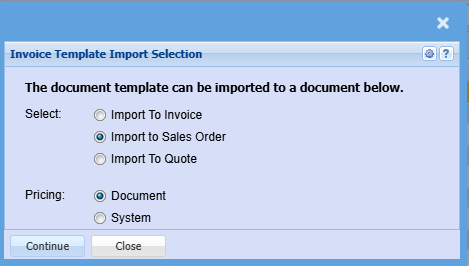
Import Template
Approvals
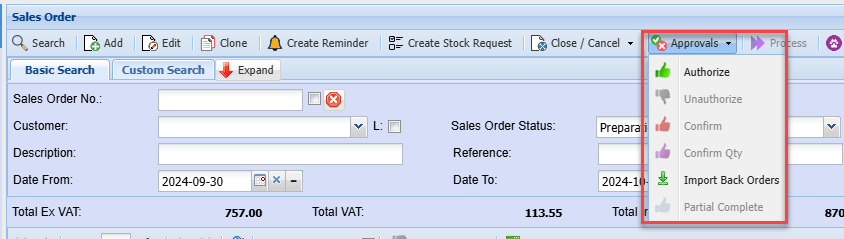
Import Back Orders
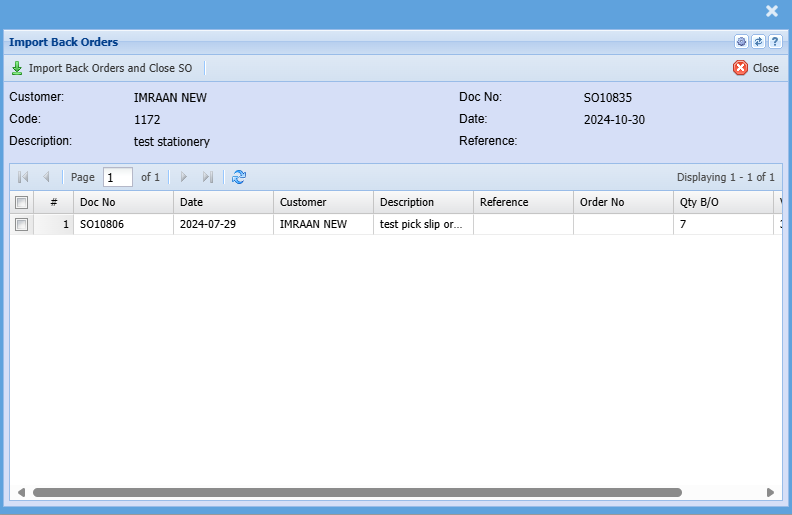
Import / Export

Keyboard quick keys
Quick keys help access functions using the keyboard
Used with Alt + Letter
| Search | Alt + s | Search for Quotes |
| Add | Alt + a | Add a new Quote |
| Edit | Alt + e | Edits the Quote that is highlighted |
| Clone | Alt + c | Clone the highlighted Quote |
| Create Reminder | Alt + r | Creates a reminder to highlighted Quote |
| Create Stock Request | Alt + q | Opens the dialog window for Stock Request |
| Process | Alt + o | Process Sales Order |
| Print Sales Order | Alt + p | Print Sales Order |
| Expand / Contract | Alt + n | Expands / Contracts the header section of the window |
| Close / Cancel | Alt + l | Focus on the Close / Cancel split button |
| Tab Basic Search | Alt + 1 | Basic Search |
| Tab Custom Search | Alt + 2 | Custom Search |
Add Sales Order
Detail Tab
Debtors Module> Activity> Sales Order
The Sales Orders screen will open
To search for existing Sales Orders, select your search criteria and click search
Search criteria can be sales order description, order number, customer name, etc
Select a date range
To create a new Sales Order, Click the Add Button as shown below

After clicking Add the screen below will appear
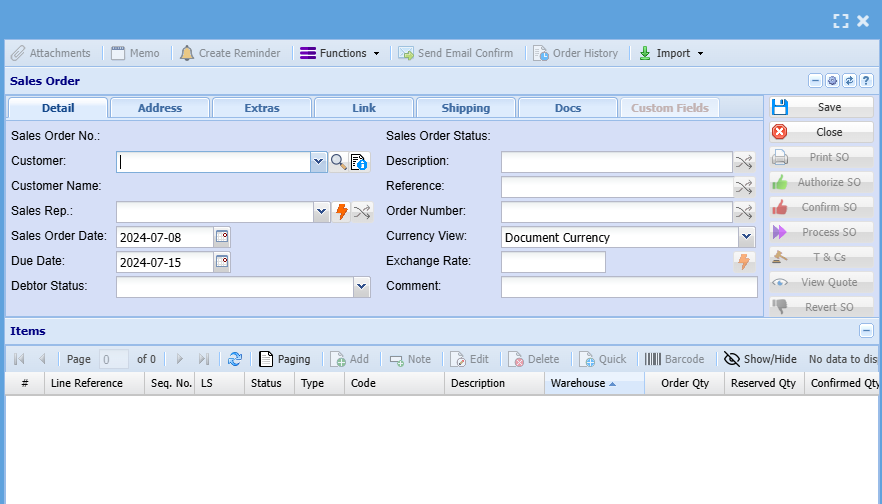
Add information below so that the greyed-out buttons can appear:
- Select the customer/ debtor you are creating a sales order for, from the drop-down menu.
- Select the sales rep on the drop-down selection, if applicable
- Update dates if necessary
- Add description and reference
- Add order number, if applicable
Then, once you are done adding all relevant information click Save and all the greyed-out buttons will be opened as shown

Add Line Items
You can only add a line item after adding all the necessary information needed on the sales order details tab and all greyed buttons have been greyed out
To add line items click on the middle Add Button shown below
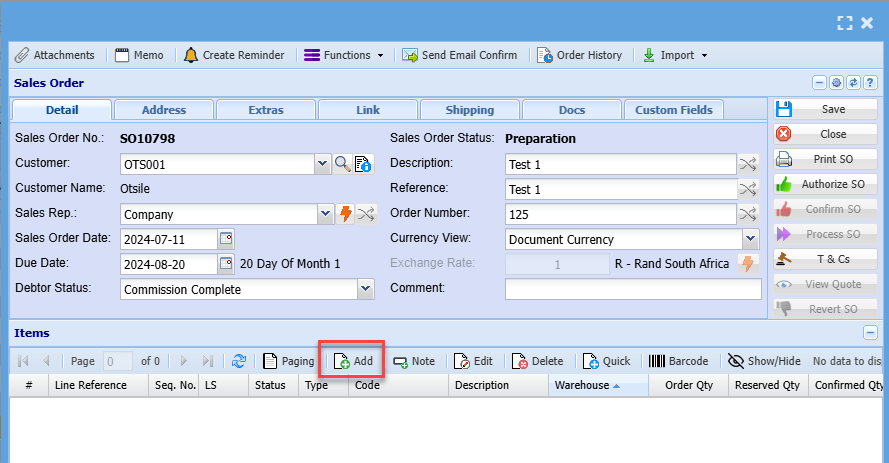
Then the screen below will appear
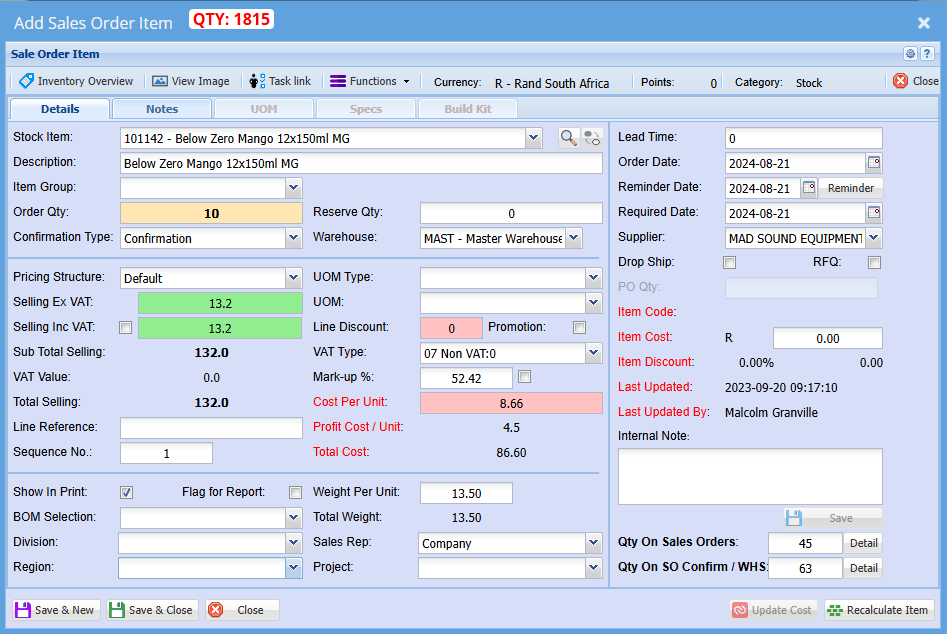
Select the item you wish to create a sales order for on the drop-down selection
You can also search for the item by using part of the code or the name of the item
You can change the description to match what you want to see on a sales order or leave it as it is
Enter the quantity or how many items you creating a sales order for
Make sure pricing is correct
Select a relevant warehouse if you have multiple warehouses
Select the correct VAT Type
Click Save & Close if capturing numerous line items
Click Save & Close if capturing a single line item
Once done
All line items will appear on the grid below
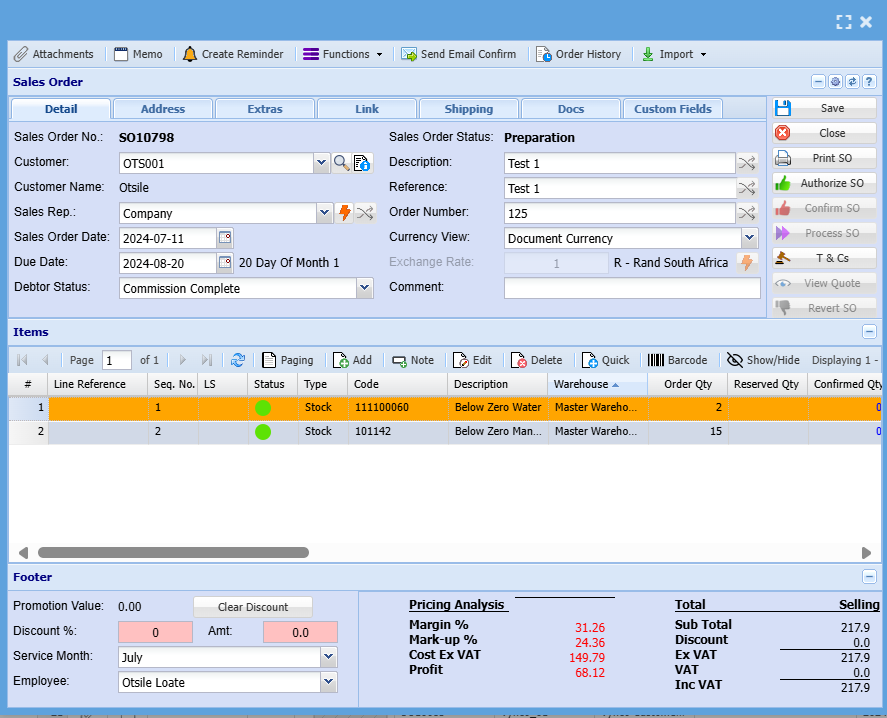
After capturing you can send it to a relevant person to authorize the SO
Sales order Printing Options
After clicking confirm the printing options will pop up below:
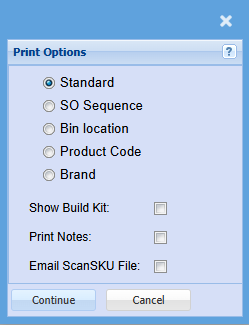
Click here to see a manual on how to confirm sales order quantity
Keyboard quick keys for Sales Order Detail
Quick keys help access functions using the keyboard
Used with Alt + Letter
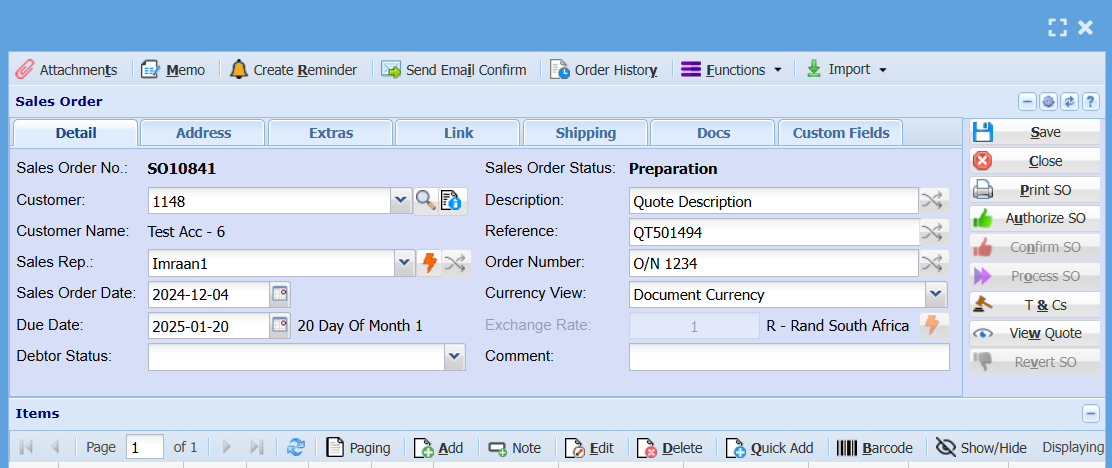
| Attachment | Alt + t | Opens the Attachment window |
| Memo | Alt + m | Opens the Memo window |
| Create Reminder | Alt + r | Opens the Reminder window |
| Send Email Confirmation | Alt + i | Sends an email to the contact person on Confirmation of Sales Order |
| Order History | Alt + o | Opens the Order History window |
| Functions | Alt + f | Focus on the Function split button |
| Save | Alt + s | Saves the sales order |
| Close | Alt + c | Closes the sales order window |
| Print SO | Alt + p |
Print the Sales Order |
| Authorize SO | Alt + u |
Authorize the Sales Order |
| Confirm SO | Alt + n |
Confirm the Sales Order |
| Process SO | Alt + o |
Process the Sales Order |
| T & Cs | Alt + & |
Opens the Terms and Conditions window |
| View Quote | Alt + w |
Opens the associated quote for viewing (if applicable) |
| Revert SO | Alt + v |
Resets the Sales Order to Preparation Status |
| Add |
Alt + a |
Opens a New Sales Order Line Detail window |
| Edit | Alt + e |
Opens the Sales Order Line Detail window for the selected sales order line |
| Delete | Alt + d |
Deletes the selected line from the sales order |
| Quick Add | Alt + q |
Opens the quick add window to add a sales order line to the sales order |
| Barcode | Alt + b |
Opens the Barcode window to add an item using barcode scanning |
| Attachment Button | Alt + 0 | Focus on the Attachment button |
| Tab Sales Order Detail | Alt + 1 | Sets the tab notebook to the Sales Order Detail tab |
| Alt + 2 | Pressing Alt + 2 repeatedly will step through the various tabs in the tabnotebook |
Keyboard quick keys for Sales Order Line Item Detail
Quick keys help access functions using the keyboard
Used with Alt + Letter


| Inventory Overview | Alt + o | Opens the Inventory Overview window |
| View Image | Alt + i | Opens the View Image window |
| Task Link | Alt + t | Opens the Special Item window |
| Close | Alt + c | Closes the Sales Order window |
| Reminder | Alt + r | Opens the Reminder window |
| Functions | Alt + f | Focus on the Function split button |
| Save & New | Alt + n |
Saves the Sales Order Item Detail window and opens a new SO Item window |
| Save & Close | Alt + v |
Saves the Sales Order Item Detail window and then closes the window |
| Update Cost |
Alt + u |
Updates the cost of the selected item to the latest cost price |
| Recalculate Item | Alt + l |
Recalculates the Sales Order Item's values Mark-Up %, Costs etc. |
| Inventory Overview | Alt + 0 |
Focus on the Inventory Over button |
| Tab Quote Item Detail | Alt + 1 | Sets the tab notebook to the Quote Item Detail tab |
| Alt + 2 | Pressing Alt + 2 repeatedly will step through the various tabs in the tab notebook |
Advanced Add Sales Order
Adding a new Sales order
.png)
Sales order window
.png)
Sales Order
Choose The Debtor by entering a customer Code
Detail Tab
.png)
| Short Details | Short Details Of the sales Order Item |
| Reference | Give it A Reference |
| Order Number | Enter an Order Number |
| Sales Rep | Select a Sales Rep |
Address Tab
.png)
.png)
| Details | Add Extra Details Regarding this Sales Order |
| TrackIt Item | Link a trackit item to this sales Order |
| Job Number | Add this sales Order to A job |
| Print Custom fields | Add a Tick If you want the Custom Field to reflect when printing The Sales Order |
Sales Order Lines
Details tab
.png)
Category select the category from the drop down arrow
Item Code to select an item code by hitting enter or using the”? “Long search button
| Item Description | comes up when the code is selected but can be edited |
| Order quantity | quantity of Items Needed |
Reserve Quantity this is the allocated quantity Company:
Selling Including Vat
If the Selling price including vat is not ticked
The Selling Including Vat will Be Greyed Out Company:
Authorise Sales Order
Changes The sales order Status to Authorized
.png)
Unauthorize Sales Order
.png)
Change Warehouse
The change warehouse allows the user to change the warehouse selected on the items lines to another warehouse that has the stock available.
.png)
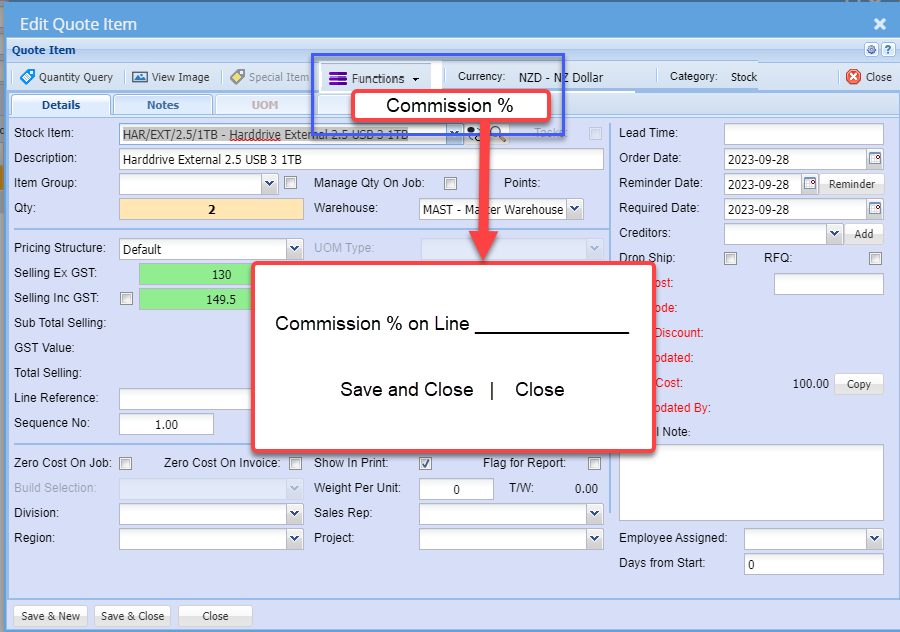
Commission line item percentage update
Commission line item percentage will be updated to documents at the time it adds the line.
There is a new field on each document line to handle the line percentage.
All documents to contain this line percentage
- Quote
- Sales Order
- Invoice
- Credit Note
When promoting the document, the original percentage will be copied between the documents.
When the Sales order is promoted from Sales order to commercial invoice, the percentage will be worked out on the percentage saved on the line.
If the commission line is blank, then the commission % will be gotten from the item line
Import sales order items
Debtors>Activity> Sales Order> Import Items
Importing items in the system is the quickest way to bring in large data at once and this can be done for a sales order items
- Click on Import items
- Select your file to upload
- Import
- and close.
.png)
The file to be imported must be in a CSV format.
Click on the Select Files… button to open the navigate window allowing the user to navigate to the file to be imported.
Once the desired file has been located either double click on the file or click the Open button.
Now click on the Upload button. If the upload was successful a window will appear confirming that the upload was successful. Click Ok.
An Import Report will open displaying any errors in the import or displaying the successful sales order items import.
Please Note: All successful records will be imported, and errors will be skipped. The column headings can be left in the import file providing that the heading is as per the sample below.
Confirmation Type
The 3 types to be used are:
| Confirmation |
| Invoice |
| Invoice & Process |
Import File Layout
|
No. |
Heading |
Value |
|
1 |
ItemCode |
PEN001 |
|
2 |
Description |
Red Pen |
|
3 |
OrderQTY |
2 |
|
4 |
ReserveQty |
0 |
|
5 |
ConfirmationType |
Confirmation |
|
6 |
SellingExVAT |
100 |
|
7 |
CostExVAT |
75 |
|
8 |
Warehouse |
Master |
|
9 |
LineDiscount |
|
|
10 |
LineRef |
|
|
11 |
Notes |
|
|
12 |
ItemGroup |
|
|
13 |
Points |
15 |
Buttons Defined
Create Stock Request
Debtors>Activity> Edit Sales Order
.png)
Storeman > Select your name from the Drop down List
Add date required by
And Click Continue
The three options in the dropdown,
Request for Purchase Order
Request for Quote
Request Create Job Picking Slip
are simply a suggestion from the Stock Request originator to the recipient of what action must be taken when processing the Stock Request.
Sales order default settings
Sales Order Process Date Setup
Video training manual 2019 - Click Here
Set up the sales order process date, that is either current or by a sales order date .
When you process the sales order, it will either select the sales order date or make it current.
By default the system will choose current date.
.png)
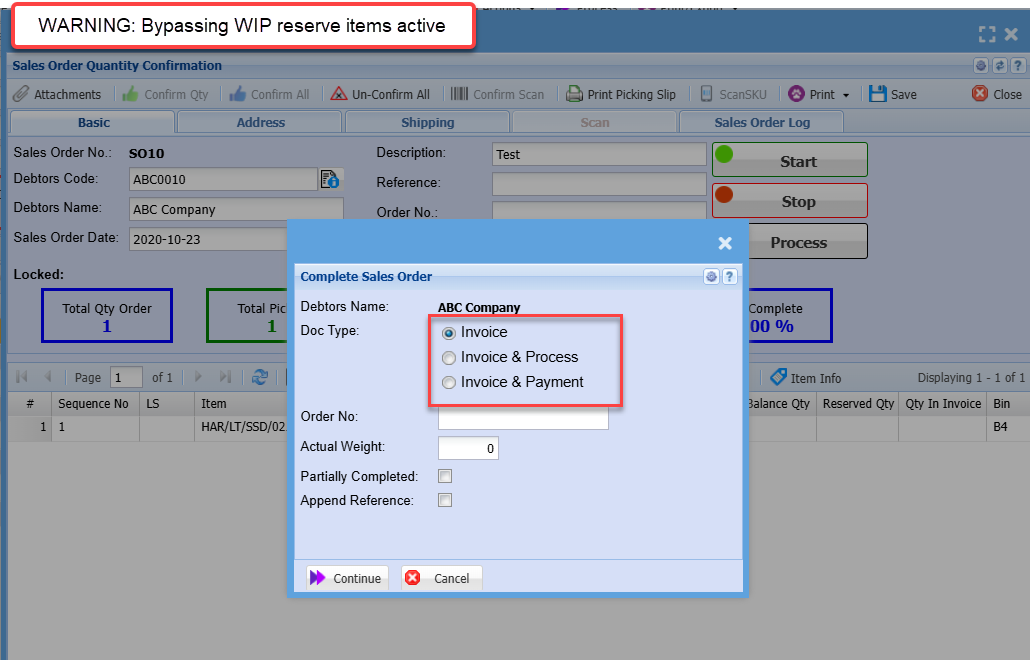
Sales Order Bypass WIP and Reserve stock
This function disables stock WIP movements and reserve stock.
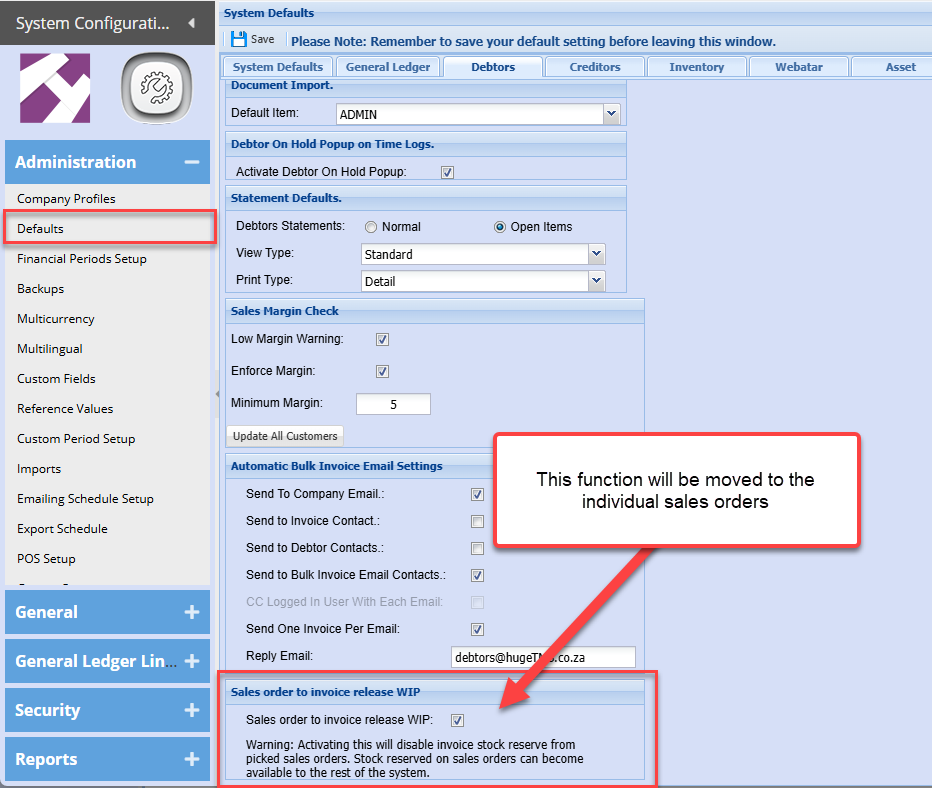
New tick box on Sales order
WARNING:
Activating this tick will not reserve stock and does not check for stock.
Full sales order will be moved to invoice, no part sales orders used
No part sales orders are allowed if Bypass WIP is active
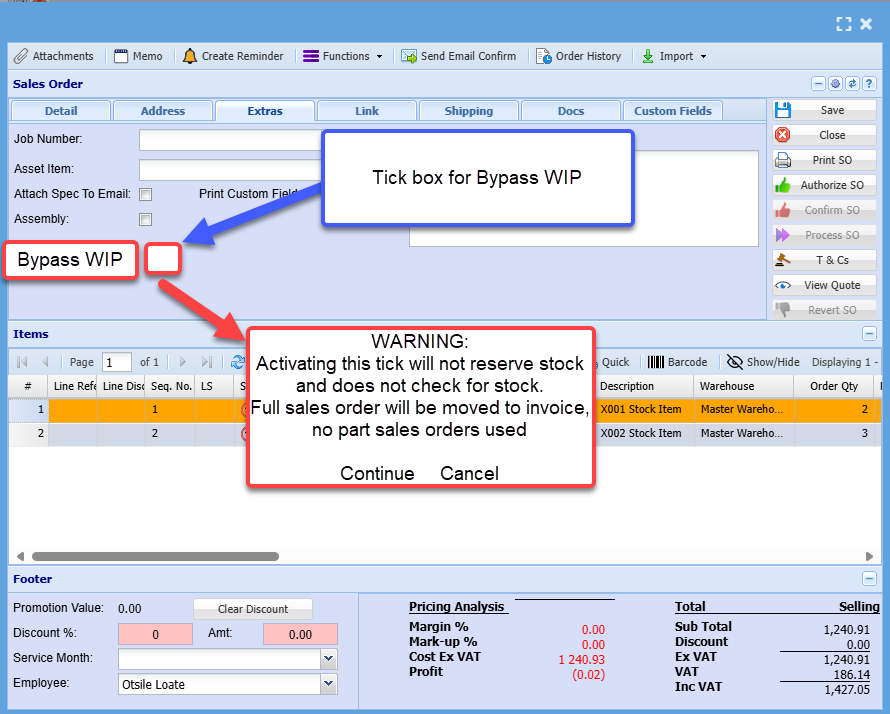
Sales order warning

Sales order lines disabled
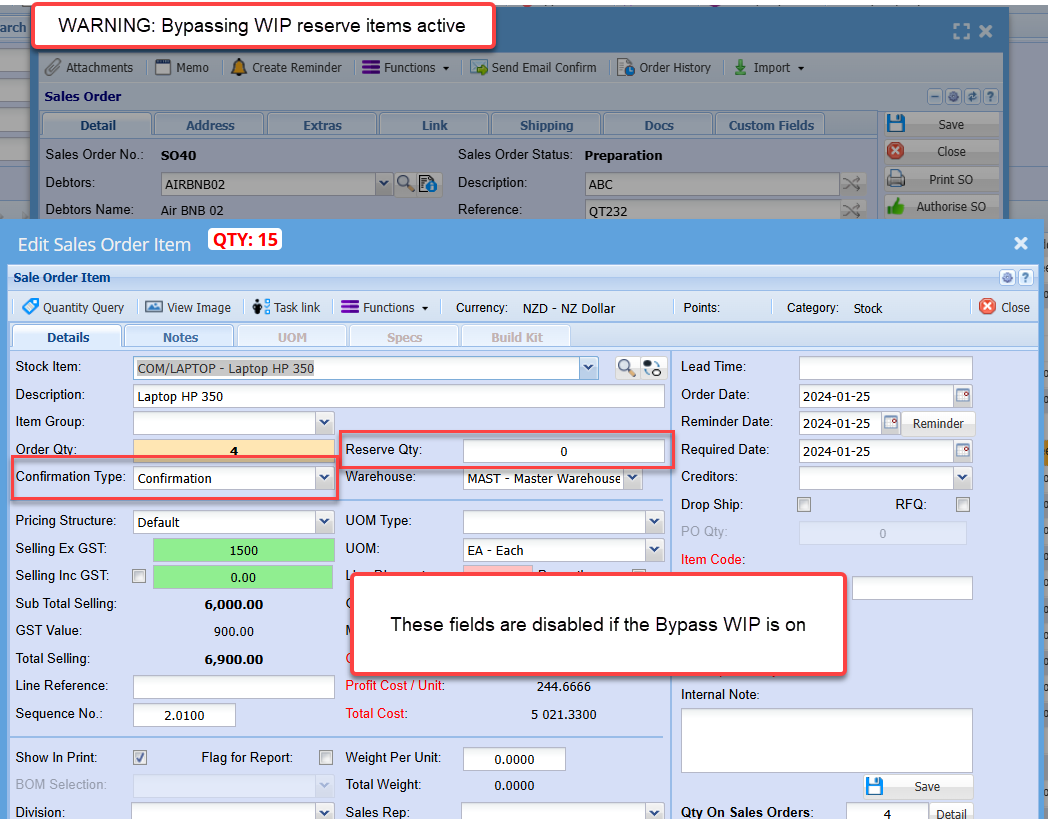
Sales Order Confirmation
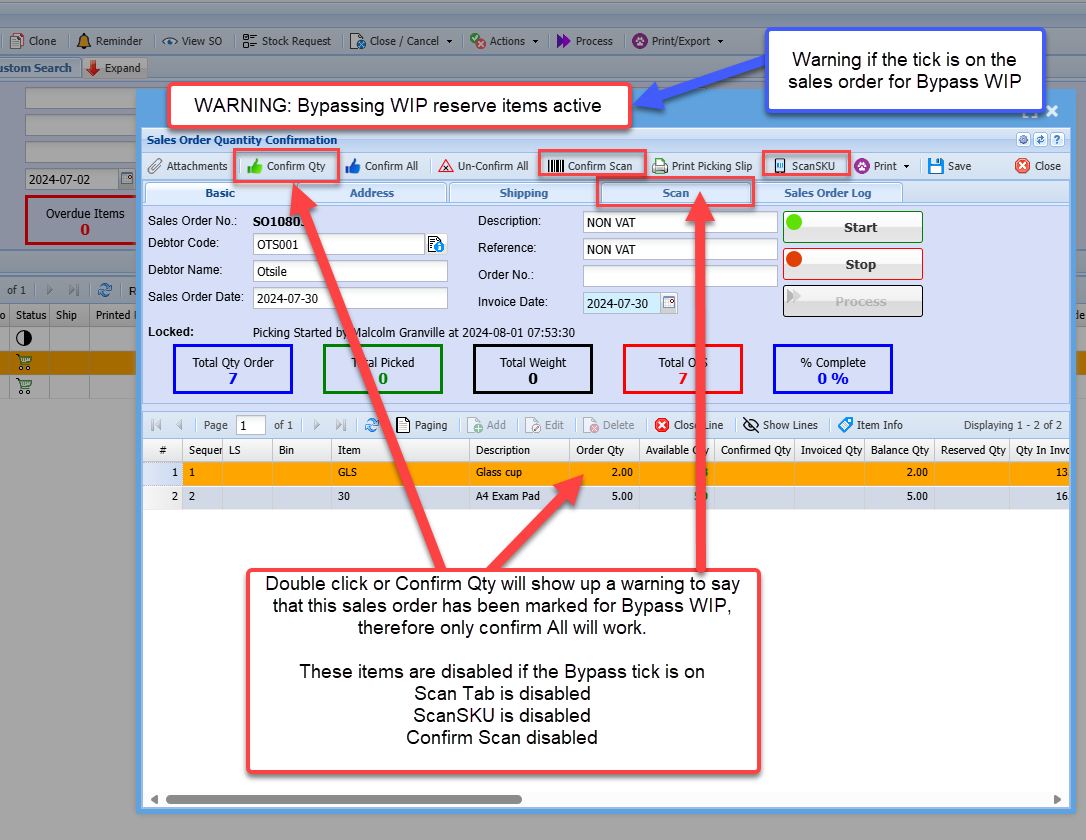
Individual confirms are disable if the Bypass WIP is on
Double click or Confirm Qty will show up a warning to say that this sales order has been marked for Bypass WIP, therefore only confirm All will work.
These items are disabled if the Bypass tick is on
Scan Tab is disabled
ScanSKU is disabled
Confirm Scan disabled
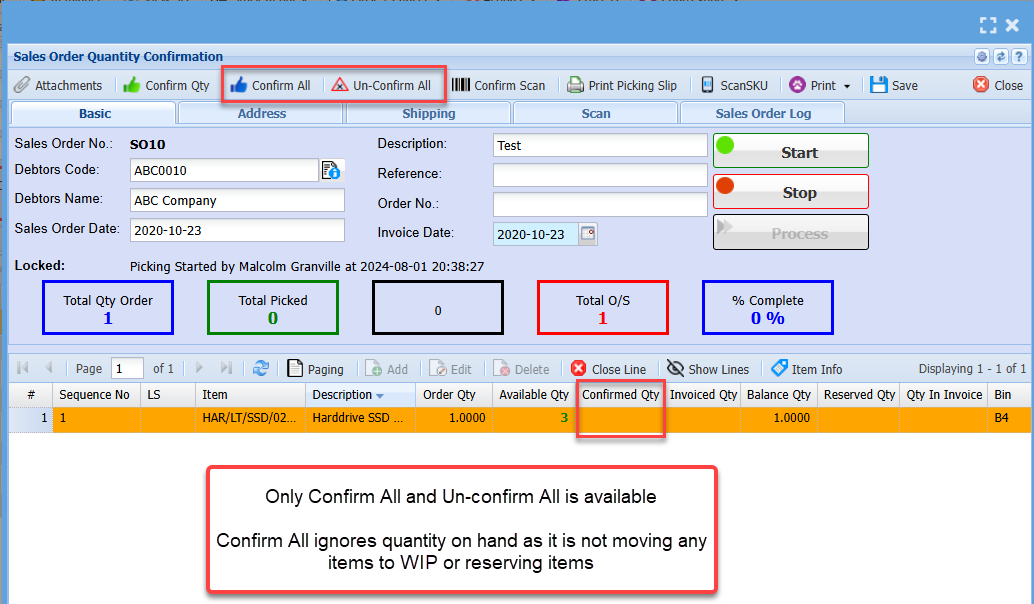
Confirm All works and will confirm all the items, whether there is stock or not.
The reason for this is because no stock movements take place for WIP and no stock is reserved.
Only Confirm All and Un-confirm All is available
Confirm All ignores quantity on hand as it is not moving any items to WIP or reserving items
Processing a Bypass WIP sales order
| Invoice |
This moves the sales order to invoice but does not reserve anything in the invoice WIP or moves anything out of sales order WIP as it did not have anything reserved in sales order WIP
This does the same function as the Sales order to invoice release WIP |
| Invoice and Process | Processes the invoice but does not take anything out of sales order WIP or invoice WIP it will run like a normal invoice taking stock out of one hand |
| Invoice and Payment | Processes the invoice but does not take anything out of sales order WIP or invoice WIP it will run like a normal invoice taking stock out of one hand |
Serial Number Import (Sales Order Confirm)
When picking large orders leaving from CSN, serials can be picked using this import.
An example XML file is attached.
See attached video. Click Here
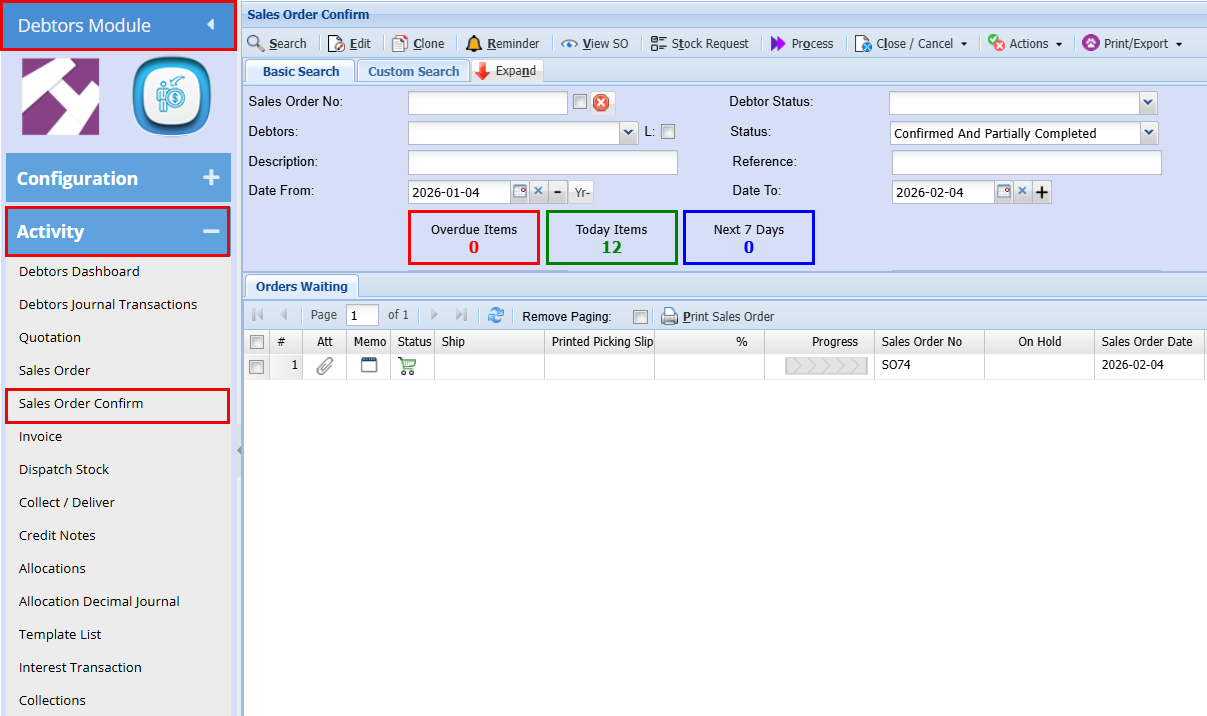
Debtors Module > Activity > Sales Order Confirm
- Find the sales order you are wanting to import serial numbers for
- Double click to open the sales order
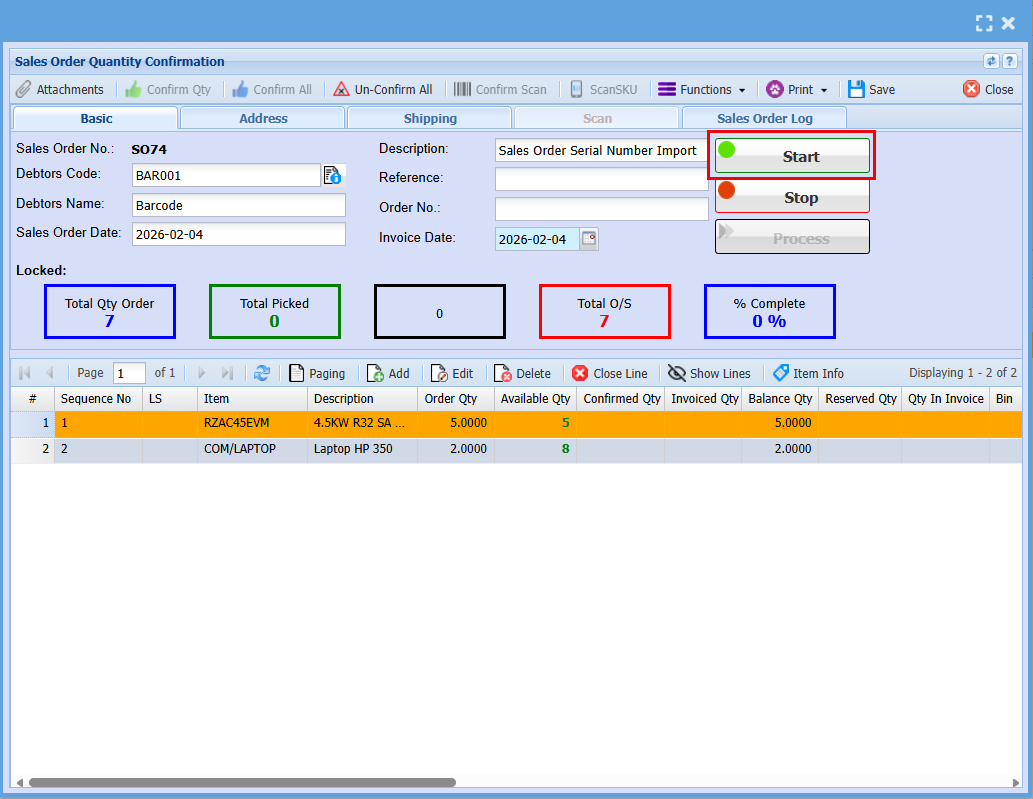
-
Click Start to begin your picking. You won’t be able to import serial numbers until you have clicked Start.
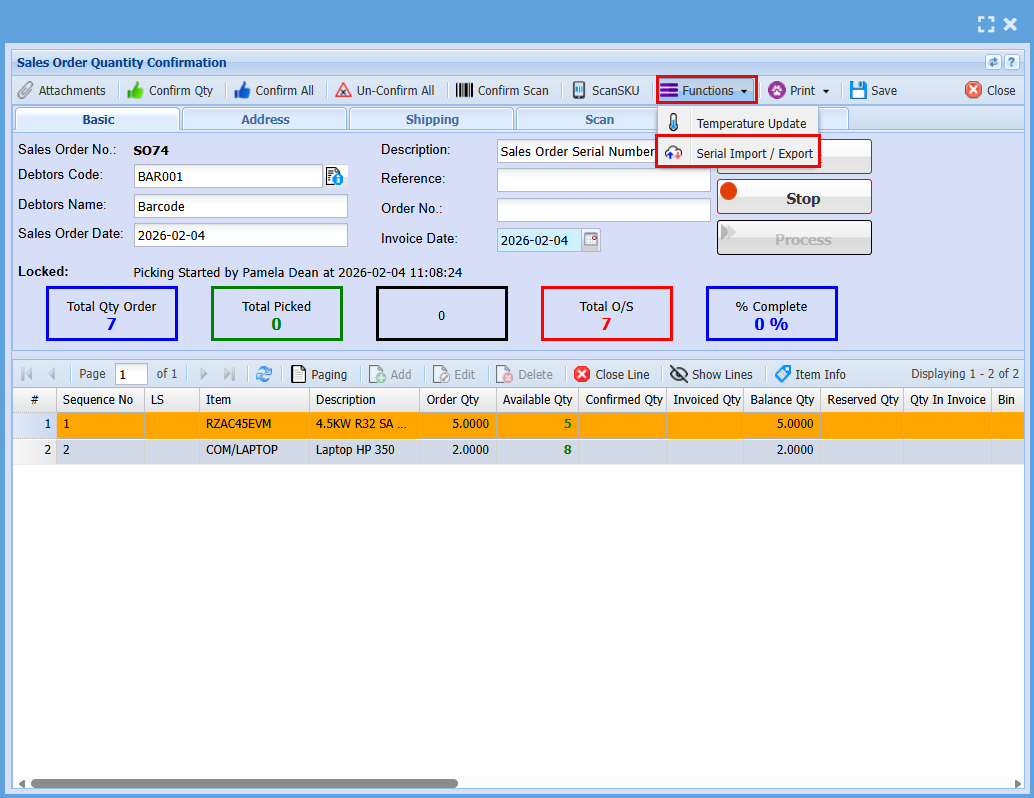
- Click the "Functions" drop-down menu
- Click on "Serial Import/Export"
A window will appear allowing you to export a template that can be used for the import.
- Click on "Template" this will download an excel file
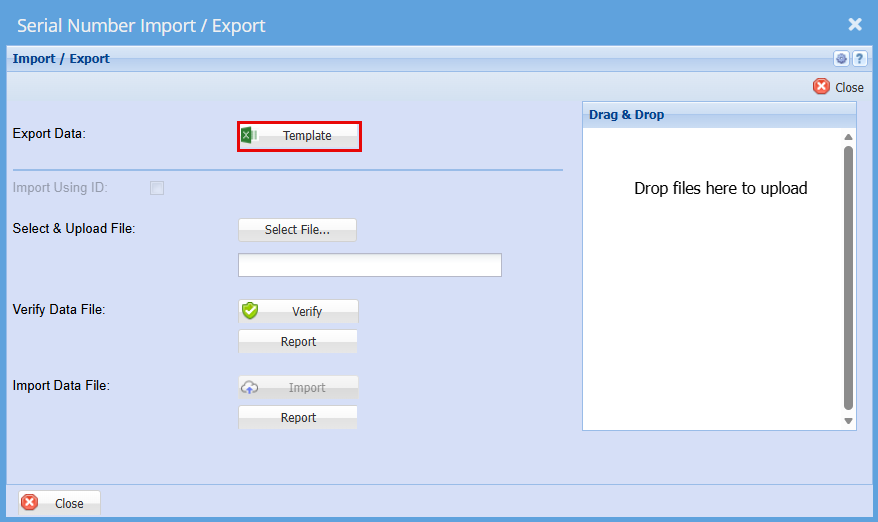
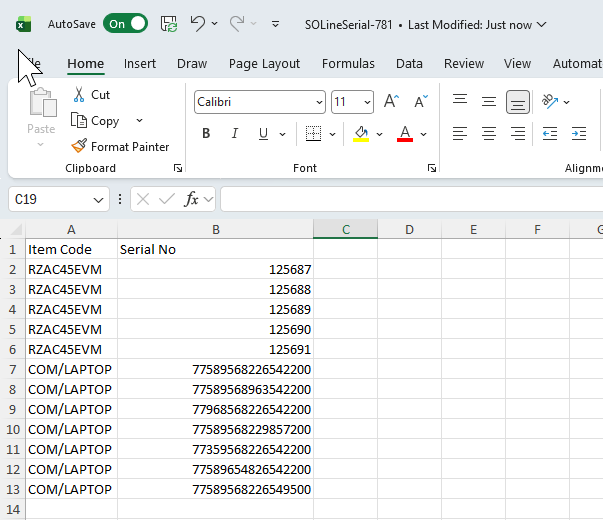
- Enter the serial numbers into the spreadsheet, with each item listed on a separate line as shown below.
- Save the file to your computer.
- Go back to the "Serial Number Import/Export" Screen
- Click "Select File"
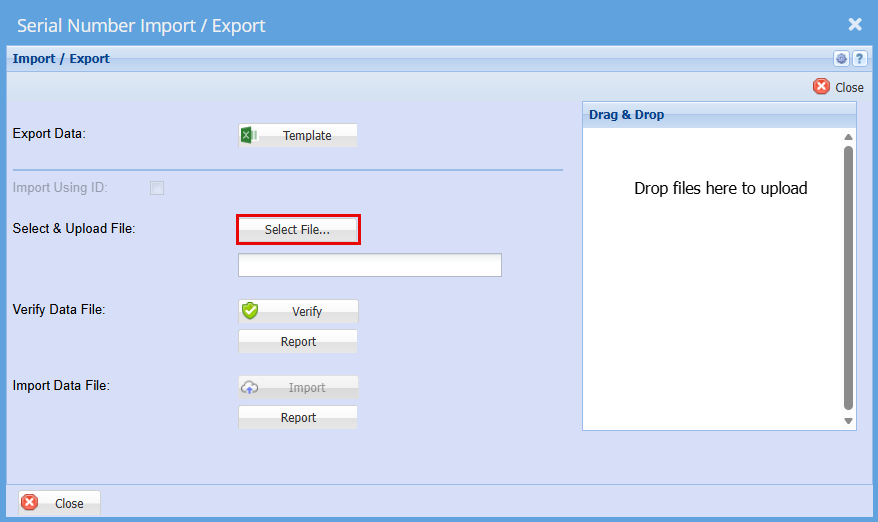
- Find the file you have saved.
- "Double Click" the file or click "Open"
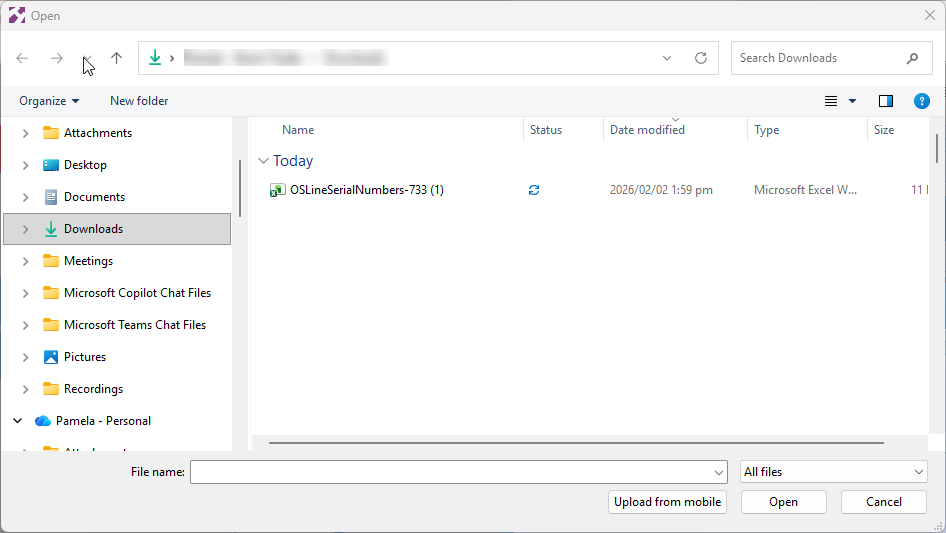
You should get a Successful Import
- Click "Verify"
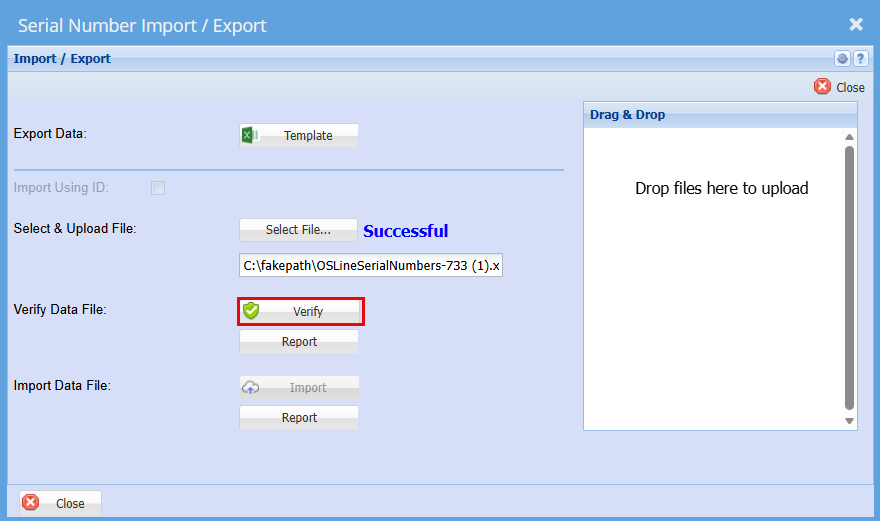
You should again get a successful for verification
- Click "Import"
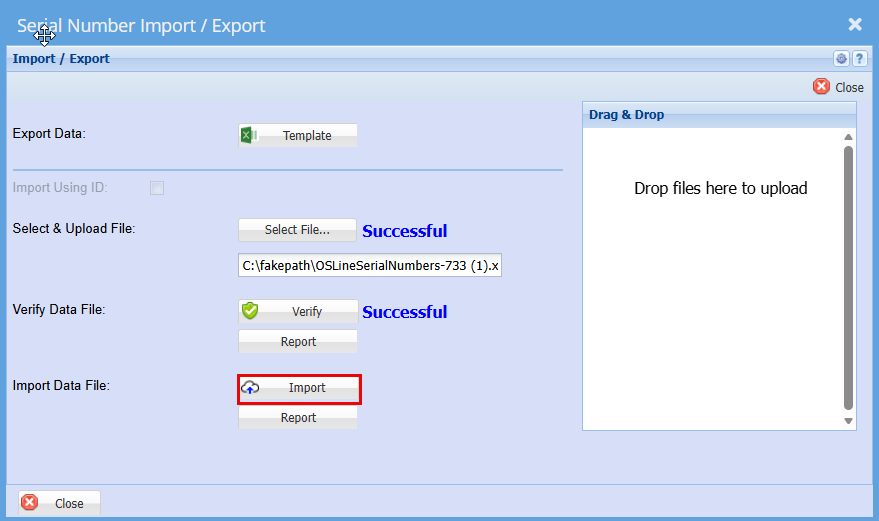
You should then get a Successful for Import.
Click "Close"
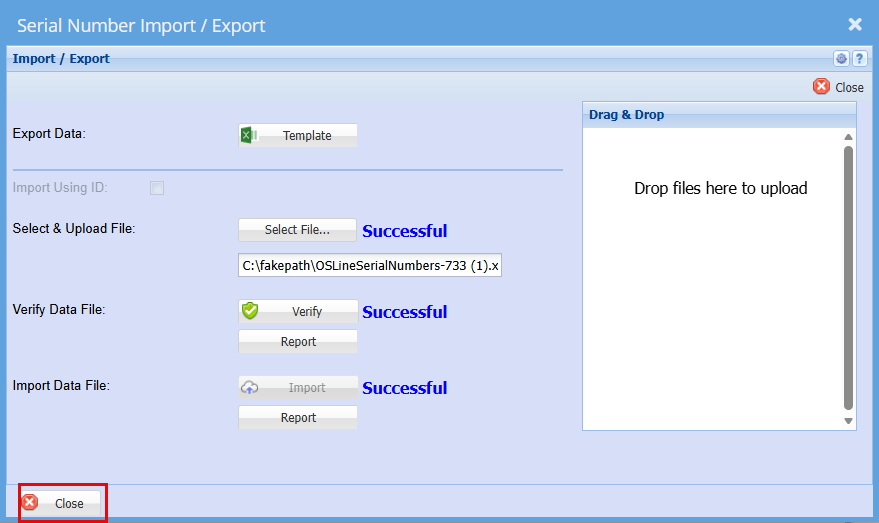
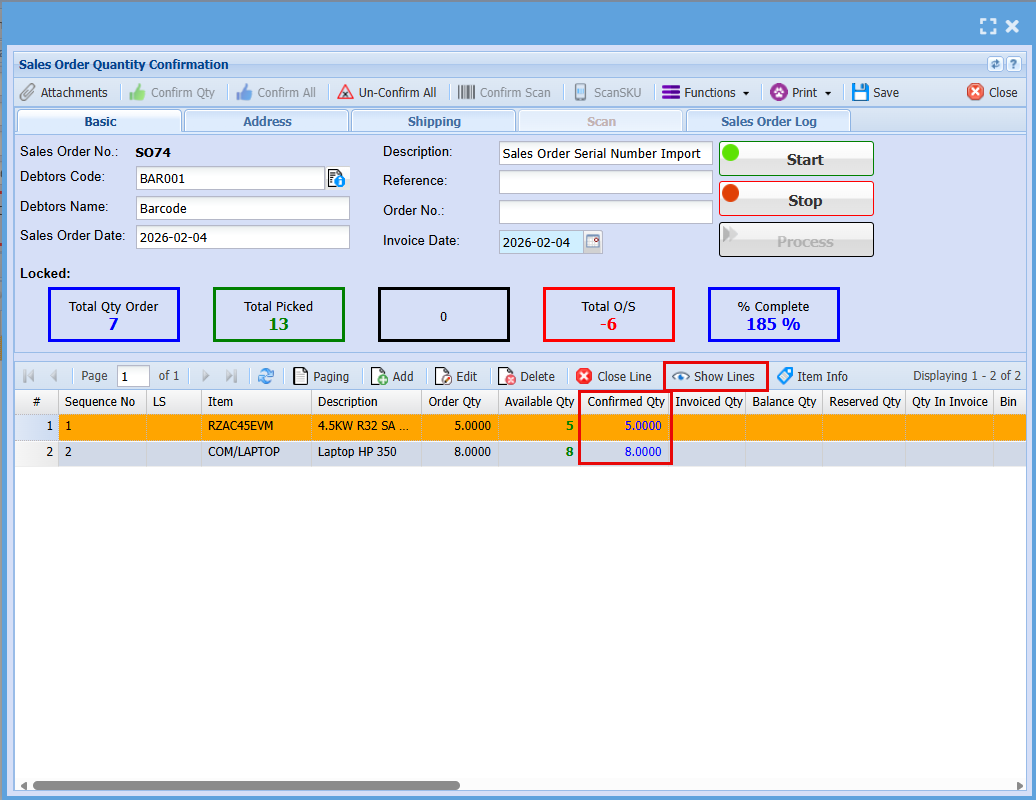
You can go check to make sure by clicking the "Show Lines" button
You will see the "Received Qty" values update.