Credit Notes Menu
- Credit Notes Search
- Add Credit Note
- Importing Invoice to Credit note warning
- Import Invoice to Credit Note
- GRA Number for Credit Note
Credit Notes Search
The correct process to reverse a posted invoice affecting stock is by raising and processing a credit note
this process will offset the original invoice.
the below demonstrates the manual capturing of this process
Video Training Manual 2016 - Click Here
Functions Drop Down
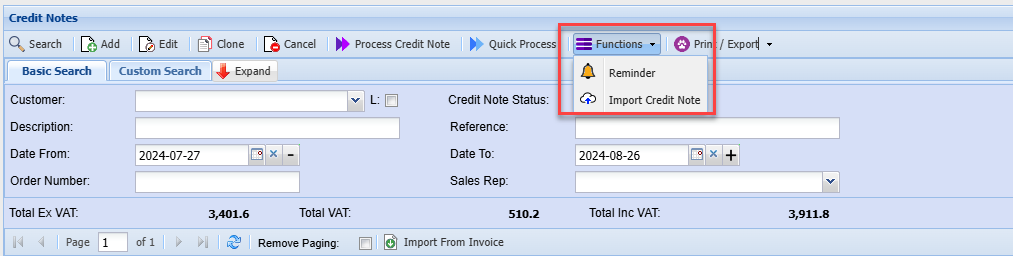
| Reminder | Allows you to create a reminder for a particular credit note |
| Import credit Note | Allows you to import credit notes into the system |
Import credit note
.png)
Click on the Select File button. This will open a window allowing you to navigate to the location of the file to be imported.
Click on the Upload button to upload the file onto the Huge ERP system, where the actual import will take place.
Once the upload has been successfully, completed click on the Import button to initiate the actual import process.
A Credit Note Import Report will open, indicating any errors that may have occurred during the import or displaying a success message if there were no errors.
If there were any errors during the import, the entire process will be rolled back, meaning no Credit Notes will be imported.
The file to be imported must be in CSV format.
Add Credit Note
To create a new credit note or search for an existing one go to
Debtors Module> Activity> Credit Note
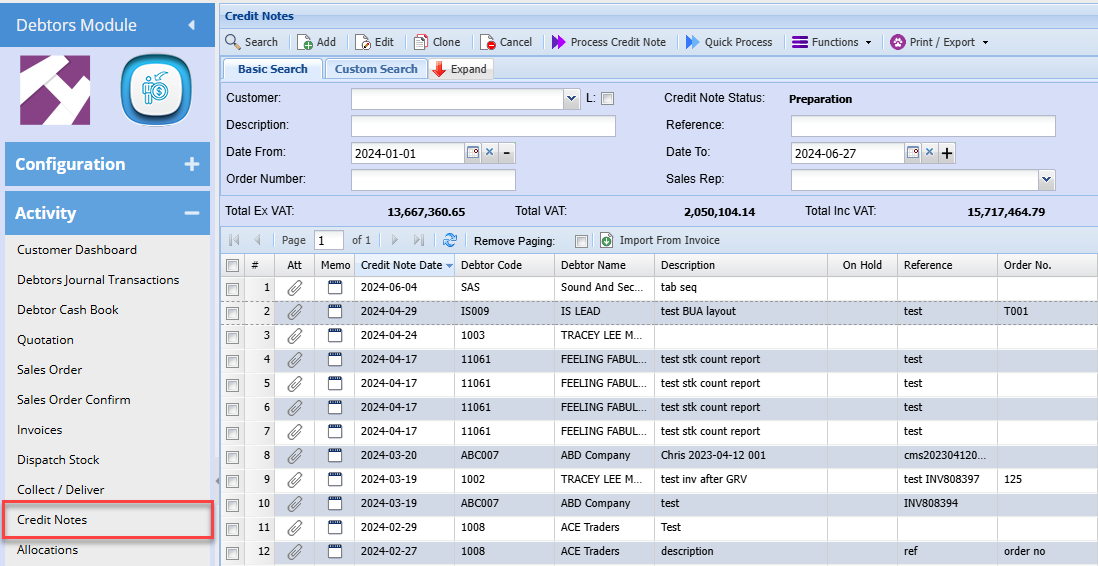
The credit note screen will open
To search for existing credit notes, select your search criteria and click search
Search criteria can be customer/ debtor name credit note description or reference, etc
Select a date range
Then click search
To create a new Credit Note, Click the Add Button as shown below

After clicking Add,
This new credit note screen will display
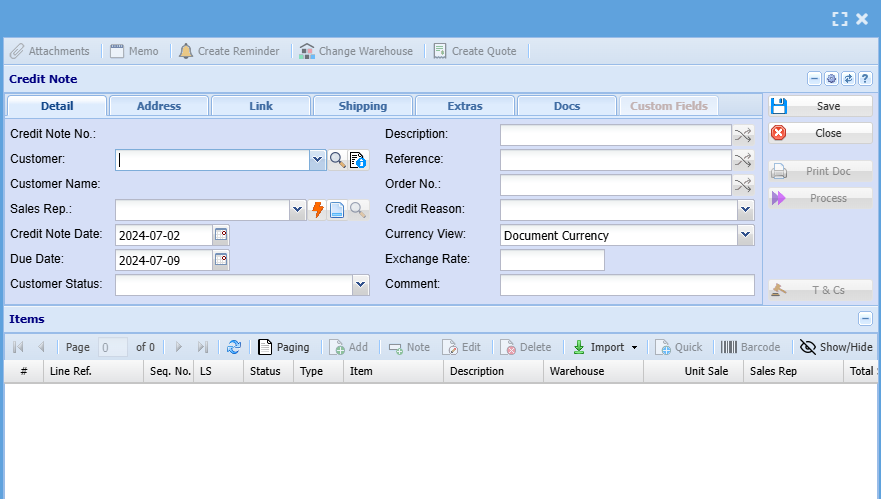
Add information below so that the greyed-out buttons can appear:
- Select the customer/ debtor from the drop-down menu to create a credit note
- Select the sales rep on the drop-down selection, if applicable
- Update dates if necessary
- Add description and reference
- Add order number, if applicable
- Select the credit note reason from the drop down
Then, once you are done adding all relevant information click Save and all the greyed-out buttons will be opened as shown below:
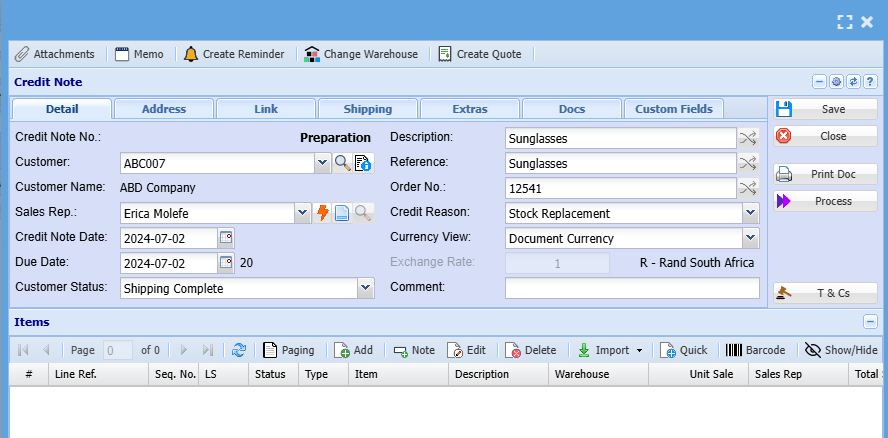
Line Items
You can only add line items after adding all the necessary information needed on the credit note details tab and all greyed buttons have been greyed out
To add line items click on the middle Add Button shown below
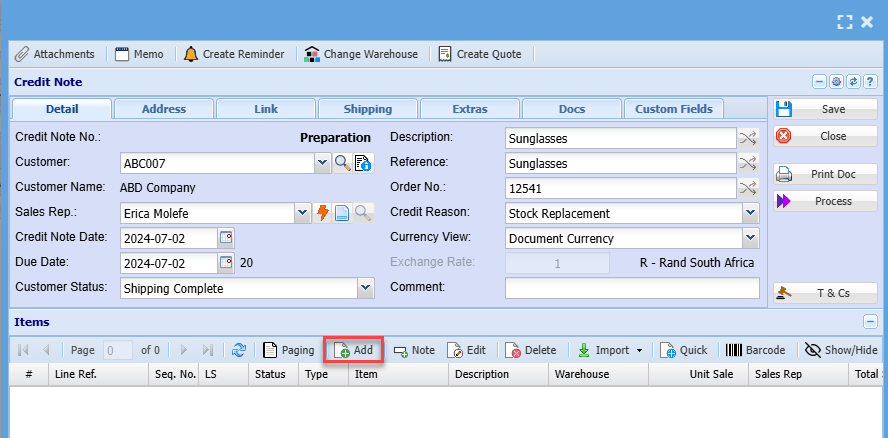
After clicking the middle add button the screen below will appear
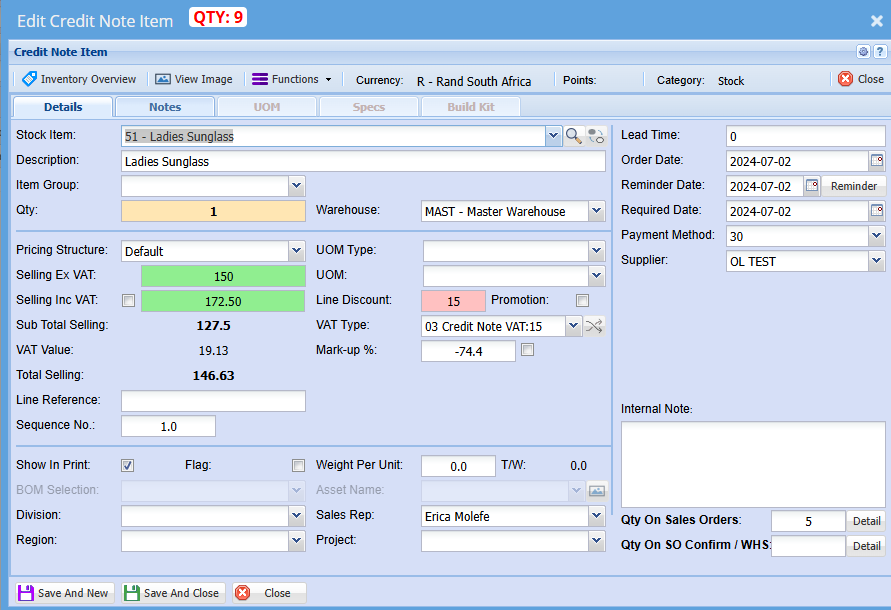
Select the item you wish to credit on the drop-down selection
You can also search for the item by using part of the code or the name of the item you wish to credit the customer on
You can change the description to match what you want to see on the credit note or leave it as it is
Enter the quantity you are crediting the customer/ debtor on
Make sure pricing is correct
Select a relevant warehouse if you have multiple warehouses
Select the correct VAT Type
Click Save & Close if capturing numerous line items
Click Save & Close if capturing a single line item
Once done
All line items will appear on the grid below:
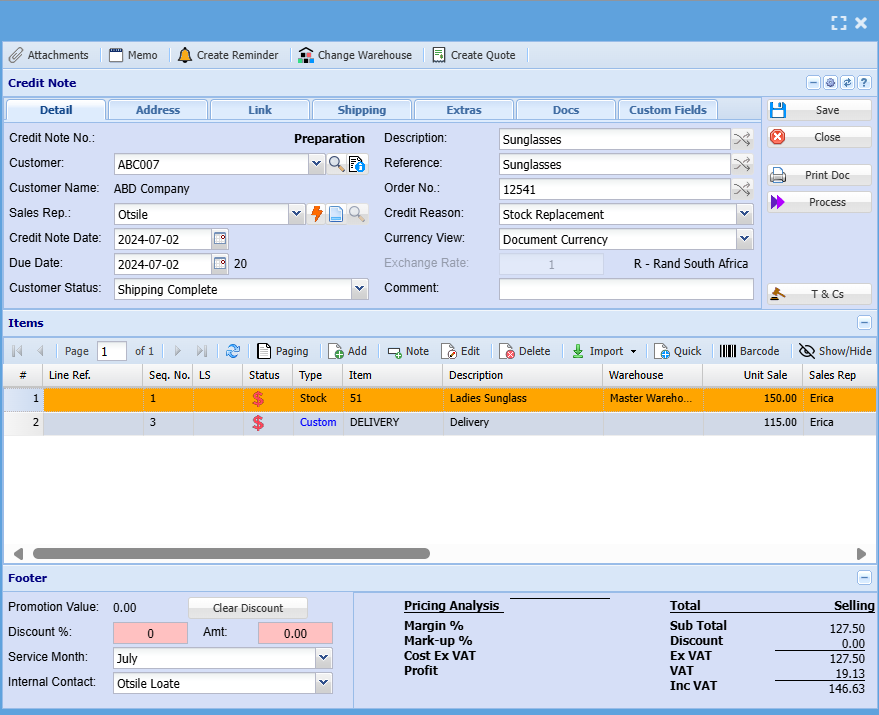
You can then process the credit note and send it to a customer/ debtor
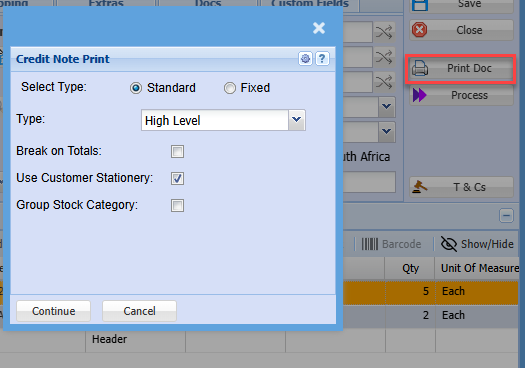
Print Doc
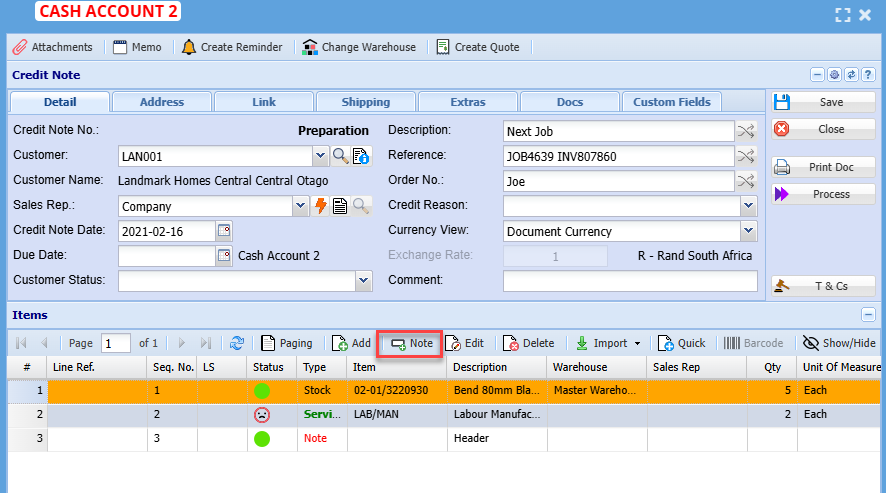
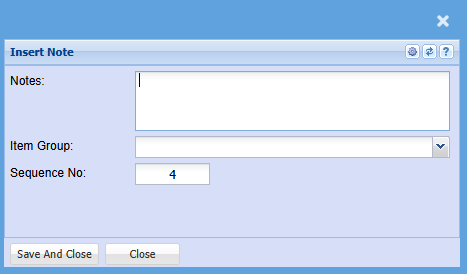
Note
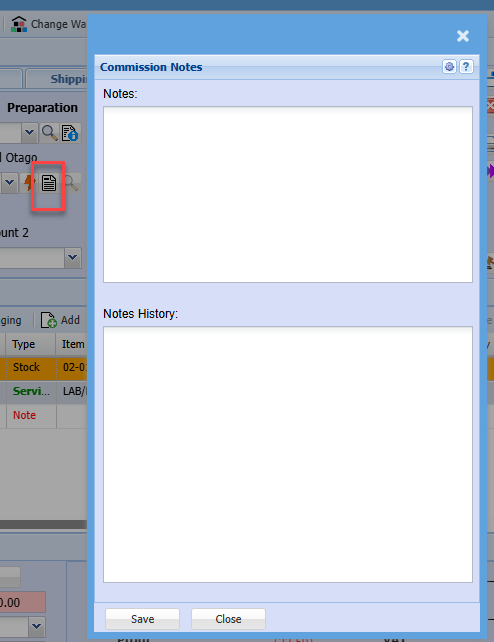
Commission Notes
Importing Invoice to Credit note warning
When importing an invoice to a credit note and the invoice been imported has a credit note allocated to it.
There is a warning to indicate that the credit note was done for this invoice.
This warning only works if:
- When using the Import From Invoice button
- The invoice import has a credit note allocated to it
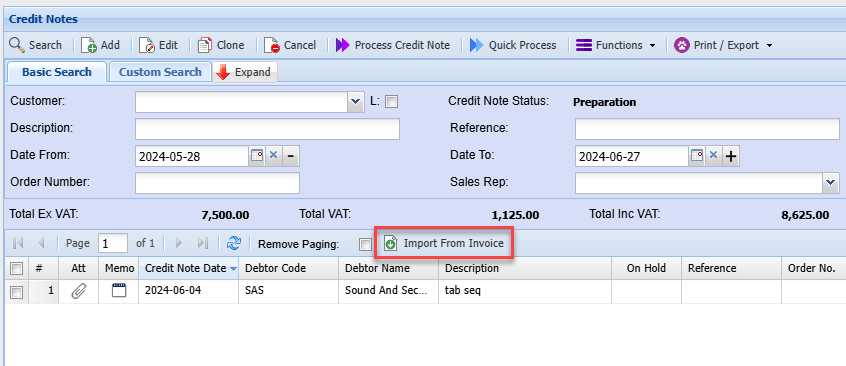
When importing, a warning to alert you that a credit note was done against the invoice you are importing
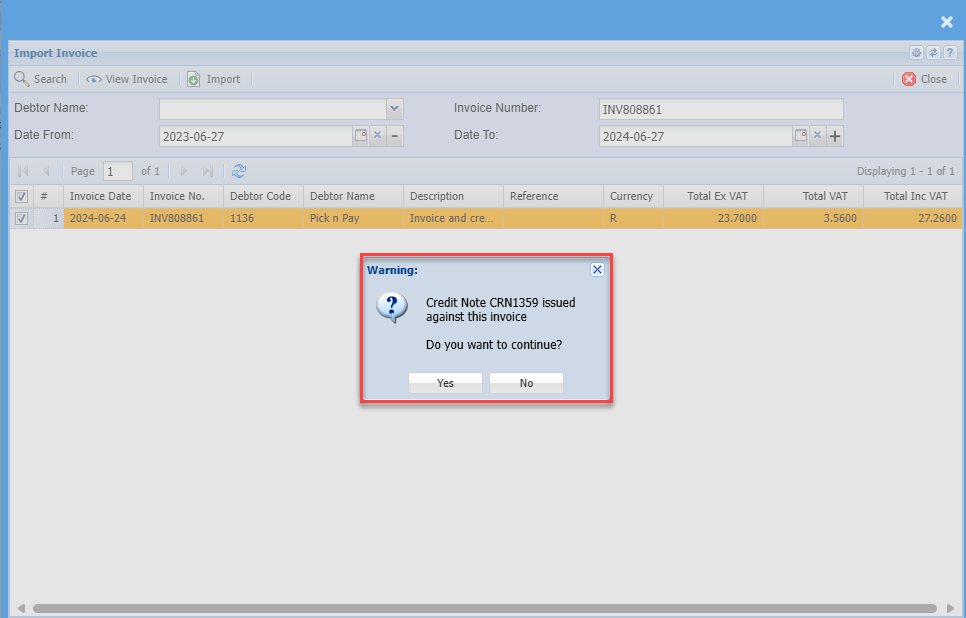
Import Invoice to Credit Note
The simplest way of creating a credit note by simply “Import from invoice”
You can however use the long method of capturing
Open Debtors Module> Activity > Credit Note
Select Import from Invoice
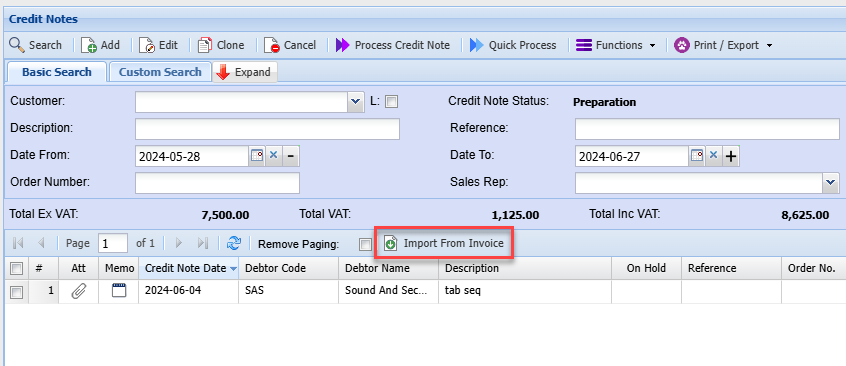
Search by document number or customer, remember the date range also counts.
The default option is to import from an invoice or import from a quote.
Importing from quote helps keep the Task build structure in place for Credit note
You can view the invoice to verify that it’s the correct one you want to reverse by clicking on the view invoice button.
Click on the Import button to create a credit note
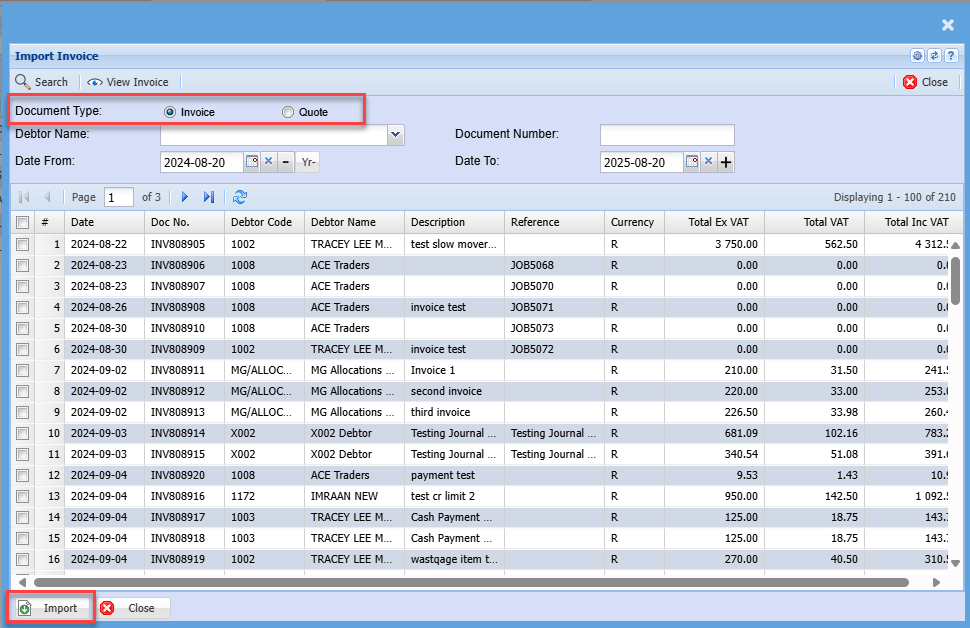
And Click Continue
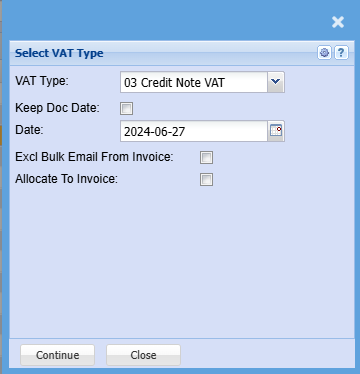
| VAT / GST Type | Select the correct Tax Type for Credit Note |
| Keep Doc Date | Enforce credit note to make date same as invoice date |
| Date | Put in a date for credit note |
| Excl Bulk Email from Invoice | Put this tick on to mark invoice to not be sent out when using Bulk email invoice function |
| Allocate to Invoice | Automatically allocate the credit note to invoice after processing the credit note |
If one changes the customer of the imported invoice to credit note, the Allocate to invoice will be cleared. No automatic allocation will occur
The credit note will now be under preparation status in the credit notes waiting to be processed
.png)
Click On process Credit note to process this document
.png)
GRA Number for Credit Note
Often called:
- RMA (Return Merchandise Authorization) – Common in retail and manufacturing.
- GRA (Goods Return Authorization) – More typical in wholesale or distribution.
These are pre-numbered documents issued before the actual credit note is finalized. They serve as placeholders and authorization for goods to be returned, inspected, and eventually credited.
GRA Number setup in Reference Values
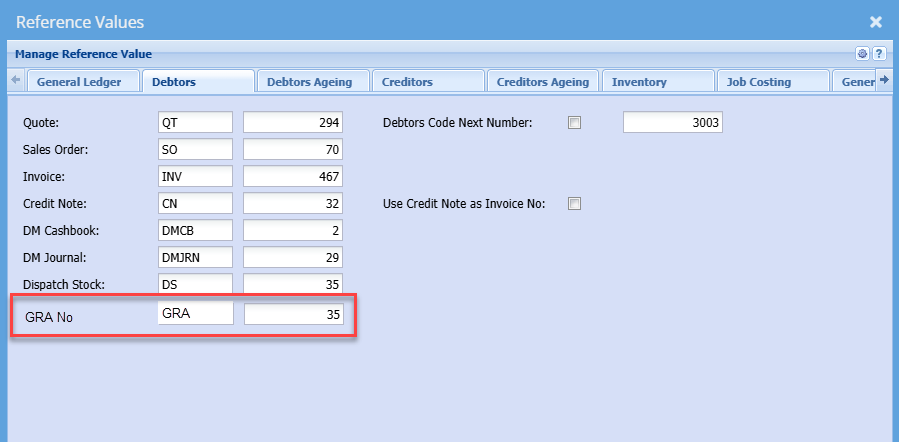
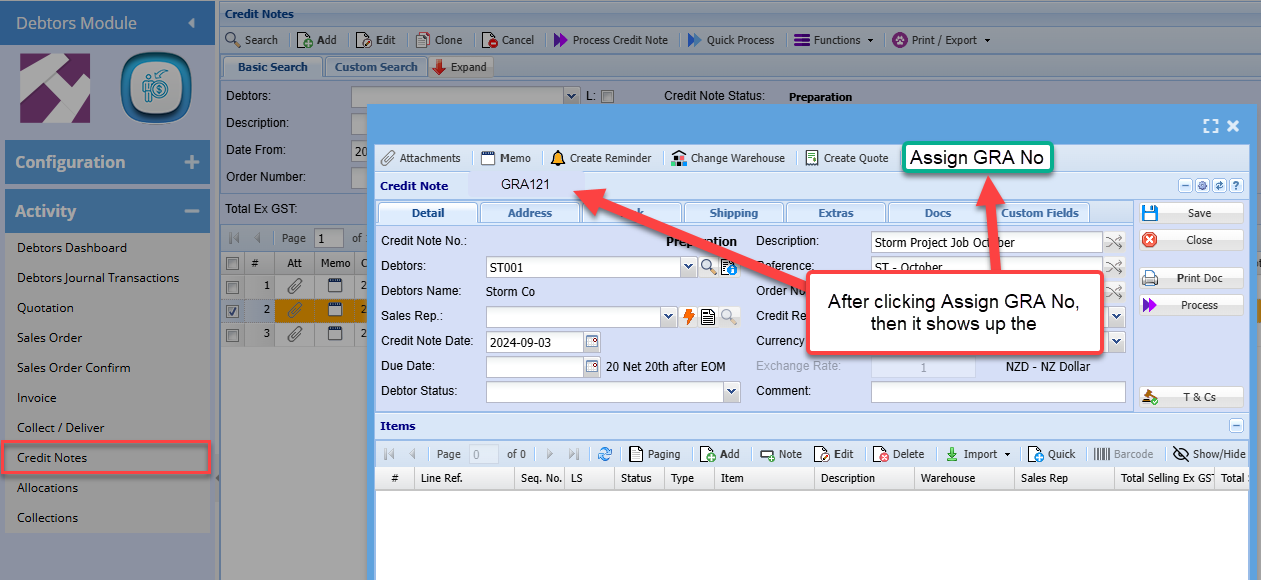
Assign a GRA number
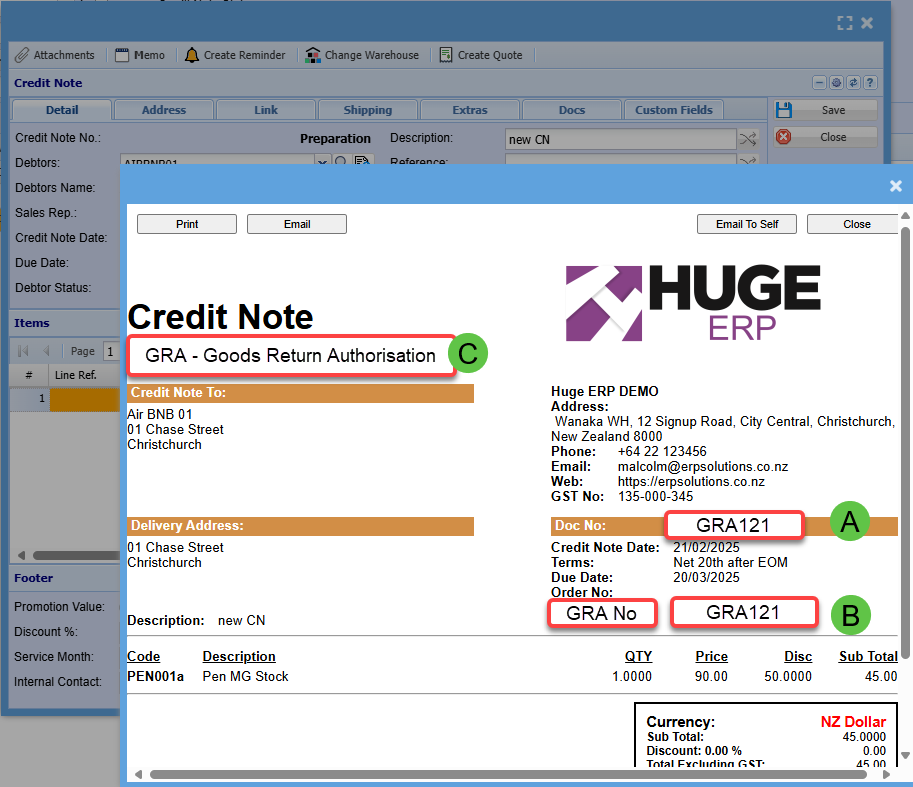
Print out for Credit note
If the credit note has a GRA number, then it will add these to the Credit Note
Search grids
GRA Number on grid with icon
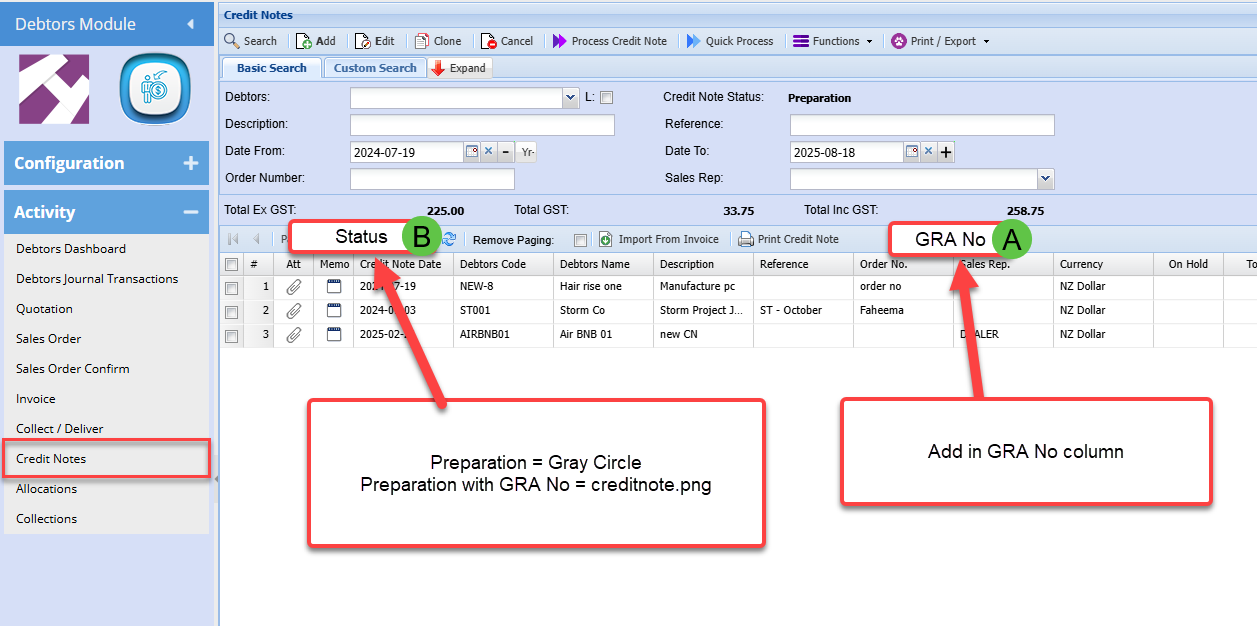
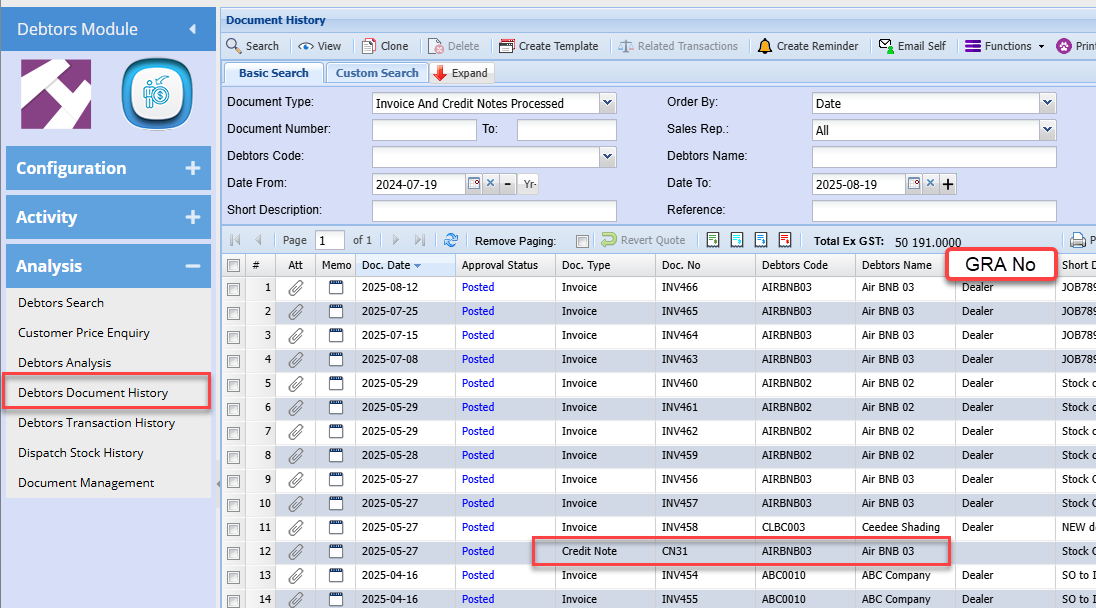
History grid will show GRA number