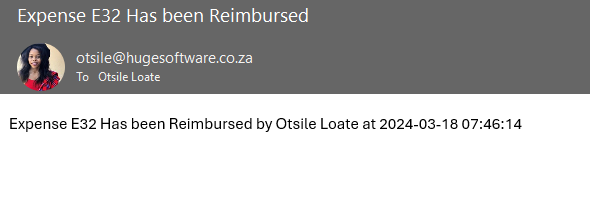
Expenses Menu
Expenses
Expenses are used to process claims for reimbursement.
Expenses help with accurate and timely expense claiming
Faster expense processing.
Employee satisfaction.
Experience processing cuts costs
Reduce errors and mistakes done by the manual traditional process.
Increased expense claim transparency.
CRM Module> Activity> Expenses
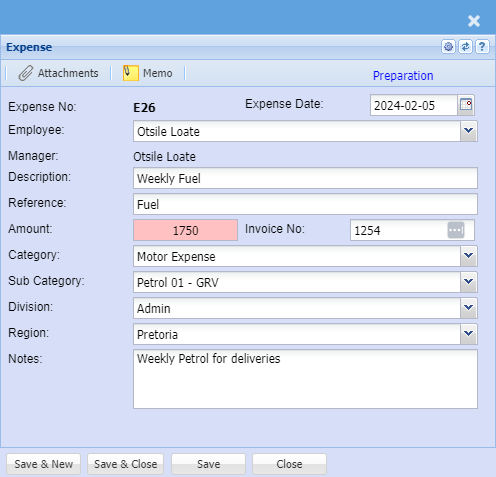
| Expense Date | Capture the correct date for the expense you are claiming for |
| Employee | Select the employee who is claiming on the drop down list. |
| Manager | The assigned approver will populate in this field |
| Description | Enter the expense description. |
| Reference | Enter the expense reference |
| Amount | Enter the expense amount. |
| Invoice No | Enter the supporting document number |
| Category | Select the category on the drop down |
| Sub Category | Select the sub category on the drop down |
| Division | Select the division on the drop down |
| Region |
Select the region on the drop down |
| Note | Allows you to add additional notes on the expense/ claim |
You can attach
.png)
Once the information has been captured
the user clicks on send approval - this emails the approver regarding this claim.
.png)
The status of the expense claim will now change to awaiting approval.
.png)
Expenses Process
The expenses function allows you to process claims for reimbursement
Benefits of Expenses:
- Accurate and timely expense claim routing
- Increase in organisational efficiency
- Faster expense processing
- Employee satisfaction
- Expense processing costs cuts
- Reduce errors and mistakes done by manual claim process
- Increased expense claim and transparency
User
Go to CRM Module> Activity> Expenses
To add a new Expense Click add or click search to see a list of existing Expenses
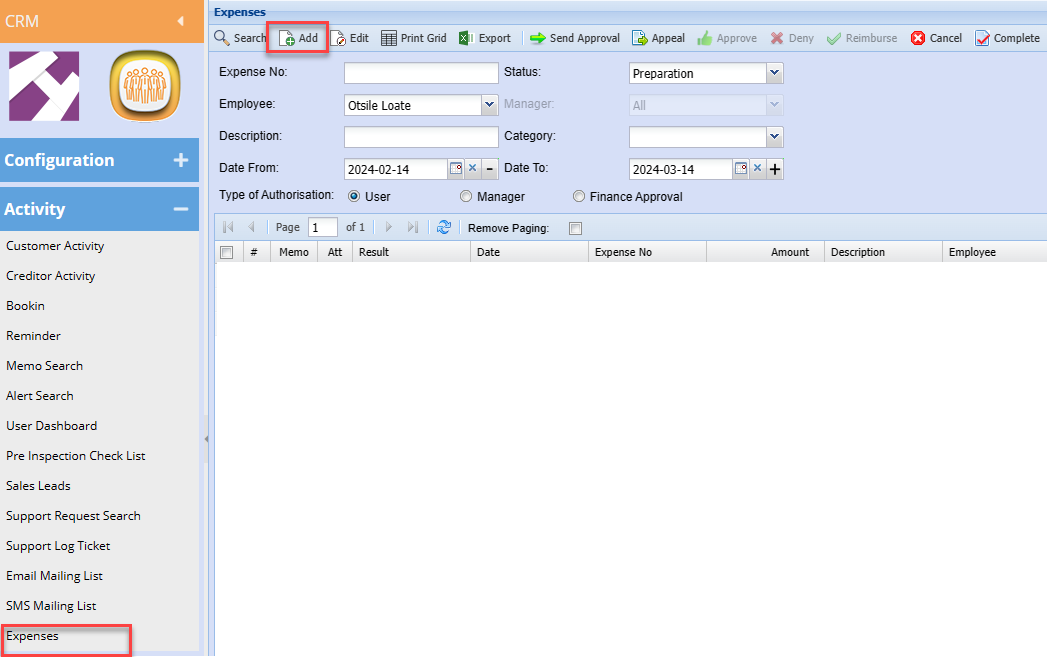
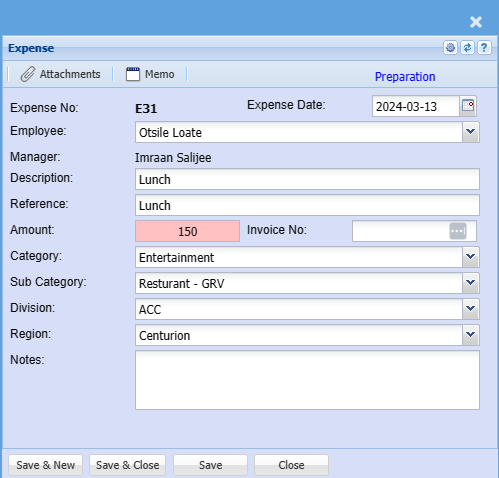
After clicking Add a screen below will appear, Add all necessary information as shown below
|
Employee |
Select the employee who is claiming on the dropdown list |
| Manager | The assigned approver will populate this field |
| Description | Enter claim description |
| Reference | Enter Claim reference |
| Amount | Enter the expense amount |
| Category | Select Category from the drop-down selection |
| Sub Category | Select the correct sub-category if there is more than one |
| Division | Enter division |
| Region | Enter region |
| Notes | Add detailed additional notes if applicable |
| Expense Date | Enter the correct date for the claim |
| Invoice No |
Enter the supporting document number if you have This is not compulsory |
Once you are done capturing you can load the receipt as proof on the attachments
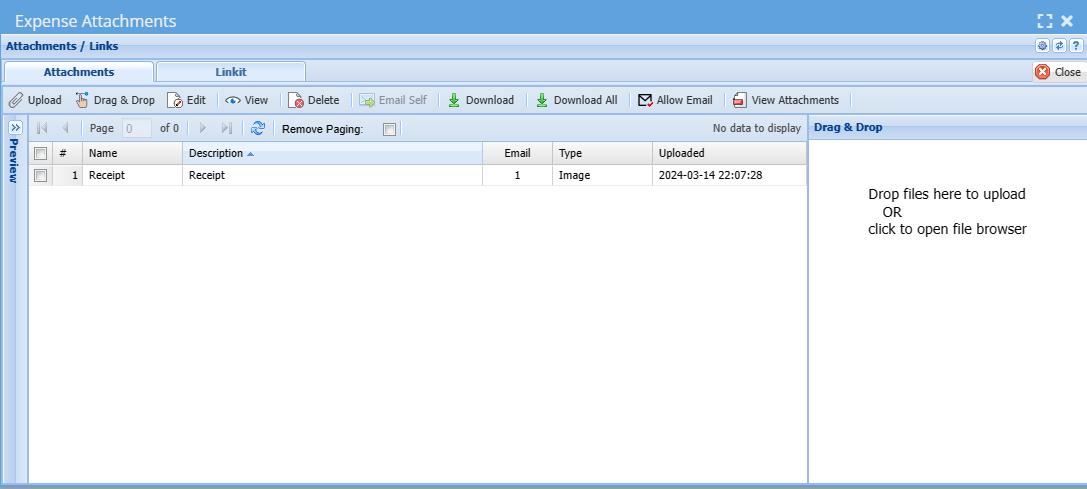
Once the information has been captured and all receipts are loaded then save and close your expense claim,
Go back to the grid
Select the expense claim from the grid and click Send Approval
This will email the approver (Manager) a request to review and approve the expense claim

Manager
The status of the expense claim will now change to awaiting approval
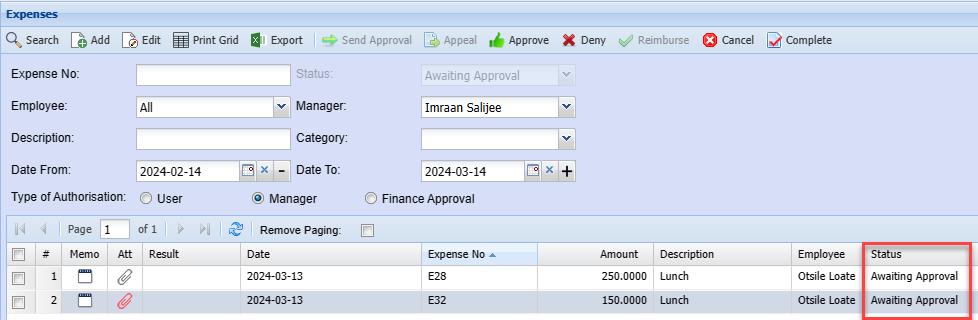
The Manager can then approve or deny the claim,
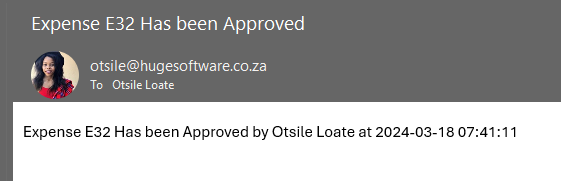
Once the manager approves the sales rep will receive an email confirming that the claim has been approved.
Finance Approval
The finance manager will then Appeal, Deny or Reimburse the expense claim.
Once the expense claim is reimbursed a journal will automatically be created
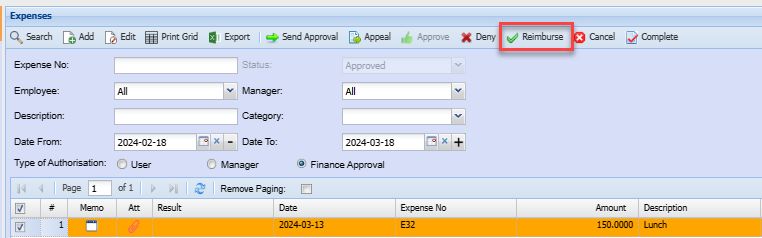
Once the fiance approval makes the decision the sales rep will receive an email informing them if they claim is going denied or going to be reimbursed.