Backups
Backups
- Backup Liability Customer
- Manual Backup Process
- Automatic Backup Setup
- Creating and Restoring Backup
- Restore Procedure
- Backup download
- Moving a backup
- Backup Restoring
- Backup Download
- Backup Creation
- Clear Backup Files
Backup Liability Customer
Backup Notice
Huge Software (Pty) Ltd endeavors to maintain a backup of Licensee data, however it is strongly recommended that the User maintains a backup of their data on a weekly basis.
It is highly recommended that the user download a backup, in case all backups fail, then Huge Software will ask the customer (You) for your downloaded backup.
Manual Backup Process
Video training manual 2016 - Click Here
System configuration>Administration> Backups
to manually create a backup
Click on the Create Button and the window will appear.
.png)
Check the name of the backup file and then click on the “Save” button.
.png)
You will be directed back the main window. Click on the Search button until the “Size” Column amount stops growing.
This indicates that the backup is completed.
Backups are stored on the server where the Cache database is stored.
.png)
Automatic Backup Setup
System configuration>Administration> Backups
Click on the Automatic backup button.
.png)
The following window comes Up.
Here you add an automatic schedule to run a backup.
Select the Interval and the time you would prefer the backup to run.
add a tick on the zip and save.
.png)
Creating and Restoring Backup
Creating a Backup
To Create a backup manually, go to:
System configuration>Administration>Backups
Click Create
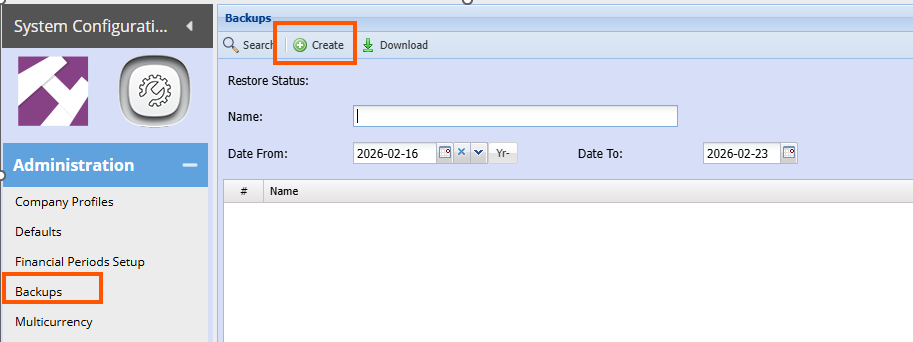
Leave the file path as is and only enter your initials or preferred description at the end of the file name
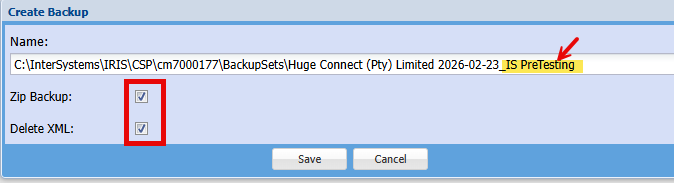
Ensure both tick boxes are ticked
Click Save
Click Search after a minute or 2 and notice the file size
Click Search again
If the file size stops increasing, the backup is complete.

Restoring a Backup
To Restore a backup, ensure all users are logged off the system.
Important: Restoring a backup will erase any transactions or setups and information added on the database subsequent to the date the backup being restored was taken.
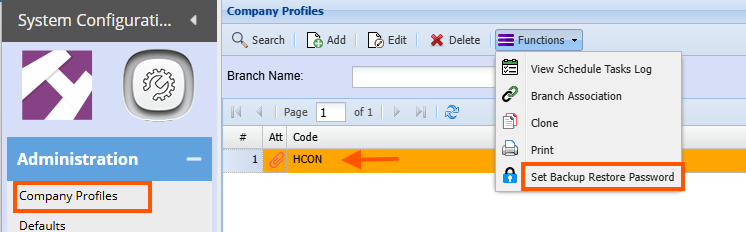
Go to : System configuration>Administration>Company Profiles
Search
Select the company name (Click once on the name)
Click the function Drop down
Select Set Backup restore password
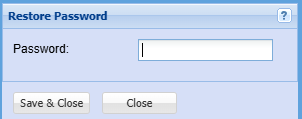
Enter a password
Save and Close
Go to: Administration>Backups
Click Search
Click once on the backup required
Click the Functions drop down and select Extract Backup 
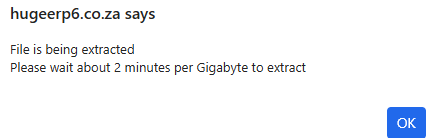
Below message will appear
Wait for a minute or 2 depending on the size of your database
Click Search
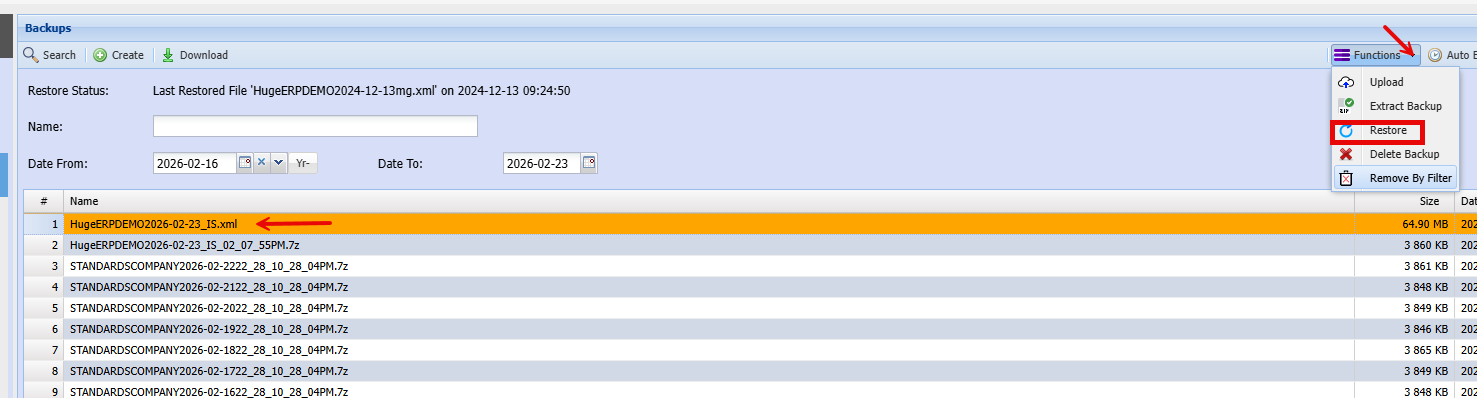
Ensure you have selected the .xml backup file (this is the unzipped file you extracted in above step)
Click functions drop down
Select Restore
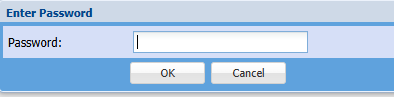
Enter the password you created earlier
Click Ok
The backup will now begin restoring
Click ok to the pop-up message
Once the backup has been restored, you will note the last restore details will be populated with the current date & time
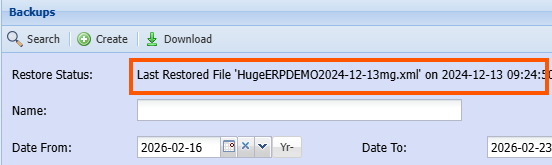
This then completes the backup restore procedure
Restore Procedure
RESTORING OF A BACKUP
1. Ensure that you have a backup of your current data before
restoring.
To restore a backup of your company, there are two steps:
- Create a restore Password
To do this: System Configuration> Administration>Company Profile
Click the Functions dropdown
Select: Set backup Restore Password
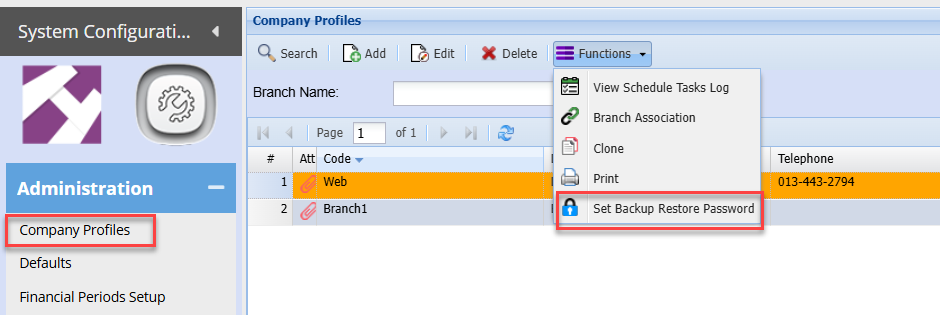
Enter a required password
could be only a number if so deemed, eg. 1
Note: There is no specific criteria for this Password. ie. number of characters, etc
Password could be anything really.
Save and close
2. Restoring the Back up
Go to: System Configuration>Administration>Backups
Search the required backup
Click Functions
Select Extract Backup

Allow the system to unzip the backup file. (if the company data volume is not excessively large, allow approximately 3-5 min)
Search
Then click once on the unzipped file .. this will be indicated by .xml at the end
Click Functions Dropdown again
Select restore
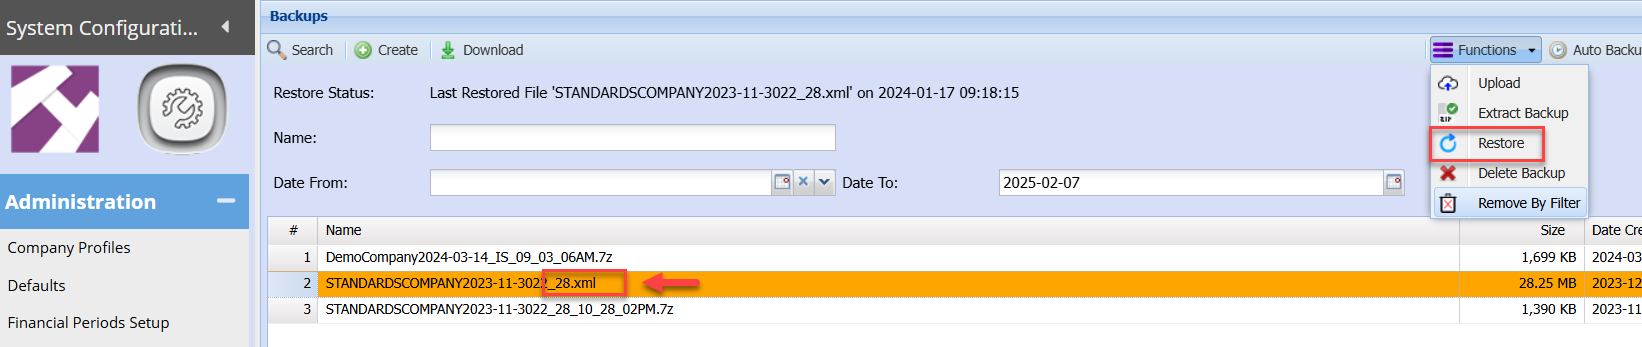
Enter the password created in step 1

Click Ok
Click Ok Again
The system will then start restoring the backup and display on the top next to restore status
Once complete, the status will read "backup... has been restored"
Once the backup has completed please log out and log back into company.
Backup download
Before going to the backup download one has to enable a password to download backups.
To restore a backup one must first create a backup restore PASSWORD which can be created under
System Configuration > Administration > Company Profiles.
Click on the Extras tab and click on the “Set Backup Restore Password” button.
.png)
Enter a password and click on the Save button.
.png)
Click on OK and then on the “Close” button.
Go back to the Backups screen System Configuration Administration Backups.
.png)
Search and find your backup that you want to download.
NOTE: You can only download the files that have a .RAR file extension.
Click on the Restore tab at the bottom of the screen.
.png)
Enter your password.
.png)
Click on Save to Save to your local drive.
Moving a backup
Moving a Backup from One Place to Another
After creating a backup of the set of books on Machine A (See document on how to create a backup).
ON Machine A go to the drive that Cache has being installed on. Browse to the folder C:\CacheSys\CSP\[Company Namespace]\BackupSets. Find the backup that was done and copy it to disk.
MOVING A BACKUP FROM ONE PLACE TO ANOTHER
After creating a backup of the set of books on Machine A (See document on how to create a backup).
ON Machine A go to the drive that Cache has being installed on. Browse to the folder C:\CacheSys\CSP\[Company Namespace]\BackupSets. Find the backup that was done and copy it to disk.
Now go to Machine B and copy the backup to the new location on the machine drive.
C:\CacheSys\CSP\[Company Namespace]\BackupSets. If the folder called “Backup Sets does not exist” create the folder with the Case on the letters indicated.
Backup Restoring
Restoring of a Backup
1. Ensure that you have a backup of your current data before restoring.
.png)
.png)
.png)
.png)
.png)
.png)
Once the backup has completed, please log out and log back into company.
Backup Download
Download backups from Webaccounting
Before going to the backup download one has to enable a password to download backups.
To restore a backup one must first create a backup restore PASSWORD which can be created under
System Configuration > Administration > Company Profiles.
Click on the Extras dropdown AND click on the “Set Backup Restore Password” button.
.png)
Enter a password and click on the Save button
.png)
Click on OK and then on the “Close” button
Go back to the Backups screen System Configuration Administration Backups.
.png)
Search and find your backup that you want to download.
NOTE: You can only download the files that have a .7z file extension.
Click on the Restore tab at the bottom of the screen.
.png)
Enter your password
.png)
Click on Save to Save to your local drive
Backup Creation
To create a backup go to System
Configuration >Administration > Backups.
.png)
Click on the Create Button and the window will appear. Check the name of the backup file and then click on the “Save” button.
.png)
You will be directed back the main window. Keep click on the Search button until the “Size” Column amount stops growing. This indicates that the backup is completed. Backups are stored on the server where the Cache database is stored. It stores it in the following path C:\CacheSys\CSP\[Company Namespace]\BackupSets. All backups are stored in this location, please ensure that you take these backups off the server onto a offsite device such as DVD disks etc.
.png)
Clear Backup Files
This function is used to clear backup files stored in the folder.
Backups are done daily and when you are on the system for a long time, there are many files.
As a general rule for clear of backups is as follows:
| 1 | The company will retain full backups for everyday for a three-month period. |
| 2 | After this the backups are keep for every month end and beginning of month |
| 3 | The backups are backed up into the cloud for storage. |
| 4 | Backups are cleared in the folder |
The function will search for all backups and based on the retention days, will keep those days and then move all other backups to a separate folder.
This folder will be deleted, and files removed from server.
Go to Backups
Select your date range to clear.
The Date From should be set to the last time you cleared the files (It does not matter if you don't have the correct date)
Date To is important to ensure that you don't remove files after that date. (This is the date we govern to ensure we keep 3 months' worth of everyday backups.
Click on the Restore drop down to find the remove by filter function.
.png)
Click on the Remove by Filter
.png)
After you click on Remove by Filter
This window will come up to confirm what you want to remove.
Confirm the Date from and Date to
Keep Month days defined.
| Start Days | set to 2 by default which means it will keep the 1st and 2nd day of every month. |
| End Days | set to 2 by default which means it will keep the last 2 days of the month, let's say 30th and 31st. |
.png)
Wait for function to finished.
After it is complete the grid will refresh, and the files left are first two days of month and last two days of month.
.png)
The data will have moved to a folder under the database in the relevant company database.
If any files were deleted by mistake, you can cut or copy them back to the company.
After the data files have been checked then these will be deleted.
.png)