# Inventory Functions Drop Down
#### Branches
[](https://hugeerp10.co.za/hsofmanual/uploads/images/gallery/2024-10/fuIimage.png)
---
#### Webshop Ext ID
[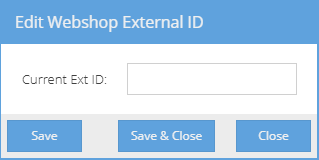](https://hugeerp10.co.za/hsofmanual/uploads/images/gallery/2024-10/Zqyimage.png)
---
#### Job Employee Schedule
[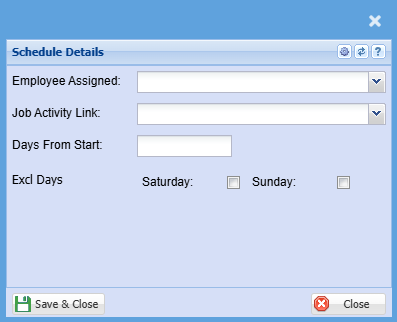](https://hugeerp10.co.za/hsofmanual/uploads/images/gallery/2024-10/gYHimage.png)
---
#### Linked Items
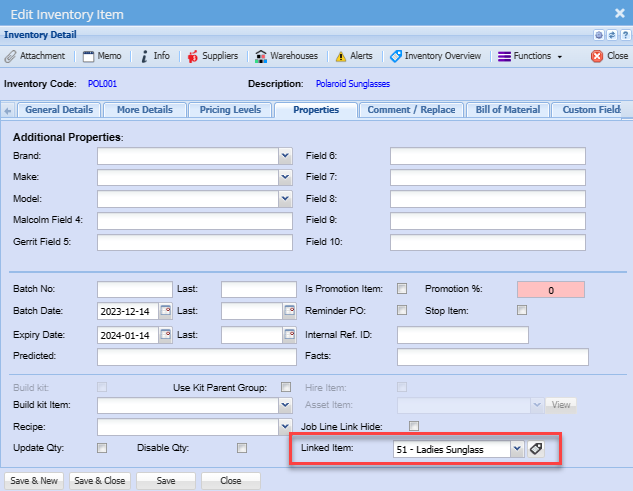
**Inventory Module> Configuration> Inventory Setup> Properties Tab**
The primary functionality of this feature is to establish links between items.
You can connect related items, creating a web of relationships within the system.
This is particularly beneficial when dealing with interconnected stock items that require a hierarchy stracture
To do this you need to go to inventory item setup, and select an item you want to link items to.
Go to properties then linked items.
Select the item you want to link on the drop-down then click save. You can link as many as you want.
**[](https://hugeerp10.co.za/hsofmanual/uploads/images/gallery/2024-01/YAwimage.png)**
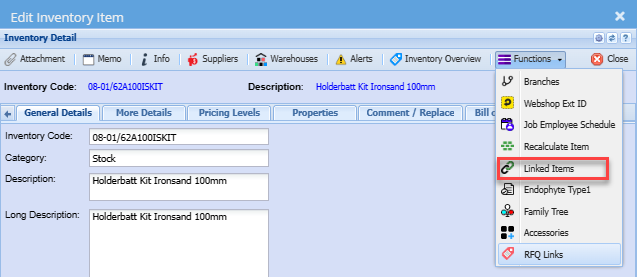
To utilize the Linked Items Hierarchy feature, follow these steps:
1. Navigate to the "Functions" drop down menu.
2. Select "Linked Items" from the drop down.
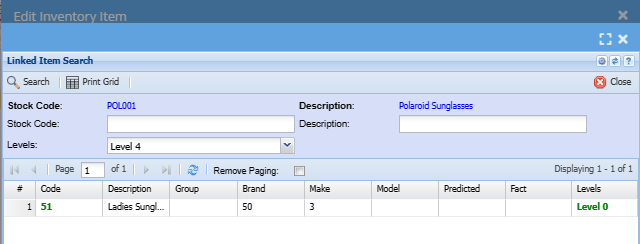
This will lead you to the dedicated section where you can view the linked items and the hierarchical relationships between them.
**[](https://hugeerp10.co.za/hsofmanual/uploads/images/gallery/2024-01/pt9image.png)**
[](https://hugeerp10.co.za/hsofmanual/uploads/images/gallery/2024-01/Mytimage.png)
---
#### Endophyte Type1
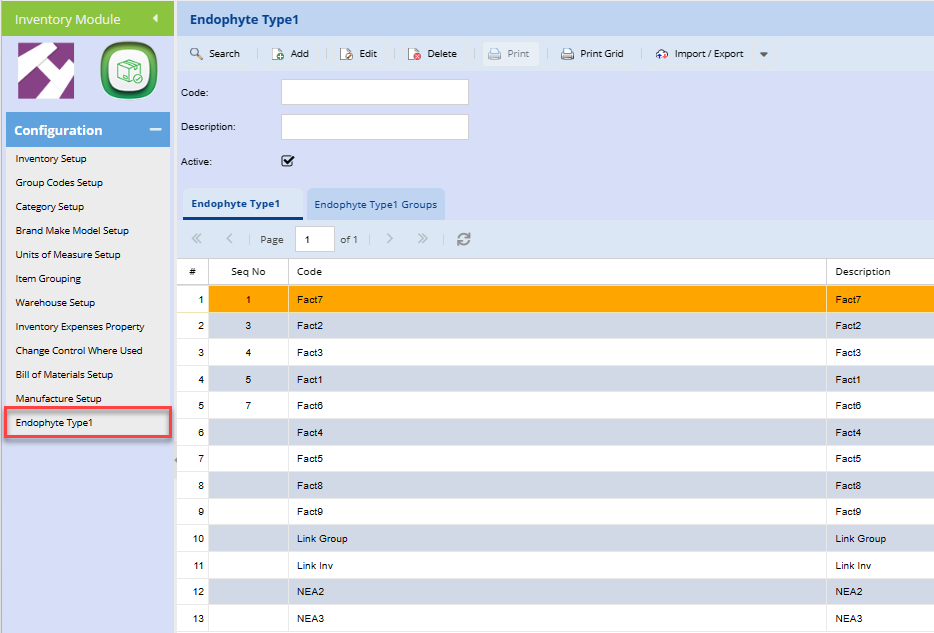
This feature allows you to easily modify and tailor fact lists based on their specific needs.
To add facts to fact groups:
Go to **Inventory Module> Configuration> Endophyte Type 1**
- Click, Add to create a new fact entry
- Create a fact list
- Save the information.
[](https://hugeerp10.co.za/hsofmanual/uploads/images/gallery/2024-01/cPmimage.png)
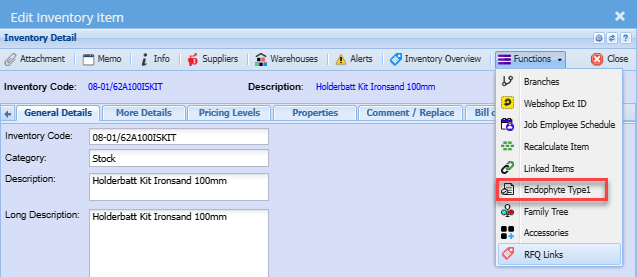
To access the Endophyte Type1/ Fact list
Go to
1. Inventory Module
2. Configuration
3. Edit the Inventory Item you want to add the Endophyte Type1 to
4. Functions drop down
5. Select Endophyte Type 1 from the drop down.
[](https://hugeerp10.co.za/hsofmanual/uploads/images/gallery/2024-01/bPBimage.png)
The system processes the information and dynamically categorizes it under Predicted and Facts.
Access the details to view short information about the marked facts.
[](https://hugeerp10.co.za/hsofmanual/uploads/images/gallery/2024-01/D0aimage.png)
---
#### Family Tree
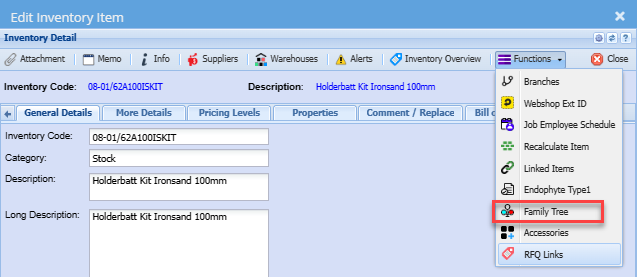
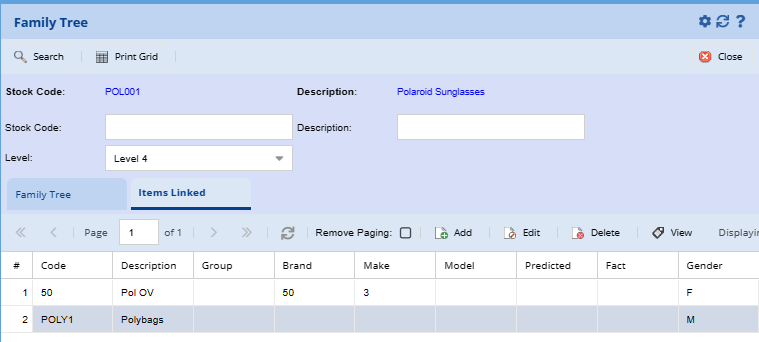
Family tree allows you to create and manage relationships among different items.
**Inventory Module > Configuration> Item Setup> Edit Inventory Item>Functions Drop Down> Family Tree**
[](https://hugeerp10.co.za/hsofmanual/uploads/images/gallery/2024-01/MH4image.png)
When creating a family tree item, you have the option to specify whether it is male or female. This is crucial for biology.
The family tree structure allows you to create multiple levels of relationships.
[](https://hugeerp10.co.za/hsofmanual/uploads/images/gallery/2024-01/zAdimage.png)
---
#### Accessories
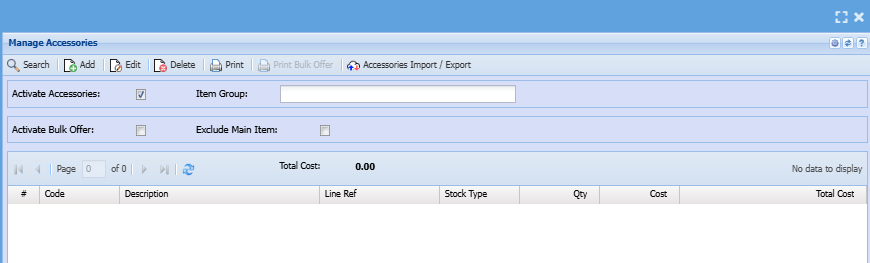
You can now activate accessories and Bulk offer
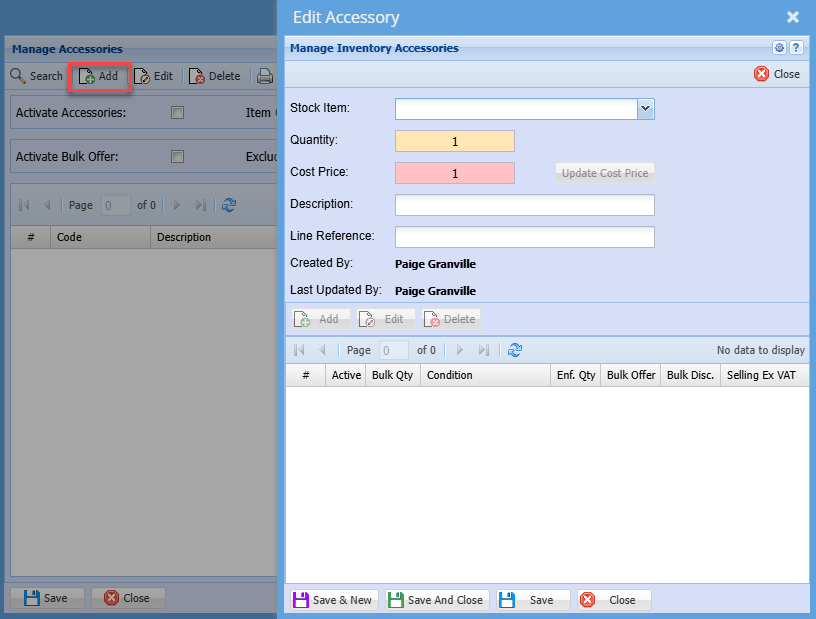
You can also manage accessories from this screen
You can also import or export accessories from this screen
[](https://hugeerp10.co.za/hsofmanual/uploads/images/gallery/2024-09/CUEimage.png)
[](https://hugeerp10.co.za/hsofmanual/uploads/images/gallery/2024-10/7Xaimage.png)
---
#### RFQ Links
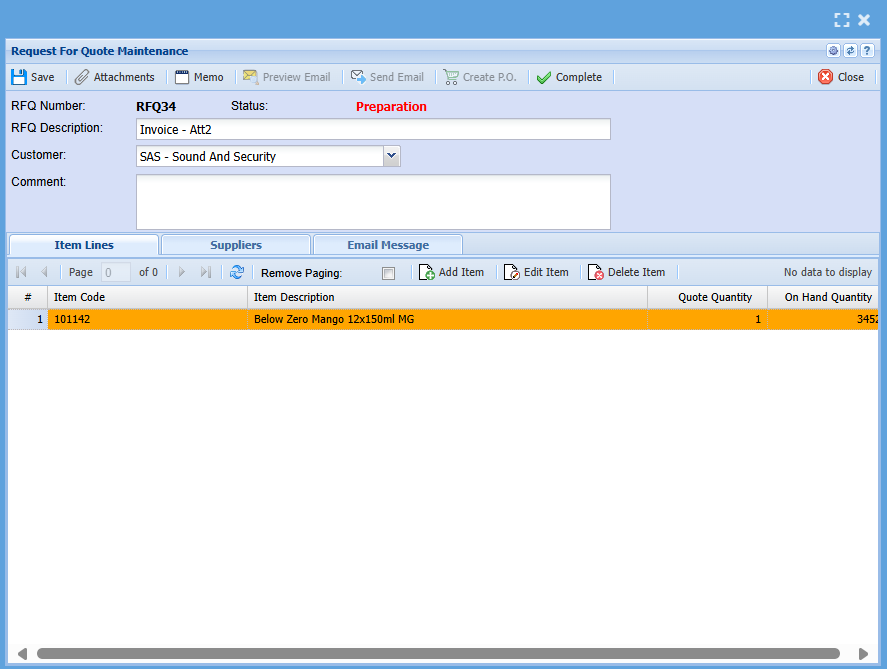
RFQ stands for Request for Quotes.
You can now search for RFQs under an item.
Instead of the person having to look for the RFQ separately, when they are viewing the item, they can see all the RFQs that were sent to the suppliers
[](https://hugeerp10.co.za/hsofmanual/uploads/images/gallery/2024-09/Cprimage.png)
---
#### Customer Item Codes
This function is used by a customer who orders stock from you and on-sells it to their customers
Therefore, the customer would request to use their own code for a specific item
So the customer item codes are the item codes that the client uses to sell to their customers
[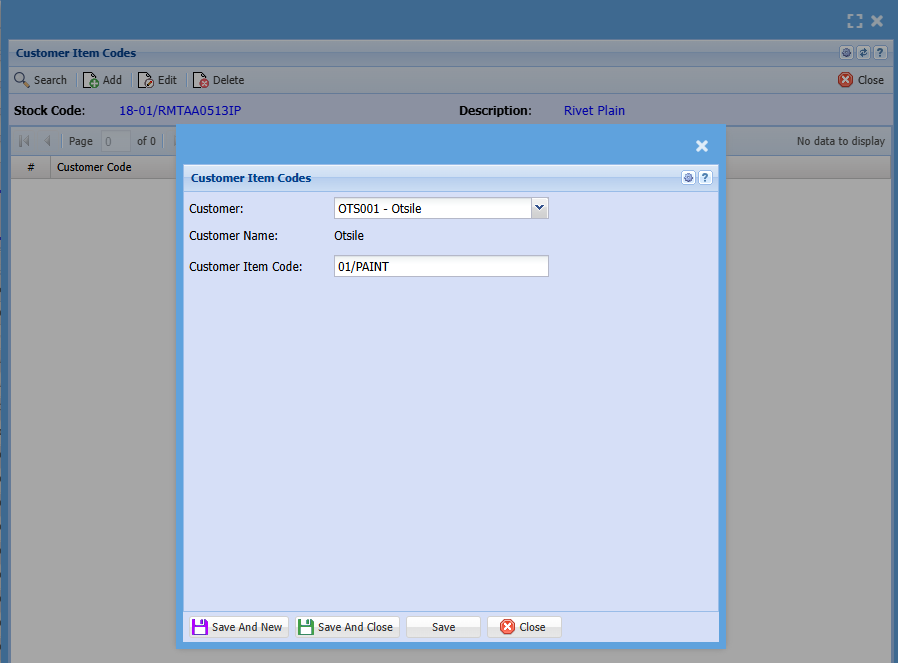](https://hugeerp10.co.za/hsofmanual/uploads/images/gallery/2024-09/doiimage.png)
You can add multiple customer codes to one item
[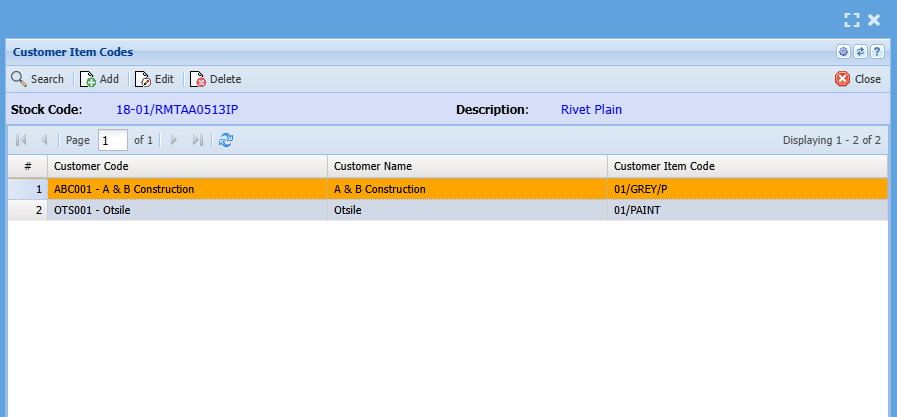](https://hugeerp10.co.za/hsofmanual/uploads/images/gallery/2024-09/cKvimage.png)
When printing an invoice use a fixed layout and it will display both your code and the customer's code
This will allow the customer to match the codes on their side
---
#### Bill of Materials
A Build kit is essentially a bill of material (BOM) that can be edited on the fly when added to transactions.
The build kit has 3 components to it:
1. A stock item, which is a BOM item
2. A Bill of Material Recipe
3. A Custom item which is the build
##### Setting Up BOM Item
**Go to Inventory Module> Configuration> Inventory Setup**
[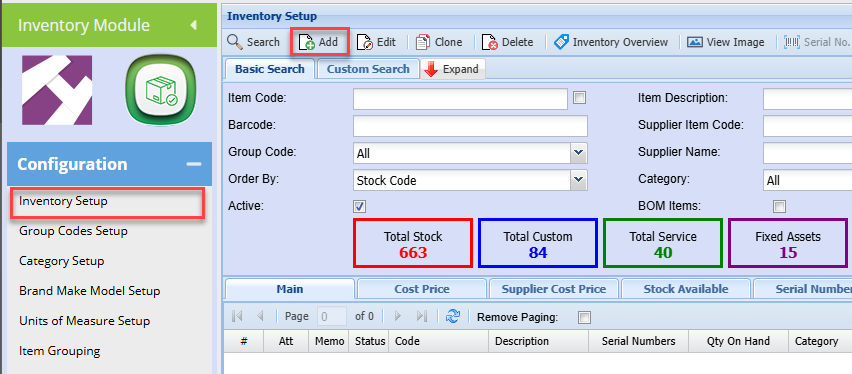](https://hugeerp10.co.za/hsofmanual/uploads/images/gallery/2024-08/Bf6image.png)
Click Add
Enter an Item code
Enter a Description
[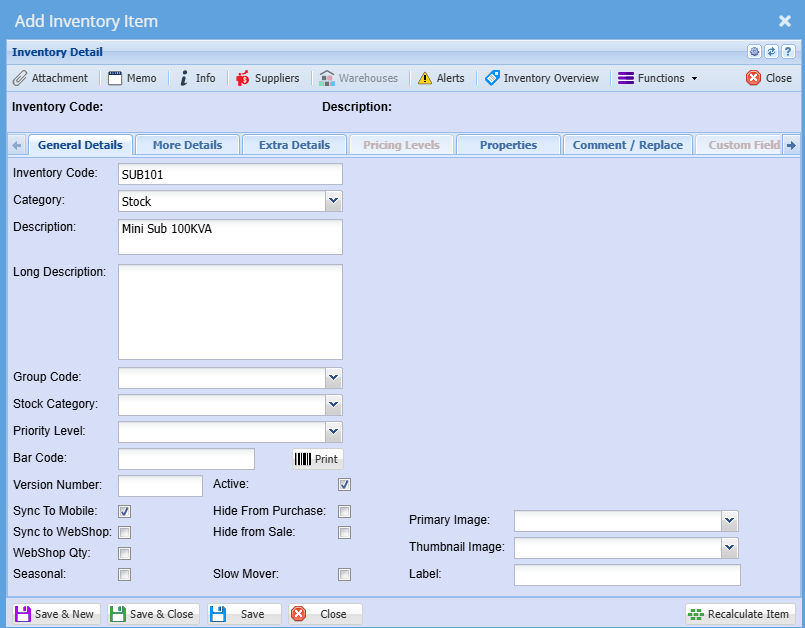](https://hugeerp10.co.za/hsofmanual/uploads/images/gallery/2024-08/WMUimage.png)
If you use group codes, for categorization and sales mapping, select the respective group code.
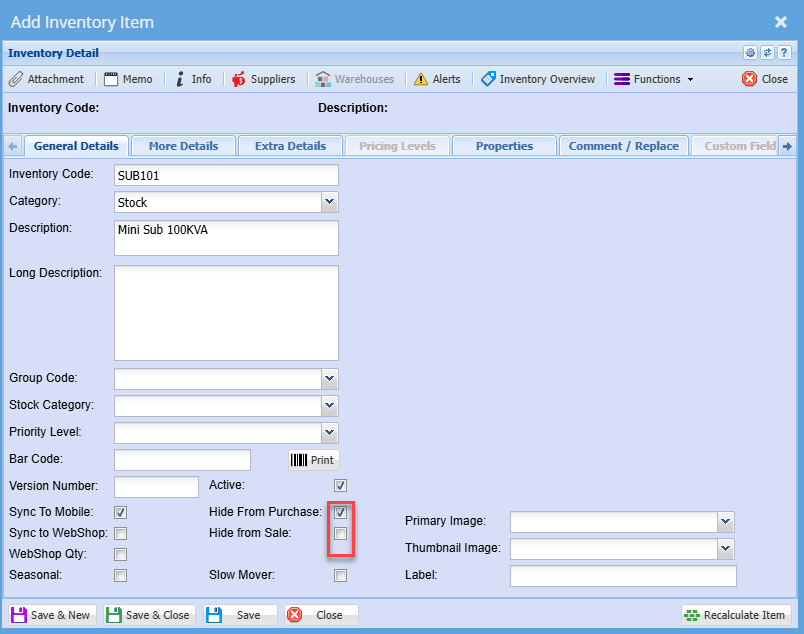
Since this is a Bill of Material (BOM) item that you, merely setting up for the Build recipe, and you are not going to be purchasing this item, you can tick the Hide from Purchases Box
Also, if most of your builds are customized and the standard BOM item is likely not to be sold then you can tick the Hide from Sales Box
[](https://hugeerp10.co.za/hsofmanual/uploads/images/gallery/2024-08/Jpjimage.png)
Click Save
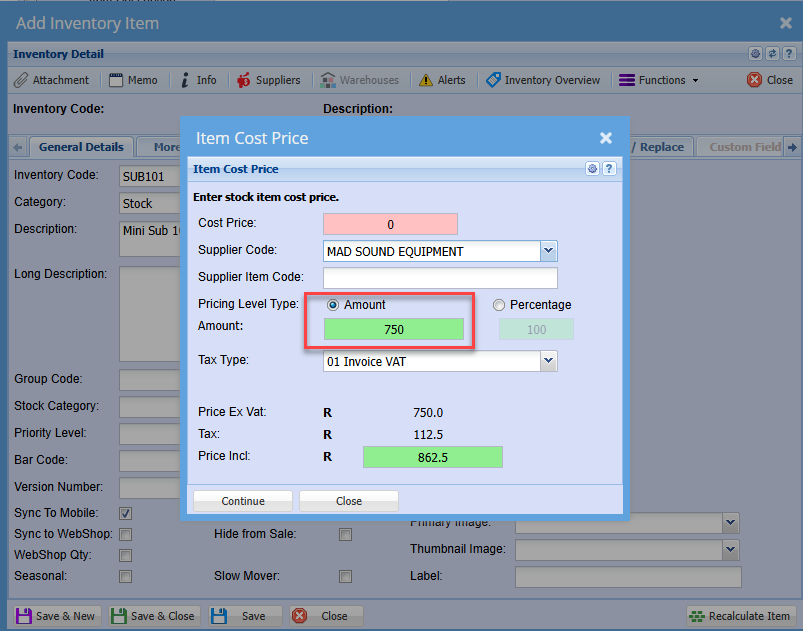
You will be prompted to enter a cost and selling price
Enter the selling price
You do not have to enter a cost price, since the cost price will be made up of the individual components
[](https://hugeerp10.co.za/hsofmanual/uploads/images/gallery/2024-08/H1Iimage.png)
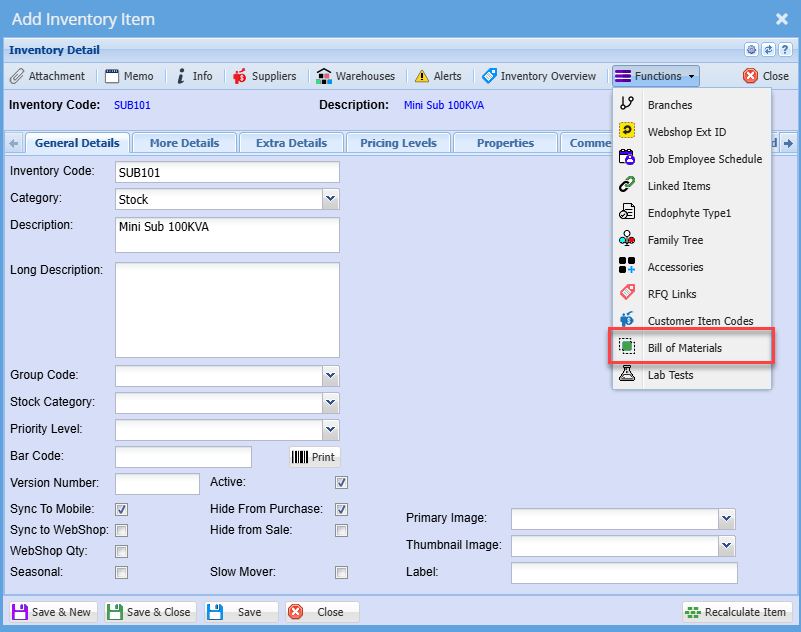
Click the Functions drop down
Select Bill of Materials
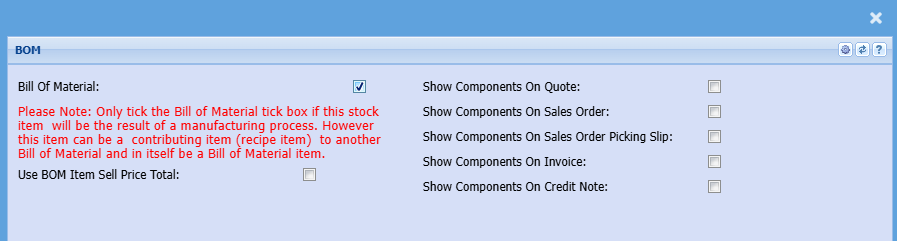
Tick the Bill of Material activation box
[](https://hugeerp10.co.za/hsofmanual/uploads/images/gallery/2024-08/wFXimage.png)
[](https://hugeerp10.co.za/hsofmanual/uploads/images/gallery/2024-08/y24image.png)
This sets the item as a BOM resultant item
Click save and close
To set up the Bill of Material (BOM) recipe click [here](https://hugeerp10.co.za/hsofmanual/books/aim-configuration/page/bill-of-material-setup-add "BOM Setup")
---
#### LabTests
Lab tests get populated through the lap module
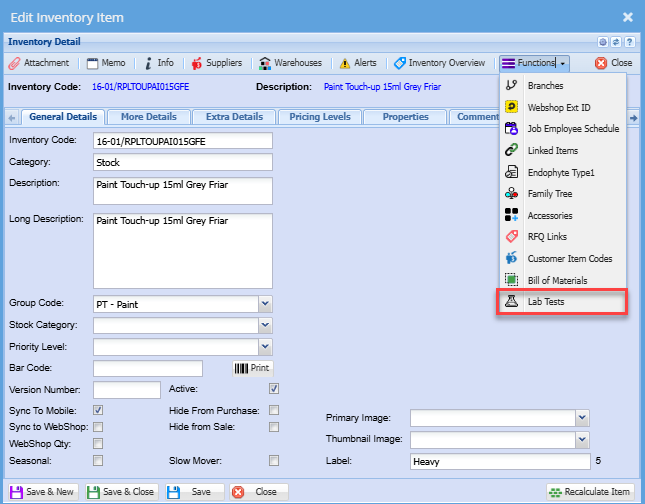
**Go to Inventory Module> Configuration> Item Setup**
[](https://hugeerp10.co.za/hsofmanual/uploads/images/gallery/2024-09/Fchimage.png)
Double-click on a stock item to open
Then select the functions drop down and Lab test
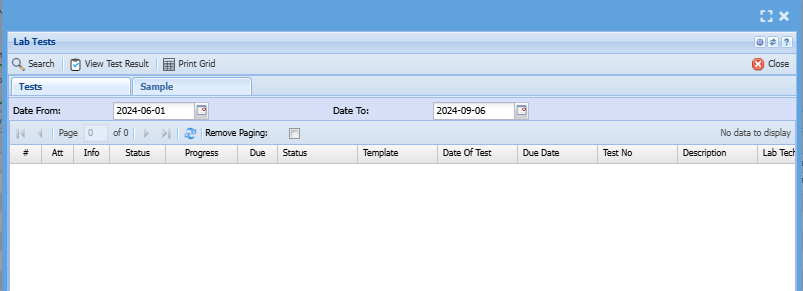
The screen below will appear with nothing on the tests and sample grid
[](https://hugeerp10.co.za/hsofmanual/uploads/images/gallery/2024-09/bFuimage.png)
| **Search** | Search for a list of tests or samples |
| **View Result** | View test and sample progress |
| **Print Grid** | Print information on the grid |
| **Tests Tab** | Shows lists of tests and progress |
| **Sample Tab** | Shows list of samples and status |
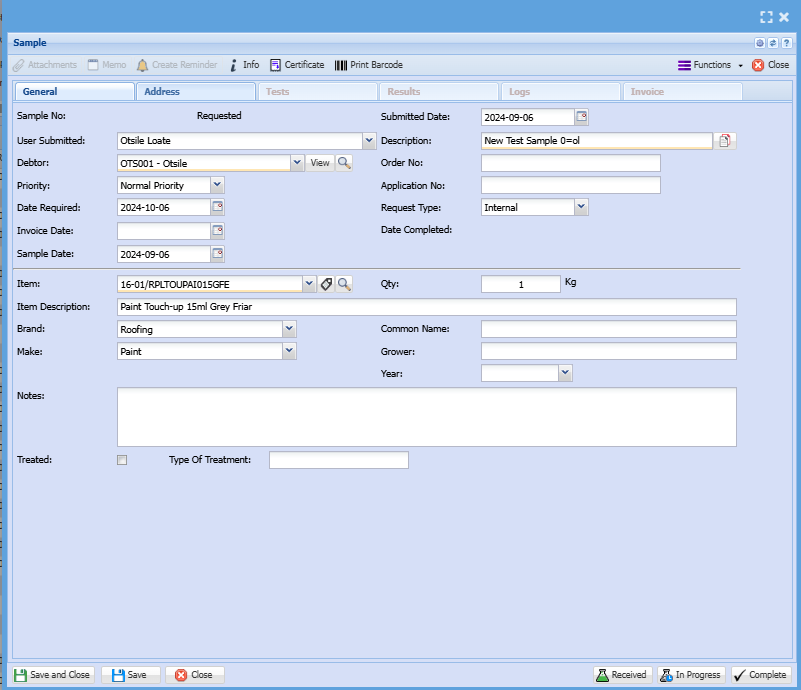
To create a test lab go to
**Lab Module> Activity> Samples**
Click on New Sample
[](https://hugeerp10.co.za/hsofmanual/uploads/images/gallery/2024-09/vLIimage.png)
Add Debtor, Description and a sample you would like to test
Once complete click Save
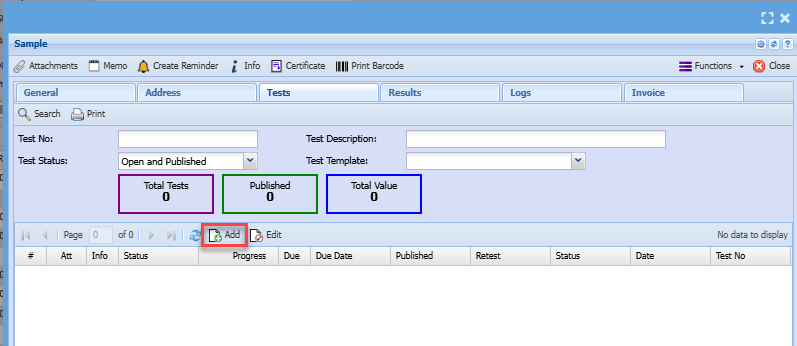
Then click on test Tab
After clicking on the test tab click Add
[](https://hugeerp10.co.za/hsofmanual/uploads/images/gallery/2024-09/iEAimage.png)
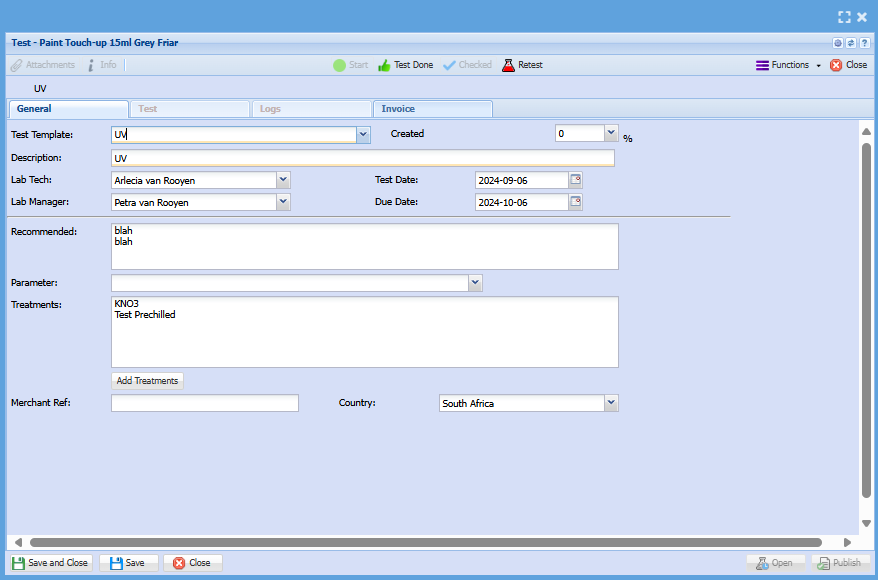
The screen below will appear select the test template from the drop down then click save
After clicking save click start to open up the greyed-out tabs
[](https://hugeerp10.co.za/hsofmanual/uploads/images/gallery/2024-09/HDJimage.png)
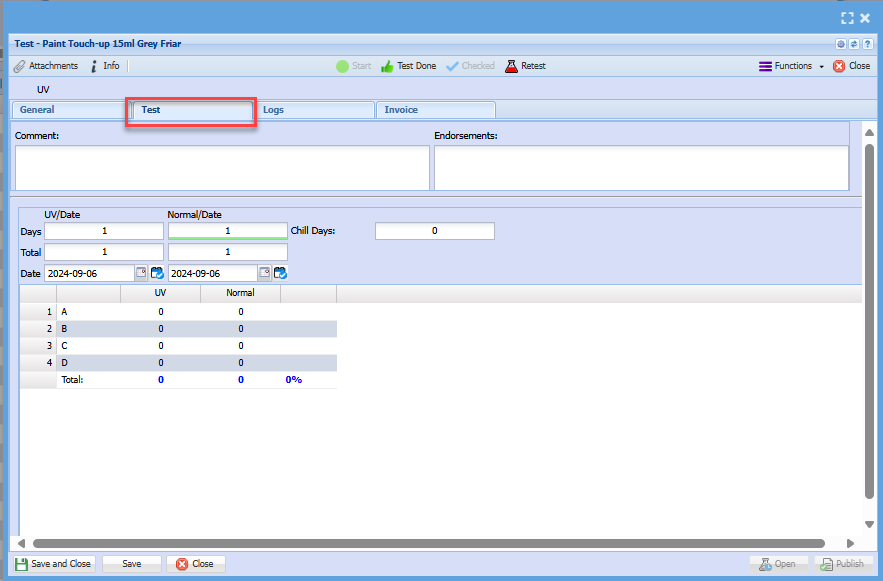
and when you click on the test tab you will see that the test is now running
[](https://hugeerp10.co.za/hsofmanual/uploads/images/gallery/2024-09/VtFimage.png)
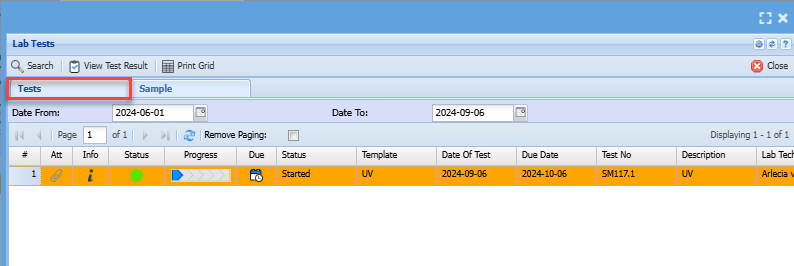
Once complete you can return to the lab test screen under the inventory module to see your test list
Go back to the functions and click on the lab test you will see under a test tab that one test has been created
You can have multiple tests of the same stock item
[](https://hugeerp10.co.za/hsofmanual/uploads/images/gallery/2024-09/XNYimage.png)
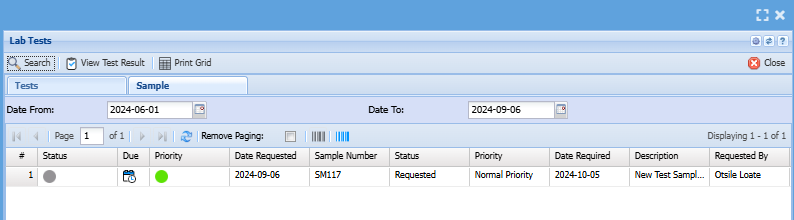
And the test has been created for one sample if you click under the sample tab
[](https://hugeerp10.co.za/hsofmanual/uploads/images/gallery/2024-09/lxhimage.png)