# AIM - Configuration

Configuration

# Inventory Setup Menu

# Inventory Item Search

**<span class="ts15" style="color: rgb(45, 194, 107);">Inventory &gt; Configuration &gt; Inventory Setup</span>**

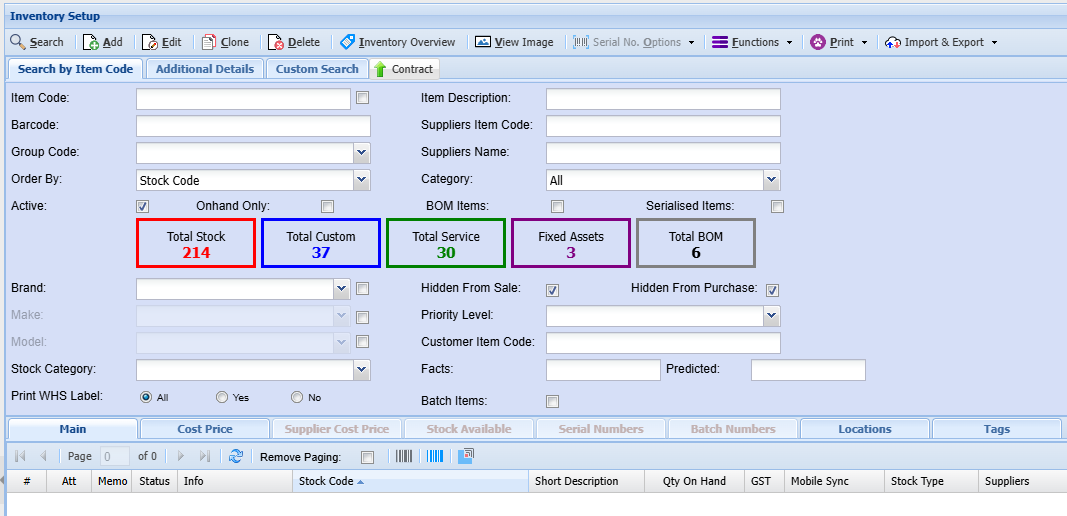
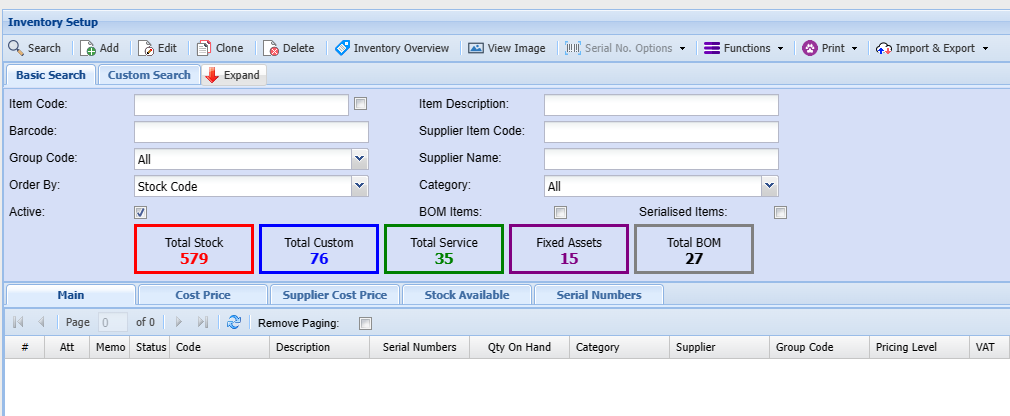
<span class="ts0">In Inventory setup search, you will see two search tabs</span>

<table border="1" id="bkmrk-basic-search-tab-if-" style="border-collapse: collapse; width: 100%;"><colgroup><col style="width: 20.6198%;"></col><col style="width: 79.3802%;"></col></colgroup><tbody><tr><td>**<span class="ts0">Search</span>**</td><td><span class="ts0">Allows you to search for an existing item, Creditor or Debtor based on system fields and which module you are in.</span></td></tr><tr><td>**<span class="ts0">Custom Search</span>**</td><td><span class="ts0">If you have setup custom fields in your inventory, you can search for the items using the custom fields linked.</span></td></tr></tbody></table>

<p class="callout info"><span class="ts0"><span style="color: rgb(224, 62, 45);">Note:</span> If you leave the fields blank it will bring back all Inventory codes which will be sorted in inventory code order alphabetically.</span></p>

<span class="ts0">If you click on the column heads they will sort A-Z or Z-A.</span>

---

##### <span class="ts0">Basic Search filter</span>

[![image.png](https://hugeerp10.co.za/hsofmanual/uploads/images/gallery/2026-08/scaled-1680-/image.png)](https://hugeerp10.co.za/hsofmanual/uploads/images/gallery/2026-08/image.png)

##### <span class="ts0">Additional Details search</span>

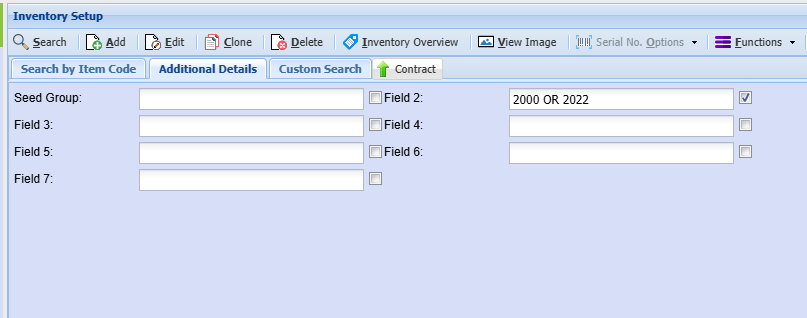
The system's inventory search function has a non-standard, dual-mode query logic that presents a usability tick. An explicit "tick" enables multi-word `OR` searches, but requires users to manually input the capitalized boolean operator, a deviation from common search engine syntax. Disabling the "tick" reverts the field to a less flexible "full string" match.

The Dual-Mode Search Logic

The inventory search contains a conditional operator system, governed by a user-selected tick box next to the search field.

- **Mode 1: Exact String Search (Tick Disabled)**
    
    
    - **Process**: When the tick is disabled, the system defaults to a standard search.
    - **Result**: The system returns only records that contain the exact, complete string entered by the user (e.g., searching for `2000 OR 2022` would look for that literal phrase).

- **Mode 2: Multi-Term Search (Tick Enabled)**
    
    
    - **Process**: The user must activate a tick next to a specific field. They can then construct a query using multiple terms separated by a capitalized `OR` operator (e.g., `2000 OR 2022`).
    - **Result**: The system returns all records containing *either* of the specified terms.

[![image.png](https://hugeerp10.co.za/hsofmanual/uploads/images/gallery/2026-08/scaled-1680-/bBRimage.png)](https://hugeerp10.co.za/hsofmanual/uploads/images/gallery/2026-08/bBRimage.png)
---

##### <span class="ts0">Navigation Ribbon</span> 

[![image.png](https://hugeerp10.co.za/hsofmanual/uploads/images/gallery/2024-11/scaled-1680-/FNqimage.png)](https://hugeerp10.co.za/hsofmanual/uploads/images/gallery/2024-11/FNqimage.png)

<span class="ts0">The Navigation Tabs above are used to action the following functions:</span>

<table border="1" id="bkmrk-search-button-the-se" style="border-collapse: collapse; width: 100%; height: 445.344px;"><colgroup><col style="width: 21.609%;"></col><col style="width: 78.3928%;"></col></colgroup><tbody><tr style="height: 46.5938px;"><td style="height: 46.5938px;">**<span class="ts0">Search</span>**</td><td style="height: 46.5938px;"><span class="ts0">Allows you to search for an existing item, Creditor or Debtor based on system fields and the module you are in.</span></td></tr><tr style="height: 46.5938px;"><td style="height: 46.5938px;">**<span class="ts0">Add</span>**</td><td style="height: 46.5938px;"><span class="ts0">Allows you to create a new Inventory item, Creditor or Debtor depending on the Module you are in.</span></td></tr><tr style="height: 46.5938px;"><td style="height: 46.5938px;">**<span class="ts0">Edit</span>**</td><td style="height: 46.5938px;"><span class="ts0">Allows you to edit an existing Inventory Item, Creditor or Debtor depending on the module you are in.</span></td></tr><tr style="height: 46.5938px;"><td style="height: 46.5938px;">**<span class="ts0">Clone</span>**</td><td style="height: 46.5938px;"><span class="ts0">Allows you to Clone an existing Inventory Item, Creditor or Debtor depending on the module you are in.</span></td></tr><tr style="height: 63.3906px;"><td style="height: 63.3906px;">**<span class="ts0">Delete </span>**</td><td style="height: 63.3906px;"><span class="ts0">Allows you to Delete an existing Inventory Item, Creditor or Debtor depending on the module you are in, you will not be able to delete an Inventory Item, Creditor or Debtor if they have transactions against the.</span></td></tr><tr style="height: 29.7969px;"><td style="height: 29.7969px;">**<span class="ts0">Inventory Overview</span>**</td><td style="height: 29.7969px;"><span class="ts0">Allows you to have a wide overview of all movements for the selected Inventory Code, from Stock coming in and going out and stock take figures.</span></td></tr><tr style="height: 29.7969px;"><td style="height: 29.7969px;">**<span class="ts0">View Image</span>**</td><td style="height: 29.7969px;"><span class="ts0">If you have uploaded an image of your Inventory item, you will be able to view it here</span></td></tr><tr style="height: 46.5938px;"><td style="height: 46.5938px;">**<span class="ts0">Serial No. Options</span>**</td><td style="height: 46.5938px;"><span class="ts0">When you select a product that has serial numbers recorded, you can either view them here or you can print them from here as well.</span></td></tr><tr style="height: 29.7969px;"><td style="height: 29.7969px;">**<span class="ts0">Functions</span>**</td><td style="height: 29.7969px;"><span class="ts0">Allows you to update various settings on the items selected</span></td></tr><tr style="height: 29.7969px;"><td style="height: 29.7969px;">**<span class="ts0">Print</span>**</td><td style="height: 29.7969px;"><span class="ts0">Prints the selected Inventory Code details</span></td></tr><tr style="height: 29.7969px;"><td style="height: 29.7969px;">**<span class="ts0">Import &amp; Export</span>**</td><td style="height: 29.7969px;"><span class="ts0">Export General Details of Inventory Code to Excel</span></td></tr></tbody></table>

---

##### Search options

[![image.png](https://hugeerp10.co.za/hsofmanual/uploads/images/gallery/2024-01/scaled-1680-/C8vimage.png)](https://hugeerp10.co.za/hsofmanual/uploads/images/gallery/2024-01/C8vimage.png)

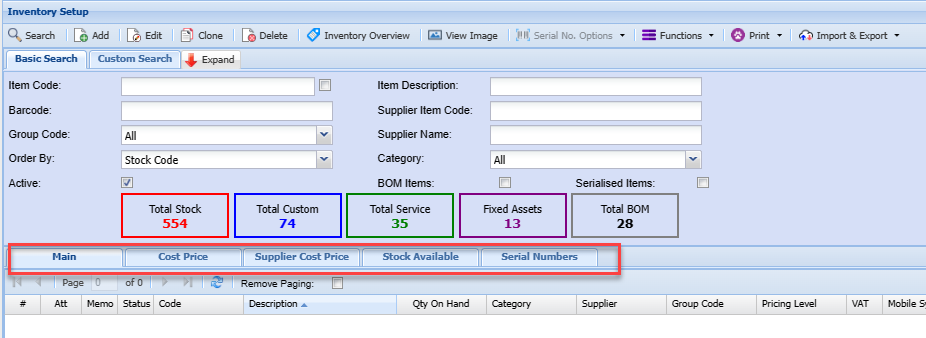
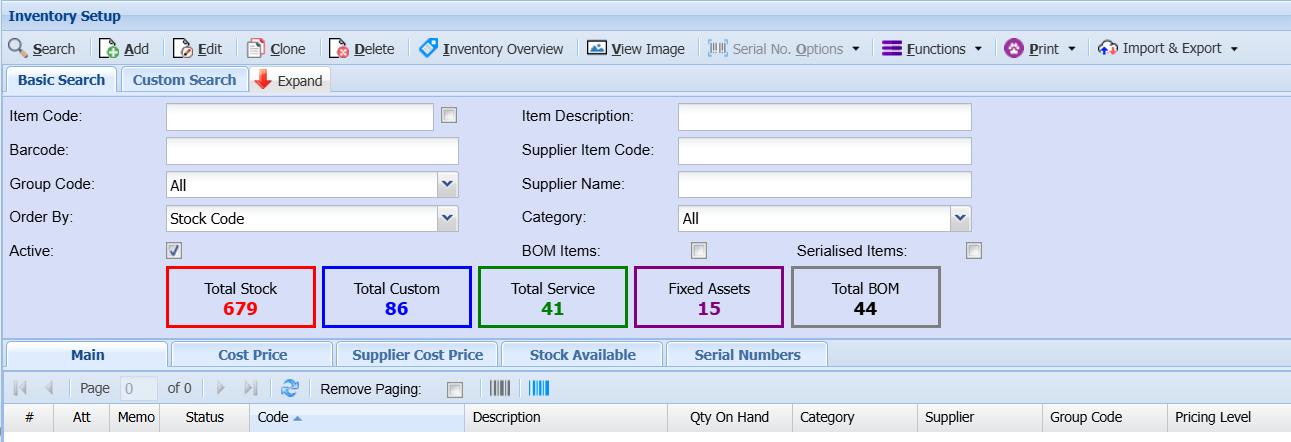
Enter any of the fields, such as the item code or part of the item description to limit your search to a specific item or range of items.

<table border="1" id="bkmrk-main-tab-shows-a-lis" style="border-collapse: collapse; width: 101.235%; height: 182.578px;"><colgroup><col style="width: 20.1434%;"></col><col style="width: 79.8319%;"></col></colgroup><tbody><tr style="height: 29.7969px;"><td style="height: 29.7969px;">**<span class="ts0">Main</span>**</td><td style="height: 29.7969px;"><span class="ts0">Displays basic information of the item within the grid which could include Item Code, Description, Quantity on hand, Supplier, Pricing level, etc.</span></td></tr><tr style="height: 29.7969px;"><td style="height: 29.7969px;">**<span class="ts0">Cost Price</span>**</td><td style="height: 29.7969px;"><span class="ts0">Shows the item cost and selling price information of a selected item</span></td></tr><tr style="height: 46.5938px;"><td style="height: 46.5938px;">**<span class="ts0">Supplier Cost Price</span>**</td><td style="height: 46.5938px;"><span class="ts0">Shows various supplier cost prices of a selected item, including historic cost prices.</span></td></tr><tr style="height: 29.7969px;"><td style="height: 29.7969px;">**<span class="ts0">Stock Available</span>**</td><td style="height: 29.7969px;"><span class="ts0">Shows stock quantity levels of the item in various warehouses.</span></td></tr><tr style="height: 46.5938px;"><td style="height: 46.5938px;">**<span class="ts0">Serial Number</span>**</td><td style="height: 46.5938px;"><span class="ts0">Shows serial numbers for the selected item. This tab is only active if the item code is flagged for serial number tracking</span></td></tr></tbody></table>

---

##### Inventory Clone

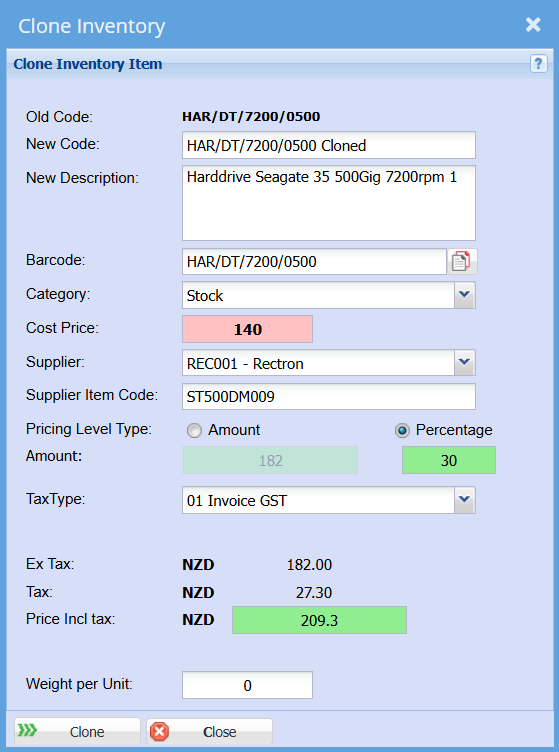
The clone feature allows one to create a new inventory item that is similar to an existing item without having to capture all the same details, such as group codes, additional properties, etc.

This feature is a quick and convenient way to add a new item to the system.

[![image.png](https://hugeerp10.co.za/hsofmanual/uploads/images/gallery/2024-05/scaled-1680-/C54image.png)](https://hugeerp10.co.za/hsofmanual/uploads/images/gallery/2024-05/C54image.png)

[![image.png](https://hugeerp10.co.za/hsofmanual/uploads/images/gallery/2024-11/scaled-1680-/IoKimage.png)](https://hugeerp10.co.za/hsofmanual/uploads/images/gallery/2024-11/IoKimage.png)
---

##### Inventory Overview Button

[![image.png](https://hugeerp10.co.za/hsofmanual/uploads/images/gallery/2024-11/scaled-1680-/OM8image.png)](https://hugeerp10.co.za/hsofmanual/uploads/images/gallery/2024-11/OM8image.png)

<span class="ts0">This is where one can view movement’s summary of the selected inventory code.</span>

<span class="ts0"> </span>[![image.png](https://hugeerp10.co.za/hsofmanual/uploads/images/gallery/2024-11/scaled-1680-/BANimage.png)](https://hugeerp10.co.za/hsofmanual/uploads/images/gallery/2024-11/BANimage.png)

<span class="ts0">This is where one can view movement of an inventory code.</span>

<table border="1" id="bkmrk-main-detail-tab-show" style="border-collapse: collapse; width: 99.881%;"><colgroup><col style="width: 33.5731%;"></col><col style="width: 66.4269%;"></col></colgroup><tbody><tr><td>**<span class="ts0">Load Totals</span>**</td><td><span class="ts0">Loads the item information on the main details tab</span></td></tr><tr><td>**<span class="ts0">Attachments</span>**</td><td><span class="ts0">Here you can attach any info, photo or document that is associated with this inventory item.</span></td></tr><tr><td>**<span class="ts0">Edit Item</span>**</td><td><span class="ts0">Here you can amend an inventory item basic information.</span></td></tr><tr><td>**<span class="ts0">Recalculate</span>**</td><td><span class="ts0">If changes have been made to your data before the end of day backup your Inventory may be a little out, if you hit the recalculate button this will bring your inventory back in line. </span></td></tr><tr><td>**<span class="ts0">Main Detail </span>**</td><td><span class="ts0">Shows summary of available stock as well as all movements for select item code as well as where they are currently in a WIP workflow.</span></td></tr><tr><td>**<span class="ts0">WIP- Work in Progress</span>**</td><td><span class="ts0">Run the count for working still currently progress items, On Shelf, All, Invoice, Sales Orders, Jobs and Bill of Materials. Most counts are done on the on-shelf option.</span></td></tr><tr><td>**<span class="ts0">Movement </span>**</td><td><span class="ts0">Shows all in and out movement of a specific item code specific to sales to customers and purchases from suppliers.</span></td></tr><tr><td>**<span class="ts0">Document Analysis </span>**</td><td><span class="ts0">Search to view all document for the item code</span></td></tr></tbody></table>

**<span class="ts0"> </span><span class="ts0">Stock Available</span>**

<span class="ts0">Displays the stock availability information </span>

[![image.png](https://hugeerp10.co.za/hsofmanual/uploads/images/gallery/2024-11/scaled-1680-/b5bimage.png)](https://hugeerp10.co.za/hsofmanual/uploads/images/gallery/2024-11/b5bimage.png)

---

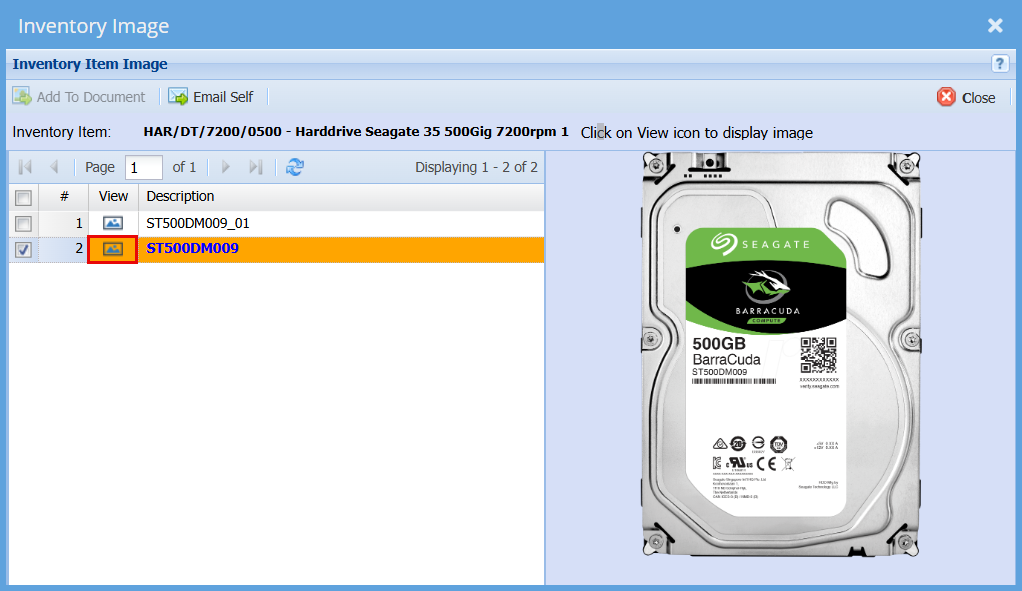
##### View Image

[![image.png](https://hugeerp10.co.za/hsofmanual/uploads/images/gallery/2024-11/scaled-1680-/SIBimage.png)](https://hugeerp10.co.za/hsofmanual/uploads/images/gallery/2024-11/SIBimage.png)

<span class="ts0">Allows the user to view an image of the inventory item provided an image has been uploaded.  
</span><span class="ts0">On the left of the panel is a grid displaying all the attachments that have been uploaded for this stock item.  
</span><span class="ts0">If the Primary Image is set up on the inventory item, then that item will be displayed in bold blue in the grid.  
</span><span class="ts0">By clicking in the icon in the View column the user can view the attachment.</span>

<span class="ts0"> </span>[![image.png](https://hugeerp10.co.za/hsofmanual/uploads/images/gallery/2024-11/scaled-1680-/gwcimage.png)](https://hugeerp10.co.za/hsofmanual/uploads/images/gallery/2024-11/gwcimage.png)

**<span class="ts11">Add To Document</span>**

- <span class="ts0">This functionality allows the user to add all or selected attachments to the original document i.e. Quote, Invoice.</span>
- <span class="ts0">Either click the check box in the column header above the check boxes to Select All or Unselect All attachments.</span>
- <span class="ts0">Alternately specific attachments can be selected by clicking the specific attachment’s check box.  
    </span><span class="ts0">Once the selection has been made click the Add To Document button and the selected attachments will be </span>added as attachments to the original document, i.e. Quote, Invoice

**<span class="ts11">Email Self</span>**

- <span class="ts0">In the event of the Email Self button being disabled this will be as a result of the logged in user not having </span><span class="ts0">an email address entered in the user setup detail.</span>
- <span class="ts0">Once the selection of attachments has been completed same method as in Add To Document above click </span><span class="ts0">on the Email Self button and the selected attachments will be emailed to the email address as setup for the</span>
- <span class="ts0">login user in Huge ERP.</span>
- <span class="ts0">Click the Close button to close this window.</span>

**<span class="ts11">Please Note:</span>**

- <span class="ts0">To load an image of an inventory item, go to </span><span class="ts11">Inventory Module -&gt; Configuration -&gt; Inventory Setup.</span>
- <span class="ts0">Enter and search for the desired inventory item. Edit the item, go to attachments and upload an image file (typically a JPG file).</span>
- <span class="ts0">Select the image name in the Primary Image drop down and click on Save.</span>

---

##### Functions Dropdown

[![image.png](https://hugeerp10.co.za/hsofmanual/uploads/images/gallery/2024-11/scaled-1680-/6RZimage.png)](https://hugeerp10.co.za/hsofmanual/uploads/images/gallery/2024-11/6RZimage.png)

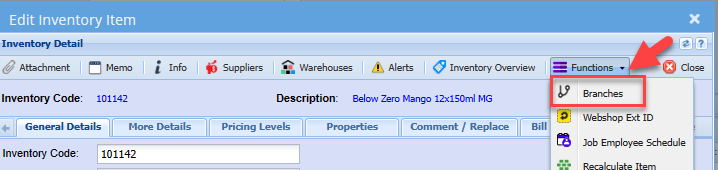
Functions for inventory setup has many options that allows you to update multiple areas of your Inventory item.

[![image.png](https://hugeerp10.co.za/hsofmanual/uploads/images/gallery/2024-11/scaled-1680-/vOUimage.png)](https://hugeerp10.co.za/hsofmanual/uploads/images/gallery/2024-11/vOUimage.png)

**<span class="ts15">Update Mark-up %</span>**

**<span class="ts15" style="color: rgb(45, 194, 107);">Inventory&gt; Configuration&gt; Inventory Setup&gt;Functions</span>**

<span class="ts0">Update Mark-up button: Updates the mark-up of the selected Inventory Item.</span>

<span class="ts0"> </span>![](https://hugeerp0.co.za/csp/webhelp/topics/images/image(3016).png)

<table border="1" id="bkmrk-group-codes-filter-t" style="border-collapse: collapse; width: 98.3333%;"><colgroup><col style="width: 19.1029%;"></col><col style="width: 80.96%;"></col></colgroup><tbody><tr><td><span class="ts0">Group Codes</span></td><td><span class="ts0">If you have set up Group Codes for your inventory you can select a group code from the drop-down menu to define your percentage mark up by a selected Group Code or All Group Codes.</span></td></tr><tr><td><span class="ts0">Price Levels</span></td><td><span class="ts0">Filter the update of the percentage mark up by a selected Price Level.</span></td></tr><tr><td><span class="ts0">New Percentage</span></td><td><span class="ts0">Enter the new percentage value.</span></td></tr></tbody></table>

- <span class="ts0">Click Update to perform the Markup Percentage change.</span>
- <span class="ts0">Click Close to exit the window without performing the update.</span>

---

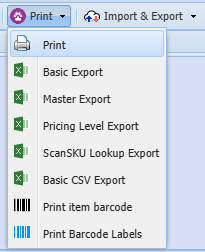
##### Print 

[![image.png](https://hugeerp10.co.za/hsofmanual/uploads/images/gallery/2024-11/scaled-1680-/xXrimage.png)](https://hugeerp10.co.za/hsofmanual/uploads/images/gallery/2024-11/xXrimage.png)

<span class="ts0">The print function will allow you to Export information and print barcodes for you inventory items.</span>

<span class="ts0"> </span>[![image.png](https://hugeerp10.co.za/hsofmanual/uploads/images/gallery/2024-11/scaled-1680-/DLXimage.png)](https://hugeerp10.co.za/hsofmanual/uploads/images/gallery/2024-11/DLXimage.png)

---

##### <span class="ts0"> Import &amp; Export</span>

[![image.png](https://hugeerp10.co.za/hsofmanual/uploads/images/gallery/2024-11/scaled-1680-/RJEimage.png)](https://hugeerp10.co.za/hsofmanual/uploads/images/gallery/2024-11/RJEimage.png)

<span class="ts0">Import &amp; Export give you many options to choose from to import or export specific information for your inventory with the use of an excel spreadsheet. </span>

<p class="callout info"><span class="ts0">Note: There is a specific format that your data needs to be in to be able to import data, you can do an export first to get the correct format.</span></p>

[![image.png](https://hugeerp10.co.za/hsofmanual/uploads/images/gallery/2024-11/scaled-1680-/ecBimage.png)](https://hugeerp10.co.za/hsofmanual/uploads/images/gallery/2024-11/ecBimage.png)

#### Keyboard quick keys

Quick keys help access functions using the keyboard

Used with Alt + Letter

[![image.png](https://hugeerp10.co.za/hsofmanual/uploads/images/gallery/2024-11/scaled-1680-/Yn3image.png)](https://hugeerp10.co.za/hsofmanual/uploads/images/gallery/2024-11/Yn3image.png)
<table border="1" id="bkmrk-search-alt-%2B-s-searc"><colgroup><col></col><col></col><col></col></colgroup><tbody><tr><td>**S**earch</td><td>Alt + s</td><td>Search for Stock Item</td></tr><tr><td>**A**dd</td><td>Alt + a</td><td>Add a new Stock Item</td></tr><tr><td>**E**dit</td><td>Alt + e</td><td>Edits the Stock Item that is highlighted</td></tr><tr><td>**D**elete</td><td>Alt + d</td><td>Deletes the Stock Item that is highlighted</td></tr><tr><td>**C**lone</td><td>Alt + c</td><td>Clones the highlighted Stock Item</td></tr><tr><td>**I**nventory Overview  
</td><td>Alt + i</td><td>Opens the Inventory Overview window</td></tr><tr><td>**V**iew Image</td><td>Alt \_ v</td><td>Opens a window to view the image associated with the Stock Item</td></tr><tr><td>Serial No. **O**ptions</td><td>Alt + o</td><td>Activate split button to view listed options</td></tr><tr><td>**F**unctions

</td><td>Alt + f</td><td>Activate split button to view listed options</td></tr><tr><td>Expa**n**d / Co**n**tract</td><td>Alt + n</td><td>Expands / Contracts the header section of the window</td></tr><tr><td>Tab Basic Search</td><td>Alt + 1</td><td>Basic Search</td></tr><tr><td>Tab Custom Search</td><td>Alt + 2</td><td>Custom Search</td></tr><tr><td>Tab Main</td><td>Alt + 3</td><td>Main Search Grid</td></tr><tr><td>  
</td><td>Alt + 4</td><td>Pressing Alt + 4 repeatedly will step through all the tabs e.g. Detail, Statutory etc.</td></tr></tbody></table>

# Add Stock Item - Basic Setup

#### <span style="color: rgb(0, 0, 0);"><span class="ts15">Adding an Item</span></span>

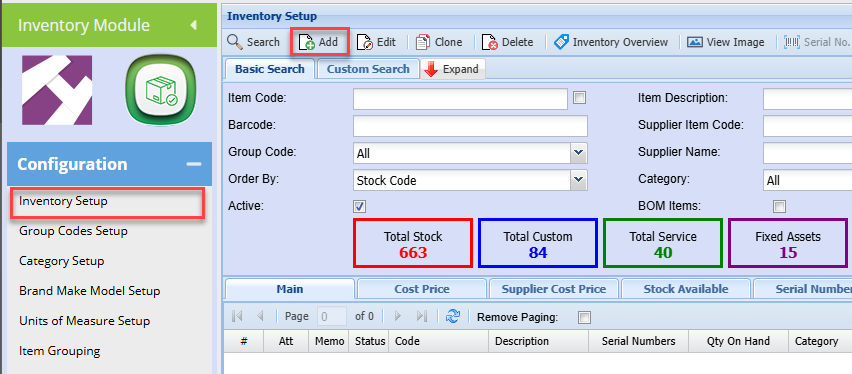
<span style="color: rgb(0, 0, 0);"><span class="ts15">To create a new inventory item, go to: </span></span>

**<span class="ts15" style="color: rgb(45, 194, 107);">Inventory Module&gt;Configuration&gt;Inventory setup</span>**

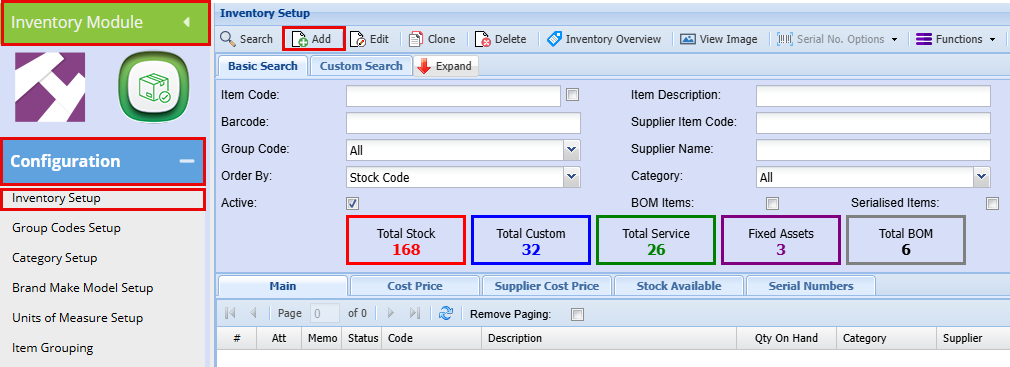
Click Add

[![image.png](https://hugeerp10.co.za/hsofmanual/uploads/images/gallery/2024-08/scaled-1680-/nR3image.png)](https://hugeerp10.co.za/hsofmanual/uploads/images/gallery/2024-08/nR3image.png)

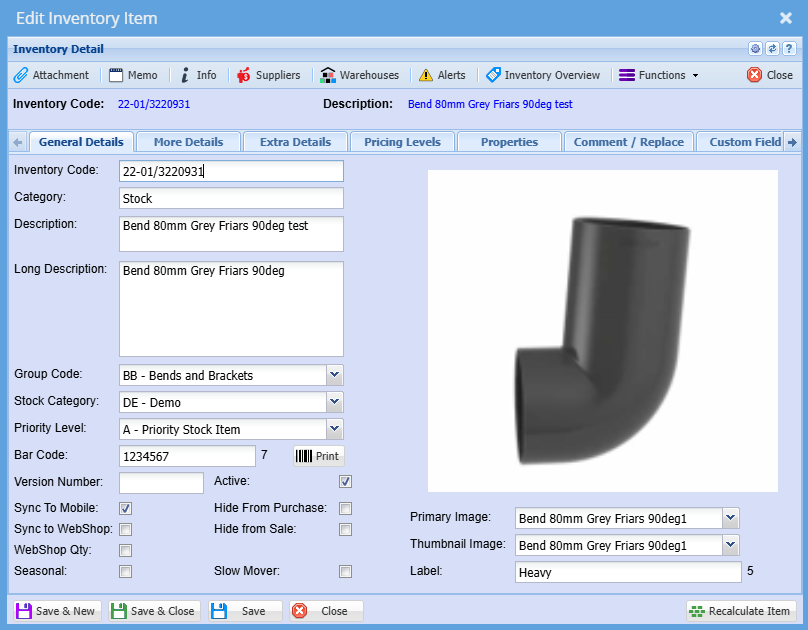
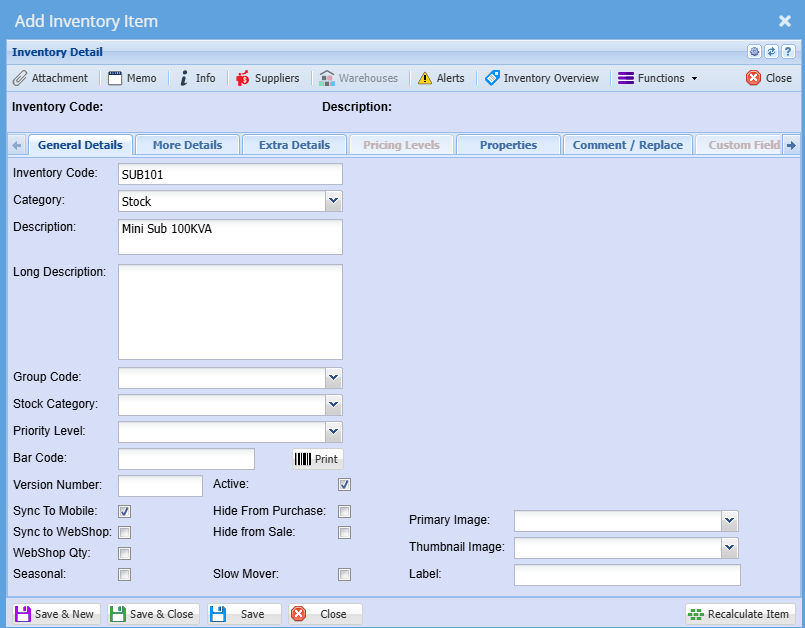
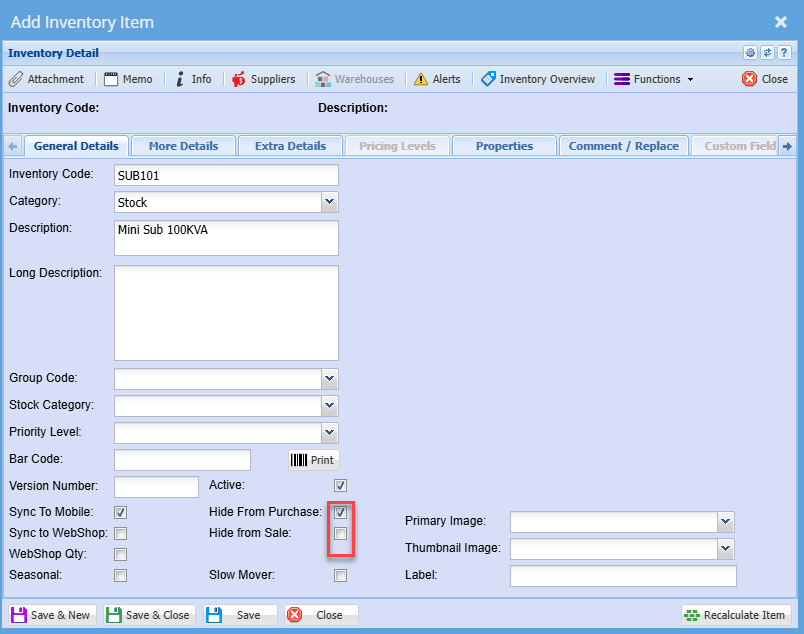
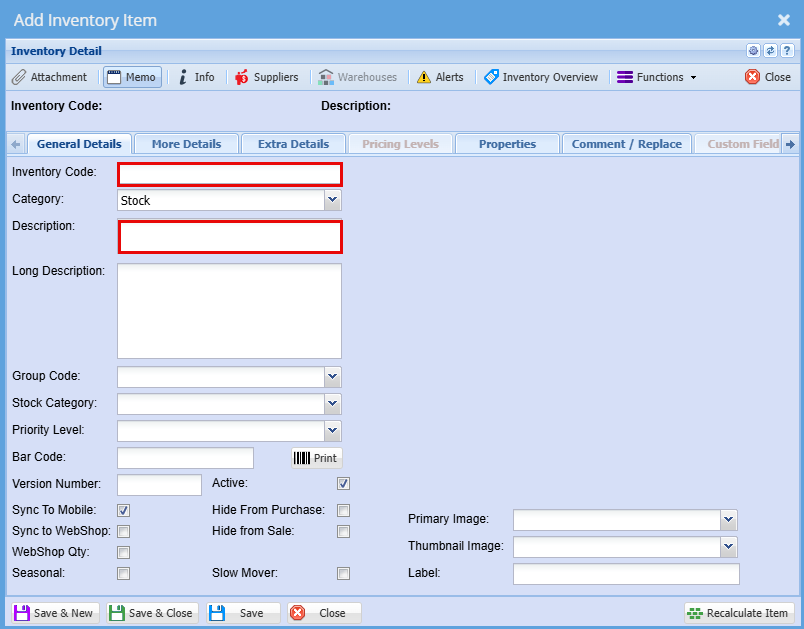
After clicking Add you will see the screen below:

[![image.png](https://hugeerp10.co.za/hsofmanual/uploads/images/gallery/2024-08/scaled-1680-/6Mgimage.png)](https://hugeerp10.co.za/hsofmanual/uploads/images/gallery/2024-08/6Mgimage.png)
<p class="callout warning">If your codes consist of only numbers, it is not advisable to start the code with a zero. This will create complications when doing bulk updates and exporting the item master into excel, where the "0" will be dropped. When you upload the updated import file, it can potentially result in a duplicate item being created. </p>

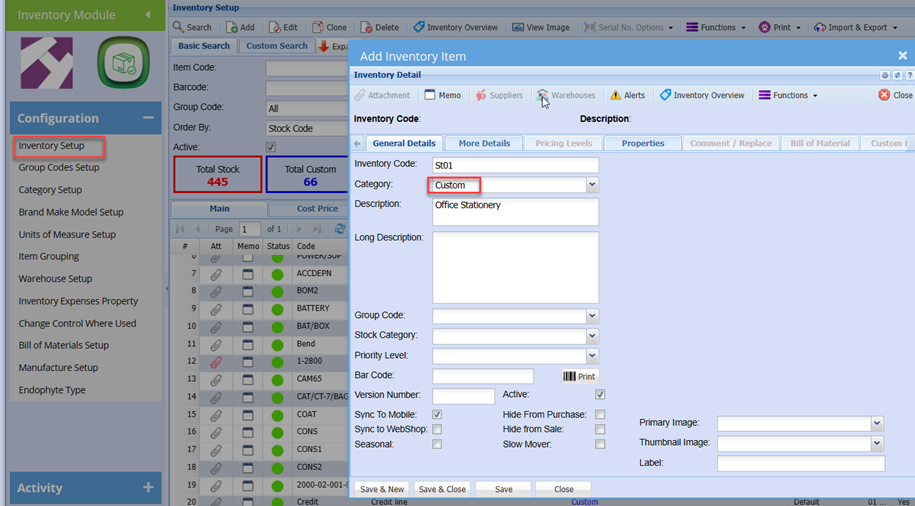
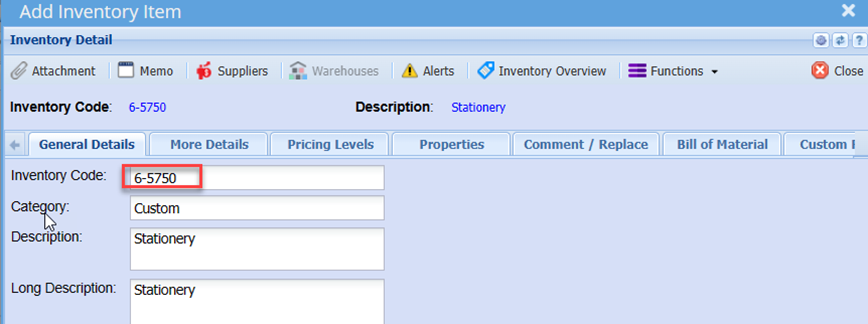
<table border="1" id="bkmrk-code-enter-a-code-fo" style="border-collapse: collapse; width: 100%; height: 603.484px;"><colgroup><col style="width: 20.5192%;"></col><col style="width: 79.4808%;"></col></colgroup><tbody><tr style="height: 29.7969px;"><td style="height: 29.7969px;">**Code**</td><td style="height: 29.7969px;">Enter a code for the item; codes can be alpha or numeric or a combination. </td></tr><tr style="height: 182px;"><td style="height: 182px;">**Category**</td><td style="height: 182px;">Select the right category for the item that you are creating

1. <span style="color: rgb(0, 0, 0);">**Stock**</span>: This is a physical tangible item
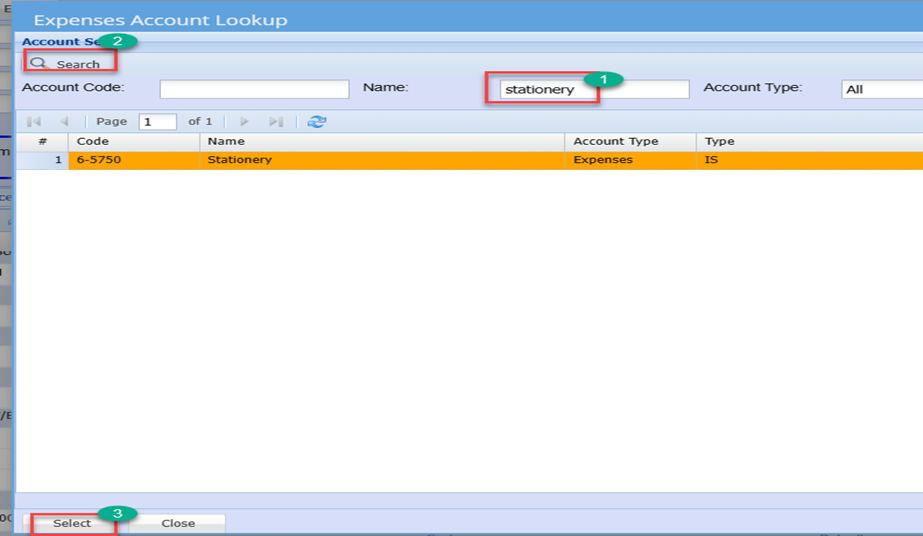
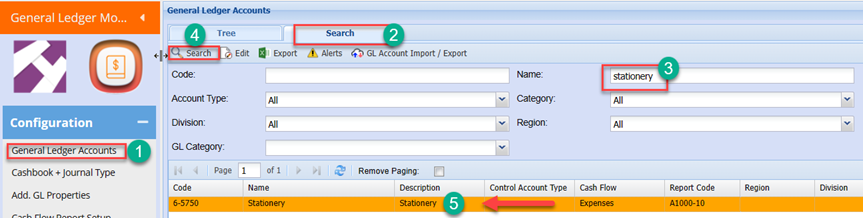
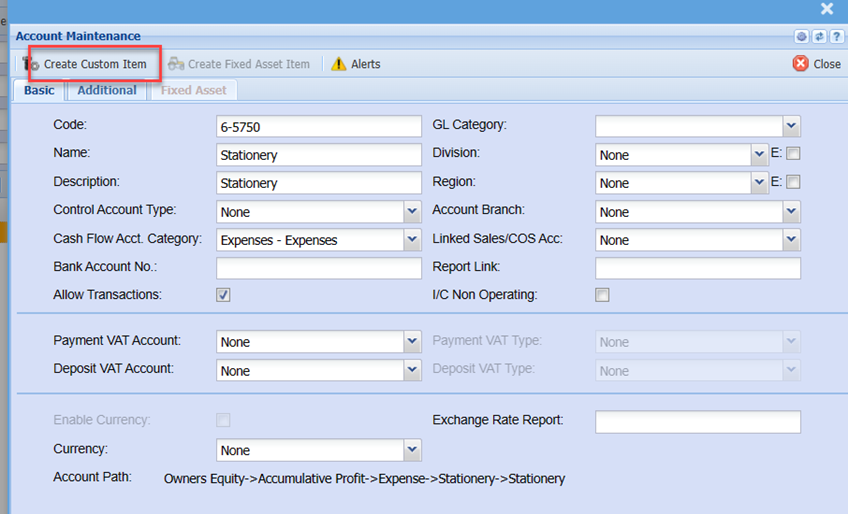
2. **<span style="color: rgb(0, 0, 0);">Custom</span>:** This is an intangible item that is predominantly used for creditors purposes. e.g. if you wish to run the office expenses such as telephone account through creditors, you could set up a custom item such as telephone which is mapped to the telephone expenses account in the ledger
3. **Service**: This is an intangible stock item such as labour, delivery etc.
4. **Fixed Asset:** This is a fixed item of the company

</td></tr><tr style="height: 57.7812px;"><td style="height: 57.7812px;">**Description**</td><td style="height: 57.7812px;">Enter an Item description

By default, description is what is displayed on the documents

</td></tr><tr style="height: 57.7812px;"><td style="height: 57.7812px;">**Long Description**</td><td style="height: 57.7812px;">Allows you to enter additional item description detail

Unless you have customized stationery, the long description will not be displayed on the documents

</td></tr><tr style="height: 50.3906px;"><td style="height: 50.3906px;">**Group Code**</td><td style="height: 50.3906px;">If you have set up Group Codes for your inventory you can select a group code from the drop-down menu to define your search to a specific group.

</td></tr><tr style="height: 50.3906px;"><td style="height: 50.3906px;">**Category**</td><td style="height: 50.3906px;">This is where you select if this item is a Stock Item that you will be tracking stock of, a Custom Item, A Service item or a Fixed Asset Item if you are doing asset tracking.

</td></tr><tr><td>**Priority Level**</td><td>If there are items that are vital for production or fast-moving items, you can use the priority level field

This can be used in stock procurement, forecasting and even automated exception reports to notify the procurement department of items with low stock levels.

Refer to advanced item setup

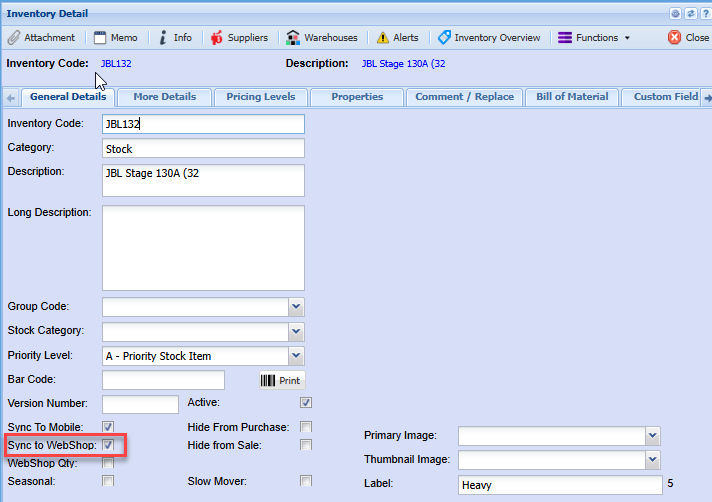
</td></tr><tr style="height: 35.3906px;"><td style="height: 35.3906px;">**Sync To Mobile**</td><td style="height: 35.3906px;">Tick the box sync to Mobile. This will allow the item to be added to the mobile application

</td></tr></tbody></table>

[![image.png](https://hugeerp10.co.za/hsofmanual/uploads/images/gallery/2024-06/scaled-1680-/1oiimage.png)](https://hugeerp10.co.za/hsofmanual/uploads/images/gallery/2024-06/1oiimage.png)

- Click Save

---

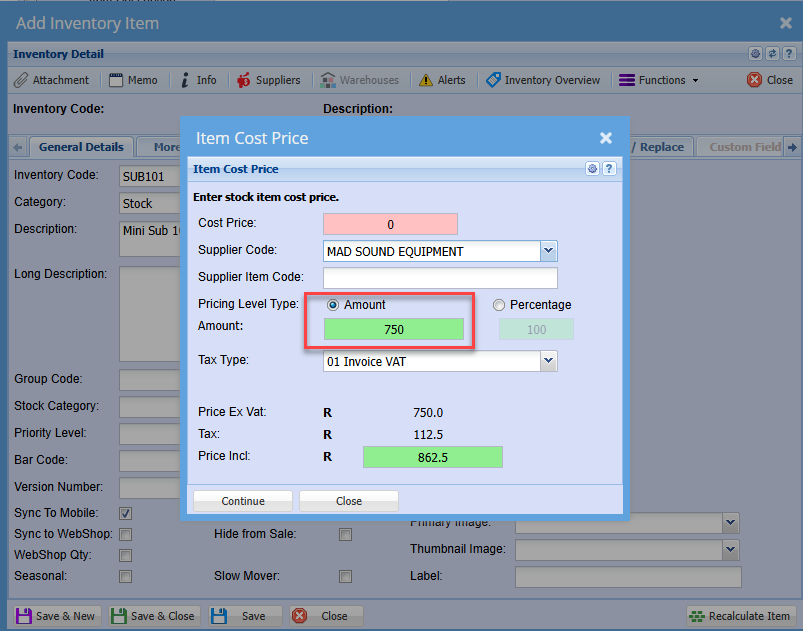
#### Item Cost Price - Pop up window

[![image.png](https://hugeerp10.co.za/hsofmanual/uploads/images/gallery/2024-11/scaled-1680-/wQdimage.png)](https://hugeerp10.co.za/hsofmanual/uploads/images/gallery/2024-11/wQdimage.png)
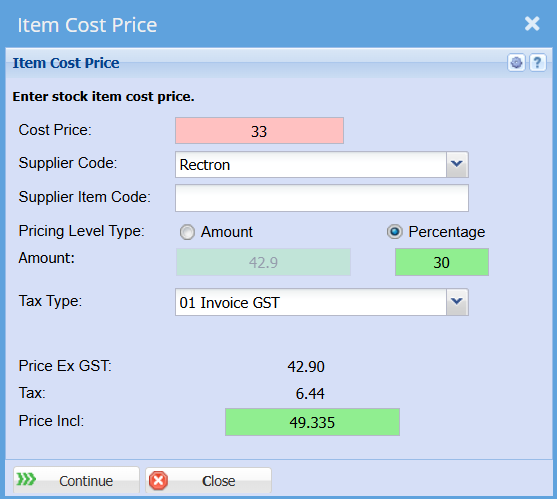
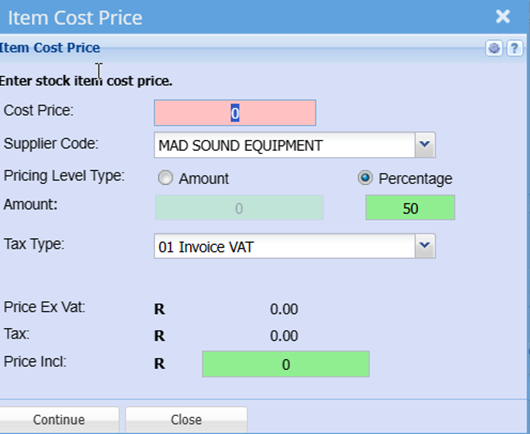
<table border="1" id="bkmrk-cost-price-enter-the" style="border-collapse: collapse; width: 100%; height: 179.547px;"><colgroup><col style="width: 27.197%;"></col><col style="width: 72.803%;"></col></colgroup><tbody><tr style="height: 80.1719px;"><td style="height: 80.1719px;">**Cost Price**</td><td style="height: 80.1719px;">Enter the Item cost price

NB: If you do not enter a cost price at this stage you will not be able to simply edit or add a cost price for a stock item later

</td></tr><tr style="height: 29.7969px;"><td style="height: 29.7969px;">**Supplier Code**</td><td style="height: 29.7969px;">Select the default supplier </td></tr><tr><td>**Supplier Item Code**</td><td>This is the suppliers code on their system, it is useful to have this information when ordering the inventory item again as this is added to the purchase order.

</td></tr><tr style="height: 57.7812px;"><td style="height: 57.7812px;">**Pricing Level Type**</td><td style="height: 57.7812px;">Select the pricing type

Enter either the mark-up percentage or the selling price amount

</td></tr></tbody></table>

Once you click the save button, the additional tabs will be activated

[![image.png](https://hugeerp10.co.za/hsofmanual/uploads/images/gallery/2024-11/scaled-1680-/aZZimage.png)](https://hugeerp10.co.za/hsofmanual/uploads/images/gallery/2024-11/aZZimage.png)

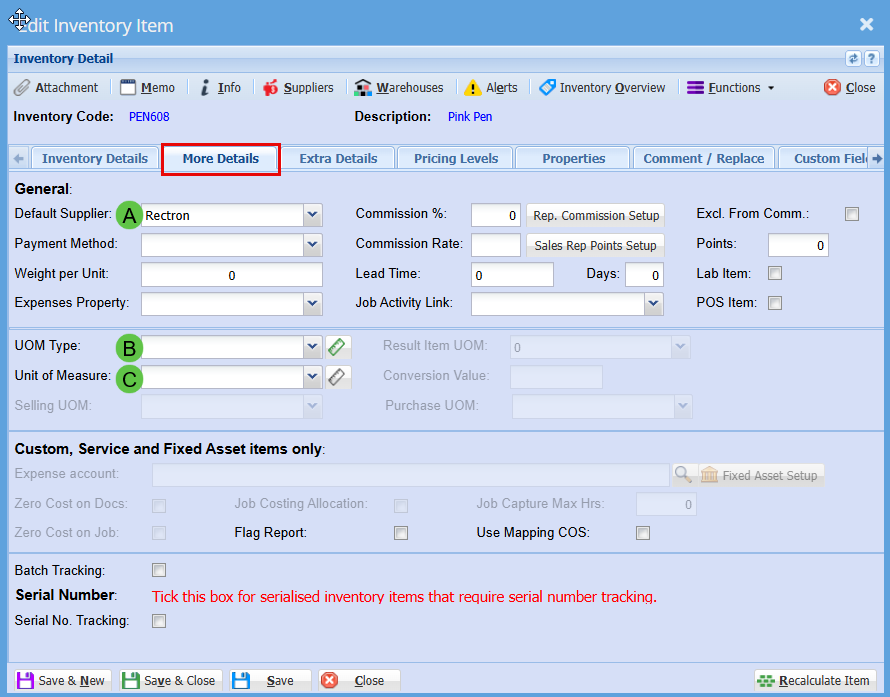
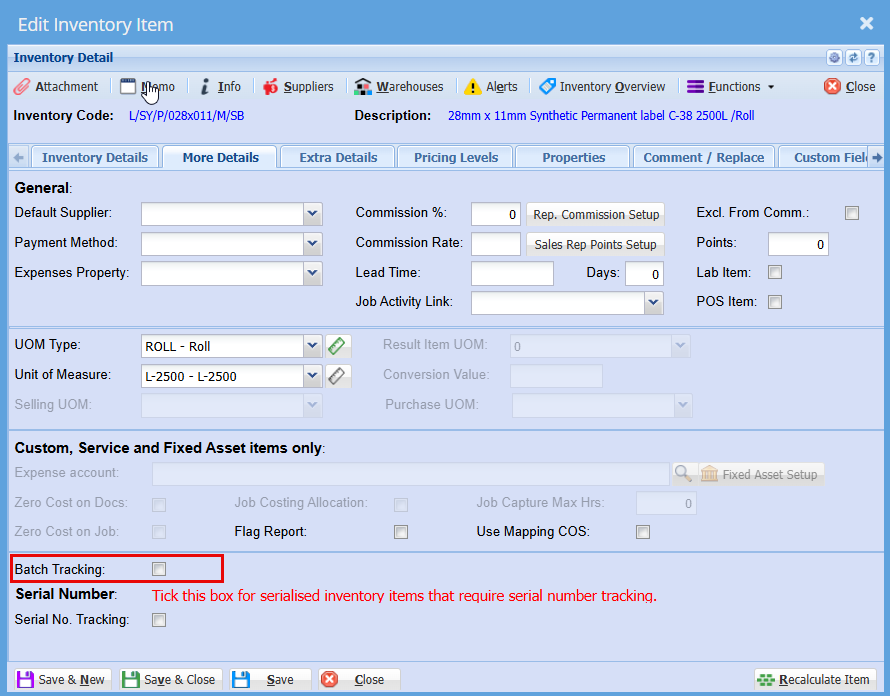
#### More Details

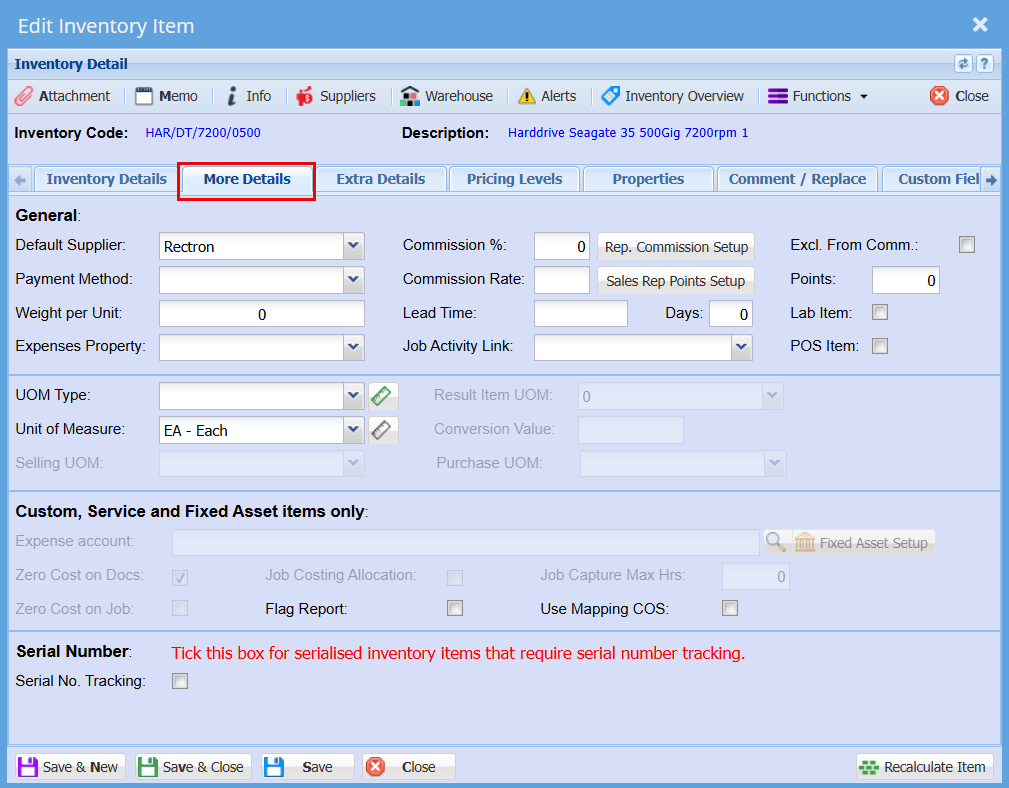
Click the **More Details** Tab to add additional information if applicable

Such as Unit of Measure, weight, etc.

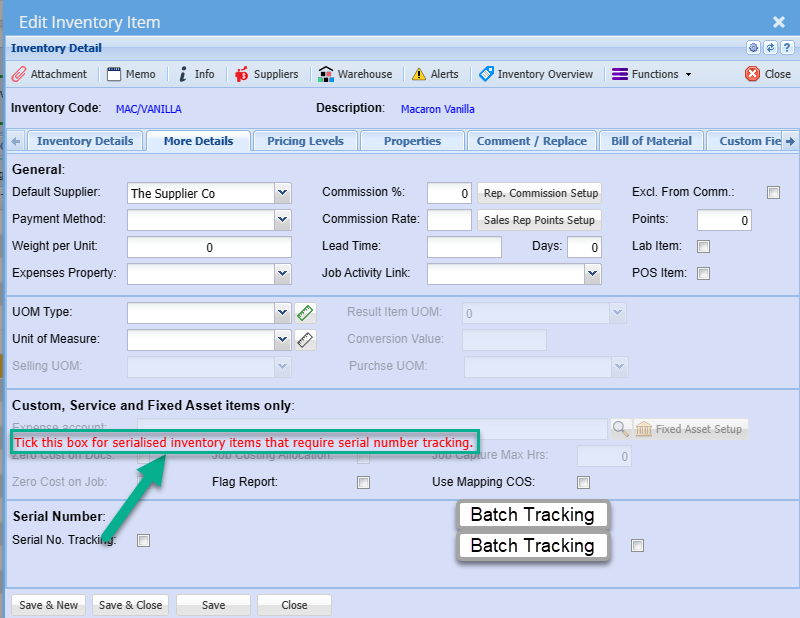
If the item has serial numbers or the items serial numbers have to be tracked, tick the Serial No Tracking box

---

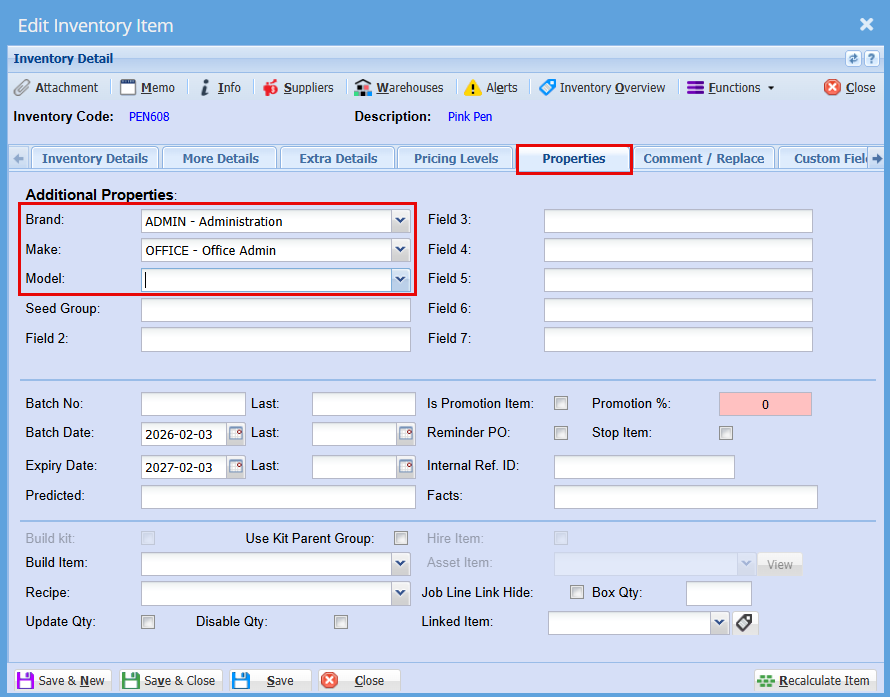
#### Properties Tab

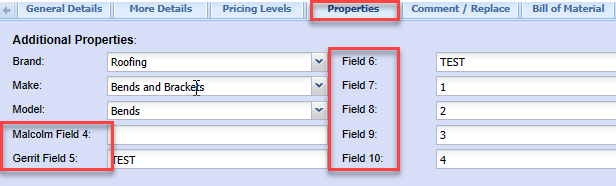
This window has additional filtering and categorisation options such as Brand, Make and Model

These filters work in conjunction with each other

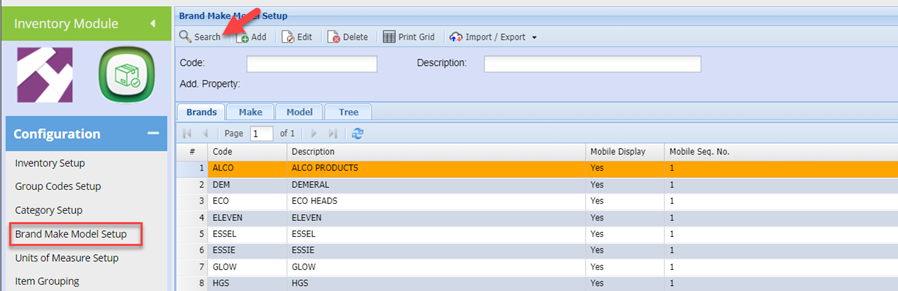
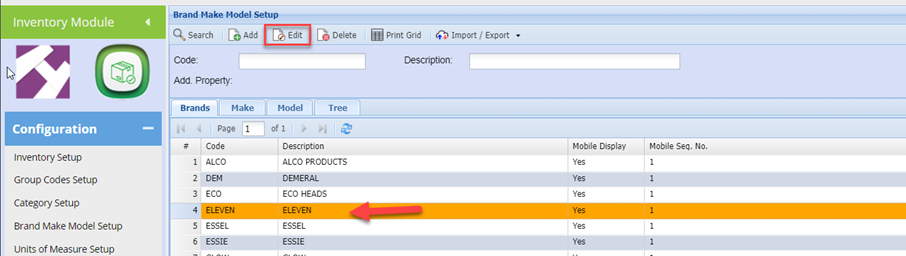
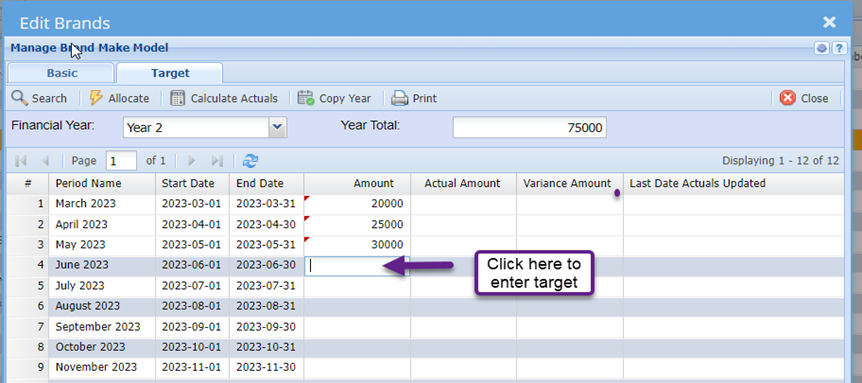
Refer to Brand Make Model Setup

There are also 7 additional customizable fields which can be renamed to description of your choice and used accordingly for purposes specific to your business

[![image.png](https://hugeerp10.co.za/hsofmanual/uploads/images/gallery/2024-01/scaled-1680-/LPmimage.png)](https://hugeerp10.co.za/hsofmanual/uploads/images/gallery/2024-01/LPmimage.png)
---

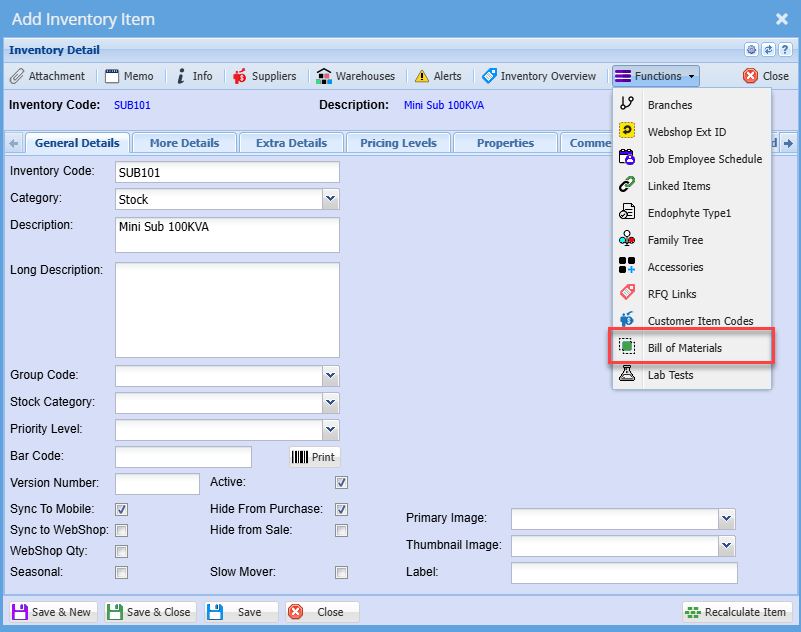
#### Bill of Material Tab

If the product being added is a product that you manufacture, you will need to tick the Activate Bill of Material Box

Refer to Bill of Material Manual for further details

---

#### Warehouse Link

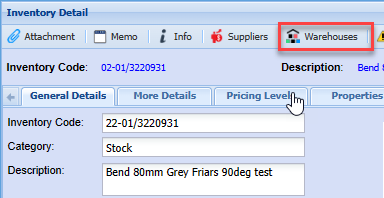
You will need to link the warehouse(s) this item is associated to

To do this click the Warehouses button

<span style="font-size: 11.0pt; line-height: 115%; font-family: 'Calibri',sans-serif; mso-ascii-theme-font: minor-latin; mso-fareast-font-family: 'Times New Roman'; mso-fareast-theme-font: minor-fareast; mso-hansi-theme-font: minor-latin; mso-bidi-theme-font: minor-latin; mso-ansi-language: EN-ZA; mso-fareast-language: EN-ZA;"> </span>[![image.png](https://hugeerp10.co.za/hsofmanual/uploads/images/gallery/2024-01/scaled-1680-/neoimage.png)](https://hugeerp10.co.za/hsofmanual/uploads/images/gallery/2024-01/neoimage.png)

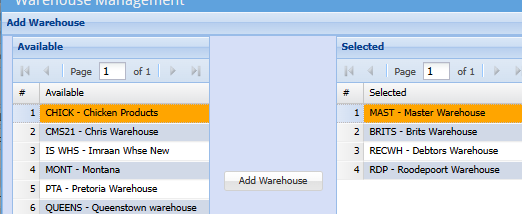
Click Add

Move the required warehouse(s) to be associated with the item to the right-hand column

Double click the warehouse you wish to select or highlight the warehouse and click on Add Warehouse

<span style="font-size: 11.0pt; line-height: 115%; font-family: 'Calibri',sans-serif; mso-ascii-theme-font: minor-latin; mso-fareast-font-family: 'Times New Roman'; mso-fareast-theme-font: minor-fareast; mso-hansi-theme-font: minor-latin; mso-bidi-theme-font: minor-latin; mso-ansi-language: EN-ZA; mso-fareast-language: EN-ZA;"> </span>[![image.png](https://hugeerp10.co.za/hsofmanual/uploads/images/gallery/2024-01/scaled-1680-/5wiimage.png)](https://hugeerp10.co.za/hsofmanual/uploads/images/gallery/2024-01/5wiimage.png)

---

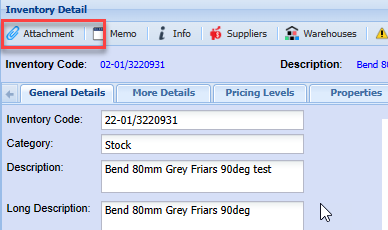
#### Attachments

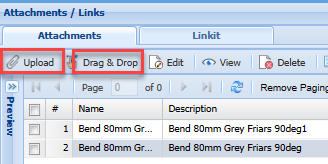
Should you wish to add an image of the item or any other details or spec sheets relating to the product, you can add them as attachments

<span style="font-size: 11.0pt; line-height: 115%; font-family: 'Calibri',sans-serif; mso-ascii-theme-font: minor-latin; mso-fareast-font-family: 'Times New Roman'; mso-fareast-theme-font: minor-fareast; mso-hansi-theme-font: minor-latin; mso-bidi-theme-font: minor-latin; mso-ansi-language: EN-ZA; mso-fareast-language: EN-ZA;">[![image.png](https://hugeerp10.co.za/hsofmanual/uploads/images/gallery/2024-01/scaled-1680-/IaOimage.png)](https://hugeerp10.co.za/hsofmanual/uploads/images/gallery/2024-01/IaOimage.png)</span>

To add an image, view this manual - [Attachment](https://hugeerp10.co.za/hsofmanual/books/attachments/page/attachment-and-linkit-hyper-links)

[![image.png](https://hugeerp10.co.za/hsofmanual/uploads/images/gallery/2024-01/scaled-1680-/Ubbimage.png)](https://hugeerp10.co.za/hsofmanual/uploads/images/gallery/2024-01/Ubbimage.png)
Click Close

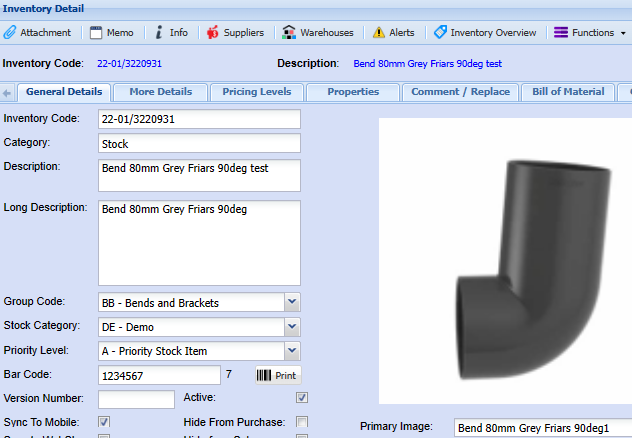
Go back to the General Details Tab, select the attachment name from the drop-down on the primary image field as the image to be displayed

Click Save

[![image.png](https://hugeerp10.co.za/hsofmanual/uploads/images/gallery/2024-01/scaled-1680-/fXgimage.png)](https://hugeerp10.co.za/hsofmanual/uploads/images/gallery/2024-01/fXgimage.png)

This will then be displayed in the image window

[![image.png](https://hugeerp10.co.za/hsofmanual/uploads/images/gallery/2024-01/scaled-1680-/Beaimage.png)](https://hugeerp10.co.za/hsofmanual/uploads/images/gallery/2024-01/Beaimage.png)
This completes the basic item setup, and the item can now be selected on various documents across the system.

---

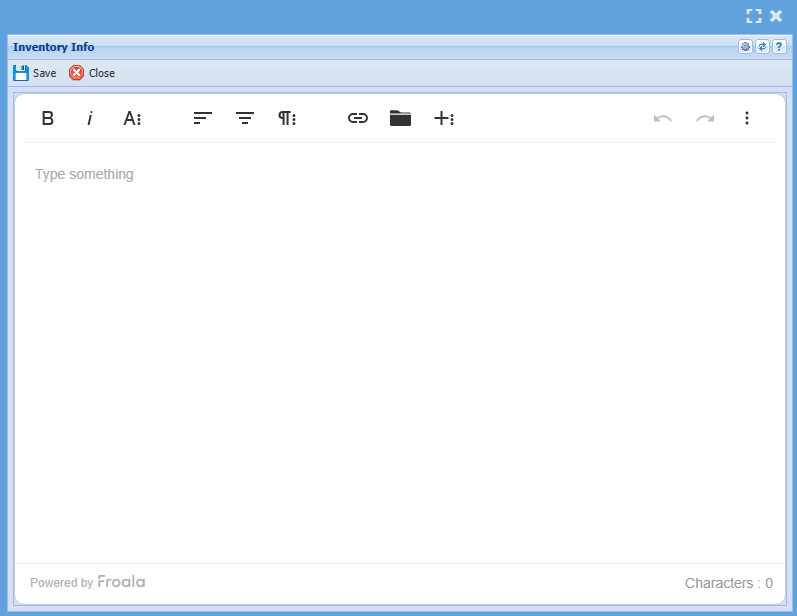
#### Info Button

[![image.png](https://hugeerp10.co.za/hsofmanual/uploads/images/gallery/2024-10/scaled-1680-/QNNimage.png)](https://hugeerp10.co.za/hsofmanual/uploads/images/gallery/2024-10/QNNimage.png)

[![image.png](https://hugeerp10.co.za/hsofmanual/uploads/images/gallery/2024-10/scaled-1680-/xgWimage.png)](https://hugeerp10.co.za/hsofmanual/uploads/images/gallery/2024-10/xgWimage.png)

---

##### Suppliers

[![image.png](https://hugeerp10.co.za/hsofmanual/uploads/images/gallery/2024-11/scaled-1680-/eeBimage.png)](https://hugeerp10.co.za/hsofmanual/uploads/images/gallery/2024-11/eeBimage.png)

[![image.png](https://hugeerp10.co.za/hsofmanual/uploads/images/gallery/2024-11/scaled-1680-/gdGimage.png)](https://hugeerp10.co.za/hsofmanual/uploads/images/gallery/2024-11/gdGimage.png)
#### Keyboard quick keys

[![image.png](https://hugeerp10.co.za/hsofmanual/uploads/images/gallery/2024-11/scaled-1680-/lGfimage.png)](https://hugeerp10.co.za/hsofmanual/uploads/images/gallery/2024-11/lGfimage.png)

Quick keys help access functions using the keyboard

Used with Alt + Letter

<table border="1" id="bkmrk-search-alt-%2B-s-searc" style="width: 111.31%;"><tbody><tr><td style="width: 19.6616%;">Attachmen**t**</td><td style="width: 10.0067%;">Alt + t</td><td style="width: 70.3079%;">Opens the Attachment window.</td></tr><tr><td style="width: 19.6616%;">**M**emo</td><td style="width: 10.0067%;">Alt + m</td><td style="width: 70.3079%;">Opens the Memo window</td></tr><tr><td style="width: 19.6616%;">**I**nfo</td><td style="width: 10.0067%;">Alt + i</td><td style="width: 70.3079%;">Opens the Inventory Item Info window</td></tr><tr><td style="width: 19.6616%;">**S**uppliers</td><td style="width: 10.0067%;">Alt + s</td><td style="width: 70.3079%;">Opens the Manage Suppliers window</td></tr><tr><td style="width: 19.6616%;">**W**arehouses</td><td style="width: 10.0067%;">Alt + w</td><td style="width: 70.3079%;">Opens the Warehouse Management window</td></tr><tr><td style="width: 19.6616%;">Al**e**rts</td><td style="width: 10.0067%;">Alt + e</td><td style="width: 70.3079%;">Opens the Alerts Setup window</td></tr><tr><td style="width: 19.6616%;">Inventory **O**verview</td><td style="width: 10.0067%;">Alt + o</td><td style="width: 70.3079%;">Opens the Inventory Overview window</td></tr><tr><td style="width: 19.6616%;">**F**unctions</td><td style="width: 10.0067%;">Alt + f</td><td style="width: 70.3079%;">Focus on the Function button</td></tr><tr><td style="width: 19.6616%;">Tab Detail</td><td style="width: 10.0067%;">Alt + 1</td><td style="width: 70.3079%;">General Details Tab</td></tr><tr><td style="width: 19.6616%;">Tab Stepping</td><td style="width: 10.0067%;">Alt + 2</td><td style="width: 70.3079%;">Pressing Alt + 2 repeatedly will step through all the tabs e.g. Details, More Details etc.</td></tr></tbody></table>

# Inventory Setup

<span style="color: rgb(45, 194, 107);">**<span class="ts2">Inventory &gt;Configuration&gt; Inventory Setup</span>**</span>

<span class="ts0">In Inventory setup search, you will see two search tabs</span>

<table border="1" id="bkmrk-basic-search-tab-if-" style="border-collapse: collapse; width: 89.8765%;"><colgroup><col style="width: 19.1856%;"></col><col style="width: 80.7883%;"></col></colgroup><tbody><tr><td>**<span class="ts0">Search</span>**</td><td><span class="ts0">Allows you to search for an existing item, Creditor or Debtor based on system fields and which module you are in.</span></td></tr><tr><td>**<span class="ts0">Custom</span>**</td><td><span class="ts0">If you have setup custom fields in your inventory, you can search for the items using the custom fields linked.</span></td></tr></tbody></table>

<p class="callout info"><span class="ts0"><span style="color: rgb(224, 62, 45);">Note:</span> If you leave the fields blank it will bring back all Inventory codes which will be sorted in inventory code order alphabetically.</span></p>

<span class="ts0">If you click on the column heads they will sort A-Z or Z-A</span>

---

##### <span class="ts0">Navigation Ribbon</span>

[![image.png](https://hugeerp10.co.za/hsofmanual/uploads/images/gallery/2024-11/scaled-1680-/z7qimage.png)](https://hugeerp10.co.za/hsofmanual/uploads/images/gallery/2024-11/z7qimage.png)

<span class="ts0">The Navigation Ribbon is used to action the following functions:</span>

<table border="1" id="bkmrk-search-button-the-se" style="border-collapse: collapse; width: 97.1605%; height: 445.344px;"><colgroup><col style="width: 24.0979%;"></col><col style="width: 75.8774%;"></col></colgroup><tbody><tr style="height: 46.5938px;"><td style="height: 46.5938px;">**<span class="ts0">Search</span>**</td><td style="height: 46.5938px;"><span class="ts0">Allows you to search for an existing item, Creditor or Debtor based on system fields and the module you are in.</span></td></tr><tr style="height: 46.5938px;"><td style="height: 46.5938px;">**<span class="ts0">Add</span>**</td><td style="height: 46.5938px;"><span class="ts0">Allows you to create a new Inventory item, Creditor or Debtor depending on the Module you are in.</span></td></tr><tr style="height: 46.5938px;"><td style="height: 46.5938px;">**<span class="ts0">Edit</span>**</td><td style="height: 46.5938px;"><span class="ts0">Allows you to edit an existing Inventory Item, Creditor or Debtor depending on the module you are in</span></td></tr><tr style="height: 46.5938px;"><td style="height: 46.5938px;">**<span class="ts0">Clone</span>**</td><td style="height: 46.5938px;"><span class="ts0">Allows you to Clone an existing Inventory Item, Creditor or Debtor depending on the module you are in</span></td></tr><tr style="height: 63.3906px;"><td style="height: 63.3906px;">**<span class="ts0">Delete </span>**</td><td style="height: 63.3906px;"><span class="ts0">Allows you to Delete an existing Inventory Item, Creditor or Debtor depending on the module you are in, you will not be able to delete an Inventory Item, Creditor or Debtor if they have transactions against the.</span></td></tr><tr style="height: 29.7969px;"><td style="height: 29.7969px;">**<span class="ts0">Inventory Overview</span>**</td><td style="height: 29.7969px;"><span class="ts0">Allows you to view an overview of all movements for the selected Inventory Code.</span></td></tr><tr style="height: 29.7969px;"><td style="height: 29.7969px;">**<span class="ts0">View Image</span>**</td><td style="height: 29.7969px;"><span class="ts0">If you have uploaded an image of your Inventory item, you will be able to view it here</span></td></tr><tr style="height: 46.5938px;"><td style="height: 46.5938px;">**<span class="ts0">Serial No. Options</span>**</td><td style="height: 46.5938px;"><span class="ts0">When you select a product that has serial numbers recorded, you can either view them here or you can print them from here as well.</span></td></tr><tr style="height: 29.7969px;"><td style="height: 29.7969px;">**<span class="ts0">Functions</span>**</td><td style="height: 29.7969px;"><span class="ts0">Allows you to update various settings on the items selected</span></td></tr><tr style="height: 29.7969px;"><td style="height: 29.7969px;">**<span class="ts0">Print</span>**</td><td style="height: 29.7969px;"><span class="ts0">Prints the selected Inventory Code details</span></td></tr><tr style="height: 29.7969px;"><td style="height: 29.7969px;">**<span class="ts0">Import &amp; Export</span>**</td><td style="height: 29.7969px;"><span class="ts0">Export General Details of Inventory Code to Excel</span></td></tr></tbody></table>

---

#### Search options

<span class="ts0">[![image.png](https://hugeerp10.co.za/hsofmanual/uploads/images/gallery/2024-01/scaled-1680-/C8vimage.png)](https://hugeerp10.co.za/hsofmanual/uploads/images/gallery/2024-01/C8vimage.png)</span>

 Enter any of the fields, such as the item code or part of the item description to limit your search to a specific item or range of items.

<table border="1" id="bkmrk-main-tab-shows-a-lis" style="border-collapse: collapse; width: 101.235%; height: 182.578px;"><tbody><tr style="height: 29.7969px;"><td style="height: 29.7969px; width: 23.8691%;">**<span class="ts0">Main</span>**</td><td style="height: 29.7969px; width: 76.2501%;"><span class="ts0">Displays basic information of the item within the grid</span></td></tr><tr style="height: 29.7969px;"><td style="height: 29.7969px; width: 23.8691%;">**<span class="ts0">Cost Price</span>**</td><td style="height: 29.7969px; width: 76.2501%;"><span class="ts0">Shows the item cost and selling price information of a selected item</span></td></tr><tr style="height: 46.5938px;"><td style="height: 46.5938px; width: 23.8691%;">**<span class="ts0">Supplier Cost Price</span>**</td><td style="height: 46.5938px; width: 76.2501%;"><span class="ts0">Shows various supplier cost prices of a selected item, including historic cost prices.</span></td></tr><tr style="height: 29.7969px;"><td style="height: 29.7969px; width: 23.8691%;">**<span class="ts0">Stock Available</span>**</td><td style="height: 29.7969px; width: 76.2501%;"><span class="ts0">Shows stock quantity levels of the item in various warehouses.</span></td></tr><tr style="height: 46.5938px;"><td style="height: 46.5938px; width: 23.8691%;">**<span class="ts0">Serial Number</span>**</td><td style="height: 46.5938px; width: 76.2501%;"><span class="ts0">Shows serial numbers for the selected item. This tab is only active if the item code is flagged for serial number tracking</span></td></tr></tbody></table>

<span class="ts0">To create a new inventory item, click on the Add button</span>

<span class="ts0">Fill in all the relevant information on the inventory item.</span>

<span class="ts0">You will have to fill in the category type example, stock, service or custom.</span>

<table border="1" id="bkmrk-stock-physical-items" style="border-collapse: collapse; width: 100%;"><colgroup><col style="width: 11.866%;"></col><col style="width: 88.1093%;"></col></colgroup><tbody><tr><td>**<span class="ts0">Stock</span>**</td><td><span class="ts0">Physical items such as a ruler. Inventory items work with costing methods a. Latest cost or b. Average Cost. </span>

<span class="ts0">This is setup under the System Configuration Module- Administration – Reference Values.</span>

</td></tr><tr><td>**<span class="ts0">Service</span>**</td><td><span class="ts0">Labor can be termed a service item. This does not track inventory. Service items cannot be used in the Goods Received Vouchers.</span></td></tr><tr><td>**<span class="ts0">Custom</span>**</td><td><span class="ts0">Works the same as Service type. You can put sub-contractors work under this. This will appear in Goods Received Vouchers.</span></td></tr><tr><td>**<span class="ts0">Fixed Assets</span>**</td><td><span class="ts0">This type of inventory is only used to insert your fixed assets. You can put a cost value to it and run a report which will list all fixed assets with their cost value.</span></td></tr></tbody></table>

<p class="callout info"><span class="ts0">The inventory code can be changed at any time.</span></p>

<p class="callout warning"><span class="ts0">The Inventory category cannot be changed after it is saved</span></p>

---

##### Inventory Details Tab

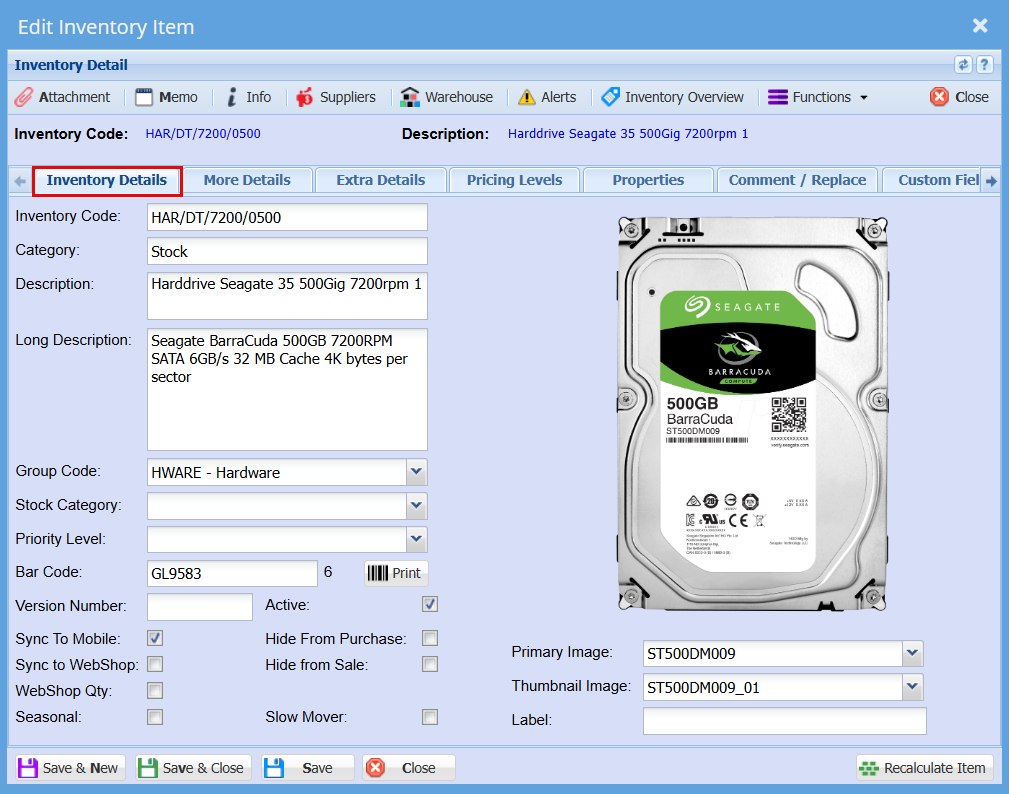
<span class="ts0">In the General Details tab fill in the static information.</span>

<table border="1" id="bkmrk-inventory-code-this-" style="border-collapse: collapse; width: 100%;"><colgroup><col style="width: 17.3334%;"></col><col style="width: 82.7655%;"></col></colgroup><tbody><tr><td>**<span class="ts0">Inventory Code</span>**</td><td><span class="ts0">This is a unique code that identifies the Inventory Item. The Code field can be Alpha Numeric and over 200 Characters long.</span></td></tr><tr><td>**<span class="ts0">Category</span>**</td><td><span class="ts0">Select the type of inventory item that is being created. There are four options, stock, service, custom and fixed asset.</span></td></tr><tr><td>**<span class="ts0">Description</span>**</td><td><span class="ts0">This is the name of the inventory item. The Description field can be Alfa Numeric and over 500 Characters long.</span></td></tr><tr><td>**<span class="ts0">Long Description</span>**</td><td><span class="ts0">This is extra information on the inventory item. You can have a very descriptive note on the item. This can be automatically copy when doing your lines in the document.</span></td></tr><tr><td>**<span class="ts0">Primary Image</span>**</td><td><span class="ts0">This is a drop down and only shows Images which have being uploaded as attachments. You can select a default image against the customer to show on the right-hand side.</span></td></tr><tr><td>**<span class="ts0">Priority Level</span>**</td><td><span class="ts0">Select a priority level form the drop-down menu</span></td></tr><tr><td>**<span class="ts0">Group Code</span>**</td><td><span class="ts0">Select a group code from the drop-down menu</span></td></tr><tr><td>**<span class="ts0">Active</span>**</td><td><span class="ts0">Select if this item is active or not. To make an item inactive the item must have zero inventory on hand in all warehouses</span></td></tr><tr><td>**<span class="ts0">POS Item</span>**</td><td><span class="ts0">Tick if inventory item is a POS item</span></td></tr><tr><td>**<span class="ts0">Internal Ref ID</span>**</td><td><span class="ts0">Customer reference number for item</span></td></tr><tr><td>**<span class="ts0">More Details Tab Unit of Measurement</span>**</td><td><span class="ts0">This indicates the unit of measure of items. Case Lots uses this for its multiplication.</span></td></tr><tr><td>**<span class="ts0">Default Supplier</span>**</td><td><span class="ts0">Set this drop down which is populated by the supplier’s button to your most commonly used supplier.</span></td></tr><tr><td>**<span class="ts0">Tax Type</span>**</td><td><span class="ts0">Set a default tax type for this inventory item.</span></td></tr><tr><td>**<span class="ts0">Account Type</span>**</td><td><span class="ts0">Only used in Custom and Service type items. This account replaces the inventory account and puts costs to the ledger account set here. Do not use inventory account when setting up your custom and service items.</span></td></tr><tr><td>**<span class="ts0">Bar Code</span>**</td><td><span class="ts0">Insert a Bar Code for the item</span></td></tr><tr><td>**<span class="ts0">Bin</span>**</td><td><span class="ts0">Bin Location – Put in a note of the location of your inventory</span></td></tr><tr><td>**<span class="ts0">Weight per unit</span>**</td><td><span class="ts0">Setup your weight per unit. You can select the stationery layout with weights column which will multiple the quantity by the weight and give you the total weight per line product.</span></td></tr><tr><td>**<span class="ts0">Default Supplier Cost</span>**</td><td><span class="ts0">Tick this if you want to default your costing methods on the supplier cost.</span></td></tr><tr><td>**<span class="ts0">Pricing Override</span>**</td><td><span class="ts0">You can choose a pricing override for an item if you wish to run a special on this product. You will need to specify the start and end date of the special.</span></td></tr></tbody></table>

[![image.png](https://hugeerp10.co.za/hsofmanual/uploads/images/gallery/2024-11/scaled-1680-/vdfimage.png)](https://hugeerp10.co.za/hsofmanual/uploads/images/gallery/2024-11/vdfimage.png)

<span class="ts0">The system will automatically revert back to the default pricing structure when the date of the special has come to an end.</span>

<table border="1" id="bkmrk-serial-no-tracking-t" style="border-collapse: collapse; width: 102.099%;"><colgroup><col style="width: 17.4883%;"></col><col style="width: 82.4842%;"></col></colgroup><tbody><tr><td>**<span class="ts0">Serial No Tracking</span>**</td><td><span class="ts0">Tick if item code must be serial number tracked</span></td></tr></tbody></table>

---

##### <span class="ts0"> More Details Tab</span>

[![image.png](https://hugeerp10.co.za/hsofmanual/uploads/images/gallery/2024-11/scaled-1680-/BuJimage.png)](https://hugeerp10.co.za/hsofmanual/uploads/images/gallery/2024-11/BuJimage.png)


---

##### <span class="ts0">Pricing Levels tab</span>

<span class="ts0">You will have to setup a Pricing level for this item before closing. To setup a pricing level click on the Add button.</span>

<span class="ts0">In this area, the cost price is important if it is an inventory type, if you do not put in a value of cost, you will only be able to change this cost price via an Inventory Value Adjustment. This cost price is affected by your costing methods setup in System Configuration under Reference Values.</span>

<span class="ts0">You will have to put in a Tax Type for this item before saving. In order to see the other tabs you will have to save this item.</span>

<table border="1" id="bkmrk-cost-price-this-is-t" style="border-collapse: collapse; width: 100%;"><colgroup><col style="width: 10.7523%;"></col><col style="width: 89.2229%;"></col></colgroup><tbody><tr><td>**<span class="ts0">Cost Price</span>**</td><td><span class="ts0">This is the cost price of the item.</span></td></tr><tr><td>**<span class="ts0">Stock</span>**</td><td><span class="ts0">This is grayed out because it is governed by accounting costing methods found in the setting Reference Values under System Configuration. There are two types of costing methods Average costing or latest costing methods. The average costing method is the most commonly used.</span></td></tr><tr><td>**<span class="ts0">Service</span>**</td><td><span class="ts0">This cost is open and the user can put in a cost value there which will be carried across when doing invoices. Use costing in service only if you are an advanced accounting user. Instead leave the cost at zero.</span></td></tr><tr><td>**<span class="ts0">Custom</span>**</td><td><span class="ts0">This cost is open and the user can put in this cost is open and the user can put in a cost value there which will be carried across when doing invoices. This cost works on latest costing method and will be updated when this custom type item is used in a Goods Received Voucher.</span></td></tr></tbody></table>

<span class="ts0"> </span>[![image.png](https://hugeerp10.co.za/hsofmanual/uploads/images/gallery/2024-11/scaled-1680-/o8Himage.png)](https://hugeerp10.co.za/hsofmanual/uploads/images/gallery/2024-11/o8Himage.png)

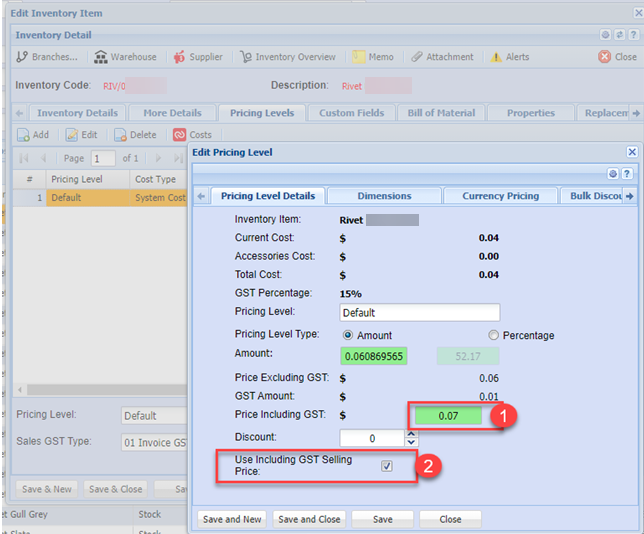
<span class="ts0">In this area you can setup two ways to work out your end selling price</span>

<table border="1" id="bkmrk-amount-put-in-the-am" style="border-collapse: collapse; width: 100%;"><colgroup><col style="width: 13.0124%;"></col><col style="width: 87.0865%;"></col></colgroup><tbody><tr><td>**<span class="ts0">Amount</span>**</td><td><span class="ts0">Put in the amount you wish to sell the product at on an exclusive basis. The system will always bring up this selling price when selling irrespective of your cost price.</span></td></tr><tr><td>**<span class="ts0">Percentage</span>**</td><td><span class="ts0">You can create a percentage markup from your cost price. This percentage will change the selling price dependent on your cost price.</span></td></tr></tbody></table>

<span class="ts0">The difference between the two above is that should you chose Percentage this is good when a product is governed by currency rates and you do not want to lose profits.</span>

<span class="ts0"> </span>![](https://hugeerp0.co.za/csp/webhelp/topics/images/image(3032).png)

<span class="ts0">Once you have selected your pricing level you will need to select a Default pricing level for this item.</span>

<table border="1" id="bkmrk-sales-tax-type-set-t" style="border-collapse: collapse; width: 100%;"><colgroup><col style="width: 25.0596%;"></col><col style="width: 75.0596%;"></col></colgroup><tbody><tr><td>**Sales Tax Type**</td><td>Set the default sales tax type for this item, generally sales invoice VAT / GST tax type</td></tr><tr><td>**Supplier Tax Type**</td><td>Set the default supplier tax type for this item, generally GRV VAT / GST tax type</td></tr><tr><td>**Pricing Level**</td><td>Default pricing level to apply pricing if multiple pricing structures have been assigned to item. Usually best to set to the highest price.</td></tr><tr><td>**Lock Pricing**</td><td>Lock the sell price so that it is not affected by discount structures from customer</td></tr><tr><td>**Item Created**</td><td>The date the item was first created</td></tr><tr><td>**No discount**</td><td>Ensure that this item is excluded from discount from Customer default discount structures</td></tr><tr><td>**Exclude Margin Enforce**</td><td>Exclude the item from been checked for margin enforce ([View Manual](https://hugeerp10.co.za/hsofmanual/books/adm-configuration/page/sales-margin-warning "Sales Margin warning"))</td></tr><tr><td>**Pricing Override**</td><td>Section for setting up an override to standard pricing structures</td></tr><tr><td>**Overriding Level**</td><td>What pricing structure must be applied</td></tr><tr><td>**On Promotion**</td><td>Set that this is an active promotion to apply the pricing override</td></tr><tr><td>**Valid From / To**</td><td>Set the date from and date to that the promotion special pricing must be applied. Once the date to has expired the system will revert back to default pricing structure</td></tr></tbody></table>


---

##### <span class="ts0">Custom Fields tab</span>

<span class="ts0">If configured, you are able to select from drop down option</span>

<span class="ts0"> </span>![](https://hugeerp0.co.za/csp/webhelp/topics/images/image(3033).png)


---

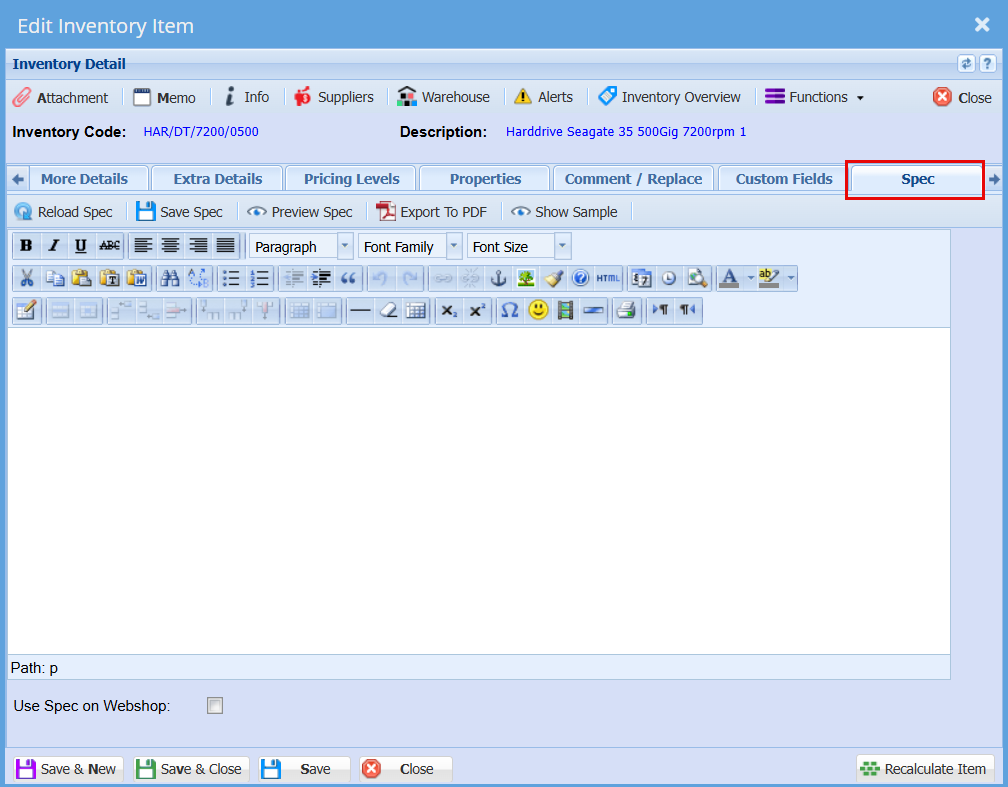
##### <span class="ts0">Spec tab</span>

<span class="ts0">To add the specifications of the item</span>

<span class="ts0">The user can also have options to activate other fields by ticking the boxes on the right hand page</span>

[![image.png](https://hugeerp10.co.za/hsofmanual/uploads/images/gallery/2024-11/scaled-1680-/wcMimage.png)](https://hugeerp10.co.za/hsofmanual/uploads/images/gallery/2024-11/wcMimage.png)

<table border="1" id="bkmrk-reload-spec-button-t" style="border-collapse: collapse; width: 62.3457%;"><colgroup><col style="width: 31.25%;"></col><col style="width: 68.7164%;"></col></colgroup><tbody><tr><td>**<span class="ts0">Reload Spec</span>**</td><td><span class="ts0">To reload the spec</span></td></tr><tr><td>**<span class="ts0">Save Spec</span>**</td><td><span class="ts0">To save specs</span></td></tr><tr><td>**<span class="ts0">Preview Spec</span>**</td><td><span class="ts0">Allows the user to preview the spec</span></td></tr><tr><td>**<span class="ts0">Export to PDF </span>**</td><td><span class="ts0">To export the spec onto a PDF file</span></td></tr><tr><td>**<span class="ts0">Show Sample </span>**</td><td><span class="ts0">Shows the sample of the text</span></td></tr></tbody></table>


---

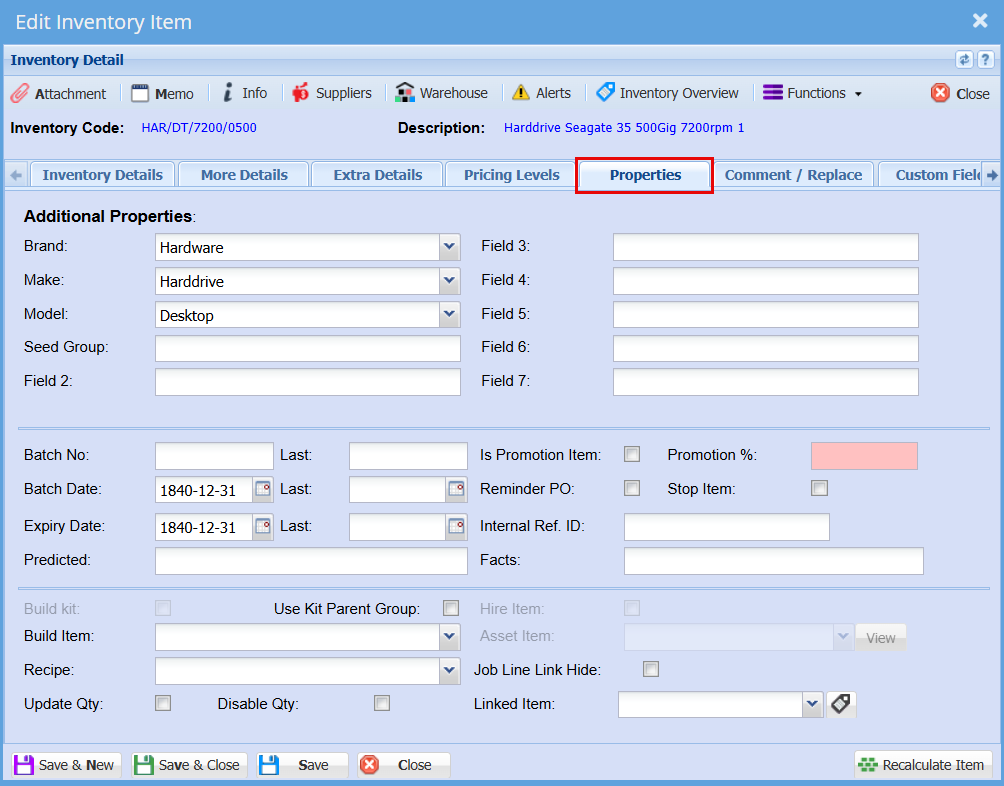
##### <span class="ts0">Properties</span><span class="ts0"> tab</span>

<span class="ts0">Add the dimensions of the inventory item</span>

[![image.png](https://hugeerp10.co.za/hsofmanual/uploads/images/gallery/2024-11/scaled-1680-/XYGimage.png)](https://hugeerp10.co.za/hsofmanual/uploads/images/gallery/2024-11/XYGimage.png)

---

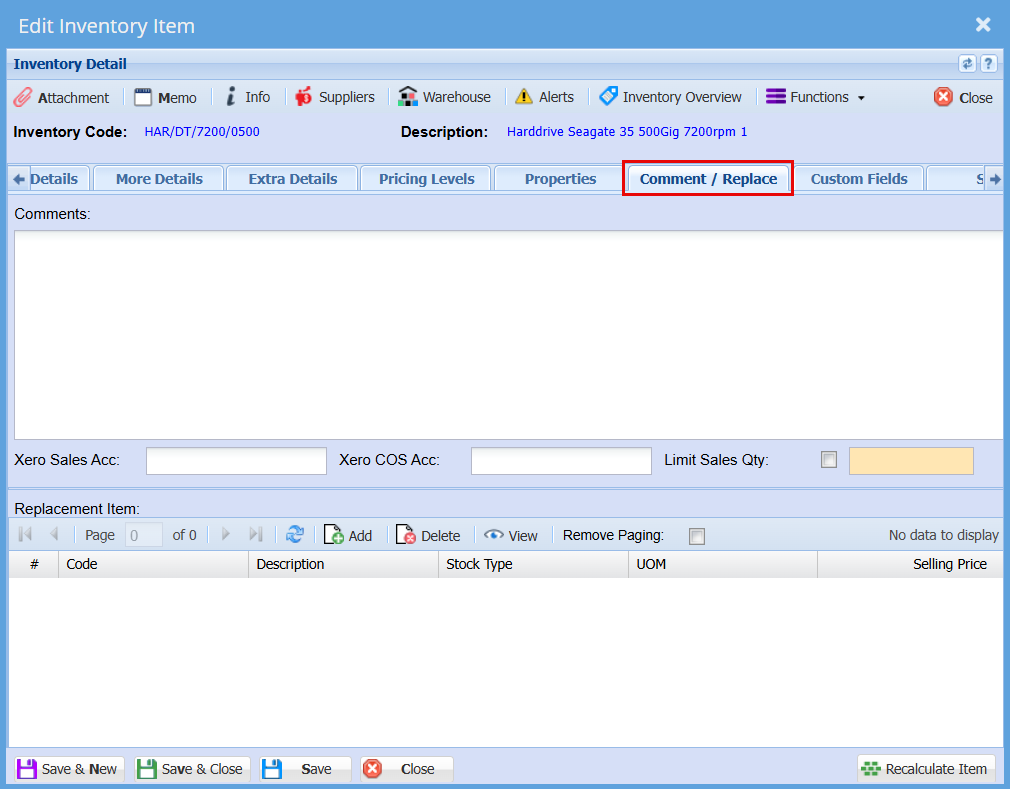
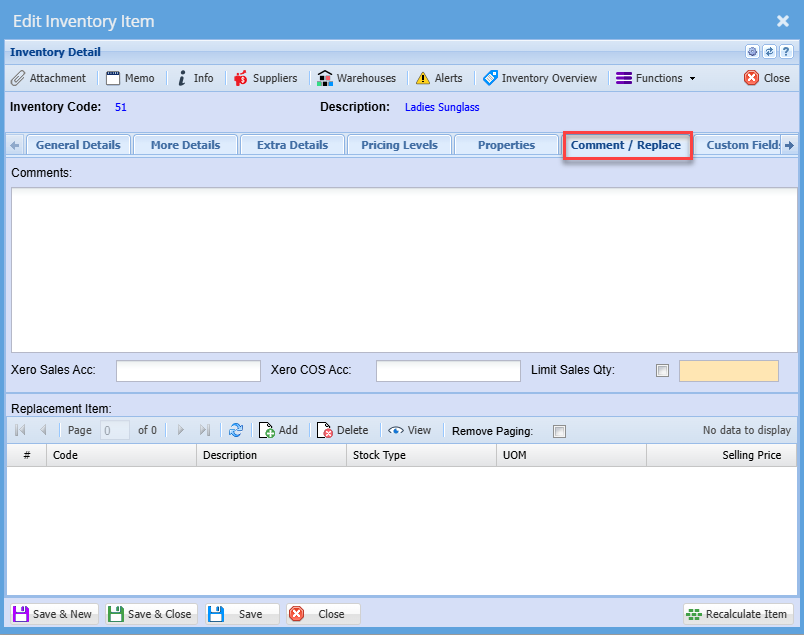
##### Comments/Replace Item Tab

<span class="ts0"> </span>[![image.png](https://hugeerp10.co.za/hsofmanual/uploads/images/gallery/2024-11/scaled-1680-/x4Yimage.png)](https://hugeerp10.co.za/hsofmanual/uploads/images/gallery/2024-11/x4Yimage.png)


---

##### <span class="ts0">Supplier’s Button</span>

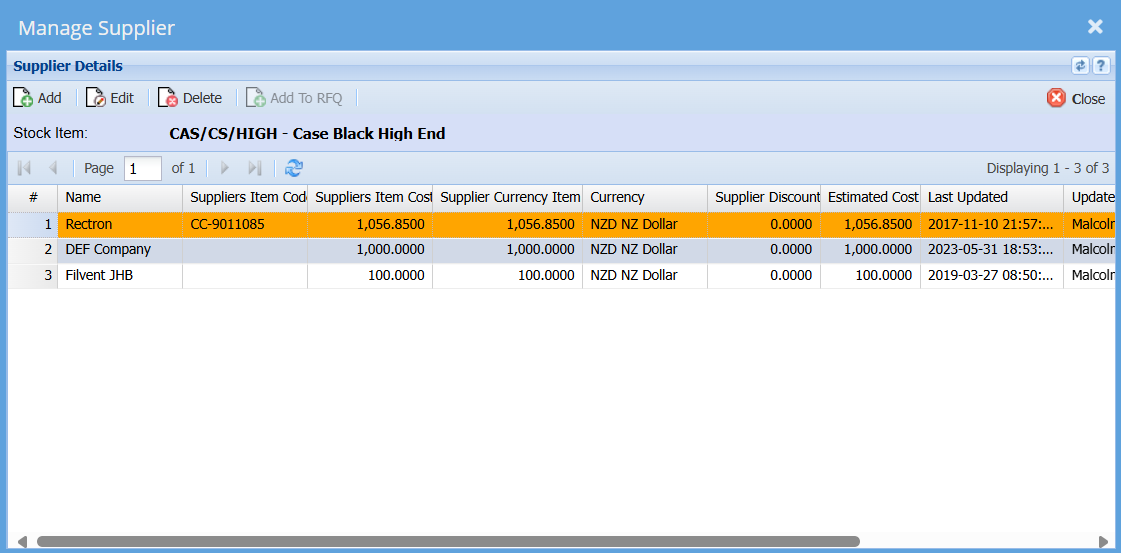
<span class="ts0">On the inventory items you will need to select the various suppliers where you purchase this item from.</span>

<span class="ts0">In this area we cater for multiple suppliers to one inventory item. This is handy so you can see what the cost price is that you purchase this item from the various suppliers. You will also be able to see the supplier item code and when the last time any changes done to this supplier was made.</span>

<span class="ts0">Last Updated field is changed in two ways:</span>

<table border="1" id="bkmrk-1-when-a-goods-recei" style="border-collapse: collapse; width: 64.1975%;"><colgroup><col style="width: 7.67583%;"></col><col style="width: 92.2885%;"></col></colgroup><tbody><tr><td>1</td><td><span class="ts0">When a Goods Received Note comes in and updates the price and date</span></td></tr><tr><td>2</td><td><span class="ts0">When the user manually changes the details.</span></td></tr></tbody></table>

<p class="callout info"><span class="ts0">This price has nothing to do with the cost price of the item, these prices have to do with the actual supplier price which he will give the item to you at.</span></p>

<span class="ts0"> </span>[![image.png](https://hugeerp10.co.za/hsofmanual/uploads/images/gallery/2024-11/scaled-1680-/KR0image.png)](https://hugeerp10.co.za/hsofmanual/uploads/images/gallery/2024-11/KR0image.png)

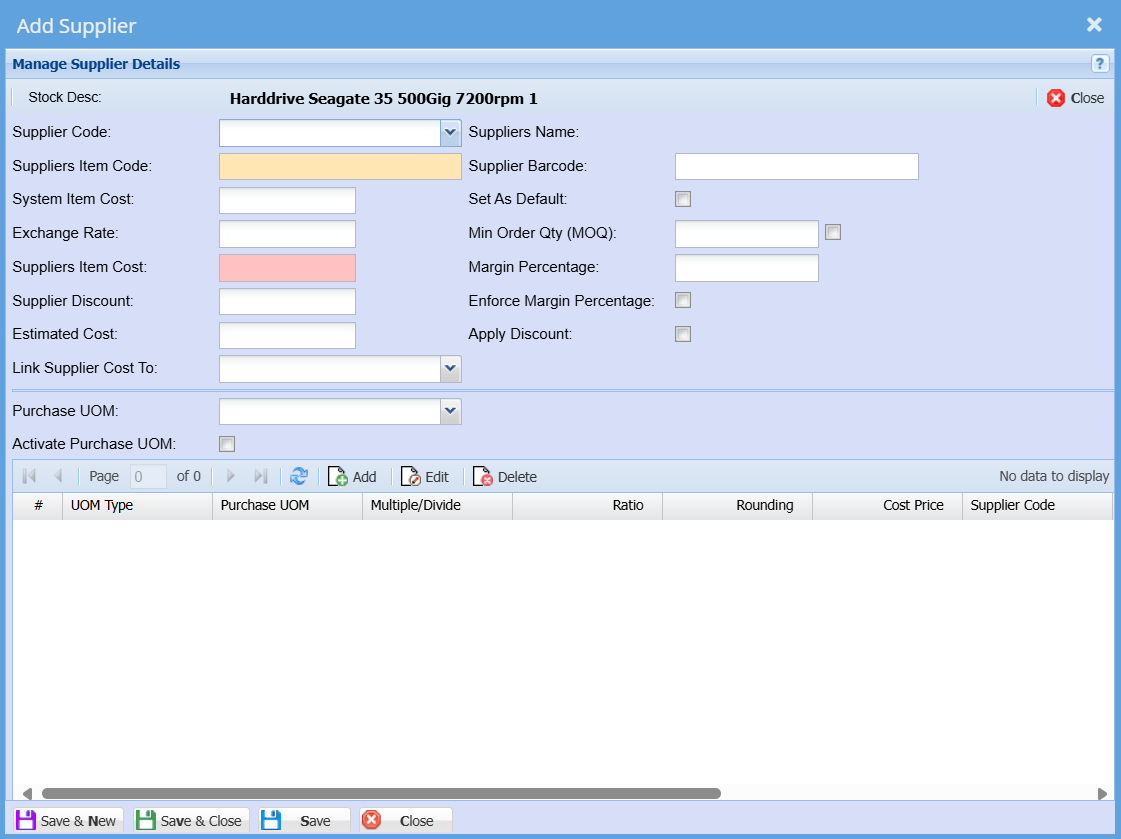
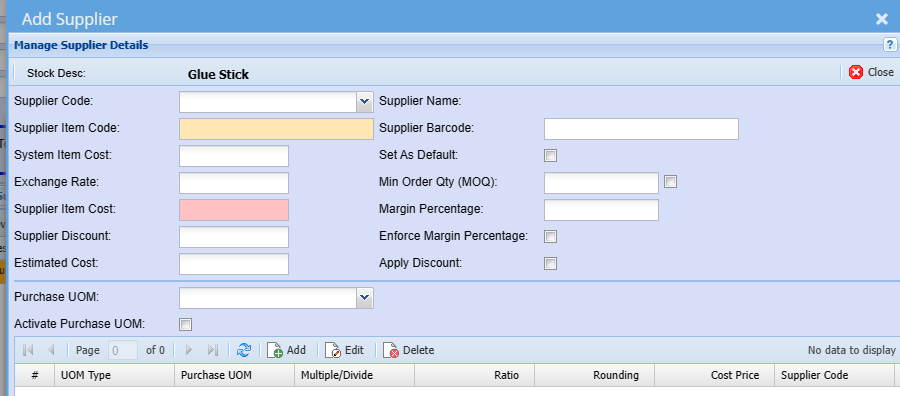
<span class="ts0">To create a new supplier, click on the Add button</span>

<span class="ts0">Fill in the Supplier item code, select the unit of measure and put in the price of the item that your supplier will sell it to you at.</span>

<p class="callout info"><span class="ts0">Prices are exclusive.</span></p>

<span class="ts0"> </span>[![image.png](https://hugeerp10.co.za/hsofmanual/uploads/images/gallery/2024-11/scaled-1680-/Eyqimage.png)](https://hugeerp10.co.za/hsofmanual/uploads/images/gallery/2024-11/Eyqimage.png)


---

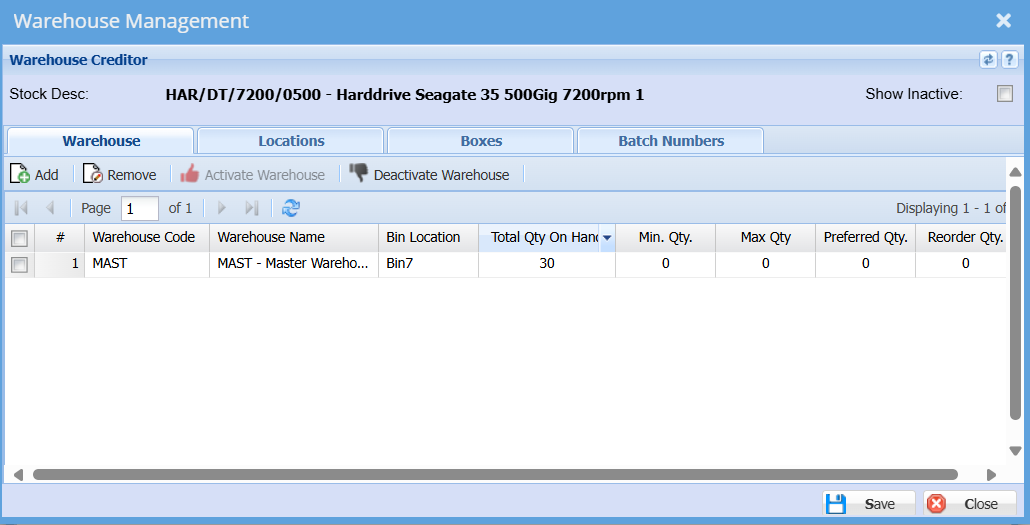
##### <span class="ts0">Warehouses Tab</span>

<span class="ts0">If you have the Warehouse Module you will be able to select multiple warehouses that this item belongs to.</span>

[![image.png](https://hugeerp10.co.za/hsofmanual/uploads/images/gallery/2024-11/scaled-1680-/3l1image.png)](https://hugeerp10.co.za/hsofmanual/uploads/images/gallery/2024-11/3l1image.png)

---

##### <span class="ts0">Attachments</span>

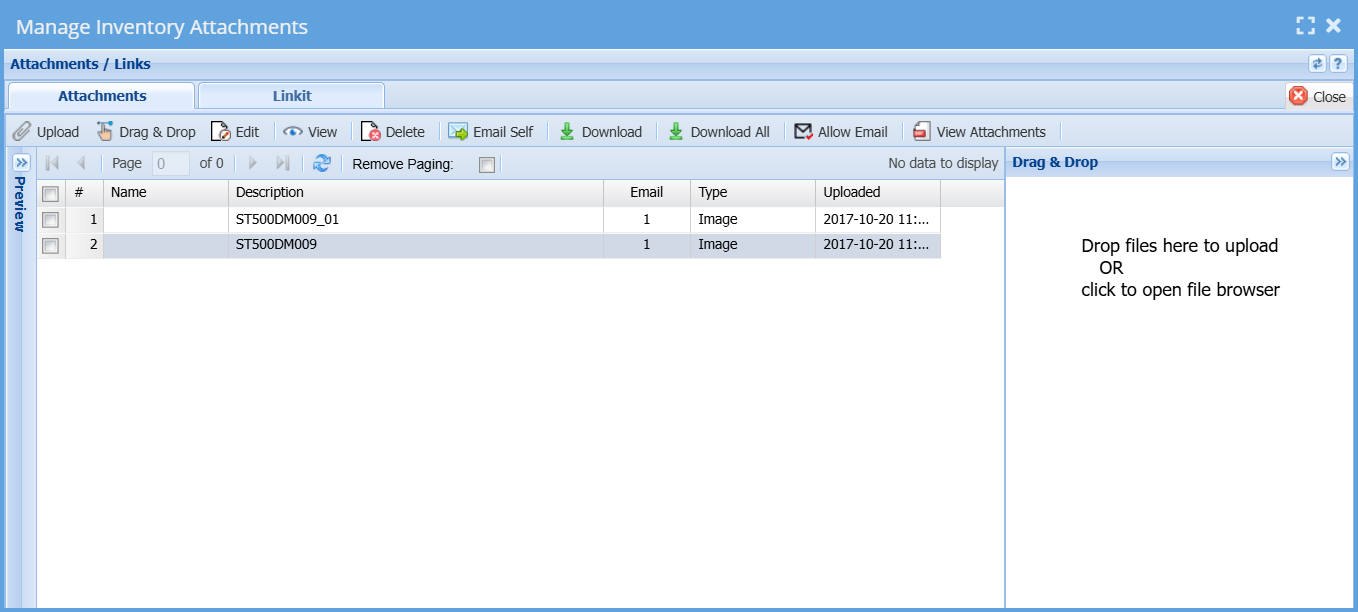
<span class="ts0">In this window we allow for unlimited number of uploads of documents to be attached to the Inventory item. You can attach pictures, Excel sheets, Word Documents and any file you wish.</span>

[![image.png](https://hugeerp10.co.za/hsofmanual/uploads/images/gallery/2024-11/scaled-1680-/0yzimage.png)](https://hugeerp10.co.za/hsofmanual/uploads/images/gallery/2024-11/0yzimage.png)

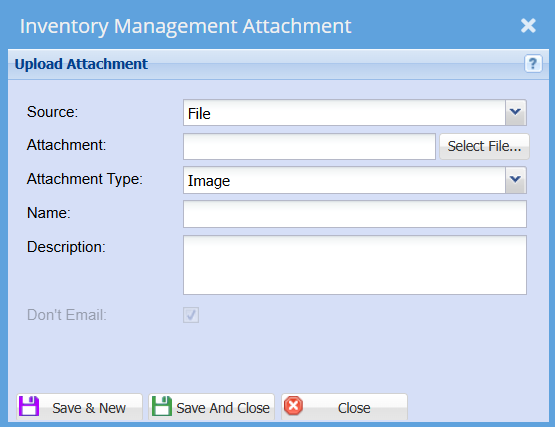
<span class="ts0">When you click on the Upload button Attachments Button the following will come up.</span>

<span class="ts0">In this area we allow you to categorize your documents, name the file and then chose the file.</span>

<span class="ts0">Once you click on the upload button it will take a copy of your file to the server. This means whenever you are in Huge ERP you will be able to view the file anywhere.</span>

[![image.png](https://hugeerp10.co.za/hsofmanual/uploads/images/gallery/2024-11/scaled-1680-/sVuimage.png)](https://hugeerp10.co.za/hsofmanual/uploads/images/gallery/2024-11/sVuimage.png)


---

##### <span class="ts0">Inventory Overview button</span>

The inventory overview window allows a quick access to view information on an item.

The icon that represents it is a blue item.

<table border="1" id="bkmrk-inventory-overview-i"><tbody><tr><td>[![stock.png](https://hugeerp10.co.za/hsofmanual/uploads/images/gallery/2024-08/scaled-1680-/stock.png)](https://hugeerp10.co.za/hsofmanual/uploads/images/gallery/2024-08/stock.png)

</td><td>Inventory Overview icon</td></tr></tbody></table>

It is accessed in most windows where stock items are present

<table border="1" id="bkmrk-main-detail-tab-show"><colgroup><col></col><col></col></colgroup><tbody><tr><td>**<span class="ts0">Load Totals</span>**</td><td><span class="ts0">Loads the item information on the main details tab</span></td></tr><tr><td>**<span class="ts0">Edit Item</span>**</td><td><span class="ts0">Here you can amend an inventory item</span></td></tr><tr><td>**<span class="ts0">Main Detail </span>**</td><td><span class="ts0">Shows summary of movements for select item code</span></td></tr><tr><td>**<span class="ts0">WIP- Work in Progress</span>**</td><td><span class="ts0">Run the count for work still currently progress items, On Shelf, All, Invoice, Sales Orders, Jobs and Bill of Materials. Most counts are done on the on-shelf option.</span></td></tr><tr><td>**<span class="ts0">Movement </span>**</td><td><span class="ts0">Shows all movements for the item code selected</span></td></tr><tr><td>**<span class="ts0">Document Analysis </span>**</td><td><span class="ts0">Search to view all document for the item code</span></td></tr></tbody></table>

<span class="ts0"> </span>[![image.png](https://hugeerp10.co.za/hsofmanual/uploads/images/gallery/2024-11/scaled-1680-/g8ximage.png)](https://hugeerp10.co.za/hsofmanual/uploads/images/gallery/2024-11/g8ximage.png)

<span class="ts0"></span>

# Inventory Import / Export

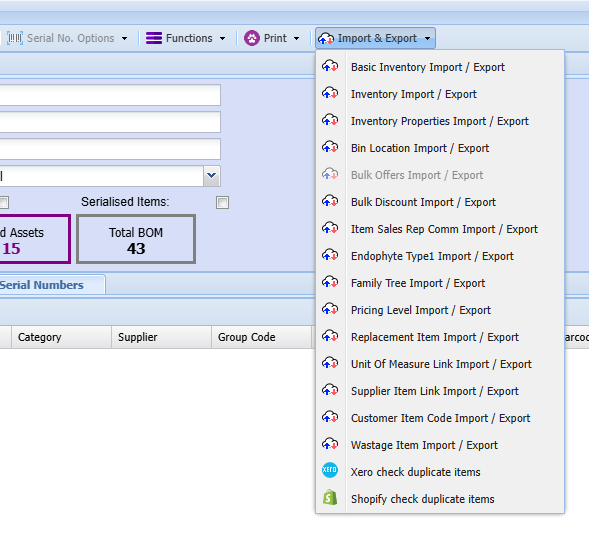
<span style="color: rgb(45, 194, 107);">**Inventory Module&gt; Configuration&gt; Import&amp; Export Drop Down**</span>

[![image.png](https://hugeerp10.co.za/hsofmanual/uploads/images/gallery/2024-09/scaled-1680-/yCrimage.png)](https://hugeerp10.co.za/hsofmanual/uploads/images/gallery/2024-09/yCrimage.png)

---

#### Basic Inventory Import/ Export

<span class="ts15">Inventory &gt; Configuration&gt; Inventory Setup</span><span class="ts15">&gt; Print</span>

<span class="ts0">Basic Export button: Exports the currently selected Inventory Item into an Excel file.</span>

![](https://hugeerp0.co.za/csp/webhelp/topics/images/image(3024).png)

<span class="ts0">This function is used to export the </span><span class="ts0">basic</span><span class="ts0"> inventory data out the system</span>

<span class="ts0">This is a summarized version contains less information than the master inventory export</span>

<span class="ts0">click print button , a</span><span class="ts0">n</span><span class="ts0">d select on the drop down the </span><span class="ts0">basic </span><span class="ts0">export</span>

<span class="ts0">the information will be exported to excel.</span>

---

#### Inventory Import/ Export

<span class="ts15">Inventory &gt; Configuration&gt; Inventory Setup</span><span class="ts15">&gt; Print</span>

<span class="ts0">Master Export button: to export complete list of inventory items to excel spread sheet. Please not that this does not use the search criteria.</span>

<span class="ts0"> </span>![](https://hugeerp0.co.za/csp/webhelp/topics/images/image(3025).png)

<span class="ts0">This function is used to export the master inventory data out the system.</span>

<span class="ts0">This is detailed it contains more information than the basic inventory export</span>

<span class="ts0">click print </span><span class="ts0">button and select on the drop down the master export.</span>

<span class="ts0">the information will be exported to excel.</span>

---

#### Inventory Properties Import/ Export

<span lang="EN-US" style="mso-ansi-language: EN-US;">This manual applies to updating the additional properties fields on the inventory item setup</span>

<span lang="EN-US" style="mso-ansi-language: EN-US;">To update the existing data in these fields, you will need to export the item list</span>

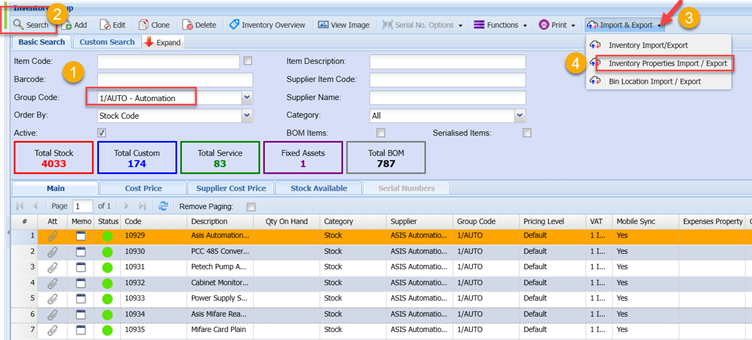
<span lang="EN-US" style="mso-ansi-language: EN-US;">To do this, go to **<span style="color: rgb(45, 194, 107);">Inventory Module&gt; Configuration&gt; Inventory Setup&gt; </span>**</span>

<span lang="EN-US" style="mso-ansi-language: EN-US;">Enter the filters required (if applicable) and click Search</span>

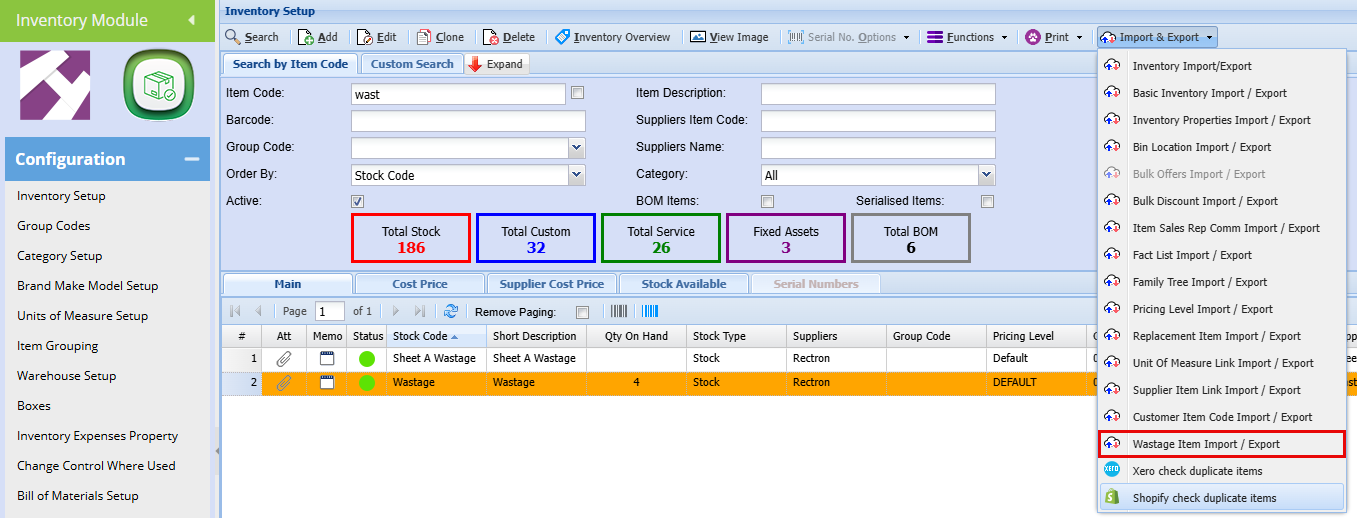
<span lang="EN-US" style="mso-ansi-language: EN-US;">Once the list of items is returned on screen, click the Import &amp; Export Drop down</span>

<span lang="EN-US" style="mso-ansi-language: EN-US;">And select Inventory Properties Import/ Export option</span>

**<span lang="EN-US" style="color: #002060; mso-ansi-language: EN-US; mso-no-proof: yes;">![Picture1.png](https://hugeerp10.co.za/hsofmanual/uploads/images/gallery/2023-06/picture1.png)</span>**

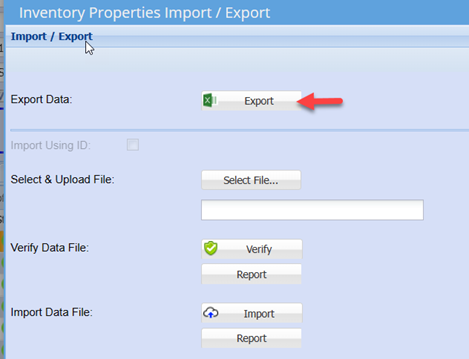
<span lang="EN-US" style="mso-ansi-language: EN-US;">Click the export button on the screen that pops up</span>

<span style="mso-no-proof: yes;">![Picture2.png](https://hugeerp10.co.za/hsofmanual/uploads/images/gallery/2023-06/picture2.png)</span>

<span lang="EN-US" style="mso-ansi-language: EN-US;">This will export the list of items in the correct import template</span>

<span lang="EN-US" style="mso-ansi-language: EN-US;"> </span><span lang="EN-US" style="mso-ansi-language: EN-US;">You can now edit the data in the respective columns</span>

<span lang="EN-US" style="color: #0070c0; mso-ansi-language: EN-US;">Note: Do not edit the Stock Code and Description fields</span>

<span lang="EN-US" style="mso-ansi-language: EN-US;">Once you have completed updating the data, save the file as a normal excel file.</span>

<span lang="EN-US" style="mso-ansi-language: EN-US;">Notes on edit data:</span>

<span lang="EN-US" style="mso-bidi-font-family: Calibri; mso-bidi-theme-font: minor-latin; mso-ansi-language: EN-US;"><span style="mso-list: Ignore;">1.<span style="font: 7.0pt 'Times New Roman';"> </span></span></span><span lang="EN-US" style="mso-ansi-language: EN-US;">Existing data in the field will be overwritten</span>

<span lang="EN-US" style="mso-bidi-font-family: Calibri; mso-bidi-theme-font: minor-latin; mso-ansi-language: EN-US;"><span style="mso-list: Ignore;">2.<span style="font: 7.0pt 'Times New Roman';"> </span></span></span><span lang="EN-US" style="mso-ansi-language: EN-US;">If you wish to remove existing data in any field, delete the existing data and enter a space in that respective field.</span>

<span lang="EN-US" style="mso-ansi-language: EN-US;">Once the file has been edited and saved, you can now import the file back into the system which will update the items with the changes made.</span>

<span lang="EN-US" style="mso-ansi-language: EN-US;">To import, click the Import &amp; Export drop down</span>

<span lang="EN-US" style="mso-ansi-language: EN-US;">Select Inventory Properties Import/ Export option</span>

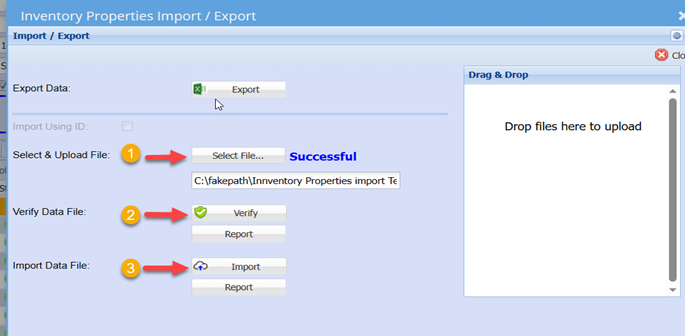
<span lang="EN-US" style="mso-ansi-language: EN-US;">Click on Select File</span>

<span lang="EN-US" style="mso-ansi-language: EN-US;">Search for the file you saved</span>

<span lang="EN-US" style="mso-ansi-language: EN-US;">Click Verify</span>

<span lang="EN-US" style="mso-ansi-language: EN-US;">This is to check for any errors</span>

<span lang="EN-US" style="mso-ansi-language: EN-US;">Click import Button</span>

<span style="mso-no-proof: yes;">![Picture3.png](https://hugeerp10.co.za/hsofmanual/uploads/images/gallery/2023-06/picture3.png)</span>

<span lang="EN-US" style="mso-ansi-language: EN-US;">You should ideally have a successfully result on all functions</span>

<span lang="EN-US" style="mso-ansi-language: EN-US;">If so, click close</span>

<span lang="EN-US" style="mso-ansi-language: EN-US;">You can now check random item on the system to see that the changes have uploaded successfully.</span>

---

#### <span lang="EN-US" style="mso-ansi-language: EN-US;">Bin Location Import/ Export</span>

<span class="ts15"><span class="ts7">The function of this window is to bulk import stock item bin locations as well as minimum, maximum, preferred and reorder quantities.</span></span>

**<span class="ts15" style="color: rgb(45, 194, 107);">Inventory&gt; Configuration&gt; Inventory Setup</span>**

<span class="ts15">Click search to return the list of all items </span>

<span class="ts15">alternatively, enter the required filter and then search to limit the list of items return of a specific range</span>

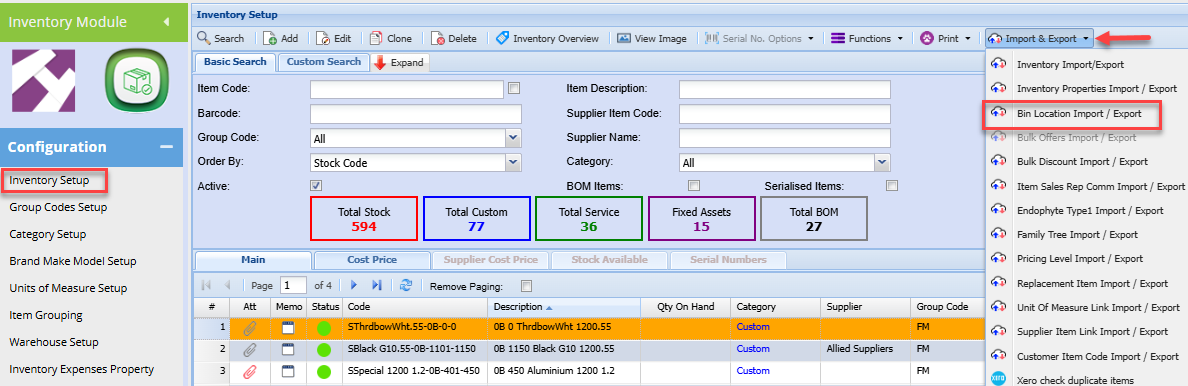
Click the Import &amp; Export button

Select the Bin Location Import / Export

[![image.png](https://hugeerp10.co.za/hsofmanual/uploads/images/gallery/2024-05/scaled-1680-/C5pimage.png)](https://hugeerp10.co.za/hsofmanual/uploads/images/gallery/2024-05/C5pimage.png)
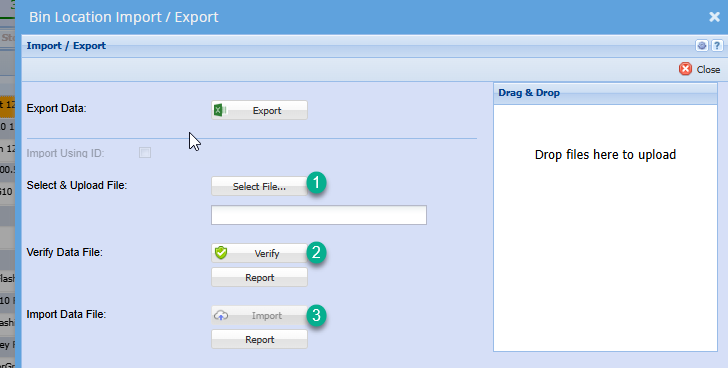
<span class="ts7">Click the Export button</span>

<span class="ts7">This will export the listed items into excel with the require columns / fields</span>

[![image.png](https://hugeerp10.co.za/hsofmanual/uploads/images/gallery/2024-05/scaled-1680-/T9Nimage.png)](https://hugeerp10.co.za/hsofmanual/uploads/images/gallery/2024-05/T9Nimage.png)

<span class="ts7">Enter the required quantities in the respective columns and save the file</span>

<span class="ts7">Open the Bin location export / import function again</span>

<span class="ts7">Select the file you saved</span>

[![image.png](https://hugeerp10.co.za/hsofmanual/uploads/images/gallery/2024-05/scaled-1680-/8gRimage.png)](https://hugeerp10.co.za/hsofmanual/uploads/images/gallery/2024-05/8gRimage.png)

<span class="ts7">Click Verify button. Should return a successful result</span>

<span class="ts7">alternatively, click the Report button to view any errors</span>

<span class="ts7">Click Import Button. Should return successful result</span>

<span class="ts7">Click Close to exit this window.</span>

<span class="ts7">You can do random searches on the item setup to ensure all details have uploaded successfully</span>

---

#### <span lang="EN-US" style="mso-ansi-language: EN-US;">Bulk offers Import/ Export</span>

---

#### <span lang="EN-US" style="mso-ansi-language: EN-US;">Bulk Discount Import/ Export</span>

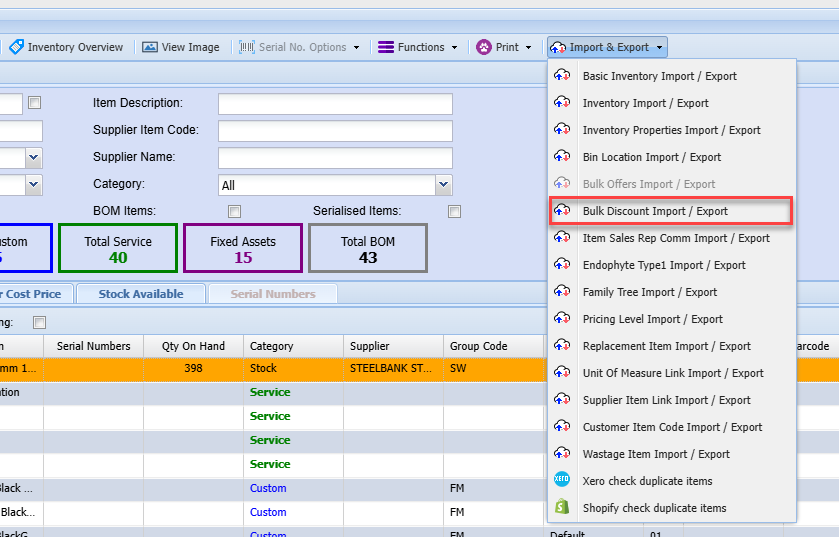
This allows you to import and export bulk Discounts

[![image.png](https://hugeerp10.co.za/hsofmanual/uploads/images/gallery/2024-09/scaled-1680-/Rctimage.png)](https://hugeerp10.co.za/hsofmanual/uploads/images/gallery/2024-09/Rctimage.png)
---

#### <span lang="EN-US" style="mso-ansi-language: EN-US;">Item Sales Reo Comm Import/ Export</span>

<span class="ts32">This function is used to update the sales rep item commission on multiple items</span>

<span class="ts32">You could have items that may have a different commission structure per sales rep</span>

<span class="ts32">This function allows you to update these commission structures in a bulk manner without having to edit each item and each rep setup individually</span>

[![image.png](https://hugeerp10.co.za/hsofmanual/uploads/images/gallery/2024-05/scaled-1680-/REAimage.png)](https://hugeerp10.co.za/hsofmanual/uploads/images/gallery/2024-05/REAimage.png)

<table border="1" id="bkmrk-1-the-heading-row-ca" style="border-collapse: collapse; width: 97.9012%; height: 339.2px;"><colgroup><col style="width: 5.53268%;"></col><col style="width: 94.4416%;"></col></colgroup><tbody><tr style="height: 29.6px;"><td style="height: 29.6px;">**1**</td><td style="height: 29.6px;"><span class="ts0">The heading row can be left in the import file.</span></td></tr><tr style="height: 29.6px;"><td style="height: 29.6px;">**2**</td><td style="height: 29.6px;"><span class="ts0">All values in red are compulsory.</span></td></tr><tr style="height: 29.6px;"><td style="height: 29.6px;">**3**</td><td style="height: 29.6px;"><span class="ts0">The Stock Code must be as it appears in the Inventory Module -&gt; Inventory Setup</span></td></tr><tr style="height: 29.6px;"><td style="height: 29.6px;">**4**</td><td style="height: 29.6px;"><span class="ts0">The SalesRep column can have either the Sales Reps name or the word Default.</span></td></tr><tr style="height: 57.6px;"><td style="height: 57.6px;">**4.1**</td><td style="height: 57.6px;"><span class="ts0">When the word Default is used the system will update the Commission % on the actual Stock Item </span><span class="ts0">with the specified percentage.</span>

</td></tr><tr style="height: 57.6px;"><td style="height: 57.6px;">**4.2**</td><td style="height: 57.6px;"><span class="ts0">When using the Sales Rep name, the Sales Rep name must be exactly as it appears in the</span>

<span class="ts0">Sales Rep Commission -&gt; Sales Rep Entity.</span>

</td></tr><tr style="height: 35.2px;"><td style="height: 35.2px;">**5**</td><td style="height: 35.2px;"><span class="ts0">The Active column must be either a 1 or 0 when a Sales Rep name is specified.</span>

</td></tr><tr style="height: 35.2px;"><td style="height: 35.2px;">**5.1**</td><td style="height: 35.2px;"><span class="ts0">The Active value will be ignored if the Sales Rep column contains the word Default</span>

</td></tr><tr style="height: 35.2px;"><td style="height: 35.2px;">**6**</td><td style="height: 35.2px;"><span class="ts0">The import file must be saves as a CSV file.</span>

</td></tr></tbody></table>

<span class="ts0">Below is an example of the template layout for the import file.</span>

<div class="block0" id="bkmrk-stockcode-descriptio"><table class="tbl8"><tbody><tr class="row0"><td class="cell0"><span class="ts0">StockCode</span>

</td><td class="cell1"><span class="ts0">Description</span>

</td><td class="cell2"><span class="ts0">SalesRep</span>

</td><td class="cell3"><span class="ts0">Percentage</span>

</td><td class="cell0"><span class="ts0">Active</span>

</td></tr><tr class="row0"><td class="cell0"><span class="ts0">PEN001</span>

</td><td class="cell1"><span class="ts0">Red Pen</span>

</td><td class="cell2"><span class="ts0">John French / Default</span>

</td><td class="cell3"><span class="ts0">10</span>

</td><td class="cell0"><span class="ts0">1 / 0</span>

</td></tr></tbody></table>

</div>---

#### <span lang="EN-US" style="mso-ansi-language: EN-US;">Endophyte Type1 Import/ Export</span>

Import the list of Facts at the inventory item setup screen

File to be imported is saved as Excel

[![image.png](https://hugeerp.co.nz/manual/uploads/images/gallery/2023-08/scaled-1680-/i8bimage.png)](https://hugeerp.co.nz/manual/uploads/images/gallery/2023-08/i8bimage.png)


##### Export Facts

Export to see all list of Facts for items

Exports in single line for each Facts per item

If an item has 5 Facts linked to it, the export will export five lines repeating the item code

[![image.png](https://hugeerp.co.nz/manual/uploads/images/gallery/2023-08/scaled-1680-/NrWimage.png)](https://hugeerp.co.nz/manual/uploads/images/gallery/2023-08/NrWimage.png)


##### Import is done in two methods:

1. Simple row by row
2. Combination of all the endophytes with the separator

<table border="0" cellpadding="0" cellspacing="0" id="bkmrk-itemcode-itemdescrip" style="border-collapse: collapse; width: 774px; height: 148.984px;" width="821"><colgroup><col style="width: 85.25px;" width="126"></col> <col style="width: 123.25px;" width="131"></col> <col style="width: 94.25px;" width="116"></col> <col style="width: 77.25px;" width="90"></col> <col style="width: 52.25px;" width="61"></col> <col style="width: 60.25px;" width="77"></col> <col style="width: 89.25px;" width="90"></col> <col style="width: 165.25px;" width="130"></col> </colgroup><tbody><tr style="height: 29.7969px;"><td class="xl63" height="20" style="height: 29.7969px; width: 95pt;" width="126">**ItemCode**</td><td class="xl63" style="border-left: none; width: 98pt; height: 29.7969px;" width="131">**ItemDescription**</td><td class="xl63" style="border-left: none; width: 87pt; height: 29.7969px;" width="116">**Fact Code**</td><td class="xl63" style="border-left: none; width: 68pt; height: 29.7969px;" width="90">**Predicted**</td><td class="xl63" style="border-left: none; width: 46pt; height: 29.7969px;" width="61">**Fact**</td><td class="xl63" style="border-left: none; width: 58pt; height: 29.7969px;" width="77">**Value**</td><td class="xl63" style="border-left: none; width: 68pt; height: 29.7969px;" width="90">**Percentage**</td><td class="xl63" style="border-left: none; width: 98pt; height: 29.7969px;" width="130">**Comment**</td></tr><tr style="height: 29.7969px;"><td class="xl64" height="20" style="height: 29.7969px; border-top: none;"><span style="background-color: rgb(191, 237, 210);">ABC001</span></td><td class="xl65" style="border-top: none; border-left: none; height: 29.7969px;"> </td><td class="xl65" style="border-top: none; border-left: none; height: 29.7969px;">A</td><td class="xl65" style="border-top: none; border-left: none; height: 29.7969px;">1/0</td><td class="xl65" style="border-top: none; border-left: none; height: 29.7969px;">1/0</td><td align="right" class="xl65" style="border-top: none; border-left: none; height: 29.7969px;">50</td><td align="right" class="xl65" style="border-top: none; border-left: none; height: 29.7969px;">40</td><td class="xl65" style="border-top: none; border-left: none; height: 29.7969px;"> </td></tr><tr style="height: 29.7969px;"><td class="xl64" height="20" style="height: 29.7969px; border-top: none;"><span style="background-color: rgb(191, 237, 210);">ABC001</span></td><td class="xl65" style="border-top: none; border-left: none; height: 29.7969px;"> </td><td class="xl65" style="border-top: none; border-left: none; height: 29.7969px;">B</td><td class="xl65" style="border-top: none; border-left: none; height: 29.7969px;"> </td><td class="xl65" style="border-top: none; border-left: none; height: 29.7969px;"> </td><td class="xl65" style="border-top: none; border-left: none; height: 29.7969px;"> </td><td class="xl65" style="border-top: none; border-left: none; height: 29.7969px;"> </td><td class="xl65" style="border-top: none; border-left: none; height: 29.7969px;"> </td></tr><tr style="height: 29.7969px;"><td class="xl64" height="20" style="height: 29.7969px; border-top: none;"><span style="background-color: rgb(191, 237, 210);">ABC001</span></td><td class="xl65" style="border-top: none; border-left: none; height: 29.7969px;"> </td><td class="xl65" style="border-top: none; border-left: none; height: 29.7969px;">C</td><td class="xl65" style="border-top: none; border-left: none; height: 29.7969px;"> </td><td class="xl65" style="border-top: none; border-left: none; height: 29.7969px;"> </td><td class="xl65" style="border-top: none; border-left: none; height: 29.7969px;"> </td><td class="xl65" style="border-top: none; border-left: none; height: 29.7969px;"> </td><td class="xl65" style="border-top: none; border-left: none; height: 29.7969px;"> </td></tr><tr style="height: 29.7969px;"><td class="xl66" height="20" style="height: 29.7969px; border-top: none;"><span style="background-color: rgb(194, 224, 244);">ABC001</span></td><td class="xl65" style="border-top: none; border-left: none; height: 29.7969px;"> </td><td class="xl65" style="border-top: none; border-left: none; height: 29.7969px;">A|B|C</td><td class="xl65" style="border-top: none; border-left: none; height: 29.7969px;">1/0</td><td class="xl65" style="border-top: none; border-left: none; height: 29.7969px;">1/0</td><td align="right" class="xl65" style="border-top: none; border-left: none; height: 29.7969px;">50</td><td align="right" class="xl65" style="border-top: none; border-left: none; height: 29.7969px;">40</td><td class="xl65" style="border-top: none; border-left: none; height: 29.7969px;"> </td></tr></tbody></table>

File must contain the headers.

<table border="1" id="bkmrk-item-code-item-code-" style="border-collapse: collapse; width: 90.1235%; height: 206.766px;"><colgroup><col style="width: 24.8455%;"></col><col style="width: 75.1545%;"></col></colgroup><tbody><tr style="height: 29.7969px;"><td style="height: 29.7969px;">**Item Code**</td><td style="height: 29.7969px;">Item code of the item</td></tr><tr style="height: 29.7969px;"><td style="height: 29.7969px;">**Item Description**</td><td style="height: 29.7969px;">Item description (this will not update the item description</td></tr><tr style="height: 57.7812px;"><td style="height: 57.7812px;">**Endophyte Code**</td><td style="height: 57.7812px;">The code of the Fact

Can be entered a single code or multiple code with separator

</td></tr><tr style="height: 29.7969px;"><td style="height: 29.7969px;">**Predicted**</td><td style="height: 29.7969px;">indicated with a 1 for tick on (Yes) or 0 No</td></tr><tr style="height: 29.7969px;"><td style="height: 29.7969px;">**Fact**</td><td style="height: 29.7969px;">indicated with a 1 for tick on (Yes) or 0 No  
</td></tr><tr style="height: 29.7969px;"><td style="height: 29.7969px;">**Value**</td><td style="height: 29.7969px;">Enter a value</td></tr><tr><td>**Percentage**</td><td>Enter as a value and not as a percentage</td></tr><tr><td>**Comment**</td><td>Enter a comment</td></tr></tbody></table>

---

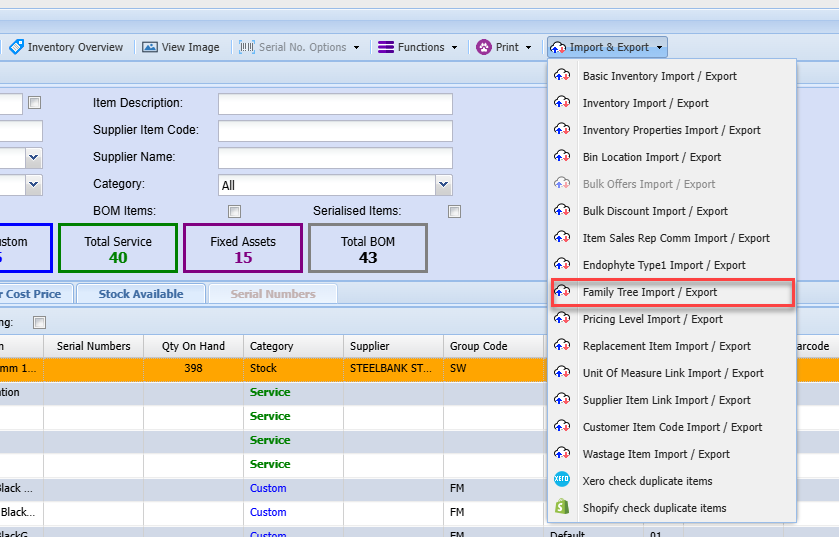
#### <span lang="EN-US" style="mso-ansi-language: EN-US;">Family Tree Import/Export</span>

This button allows for a user to import or export the family tree details

[![image.png](https://hugeerp10.co.za/hsofmanual/uploads/images/gallery/2024-09/scaled-1680-/ug1image.png)](https://hugeerp10.co.za/hsofmanual/uploads/images/gallery/2024-09/ug1image.png)
---

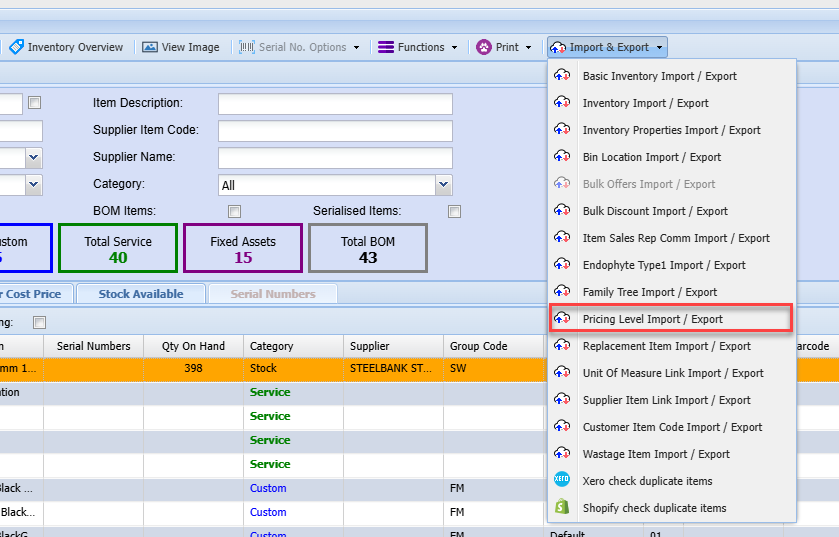
#### <span lang="EN-US" style="mso-ansi-language: EN-US;">Pricing Level Import/ Export</span>

<span class="ts15">Inventory &gt; Configuration&gt; Inventory Setup</span><span class="ts15">&gt; Print</span>

<span class="ts0">This function is used to export the </span><span class="ts0">pricing level </span><span class="ts0">information out the system</span>

[![image.png](https://hugeerp10.co.za/hsofmanual/uploads/images/gallery/2024-09/scaled-1680-/hQJimage.png)](https://hugeerp10.co.za/hsofmanual/uploads/images/gallery/2024-09/hQJimage.png)

---

#### <span lang="EN-US" style="mso-ansi-language: EN-US;">Replacement Item Import/ Export</span>

<span class="ts0">This function is used to import and export the replacement item</span><span class="ts0"> </span><span class="ts0">information out of the system</span>

[![image.png](https://hugeerp10.co.za/hsofmanual/uploads/images/gallery/2024-09/scaled-1680-/aOCimage.png)](https://hugeerp10.co.za/hsofmanual/uploads/images/gallery/2024-09/aOCimage.png)

---

#### <span lang="EN-US" style="mso-ansi-language: EN-US;">Unit of Measure Link Import/ Export</span>

<span class="ts0">This function is used to import and export the unit of measure</span><span class="ts0"> </span><span class="ts0">information out of the system</span>

[![image.png](https://hugeerp10.co.za/hsofmanual/uploads/images/gallery/2024-09/scaled-1680-/w8Jimage.png)](https://hugeerp10.co.za/hsofmanual/uploads/images/gallery/2024-09/w8Jimage.png)

---

#### <span lang="EN-US" style="mso-ansi-language: EN-US;">Supplier Item Link Import/ Export</span>

<span class="ts0">This function is used to import and export the supplier item link</span><span class="ts0"> </span><span class="ts0">information out of the system</span>

[![image.png](https://hugeerp10.co.za/hsofmanual/uploads/images/gallery/2024-09/scaled-1680-/Rskimage.png)](https://hugeerp10.co.za/hsofmanual/uploads/images/gallery/2024-09/Rskimage.png)

---

#### <span lang="EN-US" style="mso-ansi-language: EN-US;">Customer Item Code Import/ Export</span>

<span lang="EN-US" style="mso-ansi-language: EN-US;"><span class="ts0">This function is used to import and export the customer item code </span><span class="ts0">information out of the system</span></span>

---

#### <span lang="EN-US" style="mso-ansi-language: EN-US;">Wastage Item Import/ Export</span>

<span lang="EN-US" style="mso-ansi-language: EN-US;"><span class="ts0">This function is used to import and export the wastage item </span><span class="ts0">information out of the system</span></span>

[![image.png](https://hugeerp10.co.za/hsofmanual/uploads/images/gallery/2024-09/scaled-1680-/v7Gimage.png)](https://hugeerp10.co.za/hsofmanual/uploads/images/gallery/2024-09/v7Gimage.png)

---

#### Xero Check duplicate items  


<span lang="EN-US" style="mso-ansi-language: EN-US;"><span class="ts0">This function allows a user to check duplicate items on Xero</span></span>

<span lang="EN-US" style="mso-ansi-language: EN-US;"><span class="ts0">This only you have Xero integration</span></span>

[![image.png](https://hugeerp10.co.za/hsofmanual/uploads/images/gallery/2024-09/scaled-1680-/8uWimage.png)](https://hugeerp10.co.za/hsofmanual/uploads/images/gallery/2024-09/8uWimage.png)

---

#### <span lang="EN-US" style="mso-ansi-language: EN-US;">Shopify Check duplicate items</span>

<span lang="EN-US" style="mso-ansi-language: EN-US;"><span class="ts0">This will enable you to check any duplicated items on Shopify</span></span>

<span lang="EN-US" style="mso-ansi-language: EN-US;"><span class="ts0">This will only work if you have an integration with Shopify</span></span>

[![image.png](https://hugeerp10.co.za/hsofmanual/uploads/images/gallery/2024-09/scaled-1680-/005image.png)](https://hugeerp10.co.za/hsofmanual/uploads/images/gallery/2024-09/005image.png)

# Inventory Stop Item

<span class="ts0">Enable this setting so that you stop a user from promoting the stock item to the next level.</span>

<span class="ts0">Example: Quotes to Job Costing</span>

<span class="ts0">This will stop the user from promoting the document up to a job or invoice when using this item.</span>

<span class="ts0">Can be that the item is good for quoting but not for invoice.</span>

[![image.png](https://hugeerp10.co.za/hsofmanual/uploads/images/gallery/2024-12/scaled-1680-/UKKimage.png)](https://hugeerp10.co.za/hsofmanual/uploads/images/gallery/2024-12/UKKimage.png)

<span class="ts0">This will not allow you to proceed to the next stage if you try to approve to</span>

<table border="1" id="bkmrk-1-approve-to-sales-o" style="border-collapse: collapse; width: 28.8889%;"><colgroup><col style="width: 14.5578%;"></col><col style="width: 85.3565%;"></col></colgroup><tbody><tr><td>1</td><td><span class="ts0">Approve to Sales Order</span></td></tr><tr><td>2</td><td><span class="ts0">Approve to Invoice</span></td></tr><tr><td>3</td><td><span class="ts0">Approve to Job</span></td></tr></tbody></table>

[![image.png](https://hugeerp10.co.za/hsofmanual/uploads/images/gallery/2024-12/scaled-1680-/yn6image.png)](https://hugeerp10.co.za/hsofmanual/uploads/images/gallery/2024-12/yn6image.png)

<span class="ts0">Warning message will come up to tell you which items have a Stop line against them</span>

[![image.png](https://hugeerp10.co.za/hsofmanual/uploads/images/gallery/2024-12/scaled-1680-/sEIimage.png)](https://hugeerp10.co.za/hsofmanual/uploads/images/gallery/2024-12/sEIimage.png)

# Print Tab IM

[![image.png](https://hugeerp10.co.za/hsofmanual/uploads/images/gallery/2024-12/scaled-1680-/dmkimage.png)](https://hugeerp10.co.za/hsofmanual/uploads/images/gallery/2024-12/dmkimage.png)
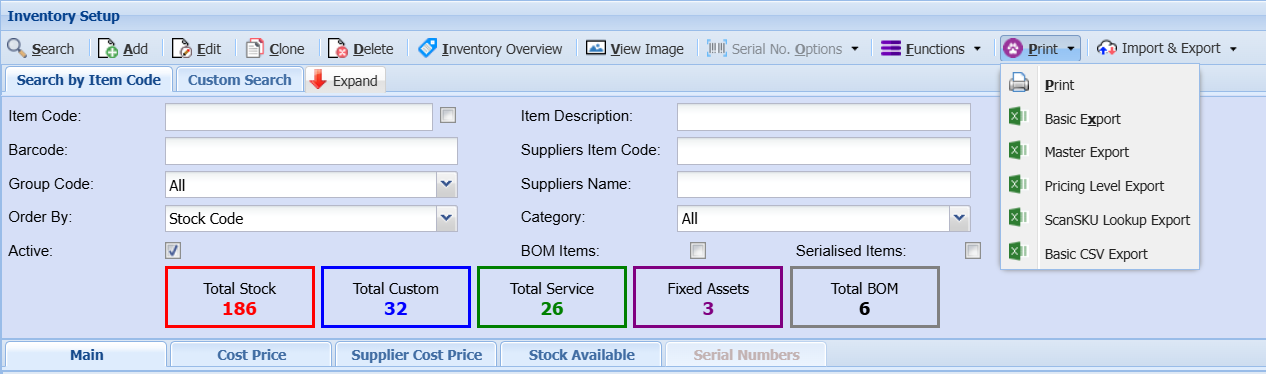
# Bar Coding Setup

**<span class="ts15">Inventory Module</span>**

<span class="ts6">Under Inventory setup, the best way to have bar codes is by numbers and can stick to nine-digit numbers sort of length. If the digit is three to six numbers, then the bar code is very small and sometimes the scan does not pick it up.</span>

<span class="ts6">If a person wants to run a number in the system, he/she can just number item from 1001 all the way or what you currently got.</span>

<span class="ts6">If he/she wants to add new items afterwards there are new updates and hot fixes.</span>

<span class="ts6">From System Configuration Module – Administration – Reference Value – Inventory</span>

<span class="ts6">tab, hot fix will have a new box under the bill of material which is going to allow a person to put a tick on there with a number so when creating a new inventory item, it will automatically take the next number in the system. Back to Inventory Setup, amend Inventory items code to a number system.</span>

<table border="1" id="bkmrk-scm-general-user-set" style="border-collapse: collapse; width: 100%;"><colgroup><col style="width: 13.1005%;"></col><col style="width: 86.8748%;"></col></colgroup><tbody><tr><td><span class="ts6">SCM General</span></td><td><span class="ts6">User setup there are two types of users. The first one is the Login ID specific for the user to log onto the system; the second user code should also be bar coded. Only users log into the system not the employees. Employees do not log onto the system but can be logged to jobs.</span></td></tr></tbody></table>

<span class="ts6">Under user code there should be a bar code, and it can be changed from nine digits to seven or eight as long as they are different from the inventory codes. When doing</span>

<span class="ts6">the codes one should avoid the zeros “0001” because they are very bad. The system can handle the zeros but excel dumps them rather be a number like “1000” in front of the zeros.</span>

<span class="ts6">For a user that is both an employee and a user, there should be no tick under user details tab on the right-hand side that reads “employee only” because the system will no longer recognize the user of the system but an employee only if the tick is there. However, the system will automatically pick up both user and the employee as an employee on the list, the only difference is that the user logs into the system other</span>

<span class="ts6">than that they are both picked up as employees.</span>

<span class="ts6">Job Costing – Configuration – Employees setup – search and amend one, a person can’t see the user login but an employee’s code which need to be put in as a bar code. On the bar code scanner there’s software that needs to be loaded and one can progress that bar code scanner to ask for specific things, then download the files to a specific location which need to setup and create tax files based on that particular thing. It should also capture the date and the time in that bar code once it’s done.</span>

<span class="ts6">Badger under Activity menu.</span>

<table border="1" id="bkmrk-service-badger-used-" style="border-collapse: collapse; width: 100%;"><colgroup><col style="width: 14.2132%;"></col><col style="width: 85.7621%;"></col></colgroup><tbody><tr><td><span class="ts6">Service Badger</span></td><td><span class="ts6">Used to capture time against job and import the time sheet</span></td></tr><tr><td><span class="ts6">Stock Badger</span></td><td><span class="ts6">It’s relevant to people taking stock out from the bar code system also control stock going out of the warehouse onto a particular job.</span></td></tr></tbody></table>

<span class="ts6">When import it the system will automatically move the stock from on shelf onto the particular job. The system will manage it straight from the import and also generate a picking slip. With Bar code scanner a person scans the items and type the quantity and import that for stock take as well.</span>

# Inventory Build Kit Setup

<span class="ts10">Video training manual 2019 - </span>[Click Here](https://vimeo.com/375561237)

<span class="ts11">Inventory &gt; Configuration &gt; Inventory Setup</span>

<span class="ts0">When setting up a build kit, this is like a bill of materials, but it's different as it does not combine all the items into one manufactured product.</span>

<span class="ts0">It helps you create a kit which is made up of individual items, which when sold can be viewed to the customer as a one item but multiple items coming out of your stock.</span>

<span class="ts0">We make use of the bill of materials module, a stock item and a custom item.</span>

<span class="ts0">Create a custom item and link this to a bill of materials recipe.</span>

<span class="ts0">You will need to put the tick on for build kit in order to activate it.</span>

<span class="ts0">select the Bill of materials item and recipe that you want as a default.</span>

<span class="ts0">there are 2 other ticks on the setup.</span>

<table border="1" id="bkmrk-1-update-quantity-ti" style="border-collapse: collapse; width: 100%;"><colgroup><col style="width: 4.33063%;"></col><col style="width: 95.6447%;"></col></colgroup><tbody><tr><td>1</td><td><span class="ts0">Update quantity tick box - when ticked this will update the quantity on the custom item to match the number of bill of materials you are making.</span></td></tr><tr><td>2</td><td><span class="ts0">Use kit parent group - this is used to process the general Ledger accounts of the custom item. If the tick is off each item will process to its own sales and cost of sales accounts. Put the tick on means you group everything together to put it into one sales account.</span></td></tr></tbody></table>

# Inventory cost price rules

Inventory cost price rules

Cost prices on inventory items can only be changed via a document journal if the item has transactions.

A cost price on an inventory item can be changed if the item has had NO transactions.

If the cost price was entered incorrectly in the setup, one can change the cost price in various ways:

1. Manually change the price (only if no transactions on item)
2. If you are creating a GRV to bring stock in, the GRV price will override the setup price.
3. Clone the item and delete the old item (remember to change the existing code before cloning)

Cost prices are very important when importing new stock for opening balances as this will take the cost price inserted at setup.

---

#### Manually change cost price

[![image.png](https://hugeerp10.co.za/hsofmanual/uploads/images/gallery/2024-12/scaled-1680-/O34image.png)](https://hugeerp10.co.za/hsofmanual/uploads/images/gallery/2024-12/O34image.png)
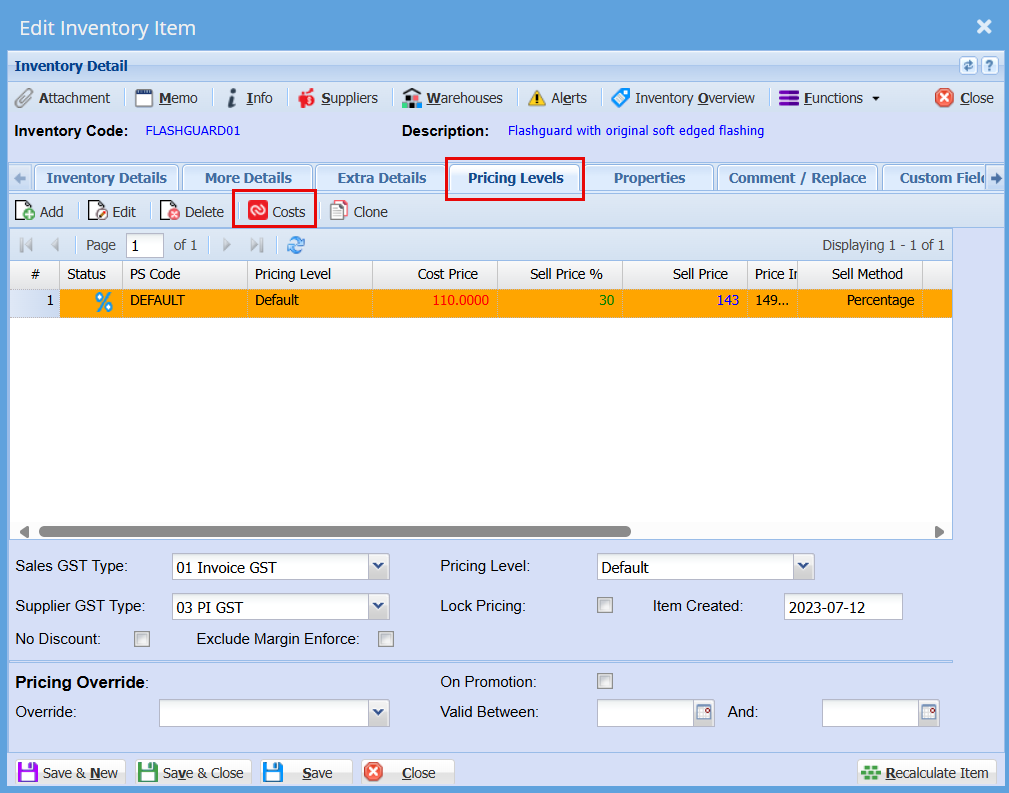
The Update Stock cost button will be active IF the stock item has had no transactions.

The button will be greyed out if there are transactions. In this instance, you can only change the cost price of an item via a Stock Value Adjustment.

[![image.png](https://hugeerp10.co.za/hsofmanual/uploads/images/gallery/2023-10/scaled-1680-/EXGimage.png)](https://hugeerp10.co.za/hsofmanual/uploads/images/gallery/2023-10/EXGimage.png)
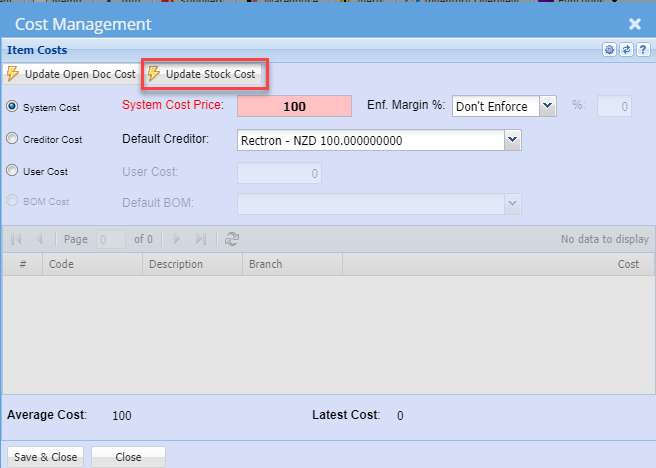
Enter your new cost price

[![image.png](https://hugeerp10.co.za/hsofmanual/uploads/images/gallery/2023-10/scaled-1680-/HpLimage.png)](https://hugeerp10.co.za/hsofmanual/uploads/images/gallery/2023-10/HpLimage.png)
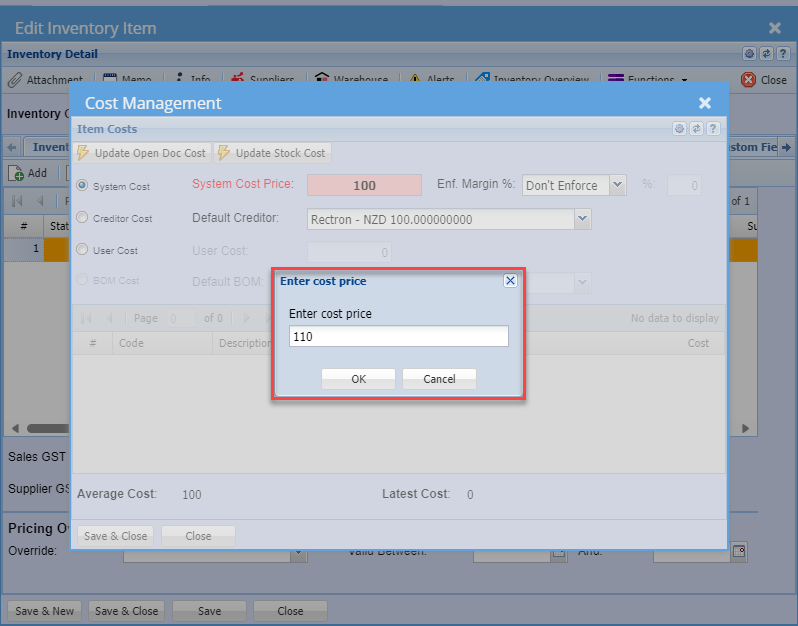
# Warehouse Locations Active

Warehouse location is activated per warehouse per item

Locations activate is a new license module

Tabs for Locations and Boxes are dependent on whether the warehouse is activated for that warehouse.

Locations and Boxes are only searches to tell you how much stock is in each location or box

Batch tab is activated at the item setup near the serial number activation

Batch tab is a search only to show what batch stock is in the system

[![image.png](https://hugeerp10.co.za/hsofmanual/uploads/images/gallery/2024-07/scaled-1680-/F5Eimage.png)](https://hugeerp10.co.za/hsofmanual/uploads/images/gallery/2024-07/F5Eimage.png)
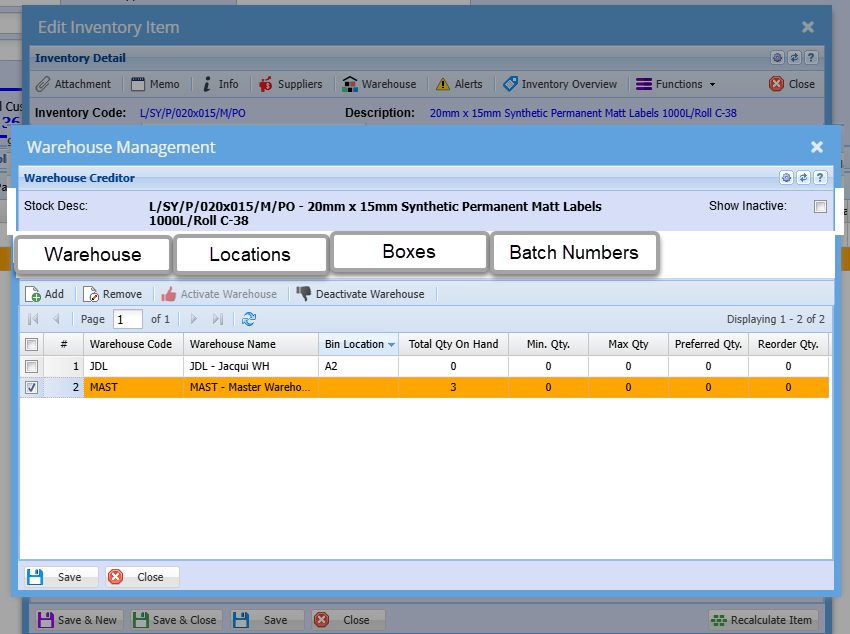
<table border="1" id="bkmrk-search-button-search" style="border-collapse: collapse; width: 100%;"><colgroup><col style="width: 24.5062%;"></col><col style="width: 75.6174%;"></col></colgroup><tbody><tr><td>**Search button**</td><td>Searches in different tabs</td></tr><tr><td>**Add**</td><td>Adds new warehouses only</td></tr><tr><td>**Edit**</td><td>Edits a warehouse to edit Min Max Quantities

Activates Locations

</td></tr></tbody></table>

---

Edit warehouse

[![image.png](https://hugeerp10.co.za/hsofmanual/uploads/images/gallery/2023-11/scaled-1680-/E1Uimage.png)](https://hugeerp10.co.za/hsofmanual/uploads/images/gallery/2023-11/E1Uimage.png)

---

Location link

[![image.png](https://hugeerp10.co.za/hsofmanual/uploads/images/gallery/2024-07/scaled-1680-/ZOLimage.png)](https://hugeerp10.co.za/hsofmanual/uploads/images/gallery/2024-07/ZOLimage.png)
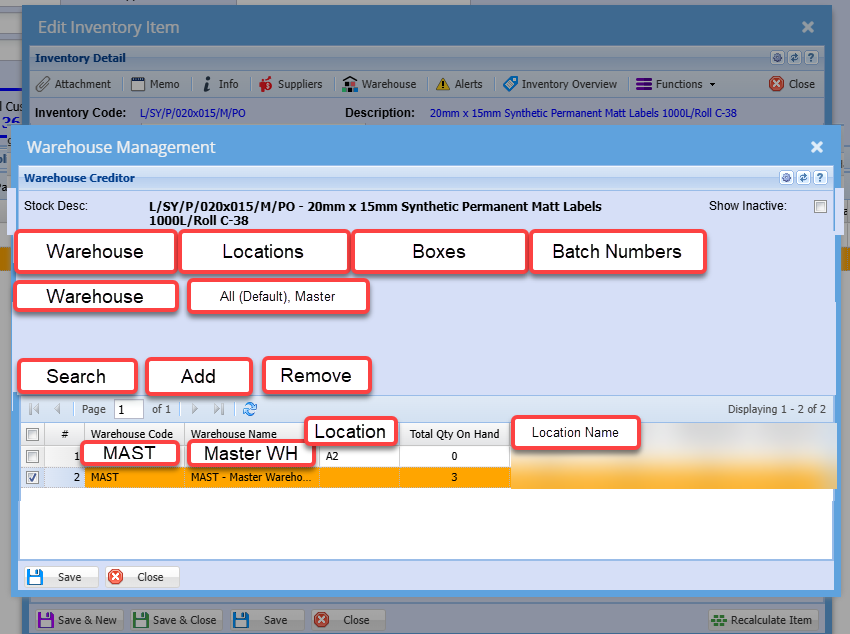
---

Batch Tracking active

Batch Tracking is a new license module

This will activate the item to be batch tracked

<p class="callout warning">A stock item is either a serial number or batch number but NOT both</p>

[![image.png](https://hugeerp10.co.za/hsofmanual/uploads/images/gallery/2023-11/scaled-1680-/IA5image.png)](https://hugeerp10.co.za/hsofmanual/uploads/images/gallery/2023-11/IA5image.png)

When an item is activated for batch tracking, a button next to the warehouse will become active to view which batches are to be sold

[![image.png](https://hugeerp10.co.za/hsofmanual/uploads/images/gallery/2023-11/scaled-1680-/l7pimage.png)](https://hugeerp10.co.za/hsofmanual/uploads/images/gallery/2023-11/l7pimage.png)
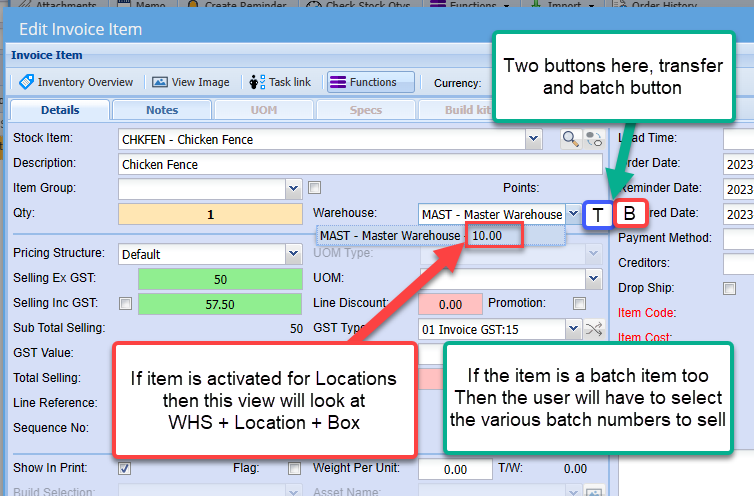
# Group List

Group lists are used with Custom and Service Type items.

When an item is activated with Group list, it will replace the selected item with a list of multiple items in the document.

It uses the same item code, but replaces the description, cost and sell.

There is a setting that one can include the scanned item as part of the list.

[![image.png](https://hugeerp10.co.za/hsofmanual/uploads/images/gallery/2023-11/scaled-1680-/dlmimage.png)](https://hugeerp10.co.za/hsofmanual/uploads/images/gallery/2023-11/dlmimage.png)
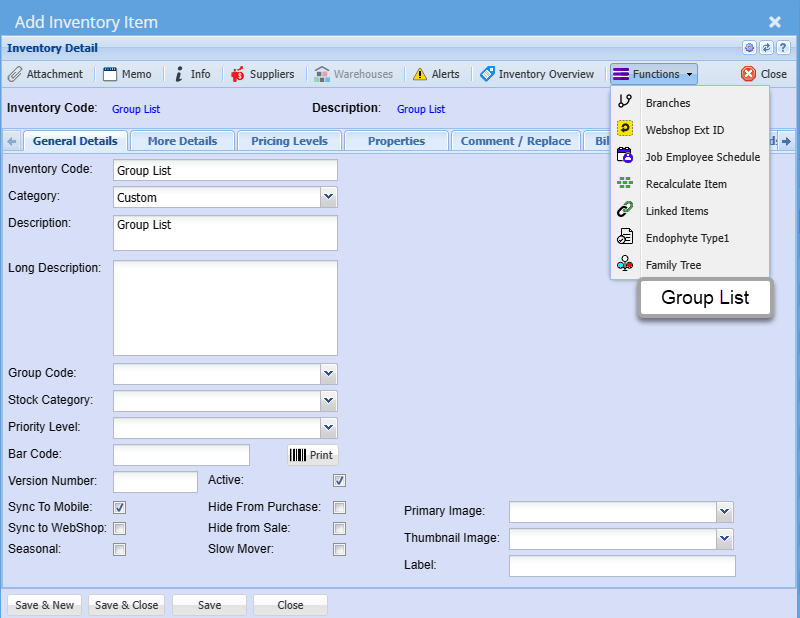
---

Group List setup

Setup the list of items to populate the document lines

[![image.png](https://hugeerp10.co.za/hsofmanual/uploads/images/gallery/2023-11/scaled-1680-/MmDimage.png)](https://hugeerp10.co.za/hsofmanual/uploads/images/gallery/2023-11/MmDimage.png)
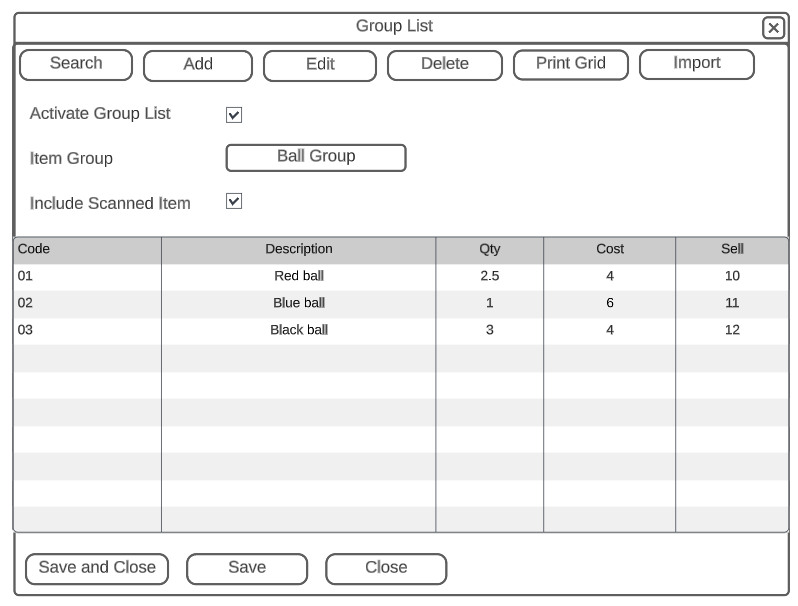
<table border="1" id="bkmrk-activate-group-list-" style="border-collapse: collapse; width: 100%;"><colgroup><col style="width: 27.8396%;"></col><col style="width: 72.284%;"></col></colgroup><tbody><tr><td>Activate Group List</td><td>Activates this option to be used when adding lines to Invoice and credit note</td></tr><tr><td>Item Group</td><td>Populates each line of the group list with the item group </td></tr><tr><td>Include Scanned Item Group</td><td>When activated, the scanned item will be part of the list in the document</td></tr></tbody></table>

<table border="1" id="bkmrk-code-sequence-in-whi" style="border-collapse: collapse; width: 100%;"><colgroup><col style="width: 18.7038%;"></col><col style="width: 81.4198%;"></col></colgroup><tbody><tr><td>**Code**</td><td>Sequence in which items is inserted on the document</td></tr><tr><td>**Description**</td><td>The description used to override the description when adding to the document</td></tr><tr><td>**Qty**</td><td>Select the quantity to insert</td></tr><tr><td>**Cost**</td><td>Insert a cost</td></tr><tr><td>**Sell**</td><td>Put in a sell price</td></tr></tbody></table>

---

Add Items

[![image.png](https://hugeerp10.co.za/hsofmanual/uploads/images/gallery/2023-11/scaled-1680-/EL4image.png)](https://hugeerp10.co.za/hsofmanual/uploads/images/gallery/2023-11/EL4image.png)

---

Document view

Invoice example of adding an item that has group list activated

[![image.png](https://hugeerp10.co.za/hsofmanual/uploads/images/gallery/2023-11/scaled-1680-/1Xoimage.png)](https://hugeerp10.co.za/hsofmanual/uploads/images/gallery/2023-11/1Xoimage.png)
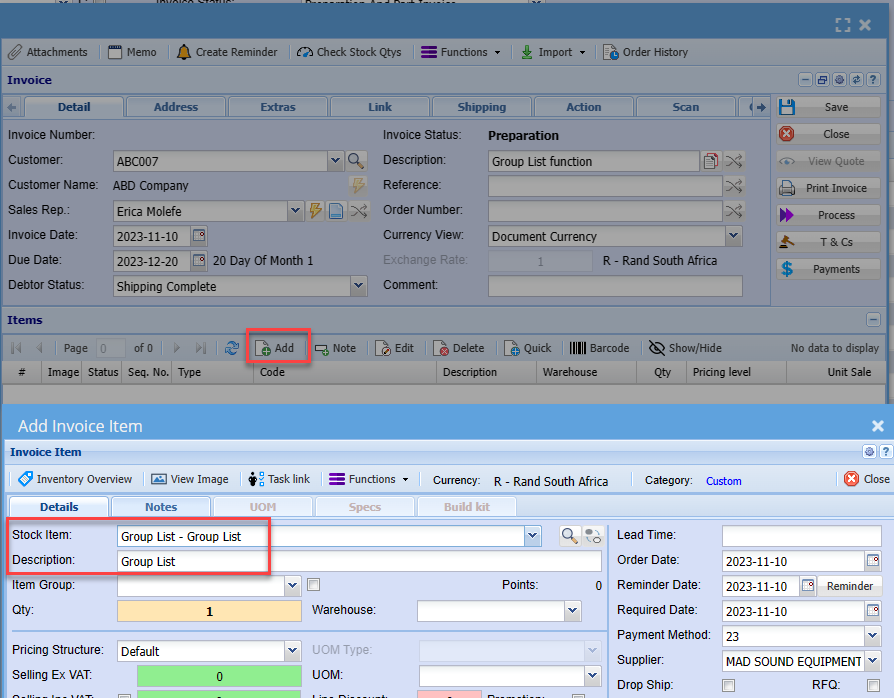
After the item is selected and saved to the invoice.

The invoice will fetch the group list and populate invoice with all three lines with the same code

[![image.png](https://hugeerp10.co.za/hsofmanual/uploads/images/gallery/2023-11/scaled-1680-/NjYimage.png)](https://hugeerp10.co.za/hsofmanual/uploads/images/gallery/2023-11/NjYimage.png)
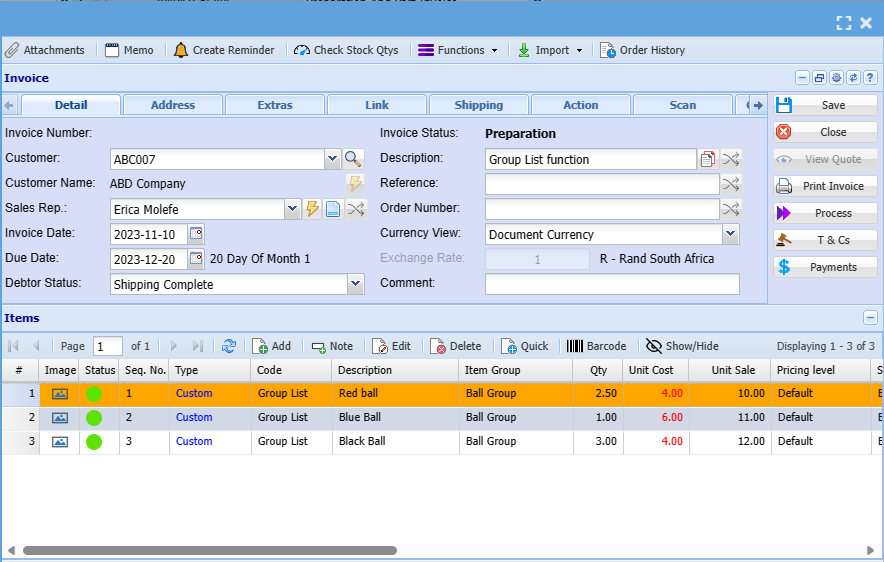
If the option for Include Scanned item is activated, then this item will be part of the item list

[![image.png](https://hugeerp10.co.za/hsofmanual/uploads/images/gallery/2023-11/scaled-1680-/tBDimage.png)](https://hugeerp10.co.za/hsofmanual/uploads/images/gallery/2023-11/tBDimage.png)
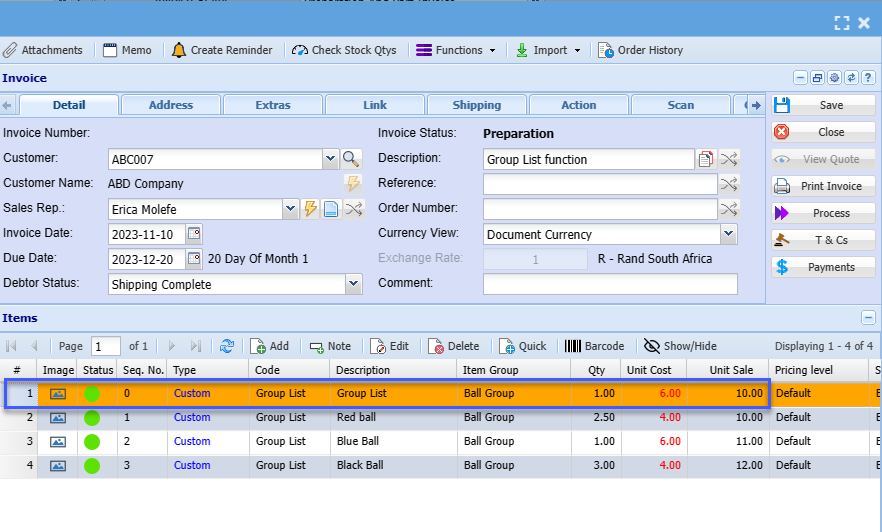
# Inventory Functions Drop Down

#### <span style="color: rgb(0, 0, 0);">Branches</span>

[![image.png](https://hugeerp10.co.za/hsofmanual/uploads/images/gallery/2024-10/scaled-1680-/fuIimage.png)](https://hugeerp10.co.za/hsofmanual/uploads/images/gallery/2024-10/fuIimage.png)

---

#### <span style="color: rgb(0, 0, 0);">Webshop Ext ID</span>

[![image.png](https://hugeerp10.co.za/hsofmanual/uploads/images/gallery/2024-10/scaled-1680-/Zqyimage.png)](https://hugeerp10.co.za/hsofmanual/uploads/images/gallery/2024-10/Zqyimage.png)

---

#### <span style="color: rgb(0, 0, 0);">Job Employee Schedule</span>

[![image.png](https://hugeerp10.co.za/hsofmanual/uploads/images/gallery/2024-10/scaled-1680-/gYHimage.png)](https://hugeerp10.co.za/hsofmanual/uploads/images/gallery/2024-10/gYHimage.png)

---

#### <span style="color: rgb(0, 0, 0);">Linked Items</span>

<span style="color: rgb(0, 0, 0);"><span style="color: rgb(45, 194, 107);">**Inventory Module&gt; Configuration&gt; Inventory Setup&gt; Properties Tab**</span></span>

The primary functionality of this feature is to establish links between items.

You can connect related items, creating a web of relationships within the system.

This is particularly beneficial when dealing with interconnected stock items that require a hierarchy stracture

To do this you need to go to inventory item setup, and select an item you want to link items to.

Go to properties then linked items.

Select the item you want to link on the drop-down then click save. You can link as many as you want.

<span style="color: rgb(0, 0, 0);"><span style="color: rgb(45, 194, 107);">**[![image.png](https://hugeerp10.co.za/hsofmanual/uploads/images/gallery/2024-01/scaled-1680-/YAwimage.png)](https://hugeerp10.co.za/hsofmanual/uploads/images/gallery/2024-01/YAwimage.png)**</span></span>

To utilize the Linked Items Hierarchy feature, follow these steps:

1. Navigate to the "Functions" drop down menu.
2. Select "Linked Items" from the drop down.

This will lead you to the dedicated section where you can view the linked items and the hierarchical relationships between them.

<span style="color: rgb(45, 194, 107);">**[![image.png](https://hugeerp10.co.za/hsofmanual/uploads/images/gallery/2024-01/scaled-1680-/pt9image.png)](https://hugeerp10.co.za/hsofmanual/uploads/images/gallery/2024-01/pt9image.png)**</span>

[![image.png](https://hugeerp10.co.za/hsofmanual/uploads/images/gallery/2024-01/scaled-1680-/Mytimage.png)](https://hugeerp10.co.za/hsofmanual/uploads/images/gallery/2024-01/Mytimage.png)

---

#### Endophyte Type1

This feature allows you to easily modify and tailor fact lists based on their specific needs.

To add facts to fact groups:

Go to <span style="color: rgb(45, 194, 107);">**Inventory Module&gt; Configuration&gt; Endophyte Type 1**</span>

- Click, Add to create a new fact entry
- Create a fact list
- Save the information.

[![image.png](https://hugeerp10.co.za/hsofmanual/uploads/images/gallery/2024-01/scaled-1680-/cPmimage.png)](https://hugeerp10.co.za/hsofmanual/uploads/images/gallery/2024-01/cPmimage.png)
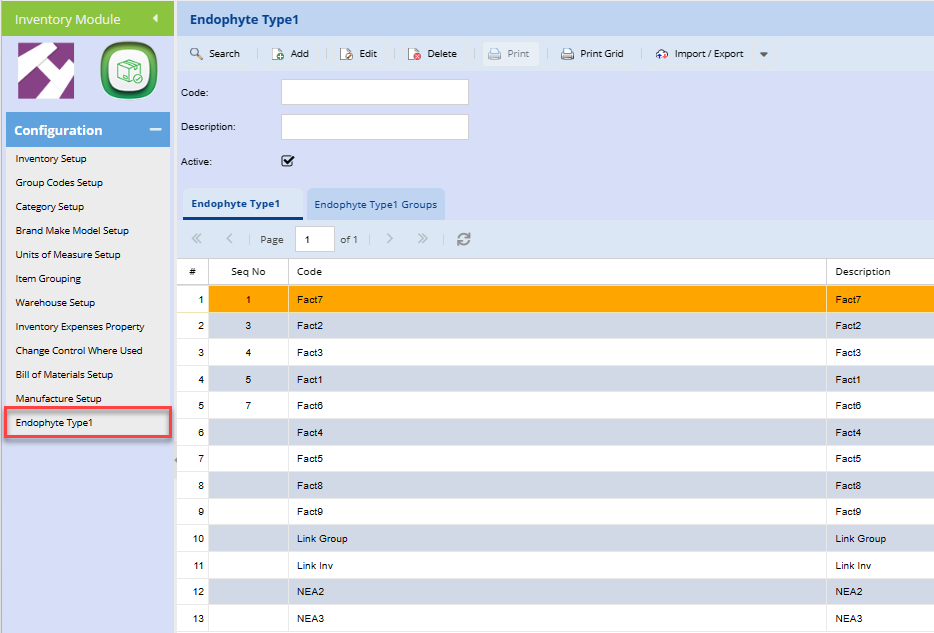
To access the Endophyte Type1/ Fact list

Go to

1. Inventory Module
2. Configuration
3. Edit the Inventory Item you want to add the Endophyte Type1 to
4. Functions drop down
5. Select Endophyte Type 1 from the drop down.

[![image.png](https://hugeerp10.co.za/hsofmanual/uploads/images/gallery/2024-01/scaled-1680-/bPBimage.png)](https://hugeerp10.co.za/hsofmanual/uploads/images/gallery/2024-01/bPBimage.png)
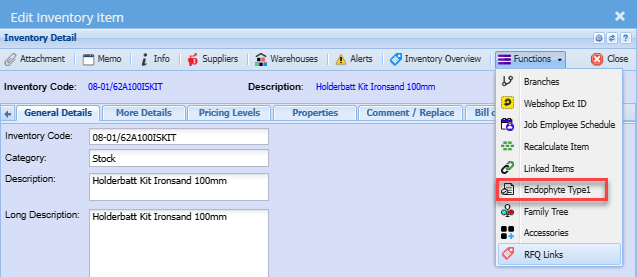
The system processes the information and dynamically categorizes it under Predicted and Facts.

Access the details to view short information about the marked facts.

[![image.png](https://hugeerp10.co.za/hsofmanual/uploads/images/gallery/2024-01/scaled-1680-/D0aimage.png)](https://hugeerp10.co.za/hsofmanual/uploads/images/gallery/2024-01/D0aimage.png)

---

#### Family Tree

Family tree allows you to create and manage relationships among different items.

<span style="color: rgb(45, 194, 107);">**Inventory Module &gt; Configuration&gt; Item Setup&gt; Edit Inventory Item&gt;Functions Drop Down&gt; Family Tree**</span>

[![image.png](https://hugeerp10.co.za/hsofmanual/uploads/images/gallery/2024-01/scaled-1680-/MH4image.png)](https://hugeerp10.co.za/hsofmanual/uploads/images/gallery/2024-01/MH4image.png)

When creating a family tree item, you have the option to specify whether it is male or female. This is crucial for biology.

The family tree structure allows you to create multiple levels of relationships.

[![image.png](https://hugeerp10.co.za/hsofmanual/uploads/images/gallery/2024-01/scaled-1680-/zAdimage.png)](https://hugeerp10.co.za/hsofmanual/uploads/images/gallery/2024-01/zAdimage.png)
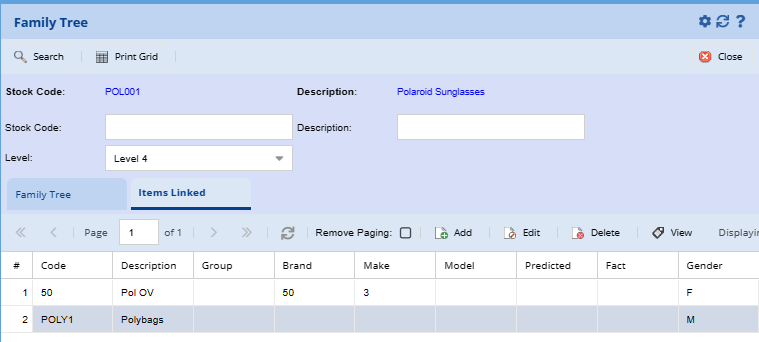
---

#### Accessories

You can now activate accessories and Bulk offer

You can also manage accessories from this screen

You can also import or export accessories from this screen

[![image.png](https://hugeerp10.co.za/hsofmanual/uploads/images/gallery/2024-09/scaled-1680-/CUEimage.png)](https://hugeerp10.co.za/hsofmanual/uploads/images/gallery/2024-09/CUEimage.png)
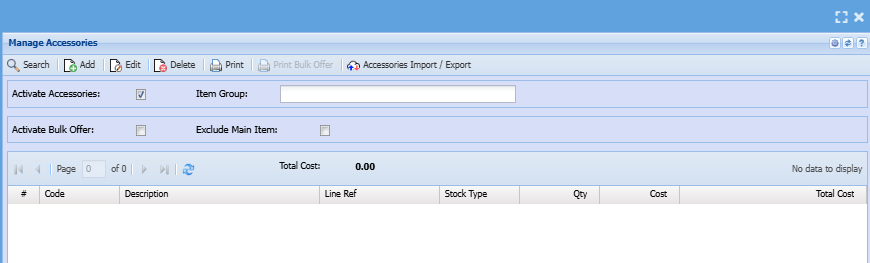
[![image.png](https://hugeerp10.co.za/hsofmanual/uploads/images/gallery/2024-10/scaled-1680-/7Xaimage.png)](https://hugeerp10.co.za/hsofmanual/uploads/images/gallery/2024-10/7Xaimage.png)
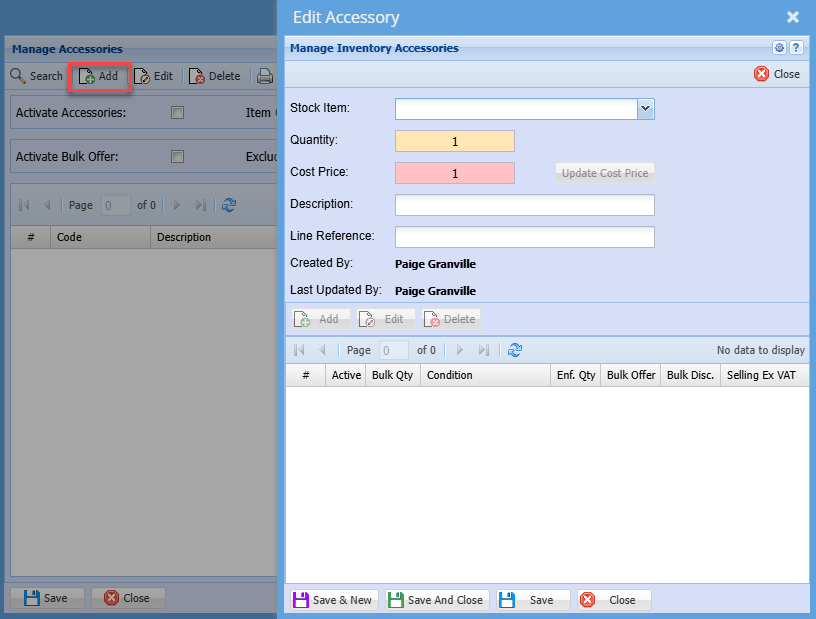
---

#### RFQ Links

RFQ stands for Request for Quotes.

You can now search for RFQs under an item.

Instead of the person having to look for the RFQ separately, when they are viewing the item, they can see all the RFQs that were sent to the suppliers

[![image.png](https://hugeerp10.co.za/hsofmanual/uploads/images/gallery/2024-09/scaled-1680-/Cprimage.png)](https://hugeerp10.co.za/hsofmanual/uploads/images/gallery/2024-09/Cprimage.png)
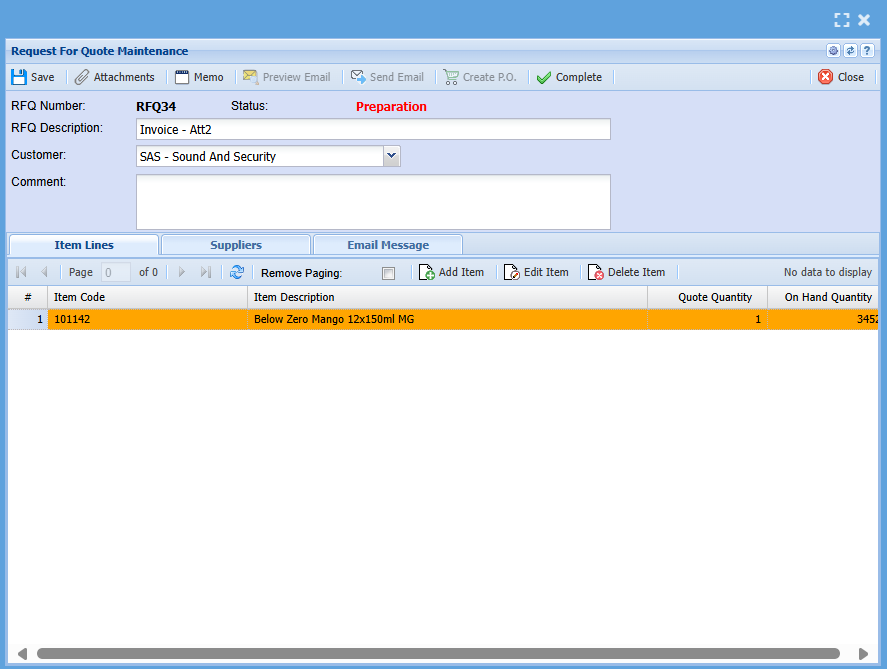
---

#### Customer Item Codes 

This function is used by a customer who orders stock from you and on-sells it to their customers

Therefore, the customer would request to use their own code for a specific item

So the customer item codes are the item codes that the client uses to sell to their customers

[![image.png](https://hugeerp10.co.za/hsofmanual/uploads/images/gallery/2024-09/scaled-1680-/doiimage.png)](https://hugeerp10.co.za/hsofmanual/uploads/images/gallery/2024-09/doiimage.png)
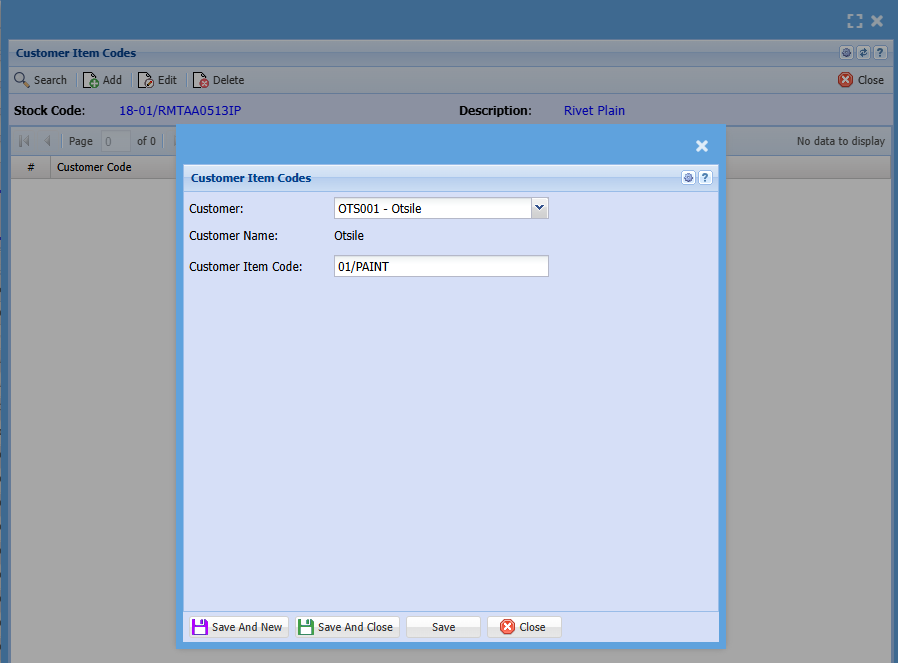
You can add multiple customer codes to one item

[![image.png](https://hugeerp10.co.za/hsofmanual/uploads/images/gallery/2024-09/scaled-1680-/cKvimage.png)](https://hugeerp10.co.za/hsofmanual/uploads/images/gallery/2024-09/cKvimage.png)
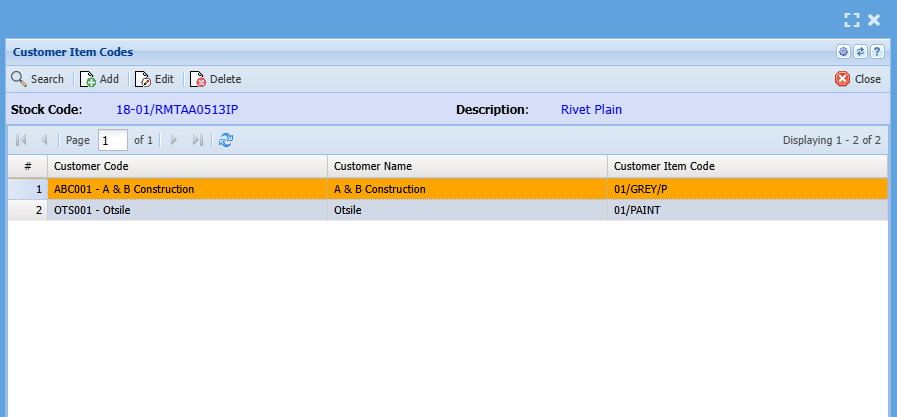
When printing an invoice use a fixed layout and it will display both your code and the customer's code

This will allow the customer to match the codes on their side

---

#### Bill of Materials

<span lang="EN-US" style="mso-ansi-language: EN-US;">A Build kit is essentially a bill of material (BOM) that can be edited on the fly when added to transactions.</span>

<span lang="EN-US" style="mso-ansi-language: EN-US;">The build kit has 3 components to it:</span>

1. <span lang="EN-US" style="mso-ansi-language: EN-US;">A stock item, which is a BOM item</span>
2. A Bill of Material Recipe
3. A Custom item which is the build

##### Setting Up BOM Item

<span style="color: rgb(45, 194, 107);">**<span lang="EN-US" style="mso-ansi-language: EN-US;">Go to Inventory Module&gt; Configuration&gt; Inventory Setup</span>**</span>

[![image.png](https://hugeerp10.co.za/hsofmanual/uploads/images/gallery/2024-08/scaled-1680-/Bf6image.png)](https://hugeerp10.co.za/hsofmanual/uploads/images/gallery/2024-08/Bf6image.png)

<span lang="EN-US" style="mso-ansi-language: EN-US;">Click Add</span>

<span lang="EN-US" style="mso-ansi-language: EN-US;">Enter an Item code</span>

<span lang="EN-US" style="mso-ansi-language: EN-US;">Enter a Description</span>

[![image.png](https://hugeerp10.co.za/hsofmanual/uploads/images/gallery/2024-08/scaled-1680-/WMUimage.png)](https://hugeerp10.co.za/hsofmanual/uploads/images/gallery/2024-08/WMUimage.png)

<span lang="EN-US" style="mso-ansi-language: EN-US;">If you use group codes, for categorization and sales mapping, select the respective group code.</span>

<span lang="EN-US" style="mso-ansi-language: EN-US;">Since this is a Bill of Material (BOM) item that you, merely setting up for the Build recipe, and you are not going to be purchasing this item, you can tick the Hide from Purchases Box</span>

<span lang="EN-US" style="mso-ansi-language: EN-US;">Also, if most of your builds are customized and the standard BOM item is likely not to be sold then you can tick the Hide from Sales Box</span>

[![image.png](https://hugeerp10.co.za/hsofmanual/uploads/images/gallery/2024-08/scaled-1680-/Jpjimage.png)](https://hugeerp10.co.za/hsofmanual/uploads/images/gallery/2024-08/Jpjimage.png)

<span lang="EN-US" style="mso-ansi-language: EN-US;">Click Save</span>

<span lang="EN-US" style="mso-ansi-language: EN-US;">You will be prompted to enter a cost and selling price</span>

<span lang="EN-US" style="mso-ansi-language: EN-US;">Enter the selling price</span>

<span lang="EN-US" style="mso-ansi-language: EN-US;">You do not have to enter a cost price, since the cost price will be made up of the individual components</span>

[![image.png](https://hugeerp10.co.za/hsofmanual/uploads/images/gallery/2024-08/scaled-1680-/H1Iimage.png)](https://hugeerp10.co.za/hsofmanual/uploads/images/gallery/2024-08/H1Iimage.png)

<span style="mso-no-proof: yes;">Click the Functions drop down</span>

<span style="mso-no-proof: yes;">Select Bill of Materials</span>

<span style="font-size: 11.0pt; line-height: 107%; font-family: 'Aptos',sans-serif; mso-ascii-theme-font: minor-latin; mso-fareast-font-family: Aptos; mso-fareast-theme-font: minor-latin; mso-hansi-theme-font: minor-latin; mso-bidi-font-family: 'Times New Roman'; mso-bidi-theme-font: minor-bidi; mso-ansi-language: EN-ZA; mso-fareast-language: EN-US; mso-bidi-language: AR-SA; mso-no-proof: yes;">Tick the Bill of Material activation box </span>

[![image.png](https://hugeerp10.co.za/hsofmanual/uploads/images/gallery/2024-08/scaled-1680-/wFXimage.png)](https://hugeerp10.co.za/hsofmanual/uploads/images/gallery/2024-08/wFXimage.png)

[![image.png](https://hugeerp10.co.za/hsofmanual/uploads/images/gallery/2024-08/scaled-1680-/y24image.png)](https://hugeerp10.co.za/hsofmanual/uploads/images/gallery/2024-08/y24image.png)
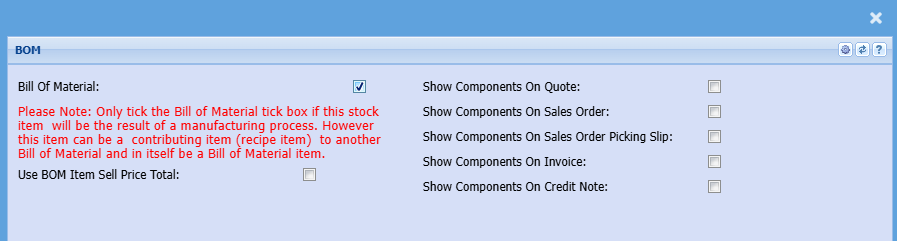
<span lang="EN-US" style="mso-ansi-language: EN-US;">This sets the item as a BOM resultant item</span>

<span lang="EN-US" style="mso-ansi-language: EN-US;">Click save and close</span>

<span lang="EN-US" style="mso-ansi-language: EN-US;">To set up the Bill of Material (BOM) recipe click [here](https://hugeerp10.co.za/hsofmanual/books/aim-configuration/page/bill-of-material-setup-add "BOM Setup")</span>

---

#### LabTests

Lab tests get populated through the lap module

**<span style="color: rgb(45, 194, 107);">Go to Inventory Module&gt; Configuration&gt; Item Setup</span>**

[![image.png](https://hugeerp10.co.za/hsofmanual/uploads/images/gallery/2024-09/scaled-1680-/Fchimage.png)](https://hugeerp10.co.za/hsofmanual/uploads/images/gallery/2024-09/Fchimage.png)

Double-click on a stock item to open

Then select the functions drop down and Lab test

The screen below will appear with nothing on the tests and sample grid

[![image.png](https://hugeerp10.co.za/hsofmanual/uploads/images/gallery/2024-09/scaled-1680-/bFuimage.png)](https://hugeerp10.co.za/hsofmanual/uploads/images/gallery/2024-09/bFuimage.png)
<table border="1" id="bkmrk-search-search-for-a-" style="border-collapse: collapse; width: 100%; height: 148px;"><colgroup><col style="width: 24.8365%;"></col><col style="width: 75.1387%;"></col></colgroup><tbody><tr style="height: 29.6px;"><td style="height: 29.6px;">**Search**</td><td style="height: 29.6px;">Search for a list of tests or samples</td></tr><tr style="height: 29.6px;"><td style="height: 29.6px;">**View Result**</td><td style="height: 29.6px;">View test and sample progress</td></tr><tr style="height: 29.6px;"><td style="height: 29.6px;">**Print Grid**</td><td style="height: 29.6px;">Print information on the grid</td></tr><tr style="height: 29.6px;"><td style="height: 29.6px;">**Tests Tab**</td><td style="height: 29.6px;">Shows lists of tests and progress</td></tr><tr style="height: 29.6px;"><td style="height: 29.6px;">**Sample Tab**</td><td style="height: 29.6px;">Shows list of samples and status</td></tr></tbody></table>

To create a test lab go to

<span style="color: rgb(45, 194, 107);">**Lab Module&gt; Activity&gt; Samples**</span>

Click on New Sample

[![image.png](https://hugeerp10.co.za/hsofmanual/uploads/images/gallery/2024-09/scaled-1680-/vLIimage.png)](https://hugeerp10.co.za/hsofmanual/uploads/images/gallery/2024-09/vLIimage.png)

Add Debtor, Description and a sample you would like to test

Once complete click Save

Then click on test Tab

After clicking on the test tab click Add

[![image.png](https://hugeerp10.co.za/hsofmanual/uploads/images/gallery/2024-09/scaled-1680-/iEAimage.png)](https://hugeerp10.co.za/hsofmanual/uploads/images/gallery/2024-09/iEAimage.png)
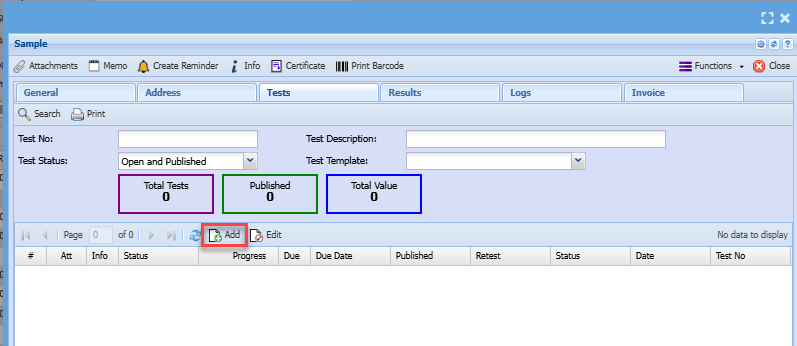
The screen below will appear select the test template from the drop down then click save

After clicking save click start to open up the greyed-out tabs

[![image.png](https://hugeerp10.co.za/hsofmanual/uploads/images/gallery/2024-09/scaled-1680-/HDJimage.png)](https://hugeerp10.co.za/hsofmanual/uploads/images/gallery/2024-09/HDJimage.png)
and when you click on the test tab you will see that the test is now running

[![image.png](https://hugeerp10.co.za/hsofmanual/uploads/images/gallery/2024-09/scaled-1680-/VtFimage.png)](https://hugeerp10.co.za/hsofmanual/uploads/images/gallery/2024-09/VtFimage.png)
Once complete you can return to the lab test screen under the inventory module to see your test list

Go back to the functions and click on the lab test you will see under a test tab that one test has been created

<p class="callout info">You can have multiple tests of the same stock item</p>

[![image.png](https://hugeerp10.co.za/hsofmanual/uploads/images/gallery/2024-09/scaled-1680-/XNYimage.png)](https://hugeerp10.co.za/hsofmanual/uploads/images/gallery/2024-09/XNYimage.png)

And the test has been created for one sample if you click under the sample tab

[![image.png](https://hugeerp10.co.za/hsofmanual/uploads/images/gallery/2024-09/scaled-1680-/lxhimage.png)](https://hugeerp10.co.za/hsofmanual/uploads/images/gallery/2024-09/lxhimage.png)
# Facts Endophyte Type

Facts is also know as Endophytes

Setup the various facts / Endophytes

[![image.png](https://hugeerp10.co.za/hsofmanual/uploads/images/gallery/2024-07/scaled-1680-/zK9image.png)](https://hugeerp10.co.za/hsofmanual/uploads/images/gallery/2024-07/zK9image.png)
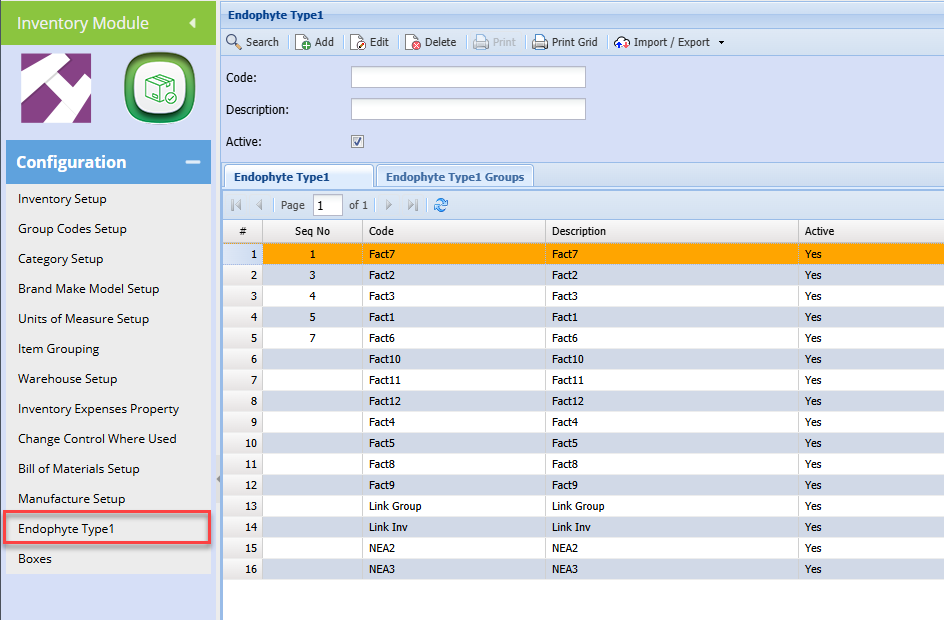
---

#### Inventory setup Fact / Endophyte link

Link Facts / Endophytes to the inventory item

[![image.png](https://hugeerp10.co.za/hsofmanual/uploads/images/gallery/2024-01/scaled-1680-/bPBimage.png)](https://hugeerp10.co.za/hsofmanual/uploads/images/gallery/2024-01/bPBimage.png)

Add the facts / Endophytes

[![image.png](https://hugeerp10.co.za/hsofmanual/uploads/images/gallery/2024-07/scaled-1680-/FBCimage.png)](https://hugeerp10.co.za/hsofmanual/uploads/images/gallery/2024-07/FBCimage.png)
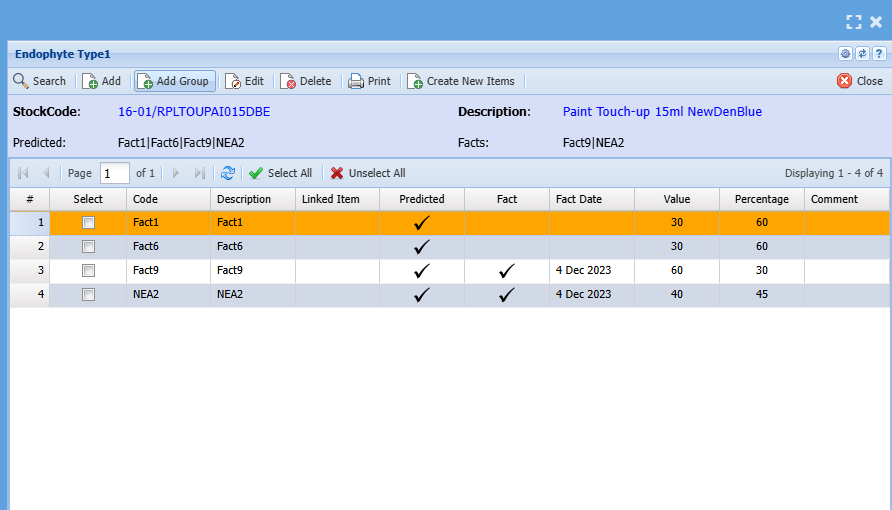
##### Add Fact items

Click on Add to add new Facts to list and link to item

[![image.png](https://hugeerp10.co.za/hsofmanual/uploads/images/gallery/2024-07/scaled-1680-/pPvimage.png)](https://hugeerp10.co.za/hsofmanual/uploads/images/gallery/2024-07/pPvimage.png)
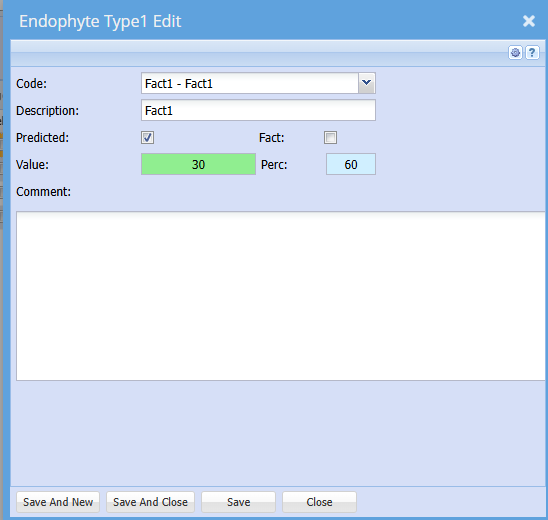
##### Adding a Group of Facts

This makes it easier to add multiple facts to the item and grid

[![image.png](https://hugeerp10.co.za/hsofmanual/uploads/images/gallery/2024-07/scaled-1680-/iJvimage.png)](https://hugeerp10.co.za/hsofmanual/uploads/images/gallery/2024-07/iJvimage.png)
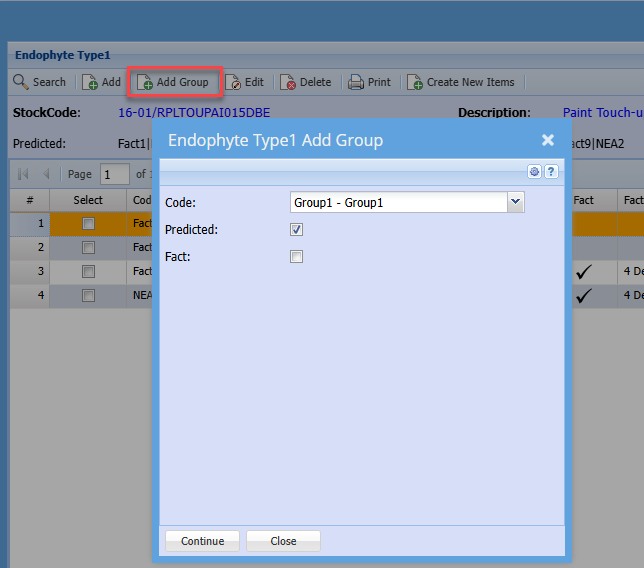

##### Create new Items

When Facts / Endophytes move from predicted to factual.

Create new items based on Result

Tick the fact lines, then click on Create new items

This will clone the item, and append the code with a - Fact1 after the new item code

The Linked Item column on the grid will display a link to the item created.

This is in place so that duplicate items cannot be created

[![image.png](https://hugeerp10.co.za/hsofmanual/uploads/images/gallery/2024-07/scaled-1680-/N2Mimage.png)](https://hugeerp10.co.za/hsofmanual/uploads/images/gallery/2024-07/N2Mimage.png)
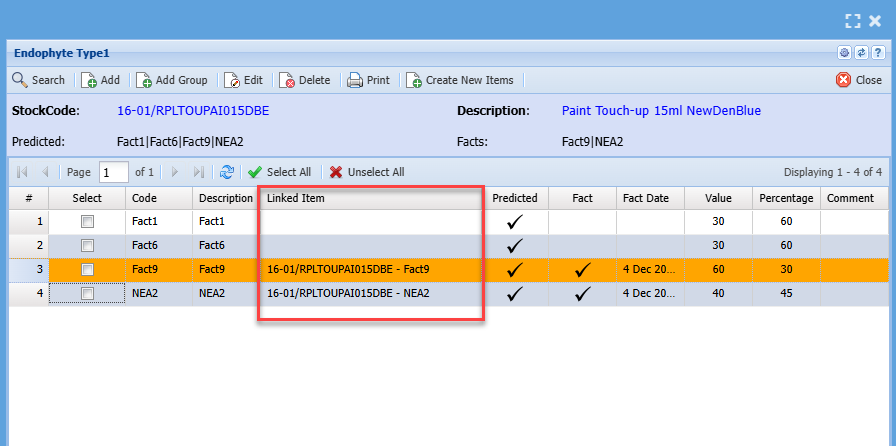
---

Facts and Predicted Endophytes show up on grid and item setup

[![image.png](https://hugeerp10.co.za/hsofmanual/uploads/images/gallery/2024-01/scaled-1680-/D0aimage.png)](https://hugeerp10.co.za/hsofmanual/uploads/images/gallery/2024-01/D0aimage.png)

# Item Cost Price Editing

#### Service and Custom Items 

Service and Custome item cost prices can be edited on the Item setup.

To add or edit the unit cost price of service and Custom items go to:

Inventory Module&gt; Configuration&gt; Inventory Setup

Search the required service or custom item.

 Click edit

Click the Pricing Level Tab

Click the Cost Button

Enter the cost price.

Save and Close

[![image.png](https://hugeerp10.co.za/hsofmanual/uploads/images/gallery/2024-01/scaled-1680-/rPQimage.png)](https://hugeerp10.co.za/hsofmanual/uploads/images/gallery/2024-01/rPQimage.png)
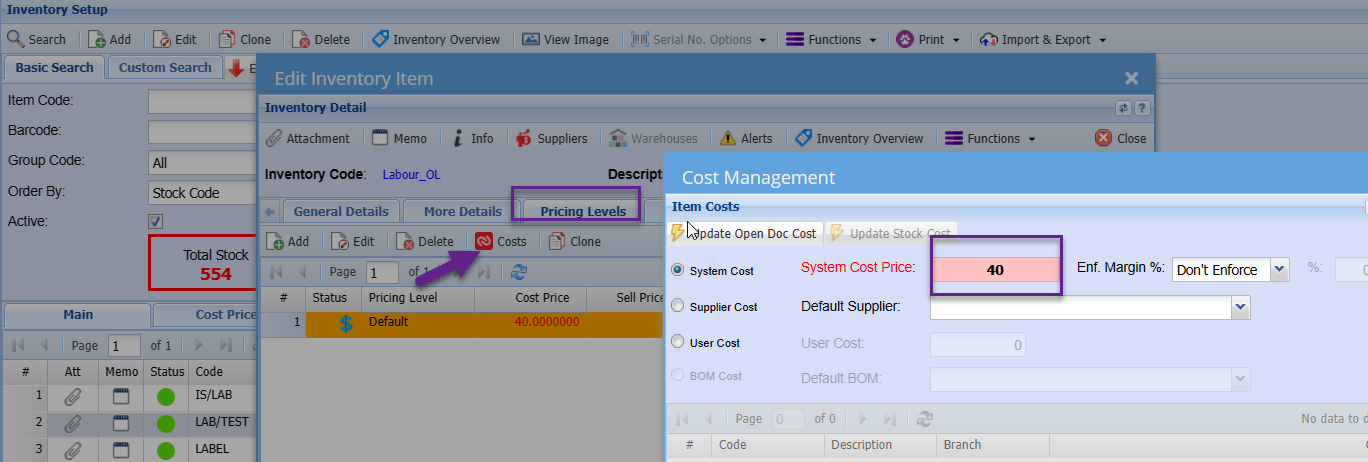
#### Stock Items

There are only 2 ways to update the cost price of a stock item:

1. Processing a Goods Received Voucher (GRV)
2. Process a Stock Value Adjustment

This is because stock is an asset, and any adjustments to the cost price will affect the stock (asset) Valuation. As such an actual entry needs to be processed so the control account balances or is affected accordingly.

# Advanced Stock Item Add

#### <span class="ts0">Adding an item</span>

<span class="ts0">To create a new inventory item, click on the Add button</span>

<span class="ts0">Fill in all the relevant information on the inventory item.</span>

<span class="ts0">You will have to fill in the category type example, stock, service or custom.</span>

<table border="1" id="bkmrk-stock-physical-items" style="border-collapse: collapse; width: 100%;"><colgroup><col style="width: 17.0517%;"></col><col style="width: 82.9483%;"></col></colgroup><tbody><tr><td>**<span class="ts0">Stock</span>**</td><td><span class="ts0">physical items such as a ruler. Inventory items work with costing methods a. Latest cost or b. Average Cost. </span>

<span class="ts0">This is setup under the System Configuration Module- Administration – Reference Values.</span>

</td></tr><tr><td>**<span class="ts0">Service</span>**</td><td><span class="ts0">labour can be termed a service item. This does not track inventory. Service items cannot be used in the Goods Received Vouchers.</span></td></tr><tr><td>**<span class="ts0">Custom</span>**</td><td><span class="ts0">works the same as Service type. You can put sub-contractors work under this. This will appear in Goods Received Vouchers.</span></td></tr><tr><td>**<span class="ts0">Fixed Assets</span>**</td><td><span class="ts0">this type of inventory is only used to insert your fixed assets. You can put a cost value to it and run a report which will list all fixed assets with their cost value.</span></td></tr></tbody></table>

<p class="callout info"><span class="ts0"><span style="color: rgb(224, 62, 45);">Note:</span> The inventory code can be changed at any time.</span></p>

---

#### <span class="ts0">General Details Tab</span>

<span class="ts0">In the General Details tab fill in the static information.</span>

<span class="ts0"> </span>![](https://hugeerp0.co.za/csp/webhelp/topics/images/image(2988).png)

<table border="1" id="bkmrk-inventory-code-this-" style="border-collapse: collapse; width: 100%; height: 398.75px;"><colgroup><col style="width: 20.6377%;"></col><col style="width: 79.3376%;"></col></colgroup><tbody><tr style="height: 46.5938px;"><td style="height: 46.5938px;">**<span class="ts0">Inventory Code</span>**</td><td style="height: 46.5938px;"><span class="ts0">this is a unique code that identifies the Inventory Item. The Code field can be Alpha Numeric and over 200 Characters long.</span></td></tr><tr style="height: 46.5938px;"><td style="height: 46.5938px;">**<span class="ts0">Category</span>**</td><td style="height: 46.5938px;"><span class="ts0">select the type of inventory item that is being created. There are four options, stock, service, custom and fixed asset.</span></td></tr><tr style="height: 46.5938px;"><td style="height: 46.5938px;">**<span class="ts0">Description</span>**</td><td style="height: 46.5938px;"><span class="ts0">this is the name of the inventory item. The Description field can be Alfa Numeric and over 500 Characters long.</span></td></tr><tr style="height: 46.5938px;"><td style="height: 46.5938px;">**<span class="ts0">Long Description</span>**</td><td style="height: 46.5938px;"><span class="ts0">this is extra information on the inventory item. You can have a very descriptive note on the item. This can be automatically copy when doing your lines in the document.</span></td></tr><tr style="height: 46.5938px;"><td style="height: 46.5938px;">**<span class="ts0">Primary Image</span>**</td><td style="height: 46.5938px;"><span class="ts0">this is a drop down and only shows Images which have being uploaded as attachments. You can select a default image against the customer to show on the right-hand side.</span></td></tr><tr style="height: 29.7969px;"><td style="height: 29.7969px;">**<span class="ts0">Priority Level</span>**</td><td style="height: 29.7969px;"><span class="ts0">to select priority level form the drop down arrow</span></td></tr><tr style="height: 29.7969px;"><td style="height: 29.7969px;">**<span class="ts0">Group Code</span>**</td><td style="height: 29.7969px;"><span class="ts0">to select group code from the drop down arrow</span></td></tr><tr style="height: 46.5938px;"><td style="height: 46.5938px;">**<span class="ts0">Active</span>**</td><td style="height: 46.5938px;"><span class="ts0">select if this item is active or not. To make an item inactive the item must have zero inventory on hand in all warehouses.</span></td></tr><tr style="height: 29.7969px;"><td style="height: 29.7969px;">**<span class="ts0">POS Item</span>**</td><td style="height: 29.7969px;"><span class="ts0">tick if inventory item is a POS item</span></td></tr><tr style="height: 29.7969px;"><td style="height: 29.7969px;">**<span class="ts0">Internal Ref ID</span>**</td><td style="height: 29.7969px;"><span class="ts0">Customer reference number for item</span></td></tr></tbody></table>


##### Cost Price Pop-up Screen

Enter the Item cost Price. Note if you do not enter a cost price at this stage, you will not be able to simply edit or add a cost price for a stock item later.

Select the selling price type

Enter either the mark up percentage or the selling price amount

Select the default supplier

[![image.png](https://hugeerp10.co.za/hsofmanual/uploads/images/gallery/2024-01/scaled-1680-/bNwimage.png)](https://hugeerp10.co.za/hsofmanual/uploads/images/gallery/2024-01/bNwimage.png)
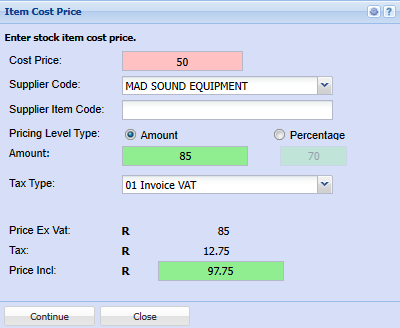

---

#### <span class="ts0">More Details Tab</span>

<span class="ts0">![](https://hugeerp0.co.za/csp/webhelp/topics/images/image(2989).png)</span>

<table border="1" id="bkmrk-unit-of-measurement-" style="border-collapse: collapse; width: 100%;"><colgroup><col style="width: 18.7846%;"></col><col style="width: 81.1907%;"></col></colgroup><tbody><tr><td>**<span class="ts0">Unit of Measurement</span>**</td><td><span class="ts0">this indicates the unit of measure of items. Case Lots uses this for its multiplication.</span></td></tr><tr><td>**<span class="ts0">Default Supplier</span>**</td><td><span class="ts0">set this drop down which is populated by the supplier’s button to your most commonly used supplier.</span></td></tr><tr><td>**<span class="ts0">Tax Type</span>**</td><td><span class="ts0">set a default tax type for this inventory item.</span></td></tr><tr><td>**<span class="ts0">Account Type</span>**</td><td><span class="ts0">only used in Custom and Service type items. This account replaces the inventory account and puts costs to the ledger account set here. Do not use inventory account when setting up your custom and service items.</span></td></tr><tr><td>**<span class="ts0">Bar Code</span>**</td><td><span class="ts0">insert a Bar Code for the item</span></td></tr><tr><td>**<span class="ts0">Bin</span>**</td><td><span class="ts0">Bin Location – Put in a note of the location of your inventory</span></td></tr><tr><td>**<span class="ts0">Weight per unit</span>**</td><td><span class="ts0">setup your weight per unit. You can select the stationery layout with weights column which will multiple the quantity by the weight and give you the total weight per line product.</span></td></tr><tr><td>**<span class="ts0">Default Supplier Cost</span>**</td><td><span class="ts0">tick this if you want to default your costing methods on the supplier cost.</span></td></tr><tr><td>**<span class="ts0">Pricing Override</span>**</td><td><span class="ts0">You can choose a pricing override for an item if you wish to run a special on this product. You will need to specify the start and end date of the special.</span>

<span class="ts0">The system will automatically revert back to the default pricing structure when the date of the special has come to an end.</span>

</td></tr></tbody></table>

<span class="ts0"> </span>

<table border="1" id="bkmrk-serial-no-tracking-t" style="border-collapse: collapse; width: 100%;"><colgroup><col style="width: 19.1547%;"></col><col style="width: 80.8206%;"></col></colgroup><tbody><tr><td>**<span class="ts0">Serial No Tracking</span>**</td><td><span class="ts0">tick if item code must be serial number tracked</span></td></tr></tbody></table>


---

#### <span class="ts11">Pricing Levels tab</span><span class="ts0"> </span>

<span class="ts0">You will have to setup a Pricing level for this item before closing. To setup a pricing level click on the Add button.</span>

<span class="ts0">In this area, the cost price is important if it is an inventory type, if you do not put in a value of cost you will only be able to change this cost price via an Inventory Value Adjustment. This cost price is affect by your costing methods setup in System Configuration under Reference Values.</span>

<span class="ts0">You will have to put in a Tax Type for this item before saving. In order to see the other tabs you will have to save this item.</span>

<span class="ts0">![](https://hugeerp0.co.za/csp/webhelp/topics/images/image(2990).png)</span>

<table border="1" id="bkmrk-cost-price-this-is-t" style="border-collapse: collapse; width: 100%;"><colgroup><col style="width: 17.0514%;"></col><col style="width: 82.9486%;"></col></colgroup><tbody><tr><td><span class="ts0">Cost Price</span></td><td><span class="ts0">this is the cost price of the item.</span></td></tr><tr><td><span class="ts0">Stock</span></td><td><span class="ts0">this is grayed out because it is governed by accounting costing methods found in the setting Reference Values under System Configuration. There are two types of costing methods</span></td></tr></tbody></table>

<span class="ts0">Average costing or latest costing methods. The average costing method is the most commonly used?</span>

<table border="1" id="bkmrk-service-this-cost-is" style="border-collapse: collapse; width: 100%;"><colgroup><col style="width: 16.5568%;"></col><col style="width: 83.4432%;"></col></colgroup><tbody><tr><td><span class="ts0">Service</span></td><td><span class="ts0">this cost is open and the user can put in a cost value there which will be carried across when doing invoices. Use costing in service only if you are an advanced accounting user. Instead leave the cost at zero.</span></td></tr><tr><td><span class="ts0">Custom</span></td><td><span class="ts0">this cost is open and the user can put in a cost value there which will be carried across when doing invoices. This cost works on latest costing method and will be updated when this custom type item is used in a Goods Received Voucher.</span></td></tr></tbody></table>

<span class="ts0">In this area you can setup two ways to work out your end selling price</span>

<table border="1" id="bkmrk-amount-put-in-the-am" style="border-collapse: collapse; width: 100%;"><colgroup><col style="width: 17.2984%;"></col><col style="width: 82.7016%;"></col></colgroup><tbody><tr><td><span class="ts0">Amount</span></td><td><span class="ts0">put in the amount you wish to sell the product at on an exclusive basis. The system will always bring up this selling price when selling irrespective of your cost price.</span></td></tr><tr><td><span class="ts0">Percentage</span></td><td><span class="ts0">you can create a percentage markup from your cost price. This percentage will change the selling price dependent on your cost price.</span></td></tr></tbody></table>

![](https://hugeerp0.co.za/csp/webhelp/topics/images/image(2991).png)

<span class="ts0">The difference between the two above is that should you chose Percentage this is good when a product is governed by currency rates and you do not want to lose profits.</span>

<span class="ts0">Once you have select your pricing level you will need to select a Default pricing level for this item.</span>

---

##### <span class="ts0">Currency Pricing</span>

<span class="ts0">This section allows the user to setup multiple currency pricing per item</span>

<span class="ts0">The multicurrency pricing will work as follows; you add the excluding value for the item that you want to sell at for that particular currency.</span>

<span class="ts0">When it comes to the documents for example an invoice, when you add the item the system will check whether the customer is a dollar or multicurrency customer.</span>

<span class="ts0">If the system sees that there is a currency pricing set up for that currency, it will use that price on the invoice.</span>

<span class="ts0"> </span>![](https://hugeerp0.co.za/csp/webhelp/topics/images/image(3008).png)

---

##### <span class="ts0">Custom Fields tab</span>

<span class="ts0">If configured, you are able to select from drop down option</span>

<span class="ts0"> </span>![](https://hugeerp0.co.za/csp/webhelp/topics/images/image(2992).png)

---

##### <span class="ts0">Bill of Materials tab</span>

<span class="ts0">Activate bill of material - Please Note; only tick the Bill of Material box if this inventory item will be the result of a manufacturing process. However, this item can be a contributing item (recipe item) to another Bill of Material and in itself be a Bill of Material item.</span>

<span class="ts0"> </span>![](https://hugeerp0.co.za/csp/webhelp/topics/images/image(2994).png)

---

##### <span class="ts0">Properties Tab</span>

<span class="ts0">Add the dimensions of the inventory item</span>

<span class="ts0"> </span>![](https://hugeerp0.co.za/csp/webhelp/topics/images/image(2995).png)

---

#### <span class="ts0">Comment or Replace Item Tab</span>

<span class="ts0">The comment/ Replace tab allows a user to add items to substitute on the transaction documents</span>

<span class="ts0">For this to work you need to set it up under this tab first</span>

[![image.png](https://hugeerp10.co.za/hsofmanual/uploads/images/gallery/2024-08/scaled-1680-/bgiimage.png)](https://hugeerp10.co.za/hsofmanual/uploads/images/gallery/2024-08/bgiimage.png)

You can add all relevant comments about the item on the comments section and Xero accounts if linked to your Xero system.

To add a replacement item, click on Add

Then the screen below will pop up

[![image.png](https://hugeerp10.co.za/hsofmanual/uploads/images/gallery/2024-08/scaled-1680-/Gwmimage.png)](https://hugeerp10.co.za/hsofmanual/uploads/images/gallery/2024-08/Gwmimage.png)
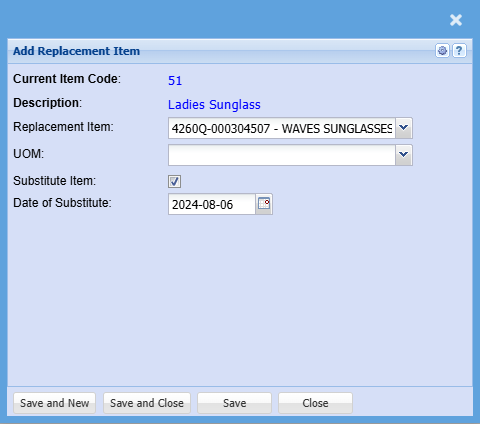
<table border="1" id="bkmrk-current-item-code-th" style="border-collapse: collapse; width: 100%; height: 119.188px;"><colgroup><col style="width: 27.0988%;"></col><col style="width: 73.0248%;"></col></colgroup><tbody><tr style="height: 29.7969px;"><td style="height: 29.7969px;">**Current Item Code**</td><td style="height: 29.7969px;">This is the main item that you need to add a substitute item for</td></tr><tr style="height: 29.7969px;"><td style="height: 29.7969px;">**Description**</td><td style="height: 29.7969px;">This will prepopulate</td></tr><tr style="height: 29.7969px;"><td style="height: 29.7969px;">**Replacement Item**</td><td style="height: 29.7969px;">Select the item you want to add as a substitute for the main item

You can add as many substitute for an item

</td></tr><tr style="height: 29.7969px;"><td style="height: 29.7969px;">**UOM**</td><td style="height: 29.7969px;">Select the unit of measure if it is a unit of measure item</td></tr><tr><td>**Substitute Item**</td><td>Put a tick on the substitute item to make it active</td></tr><tr><td>**Date of Substitute**</td><td>Add a date of substitute </td></tr></tbody></table>

To add a substitute item to a sales document, [click here](https://hugeerp10.co.za/hsofmanual/books/general/page/substitute-item-on-sales-documents)

---

##### <span class="ts0">S</span><span class="ts0">pec tab</span>

<span class="ts0">To add the specifications of the item</span>

<span class="ts0"> </span>![](https://hugeerp0.co.za/csp/webhelp/topics/images/image(2997).png)

<table border="1" id="bkmrk-reload-spec-button-t" style="border-collapse: collapse; width: 53.8272%;"><colgroup><col style="width: 34.4559%;"></col><col style="width: 65.4981%;"></col></colgroup><tbody><tr><td><span class="ts0">Reload Spec button</span></td><td><span class="ts0">to reload the spec</span></td></tr><tr><td><span class="ts0">Save Spec button</span></td><td><span class="ts0">to save specs</span></td></tr><tr><td><span class="ts0">Preview Spec button</span></td><td><span class="ts0">allows the user to preview the spec</span></td></tr><tr><td><span class="ts0">Export to PDF button</span></td><td><span class="ts0">to export the spec onto a PDF file</span></td></tr><tr><td><span class="ts0">Show Sample button</span></td><td><span class="ts0">shows the sample of the text</span></td></tr></tbody></table>

##### <span class="ts0">Supplier’s button</span>

<span class="ts0">On the inventory items you will need to select the various suppliers where you purchase this item from.</span>

<span class="ts0"> </span>![](https://hugeerp0.co.za/csp/webhelp/topics/images/image(2998).png)

<span class="ts0">In this area we cater for multiple suppliers to one inventory item. This is handy so you can see what the cost price is that you purchase this item from the various suppliers. You will also be able to see the supplier item code and when the last time any changes done to this supplier was made.</span>

<span class="ts0">Last Updated field is changed in two ways:</span>

<table border="1" id="bkmrk-1-when-a-goods-recei" style="border-collapse: collapse; width: 64.8148%;"><colgroup><col style="width: 7.0639%;"></col><col style="width: 92.8979%;"></col></colgroup><tbody><tr><td>1</td><td><span class="ts0">When a Goods Received Note comes in and updates the price and date</span></td></tr><tr><td>2</td><td><span class="ts0">When the user manually changes the details.</span></td></tr></tbody></table>

<span class="ts0"><span style="color: rgb(224, 62, 45);">Note:</span> This price has nothing to do with the cost price of the item, these prices have to do with the actual supplier price which he will give the item to you at.</span>

<span class="ts0">To create a new supplier, click on the Add button</span>

<span class="ts0">Fill in the Supplier item code, select the unit of measure and put in the price of the item that your supplier will sell it to you at.</span>

<span class="ts0"><span style="color: rgb(224, 62, 45);">Note:</span> Prices are exclusive.</span>

[![image.png](https://hugeerp10.co.za/hsofmanual/uploads/images/gallery/2024-01/scaled-1680-/ybyimage.png)](https://hugeerp10.co.za/hsofmanual/uploads/images/gallery/2024-01/ybyimage.png)

##### <span class="ts0">Warehouses button</span>

<span class="ts0">If you have the Multi warehouse Module you will be able to associate multiple warehouses to this item.</span>

<span class="ts0">Shows the warehouses associated with that Inventory Item</span>

<span class="ts0"> </span>![](https://hugeerp0.co.za/csp/webhelp/topics/images/image(3004).png)

<span class="ts0">This is where warehouse suppliers are created and various values are managed.</span>

<span class="ts0">The grid will display all warehouses associated with this stock item.</span>

<span class="ts0">The columns, Bin Location, Min Qty., Max Qty., Preferred Qty. and Reorder Qty. can be edited on the grid.</span>

<table border="1" id="bkmrk-definition-of-active" style="border-collapse: collapse; width: 100%;"><colgroup><col style="width: 24.4691%;"></col><col style="width: 75.5062%;"></col></colgroup><tbody><tr><td><span class="ts0">Definition of Active or Inactive Warehouse</span></td><td><span class="ts0">Active or Inactive warehouse means that this warehouse which is associated with the selected stock item can be either activated or deactivated. When deactivated the warehouse will still exist for all other stock items associate it but will be inactive for this stock item.</span></td></tr><tr><td><span class="ts0">Show Inactive tick box</span></td><td><span class="ts0">Placing a tick in this box will display all inactive warehouses, removing the tick will display all active warehouses associated with this stock item</span></td></tr><tr><td><span class="ts0">Add button</span></td><td><span class="ts0">to insert a new warehouse supplier.</span></td></tr><tr><td><span class="ts0">Remove button</span></td><td><span class="ts0">removes the currently selected warehouse supplier.</span></td></tr><tr><td><span class="ts0">Activate Warehouse button</span></td><td><span class="ts0">To activate a warehouse the system check that the warehouse is an active warehouse in Warehouse Setup.</span></td></tr><tr><td><span class="ts0">Deactivate Warehouse button</span></td><td><span class="ts0">To deactivate a warehouse the system checks that there is no quantity on hand or quantity in WIP for this item.</span></td></tr></tbody></table>

<span class="ts0">In this window we allow for unlimited number of uploads of documents to be attached to the Inventory item. You can attach pictures, Excel sheets, Word Documents and any file you wish.</span>

<span class="ts0"> </span>![](https://hugeerp0.co.za/csp/webhelp/topics/images/image(3001).png)<span class="ts0"> </span>

<span class="ts0">When you click on the Upload button Attachments Button the following will come up.</span>

<span class="ts0">In this area we allow you to categorize your documents, name the file and then chose the file.</span>

<span class="ts0">Once you click on the upload button it will take a copy of your file to the server. This means whenever you are in Huge ERP you will be able to view the file anywhere</span>

<span class="ts0"> </span>![](https://hugeerp0.co.za/csp/webhelp/topics/images/image(3002).png)

---

##### <span class="ts2">Branches button</span>

<span class="ts0">You are able to allocate an inventory code to a branch.</span>

<span class="ts0">Click on the Functions drop down and select Branches</span>

[![image.png](https://hugeerp10.co.za/hsofmanual/uploads/images/gallery/2024-01/scaled-1680-/UbVimage.png)](https://hugeerp10.co.za/hsofmanual/uploads/images/gallery/2024-01/UbVimage.png)

<span class="ts0">Double click the required branch or click once on the Branch in the left grid.</span>

<span class="ts0">then click the Add Branch button, to move the branch to the selected grid on the right.</span>

<span class="ts0"> </span>![](https://hugeerp0.co.za/csp/webhelp/topics/images/image(3003).png)

<span class="ts25">Should you be running multi-branch you can select the branch that th</span><span class="ts25">ese</span><span class="ts25"> </span><span class="ts25">items are </span><span class="ts25">linked to.</span>

<span class="ts25">When searching inventory items, the system will then look at the logged in user's branch access and only items that are associated to the users branch access will be returned.</span>

---

##### <span class="ts2">Warehouse button</span>

<span class="ts0">Shows the warehouses associated with that Inventory Item</span>

<span class="ts0"> </span>![](https://hugeerp0.co.za/csp/webhelp/topics/images/image(3004).png)

<span class="ts0">This is where warehouse suppliers are created and various values are managed.</span>

<span class="ts0">The grid will display all warehouses associated with this stock item.</span>

<span class="ts0">The columns, Bin Location, Min Qty., Max Qty., Preferred Qty. and Reorder Qty. can be edited on the grid.</span>

<table border="1" id="bkmrk-definition-of-active-1" style="border-collapse: collapse; width: 100%;"><colgroup><col style="width: 26.2223%;"></col><col style="width: 73.8766%;"></col></colgroup><tbody><tr><td><span class="ts0">Definition of Active or Inactive Warehouse</span></td><td><span class="ts0">Active or Inactive warehouse means that this warehouse which is associated with the selected stock item can be either activated or deactivated. When deactivated the warehouse will still exist for all other stock items associate it but will be inactive for this stock item.</span></td></tr><tr><td><span class="ts0">Show Inactive tick box</span></td><td><span class="ts0">Placing a tick in this box will display all inactive warehouses, removing the tick will display all active warehouses associated with this stock item.</span></td></tr><tr><td><span class="ts0">Add button</span></td><td><span class="ts0">to insert a new warehouse supplier.</span></td></tr><tr><td><span class="ts0">Remove button</span></td><td><span class="ts0">removes the currently selected warehouse supplier.</span></td></tr><tr><td><span class="ts0">Activate Warehouse button</span></td><td><span class="ts0">To activate a warehouse the system check that the warehouse is an active warehouse in Warehouse Setup.</span></td></tr><tr><td><span class="ts0">Deactivate Warehouse button</span></td><td><span class="ts0">To deactivate a warehouse the system checks that there is no quantity on hand or quantity in WIP for this item.</span></td></tr></tbody></table>

# Inventory Setup Tips

### Items setup below sell of 10c

<span class="ts9">Setting up items that are below 10c , it is suggest that these be marked as an including Tax price.</span>

<span class="ts9">This is because of the Tax values and rounding</span>

<span class="ts9">When creating a quote or invoice, then the system will work on the including price of 0.07 cents</span>

<span class="ts9">If you take 100 x 0.07 = $7 including</span>

[![image.png](https://hugeerp10.co.za/hsofmanual/uploads/images/gallery/2024-01/scaled-1680-/ALIimage.png)](https://hugeerp10.co.za/hsofmanual/uploads/images/gallery/2024-01/ALIimage.png)

# Add Custom Item

**<span style="font-size: 16.0pt; color: #002060; mso-ansi-language: EN-ZA;">Custom Item Setup</span>**

**<span style="font-size: 16.0pt; color: #002060; mso-ansi-language: EN-ZA;"> </span>**<span style="font-size: 11.0pt; font-family: 'Calibri',sans-serif; mso-ascii-theme-font: minor-latin; mso-hansi-theme-font: minor-latin; mso-bidi-theme-font: minor-latin; mso-ansi-language: EN-ZA;">A custom item is a non stock item or intangible item that does not form part of your stock holding or stock control. Typically a custom item will be used for expenses that you wish to run through the creditors module and generate Purchase orders for.</span>

<span style="font-size: 11.0pt; font-family: 'Calibri',sans-serif; mso-ascii-theme-font: minor-latin; mso-hansi-theme-font: minor-latin; mso-bidi-theme-font: minor-latin; mso-ansi-language: EN-ZA;">Custom items can also be used for small consumables, such as screws, washers, etc used in manufacturing that you do not necessarily control stock quantities on. </span>

<span style="font-size: 11.0pt; font-family: 'Calibri',sans-serif; mso-ascii-theme-font: minor-latin; mso-hansi-theme-font: minor-latin; mso-bidi-theme-font: minor-latin; mso-ansi-language: EN-ZA;"> </span>

<span style="font-size: 11.0pt; font-family: 'Calibri',sans-serif; mso-ascii-theme-font: minor-latin; mso-hansi-theme-font: minor-latin; mso-bidi-theme-font: minor-latin; mso-ansi-language: EN-ZA;">There are 2 methods to create a custom item:</span>

**<span style="mso-ascii-font-family: Calibri; mso-ascii-theme-font: minor-latin; mso-fareast-font-family: Calibri; mso-fareast-theme-font: minor-latin; mso-hansi-font-family: Calibri; mso-hansi-theme-font: minor-latin; mso-bidi-font-family: Calibri; mso-bidi-theme-font: minor-latin;"><span style="mso-list: Ignore;">1.<span style="font: 7.0pt 'Times New Roman';"> </span></span></span>****<span style="mso-ascii-font-family: Calibri; mso-ascii-theme-font: minor-latin; mso-hansi-font-family: Calibri; mso-hansi-theme-font: minor-latin; mso-bidi-font-family: Calibri; mso-bidi-theme-font: minor-latin;">From Inventory Item setup</span>**

**<span style="mso-ascii-font-family: Calibri; mso-ascii-theme-font: minor-latin; mso-fareast-font-family: Calibri; mso-fareast-theme-font: minor-latin; mso-hansi-font-family: Calibri; mso-hansi-theme-font: minor-latin; mso-bidi-font-family: Calibri; mso-bidi-theme-font: minor-latin;"><span style="mso-list: Ignore;">2.<span style="font: 7.0pt 'Times New Roman';"> </span></span></span>****<span style="mso-ascii-font-family: Calibri; mso-ascii-theme-font: minor-latin; mso-hansi-font-family: Calibri; mso-hansi-theme-font: minor-latin; mso-bidi-font-family: Calibri; mso-bidi-theme-font: minor-latin;">From the GL account setup</span>**

**<span lang="EN-GB" style="font-family: 'Calibri',sans-serif; mso-ascii-theme-font: minor-latin; mso-hansi-theme-font: minor-latin; mso-bidi-theme-font: minor-latin;"> </span><span lang="EN-GB" style="font-family: 'Calibri',sans-serif; mso-ascii-theme-font: minor-latin; mso-hansi-theme-font: minor-latin; mso-bidi-theme-font: minor-latin;">Custom item create from Inventory Setup</span>**<span lang="EN-GB" style="font-family: 'Calibri',sans-serif; mso-ascii-theme-font: minor-latin; mso-hansi-theme-font: minor-latin; mso-bidi-theme-font: minor-latin;">:</span>

<span lang="EN-GB" style="font-family: 'Calibri',sans-serif; mso-ascii-theme-font: minor-latin; mso-hansi-theme-font: minor-latin; mso-bidi-theme-font: minor-latin;"> </span><span lang="EN-GB" style="font-family: 'Calibri',sans-serif; mso-ascii-theme-font: minor-latin; mso-hansi-theme-font: minor-latin; mso-bidi-theme-font: minor-latin;">Should you not have access to the General Ledger module, you can create a custom item as follows:</span>

<span lang="EN-GB" style="font-family: 'Calibri',sans-serif; mso-ascii-theme-font: minor-latin; mso-hansi-theme-font: minor-latin; mso-bidi-theme-font: minor-latin;">Go to: <span style="color: #00b050;">I**nventory Module &gt; Configuration &gt; Inventory Setup**</span></span>

<span lang="EN-GB" style="font-family: 'Calibri',sans-serif; mso-ascii-theme-font: minor-latin; mso-hansi-theme-font: minor-latin; mso-bidi-theme-font: minor-latin;"> </span><span lang="EN-GB" style="font-family: 'Calibri',sans-serif; mso-ascii-theme-font: minor-latin; mso-hansi-theme-font: minor-latin; mso-bidi-theme-font: minor-latin;">Click Add button</span>

<span lang="EN-GB" style="font-family: 'Calibri',sans-serif; mso-ascii-theme-font: minor-latin; mso-hansi-theme-font: minor-latin; mso-bidi-theme-font: minor-latin;">Enter a code </span>

<span lang="EN-GB" style="font-family: 'Calibri',sans-serif; mso-ascii-theme-font: minor-latin; mso-hansi-theme-font: minor-latin; mso-bidi-theme-font: minor-latin;">Enter a Description</span>

<span lang="EN-GB" style="font-family: 'Calibri',sans-serif; mso-ascii-theme-font: minor-latin; mso-hansi-theme-font: minor-latin; mso-bidi-theme-font: minor-latin;"> </span><span lang="EN-GB" style="font-family: 'Calibri',sans-serif; mso-ascii-theme-font: minor-latin; mso-hansi-theme-font: minor-latin; mso-bidi-theme-font: minor-latin;">Select the category: Custom</span>

<span lang="EN-GB" style="font-family: 'Calibri',sans-serif; mso-ascii-theme-font: minor-latin; mso-hansi-theme-font: minor-latin; mso-bidi-theme-font: minor-latin;"> </span><span lang="EN-GB" style="font-family: 'Calibri',sans-serif; mso-ascii-theme-font: minor-latin; mso-hansi-theme-font: minor-latin; mso-bidi-theme-font: minor-latin;">Enter any other relevant details such as group code, etc</span>

<span lang="EN-GB" style="font-family: 'Calibri',sans-serif; mso-ascii-theme-font: minor-latin; mso-hansi-theme-font: minor-latin; mso-bidi-theme-font: minor-latin;"> </span><span lang="EN-GB" style="font-family: 'Calibri',sans-serif; mso-ascii-theme-font: minor-latin; mso-hansi-theme-font: minor-latin; mso-bidi-theme-font: minor-latin;">You can tick the “Hide from Sales” box, which will exclude this item of sales document searches.</span>

<span lang="EN-GB" style="font-family: 'Calibri',sans-serif; mso-ascii-theme-font: minor-latin; mso-hansi-theme-font: minor-latin; mso-bidi-theme-font: minor-latin;"> </span>![](https://hugeerp10.co.za/hsofmanual/uploads/images/gallery/2024-05/embedded-image-owve0tls.png)

<span lang="EN-GB" style="font-family: 'Calibri',sans-serif; mso-ascii-theme-font: minor-latin; mso-hansi-theme-font: minor-latin; mso-bidi-theme-font: minor-latin;"> </span><span lang="EN-GB" style="font-family: 'Calibri',sans-serif; mso-ascii-theme-font: minor-latin; mso-hansi-theme-font: minor-latin; mso-bidi-theme-font: minor-latin;">Click the more details tab </span>

<span lang="EN-GB" style="font-family: 'Calibri',sans-serif; mso-ascii-theme-font: minor-latin; mso-hansi-theme-font: minor-latin; mso-bidi-theme-font: minor-latin;">Select the required GL account for posting.</span>

<span lang="EN-GB" style="font-family: 'Calibri',sans-serif; mso-ascii-theme-font: minor-latin; mso-hansi-theme-font: minor-latin; mso-bidi-theme-font: minor-latin;"> </span><span lang="EN-GB" style="font-family: 'Calibri',sans-serif; mso-ascii-theme-font: minor-latin; mso-hansi-theme-font: minor-latin; mso-bidi-theme-font: minor-latin;">This is the GL account that the GRV needs to be posted to.</span>

<span lang="EN-GB" style="font-family: 'Calibri',sans-serif; mso-ascii-theme-font: minor-latin; mso-hansi-theme-font: minor-latin; mso-bidi-theme-font: minor-latin;">Leaving the default account: Cost of Sales General will result in the GRV entry being posted to Cost of sales instead of the requires Expense Account.</span>

<span lang="EN-GB" style="font-family: 'Calibri',sans-serif; mso-ascii-theme-font: minor-latin; mso-hansi-theme-font: minor-latin; mso-bidi-theme-font: minor-latin;"> </span><span lang="EN-GB" style="font-family: 'Calibri',sans-serif; mso-ascii-theme-font: minor-latin; mso-hansi-theme-font: minor-latin; mso-bidi-theme-font: minor-latin;">To search the required GL Account, click the long search icon</span>

<span lang="EN-GB" style="font-family: 'Calibri',sans-serif; mso-ascii-theme-font: minor-latin; mso-hansi-theme-font: minor-latin; mso-bidi-theme-font: minor-latin;">Then enter the account description</span>

<span lang="EN-GB" style="font-family: 'Calibri',sans-serif; mso-ascii-theme-font: minor-latin; mso-hansi-theme-font: minor-latin; mso-bidi-theme-font: minor-latin;">Click Search</span>

<span lang="EN-GB" style="font-family: 'Calibri',sans-serif; mso-ascii-theme-font: minor-latin; mso-hansi-theme-font: minor-latin; mso-bidi-theme-font: minor-latin;">Click Select</span>

<span lang="EN-GB" style="font-family: 'Calibri',sans-serif; mso-ascii-theme-font: minor-latin; mso-hansi-theme-font: minor-latin; mso-bidi-theme-font: minor-latin;"> </span><span lang="EN-GB" style="mso-no-proof: yes;"></span>![](https://hugeerp10.co.za/hsofmanual/uploads/images/gallery/2024-05/embedded-image-j2tg7z0u.png)

<span lang="EN-GB" style="font-family: 'Calibri',sans-serif; mso-ascii-theme-font: minor-latin; mso-hansi-theme-font: minor-latin; mso-bidi-theme-font: minor-latin;"> </span>

[![download.png](https://hugeerp10.co.za/hsofmanual/uploads/images/gallery/2024-05/scaled-1680-/download.png)](https://hugeerp10.co.za/hsofmanual/uploads/images/gallery/2024-05/download.png)
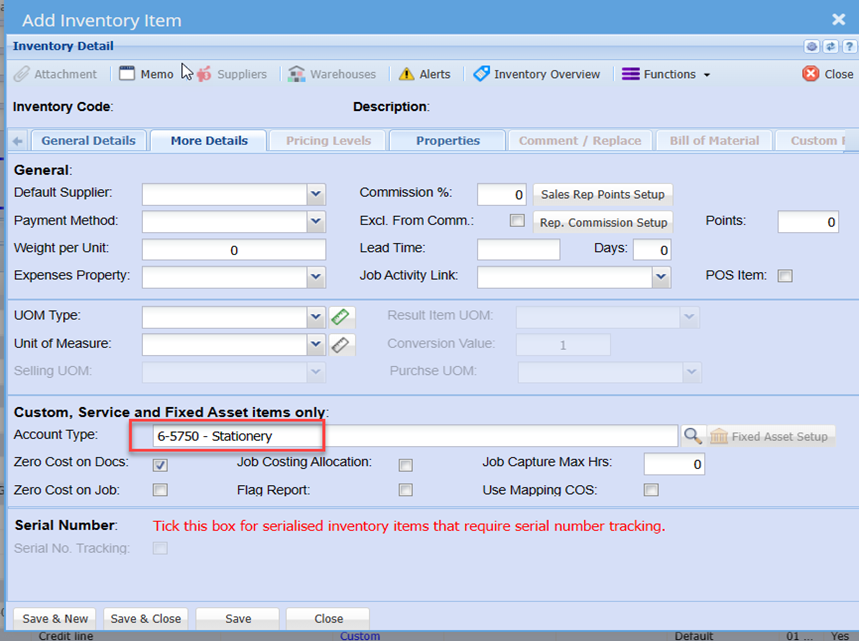
![](https://hugeerp10.co.za/hsofmanual/uploads/images/gallery/2024-05/embedded-image-gelgx9kj.png)

<span lang="EN-GB" style="font-family: 'Calibri',sans-serif; mso-ascii-theme-font: minor-latin; mso-hansi-theme-font: minor-latin; mso-bidi-theme-font: minor-latin;">You will note the selected account is populated</span>

<span lang="EN-GB" style="font-family: 'Calibri',sans-serif; mso-ascii-theme-font: minor-latin; mso-hansi-theme-font: minor-latin; mso-bidi-theme-font: minor-latin;">Click Save</span>

<span style="font-size: 11.0pt; font-family: 'Calibri',sans-serif; mso-ascii-theme-font: minor-latin; mso-hansi-theme-font: minor-latin; mso-bidi-theme-font: minor-latin; mso-ansi-language: EN-ZA;">Enter a cost if required</span>

<span style="font-size: 11.0pt; font-family: 'Calibri',sans-serif; mso-ascii-theme-font: minor-latin; mso-hansi-theme-font: minor-latin; mso-bidi-theme-font: minor-latin; mso-ansi-language: EN-ZA;">Click Continue</span>

<span style="font-size: 11.0pt; font-family: 'Calibri',sans-serif; mso-ascii-theme-font: minor-latin; mso-hansi-theme-font: minor-latin; mso-bidi-theme-font: minor-latin; mso-ansi-language: EN-ZA;">Click save and close</span>

<span style="font-size: 11.0pt; font-family: 'Calibri',sans-serif; mso-ascii-theme-font: minor-latin; mso-hansi-theme-font: minor-latin; mso-bidi-theme-font: minor-latin; mso-ansi-language: EN-ZA;"> </span>![](https://hugeerp10.co.za/hsofmanual/uploads/images/gallery/2024-05/embedded-image-eyoh50oh.png)

**<span style="font-family: 'Calibri',sans-serif; mso-ascii-theme-font: minor-latin; mso-hansi-theme-font: minor-latin; mso-bidi-theme-font: minor-latin; mso-ansi-language: EN-ZA;"><span style="text-decoration: underline;">To create a custom Item from General Ledge</span>r:</span>**

**<span style="font-family: 'Calibri',sans-serif; mso-ascii-theme-font: minor-latin; mso-hansi-theme-font: minor-latin; mso-bidi-theme-font: minor-latin; mso-ansi-language: EN-ZA;"> </span>**<span style="font-family: 'Calibri',sans-serif; mso-ascii-theme-font: minor-latin; mso-hansi-theme-font: minor-latin; mso-bidi-theme-font: minor-latin; mso-ansi-language: EN-ZA;">Go to General Ledger Module</span>

<span style="font-family: 'Calibri',sans-serif; mso-ascii-theme-font: minor-latin; mso-hansi-theme-font: minor-latin; mso-bidi-theme-font: minor-latin; mso-ansi-language: EN-ZA;">Configuration &gt; General Ledger Account</span>

<span style="font-family: 'Calibri',sans-serif; mso-ascii-theme-font: minor-latin; mso-hansi-theme-font: minor-latin; mso-bidi-theme-font: minor-latin; mso-ansi-language: EN-ZA;"> </span><span style="font-family: 'Calibri',sans-serif; mso-ascii-theme-font: minor-latin; mso-hansi-theme-font: minor-latin; mso-bidi-theme-font: minor-latin; mso-ansi-language: EN-ZA;">Search for the require GL account using the Tree structure, or</span>

<span style="font-family: 'Calibri',sans-serif; mso-ascii-theme-font: minor-latin; mso-hansi-theme-font: minor-latin; mso-bidi-theme-font: minor-latin; mso-ansi-language: EN-ZA;"> </span><span style="font-family: 'Calibri',sans-serif; mso-ascii-theme-font: minor-latin; mso-hansi-theme-font: minor-latin; mso-bidi-theme-font: minor-latin; mso-ansi-language: EN-ZA;">Click the Search Tab</span>

<span style="font-family: 'Calibri',sans-serif; mso-ascii-theme-font: minor-latin; mso-hansi-theme-font: minor-latin; mso-bidi-theme-font: minor-latin; mso-ansi-language: EN-ZA;">Enter the GL account Code or Description </span>

<span style="font-family: 'Calibri',sans-serif; mso-ascii-theme-font: minor-latin; mso-hansi-theme-font: minor-latin; mso-bidi-theme-font: minor-latin; mso-ansi-language: EN-ZA;">Click Search</span>

<span style="font-family: 'Calibri',sans-serif; mso-ascii-theme-font: minor-latin; mso-hansi-theme-font: minor-latin; mso-bidi-theme-font: minor-latin; mso-ansi-language: EN-ZA;">Edit the GL Account</span>

<span style="font-family: 'Calibri',sans-serif; mso-ascii-theme-font: minor-latin; mso-hansi-theme-font: minor-latin; mso-bidi-theme-font: minor-latin; mso-ansi-language: EN-ZA;"> </span>![](https://hugeerp10.co.za/hsofmanual/uploads/images/gallery/2024-05/embedded-image-rechndm5.png)

<span style="font-family: 'Calibri',sans-serif; mso-ascii-theme-font: minor-latin; mso-hansi-theme-font: minor-latin; mso-bidi-theme-font: minor-latin; mso-ansi-language: EN-ZA;"> </span><span style="font-size: 11.0pt; font-family: 'Calibri',sans-serif; mso-ascii-theme-font: minor-latin; mso-hansi-theme-font: minor-latin; mso-bidi-theme-font: minor-latin; mso-ansi-language: EN-ZA;">Click the Create Custom item Button</span>

<span style="font-size: 11.0pt; font-family: 'Calibri',sans-serif; mso-ascii-theme-font: minor-latin; mso-hansi-theme-font: minor-latin; mso-bidi-theme-font: minor-latin; mso-ansi-language: EN-ZA;"> </span><span lang="EN-GB" style="mso-no-proof: yes;"></span>![](https://hugeerp10.co.za/hsofmanual/uploads/images/gallery/2024-05/embedded-image-cw7cbfwa.png)

<span style="font-size: 16.0pt; mso-ansi-language: EN-ZA;"> </span><span style="font-size: 11.0pt; font-family: 'Calibri',sans-serif; mso-ascii-theme-font: minor-latin; mso-hansi-theme-font: minor-latin; mso-bidi-theme-font: minor-latin; mso-ansi-language: EN-ZA;">You will notice all the details have been populated as per the setup shown in creating Custom item from inventory above</span>

<span style="font-size: 11.0pt; font-family: 'Calibri',sans-serif; mso-ascii-theme-font: minor-latin; mso-hansi-theme-font: minor-latin; mso-bidi-theme-font: minor-latin; mso-ansi-language: EN-ZA;"> </span><span lang="EN-GB" style="mso-no-proof: yes;"></span>![](https://hugeerp10.co.za/hsofmanual/uploads/images/gallery/2024-05/embedded-image-yyr6d1qn.png)

<span style="font-size: 11.0pt; font-family: 'Calibri',sans-serif; mso-ascii-theme-font: minor-latin; mso-hansi-theme-font: minor-latin; mso-bidi-theme-font: minor-latin; mso-ansi-language: EN-ZA;"> </span><span lang="EN-GB" style="mso-no-proof: yes;"></span>![](https://hugeerp10.co.za/hsofmanual/uploads/images/gallery/2024-05/embedded-image-qlrzvotw.png)

<span style="font-size: 11.0pt; font-family: 'Calibri',sans-serif; mso-ascii-theme-font: minor-latin; mso-hansi-theme-font: minor-latin; mso-bidi-theme-font: minor-latin; mso-ansi-language: EN-ZA;"> Clic</span><span style="font-size: 11.0pt; font-family: 'Calibri',sans-serif; mso-ascii-theme-font: minor-latin; mso-hansi-theme-font: minor-latin; mso-bidi-theme-font: minor-latin; mso-ansi-language: EN-ZA;">k Save And Close</span>

<span style="font-size: 11.0pt; font-family: 'Calibri',sans-serif; mso-ascii-theme-font: minor-latin; mso-hansi-theme-font: minor-latin; mso-bidi-theme-font: minor-latin; mso-ansi-language: EN-ZA;"> </span>

<span style="font-size: 11.0pt; font-family: 'Calibri',sans-serif; mso-ascii-theme-font: minor-latin; mso-hansi-theme-font: minor-latin; mso-bidi-theme-font: minor-latin; mso-ansi-language: EN-ZA;"></span>

# Dimension selling price matrix example

Setting up a price matrix with calculations

Pricing below is based on 1m

[![image.png](https://hugeerp10.co.za/hsofmanual/uploads/images/gallery/2024-08/scaled-1680-/hfhimage.png)](https://hugeerp10.co.za/hsofmanual/uploads/images/gallery/2024-08/hfhimage.png)
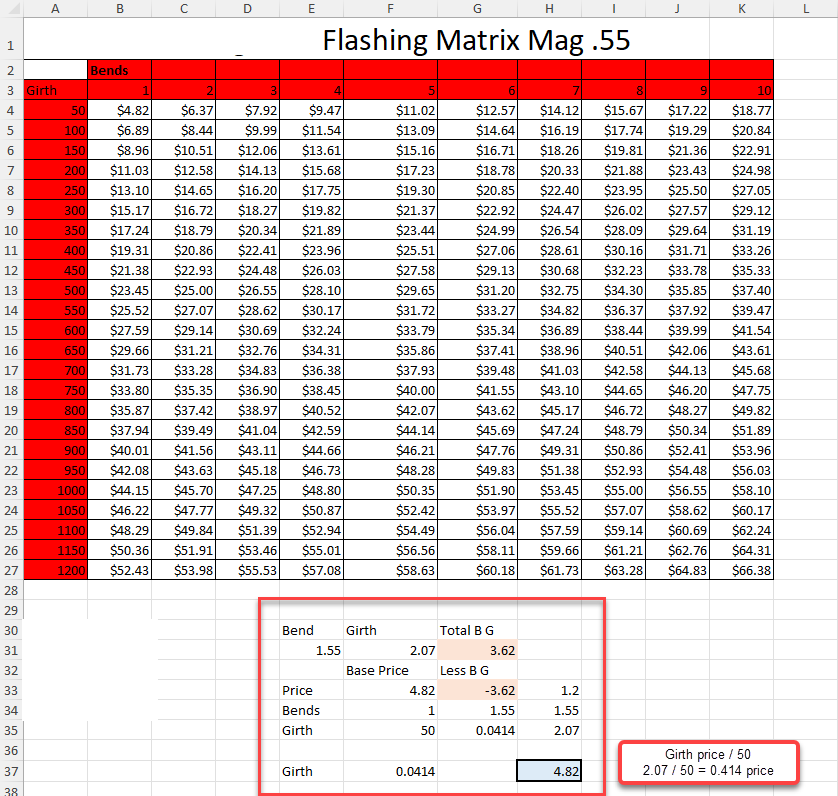
---

#### Create the following Custom items

1. Flashing item
2. Flashing base price
3. Bends
4. Girths
5. Length

[![image.png](https://hugeerp10.co.za/hsofmanual/uploads/images/gallery/2024-08/scaled-1680-/6yGimage.png)](https://hugeerp10.co.za/hsofmanual/uploads/images/gallery/2024-08/6yGimage.png)
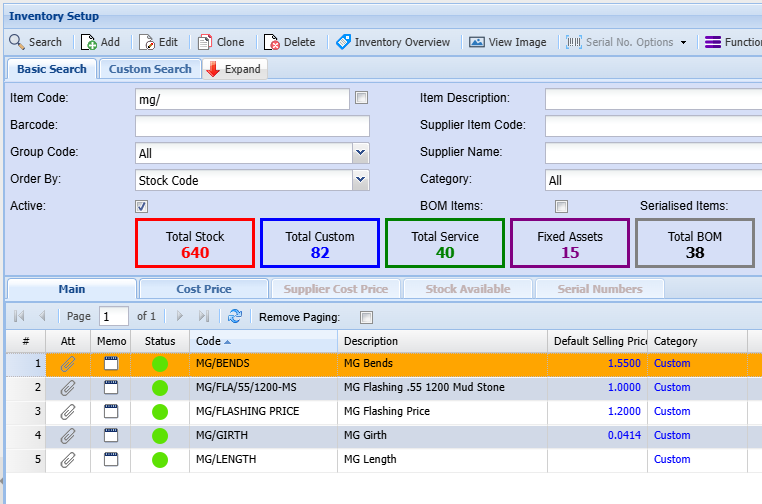
Setup Flashing base price

[![image.png](https://hugeerp10.co.za/hsofmanual/uploads/images/gallery/2024-08/scaled-1680-/UBqimage.png)](https://hugeerp10.co.za/hsofmanual/uploads/images/gallery/2024-08/UBqimage.png)
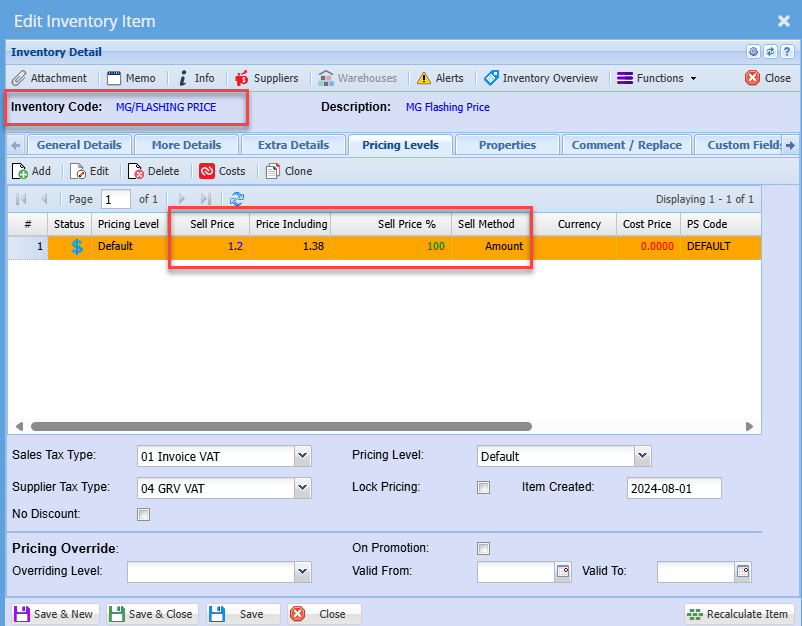
Setup Bends

[![image.png](https://hugeerp10.co.za/hsofmanual/uploads/images/gallery/2024-08/scaled-1680-/jxwimage.png)](https://hugeerp10.co.za/hsofmanual/uploads/images/gallery/2024-08/jxwimage.png)
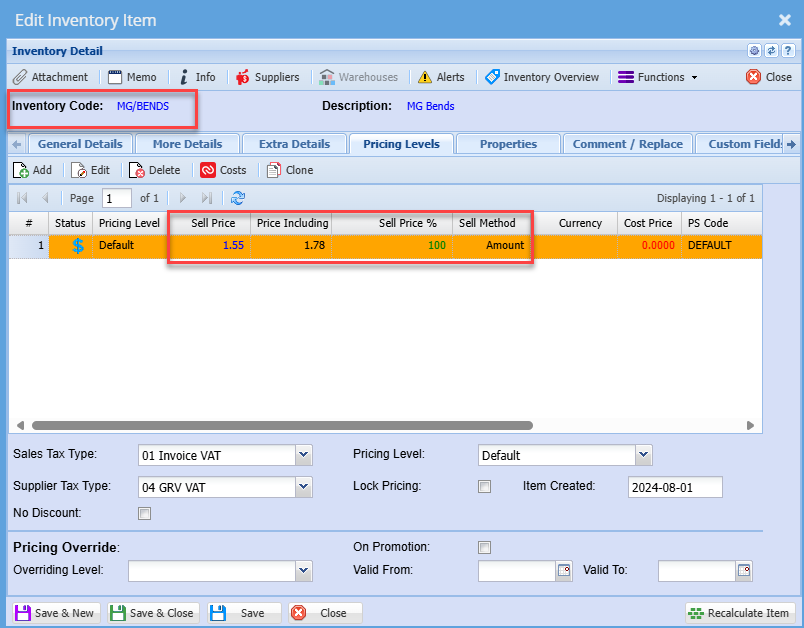
Setup Girth

[![image.png](https://hugeerp10.co.za/hsofmanual/uploads/images/gallery/2024-08/scaled-1680-/3d3image.png)](https://hugeerp10.co.za/hsofmanual/uploads/images/gallery/2024-08/3d3image.png)
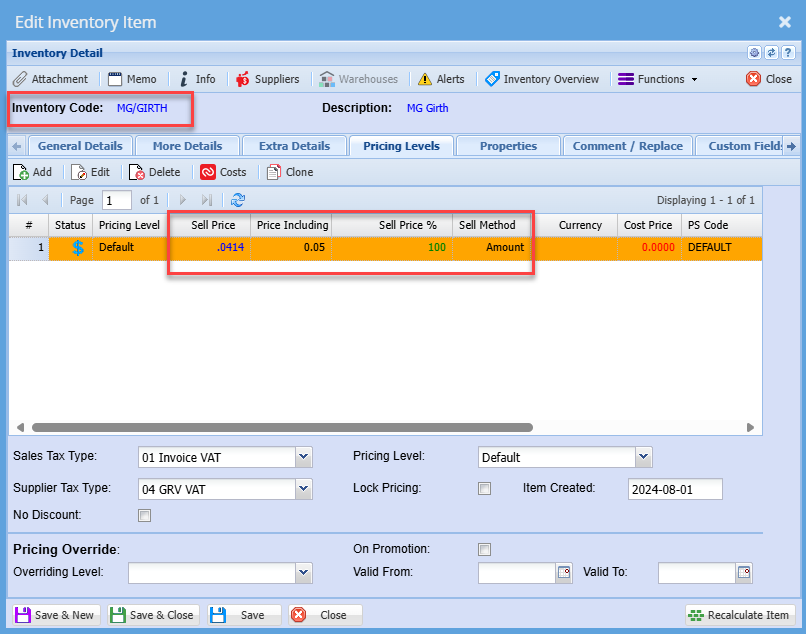
Setup Length

Sell price is zero as this is only going to be used as a multiplier

[![image.png](https://hugeerp10.co.za/hsofmanual/uploads/images/gallery/2024-08/scaled-1680-/glyimage.png)](https://hugeerp10.co.za/hsofmanual/uploads/images/gallery/2024-08/glyimage.png)
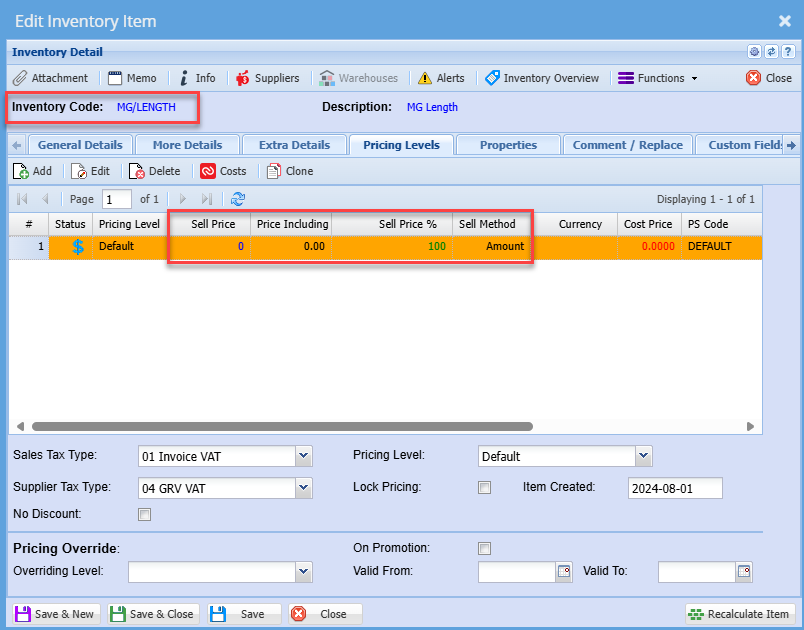
---

Setup Flashing item with Dimension Formula

Enable Dimensions formula

[![image.png](https://hugeerp10.co.za/hsofmanual/uploads/images/gallery/2024-08/scaled-1680-/erNimage.png)](https://hugeerp10.co.za/hsofmanual/uploads/images/gallery/2024-08/erNimage.png)
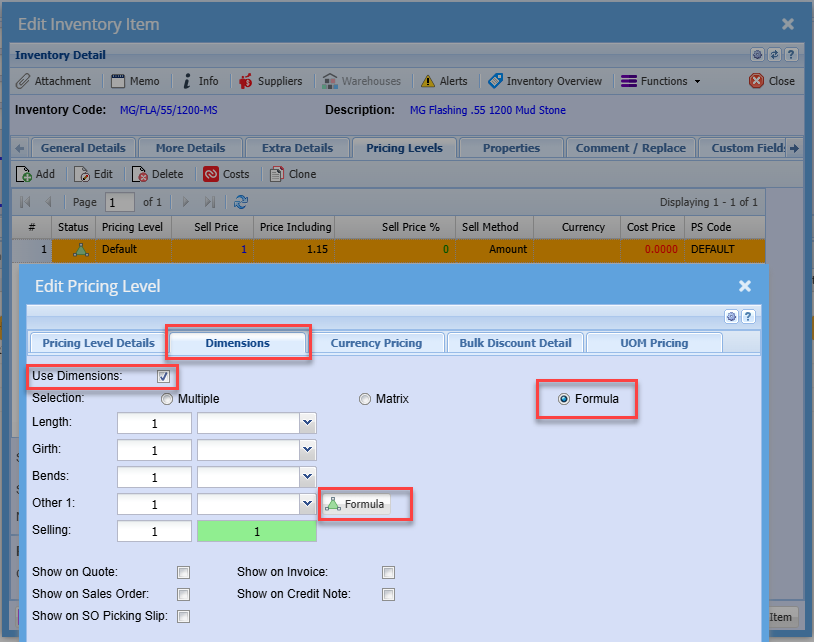
Setup line items to affect sell price

[![image.png](https://hugeerp10.co.za/hsofmanual/uploads/images/gallery/2024-08/scaled-1680-/HYoimage.png)](https://hugeerp10.co.za/hsofmanual/uploads/images/gallery/2024-08/HYoimage.png)
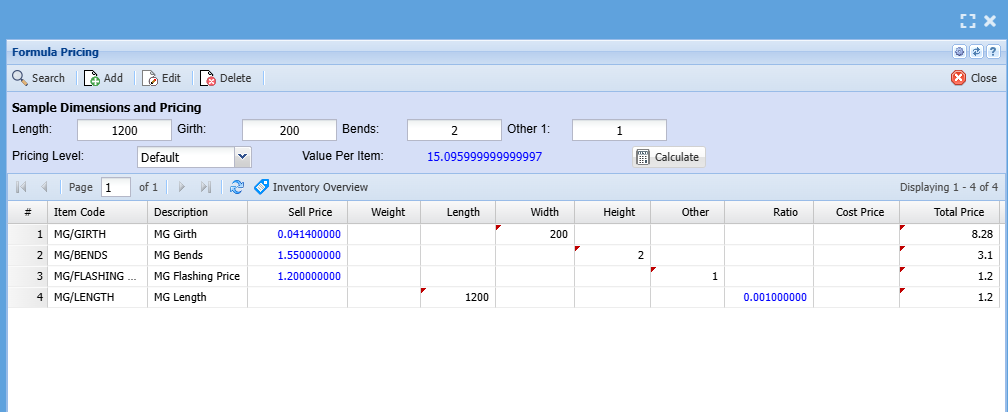
Setup Girth sell pricing

[![image.png](https://hugeerp10.co.za/hsofmanual/uploads/images/gallery/2024-08/scaled-1680-/1ptimage.png)](https://hugeerp10.co.za/hsofmanual/uploads/images/gallery/2024-08/1ptimage.png)
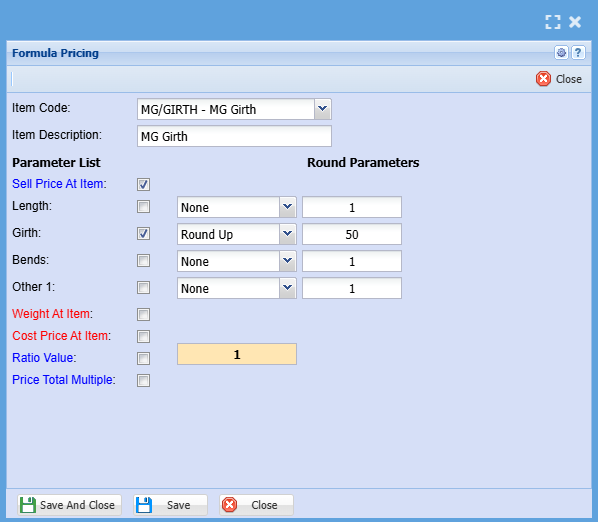
Setup Bends sell pricing

[![image.png](https://hugeerp10.co.za/hsofmanual/uploads/images/gallery/2024-08/scaled-1680-/SZVimage.png)](https://hugeerp10.co.za/hsofmanual/uploads/images/gallery/2024-08/SZVimage.png)
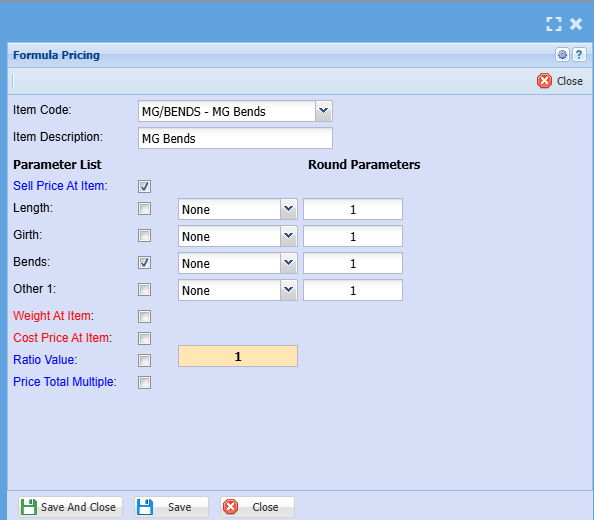
Setup Flashing sell pricing

[![image.png](https://hugeerp10.co.za/hsofmanual/uploads/images/gallery/2024-08/scaled-1680-/z8ximage.png)](https://hugeerp10.co.za/hsofmanual/uploads/images/gallery/2024-08/z8ximage.png)

The items above will add up together

1. Girth
2. Bends
3. Flashing Price

Then add in Length which will be marked as a multiplier

Formula is (Girth + Bends + Flashing Price) x Length = Sell price

Price Total Multiple is ticked on this item.

This means that the total of the other prices will be multiplied by this item

The item will be excluded from the sum total price as it works as a multiplication

[![image.png](https://hugeerp10.co.za/hsofmanual/uploads/images/gallery/2024-08/scaled-1680-/uxzimage.png)](https://hugeerp10.co.za/hsofmanual/uploads/images/gallery/2024-08/uxzimage.png)
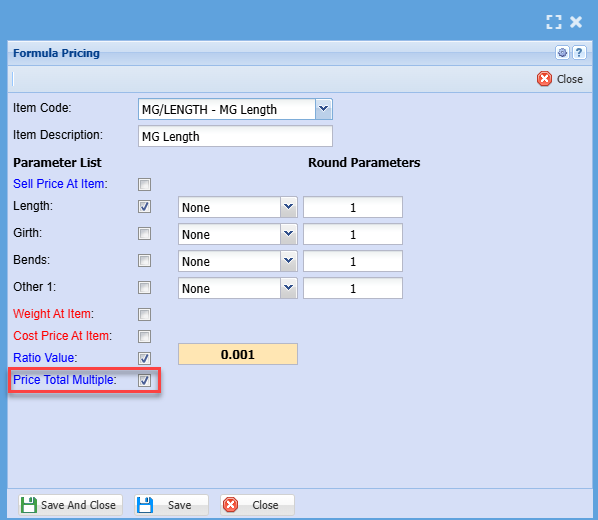
---

#### Setup Bill of materials for costs

Setup costing for costs for Coil

[![image.png](https://hugeerp.co.nz/manual/uploads/images/gallery/2024-07/scaled-1680-/l1Wimage.png)](https://hugeerp.co.nz/manual/uploads/images/gallery/2024-07/l1Wimage.png)
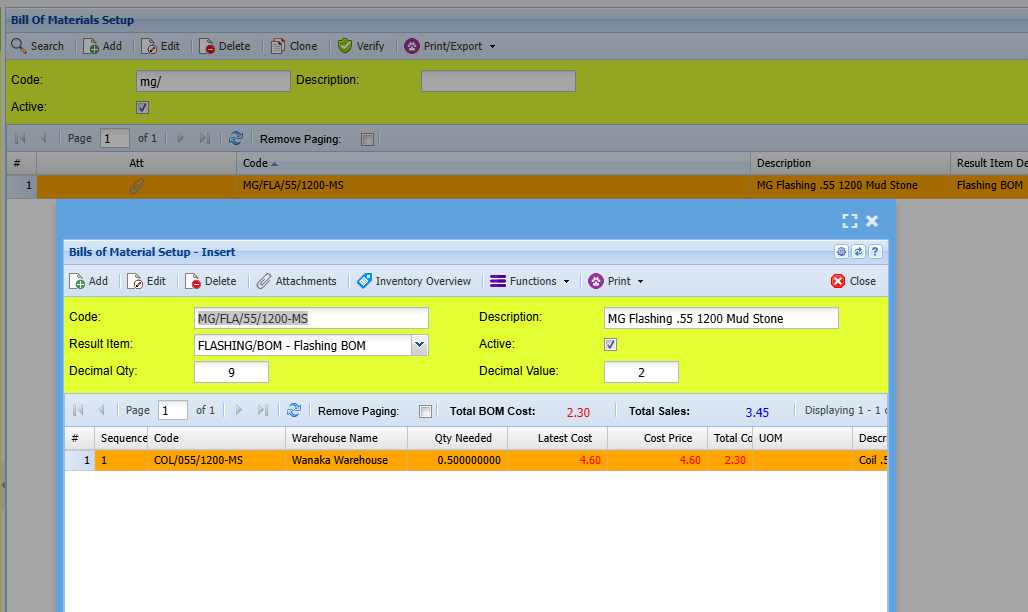
Check settings for BOM item for coil

[![image.png](https://hugeerp.co.nz/manual/uploads/images/gallery/2024-07/scaled-1680-/LGjimage.png)](https://hugeerp.co.nz/manual/uploads/images/gallery/2024-07/LGjimage.png)
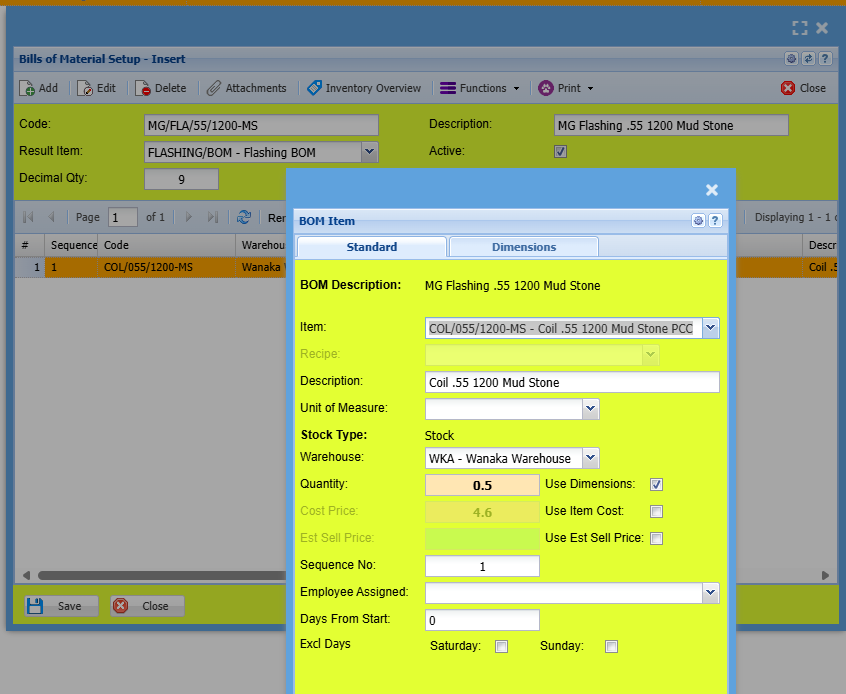
[![image.png](https://hugeerp.co.nz/manual/uploads/images/gallery/2024-07/scaled-1680-/6R6image.png)](https://hugeerp.co.nz/manual/uploads/images/gallery/2024-07/6R6image.png)
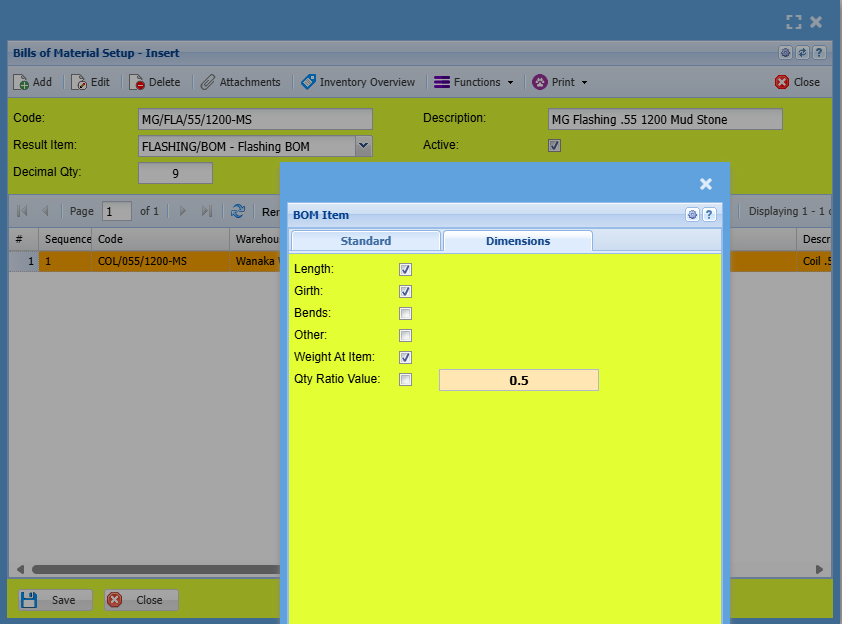
# Wastage

Track wastage items by creating a new wastage item and flagging it a wastage item.

<div class="x_elementToProof" id="bkmrk-wastage-item-is-acti">Wastage item is activated on an item or custom item</div><div class="x_elementToProof" id="bkmrk-">  
</div><div class="x_elementToProof" id="bkmrk-setup-the-wastage-it">Setup the Wastage Item in Inventory Setup</div><div class="x_elementToProof" id="bkmrk-tick-to-activate-was">Tick the Wastage item box to activate Wastage Item under the Extra Details Tab</div><div class="x_elementToProof" id="bkmrk-tick-the-boxes-of-th">Tick the boxes of the perimeters for your wastage item (Quantity, Length, Weight, Width, Height, Ratio)</div><div class="x_elementToProof" id="bkmrk-button-to-open-up-ne">Press the Wastage Item Button to open up new menu to show all linked wastage items</div><div class="x_elementToProof" id="bkmrk--1"></div>[![image.png](https://hugeerp10.co.za/hsofmanual/uploads/images/gallery/2025-01/scaled-1680-/iqfimage.png)](https://hugeerp10.co.za/hsofmanual/uploads/images/gallery/2025-01/iqfimage.png)

<div class="x_elementToProof" id="bkmrk-when-this-item-is-ad">When this item is added to a job, which is flagged as Wastage item.</div><div class="x_elementToProof" id="bkmrk-then-the-user-would-">Then the user would need to select which wastage item that is been used.</div><div class="x_elementToProof" id="bkmrk-a-formular-is-used-t">A formular is used to work out what quantity to use to log the item quantity.</div><div class="x_elementToProof" id="bkmrk-item-will-then-be-ma">Item will then be marked as status - Out, once used</div>---

##### **Wastage List**

<div class="x_elementToProof" id="bkmrk-button-will-open-up-">Button will open up a new window that shows wastage items linked to main item</div><div class="x_elementToProof" id="bkmrk--5">  
</div><div class="x_elementToProof" id="bkmrk-there-are-three-stat">There are three statuses on wastage item</div>1. <div>In</div>
2. <div class="x_elementToProof">Out</div>
3. <div class="x_elementToProof">Completed</div>

<div class="x_elementToProof" id="bkmrk--6">  
</div><div class="x_elementToProof" id="bkmrk-allow-for-an-import-">Allow for an import of wastage items</div><div class="x_elementToProof" id="bkmrk--7"></div>[![image.png](https://hugeerp10.co.za/hsofmanual/uploads/images/gallery/2025-01/scaled-1680-/s5Vimage.png)](https://hugeerp10.co.za/hsofmanual/uploads/images/gallery/2025-01/s5Vimage.png)

---

<div class="x_elementToProof" id="bkmrk--13"></div>**Manually Adjust Quantity**

You can manually adjust the quantity of a specific item by clicking Qty Adjustment.

Select whether you are wanting to increase or decrease the quantity, add a quantity you are adjusting and click apply.

[![image.png](https://hugeerp10.co.za/hsofmanual/uploads/images/gallery/2025-01/scaled-1680-/vjkimage.png)](https://hugeerp10.co.za/hsofmanual/uploads/images/gallery/2025-01/vjkimage.png)
---


#####  

#### Bulk Wastage Items Import

<div class="x_elementToProof" id="bkmrk-allows-to-import-was">Allows to import Wastage items and link to items</div><div class="x_elementToProof" id="bkmrk--35"></div>[![image.png](https://hugeerp10.co.za/hsofmanual/uploads/images/gallery/2025-01/scaled-1680-/WwEimage.png)](https://hugeerp10.co.za/hsofmanual/uploads/images/gallery/2025-01/WwEimage.png)

Click Export to get the template for your import, transfer your data to this excel template.

[![image.png](https://hugeerp10.co.za/hsofmanual/uploads/images/gallery/2025-01/scaled-1680-/BUPimage.png)](https://hugeerp10.co.za/hsofmanual/uploads/images/gallery/2025-01/BUPimage.png)
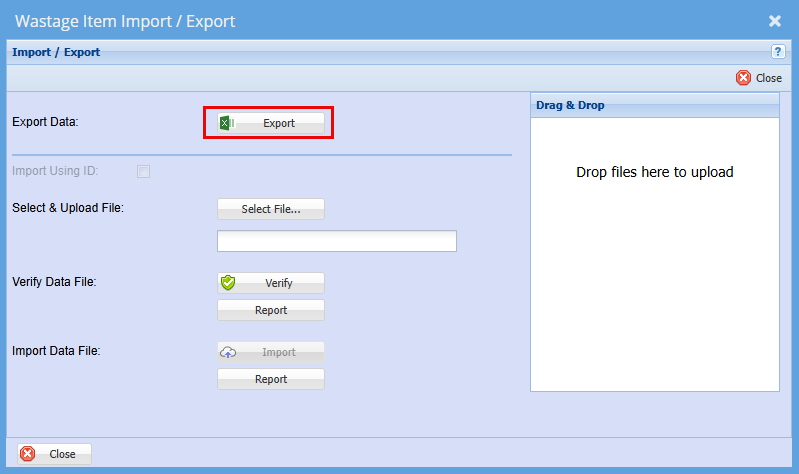
When your data file (Excel Spreadsheet) is ready go back to the Wastage Import/Export Tab, select your File, Click Verify and then Import.

[![image.png](https://hugeerp10.co.za/hsofmanual/uploads/images/gallery/2025-01/scaled-1680-/n0Fimage.png)](https://hugeerp10.co.za/hsofmanual/uploads/images/gallery/2025-01/n0Fimage.png)
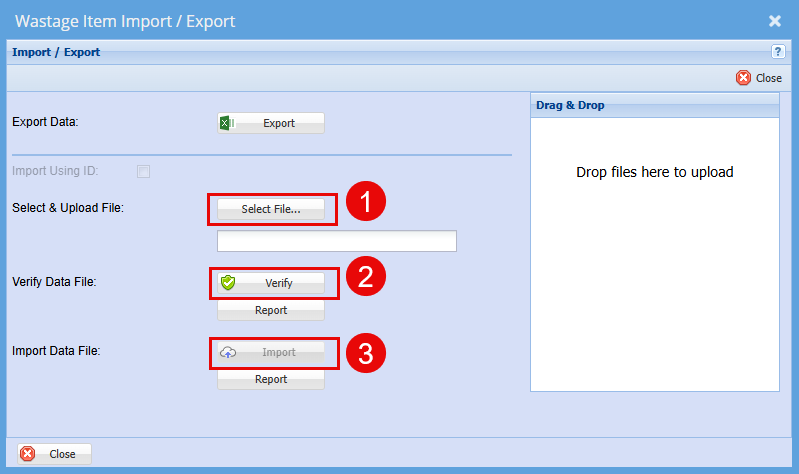
---

##### **Wastage Stock Level Adjustment and Adding New Wastage Item**

<span style="color: rgb(45, 194, 107);">**<span class="ts2">Inventory Module &gt; Activity &gt; Stock Level Adjustment</span>**</span>

Click Add

Add a Short Description for what you are adding e.g. Stock, off cuts, or be specific to the item being adjusted.

Then click Save

[![image.png](https://hugeerp.co.nz/manual/uploads/images/gallery/2025-02/scaled-1680-/image.png)](https://hugeerp.co.nz/manual/uploads/images/gallery/2025-02/image.png)
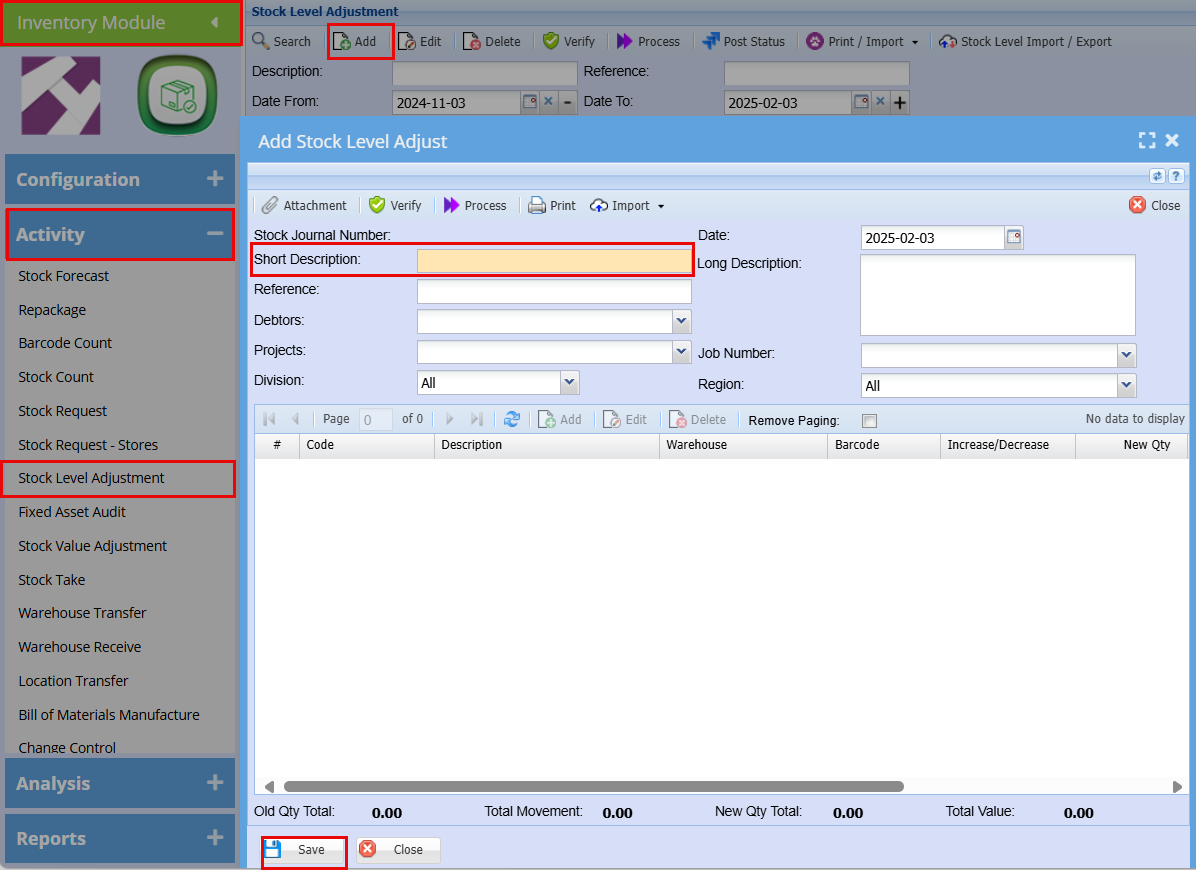
Once you click Save the Add, Edit and Delete buttons will become available.

[![image.png](https://hugeerp.co.nz/manual/uploads/images/gallery/2025-02/scaled-1680-/I22image.png)](https://hugeerp.co.nz/manual/uploads/images/gallery/2025-02/I22image.png)
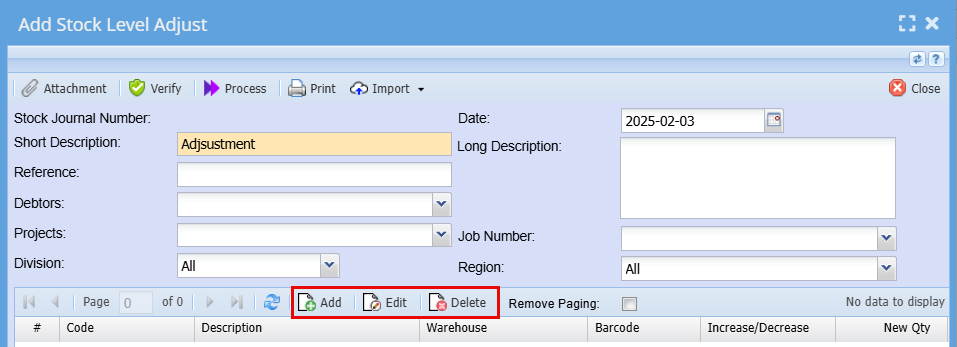
1\. Click Add to add a new wastage item.

2\. Search for your wastage code in the drop-down menu.

3\. Add the total quantity of stock you are increasing by

4\. Click the Wastage Button

[![image.png](https://hugeerp10.co.za/hsofmanual/uploads/images/gallery/2025-02/scaled-1680-/jMUimage.png)](https://hugeerp10.co.za/hsofmanual/uploads/images/gallery/2025-02/jMUimage.png)
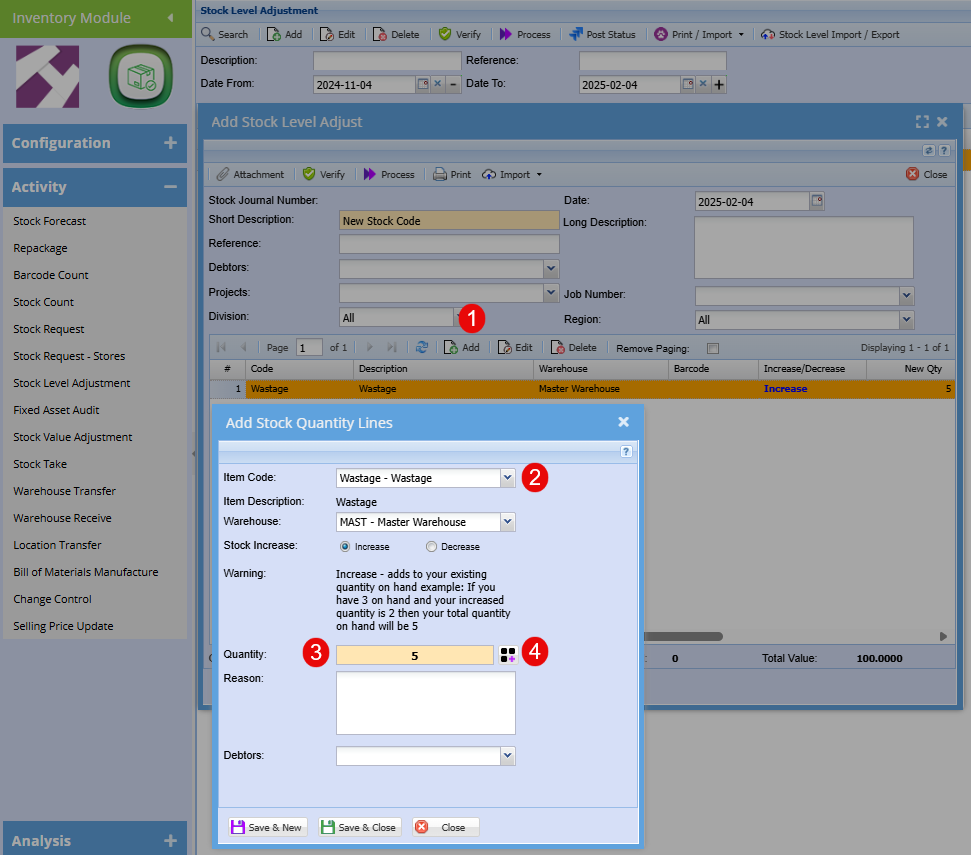
This window shows you all your existing wastage code that you currently have along with their quantities, but we are adding a new wastage item.

[![image.png](https://hugeerp10.co.za/hsofmanual/uploads/images/gallery/2025-02/scaled-1680-/m3nimage.png)](https://hugeerp10.co.za/hsofmanual/uploads/images/gallery/2025-02/m3nimage.png)
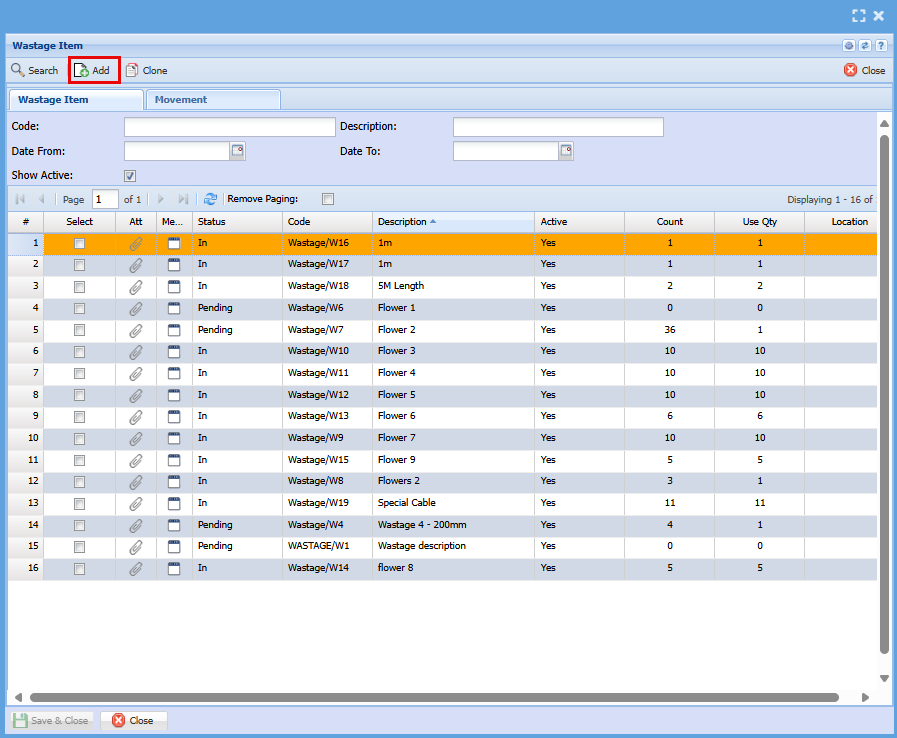
Click the Add button, a new window will open Called Wastage Item Add.

The wastage code will auto populate with the next code in sequence.

In this section you will add perimeters for your wastage item such as Quantity, Length, Weight, Width, Height, Ratio.

<p class="callout warning">Tick the box next to each of the perimeters you want to apply to this wastage item, or it will not be taken into account when you click save</p>

<p class="callout warning">Be specific in your Description as this will be what tells the next person what this item is.</p>

Once you happy with what you have added you can click "Save &amp; Close"

[![image.png](https://hugeerp.co.nz/manual/uploads/images/gallery/2025-02/scaled-1680-/2fZimage.png)](https://hugeerp.co.nz/manual/uploads/images/gallery/2025-02/2fZimage.png)

<table border="1" id="bkmrk-wastage-code-this-co" style="border-collapse: collapse; width: 100%;"><colgroup><col style="width: 13.2804%;"></col><col style="width: 86.6137%;"></col></colgroup><tbody><tr><td>Wastage Code</td><td>This code is Automatically added with the next numerical code.</td></tr><tr><td>Description</td><td>Make sure to add the detail needed to identify this item at a glance, add colour, size, product name etc.</td></tr><tr><td>Location</td><td>If you have locations set up you can add where one would find this item</td></tr><tr><td>Quantity</td><td>Add how many of this item you are adding</td></tr><tr><td>Weight</td><td>Add the weight if needed </td></tr><tr><td>Ratio</td><td>This feature is used to track and sell various lengths of your waste items. For instance, when managing stock and using different lengths of the stock item to achieve the total length needed for your project, knowing the length of each piece is crucial. You will input the length in millimeters, then tick the ratio, length, and quantity boxes (as shown in the above screenshot). This will display the length in meters on your invoice.</td></tr><tr><td>Bin Location </td><td>The bin location is a certain box that the wastage item may be in within the location it would be found.</td></tr><tr><td>Status</td><td>  
</td></tr><tr><td>Active</td><td>This tick will automatically be ticked, however if you would want this item to be inactive, untick this box</td></tr><tr><td>Length</td><td>Add the length of this item if needed </td></tr><tr><td>Width</td><td>Add the width of this item if needed </td></tr><tr><td>Hight </td><td>Add the height of this item if needed </td></tr><tr><td>Comments</td><td>This is a text box so any extra notes can be added here.</td></tr></tbody></table>

Once you have clicked Save &amp; Close you will see your item added to the previous screen with its quantity.

[![image.png](https://hugeerp.co.nz/manual/uploads/images/gallery/2025-02/scaled-1680-/myYimage.png)](https://hugeerp.co.nz/manual/uploads/images/gallery/2025-02/myYimage.png)
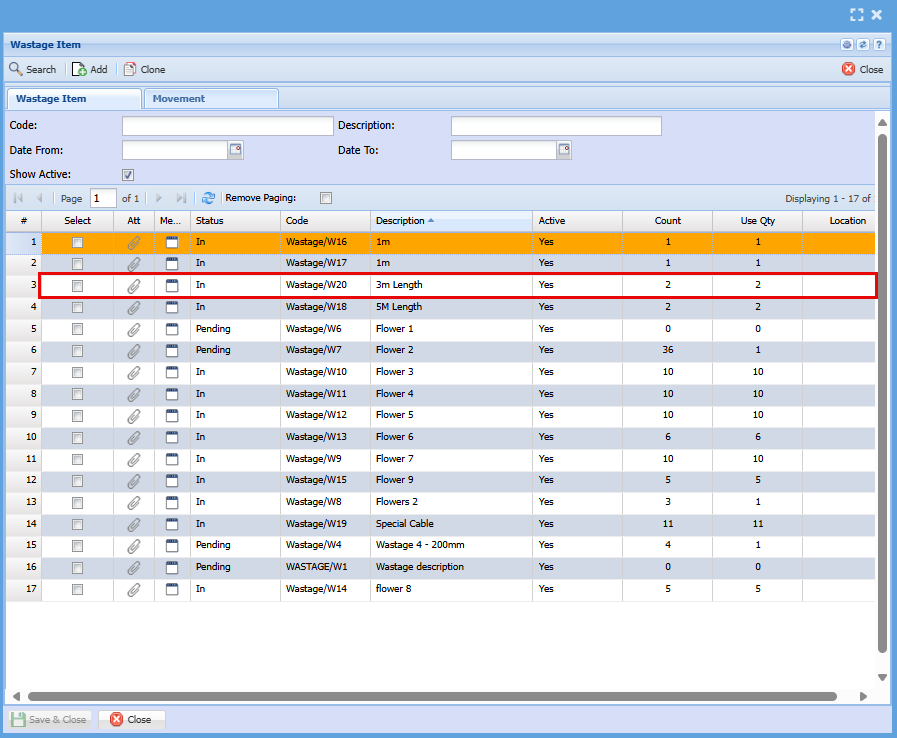
Click Close, you will then see the Add Stock Quantity Lines window, click Save &amp; Close

[![image.png](https://hugeerp.co.nz/manual/uploads/images/gallery/2025-02/scaled-1680-/2R2image.png)](https://hugeerp.co.nz/manual/uploads/images/gallery/2025-02/2R2image.png)

Once you have clicked save and Close, you will go back to the Add Stock Level Adjustment window, you will see the stock item you have added.

From here you can choose to add another stock item by repeating the above steps, or you can click the process button at the top of the screen to complete this process &gt;Refresh Status &gt; Close.

[![image.png](https://hugeerp.co.nz/manual/uploads/images/gallery/2025-02/scaled-1680-/OQaimage.png)](https://hugeerp.co.nz/manual/uploads/images/gallery/2025-02/OQaimage.png)

Now that you have processed your new Wastage item you can go see it In Inventory Setup

<span style="color: rgb(45, 194, 107);">**<span class="ts2">Inventory &gt;Configuration&gt; Inventory Setup</span>**</span>

Add your Wastage code to the Item Code Box and click "Search"

Double click on your Wastage Item, the Edit Inventory Item window will open.

Click on the Extra Details Tab

Click the "Wastage Item" button.

[![image.png](https://hugeerp.co.nz/manual/uploads/images/gallery/2025-02/scaled-1680-/7kZimage.png)](https://hugeerp.co.nz/manual/uploads/images/gallery/2025-02/7kZimage.png)
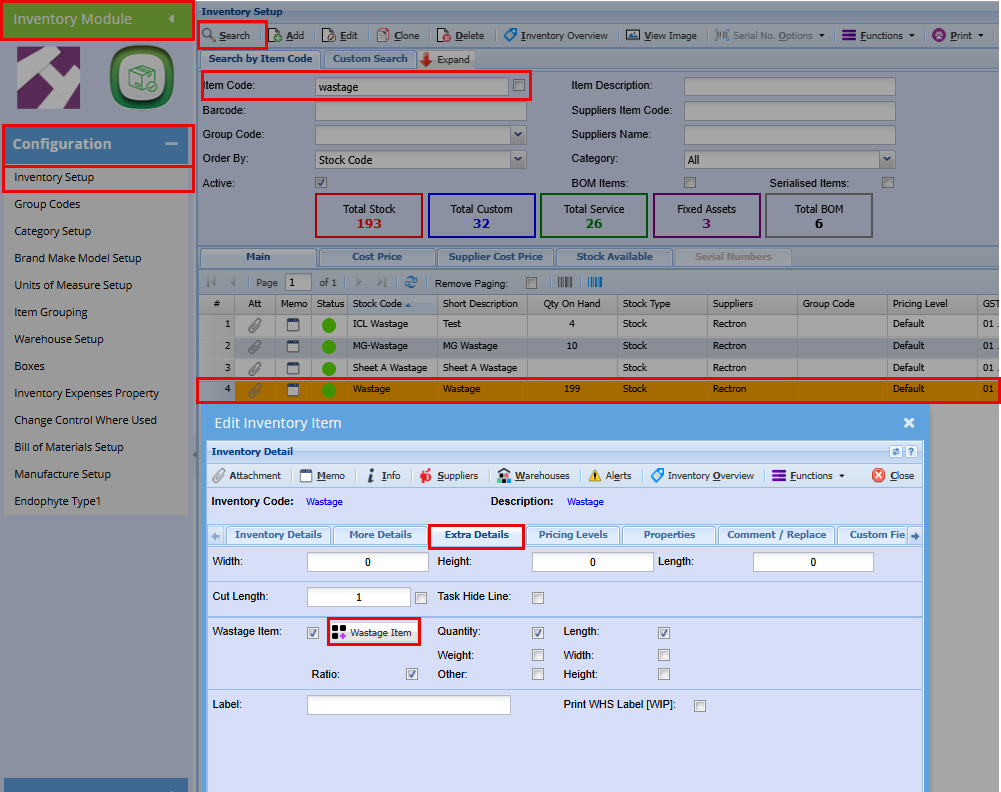
The Below window will open and here you will be able to see your new wastage item along with the quantity added.

[![image.png](https://hugeerp.co.nz/manual/uploads/images/gallery/2025-02/scaled-1680-/mWDimage.png)](https://hugeerp.co.nz/manual/uploads/images/gallery/2025-02/mWDimage.png)
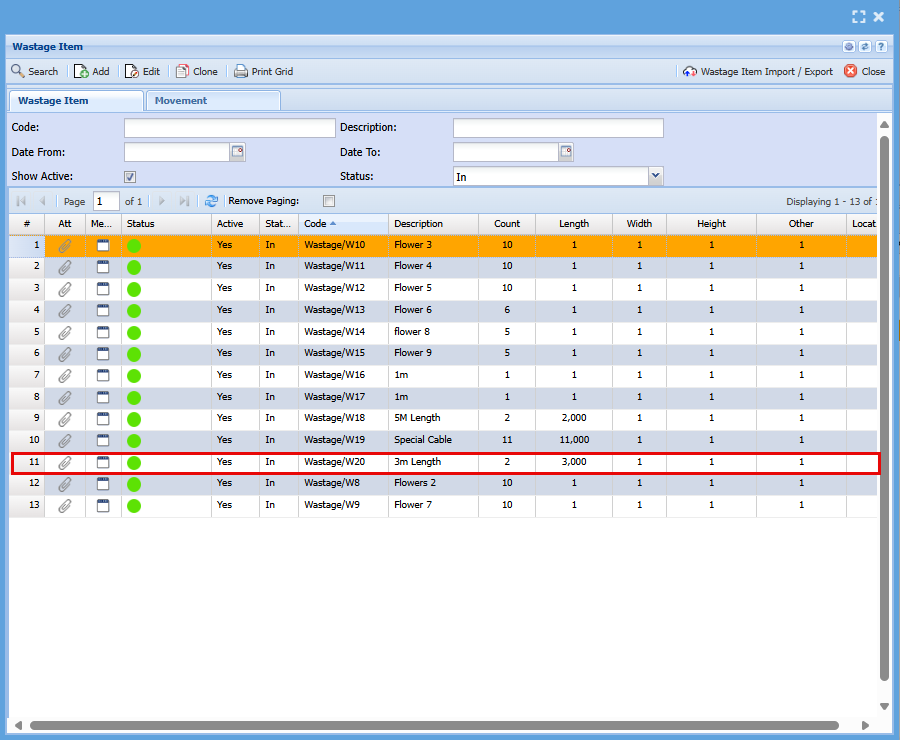
---


##### **Wastage Stock Level Adjustment to an Existing Wastage Item**

Adding stock to an existing wastage item is a twostep process. First step is to add stock, and the second will be to allocate the stock.

**Step 1**

1\. Click Add to add a new wastage item.

2\. Search for your wastage code in the drop-down menu.

3\. Add a quantity to increase by.

<p class="callout info">This should be the total quantity, no matter the description as you will allocate the quantities to the specific items in the next step.</p>

At this point click the "Save and Close"

[![image.png](https://hugeerp.co.nz/manual/uploads/images/gallery/2025-02/scaled-1680-/AJLimage.png)](https://hugeerp.co.nz/manual/uploads/images/gallery/2025-02/AJLimage.png)

Click the "Process" button at the top of the screen to complete this process &gt;Refresh Status &gt; Close.

[![image.png](https://hugeerp.co.nz/manual/uploads/images/gallery/2025-02/scaled-1680-/xGFimage.png)](https://hugeerp.co.nz/manual/uploads/images/gallery/2025-02/xGFimage.png)

**Step 2**

Now that you have added stock to an existing wastage item you to allocate the stock to a specific wastage item

<span style="color: rgb(45, 194, 107);">**<span class="ts2">Inventory &gt;Configuration&gt; Inventory Setup</span>**</span>

1\. Add your Wastage code to the Item Code Box and click "Search"

2\. Double click on your Wastage Item, the Edit Inventory Item window will open.

3\. lick on the "Extra Details" Tab

4\. Click the "Wastage Item" button.

[![image.png](https://hugeerp.co.nz/manual/uploads/images/gallery/2025-02/scaled-1680-/7kZimage.png)](https://hugeerp.co.nz/manual/uploads/images/gallery/2025-02/7kZimage.png)

When click the wastage button the Wastage item window will open.

<p class="callout info">You will see that the quantity added will increase the Quantity on Hand but will be out by the quantity added when you see the total of the current allocated quantities. </p>

[![image.png](https://hugeerp.co.nz/manual/uploads/images/gallery/2025-02/scaled-1680-/zIUimage.png)](https://hugeerp.co.nz/manual/uploads/images/gallery/2025-02/zIUimage.png)

You now need to allocate the quantity that you processed in your stock level adjustment.

e.g.: if your Stock Level Adjustment quantity was 5:

2x is for Flowers 3  
2x is for 1m and   
1x is for Special Cable.

Double click on each of those items, make the adjustments and click "Save &amp; Close"

Your Quantity on hand and your count total should be the same.

[![image.png](https://hugeerp.co.nz/manual/uploads/images/gallery/2025-02/scaled-1680-/G5iimage.png)](https://hugeerp.co.nz/manual/uploads/images/gallery/2025-02/G5iimage.png)
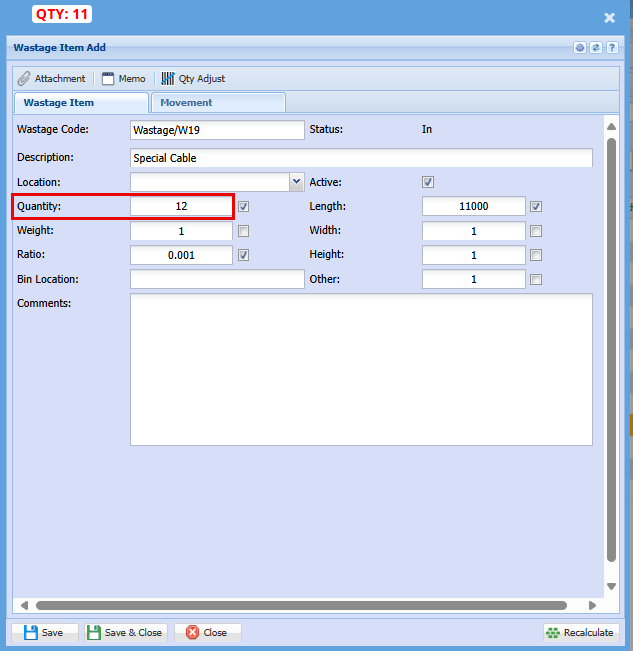
<div class="x_elementToProof" id="bkmrk--33"></div>---

##### **Photos and memo notes**

Take photos of the wastage and make notes on wastage items

[![image.png](https://hugeerp10.co.za/hsofmanual/uploads/images/gallery/2025-01/scaled-1680-/1nyimage.png)](https://hugeerp10.co.za/hsofmanual/uploads/images/gallery/2025-01/1nyimage.png)
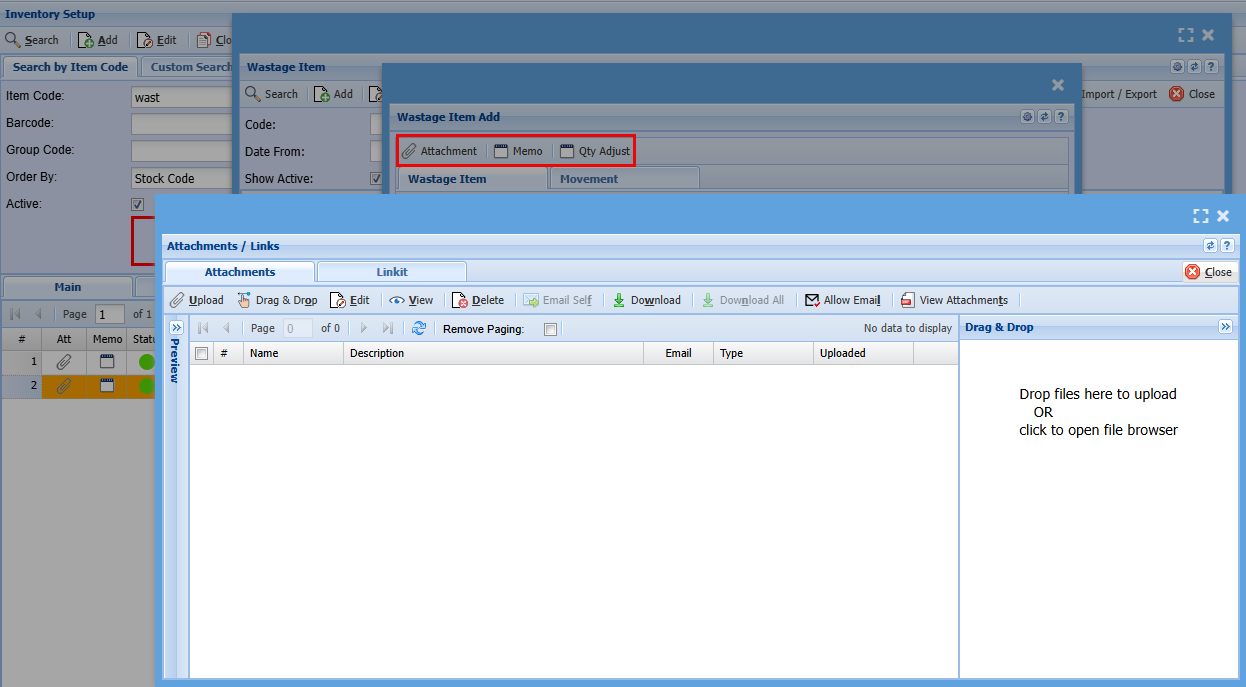
---

##### **Managing Wastage on Documents**

Wastage is managed on the following documents

1. Invoice out
2. Credit notes in
3. Manage job Scope Creep and Cost to Company - wastage out
4. Item setup - manage new wastage items marked as in

##### Invoice

Invoice lines activated for Wastage out

Add an invoice as normal, when you want to add a wastage item, select your wastage item from the Stock Item drop down, then click on the Wastage button as shown below.

Your Quantity will always default to 1

[![image.png](https://hugeerp10.co.za/hsofmanual/uploads/images/gallery/2024-09/scaled-1680-/FMoimage.png)](https://hugeerp10.co.za/hsofmanual/uploads/images/gallery/2024-09/FMoimage.png)
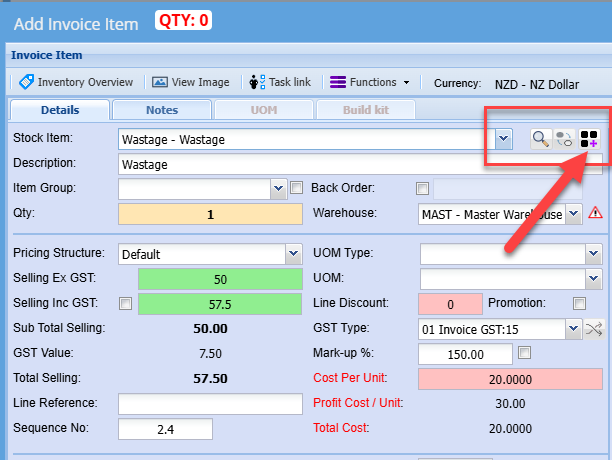
Select the item/Items you want to add to the invoice

You can manually change the quantity in the "Use Qty" column by clicking in the block and changing the quantity you want to add to the invoice.

Click Save &amp; Close

<p class="callout warning">Check your quantity ties up to the quantity of items you are adding to your invoice</p>

[![image.png](https://hugeerp10.co.za/hsofmanual/uploads/images/gallery/2025-01/scaled-1680-/L59image.png)](https://hugeerp10.co.za/hsofmanual/uploads/images/gallery/2025-01/L59image.png)

If you would like to see what was added to this invoice, click on the Movement tab

Here you can also remove any items by ticking the box of the specific item and then click Revert.

[![image.png](https://hugeerp10.co.za/hsofmanual/uploads/images/gallery/2025-01/scaled-1680-/7h2image.png)](https://hugeerp10.co.za/hsofmanual/uploads/images/gallery/2025-01/7h2image.png)
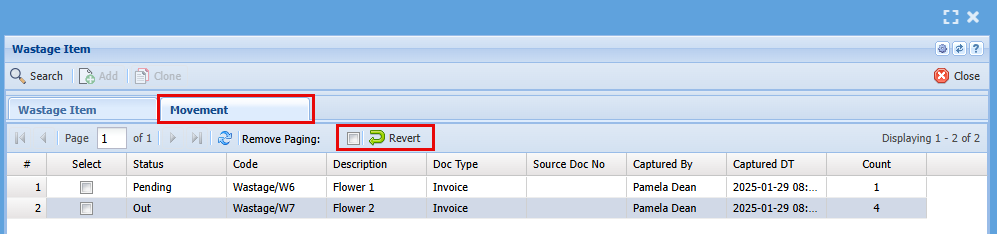
On your invoice you will see an item of wastage and a quantity however if you open the wastage item and go into the Notes tab, a description on the wastage item will be copied there.

[![image.png](https://hugeerp10.co.za/hsofmanual/uploads/images/gallery/2025-01/scaled-1680-/IzQimage.png)](https://hugeerp10.co.za/hsofmanual/uploads/images/gallery/2025-01/IzQimage.png)
[![image.png](https://hugeerp10.co.za/hsofmanual/uploads/images/gallery/2025-01/scaled-1680-/oNvimage.png)](https://hugeerp10.co.za/hsofmanual/uploads/images/gallery/2025-01/oNvimage.png)
---

##### Credit Notes

Credit note lines activated for Wastage in

[![image.png](https://hugeerp10.co.za/hsofmanual/uploads/images/gallery/2024-09/scaled-1680-/xNOimage.png)](https://hugeerp10.co.za/hsofmanual/uploads/images/gallery/2024-09/xNOimage.png)
##### Job lines SC and CTC

Manage wastage usage on jobs

[![image.png](https://hugeerp10.co.za/hsofmanual/uploads/images/gallery/2024-09/scaled-1680-/kTNimage.png)](https://hugeerp10.co.za/hsofmanual/uploads/images/gallery/2024-09/kTNimage.png)
Adding a wastage line to a job

[![image.png](https://hugeerp10.co.za/hsofmanual/uploads/images/gallery/2024-09/scaled-1680-/NL4image.png)](https://hugeerp10.co.za/hsofmanual/uploads/images/gallery/2024-09/NL4image.png)
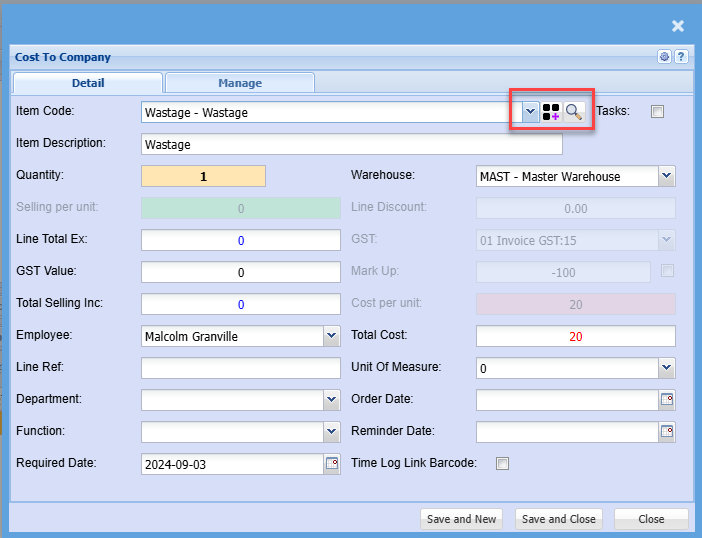
---

#### Selecting Wastage onto a document

When selecting wastage onto a document, wastage looks at all wastage marked as In.

Select the wastage to be used.

On save and close, the wastage will automatically be assigned to the document or job.

The wastage item will be marked as Out and removed from list view.

[![image.png](https://hugeerp10.co.za/hsofmanual/uploads/images/gallery/2024-09/scaled-1680-/5e0image.png)](https://hugeerp10.co.za/hsofmanual/uploads/images/gallery/2024-09/5e0image.png)
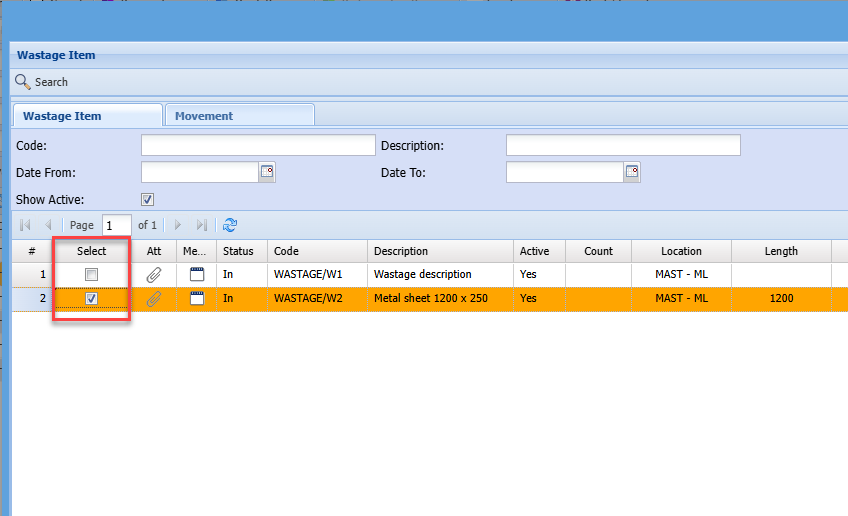
If wrong wastage item selected, then go to the movement tab to revert wastage back to In status.

Highlight the items to move back to In and click on Revert

[![image.png](https://hugeerp10.co.za/hsofmanual/uploads/images/gallery/2024-09/scaled-1680-/mrnimage.png)](https://hugeerp10.co.za/hsofmanual/uploads/images/gallery/2024-09/mrnimage.png)
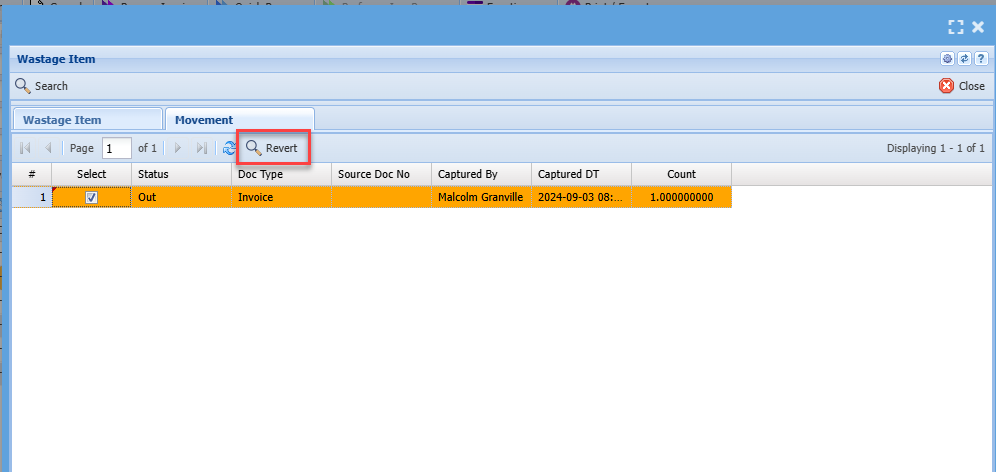
Quantity of wastage will be updated to quantity on item line based on tick calculations

In the example below, Quantity and Ratio is ticked, this means that A x B will make up the quantity to line item.

Quantity to be updated would be 3 because A- 6 x B- 0.5 = 3

This allows for square meters or linear meters etc to be tracked

[![image.png](https://hugeerp10.co.za/hsofmanual/uploads/images/gallery/2024-09/scaled-1680-/9Glimage.png)](https://hugeerp10.co.za/hsofmanual/uploads/images/gallery/2024-09/9Glimage.png)
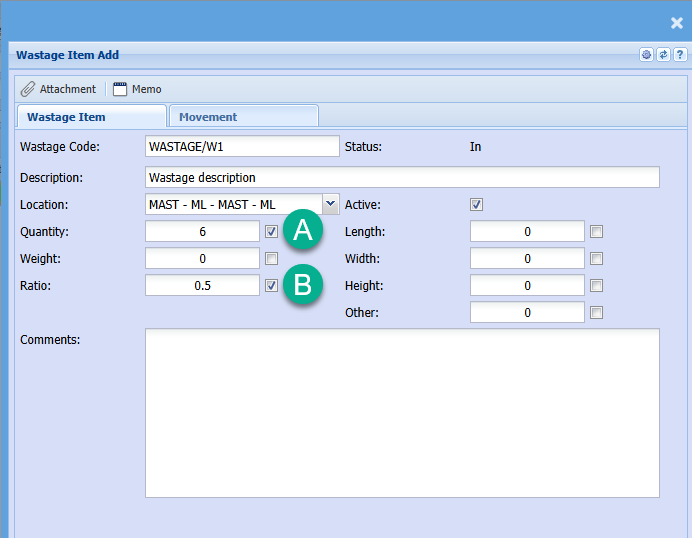
---

#### **Future development**

Wastage on quotes to set status to Pending

[![image.png](https://hugeerp10.co.za/hsofmanual/uploads/images/gallery/2024-09/scaled-1680-/AJkimage.png)](https://hugeerp10.co.za/hsofmanual/uploads/images/gallery/2024-09/AJkimage.png)
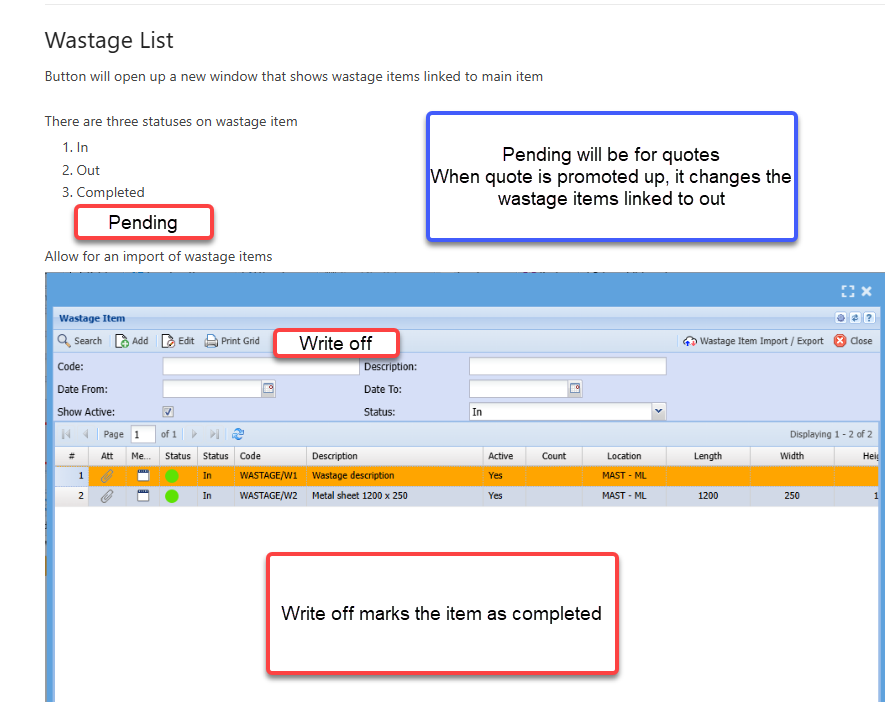
Search list for all wastage items

[![image.png](https://hugeerp10.co.za/hsofmanual/uploads/images/gallery/2024-09/scaled-1680-/Z3uimage.png)](https://hugeerp10.co.za/hsofmanual/uploads/images/gallery/2024-09/Z3uimage.png)
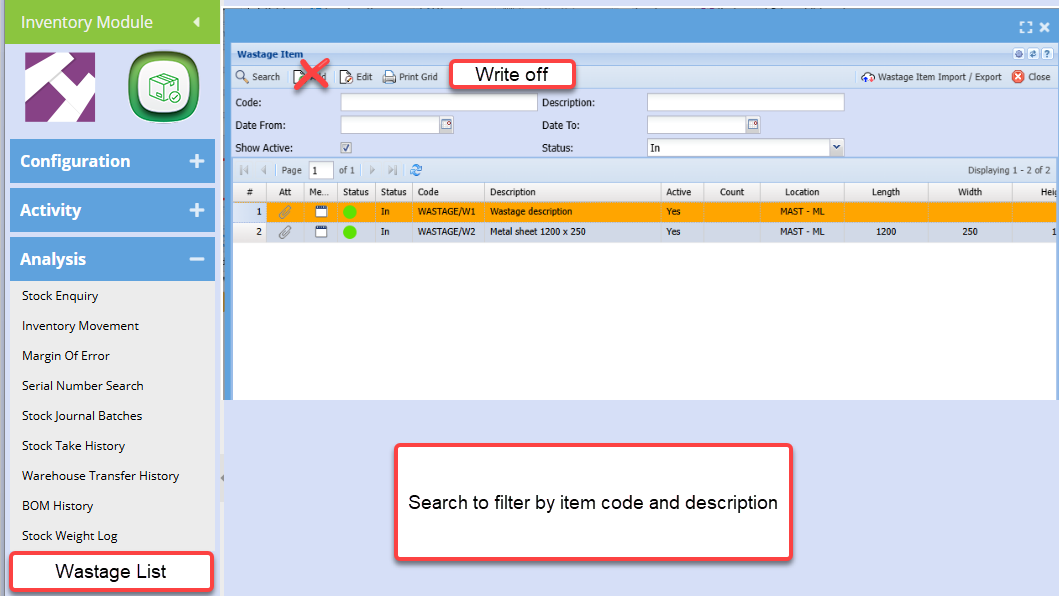
# Inventory Functions

[![image.png](https://hugeerp10.co.za/hsofmanual/uploads/images/gallery/2024-09/scaled-1680-/izvimage.png)](https://hugeerp10.co.za/hsofmanual/uploads/images/gallery/2024-09/izvimage.png)
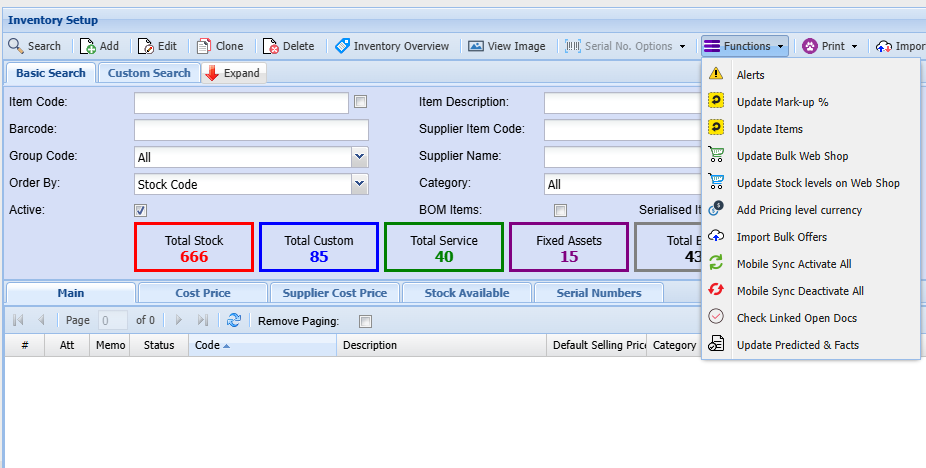
---

#### Alerts

<span class="ts0">Alerts allow an automatic pop-up to occur when selecting a specific customer, supplier, stock item and other sections within the system.</span>

<div aria-label="Page Section Options" class="pointer-container" id="bkmrk-%C2%A0-2" refs="pointer@pointer" tabindex="-1"><div class="pointer flex-container-row items-center justify-space-between p-s anim is-page-editable"><div class="flex-container-row items-center gap-s" refs="pointer@mode-section"><button class="text-button icon px-xs" title="Permalink mode, Press to show include tag"><svg class="svg-icon" data-icon="link" role="presentation" viewbox="0 0 24 24" xmlns="http://www.w3.org/2000/svg"></svg></button><div class="input-group"> <button class="button outline icon" title="Copy Link" type="button"><svg class="svg-icon" data-icon="copy" role="presentation" viewbox="0 0 24 24" xmlns="http://www.w3.org/2000/svg"></svg></button></div></div><svg class="svg-icon" data-icon="edit" role="presentation" viewbox="0 0 24 24" xmlns="http://www.w3.org/2000/svg"></svg></div></div><span class="ts0">When creating the alert it will be in an active state</span>

<span class="ts0">If you want to remove the alert, make the alert inactive or Cancel the alert</span>

<p class="callout info"><span class="ts0">Alerts can be created across the system for various document types</span></p>

[![image.png](https://hugeerp10.co.za/hsofmanual/uploads/images/gallery/2024-09/scaled-1680-/V2wimage.png)](https://hugeerp10.co.za/hsofmanual/uploads/images/gallery/2024-09/V2wimage.png)

---

#### Update Mark-up%

Highlight an item you want to change or update a mark-up% for, then click on mark-up%

[![image.png](https://hugeerp10.co.za/hsofmanual/uploads/images/gallery/2024-09/scaled-1680-/CAlimage.png)](https://hugeerp10.co.za/hsofmanual/uploads/images/gallery/2024-09/CAlimage.png)
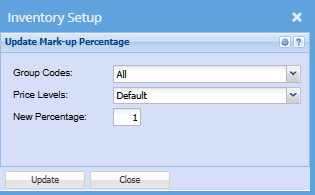
<table border="1" id="bkmrk-group-codes-select-t" style="border-collapse: collapse; width: 100%;"><colgroup><col style="width: 22.1482%;"></col><col style="width: 77.9507%;"></col></colgroup><tbody><tr><td>**Group Codes**</td><td>Select the correct group code on the drop down</td></tr><tr><td>**Pricing Levels**</td><td>Select the pricing level you want to update the mark-up percentage for</td></tr><tr><td>**New Percentage**</td><td>Add a new mark-up percentage</td></tr></tbody></table>

Once complete click update

---

#### Update Items

This is a shortcut to update details on an inventory item without having to open the whole item

[![image.png](https://hugeerp10.co.za/hsofmanual/uploads/images/gallery/2024-09/scaled-1680-/z1wimage.png)](https://hugeerp10.co.za/hsofmanual/uploads/images/gallery/2024-09/z1wimage.png)
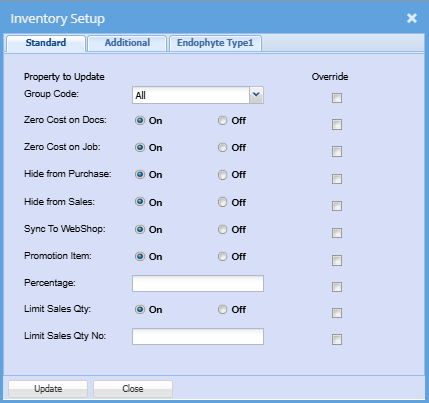
---

#### Update Bulk Web Shop

This function allows the user to activate the Web Shop indicator on all items without having to edit each item individually.

The Web Shop indicator activates items to be seen on the online web shop searches

To do a bulk update, click the Extra Drop down

Select Update Bilk Web Shop

![](https://hugeerp0.co.za/csp/webhelp/topics/images/image(3242).png)

![](https://hugeerp0.co.za/csp/webhelp/topics/images/image(3243).png)

[![image.png](https://hugeerp10.co.za/hsofmanual/uploads/images/gallery/2024-06/scaled-1680-/9YCimage.png)](https://hugeerp10.co.za/hsofmanual/uploads/images/gallery/2024-06/9YCimage.png)

---

#### Update Stock Level on Web Shop

This is a shortcut to update all stock level on a web shop

[![image.png](https://hugeerp10.co.za/hsofmanual/uploads/images/gallery/2024-09/scaled-1680-/mNlimage.png)](https://hugeerp10.co.za/hsofmanual/uploads/images/gallery/2024-09/mNlimage.png)
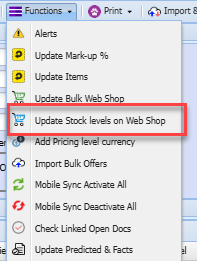
---

#### Add Pricing Level Currency

This button allows you to update the pricing level currency

[![image.png](https://hugeerp10.co.za/hsofmanual/uploads/images/gallery/2024-09/scaled-1680-/g40image.png)](https://hugeerp10.co.za/hsofmanual/uploads/images/gallery/2024-09/g40image.png)
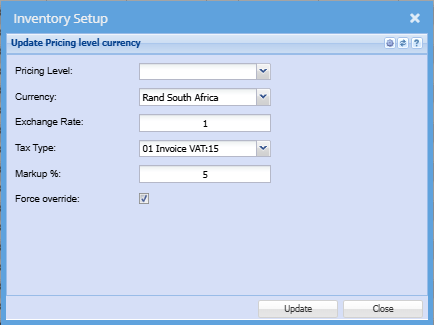
---

#### Import Bulk Offers

---

#### Mobile Sync Activate All

This function allows the users to update all items to sync to the Webatar mobile app

This indicator is required for searching and transaction on items using the Webatar Mobile App

[![image.png](https://hugeerp10.co.za/hsofmanual/uploads/images/gallery/2023-07/scaled-1680-/Pfeimage.png)](https://hugeerp10.co.za/hsofmanual/uploads/images/gallery/2023-07/Pfeimage.png)
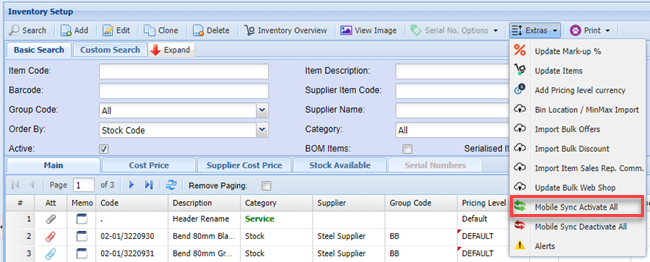
[![image.png](https://hugeerp10.co.za/hsofmanual/uploads/images/gallery/2024-06/scaled-1680-/YXJimage.png)](https://hugeerp10.co.za/hsofmanual/uploads/images/gallery/2024-06/YXJimage.png)
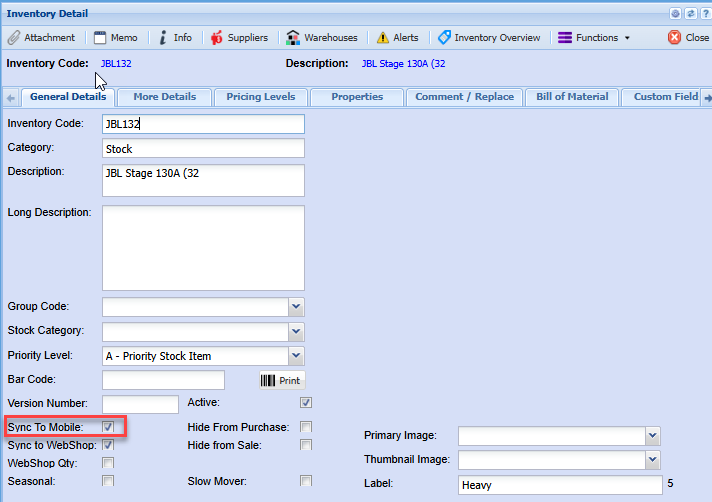
---

#### Mobile Sync Deactivate All

This function allows the users to deactivate the sync to mobile indicator on all searched items.

Example: If a range or group of items have been discontinued and you wish to remove these items from the Webatar App searches, this function will assist in deactivating the indicator without you editing each item individually

[![image.png](https://hugeerp10.co.za/hsofmanual/uploads/images/gallery/2023-07/scaled-1680-/hBsimage.png)](https://hugeerp10.co.za/hsofmanual/uploads/images/gallery/2023-07/hBsimage.png)
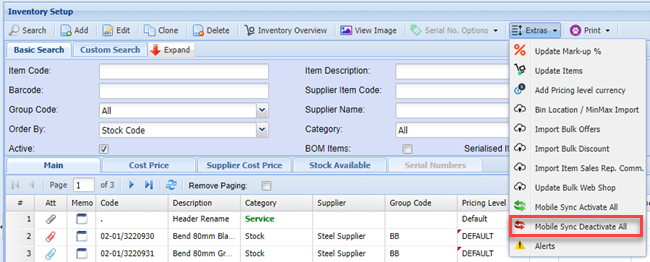
[![image.png](https://hugeerp10.co.za/hsofmanual/uploads/images/gallery/2024-06/scaled-1680-/u2Mimage.png)](https://hugeerp10.co.za/hsofmanual/uploads/images/gallery/2024-06/u2Mimage.png)
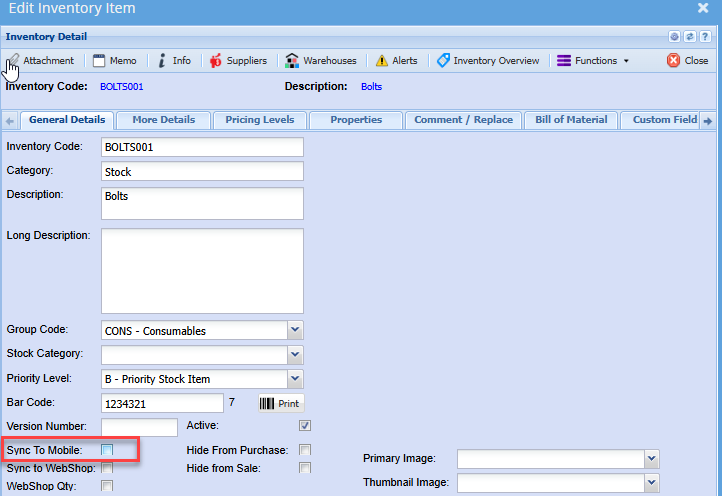
---

#### Check Linked Open Docs

This will give a list of documents that the stock item you have highlighted is linked too

[![image.png](https://hugeerp10.co.za/hsofmanual/uploads/images/gallery/2024-09/scaled-1680-/Axkimage.png)](https://hugeerp10.co.za/hsofmanual/uploads/images/gallery/2024-09/Axkimage.png)
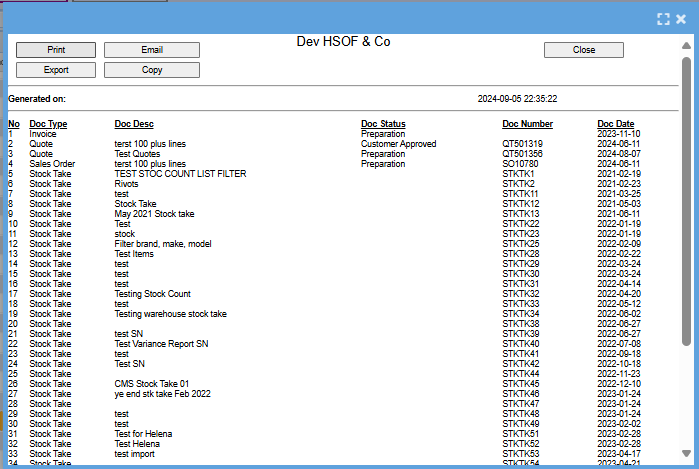
---

#### Update Predicted and Facts

This button will update all your predicted and facts

Once the update is complete you will receive an email informing you that the predicted and facts have been updated

[![image.png](https://hugeerp10.co.za/hsofmanual/uploads/images/gallery/2024-09/scaled-1680-/2gyimage.png)](https://hugeerp10.co.za/hsofmanual/uploads/images/gallery/2024-09/2gyimage.png)
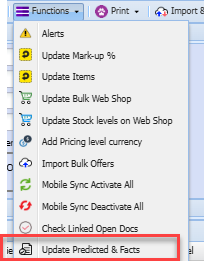
# Inventory / Stock Types

When setting up an inventory item, one will need to specify the type of stock item you wish to create.

[![image.png](https://hugeerp10.co.za/hsofmanual/uploads/images/gallery/2025-01/scaled-1680-/image.png)](https://hugeerp10.co.za/hsofmanual/uploads/images/gallery/2025-01/image.png)
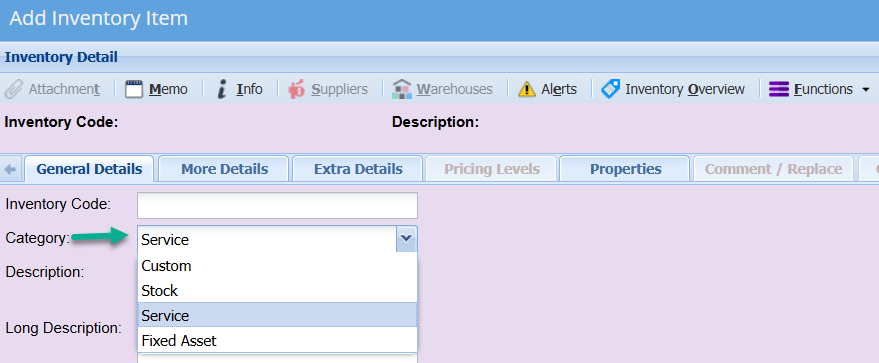
There are 4 options:

<table border="1" id="bkmrk-stock-this-is-a-phys" style="border-collapse: collapse; width: 100%;"><colgroup><col style="width: 15.1786%;"></col><col style="width: 84.9405%;"></col></colgroup><tbody><tr><td>Stock</td><td>This is a physical tangible item. If an item is setup as stock type, then stock quantity is control. you will also be able to perform stock takes on these items. If no quantity is available, you will not be able to process any documents.</td></tr><tr><td>Custom</td><td>This is typically used for items that you do not wish to control stock on, such as consumables.

It is also used for intangible items that are predominantly used for creditors purposes. e.g. if you wish to run the office expenses such as telephone account through creditors, you could set up a Custom item called Telephone Expenses which is mapped to the telephone expenses account in the ledger.

</td></tr><tr><td>Service</td><td>This is typically used for services related items such as labour, consulting, deliver, training, etc.

note, if an item is setup as a Service item, then it will not be visible on creditors module or documents such a purchases order or GRVs

</td></tr><tr><td>Fixed Asset</td><td>These are your normal Fixed asset items. These items will need to be serialised.</td></tr></tbody></table>

# Pricing Level Promotion

Pricing level promotion is different to item promotion.

The big difference is that pricing level promotion gives a special price to only that price level structure whereas the item promotion will override all pricing structures.

Pricing level promotion can be activated for a date from and date to period.

Promotion can be applied on the following basis:

<table border="1" id="bkmrk-amount-override-on-a" style="border-collapse: collapse; width: 100%;"><colgroup><col style="width: 23.9882%;"></col><col style="width: 76.131%;"></col></colgroup><tbody><tr><td>**Amount**</td><td>Override on a specific amount</td></tr><tr><td>**Percentage**</td><td>Percentage markup from cost</td></tr><tr><td>**Discount**</td><td>Add a discount on the line</td></tr></tbody></table>

Promotion price level will override ALL other discount structures for that level

[![image.png](https://hugeerp10.co.za/hsofmanual/uploads/images/gallery/2025-03/scaled-1680-/dLQimage.png)](https://hugeerp10.co.za/hsofmanual/uploads/images/gallery/2025-03/dLQimage.png)
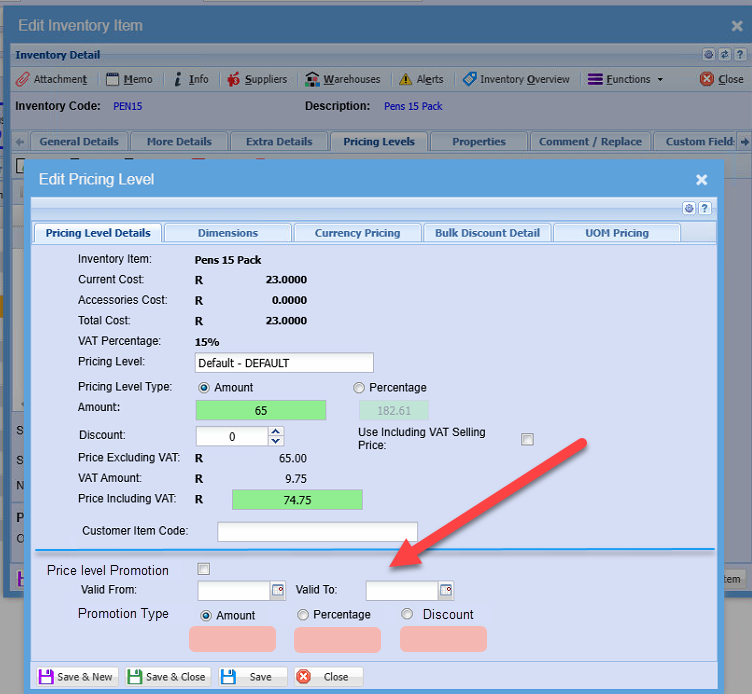
# Cloning an Inventory Item (Basic)

When creating a new inventory item that is similar to an existing one, it’s often easier to clone the current item and then make the small adjustments needed to ensure the new item is unique.

<span style="color: rgb(45, 194, 107);">**Inventory Module &gt; Configuration &gt; Inventory Setup**</span>

- Search for the inventory item you are wanting to clone
- Click on "**Clone**"

[![image.png](https://hugeerp10.co.za/hsofmanual/uploads/images/gallery/2026-02/scaled-1680-/wX3image.png)](https://hugeerp10.co.za/hsofmanual/uploads/images/gallery/2026-02/wX3image.png)
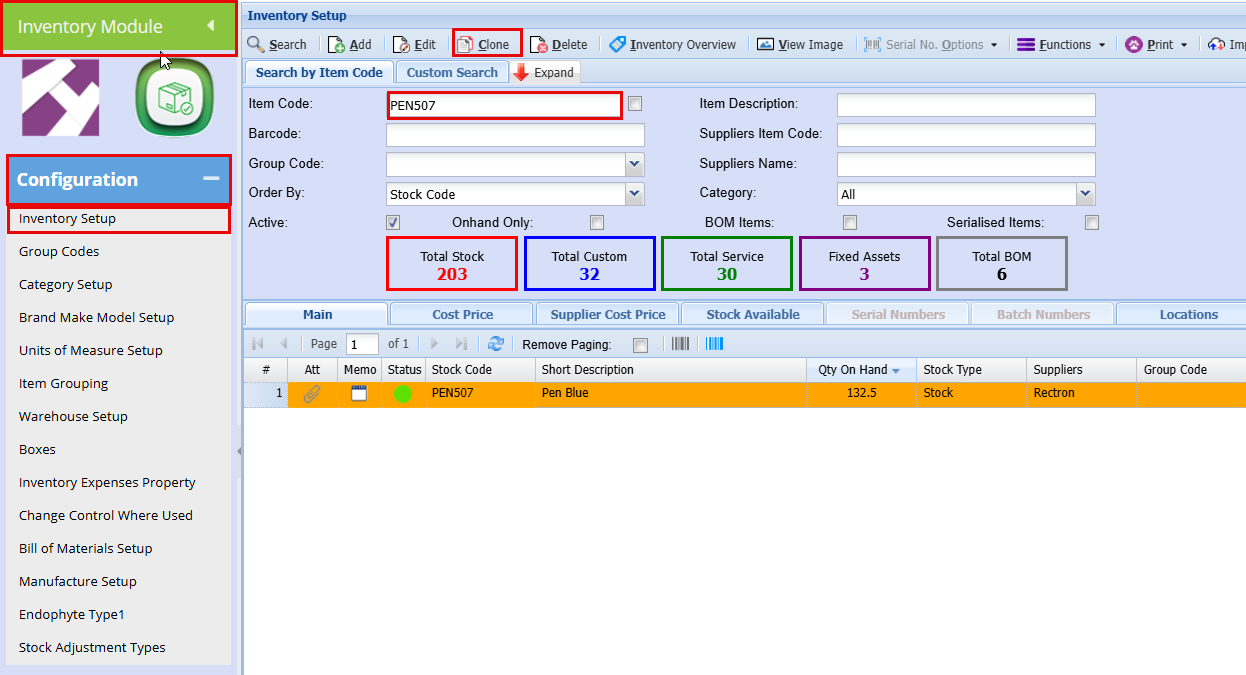
A new window will open to show

- **Update** A - E as shown below as needed
- Click "**Clone**"

[![image.png](https://hugeerp10.co.za/hsofmanual/uploads/images/gallery/2026-02/scaled-1680-/bpMimage.png)](https://hugeerp10.co.za/hsofmanual/uploads/images/gallery/2026-02/bpMimage.png)
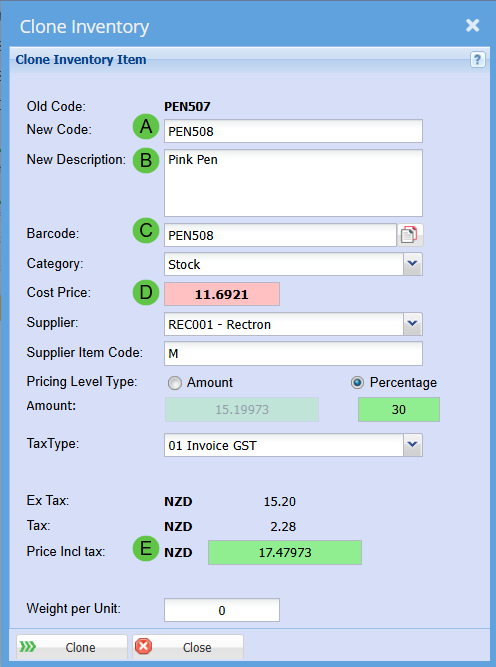
<div id="bkmrk-the-newly-created-in">The newly created Inventory Item will then open, allowing you to review the details and make any necessary updates or changes.</div><div id="bkmrk--2"></div>##### Update Inventory Description 

<span style="color: rgb(45, 194, 107);">**Inventory Module &gt; Configuration &gt; Inventory Setup**</span>

Double-click on the item and go to the **“Inventory Details”** tab.

Update A-D

[![image.png](https://hugeerp10.co.za/hsofmanual/uploads/images/gallery/2026-02/scaled-1680-/6slimage.png)](https://hugeerp10.co.za/hsofmanual/uploads/images/gallery/2026-02/6slimage.png)
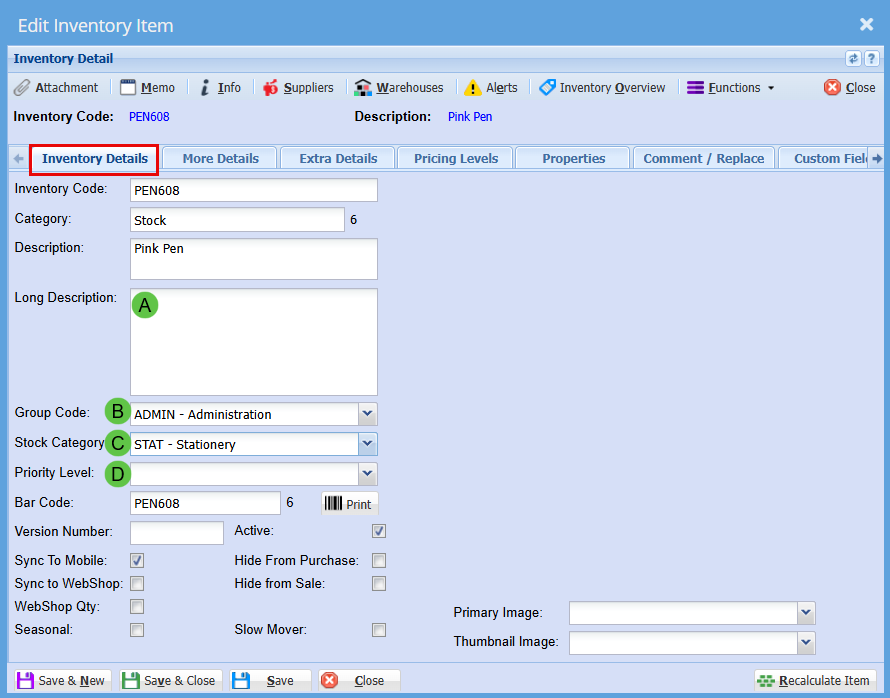
##### Updating the Default Supplier

<span style="color: rgb(45, 194, 107);">**Inventory Module &gt; Configuration &gt; Inventory Setup**</span>

Double-click on the item and go to the **“More Details”** tab.

<div id="bkmrk-if-you-need-to-updat">- If you need to update details such as the Unit of Measure or Unit of Measure Type, this is where those changes should be made.
- Update your Default Supplier

</div>[![image.png](https://hugeerp10.co.za/hsofmanual/uploads/images/gallery/2026-02/scaled-1680-/FxIimage.png)](https://hugeerp10.co.za/hsofmanual/uploads/images/gallery/2026-02/FxIimage.png)

#####  

##### Inventory Label Description

<span style="color: rgb(45, 194, 107);">**Inventory Module &gt; Configuration &gt; Inventory Setup**</span>

Double-click on the item and go to the **“Extra Details”** tab.

Update the "**Label**" Field with what you would like your label to say

<p class="callout info">Depending on the size of your font you may need to keep this description short by using abbreviations</p>

[![image.png](https://hugeerp10.co.za/hsofmanual/uploads/images/gallery/2026-02/scaled-1680-/32Oimage.png)](https://hugeerp10.co.za/hsofmanual/uploads/images/gallery/2026-02/32Oimage.png)

##### Brand, Make and Model

<span style="color: rgb(45, 194, 107);">**Inventory Module &gt; Configuration &gt; Inventory Setup**</span>

Double-click on the item and go to the **“Extra Details”** tab.

From the drop-down manus, select your **Brand, Make and Model**

Click "**Save &amp; Close**"

[![image.png](https://hugeerp10.co.za/hsofmanual/uploads/images/gallery/2026-02/scaled-1680-/dWJimage.png)](https://hugeerp10.co.za/hsofmanual/uploads/images/gallery/2026-02/dWJimage.png)

# Group Codes Setup Menu

# Group Codes Search

<span class="ts7">Group codes cater for grouping of the inventory master listing into various product groups and also is used for sales mapping purposes whereby the configuration can dictate posting of entries to respective GL Accounts.</span>

##### <span class="ts7">Basic Search Tab</span>

<span class="ts7">Allows the user to view and edit any existing group codes.</span>

<span class="ts7">The user can also add any new group codes required.</span>

[![image.png](https://hugeerp10.co.za/hsofmanual/uploads/images/gallery/2024-01/scaled-1680-/YUSimage.png)](https://hugeerp10.co.za/hsofmanual/uploads/images/gallery/2024-01/YUSimage.png)

<table border="1" id="bkmrk-group-code-search-by" style="border-collapse: collapse; width: 100.952%;"><colgroup><col style="width: 25.1557%;"></col><col style="width: 74.8443%;"></col></colgroup><tbody><tr><td>**<span class="ts7">Group Code</span>**</td><td><span class="ts7">Search by entering the code</span></td></tr><tr><td>**<span class="ts7">Description</span>**</td><td><span class="ts7">Search by entering the description</span></td></tr><tr><td>**<span class="ts7">Active</span>**</td><td><span class="ts7">Search for active group codes by ticking the box.</span>

<span class="ts7">Remove the tick to search for any deactivated group codes.</span>

</td></tr><tr><td>**<span class="ts7">Add button</span>**</td><td><span class="ts7">To create a new group code</span></td></tr><tr><td>**<span class="ts7">Edit button</span>**</td><td><span class="ts7">To view or make changes on the existing group code</span></td></tr><tr><td>**<span class="ts7">Delete button</span>**</td><td><span class="ts7">To delete the selected group code</span></td></tr><tr><td>**<span class="ts7">Print Grid button</span>**</td><td><span class="ts7">Returns the list of group codes in the grid based on search criteria and allows the user to print, email or export to excel.</span></td></tr></tbody></table>

---

##### Report Grouping Search

This tab allows the user to search and edit any existing group code groupings.

The user can also add any new groupings when accessing this tab.

# Group Codes Setup

<span class="ts0">Group codes are used for the following reasons:</span>

1. <span class="ts0">Categorise stock listing.</span>
2. Sales mapping - this caters for automatic postings to specific GL accounts when documents are processed.

<span style="color: rgb(45, 194, 107);">**<span class="ts15">Inventory Module&gt;Configuration Menu&gt;Group Codes Setup</span>**</span>

<span class="ts0"> </span>![](https://hugeerp0.co.za/csp/webhelp/topics/images/image(3044).png)

- <span class="ts0">Click search to find the existing group codes and click on edit button to edit any existing group code.</span>
- <span class="ts0">To create a new group code, click the Add button.</span>

![](https://hugeerp0.co.za/csp/webhelp/topics/images/image(3045).png)

<table border="1" id="bkmrk-general-tab-fill-in-" style="border-collapse: collapse; width: 94.7619%;"><colgroup><col style="width: 26.8613%;"></col><col style="width: 73.1387%;"></col></colgroup><tbody><tr><td>**<span class="ts0">Code</span>**</td><td><span class="ts0">Enter a code of your choice</span></td></tr><tr><td>**<span class="ts0">Description</span>**</td><td><span class="ts0">Enter a description</span></td></tr></tbody></table>

- <span class="ts0">Click Save</span>
- <span class="ts0">Then click the Add button on the same screen.</span>

[![image.png](https://hugeerp10.co.za/hsofmanual/uploads/images/gallery/2024-01/scaled-1680-/AV5C2cimage.png)](https://hugeerp10.co.za/hsofmanual/uploads/images/gallery/2024-01/AV5C2cimage.png)

![](https://hugeerp0.co.za/csp/webhelp/topics/images/image(3046).png)

<table border="1" id="bkmrk-sales---short-search" style="border-collapse: collapse; width: 100%; height: 118.4px;"><colgroup><col style="width: 23.9715%;"></col><col style="width: 76.0038%;"></col></colgroup><tbody><tr><td>**<span class="ts0">Branch</span>**</td><td><span class="ts0">if you have branches setup, you can select the respective branch for the specific group code</span>

<span class="ts0">if the group code is to be linked to multiple branches, you will need to click add a separate account postings setup linked to the relevant GL accounts for the branch.</span>

</td></tr><tr style="height: 29.6px;"><td style="height: 29.6px;">**<span class="ts0">Sales - Short Search</span>**</td><td style="height: 29.6px;"><span class="ts0">Select the sales account </span></td></tr><tr><td>**<span class="ts0">  
</span>**</td><td><span class="ts0">  
</span></td></tr><tr style="height: 29.6px;"><td style="height: 29.6px;">**<span class="ts0">Cost of sales - Short Search</span>**</td><td style="height: 29.6px;"><span class="ts0">Select the required Cost of Sales account</span></td></tr><tr style="height: 29.6px;"><td style="height: 29.6px;">**<span class="ts0">Custom - Short Search</span>**</td><td style="height: 29.6px;"><span class="ts0">Select the alternate Cost of Sales account. This is for service and Custom items.</span></td></tr><tr style="height: 29.6px;"><td style="height: 29.6px;">**<span class="ts0">Service - Short Search</span>**</td><td style="height: 29.6px;"><span class="ts0">Select the alternate Cost of Sales account. This is for service and Custom items.</span></td></tr></tbody></table>

<span class="ts0">To export the Group code list to excel, click on Print grid and select export.</span>

# Report Grouping Setup

Report Grouping allows one to link various groups

This assists when generating reports, so that the user does not need to select multiple groups individually.

One can then simply select the grouping option and the linked group codes will automatically be selected.

To link multiple group codes, click the Report Grouping tab

[![image.png](https://hugeerp10.co.za/hsofmanual/uploads/images/gallery/2024-01/scaled-1680-/66mimage.png)](https://hugeerp10.co.za/hsofmanual/uploads/images/gallery/2024-01/66mimage.png)
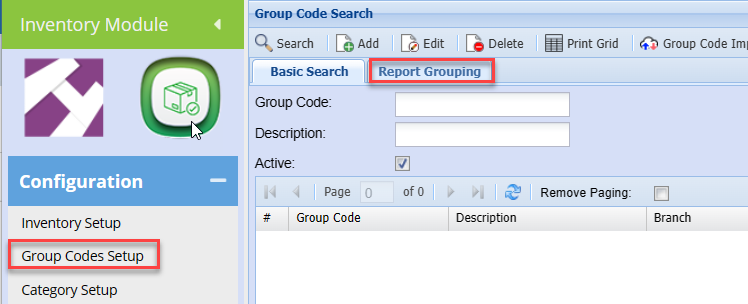
 Click Add

<table border="1" id="bkmrk-code-enter-a-code-fo" style="border-collapse: collapse; width: 100%;"><colgroup><col style="width: 18.0741%;"></col><col style="width: 82.0247%;"></col></colgroup><tbody><tr><td>**Code**</td><td>Enter a code for the grouping</td></tr><tr><td>**Description**</td><td>Enter a description of the grouping</td></tr></tbody></table>

[![image.png](https://hugeerp10.co.za/hsofmanual/uploads/images/gallery/2024-01/scaled-1680-/2RMimage.png)](https://hugeerp10.co.za/hsofmanual/uploads/images/gallery/2024-01/2RMimage.png)

You will notice the grid is then populated with the existing group codes

You can now select respective group codes to be linked together.

In this example, we created a group: Fittings

We can now link multiple group codes to this reporting group

To link group codes, double click on the required group code in the top grid, this will then move to the bottom selected grid.

[![image.png](https://hugeerp10.co.za/hsofmanual/uploads/images/gallery/2024-01/scaled-1680-/AlFimage.png)](https://hugeerp10.co.za/hsofmanual/uploads/images/gallery/2024-01/AlFimage.png)
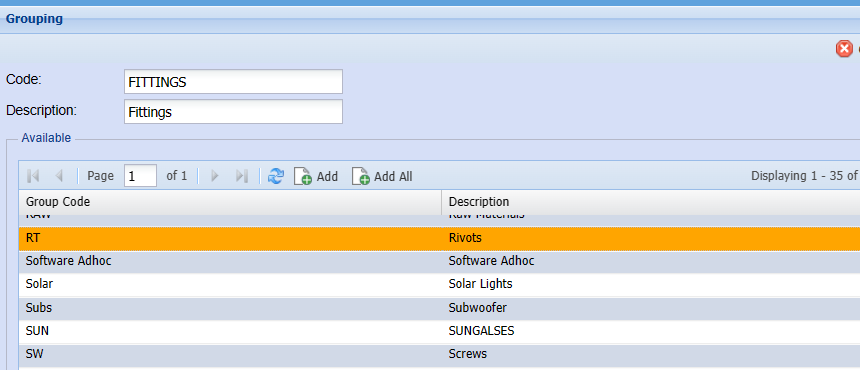
[![image.png](https://hugeerp10.co.za/hsofmanual/uploads/images/gallery/2024-01/scaled-1680-/zsZimage.png)](https://hugeerp10.co.za/hsofmanual/uploads/images/gallery/2024-01/zsZimage.png)
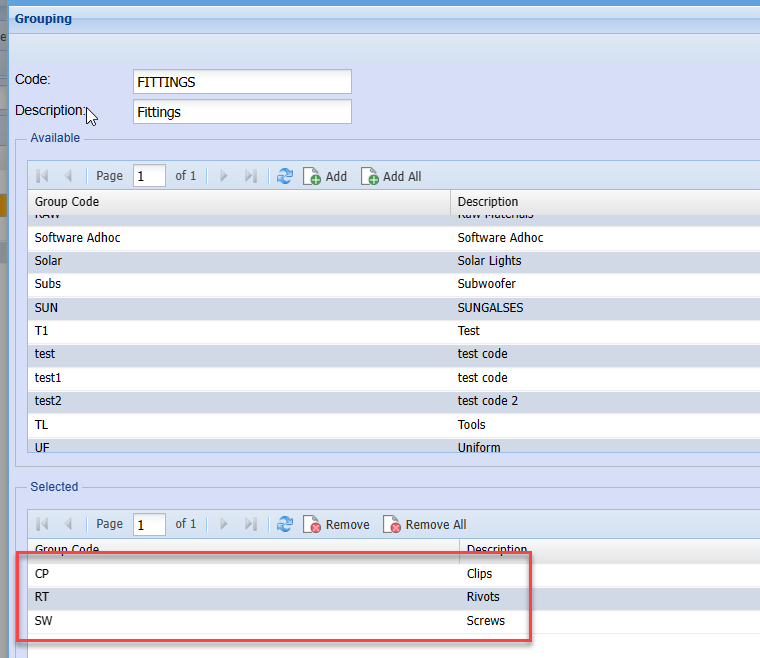
<span class="ts0"> Click save once complete.</span>

<span class="ts0">When you generate a report, you can select the reporting group. This will automatically select the underlying group codes without the user having to select each individual group code one at a time.</span>

[![image.png](https://hugeerp10.co.za/hsofmanual/uploads/images/gallery/2024-01/scaled-1680-/WuSimage.png)](https://hugeerp10.co.za/hsofmanual/uploads/images/gallery/2024-01/WuSimage.png)

<span class="ts0"></span>

# Link Group Code to Inventory Item

<span class="ts2">Once the groups have been created, you will need to link the inventory Items to the respective group codes.</span>

<span class="ts2"><span style="color: rgb(45, 194, 107);">**Inventory Module&gt; Configuration&gt; Inventory Setu**</span>p</span>

<span class="ts2">Select and edit the required Inventory Item</span>

<span class="ts10">Select the required group code from the drop down list</span>

![](https://hugeerp0.co.za/csp/webhelp/topics/images/image(3049).png)

<span class="ts67">Click Save and Close.</span>

<span class="ts10">As noted in the group code setup section, this will dictate the relevant sales and cost of sales account posting when this item is processed on an invoice or credit note.</span>

<span class="ts10">Multiple reports can be generated using the inventory group code as a filter, thereby assisting in sales and inventory analysis.</span>

# Category Setup Menu

# Inventory Category Setup

Inventory Categories are another way to group your inventory listing.

if you use group codes to categorize or group your inventory items and you require an addition level of categorization, then inventory category setup will be an option.

<table border="1" id="bkmrk-search-will-search-a" style="border-collapse: collapse; width: 100%; height: 350.8px;"><colgroup><col style="width: 15.9451%;"></col><col style="width: 84.0302%;"></col></colgroup><tbody><tr style="height: 46.4px;"><td style="height: 46.4px;"><span class="ts0">Search</span></td><td style="height: 46.4px;"><span class="ts0">Returns all existing inventory Categories previously created. Leave the Code and Description fields blank to see all categories.</span></td></tr><tr style="height: 29.6px;"><td style="height: 29.6px;"><span class="ts0">Code</span></td><td style="height: 29.6px;"><span class="ts0">Search by code. Enter the code or part of the code.</span></td></tr><tr style="height: 29.6px;"><td style="height: 29.6px;"><span class="ts0">Description</span></td><td style="height: 29.6px;"><span class="ts0">Search by Description. Enter description or part of the description.</span></td></tr><tr style="height: 29.6px;"><td style="height: 29.6px;"><span class="ts0">Add</span></td><td style="height: 29.6px;"><span class="ts0">Brings up the window to create a new category</span></td></tr><tr style="height: 33.8px;"><td style="height: 33.8px;"><span class="ts0">Edit</span></td><td style="height: 33.8px;"><span class="ts0">Allows the User to amend an existing category.</span></td></tr><tr style="height: 33.8px;"><td style="height: 33.8px;"><span class="ts0">Delete</span></td><td style="height: 33.8px;"><span class="ts0">Allows the User to delete a category provided they have not been used or linked to inventory items.</span></td></tr><tr style="height: 29.6px;"><td style="height: 29.6px;"><span class="ts0">Print Grid</span></td><td style="height: 29.6px;"><span class="ts0">Allows the user to print the categories displayed in the grid based on the respective search.</span></td></tr><tr style="height: 29.6px;"><td style="height: 29.6px;"><span class="ts0">Stock Category import/export</span></td><td style="height: 29.6px;"><span class="ts0">Options to either export existing categories or import new categories form an excel worksheet.</span></td></tr></tbody></table>

To Create a new inventory category

- Click the Add button
- Enter a Code
- Enter a description.
- Click Save and Close, or Save and New to add another category.

[![image.png](https://hugeerp10.co.za/hsofmanual/uploads/images/gallery/2024-01/scaled-1680-/mhCimage.png)](https://hugeerp10.co.za/hsofmanual/uploads/images/gallery/2024-01/mhCimage.png)
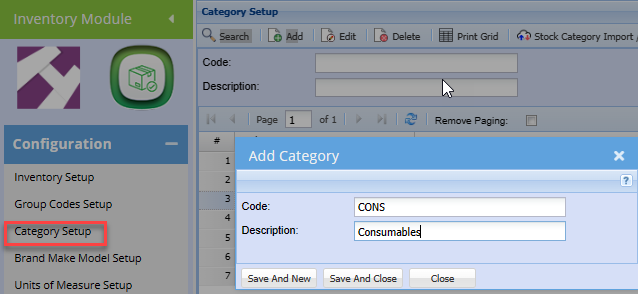
# Brand Make Model Menu

Brand Make Model

# Brand Make Model Search

<span class="ts10">Video training manual 2016 - </span>[Click Here](https://vimeo.com/357003603)

<span style="color: rgb(45, 194, 107);">**<span class="ts15">Inventory Module&gt; Configuration &gt;</span><span class="ts15">Brand Make Model Setup</span>**</span>

[![image.png](https://hugeerp10.co.za/hsofmanual/uploads/images/gallery/2024-04/scaled-1680-/RHRimage.png)](https://hugeerp10.co.za/hsofmanual/uploads/images/gallery/2024-04/RHRimage.png)

<table border="1" id="bkmrk-search-will-search-a" style="border-collapse: collapse; width: 100%; height: 325.6px;"><colgroup><col style="width: 17.6693%;"></col><col style="width: 82.3059%;"></col></colgroup><tbody><tr style="height: 29.6px;"><td style="height: 29.6px;">**<span class="ts0">Search</span>**</td><td style="height: 29.6px;"><span class="ts0">Will search according to the selected tab and will bring out the existing Items.</span></td></tr><tr style="height: 29.6px;"><td style="height: 29.6px;">**<span class="ts0">Code</span>**</td><td style="height: 29.6px;"><span class="ts0">Search by code</span></td></tr><tr style="height: 29.6px;"><td style="height: 29.6px;">**<span class="ts0">Description</span>**</td><td style="height: 29.6px;"><span class="ts0">Search by Description</span></td></tr><tr style="height: 29.6px;"><td style="height: 29.6px;">**<span class="ts0">Add</span>**</td><td style="height: 29.6px;"><span class="ts0">This Function will bring out a window where a user will add the brand properties</span></td></tr><tr style="height: 29.6px;"><td style="height: 29.6px;">**Edit**</td><td style="height: 29.6px;">Allows the User to amend the added details</td></tr><tr style="height: 29.6px;"><td style="height: 29.6px;">**<span class="ts0">Delete</span>**</td><td style="height: 29.6px;"><span class="ts0">Allows the User to delete the Added details provided they have not been used or linked to other items</span></td></tr><tr style="height: 29.6px;"><td style="height: 29.6px;">**<span class="ts0">Print Grid</span>**</td><td style="height: 29.6px;"><span class="ts0">this will print out an Additional Inventory Properties Report</span></td></tr><tr style="height: 29.6px;"><td style="height: 29.6px;">**<span class="ts0">Brand</span>**</td><td style="height: 29.6px;"><span class="ts0">This is where you set up a brand</span></td></tr><tr style="height: 29.6px;"><td style="height: 29.6px;">**<span class="ts0">Make</span>**</td><td style="height: 29.6px;"><span class="ts0">This is where you setup a Make linking it to a certain Brand</span></td></tr><tr style="height: 29.6px;"><td style="height: 29.6px;">**<span class="ts0">Model</span>**</td><td style="height: 29.6px;"><span class="ts0">This is where you setup a model linking it to a certain make and brand.</span></td></tr><tr style="height: 29.6px;"><td style="height: 29.6px;">**<span class="ts0">Tree View</span>**</td><td style="height: 29.6px;"><span class="ts0">This is where you can view all the added brand make and models</span></td></tr></tbody></table>

One can search by code or by Brand description.

alternatively. click search to see all brands.

to view Models linked to a specific Brand, double click the respective Brand.

[![image.png](https://hugeerp10.co.za/hsofmanual/uploads/images/gallery/2024-01/scaled-1680-/U6wimage.png)](https://hugeerp10.co.za/hsofmanual/uploads/images/gallery/2024-01/U6wimage.png)
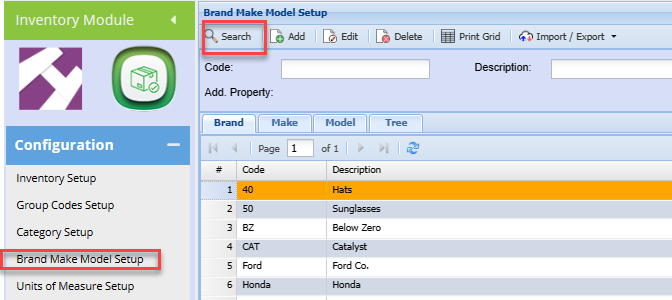
 One can also view underlying Makes and models using the Tree structure.

[![image.png](https://hugeerp10.co.za/hsofmanual/uploads/images/gallery/2024-01/scaled-1680-/qf3image.png)](https://hugeerp10.co.za/hsofmanual/uploads/images/gallery/2024-01/qf3image.png)
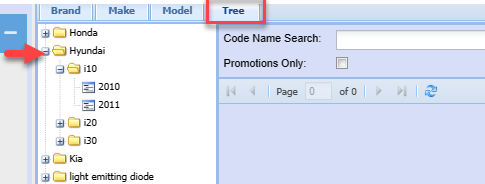
# Add Brand/Make/Model

![](https://hugeerp0.co.za/csp/webhelp/topics/images/image(3258).png)

<span class="ts0">Click on Add</span>

<span class="ts0"> </span>![](https://hugeerp0.co.za/csp/webhelp/topics/images/image(3259).png)

<table border="1" id="bkmrk-code-enter-code-for-" style="border-collapse: collapse; width: 100%;"><colgroup><col style="width: 50%;"></col><col style="width: 50%;"></col></colgroup><tbody><tr><td><span class="ts0">Code</span></td><td><span class="ts0">Enter Code for the brand item</span></td></tr><tr><td><span class="ts0">Description</span></td><td><span class="ts0">Enter description for the brand item</span></td></tr><tr><td><span class="ts0">Activity report display</span></td><td><span class="ts0">add a tick to enable display</span></td></tr><tr><td><span class="ts0">Sequence No.</span></td><td><span class="ts0">add the sequen</span><span class="ts0">c</span><span class="ts0">e you desire for this entry</span></td></tr></tbody></table>

<span class="ts0">Save and Close</span>

<span class="ts0">Save and New - to add a new item on this list</span>

<span class="ts11">Add Make</span>

<span class="ts0">First highlight the brand previously entered and move to the make tab</span>

![](https://hugeerp0.co.za/csp/webhelp/topics/images/image(3260).png)

![](https://hugeerp0.co.za/csp/webhelp/topics/images/image(3261).png)

<span class="ts0"> </span>

<span class="ts0"></span>

# Inventory Brand Targets Setup

**<span lang="EN-US" style="color: #002060; mso-ansi-language: EN-US;"> </span>**

<span lang="EN-US" style="font-size: 10.0pt; mso-ansi-language: EN-US;">The systems caters for applying budgets or targets against product brands.</span>

<span lang="EN-US" style="font-size: 10.0pt; mso-ansi-language: EN-US;"> </span><span lang="EN-US" style="font-size: 10.0pt; mso-ansi-language: EN-US;">To setup targets per brands go to:</span>

<span style="background-color: rgb(255, 255, 255); color: rgb(45, 194, 107);"><span lang="EN-US" style="font-size: 10pt; background-color: rgb(255, 255, 255);"> </span>**<span lang="EN-US" style="font-size: 10pt; background-color: rgb(255, 255, 255);">Inventory Module &gt; Configuration &gt; Brand Make Model setup</span>**</span>

<span lang="EN-US" style="font-size: 10.0pt; mso-ansi-language: EN-US;">Click search to return existing Brands </span>

**<span lang="EN-US" style="font-size: 10.0pt; mso-ansi-language: EN-US;"> </span>**![](https://hugeerp10.co.za/hsofmanual/uploads/images/gallery/2024-01/embedded-image-oewht03z.png)

**<span lang="EN-US" style="font-size: 10.0pt; mso-ansi-language: EN-US;"> </span>**<span lang="EN-US" style="font-size: 10.0pt; mso-ansi-language: EN-US;">Click once on the required Brand to select and then click the Edit button on the top of the page.</span>

<span lang="EN-US" style="font-size: 10.0pt; mso-ansi-language: EN-US;"> </span><span lang="EN-GB" style="mso-no-proof: yes;"></span>![](https://hugeerp10.co.za/hsofmanual/uploads/images/gallery/2024-01/embedded-image-bd2gnwxo.png)

**<span lang="EN-US" style="font-size: 10.0pt; mso-ansi-language: EN-US;"> </span>**<span lang="EN-US" style="font-size: 10.0pt; mso-ansi-language: EN-US;">Click the Target Tab</span>

<span lang="EN-US" style="font-size: 10.0pt; mso-ansi-language: EN-US;"> </span><span lang="EN-US" style="font-size: 10.0pt; mso-ansi-language: EN-US;">You can now click on each respective period and enter a target for the period.</span>

<span lang="EN-US" style="font-size: 10.0pt; mso-ansi-language: EN-US;"> </span><span lang="EN-GB" style="mso-no-proof: yes;"></span>![](https://hugeerp10.co.za/hsofmanual/uploads/images/gallery/2024-01/embedded-image-1scalrlq.png)

**<span lang="EN-US" style="font-size: 10.0pt; mso-ansi-language: EN-US;"> </span>**<span lang="EN-US" style="font-size: 10.0pt; mso-ansi-language: EN-US;">If your Targets are mostly the same for each period, you can save time by entering a yearly target and allocate equally across each period.</span>

<span lang="EN-GB" style="mso-no-proof: yes;">![](https://hugeerp10.co.za/hsofmanual/uploads/images/gallery/2024-01/embedded-image-x0v0dycx.png)  
</span>

**<span lang="EN-US" style="font-size: 10.0pt; mso-ansi-language: EN-US;"> </span>**<span lang="EN-US" style="font-size: 10.0pt; mso-ansi-language: EN-US;">You will notice the annual target has been divided equally across all periods.</span>

<span lang="EN-US" style="font-size: 10.0pt; mso-ansi-language: EN-US;"> </span><span lang="EN-US" style="font-size: 10.0pt; mso-ansi-language: EN-US;">One can then click on selected periods and override the allocated target in the event that you wish to compensate for seasonal cycles as an example.</span>

<span lang="EN-US" style="font-size: 10.0pt; mso-ansi-language: EN-US;"><span style="mso-spacerun: yes;"> </span></span><span lang="EN-GB" style="mso-no-proof: yes;"></span>![](https://hugeerp10.co.za/hsofmanual/uploads/images/gallery/2024-01/embedded-image-xb44e4sm.png)

**<span lang="EN-US" style="font-size: 10.0pt; mso-ansi-language: EN-US;"> </span>**<span lang="EN-US" style="font-size: 10.0pt; mso-ansi-language: EN-US;">Editing the period target will update the annual target automatically.</span>

# Units of Measure Setup Menu

# Basic Unit of Measure (UOM) Setup

<span class="ts10">Video training manual 2016 - </span>[Click Here](https://vimeo.com/357004170)

<span class="ts0"> </span>![](https://hugeerp0.co.za/csp/webhelp/topics/images/image(3051).png)

<span class="ts0">Unit of measure is used as a standard for measurement of the physical quantity</span>

<span class="ts0">Standard Tab has four buttons:</span>

<table border="1" id="bkmrk-add-button-to-add-un" style="border-collapse: collapse; width: 83.8272%;"><colgroup><col style="width: 21.1288%;"></col><col style="width: 78.8429%;"></col></colgroup><tbody><tr><td><span class="ts0">Add button</span></td><td><span class="ts0">to add unit of measure</span></td></tr><tr><td><span class="ts0">Edit button</span></td><td><span class="ts0">to view or make changes on the existing unit of measure</span></td></tr><tr><td><span class="ts0">Delete button</span></td><td><span class="ts0">the delete button allows you to remove the currently selected Unit of Measure.</span></td></tr><tr><td><span class="ts0">Print Grid button</span></td><td><span class="ts0">to print inventory unit of measures’ list</span></td></tr></tbody></table>

<span class="ts7">To Add or create a new Unit of Measure, Click the Add button</span>

<span class="ts50">Standard Tab</span>

<table border="1" id="bkmrk-unit-code-to-enter-t" style="border-collapse: collapse; width: 54.6914%;"><colgroup><col style="width: 22.5898%;"></col><col style="width: 77.3746%;"></col></colgroup><tbody><tr><td><span class="ts7">Unit Code</span></td><td><span class="ts7">Enter the unique code for unit of measure</span></td></tr><tr><td><span class="ts7">Description</span></td><td><span class="ts7">Enter the description</span></td></tr></tbody></table>

[![image.png](https://hugeerp10.co.za/hsofmanual/uploads/images/gallery/2024-01/scaled-1680-/XFKimage.png)](https://hugeerp10.co.za/hsofmanual/uploads/images/gallery/2024-01/XFKimage.png)

Click Save and Close or

Save an New to add another UOM setup

# Case Lots Seup

<span class="ts50">Case Lots Tab</span>

<table border="1" id="bkmrk-active-to-activate-c" style="border-collapse: collapse; width: 54.8148%;"><colgroup><col style="width: 16.0134%;"></col><col style="width: 83.9415%;"></col></colgroup><tbody><tr><td><span class="ts7">Active</span></td><td><span class="ts7">to activate case lots</span></td></tr></tbody></table>

<span class="ts7">Conversion</span>

<span class="ts7">Result Item</span>

<span class="ts7">Prompt for result</span>

<table border="1" id="bkmrk-save-and-new-saves-t" style="border-collapse: collapse; width: 100%;"><colgroup><col style="width: 13.8391%;"></col><col style="width: 86.1362%;"></col></colgroup><tbody><tr><td><span class="ts7">Save And New</span></td><td><span class="ts7">Saves the current form then reopens it so that you don’t have to constantly close and open the form if you wish to create more than one Unit Of Measurement.</span></td></tr><tr><td><span class="ts7">Save And Close</span></td><td><span class="ts7">Saves the current form and closes it.</span></td></tr></tbody></table>

# Advanced Unit of Measure Setup

The advance Unit of Measure setup caters for linking multiple units of measure to a UOM type.

one could for instance sell the same product but in various pack sizes

example: Grain could be sold in 1Kg, 2Kg or 5Kg packets

 In which case the UOM Type could be packets, and you then link the various packet sizes to the packets.

To setup UOM Type:

<span style="color: rgb(45, 194, 107);"><span style="color: #2dc26b;">**Inventory Module &gt; Configuration&gt; Unit of Measure Setup**</span></span>

Add the individual pack unit of measure as shown in the Basic Unit of Measure setup section.

Click the UOM Type Tab

Click Add

Enter a Code.

Enter the Description.

Click Save and Close

Edit the new UOM type created.

Select the respective unit of measure to be linked to this UOM type.

[![image.png](https://hugeerp10.co.za/hsofmanual/uploads/images/gallery/2024-01/scaled-1680-/RJ9image.png)](https://hugeerp10.co.za/hsofmanual/uploads/images/gallery/2024-01/RJ9image.png)
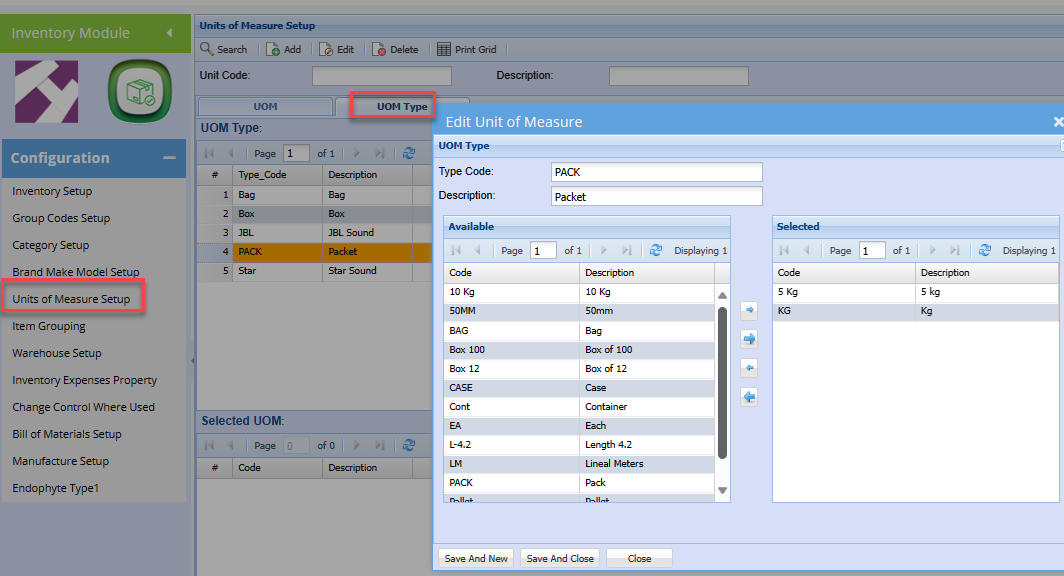
# Item Grouping Menu

# Check sheet groups /Item grouping

<span class="ts15">Inventory&gt; Configuration&gt; Item Grouping</span>

<span class="ts15"> </span>![](https://hugeerp0.co.za/csp/webhelp/topics/images/image(3053).png)

<span class="ts0">Are the logical grouping of activities which are used in the Check Sheet Template to create a Check Sheet</span>

<span class="ts0">Basic Search button pulls out all Check Sheet Groups on the system if Check Sheet Group name is not specified when searching.</span>

<table border="1" id="bkmrk-add-button-to-insert" style="border-collapse: collapse; width: 100%; height: 118.4px;"><colgroup><col style="width: 28.8149%;"></col><col style="width: 71.284%;"></col></colgroup><tbody><tr style="height: 29.6px;"><td style="height: 29.6px;"><span class="ts0">Add button</span></td><td style="height: 29.6px;"><span class="ts0">to insert a new Check Sheet Group.</span></td></tr><tr style="height: 29.6px;"><td style="height: 29.6px;"><span class="ts0">Edit button</span></td><td style="height: 29.6px;"><span class="ts0">to view or edit an already added Check Sheet Group.</span></td></tr><tr style="height: 29.6px;"><td style="height: 29.6px;"><span class="ts0">Delete button</span></td><td style="height: 29.6px;"><span class="ts0">to delete the currently selected Check Sheet Group.</span></td></tr><tr style="height: 29.6px;"><td style="height: 29.6px;"><span class="ts0">Print/Export Dropdown button</span></td><td style="height: 29.6px;"><span class="ts0">option the Print Grid which prints the contents of the grid displayed</span></td></tr></tbody></table>

![](https://hugeerp0.co.za/csp/webhelp/topics/images/image(3054).png)

<span class="ts0">Edit Check Sheet Group Help</span>

<table border="1" id="bkmrk-code-check-sheet-gro" style="border-collapse: collapse; width: 96.2963%;"><colgroup><col style="width: 12.2343%;"></col><col style="width: 87.741%;"></col></colgroup><tbody><tr><td><span class="ts0">Code</span></td><td><span class="ts0">Check Sheet Group Code</span></td></tr><tr><td><span class="ts0">Description</span></td><td><span class="ts0"> Description of the Check Sheet Code</span></td></tr><tr><td><span class="ts0">Active</span></td><td><span class="ts0">Tick the tick box to flag Check Sheet Code as Active if tick box is un-ticked the Check Sheet Group code is inactive</span></td></tr></tbody></table>

# Warehouse Setup Menu

# Warehouse Setup

<span class="ts0">Multi-warehouse is a separate sub-module of Huge ERP.</span>

<span class="ts0">Multi-warehouse allows one to put stock in multiple warehouses.</span>

<span class="ts0">Multi-warehouse allows one to transfer stock from one warehouse to another.</span>

<span class="ts0">Take stock control and stock takes on each warehouse.</span>

<span class="ts0">Allows one to GRV stock into a specific warehouse and sell from another warehouse</span>

<span class="ts0">Multi-Warehouse is also used for consignment stock.</span>

<span class="ts0">This sub-module resides in the main inventory module.</span><span class="ts31"> </span>

[![image.png](https://hugeerp10.co.za/hsofmanual/uploads/images/gallery/2024-09/scaled-1680-/TSQimage.png)](https://hugeerp10.co.za/hsofmanual/uploads/images/gallery/2024-09/TSQimage.png)

<table border="1" id="bkmrk-search-allows-you-to" style="border-collapse: collapse; width: 100%;"><colgroup><col style="width: 18.5395%;"></col><col style="width: 81.4358%;"></col></colgroup><tbody><tr><td>**Search**</td><td>Allows you to search for a specific warehouse

If you don't put any information on the search criteria the search button will recall all warehouse

</td></tr><tr><td>**Add**</td><td>Add allows you to create a new warehouse</td></tr><tr><td>**Edit**</td><td>Allows you to edit an existing warehouse</td></tr><tr><td>**Associate**</td><td>Allows you to link all stock items to a warehouse</td></tr><tr><td>**Disassociate**</td><td>Allows you to delink all stock items to a warehouse</td></tr><tr><td>**Print Grid**</td><td>Allows you to print information that is displayed on the grid</td></tr><tr><td>**Print Linked Items**</td><td>Allows you to print items linked to a specific warehouse

For you to be able to see linked items you first need to highlight a warehouse you want to see linked items for

</td></tr></tbody></table>

When you click add or edit the screen below will be displayed:

[![image.png](https://hugeerp10.co.za/hsofmanual/uploads/images/gallery/2024-09/scaled-1680-/VRdimage.png)](https://hugeerp10.co.za/hsofmanual/uploads/images/gallery/2024-09/VRdimage.png)
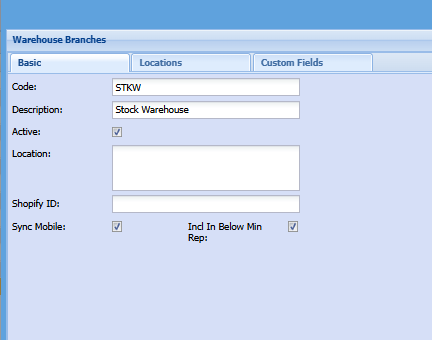
<table border="1" id="bkmrk-code-enter-the-wareh" style="border-collapse: collapse; width: 100%; height: 224px;"><colgroup><col style="width: 32.6248%;"></col><col style="width: 67.3505%;"></col></colgroup><tbody><tr style="height: 29.6px;"><td style="height: 29.6px;">**Code**</td><td style="height: 29.6px;">Enter the warehouse's unique code</td></tr><tr style="height: 29.6px;"><td style="height: 29.6px;">**Description**</td><td style="height: 29.6px;">Enter the warehouse description or name</td></tr><tr style="height: 29.6px;"><td style="height: 29.6px;">**Active**</td><td style="height: 29.6px;">Leave a tick on if the warehouse is active </td></tr><tr style="height: 29.6px;"><td style="height: 29.6px;">**Location**</td><td style="height: 29.6px;"> </td></tr><tr style="height: 29.6px;"><td style="height: 29.6px;">**Shopify ID**</td><td style="height: 29.6px;">Add a warehouse Shopify ID if you have Shopify integration</td></tr><tr style="height: 29.6px;"><td style="height: 29.6px;">**Sync Mobile**</td><td style="height: 29.6px;">This tick allows for a warehouse to be linked to Webatar mobile app</td></tr><tr style="height: 46.4px;"><td style="height: 46.4px;">**Incl In Below Min Report**</td><td style="height: 46.4px;">Put a tick on if you want the warehouse to be displayed on the below minimum report</td></tr></tbody></table>

Locations Tab are where all the boxes are stored

# Add New Warehouse

**<span class="ts15" style="color: rgb(45, 194, 107);">Inventory Module&gt; Configuration&gt; Warehouse Setup</span>**

<span class="ts15" style="color: rgb(52, 73, 94);">C<span style="color: rgb(0, 0, 0);">lick Add to add a new warehouse</span></span>

<span style="color: rgb(0, 0, 0);"><span class="ts15">Enter a Code</span></span>

<span style="color: rgb(126, 140, 141);"><span class="ts15"><span style="color: rgb(0, 0, 0);">Enter a Descriptio</span>n</span></span>

<span style="color: rgb(0, 0, 0);"><span class="ts15">Click Save</span></span>

[![image.png](https://hugeerp10.co.za/hsofmanual/uploads/images/gallery/2024-01/scaled-1680-/QuRimage.png)](https://hugeerp10.co.za/hsofmanual/uploads/images/gallery/2024-01/QuRimage.png)

<span class="ts15"> </span><span class="ts0">Branches Link</span>

<span class="ts0">Warehouses are typically linked to Branches. Thus, this setup is only required if you have multiple branches setup on the system.</span>

<span class="ts9">To link a branch to a warehouse</span>

<span class="ts9">Click the Branch button.</span>

<span class="ts9">Then select the respective Branch to be linked to this warehouse.</span>

<span class="ts9"> double click the required branch on the left to move to the selected grid on the right.</span>

[![image.png](https://hugeerp10.co.za/hsofmanual/uploads/images/gallery/2024-01/scaled-1680-/3q9image.png)](https://hugeerp10.co.za/hsofmanual/uploads/images/gallery/2024-01/3q9image.png)

##### Warehouse item association:

Once the warehouse has been created, you will need to associate inventory items to the specific warehouse.

This feature allows one to have the flexibility to link specific items to specific warehouses.

for instance, if you have multiple branches, all branches may not necessarily stock the same items.

to associate items:

If all warehouses stock all items, then you can do a quick associate:

Click once on the selected or new warehouse and click the Associate button.

[![image.png](https://hugeerp10.co.za/hsofmanual/uploads/images/gallery/2024-01/scaled-1680-/OQximage.png)](https://hugeerp10.co.za/hsofmanual/uploads/images/gallery/2024-01/OQximage.png)
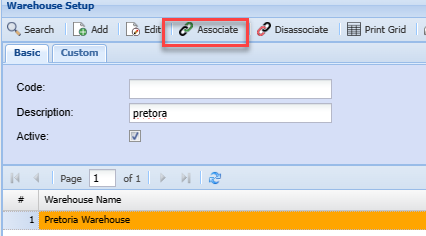
# Locations

Locations are linked to a warehouse

Locations have a unique code across all warehouses. This adds value when you want to scan a location, it will give you the warehouse that it is linked to.

There is Always one location setup per warehouse which is the default (system Location)

<p class="callout warning">A hotfix will be created and run to update all existing warehouses with at least one location for each.</p>

This system location cannot be deleted or made inactive. One can change the code or description, but not remove as it is linked to the warehouse.

#### Warehouse setup

[![image.png](https://hugeerp10.co.za/hsofmanual/uploads/images/gallery/2024-08/scaled-1680-/DUCimage.png)](https://hugeerp10.co.za/hsofmanual/uploads/images/gallery/2024-08/DUCimage.png)
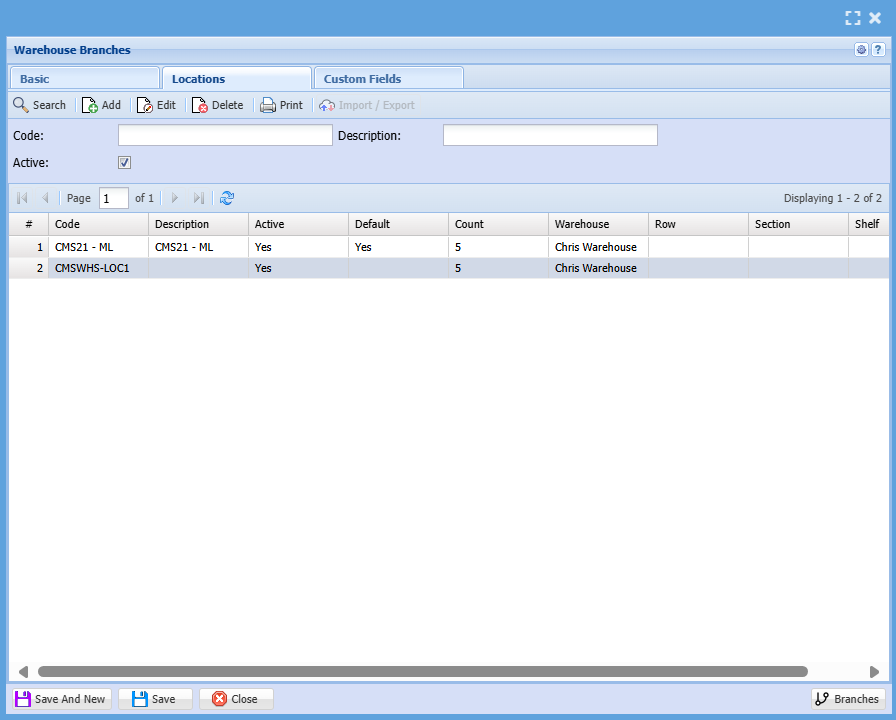
<table border="1" id="bkmrk-location-code-code-o" style="border-collapse: collapse; width: 100%; height: 206.766px;"><colgroup><col style="width: 23.7655%;"></col><col style="width: 76.3581%;"></col></colgroup><tbody><tr style="height: 29.7969px;"><td style="height: 29.7969px;">**Location Code**</td><td style="height: 29.7969px;">Code of the location which is unique across all warehouses</td></tr><tr style="height: 29.7969px;"><td style="height: 29.7969px;">**Location Description**</td><td style="height: 29.7969px;">Description of Location</td></tr><tr style="height: 57.7812px;"><td style="height: 57.7812px;">**Active**</td><td style="height: 57.7812px;">Shows that the location is active

A location cannot become inactive if it has items assigned to it

</td></tr><tr style="height: 29.7969px;"><td style="height: 29.7969px;">**Default**</td><td style="height: 29.7969px;">Shows which location is the default</td></tr><tr style="height: 29.7969px;"><td style="height: 29.7969px;">**Count**</td><td style="height: 29.7969px;">Shows how many products are linked in this location</td></tr></tbody></table>

---

#### Add or edit a location

[![image.png](https://hugeerp10.co.za/hsofmanual/uploads/images/gallery/2024-08/scaled-1680-/6qXimage.png)](https://hugeerp10.co.za/hsofmanual/uploads/images/gallery/2024-08/6qXimage.png)

<table border="1" id="bkmrk-location-code-unique" style="border-collapse: collapse; width: 100%;"><colgroup><col style="width: 28.188%;"></col><col style="width: 71.812%;"></col></colgroup><tbody><tr><td>**Location Code**</td><td>Unique number

</td></tr><tr><td>**Location Description**</td><td>Description of location</td></tr><tr><td>**Warehouse Linked**</td><td>Name of Location (Only name)</td></tr><tr><td>**System Warehouse**</td><td>Informs the user that this Location cannot be deleted or made inactive</td></tr><tr><td>**Active**</td><td>Tick to make inactive

Can only be made inactive if no items are linked to the location

System Linked warehouse locations cannot be made inactive

</td></tr><tr><td>**WHS**</td><td>Inserts the Warehouse code here but user can change</td></tr><tr><td>**Row**</td><td>User can enter a row value</td></tr><tr><td>**Section**</td><td>User can enter a Section value</td></tr><tr><td>**Shelf**</td><td>User can enter a shelf value</td></tr><tr><td>**Seperator**</td><td>Allows the user to use a separator when creating the code from WHS + Row + Section + Shelf

Default is None (other values are Space or - or | or \\ or / )

</td></tr><tr><td>**Make Code button**</td><td>When clicking on this, it will make a code based on WHS, Row, Section and Shelf</td></tr></tbody></table>

# Multi location and bin location

This is a new feature that is coming up before the end of the year

This feature will be found under

<span style="color: rgb(45, 194, 107);">**Inventory Module&gt; Configurations&gt; Warehouse Set up&gt; Locations Tab**</span>

The feature will include the following:

1. Multi-locations within a warehouse
2. Multi-bin locations within a warehouse
3. Boxing of products in a location

[![image.png](https://hugeerp10.co.za/hsofmanual/uploads/images/gallery/2024-08/scaled-1680-/g3Qimage.png)](https://hugeerp10.co.za/hsofmanual/uploads/images/gallery/2024-08/g3Qimage.png)
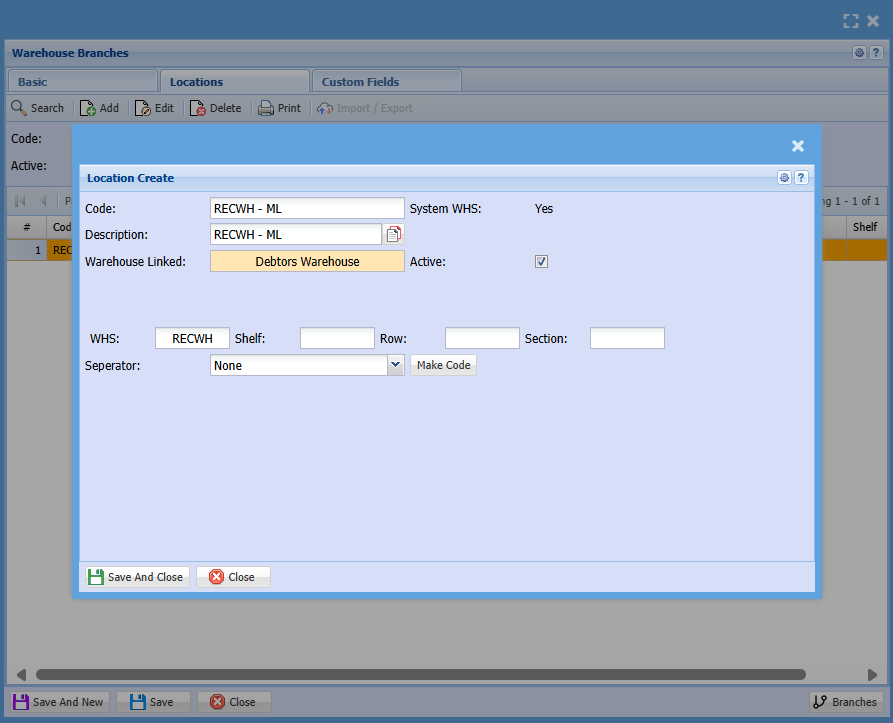
# Boxes Setup Menu

# Boxes

Setup boxes that will be linked to a location which in turn is linked to a warehouse

Boxes numbers are unique

The box is always linked to a location

Boxes can be moved between locations, and the contents are then moved to the new location.

Record of the movement of the items to the new location is recorded

[![image.png](https://hugeerp10.co.za/hsofmanual/uploads/images/gallery/2024-08/scaled-1680-/NcJimage.png)](https://hugeerp10.co.za/hsofmanual/uploads/images/gallery/2024-08/NcJimage.png)
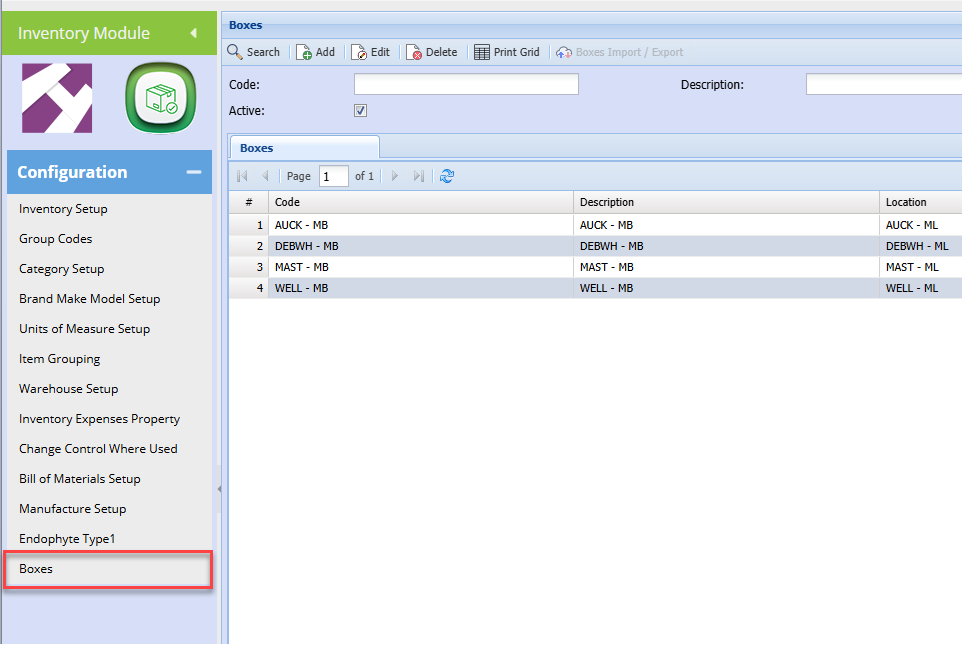
Buttons

<table border="1" id="bkmrk-add-create-a-new-box" style="border-collapse: collapse; width: 100%; height: 118.4px;"><colgroup><col style="width: 29.6791%;"></col><col style="width: 70.4198%;"></col></colgroup><tbody><tr style="height: 29.6px;"><td style="height: 29.6px;">**Add**</td><td style="height: 29.6px;">Create a new box</td></tr><tr style="height: 29.6px;"><td style="height: 29.6px;">**Edit**</td><td style="height: 29.6px;">Edit an existing box</td></tr><tr style="height: 29.6px;"><td style="height: 29.6px;">**Delete**</td><td style="height: 29.6px;">The delete button allows you to delete a box as long as there is no movement against it</td></tr><tr style="height: 29.6px;"><td style="height: 29.6px;">**Print Grid**</td><td style="height: 29.6px;">Allows you to print boxes on the grid</td></tr></tbody></table>

To add a new box click add

When you click add the screen below will be displayed

[![image.png](https://hugeerp10.co.za/hsofmanual/uploads/images/gallery/2024-09/scaled-1680-/iDwimage.png)](https://hugeerp10.co.za/hsofmanual/uploads/images/gallery/2024-09/iDwimage.png)
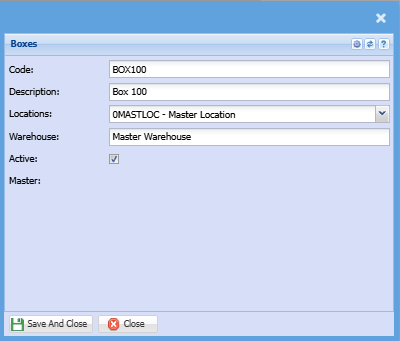
Add the following information

<table border="1" id="bkmrk-code-enter-box-code-" style="border-collapse: collapse; width: 100%; height: 119.188px;"><colgroup><col style="width: 26.3581%;"></col><col style="width: 73.7655%;"></col></colgroup><tbody><tr style="height: 29.7969px;"><td style="height: 29.7969px;">**Code**</td><td style="height: 29.7969px;">Enter box code</td></tr><tr style="height: 29.7969px;"><td style="height: 29.7969px;">**Description**</td><td style="height: 29.7969px;">Enter the box description</td></tr><tr style="height: 29.7969px;"><td style="height: 29.7969px;">**Locations**</td><td style="height: 29.7969px;">Select the box location on the drop down menu

This location will determine the warehouse

</td></tr><tr style="height: 29.7969px;"><td style="height: 29.7969px;">**Warehouse**</td><td style="height: 29.7969px;">This will be automatically populated based on the location </td></tr></tbody></table>

<p class="callout info">You can have multiple boxes linked to one location</p>

To see the boxes linked

Go to <span style="color: rgb(45, 194, 107);">**Inventory Module&gt; Configuration&gt; Warehouse setup** </span>

Click search, then double-click on the warehouse linked to the box you want to see

Click on the locations tab and the boxes will display as shown below:

[![image.png](https://hugeerp10.co.za/hsofmanual/uploads/images/gallery/2024-09/scaled-1680-/ArQimage.png)](https://hugeerp10.co.za/hsofmanual/uploads/images/gallery/2024-09/ArQimage.png)
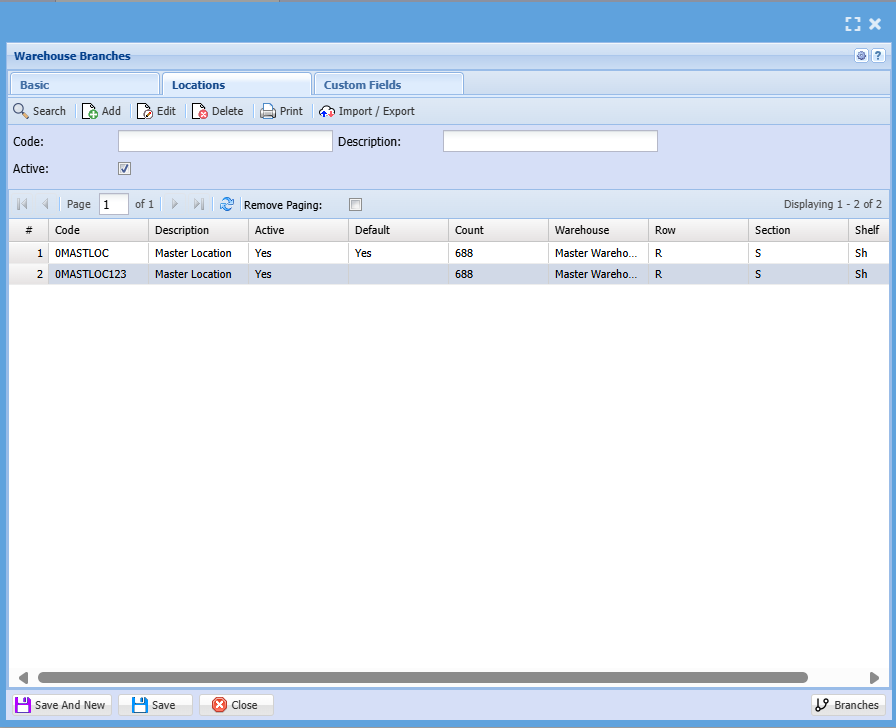
# Inventory Expense Property Menu

# Inventory Expense Property

<span class="ts15">Inventory&gt; Configuration&gt; Expense Property</span>

<span class="ts0"> </span>![](https://hugeerp0.co.za/csp/webhelp/topics/images/image(3057).png)

<table border="1" id="bkmrk-search-search-for-an" style="border-collapse: collapse; width: 50%;"><colgroup><col style="width: 18.7879%;"></col><col style="width: 81.1626%;"></col></colgroup><tbody><tr><td><span class="ts0">Search</span></td><td><span class="ts0">search for an existing expense property</span></td></tr><tr><td><span class="ts0">Add</span></td><td><span class="ts0">add a new expense property</span></td></tr><tr><td><span class="ts0">Edit</span></td><td><span class="ts0">amend an existing expense property</span></td></tr></tbody></table>

# Inventory Average Costing

<span class="ts10">Video training manual 2016 - </span>[Click Here](https://vimeo.com/357005469)

<span class="ts0">The system caters for</span>

<table border="1" id="bkmrk-1-average-costing-2-" style="border-collapse: collapse; width: 28.1481%;"><colgroup><col style="width: 13.195%;"></col><col style="width: 86.717%;"></col></colgroup><tbody><tr><td>1</td><td><span class="ts0">average costing</span></td></tr><tr><td>2</td><td><span class="ts0">latest costing methods</span></td></tr></tbody></table>

<span class="ts0">Average Costing</span>

<span class="ts0">Average costing is worked out by the number of stock items coming into the system with a value. </span>

<span class="ts0">This value is posted to the general ledger books to your stock ledger account and Creditors control account. </span>

<span class="ts0">When the next Goods Received Note with stock comes in, the value of the incoming stock and quantity is worked out. </span>

<span class="ts0">The existing stock quantity and value is multiplied to give you a value and the new value from the Goods Received Note is added together and then divided to give you the new average cost of the item.</span>

<span class="ts0">Looking at the table below the average cost of the item is worked out each time stock comes in based on quantity and value. </span>

<span class="ts0">If the user does not back date any GRV or revalue the stock, one can work out the average cost of the item in excel and in history sorting by audit date and time.</span>

<span class="ts0">If a stock value adjustment has been made, the system will work out from the last stock value adjustment</span>

<span class="ts0"> </span>![](https://hugeerp0.co.za/csp/webhelp/topics/images/image(3138).png)

<table border="1" id="bkmrk-total-line-value-%3D-q" style="border-collapse: collapse; width: 54.9383%; height: 118.4px;"><colgroup><col style="width: 29.2637%;"></col><col style="width: 70.6913%;"></col></colgroup><tbody><tr style="height: 29.6px;"><td style="height: 29.6px;"><span class="ts0">Total Line Value =</span></td><td style="height: 29.6px;"><span class="ts0">QTY x Unit Value</span></td></tr><tr style="height: 29.6px;"><td style="height: 29.6px;"><span class="ts0">Total Value </span><span class="ts0">=</span></td><td style="height: 29.6px;"><span class="ts0">Previous Total Value + New Total Line Value</span></td></tr><tr style="height: 29.6px;"><td style="height: 29.6px;"><span class="ts0">Total QTY </span><span class="ts0">=</span></td><td style="height: 29.6px;"><span class="ts0">Previous Total QTY + New Line QTY</span></td></tr><tr style="height: 29.6px;"><td style="height: 29.6px;"><span class="ts0">Ave Cost </span><span class="ts0">=</span></td><td style="height: 29.6px;"><span class="ts0">Total Value / Total QTY</span></td></tr></tbody></table>

##### <span class="ts0">Average Costing Test</span>

<span class="ts0">When working out the average unit cost</span>

<span class="ts0"> </span>![](https://hugeerp0.co.za/csp/webhelp/topics/images/image(3139).png)

<span class="ts0"> </span><span class="ts0">Checking the stock value</span>

<span class="ts0"> </span>![](https://hugeerp0.co.za/csp/webhelp/topics/images/image(3140).png)

<span class="ts0"> </span><span class="ts0">Inventory valuation report</span>

<span class="ts0"> </span>![](https://hugeerp0.co.za/csp/webhelp/topics/images/image(3141).png)

<span class="ts0"> </span><span class="ts0">Quantity on hand check</span>

<span class="ts0"> </span>![](https://hugeerp0.co.za/csp/webhelp/topics/images/image(3142).png)

<span class="ts0"> </span><span class="ts0">Inventory movement check</span>

<span class="ts0"> </span>![](https://hugeerp0.co.za/csp/webhelp/topics/images/image(3143).png)

<span class="ts0"> </span><span class="ts0"> </span><span class="ts0">Document related transactions check</span>

<span class="ts0"> </span>![](https://hugeerp0.co.za/csp/webhelp/topics/images/image(3144).png)

<span class="ts0"> </span>![](https://hugeerp0.co.za/csp/webhelp/topics/images/image(3145).png)

<span class="ts0"> </span>![](https://hugeerp0.co.za/csp/webhelp/topics/images/image(3146).png)

<span class="ts0"> </span>![](https://hugeerp0.co.za/csp/webhelp/topics/images/image(3147).png)

<span class="ts0"> </span>![](https://hugeerp0.co.za/csp/webhelp/topics/images/image(3148).png)

<span class="ts0"> </span><span class="ts0"> </span>![](https://hugeerp0.co.za/csp/webhelp/topics/images/image(3149).png)

<span class="ts0"> </span>![](https://hugeerp0.co.za/csp/webhelp/topics/images/image(3150).png)

<span class="ts0"> </span>![](https://hugeerp0.co.za/csp/webhelp/topics/images/image(3151).png)

<span class="ts0"> </span><span class="ts0"> </span><span class="ts0">Item check</span>

<span class="ts0"> </span>![](https://hugeerp0.co.za/csp/webhelp/topics/images/image(3152).png)

# Change Control Where Used

# Where Used Search

[![image.png](https://hugeerp10.co.za/hsofmanual/uploads/images/gallery/2024-10/scaled-1680-/pupimage.png)](https://hugeerp10.co.za/hsofmanual/uploads/images/gallery/2024-10/pupimage.png)
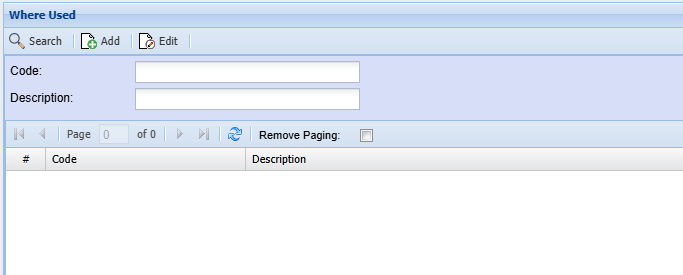
Clicking Add

[![image.png](https://hugeerp10.co.za/hsofmanual/uploads/images/gallery/2024-10/scaled-1680-/PrSimage.png)](https://hugeerp10.co.za/hsofmanual/uploads/images/gallery/2024-10/PrSimage.png)
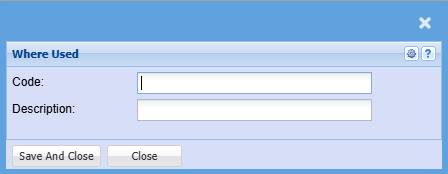
# Bill of Materials (BOM) Setup Menu

# Bill Of Material Setup Add

<span style="color: rgb(45, 194, 107);">**<span class="ts23">Go to Inventory Module&gt; Configuration&gt; Bill of Materials Setup</span>**</span>

[![image.png](https://hugeerp10.co.za/hsofmanual/uploads/images/gallery/2024-08/scaled-1680-/kogimage.png)](https://hugeerp10.co.za/hsofmanual/uploads/images/gallery/2024-08/kogimage.png)

<span lang="EN-US" style="mso-ansi-language: EN-US;">Click Add</span>

<span lang="EN-US" style="mso-ansi-language: EN-US;">Enter a BOM code</span>

<span lang="EN-US" style="mso-ansi-language: EN-US;">Enter a Description</span>

<span lang="EN-US" style="mso-ansi-language: EN-US;">Select the BOM Resultant Item -<span style="mso-spacerun: yes;"> </span>this is the Stock item created in the previous step</span>

<span lang="EN-US" style="mso-ansi-language: EN-US;">Check the Active box is ticked</span>

<span lang="EN-US" style="mso-ansi-language: EN-US;">Click the Save button</span>

[![image.png](https://hugeerp10.co.za/hsofmanual/uploads/images/gallery/2024-08/scaled-1680-/b0Bimage.png)](https://hugeerp10.co.za/hsofmanual/uploads/images/gallery/2024-08/b0Bimage.png)

<span lang="EN-US" style="mso-ansi-language: EN-US;">You will notice the Add button becomes active</span>

<span lang="EN-US" style="mso-ansi-language: EN-US;">Click Add to begin adding the components of the Bill of materials<span style="mso-spacerun: yes;"> </span>(BOM)</span>

<span lang="EN-US" style="mso-ansi-language: EN-US;">Select the Component item</span>

<p class="callout info"><span lang="EN-US" style="mso-ansi-language: EN-US;">Enter the required quantity, this is the quantity of the component required in the manufacture of<span style="mso-spacerun: yes;"> </span></span><span lang="EN-US" style="mso-ansi-language: EN-US;">one of the resultant item</span></p>

<span lang="EN-US" style="mso-ansi-language: EN-US;">Click Save and New to add the next component and quantity</span>

<span lang="EN-US" style="mso-ansi-language: EN-US;">Repeat this step until all components are added</span>

[![image.png](https://hugeerp10.co.za/hsofmanual/uploads/images/gallery/2024-08/scaled-1680-/2vbimage.png)](https://hugeerp10.co.za/hsofmanual/uploads/images/gallery/2024-08/2vbimage.png)

<span lang="EN-US" style="mso-ansi-language: EN-US;">Once you have added all the components, click Save and Close.</span>

<span lang="EN-US" style="mso-ansi-language: EN-US;">You will notice the components will be listed in the grid.</span>

[![image.png](https://hugeerp10.co.za/hsofmanual/uploads/images/gallery/2024-08/scaled-1680-/UD3image.png)](https://hugeerp10.co.za/hsofmanual/uploads/images/gallery/2024-08/UD3image.png)

<span lang="EN-US" style="mso-ansi-language: EN-US;">Click and Close</span>

---

#### <span lang="EN-US" style="mso-ansi-language: EN-US;">Setting up the Build item</span>

<span lang="EN-US" style="mso-ansi-language: EN-US;">The build item is always a Custom item</span>

<span style="color: rgb(45, 194, 107);">**<span lang="EN-US" style="mso-ansi-language: EN-US;">Go to Inventory Module&gt; Configuration&gt; Inventory Setup</span>**</span>

<span lang="EN-US" style="mso-ansi-language: EN-US;">Enter a Code and description</span>

<span lang="EN-US" style="mso-ansi-language: EN-US;">Select the Category as Custom</span>

[![image.png](https://hugeerp10.co.za/hsofmanual/uploads/images/gallery/2024-08/scaled-1680-/Qjfimage.png)](https://hugeerp10.co.za/hsofmanual/uploads/images/gallery/2024-08/Qjfimage.png)

<span lang="EN-US" style="mso-ansi-language: EN-US;">Click Save</span>

<span lang="EN-US" style="mso-ansi-language: EN-US;">You will be prompted to enter the cost and selling prices</span>

<span lang="EN-US" style="mso-ansi-language: EN-US;">Enter the Sell Price</span>

<span lang="EN-US" style="mso-ansi-language: EN-US;">Once again, the cost price will be the total of the BOM component's costs</span>

<span lang="EN-US" style="mso-ansi-language: EN-US;">Click Continue</span>

<span lang="EN-US" style="mso-ansi-language: EN-US;"> </span>

##### <span lang="EN-US" style="mso-ansi-language: EN-US;">Click the Properties Tab</span>

<span lang="EN-US" style="mso-ansi-language: EN-US;">Tick the Build Kit Box – this identifies this item as a build item</span>

<span lang="EN-US" style="mso-ansi-language: EN-US;">Select the BOM resultant Item</span>

<span lang="EN-US" style="mso-ansi-language: EN-US;">Select the BOM Recipe</span>

<span lang="EN-US" style="mso-ansi-language: EN-US;">Tick Update Qty Box – This allows you to edit the quantity of the builds when adding on sales documents or jobs.</span>

<span lang="EN-US" style="mso-ansi-language: EN-US;"> </span>

##### <span lang="EN-US" style="mso-ansi-language: EN-US;">Use Kit Parent Group</span>

<span lang="EN-US" style="mso-ansi-language: EN-US;">This will dictate the posting to the respective sales and cost of sales GL accounts using the group code selected on the parent which is the Stock item created above.</span>

<p class="callout info"><span lang="EN-US" style="mso-ansi-language: EN-US;">Each component of the recipe may have its own group code setup. If this box is not ticked, the postings will be based on the various groups on the individual components of the build (recipe).</span></p>

[![image.png](https://hugeerp10.co.za/hsofmanual/uploads/images/gallery/2024-08/scaled-1680-/VSHimage.png)](https://hugeerp10.co.za/hsofmanual/uploads/images/gallery/2024-08/VSHimage.png)

<span lang="EN-US" style="mso-ansi-language: EN-US;">Click Save and close</span>

<span lang="EN-US" style="mso-ansi-language: EN-US;">This concludes the Build Kit Setup</span>

<span lang="EN-US" style="mso-ansi-language: EN-US;">The Build can now be used on Sales documents and Jobs</span>

<span lang="EN-US" style="mso-ansi-language: EN-US;"> </span>

  
Old <span class="ts10">Video Training Manual 2019 - </span>[Click Here](https://vimeo.com/375561179)

# Resultant Item Setup

<span class="ts43">A resultant item is an item that is manufactured by the company. It is made up of various components that are linked to a Bill of Material. When the Bill of Material 9BOM) is manufactured the resultant or manufactured item is then added into the stock.</span>

<span class="ts43">The system thus needs to be able to differentiate a BOM or resultant item from a standard item.</span>

To mark an item as a resultant item, create a stock. refer to Inventory Item setup section.

<span class="ts43">Click the Bill of Material tab</span>

<span class="ts43">Tock the activate BOM Box</span>

<span class="ts43">One can opt to show the underlying components of this resultant item on various documents.</span>

<span class="ts43">Ticking any of the boxes will result in the components being displayed on the respect document.</span>

![](https://hugeerp0.co.za/csp/webhelp/topics/images/image(3060).png)

<span class="ts43">Tick the BOM Item Box</span>

<span class="ts43">Click Save and Close</span>

![](https://hugeerp0.co.za/csp/webhelp/topics/images/image(3061).png)

# BOM Multiple Import

![](https://hugeerp0.co.za/csp/webhelp/topics/images/new%20feature(1).jpg)

<span class="ts70">Still coming or will be in new release</span>

**<span class="ts2">Bill of Materials (BOM) multiple import</span>**

<span class="ts0">This will allow for multiple BOM imports from one Excel sheet.</span>

<span class="ts0">Go to Inventory &gt; Configuration &gt; BOM setup</span>

<span class="ts0">Click on Print/ Export drop down and select Import BOMs</span>

<span class="ts0"> </span>![](https://hugeerp0.co.za/csp/webhelp/topics/images/image(3062).png)

<span class="ts0">Select your file for import, upload and import</span>

<span class="ts0"> </span>![](https://hugeerp0.co.za/csp/webhelp/topics/images/image(3063).png)

<span class="ts0">Exception report</span>

<span class="ts0">There will be an except report afterwards which will show what Bill of Materials have not imported due to the following:</span>

<table border="1" id="bkmrk-1-bill-of-materials-" style="border-collapse: collapse; width: 52.0988%;"><colgroup><col style="width: 9.96611%;"></col><col style="width: 90.2238%;"></col></colgroup><tbody><tr><td>1</td><td><span class="ts0">Bill of materials code is not unique, duplicate found</span></td></tr><tr><td>2</td><td><span class="ts0">Inventory line item does not exist, or is Not active</span></td></tr><tr><td>3</td><td><span class="ts0">Bill of materials result item does not exist</span></td></tr><tr><td>4</td><td><span class="ts0">Bill of materials result item is not marked as a BOM</span></td></tr></tbody></table>

**<span class="ts4">Excel file layout</span>**

<span class="ts0">Prepare the Excel file for import</span>

<span class="ts0">The file is prepared in a CSV file and separated by Semi colon.</span>

<table border="1" id="bkmrk-bh-bom-header-which-" style="border-collapse: collapse; width: 100%; height: 118.4px;"><colgroup><col style="width: 16.8396%;"></col><col style="width: 83.2593%;"></col></colgroup><tbody><tr style="height: 29.6px;"><td style="height: 29.6px;"><span class="ts0">BH</span></td><td style="height: 29.6px;"><span class="ts0">BOM Header which stands for the BOM information</span></td></tr><tr style="height: 29.6px;"><td style="height: 29.6px;"><span class="ts0">BL</span></td><td style="height: 29.6px;"><span class="ts0">BOM Lines which make up the BOM or build inventory lines</span></td></tr><tr style="height: 29.6px;"><td style="height: 29.6px;"><span class="ts0">Code</span></td><td style="height: 29.6px;"><span class="ts0">This is unique and is the code of the BOM (Required)</span></td></tr><tr style="height: 29.6px;"><td style="height: 29.6px;"><span class="ts0">Description</span></td><td style="height: 29.6px;"><span class="ts0">Description of the BOM (Required)</span></td></tr><tr><td><span class="ts0">Result item</span></td><td><span class="ts0">is the code of the BOM inventory item which is flagged as a bill of materials item (Required)</span></td></tr><tr><td><span class="ts0">BL</span></td><td><span class="ts0">  
</span></td></tr><tr><td><span class="ts0">Code</span></td><td><span class="ts0">Inventory item code (Required)</span></td></tr><tr><td><span class="ts0">Description</span></td><td><span class="ts0">Description of inventory item</span></td></tr><tr><td><span class="ts0">Qty</span></td><td><span class="ts0">Quantity of BOM line which will make up one item (Required)</span></td></tr><tr><td><span class="ts0">Warehouse</span></td><td><span class="ts0">Stock item warehouse code (Required for stock items)</span></td></tr><tr><td><span class="ts0">Cost</span></td><td><span class="ts0">Cost price of line</span></td></tr></tbody></table>

<span class="ts0">Stock items will get cost from system</span>

<span class="ts0">Service and custom items will update cost that is set here</span>

<span class="ts0">Note - if value is left blank for service and custom, this will bring in a cost of zero</span>

<div id="bkmrk-bh-code-description-"><table class="tbl4"><tbody><tr class="row0"><td class="cell30"><span class="ts12">BH</span>

</td><td class="cell31"><span class="ts12">Code</span>

</td><td class="cell32"><span class="ts12">Description</span>

</td><td class="cell33"><span class="ts12">Result item</span>

</td><td class="cell34"><span class="ts13"> </span>

</td><td class="cell35"><span class="ts13"> </span>

</td><td class="cell36"></td></tr><tr class="row0"><td class="cell30"><span class="ts12">BL</span>

</td><td class="cell37"><span class="ts12">Code</span>

</td><td class="cell32"><span class="ts12">Description</span>

</td><td class="cell38"><span class="ts12">QTY</span>

</td><td class="cell39"><span class="ts12">Warehouse</span>

</td><td class="cell40"><span class="ts12">Cost</span>

</td><td class="cell41"><span class="ts71">Stock Type</span>

</td></tr><tr class="row0"><td class="cell30"><span class="ts12">BL</span>

</td><td class="cell37"><span class="ts12">Code</span>

</td><td class="cell32"><span class="ts12">Description</span>

</td><td class="cell38"><span class="ts12">QTY</span>

</td><td class="cell39"><span class="ts12">Warehouse</span>

</td><td class="cell40"><span class="ts12">Cost</span>

</td><td class="cell41"><span class="ts71">Stock Type</span>

</td></tr><tr class="row0"><td class="cell30"><span class="ts12">BL</span>

</td><td class="cell37"><span class="ts12">Code</span>

</td><td class="cell32"><span class="ts12">Description</span>

</td><td class="cell38"><span class="ts12">QTY</span>

</td><td class="cell39"><span class="ts12">Warehouse</span>

</td><td class="cell40"><span class="ts12">Cost</span>

</td><td class="cell41"><span class="ts71">Stock Type</span>

</td></tr><tr class="row0"><td class="cell42"><span class="ts13"> </span>

</td><td class="cell43"><span class="ts13"> </span>

</td><td class="cell32"><span class="ts13"> </span>

</td><td class="cell44"><span class="ts13"> </span>

</td><td class="cell34"><span class="ts13"> </span>

</td><td class="cell35"><span class="ts13"> </span>

</td><td class="cell36"><span class="ts71"> </span>

</td></tr><tr class="row0"><td class="cell42"><span class="ts12">BH</span>

</td><td class="cell43"><span class="ts12">Code</span>

</td><td class="cell32"><span class="ts12">Description</span>

</td><td class="cell44"><span class="ts12">Result item</span>

</td><td class="cell34"><span class="ts13"> </span>

</td><td class="cell35"><span class="ts13"> </span>

</td><td class="cell36"><span class="ts71"> </span>

</td></tr><tr class="row0"><td class="cell42"><span class="ts12">BL</span>

</td><td class="cell43"><span class="ts12">Code</span>

</td><td class="cell32"><span class="ts12">Description</span>

</td><td class="cell44"><span class="ts12">QTY</span>

</td><td class="cell34"><span class="ts12">Warehouse</span>

</td><td class="cell35"><span class="ts12">Cost</span>

</td><td class="cell36"><span class="ts71">Stock Type</span>

</td></tr><tr class="row0"><td class="cell42"><span class="ts12">BL</span>

</td><td class="cell43"><span class="ts12">Code</span>

</td><td class="cell32"><span class="ts12">Description</span>

</td><td class="cell44"><span class="ts12">QTY</span>

</td><td class="cell34"><span class="ts12">Warehouse</span>

</td><td class="cell35"><span class="ts12">Cost</span>

</td><td class="cell36"><span class="ts71">Stock Type</span>

</td></tr><tr class="row0"><td class="cell42"><span class="ts12">BL</span>

</td><td class="cell43"><span class="ts12">Code</span>

</td><td class="cell32"><span class="ts12">Description</span>

</td><td class="cell44"><span class="ts12">QTY</span>

</td><td class="cell34"><span class="ts12">Warehouse</span>

</td><td class="cell35"><span class="ts12">Cost</span>

</td><td class="cell36"><span class="ts71">Stock Type</span>

</td></tr><tr class="row0"><td class="cell42"><span class="ts13"> </span>

</td><td class="cell43"><span class="ts13"> </span>

</td><td class="cell32"><span class="ts13"> </span>

</td><td class="cell44"><span class="ts13"> </span>

</td><td class="cell34"><span class="ts13"> </span>

</td><td class="cell35"><span class="ts13"> </span>

</td><td class="cell36"><span class="ts71"> </span>

</td></tr><tr class="row0"><td class="cell42"><span class="ts12">BH</span>

</td><td class="cell43"><span class="ts12">PC/BOM/WSi3/01</span>

</td><td class="cell32"><span class="ts12">PC BOM Workstation i3</span>

</td><td class="cell44"><span class="ts12">XX/PC/BOM/WSi3</span>

</td><td class="cell34"><span class="ts13"> </span>

</td><td class="cell35"><span class="ts13"> </span>

</td><td class="cell36"><span class="ts71"> </span>

</td></tr><tr class="row0"><td class="cell42"><span class="ts12">BL</span>

</td><td class="cell43"><span class="ts12">CAS/SIL/PS08</span>

</td><td class="cell32"><span class="ts12">Silverstone case</span>

</td><td class="cell44"><span class="ts12">1</span>

</td><td class="cell34"><span class="ts12">MAST</span>

</td><td class="cell35"><span class="ts12">50.00</span>

</td><td class="cell36"><span class="ts71">Stock</span>

</td></tr><tr class="row0"><td class="cell42"><span class="ts12">BL</span>

</td><td class="cell43"><span class="ts12">POW/DES</span>

</td><td class="cell32"><span class="ts12">Power supply</span>

</td><td class="cell44"><span class="ts12">1</span>

</td><td class="cell34"><span class="ts12">MAST</span>

</td><td class="cell35"><span class="ts12">85.00</span>

</td><td class="cell36"><span class="ts71">Stock</span>

</td></tr><tr class="row0"><td class="cell42"><span class="ts12">BL</span>

</td><td class="cell43"><span class="ts12">MBD/H310M</span>

</td><td class="cell32"><span class="ts12">Motherboard</span>

</td><td class="cell44"><span class="ts12">1</span>

</td><td class="cell34"><span class="ts12">MAST</span>

</td><td class="cell35"><span class="ts12">140.00</span>

</td><td class="cell36"><span class="ts71">Custom</span>

</td></tr><tr class="row0"><td class="cell42"><span class="ts12">BL</span>

</td><td class="cell43"><span class="ts12">MEM/DES/DDR4/4Gig</span>

</td><td class="cell32"><span class="ts12">Power supply</span>

</td><td class="cell44"><span class="ts12">4</span>

</td><td class="cell34"><span class="ts12">MAST</span>

</td><td class="cell35"><span class="ts12">45.00</span>

</td><td class="cell36"><span class="ts71">Stock</span>

</td></tr><tr class="row0"><td class="cell42"><span class="ts12">BL</span>

</td><td class="cell43"><span class="ts12">LAB/LABSD</span>

</td><td class="cell32"><span class="ts12">Labour</span>

</td><td class="cell44"><span class="ts12">2</span>

</td><td class="cell34"><span class="ts13"> </span>

</td><td class="cell35"><span class="ts12">90.00</span>

</td><td class="cell36"><span class="ts71">Service</span>

</td></tr></tbody></table>

</div>**<span class="ts4">Template</span>**

<span class="ts0">Import template can be found under System Configuration &gt; Administration &gt; Imports</span>

<span class="ts0"> </span><span class="ts0"> </span>![](https://hugeerp0.co.za/csp/webhelp/topics/images/image(3064).png)

<span class="ts0"> </span>

<span class="ts0"> </span>

<span class="ts0"></span>

# BOM Setup

<span class="ts15">Inventory&gt; Configuration&gt; Bill of Materials Setup</span>

<span class="ts0">This is where you will setup the Bill of Materials Recipe based on your manufacturing items.</span>

<span class="ts0">In order to create a BOM item you need raw material stock type items, custom type items and or as well as Service type items.</span>

<span class="ts0">One would have created a BOM item and put all of its information in.</span>

<span class="ts0">Remember when creating a Bill of Materials item always remember these rules.</span>

<span class="ts0">Unit of Measure IN = Unit of Measure OUT</span>

<span class="ts0">Don’t mix up your units of measures, if you are working in Kg work all the way in KGs.</span>

<span class="ts0">Always work your recipe to the unit of ONE.</span>

<span class="ts0">Here is a simple example of a Bill of Materials.</span>

<span class="ts0">BOM item (Result Item or Finished Goods) will be a </span><span class="ts0">Pencil</span>

<span class="ts0">Box</span>

<span class="ts0">(In this example we are only going to use simple items so one can get the idea of a BOM recipe)</span>

<span class="ts0">In the BOM setup screen we first have to setup the BOM recipe.</span>

<span class="ts0"> </span>![](https://hugeerp0.co.za/csp/webhelp/topics/images/image(3065).png)

<span class="ts0">Click on the insert button to insert a new BOM recipe. Fill in the information for your Bill of Materials and then click on Save.</span>

<span class="ts0"> </span>![](https://hugeerp0.co.za/csp/webhelp/topics/images/image(3066).png)

<span class="ts0">After clicking on the save button go to insert to put in the raw material lines.</span>

![](https://hugeerp0.co.za/csp/webhelp/topics/images/image(3067).png)

<span class="ts0">After entering all the stock items for the recipe this is what the BOM will look like.</span>

<span class="ts0"> </span>![](https://hugeerp0.co.za/csp/webhelp/topics/images/image(3068).png)

<span class="ts0">We now have one recipe for a BOM</span>

<span class="ts0"> </span>![](https://hugeerp0.co.za/csp/webhelp/topics/images/image(3069).png)

<span class="ts0">Under the Extras tab, there are 2 functions</span>

<table border="1" id="bkmrk-clone-this-is-where-" style="border-collapse: collapse; width: 100%;"><colgroup><col style="width: 7.91307%;"></col><col style="width: 92.0622%;"></col></colgroup><tbody><tr><td><span class="ts0">Clone</span></td><td><span class="ts0">this is where one wants to create a new BOM using the current recipe, after you have created the item you can make changes to the raw materials.</span></td></tr><tr><td><span class="ts0">Verify</span></td><td><span class="ts0">this is where you want to check what stock you would need if you wanted to manufacture stock.</span></td></tr></tbody></table>

<span class="ts0"> </span>![](https://hugeerp0.co.za/csp/webhelp/topics/images/image(3070).png)

<span class="ts0">To Clone, highlight the BOM you want to clone and click on the Clone button. Once the Code and Description has been entered click on OK.</span>

<span class="ts0"> </span>![](https://hugeerp0.co.za/csp/webhelp/topics/images/image(3071).png)

<span class="ts0">There will be two Bills created.</span>

<span class="ts0"> </span>![](https://hugeerp0.co.za/csp/webhelp/topics/images/image(3072).png)

<span class="ts0">To verify if we can manufacture a BOM item, lets highlight the BOM and click on Verify button.</span>

<span class="ts0">Enter the quantity of Cakes one wants to manufacture and then click OK</span>

<span class="ts0"> </span>![](https://hugeerp0.co.za/csp/webhelp/topics/images/image(2085).png)

<span class="ts0">Should there not be enough stock to manufacture this will be indicated by a red block or Invalid message.</span>

<span class="ts0"> </span>![](https://hugeerp0.co.za/csp/webhelp/topics/images/image(2086).png)

<span class="ts0">If all is correct then all lines will be green</span>

![](https://hugeerp0.co.za/csp/webhelp/topics/images/image(2087).png)

<span class="ts0">You can print out the BOM Verification report by clicking on the print button.</span>

<span class="ts0"> </span>![](https://hugeerp0.co.za/csp/webhelp/topics/images/image(2088).png)

<span class="ts0">To print out the BOM recipe and have a look at the costs of the Bill of Material. Search for the BOM, highlight it and click on the print tab and then print button at the bottom of the BOM setup screen.</span>

![](https://hugeerp0.co.za/csp/webhelp/topics/images/image(2091).png)

# Print Tab

[![image.png](https://hugeerp10.co.za/hsofmanual/uploads/images/gallery/2024-10/scaled-1680-/mUvimage.png)](https://hugeerp10.co.za/hsofmanual/uploads/images/gallery/2024-10/mUvimage.png)

#### Print

[![image.png](https://hugeerp10.co.za/hsofmanual/uploads/images/gallery/2024-10/scaled-1680-/wDOimage.png)](https://hugeerp10.co.za/hsofmanual/uploads/images/gallery/2024-10/wDOimage.png)
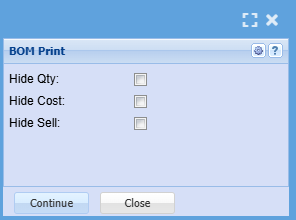
# Import

![](https://hugeerp0.co.za/csp/webhelp/topics/images/image(3274).png)

<span class="ts0"> </span>![](https://hugeerp0.co.za/csp/webhelp/topics/images/image(3074).png)

<span class="ts0">Import Bill of Materials Help</span>

<span class="ts0">Imports items into the Bill of Materials recipe from a CSV File that has been prepared with the fields as indicated below.</span>

<table border="1" id="bkmrk-select-file-allows-t" style="border-collapse: collapse; width: 75.4321%;"><colgroup><col style="width: 16.5466%;"></col><col style="width: 83.4206%;"></col></colgroup><tbody><tr><td><span class="ts0">Select File</span></td><td><span class="ts0">Allows the user to browse the computer to find the CSV file to be imported.</span></td></tr><tr><td><span class="ts0">Upload</span></td><td><span class="ts0">Uploads the file to the server</span></td></tr><tr><td><span class="ts0">Import</span></td><td><span class="ts0">Import the data from the CSV File</span></td></tr></tbody></table>

<div class="block0" id="bkmrk-field-name-required-"><table class="tbl4"><tbody><tr class="row1"><td class="cell45"><span class="ts0">FIELD NAME</span>

</td><td class="cell46"><span class="ts0">REQUIRED</span>

</td><td class="cell47"><span class="ts0">VALUE</span>

</td></tr><tr class="row1"><td class="cell45"><span class="ts0">SubBOM</span>

</td><td class="cell46"><span class="ts0">No</span>

</td><td class="cell47"><span class="ts0"> </span>

</td></tr><tr class="row1"><td class="cell45"><span class="ts0">StockCode</span>

</td><td class="cell46"><span class="ts0">Yes</span>

</td><td class="cell47"><span class="ts0"> </span>

</td></tr><tr class="row1"><td class="cell45"><span class="ts0">Description</span>

</td><td class="cell46"><span class="ts0">No</span>

</td><td class="cell47"><span class="ts0"> </span>

</td></tr><tr class="row1"><td class="cell45"><span class="ts0">Quantity</span>

</td><td class="cell46"><span class="ts0">Yes</span>

</td><td class="cell47"><span class="ts0"> </span>

</td></tr><tr class="row1"><td class="cell45"><span class="ts0">WarehouseCode</span>

</td><td class="cell46"><span class="ts0">No, only if Stock item</span>

</td><td class="cell47"><span class="ts0"> </span>

</td></tr><tr class="row1"><td class="cell45"><span class="ts0">Cost</span>

</td><td class="cell46"><span class="ts0">No, only if Service Item</span>

</td><td class="cell47"><span class="ts0"> </span>

</td></tr><tr class="row1"><td class="cell45"><span class="ts0">Total</span>

</td><td class="cell46"><span class="ts0">No</span>

</td><td class="cell47"><span class="ts0"> </span>

</td></tr><tr class="row1"><td class="cell45"><span class="ts0">StockType</span>

</td><td class="cell46"><span class="ts0">No</span>

</td><td class="cell47"><span class="ts0">Service, custom or stock</span>

</td></tr></tbody></table>

</div><span class="ts0"></span>

# Update Cost Price

![](https://hugeerp0.co.za/csp/webhelp/topics/images/image(3264).png)

<span class="ts0">This function updates custom or service items found in the selected BOM</span>

# Create Stock Request

![](https://hugeerp0.co.za/csp/webhelp/topics/images/image(3266).png)

![](https://hugeerp0.co.za/csp/webhelp/topics/images/image(3265).png)

<span class="ts7">The three options in the dropdown,</span>

<table border="1" id="bkmrk-1-request-for-purcha" style="border-collapse: collapse; width: 44.4444%;"><colgroup><col style="width: 8.89768%;"></col><col style="width: 91.0776%;"></col></colgroup><tbody><tr><td>1</td><td><span class="ts7">Request for Purchase Order</span></td></tr><tr><td>2</td><td><span class="ts7">Request for Quote</span></td></tr><tr><td>3</td><td><span class="ts7">Request Create Job Picking Slip</span></td></tr></tbody></table>

<span class="ts7">Are simply a suggestion from the Stock Request originator to the recipient of what action must be taken when processing the Stock Request.</span>

---

#### <span class="ts7">Retain Recipe</span>

[![image.png](https://hugeerp10.co.za/hsofmanual/uploads/images/gallery/2024-10/scaled-1680-/UBaimage.png)](https://hugeerp10.co.za/hsofmanual/uploads/images/gallery/2024-10/UBaimage.png)

[![image.png](https://hugeerp10.co.za/hsofmanual/uploads/images/gallery/2024-10/scaled-1680-/LhDimage.png)](https://hugeerp10.co.za/hsofmanual/uploads/images/gallery/2024-10/LhDimage.png)
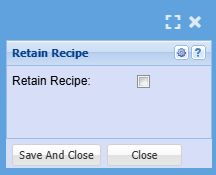
# Manufacture Setup

# Manufacture Setup Search

[![image.png](https://hugeerp10.co.za/hsofmanual/uploads/images/gallery/2024-10/scaled-1680-/0HAimage.png)](https://hugeerp10.co.za/hsofmanual/uploads/images/gallery/2024-10/0HAimage.png)
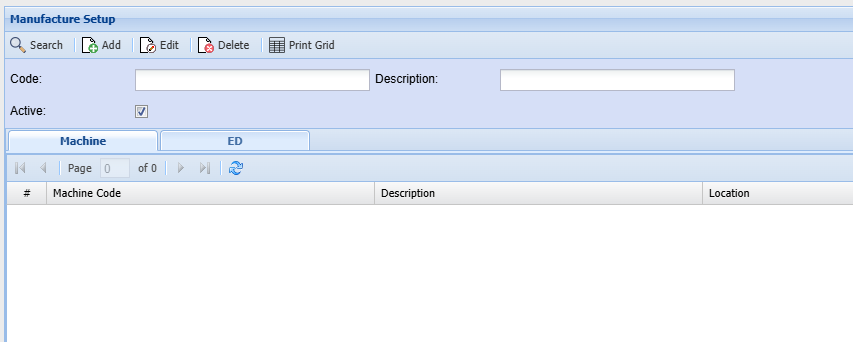
Adding Machine

[![image.png](https://hugeerp10.co.za/hsofmanual/uploads/images/gallery/2024-10/scaled-1680-/BP1image.png)](https://hugeerp10.co.za/hsofmanual/uploads/images/gallery/2024-10/BP1image.png)
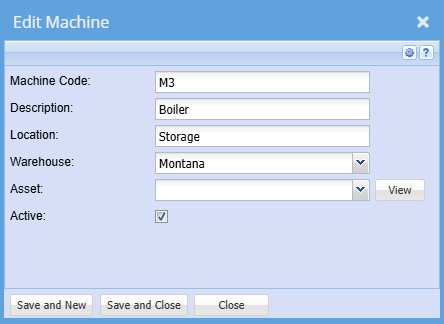
Adding Eligible Document

[![image.png](https://hugeerp10.co.za/hsofmanual/uploads/images/gallery/2024-10/scaled-1680-/ZUoimage.png)](https://hugeerp10.co.za/hsofmanual/uploads/images/gallery/2024-10/ZUoimage.png)
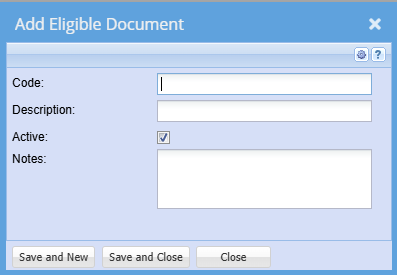
# Endophyte Type1

# Endophyte Type Search

[![image.png](https://hugeerp10.co.za/hsofmanual/uploads/images/gallery/2024-10/scaled-1680-/xHcimage.png)](https://hugeerp10.co.za/hsofmanual/uploads/images/gallery/2024-10/xHcimage.png)

Add Endophyte Type1

[![image.png](https://hugeerp10.co.za/hsofmanual/uploads/images/gallery/2024-10/scaled-1680-/cLDimage.png)](https://hugeerp10.co.za/hsofmanual/uploads/images/gallery/2024-10/cLDimage.png)
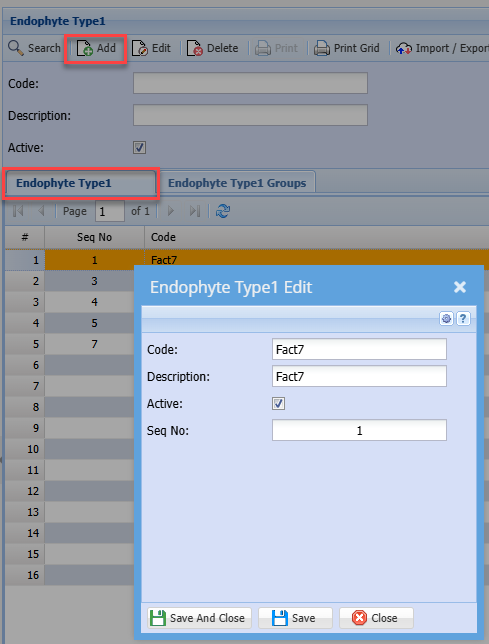
Add Endophyte Type1 Groups

[![image.png](https://hugeerp10.co.za/hsofmanual/uploads/images/gallery/2024-10/scaled-1680-/vTtimage.png)](https://hugeerp10.co.za/hsofmanual/uploads/images/gallery/2024-10/vTtimage.png)
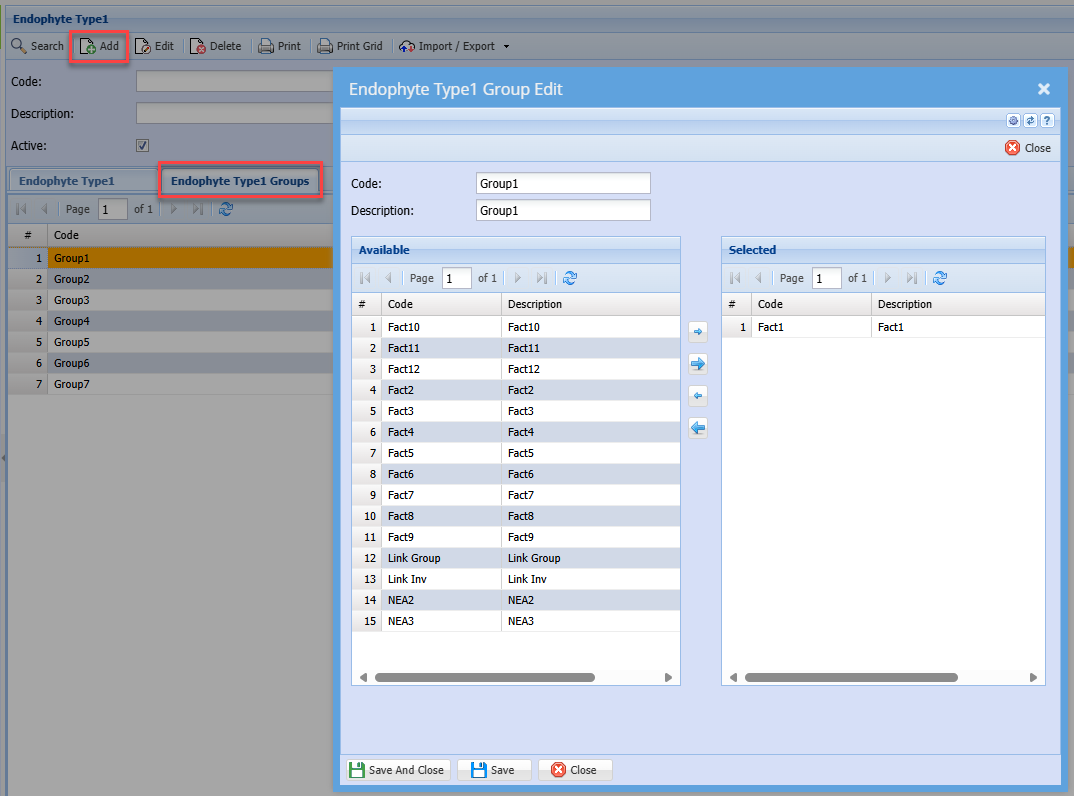
# Inventory Setup Functions Explained

# Cut Length

Cut Length is used to define a length of material which is used to calculate the number of lengths one requires in Quote Build task.

This is different to the UOM (Unit of Measure) as Cut length is used in Quote Build tasks.

Example

A stock item is measured in meters but lengths are in 3m lengths.

Set the cut length to 3 in inventory setup

[![image.png](https://hugeerp10.co.za/hsofmanual/uploads/images/gallery/2024-10/scaled-1680-/gg1image.png)](https://hugeerp10.co.za/hsofmanual/uploads/images/gallery/2024-10/gg1image.png)
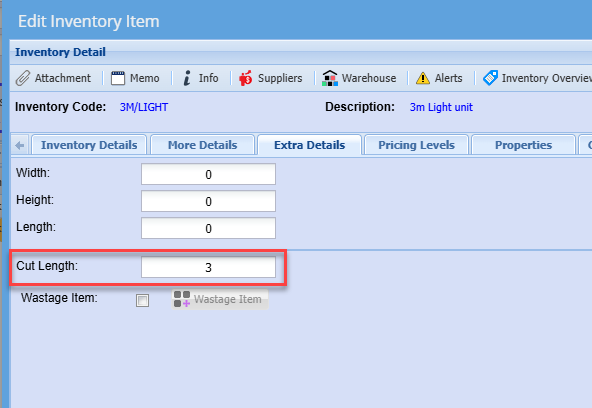
Activate the Cut Length quantity on this item to look at the cut length value

[![image.png](https://hugeerp10.co.za/hsofmanual/uploads/images/gallery/2024-10/scaled-1680-/hTcimage.png)](https://hugeerp10.co.za/hsofmanual/uploads/images/gallery/2024-10/hTcimage.png)
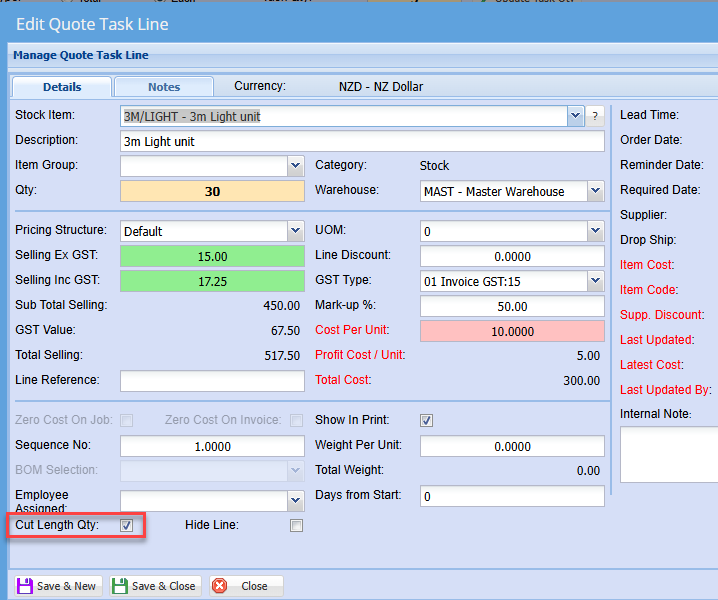
When making a build task of 5 and each quantity required on the base build is 30 meters.

The total meters required is 150 meters

The Light length comes in 3 meter lengths, production needs to know how many lengths are required to fulfil the build task.

Therefore it is 150 / 3m = 50 lengths required

The system will store this as a text value in the table and display 50 x 3

50 = Number of items required

3 = Length meter of item

[![image.png](https://hugeerp10.co.za/hsofmanual/uploads/images/gallery/2024-10/scaled-1680-/rRsimage.png)](https://hugeerp10.co.za/hsofmanual/uploads/images/gallery/2024-10/rRsimage.png)
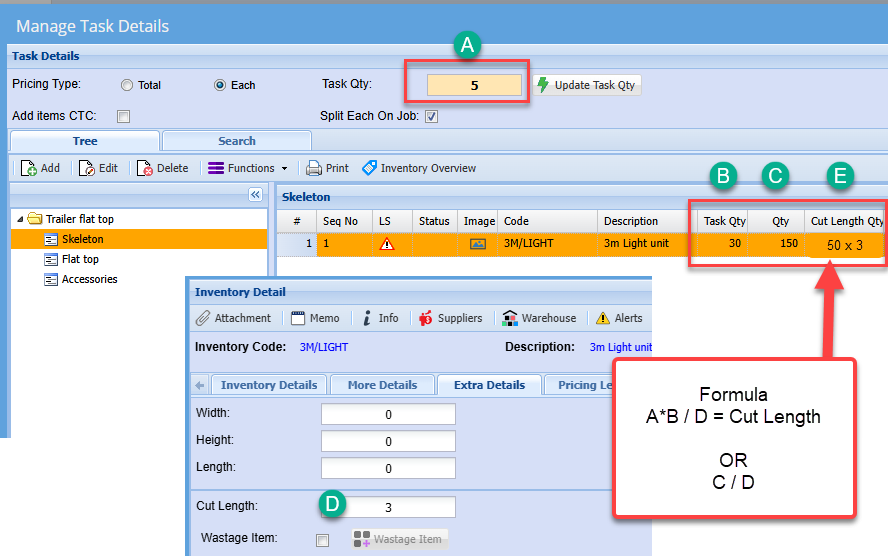
The quantity on Packing Slip and Cut Sheet (Job Card) will display the Cut Length instead of the quantity.

Use stationery layout Quote\_ANZ155 as an example

[![image.png](https://hugeerp10.co.za/hsofmanual/uploads/images/gallery/2024-10/scaled-1680-/FgLimage.png)](https://hugeerp10.co.za/hsofmanual/uploads/images/gallery/2024-10/FgLimage.png)
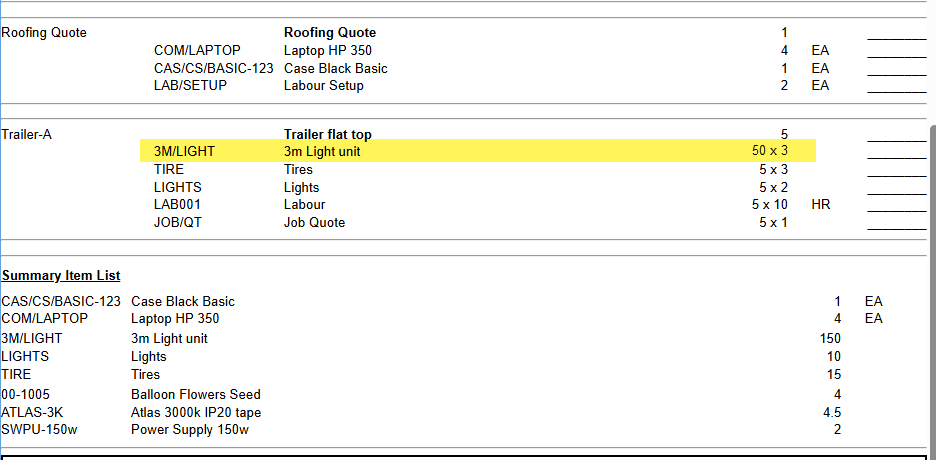
# Stock Level Adjustment Types

Stock Level Adjustment Types

# Stock Adjustment Types

Types allow one to define the ledger account the stock adjustments will update and tag the stock adjustments, which are both stock level and stock value.

If no ledger account is specified, then the default General Ledger Link will be processed.

When the system does an update, this will create a hotfix to add in a system type which all stock adjustments will be allocated to.

The hotfix will update all past stock adjustments done for both Level and Value

[![image.png](https://hugeerp10.co.za/hsofmanual/uploads/images/gallery/2026-01/scaled-1680-/lsbimage.png)](https://hugeerp10.co.za/hsofmanual/uploads/images/gallery/2026-01/lsbimage.png)
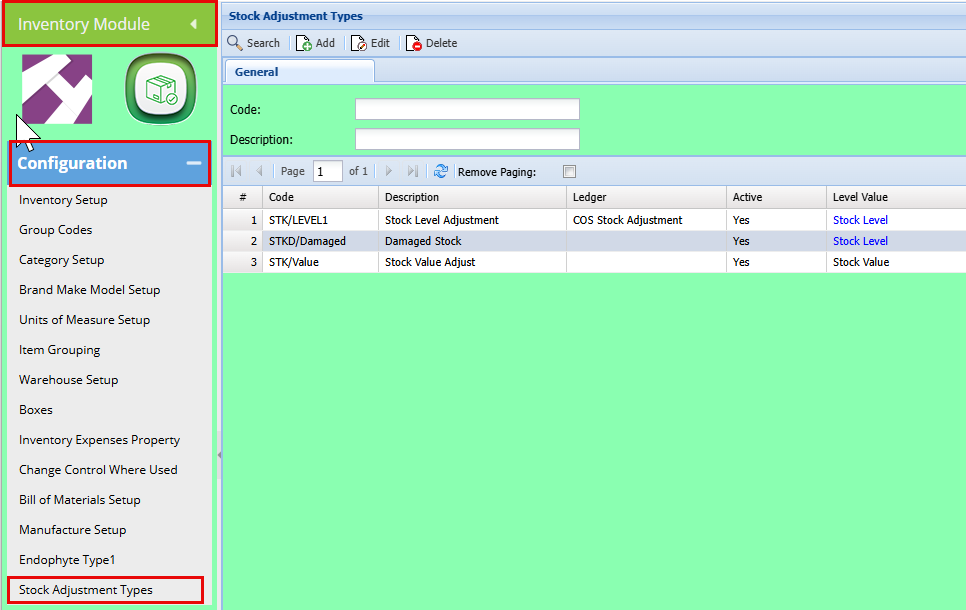
When deleting, check that this type is not used on any stock adjustments, if yes, then it cannot delete

<p class="callout warning">COS ledger is restricted to Cost of Sales and Expense ledger accounts</p>

##### Add a Stock Level Adjustment Type  


<span style="color: rgb(45, 194, 107);">**Inventory &gt; Configuration &gt; Stock Adjustment Type**</span>

<div id="bkmrk-click-add.">Click **Add**.</div><div id="bkmrk-enter-a%C2%A0code.">Enter a **Code**.</div><div id="bkmrk-enter-a%C2%A0description.">Enter a **Description**.</div><div id="bkmrk-choose-the%C2%A0cost-of-s">Choose the **Cost of Sales** account that this adjustment should be allocated to.</div><div id="bkmrk-specify-whether-this">Specify whether this setup applies to a **Stock Level Adjustment** or a **Stock Value Adjustment**.</div><div id="bkmrk-click%C2%A0save-and-close">Click **Save And Close**.</div><div id="bkmrk--1"></div>[![image.png](https://hugeerp10.co.za/hsofmanual/uploads/images/gallery/2026-01/scaled-1680-/U5aimage.png)](https://hugeerp10.co.za/hsofmanual/uploads/images/gallery/2026-01/U5aimage.png)

---

##### Stock Level Adjustment

All stock level adjustments will require a stock type, when the stock type is select, the description will be copied to the short description.

The default stock adjustment type will populate the drop down.

---

##### Stock Level Adjustment search

Filter by "**Stock Adjustment Types**"  
Click "**Search**"

Here you can print a report for history of each type

[![image.png](https://hugeerp10.co.za/hsofmanual/uploads/images/gallery/2026-01/scaled-1680-/6nximage.png)](https://hugeerp10.co.za/hsofmanual/uploads/images/gallery/2026-01/6nximage.png)
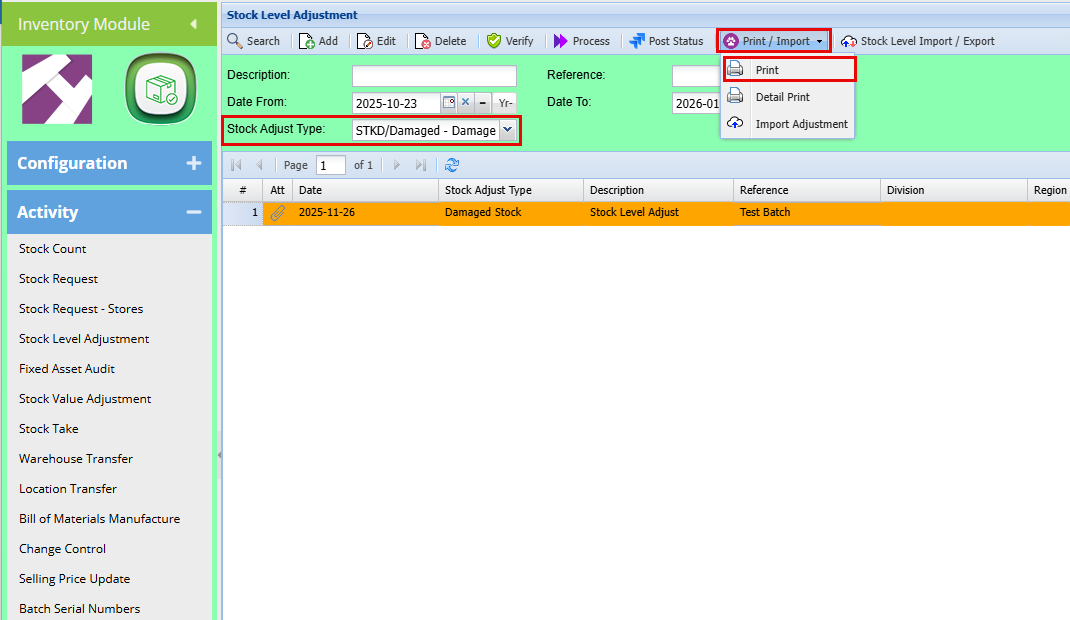
---

##### User access Types

User can be restricted on which stock adjustment types they see

<span style="color: rgb(45, 194, 107);">**Configuration &gt; General &gt; User Setup** </span>

Select the "**User**"  
Click on "**Restricted Access**" Drop down  
Select "**Stock Adjustment Type Access**"

[![image.png](https://hugeerp10.co.za/hsofmanual/uploads/images/gallery/2026-01/scaled-1680-/MaIimage.png)](https://hugeerp10.co.za/hsofmanual/uploads/images/gallery/2026-01/MaIimage.png)
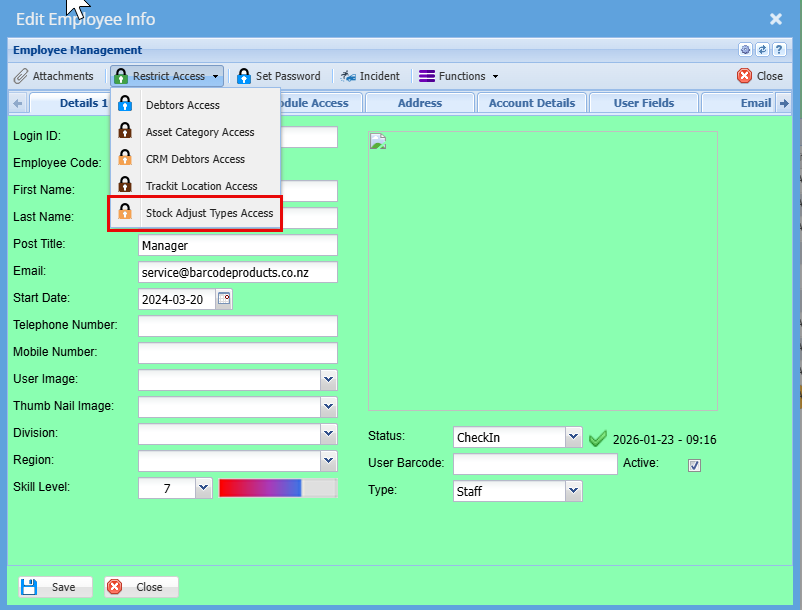
<div id="bkmrk-by-double%E2%80%91clicking-a">By double‑clicking any of the Stock Level Adjustment Types in the first grid, the selected type will move to the right‑hand column, allowing the user to process stock adjustments using that type.</div><div id="bkmrk--9"></div><div id="bkmrk-if-the-restriction-i">If the restriction is not enabled, the user will see all types</div><div id="bkmrk--10"></div>[![image.png](https://hugeerp10.co.za/hsofmanual/uploads/images/gallery/2026-01/scaled-1680-/Hmkimage.png)](https://hugeerp10.co.za/hsofmanual/uploads/images/gallery/2026-01/Hmkimage.png)

Click "**Save And Close**"

---

#####  

##### Webatar Stock Level Adjustment module

For the next Stock Level Adjust sent to the server, the Stock Adjustment Type can be changed by selecting from the "Stock Types" field **(2)**. The available Stock Level Adjustment Types, which are synced to the device in the Settings panel, will contain all active Types, unless restrictions were enabled in SCM User Setup, on the user in the "Process By" field **(1)**.

The Description field **(3)** is automatically set to the description of the selected Stock Adjustment Type.

<p class="callout info">Unlike the Stock Types field, the "Item WHS" field **(4)** currently is populated by the user signed into Webatar and not the "Process By" user.</p>

<p class="callout warning">While the form fields are saved for each Process By user, so that an incomplete Stock Level Adjust can be returned to later, the list of items is currently shared between all Process By users on the device. This means that any items left by the last Process By user will remain for the next Process By user.</p>

![image.png](https://hugeerp10.co.za/hsofmanual/uploads/images/gallery/2025-05/scaled-1680-/7BZimage.png)

# Batch Tracking

# Batch Tracking

New future development in Huge ERP

Batch tracking in inventory management is a method used to monitor and trace groups of products that were manufactured or received together. It’s especially useful in industries like food, pharmaceuticals, and manufacturing, where tracking expiration dates, recalls, or quality issues is critical.

Here’s how it works:

<div id="bkmrk-">---

</div>##### **1. What Is a Batch?**

A **batch** (or lot) is a specific quantity of a product that is produced or received at the same time and under the same conditions. Each batch is assigned a **unique identifier** (batch number or lot number).

<div id="bkmrk--1">---

</div>##### **2. Key Components of Batch Tracking**

<div id="bkmrk-batch-number%3A-a-uniq">- **Batch Number**: A unique code assigned to a group of items.
- **Production/Receipt Date**: When the batch was made or received.
- **Expiration Date** (if applicable): Especially important for perishable goods.
- **Supplier or Manufacturer Info**: Useful for traceability.
- **Quantity**: How many units are in the batch.

---

</div>##### **3. How It Works in Inventory Systems**

<div id="bkmrk-when-items-are-recei">- When items are received or produced, they are logged into the inventory system with their batch number.
- As items are sold, used, or moved, the system tracks which batch they came from.
- If a problem arises (e.g., a recall), the system can identify: 
    - Which customers received items from the affected batch.
    - How much of the batch remains in stock.
    - Where the batch is stored.

---

</div>##### **4. Benefits of Batch Tracking**

<div id="bkmrk-traceability%3A-quickl">- **Traceability**: Quickly trace defective or expired products.
- **Compliance**: Meet regulatory requirements (e.g., FDA, ISO).
- **Inventory Accuracy**: Know exactly what’s in stock and its condition.
- **Quality Control**: Identify patterns in defects or issues.

---

</div>##### **5. Common Use Cases**

<div id="bkmrk-food-%26-beverage%3A-tra">- **Food &amp; Beverage**: Track expiration dates and recalls.
- **Pharmaceuticals**: Ensure compliance and patient safety.
- **Manufacturing**: Monitor quality and production consistency.
- **Cosmetics**: Manage shelf life and ingredient sourcing.

---

</div>#### How it works

Batch number tracking setup

<span lang="EN-US" style="mso-ansi-language: EN-US;">You cannot have serial number and batch number active at the same time, </span><span lang="EN-US" style="mso-ansi-language: EN-US;">if serial number is active then batch number must be grayed out, </span><span lang="EN-US" style="mso-ansi-language: EN-US;">same goes the other way.</span>

[![image.png](https://hugeerp10.co.za/hsofmanual/uploads/images/gallery/2026-03/scaled-1680-/2o7image.png)](https://hugeerp10.co.za/hsofmanual/uploads/images/gallery/2026-03/2o7image.png)

<div id="bkmrk--3">---

</div>#### **Example: Batch Tracking**

Imagine you run a small business that sells organic honey. You receive honey in batches from your supplier and want to track:

<div id="bkmrk-batch-number-date-re">- **Batch Number**
- **Date Received**
- **Expiration Date**
- **Quantity Received**
- **Quantity Sold**
- **Remaining Stock**

</div>##### **Excel Table Example**

<div id="bkmrk-batch-no-date-receiv"><table><thead><tr><th>Batch No</th><th>Date Received</th><th>Expiry Date</th><th>Quantity Received</th><th>Quantity Sold</th><th>Remaining Stock</th></tr></thead><tbody><tr><td>HNY001</td><td>2025-06-01</td><td>2026-06-01</td><td>100 jars</td><td>40</td><td>60</td></tr><tr><td>HNY002</td><td>2025-07-01</td><td>2026-07-01</td><td>150 jars</td><td>20</td><td>130</td></tr></tbody></table>

</div>You can use formulas to automatically calculate **Remaining Stock**:

```Latex
= [Quantity Received] - [Quantity Sold]

```

<div id="bkmrk--4"><div><div class="scriptor-paragraph">  
</div></div></div>You can also use **conditional formatting** to highlight batches nearing expiration or low stock.

Checking Batch numbers and Quantity

[![image.png](https://hugeerp10.co.za/hsofmanual/uploads/images/gallery/2025-07/scaled-1680-/YXiimage.png)](https://hugeerp10.co.za/hsofmanual/uploads/images/gallery/2025-07/YXiimage.png)

---

#### Creating Batch Numbers

This will be used in multiple places

1. GRV
2. Stock Receive
3. Credit Note
4. Bill of Materials
5. Job BOM

GRV Example

[![image.png](https://hugeerp10.co.za/hsofmanual/uploads/images/gallery/2026-03/scaled-1680-/mJoimage.png)](https://hugeerp10.co.za/hsofmanual/uploads/images/gallery/2026-03/mJoimage.png)

Batch Numbers Create

[![image.png](https://hugeerp10.co.za/hsofmanual/uploads/images/gallery/2025-07/scaled-1680-/bKSimage.png)](https://hugeerp10.co.za/hsofmanual/uploads/images/gallery/2025-07/bKSimage.png)

---

#### Invoicing Out

Invoicing out a warehouse

[![image.png](https://hugeerp10.co.za/hsofmanual/uploads/images/gallery/2026-03/scaled-1680-/kP5image.png)](https://hugeerp10.co.za/hsofmanual/uploads/images/gallery/2026-03/kP5image.png)

The Default Cursor is on Scan Batch No, if you scan multiple times, it will add 1 to the Doc Qty.

If you put the tick on next to the Scan Batch No, then after the scan a pop up will appear to put in a quantity.

The Warehouse filter is defaulted to the line item warehouse, if you select to search off all warehouses or other warehouse that does not match the line item warehouse.

<p class="callout warning">If multiple batches are selected from multiple warehouses then a warning will pop up to say that you have selected from multiple warehouses and that this will create multiple document lines with different warehouses. After the window closes, it saves the item and closes the add line item window.</p>

However one can click on transfer button to transfer stock from one warehouse to another.

This window allows one to select multiple batches of stock to sell.

In the first column, there is an icon which will pop up an icon if the product is about to expired, going to expiry in 30 days, in 7 days, in 3 months

[![image.png](https://hugeerp10.co.za/hsofmanual/uploads/images/gallery/2025-07/scaled-1680-/LpXimage.png)](https://hugeerp10.co.za/hsofmanual/uploads/images/gallery/2025-07/LpXimage.png)
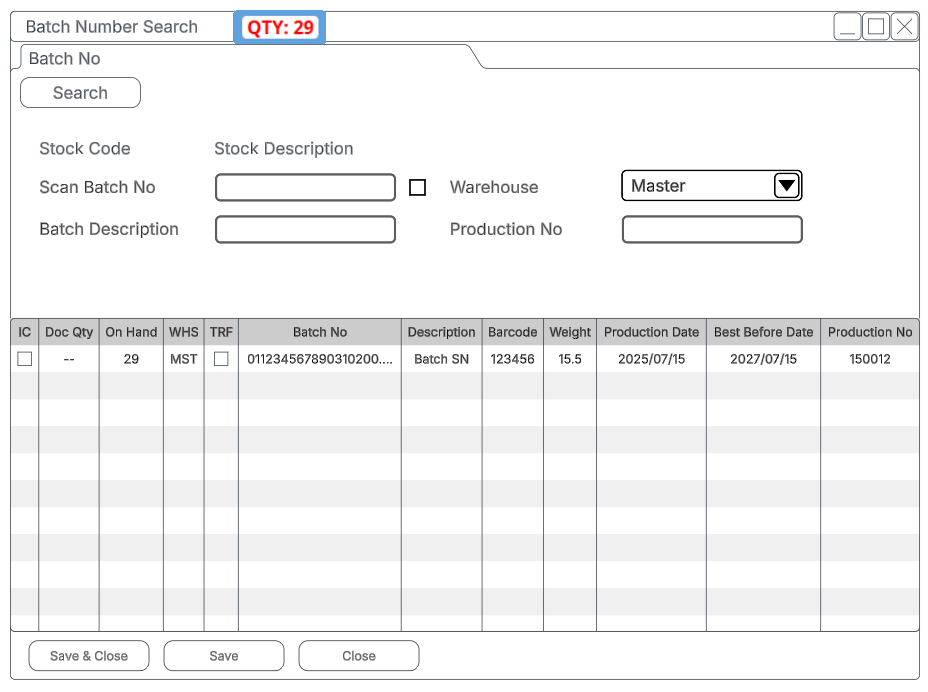
Batch Serial number scan on Docs

[![image.png](https://hugeerp10.co.za/hsofmanual/uploads/images/gallery/2025-07/scaled-1680-/UA2image.png)](https://hugeerp10.co.za/hsofmanual/uploads/images/gallery/2025-07/UA2image.png)
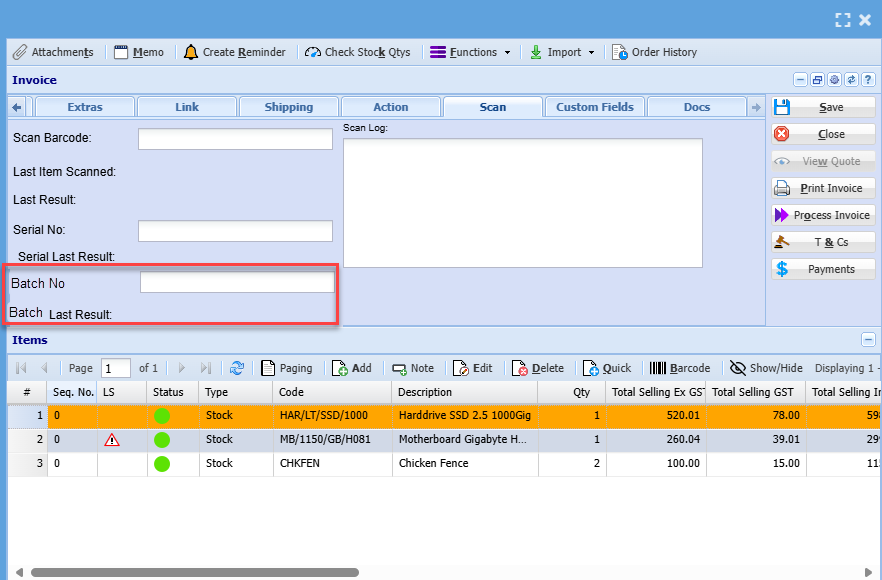
<div id="bkmrk--15">---

</div>##### **How ERP System works**

<div id="bkmrk-batch-numbers-are-as">1. **Batch Numbers** are assigned automatically or manually during receiving or production.
2. Each batch is linked to: 
    - Supplier
    - Purchase Order
    - Expiry Date
    - Storage Location
3. When fulfilling sales orders, you can: 
    - Choose specific batches (FIFO, FEFO, or manually).
    - Track which customer received which batch.
4. Reports can show: 
    - Batch-level stock levels
    - Expiring soon batches
    - Recall traceability

---

</div>You can expand it with additional features like:

- Conditional formatting for near-expiry items
- Drop-downs for batch status
- Charts for visual stock tracking

<div id="bkmrk--17">---

</div>##### 🔄 **1. Automatic Alerts**

<div id="bkmrk-conditional-formatti-1">- **Conditional Formatting** to highlight: 
    - Batches nearing expiration (e.g., within 30 days)
    - Low stock levels (e.g., below a threshold)
- Example: Highlight rows in red if `Remaining Stock < 10` or `Expiry Date < TODAY()+30`

---

</div>##### 📦 **2. Batch Status Column**

<div id="bkmrk-add-a-column-like-st">- Add a column like **Status** with values such as: 
    - `In Stock`
    - `Sold Out`
    - `Expired`
- Use formulas to auto-update based on stock and expiry.

---

</div>##### 📊 **3. Dashboard or Summary Sheet**

<div id="bkmrk-create-a-separate-sh">- Create a separate sheet with: 
    - Total stock by batch
    - Number of batches expiring soon
    - Graphs showing stock trends or expiry timelines

---

</div>##### 🔍 **4. Search &amp; Filter Tools**

<div id="bkmrk-use-excel%E2%80%99s-data-val">- Use Excel’s **Data Validation** to create drop-downs for filtering by batch or status.
- Add a **search bar** using filters or VBA for quick lookup.

---

</div>##### 📁 **5. Traceability Features**

<div id="bkmrk-add-columns-for%3A-sup">- Add columns for: 
    - **Supplier Name**
    - **Purchase Order Number**
    - **Customer Name** (for sold batches)
- Helps with recalls or audits.

---

</div>##### 📅 **6. FIFO/FEFO Tracking**

<div id="bkmrk-add-logic-to-suggest">- Add logic to suggest which batch to sell next: 
    - **FIFO**: First In, First Out
    - **FEFO**: First Expired, First Out

---

</div>##### 🔐 **7. Data Protection**

<div id="bkmrk-lock-formula-cells-t">- Lock formula cells to prevent accidental edits.
- Use sheet protection with a password.

---

</div>

# Tag Number

# Tag Number

Tag number list allows one to add a tag number or RFID unique tag number to an item.

This tag does not need to match the number of items sold, but log whether that tag number is sold or not.

Activate the tag tracking against an item

[![image.png](https://hugeerp10.co.za/hsofmanual/uploads/images/gallery/2026-05/scaled-1680-/hELimage.png)](https://hugeerp10.co.za/hsofmanual/uploads/images/gallery/2026-05/hELimage.png)
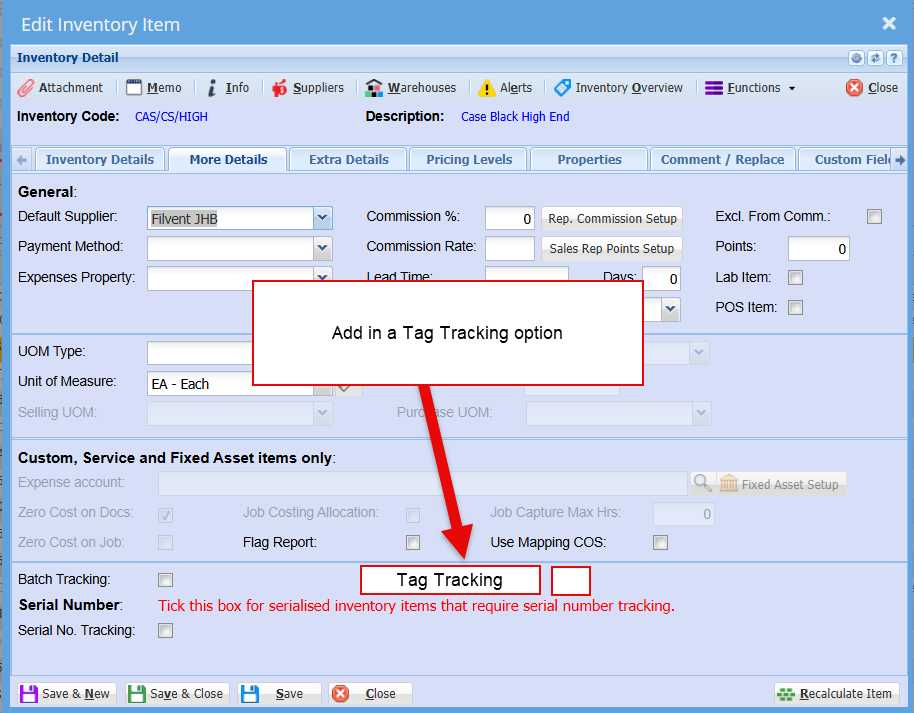
---

##### Entering a tag number against an item

This button is active if the item highlighted is Tag tracking active

This allows one to scan or import tags to an item

Rule for deleting

Can delete a tag number as long as it has not been marked as sold

[![image.png](https://hugeerp10.co.za/hsofmanual/uploads/images/gallery/2026-05/scaled-1680-/OqWimage.png)](https://hugeerp10.co.za/hsofmanual/uploads/images/gallery/2026-05/OqWimage.png)
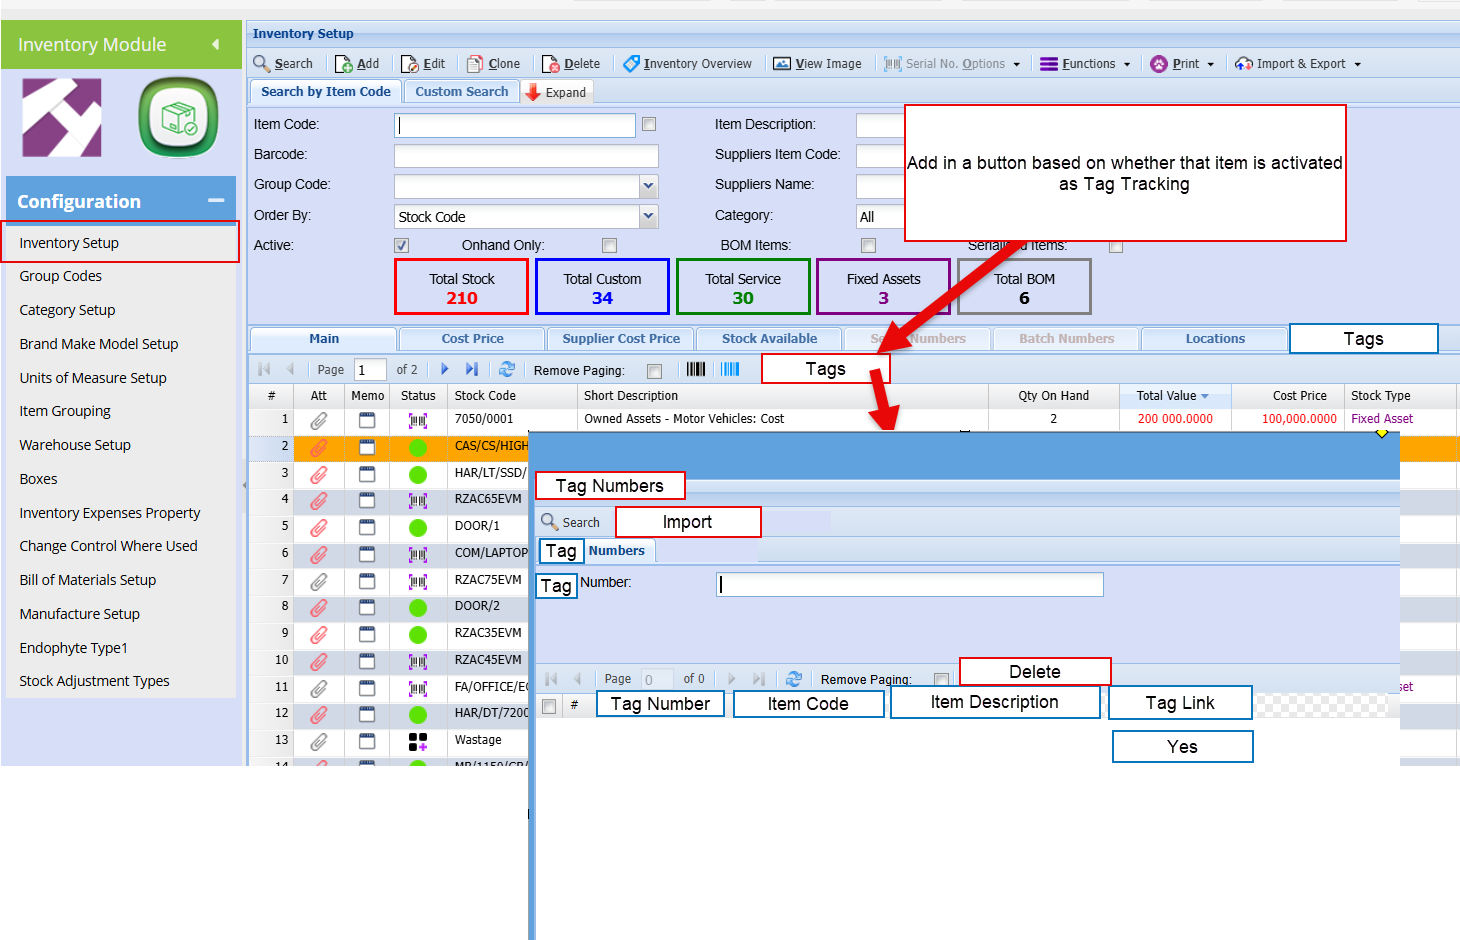
Add and Remove tags

[![image.png](https://hugeerp10.co.za/hsofmanual/uploads/images/gallery/2026-06/scaled-1680-/Uenimage.png)](https://hugeerp10.co.za/hsofmanual/uploads/images/gallery/2026-06/Uenimage.png)
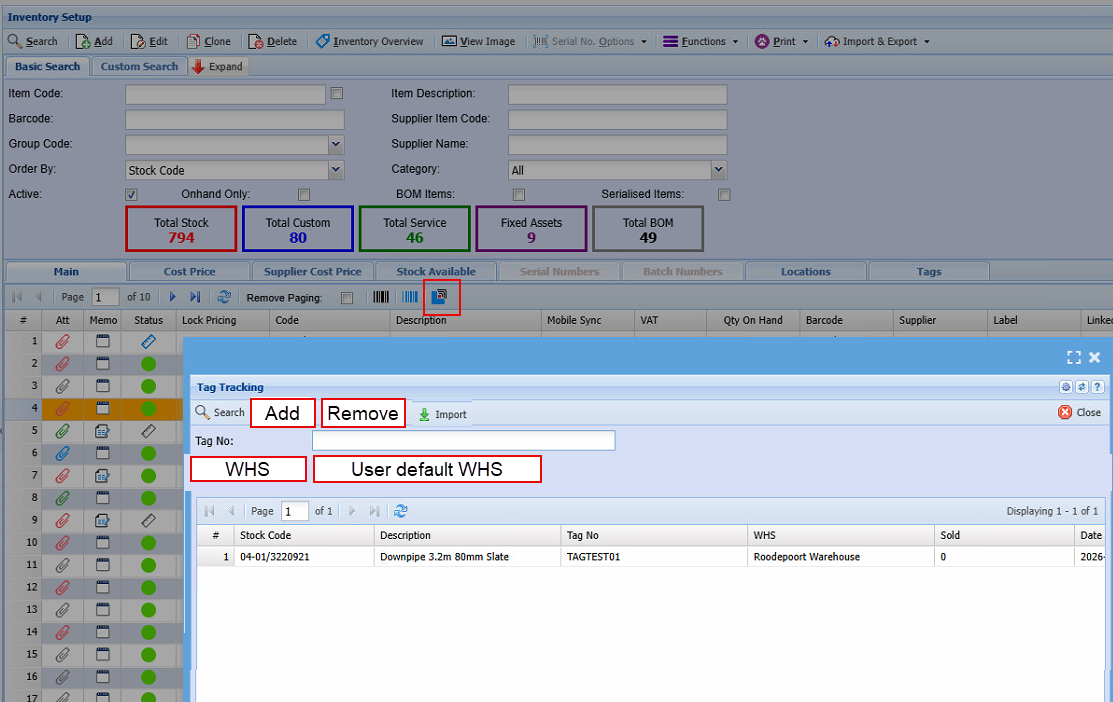
---

##### Linked tag number search

This tab looks at tag numbers linked to a stock item

This grid shows the tag numbers, date added and date sold

Good to add in the invoice it was linked to when sold

[![image.png](https://hugeerp10.co.za/hsofmanual/uploads/images/gallery/2026-05/scaled-1680-/WZWimage.png)](https://hugeerp10.co.za/hsofmanual/uploads/images/gallery/2026-05/WZWimage.png)
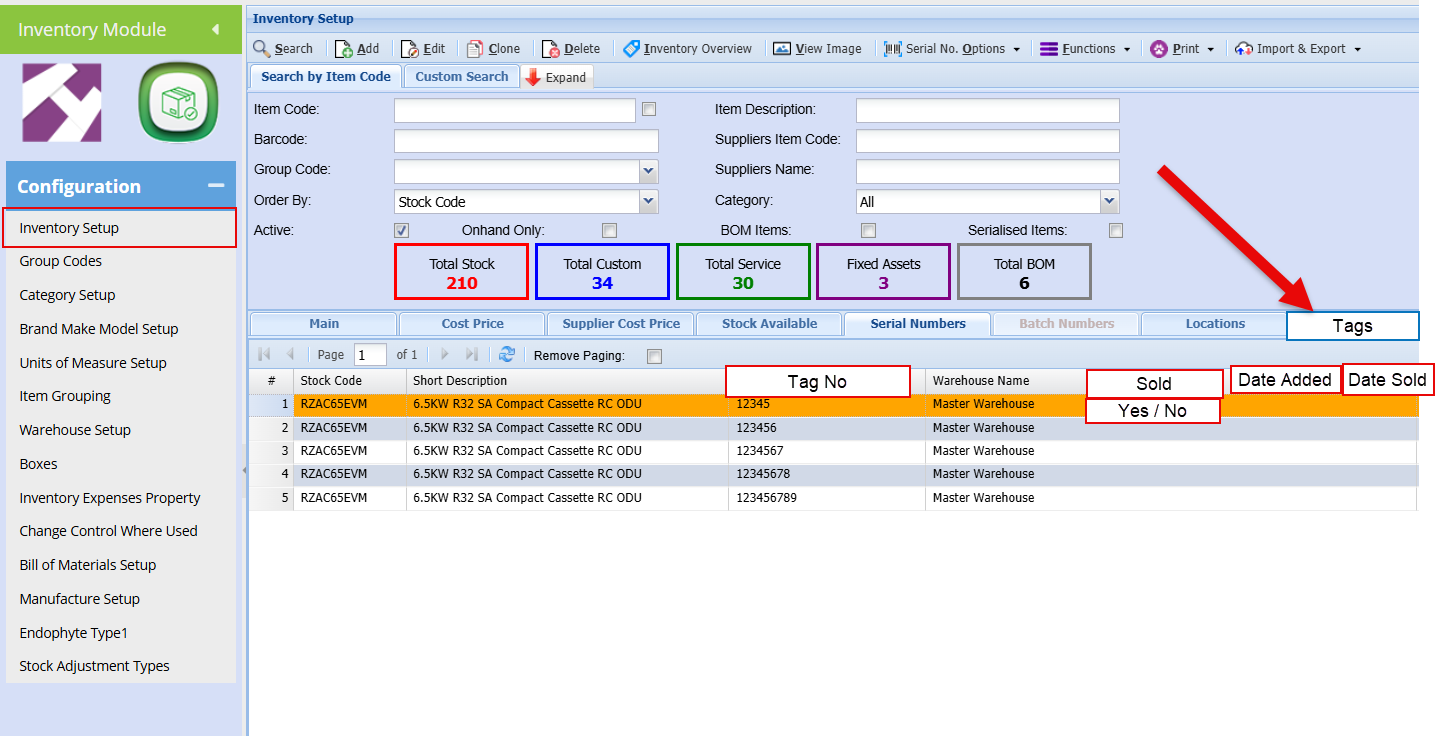
---

##### Invoicing

When invoicing, the tag number button is active for item if the item is marked as tag number

[![image.png](https://hugeerp10.co.za/hsofmanual/uploads/images/gallery/2026-05/scaled-1680-/2rNimage.png)](https://hugeerp10.co.za/hsofmanual/uploads/images/gallery/2026-05/2rNimage.png)
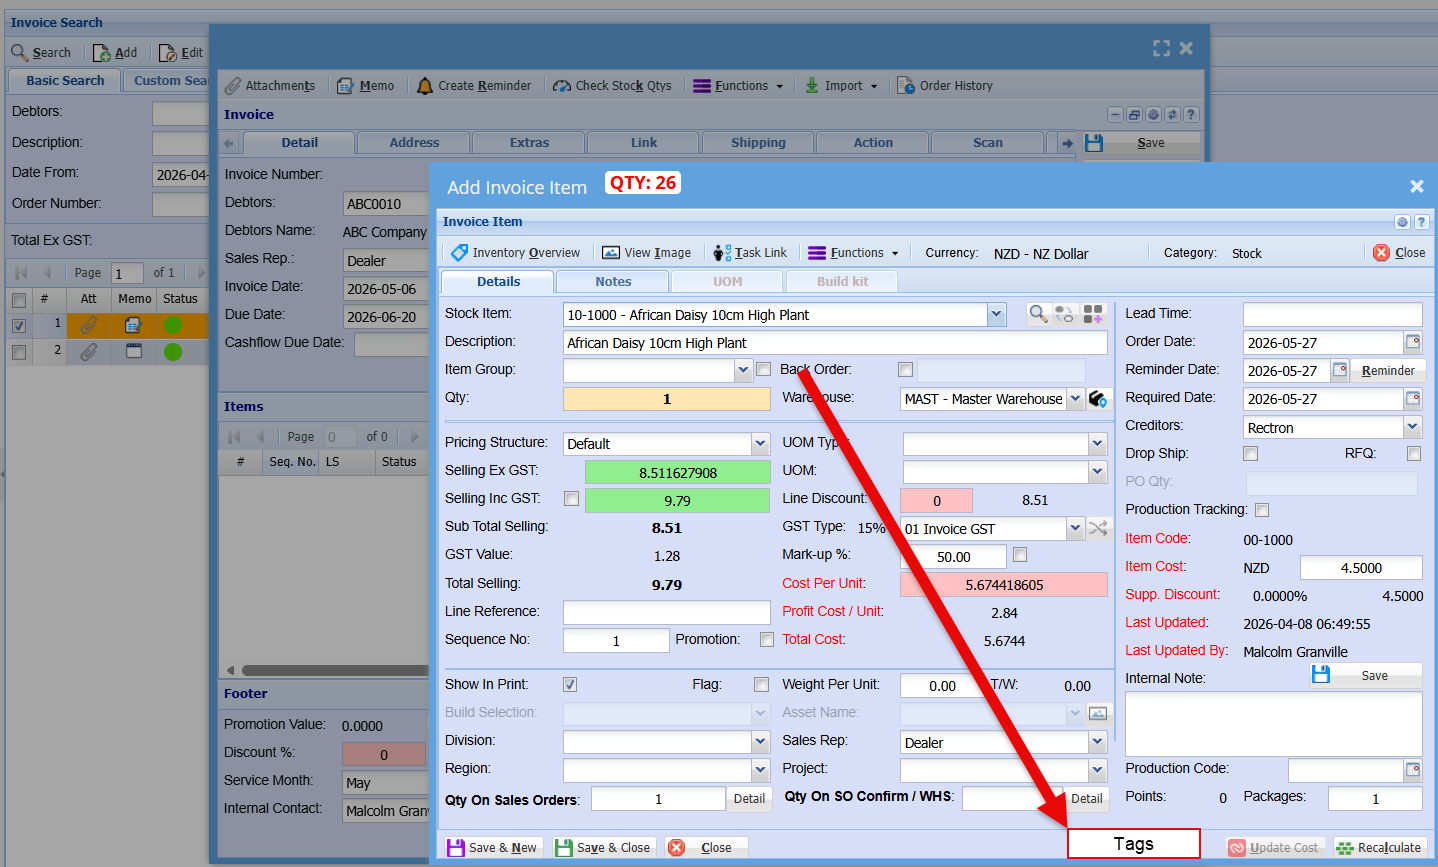
Tag search on invoice

The scan can search the tag number table, then add the item linked to it and put the tag number on the invoice

[![image.png](https://hugeerp10.co.za/hsofmanual/uploads/images/gallery/2026-05/scaled-1680-/DaPimage.png)](https://hugeerp10.co.za/hsofmanual/uploads/images/gallery/2026-05/DaPimage.png)
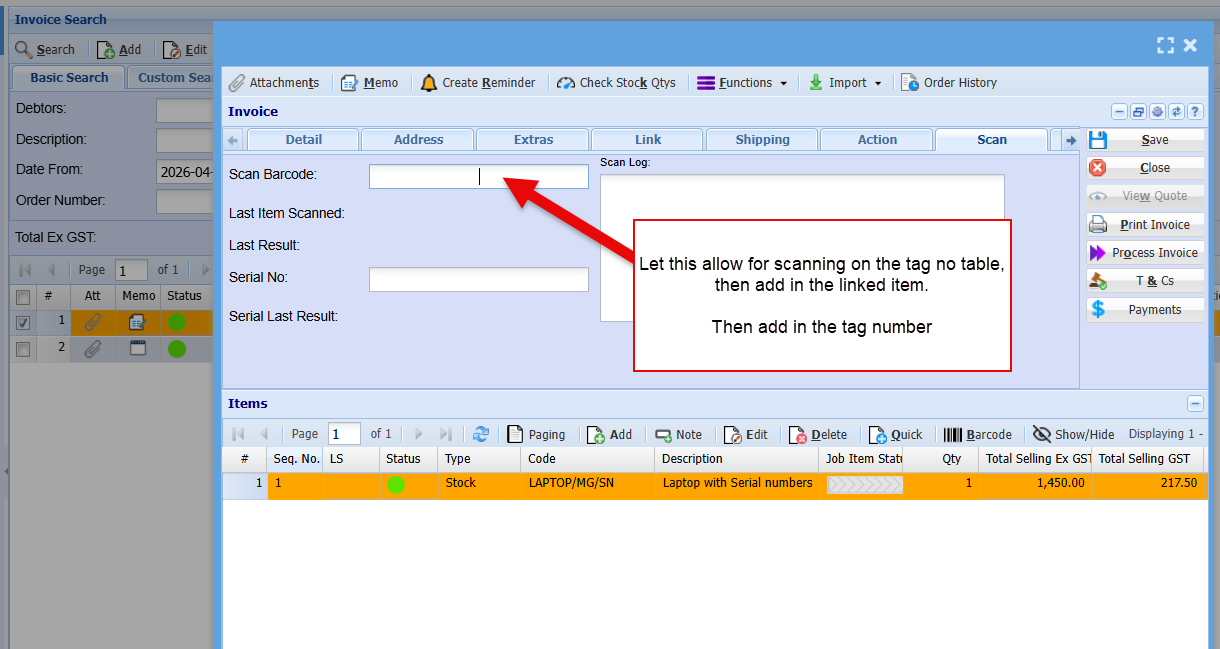
---

##### Sales Order confirm

Confirming an item allow one to allocate tags

[![image.png](https://hugeerp10.co.za/hsofmanual/uploads/images/gallery/2026-06/scaled-1680-/image.png)](https://hugeerp10.co.za/hsofmanual/uploads/images/gallery/2026-06/image.png)
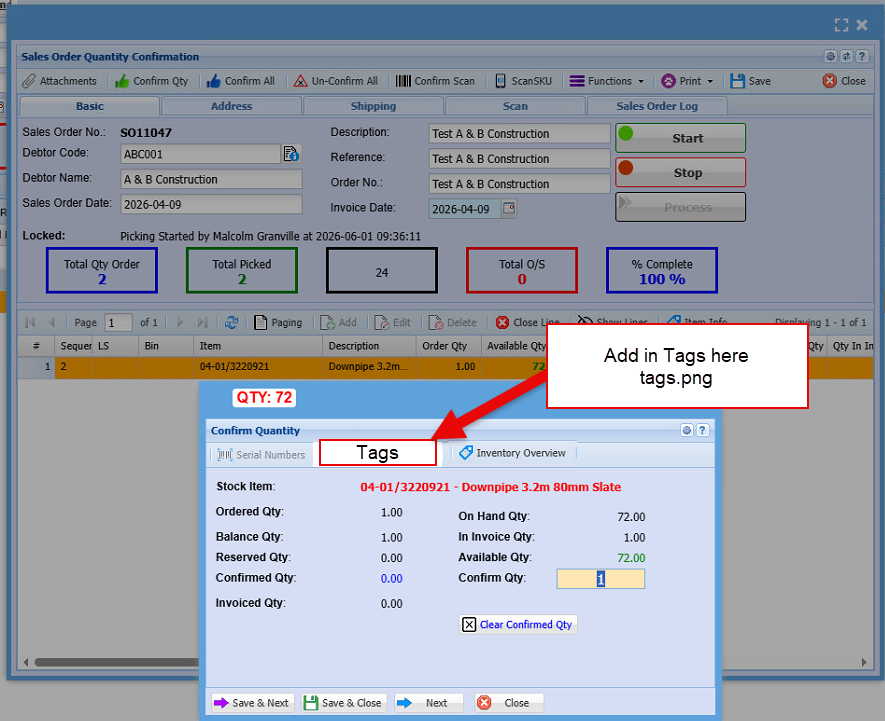
---

##### RFID tag log

This log must check the tag number table

[![image.png](https://hugeerp10.co.za/hsofmanual/uploads/images/gallery/2026-05/scaled-1680-/fglimage.png)](https://hugeerp10.co.za/hsofmanual/uploads/images/gallery/2026-05/fglimage.png)
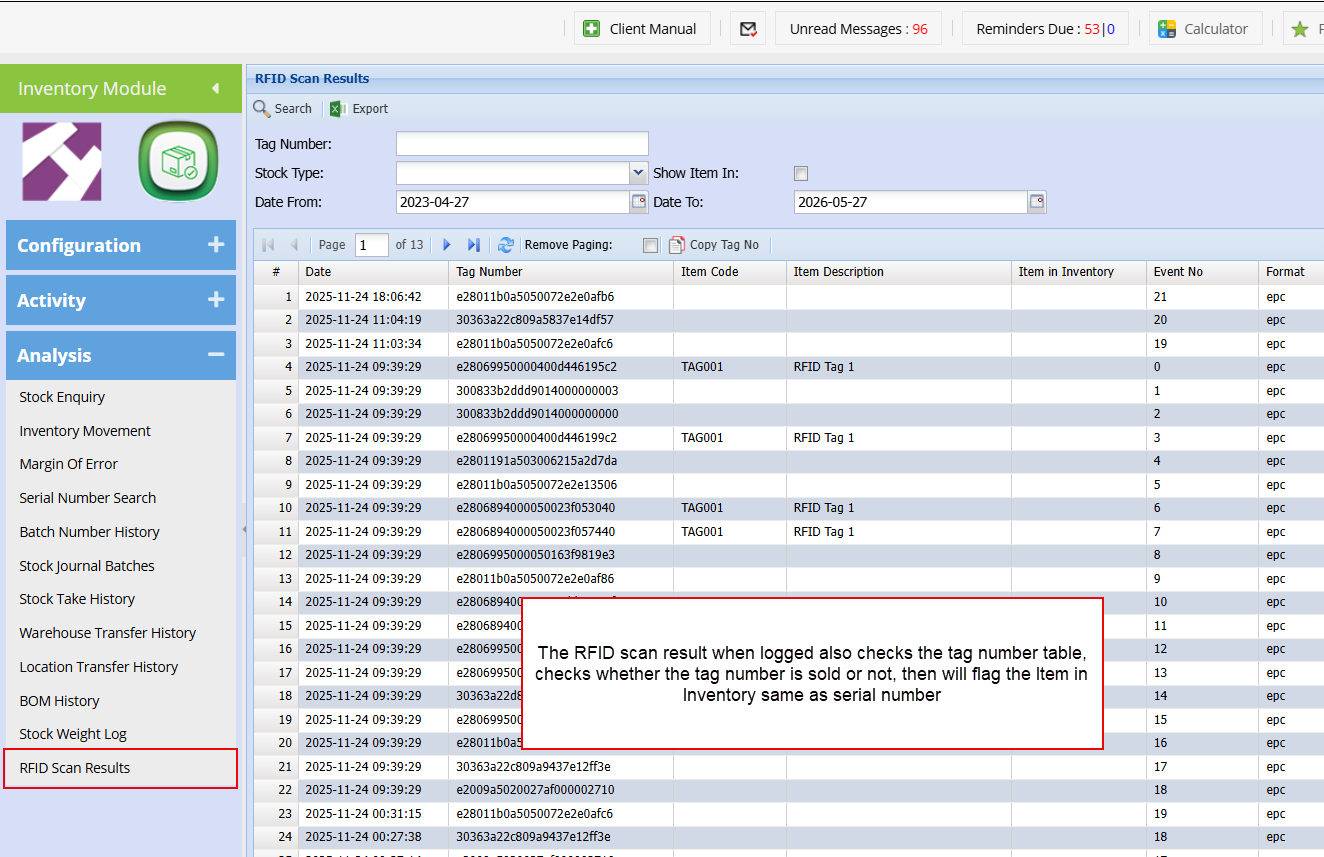
---

##### Invoice Tag number list

[![image.png](https://hugeerp10.co.za/hsofmanual/uploads/images/gallery/2026-05/scaled-1680-/ug0image.png)](https://hugeerp10.co.za/hsofmanual/uploads/images/gallery/2026-05/ug0image.png)
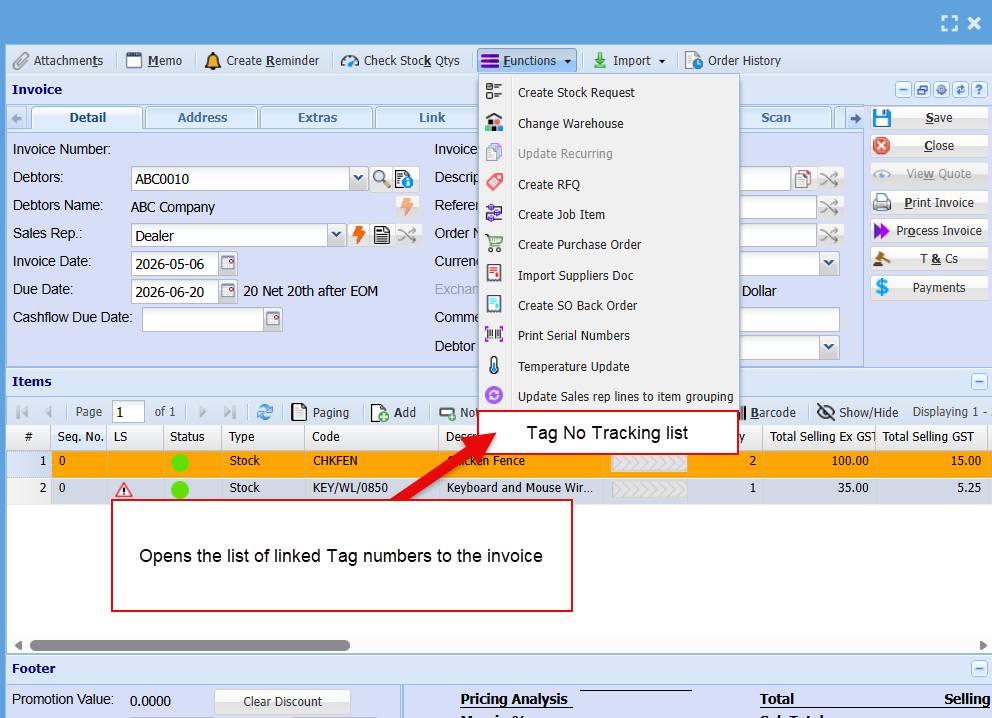
---

##### Tag Tracking History

[![image.png](https://hugeerp10.co.za/hsofmanual/uploads/images/gallery/2026-06/scaled-1680-/002image.png)](https://hugeerp10.co.za/hsofmanual/uploads/images/gallery/2026-06/002image.png)
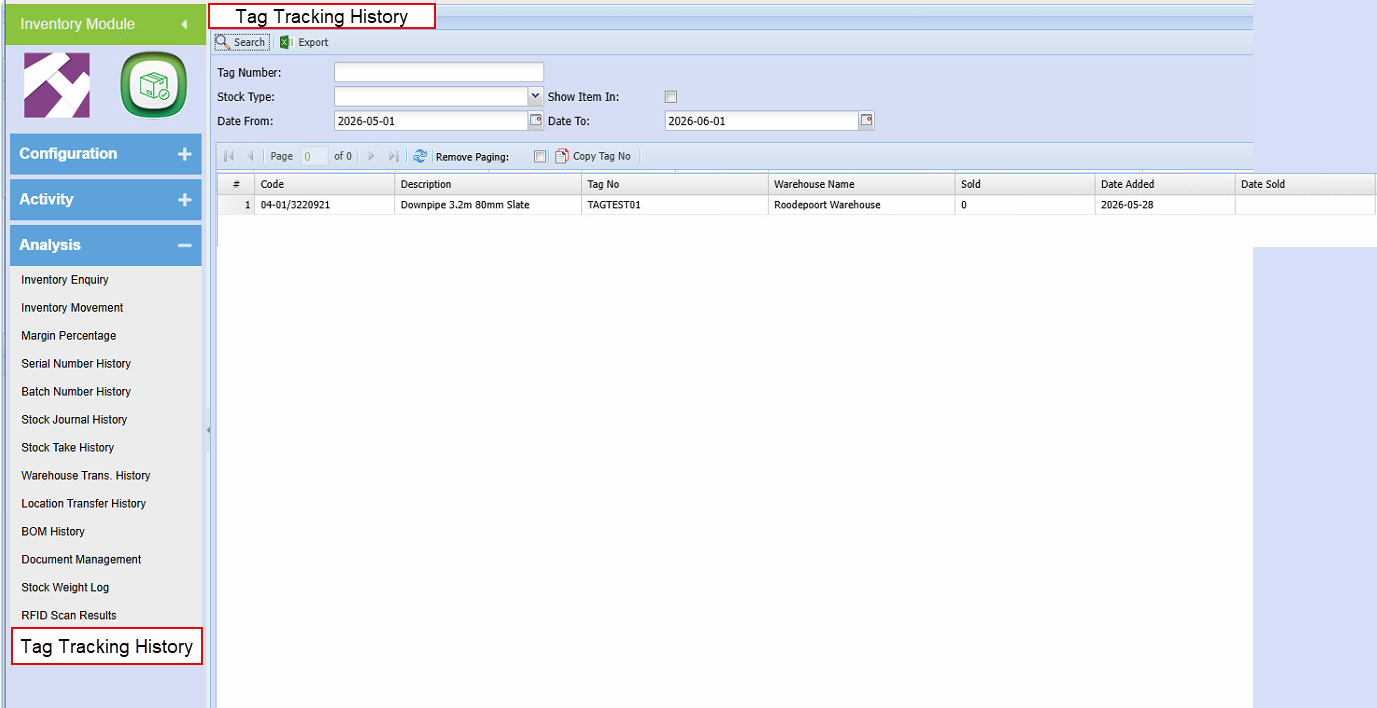
# Handling Unit

Handling Unit

# Handling Unit

Handling Unit allows one to group multiple stock items together and move the full unit to multiple locations and jobs.

##### Handling Unit WIP

The handling unit has its own reserve stock called Handling Unit WIP or HU WIP.

When stock items are moved into a handling unit, then the items are moved from on shelf into the Handling Unit WIP.

[![image.png](https://hugeerp10.co.za/hsofmanual/uploads/images/gallery/2026-07/scaled-1680-/VLkimage.png)](https://hugeerp10.co.za/hsofmanual/uploads/images/gallery/2026-07/VLkimage.png)
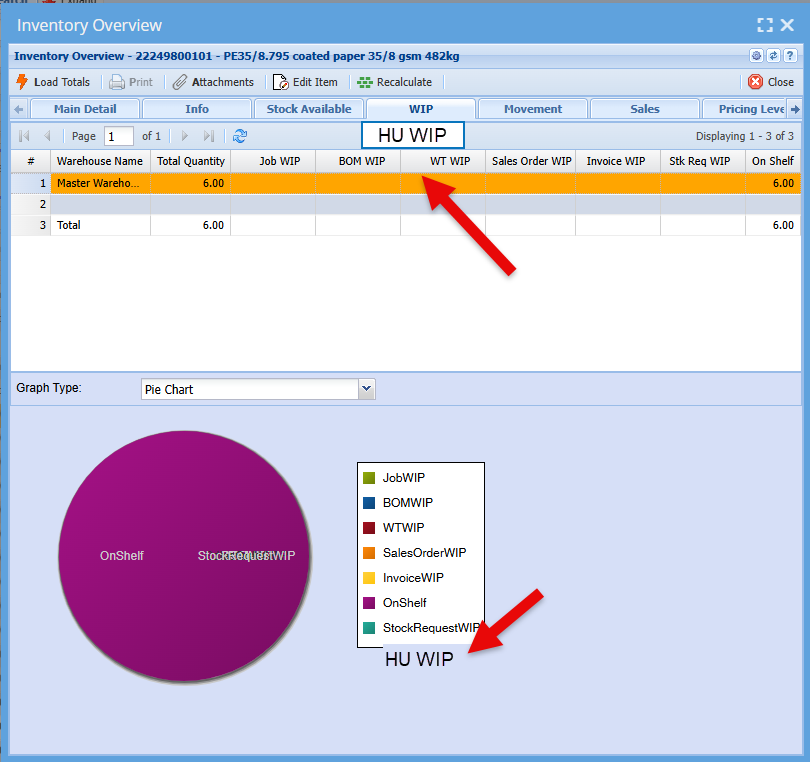
---

##### Setup of handling Unit Type and Locations

The setup of handling unit types and locations is done under the configuration section of the Inventory module.

The first setup is the handling unit types, the define what type of unit or container items will go into.

for example it can be a box, carton or pallet

[![image.png](https://hugeerp10.co.za/hsofmanual/uploads/images/gallery/2026-07/scaled-1680-/GGtimage.png)](https://hugeerp10.co.za/hsofmanual/uploads/images/gallery/2026-07/GGtimage.png)
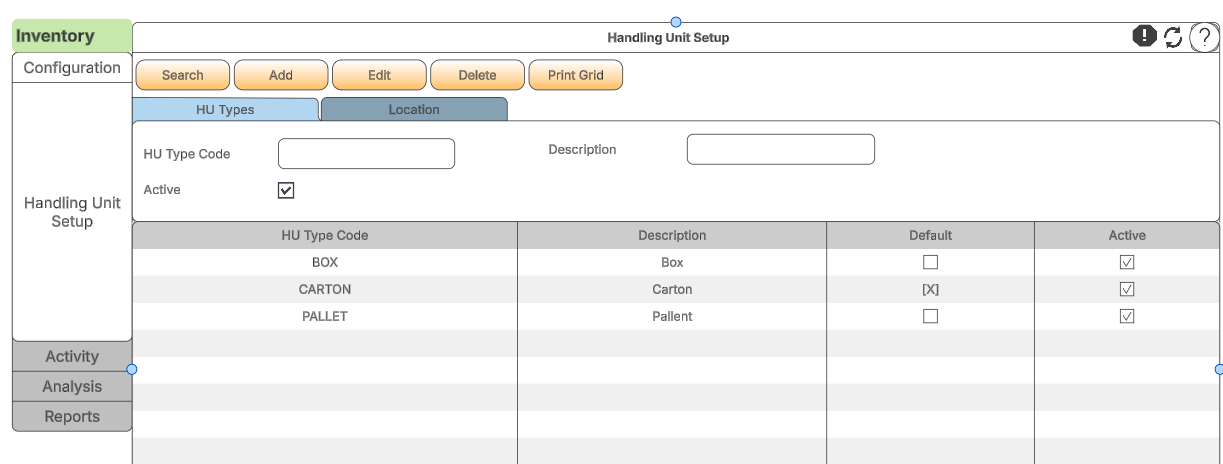
Adding or editing the type

When adding or editing the handling unit type, one can decide which one will be the default.

This means that when the handling unit is added it will automatically default to Handling Unit type

[![image.png](https://hugeerp10.co.za/hsofmanual/uploads/images/gallery/2026-07/scaled-1680-/3oHimage.png)](https://hugeerp10.co.za/hsofmanual/uploads/images/gallery/2026-07/3oHimage.png)
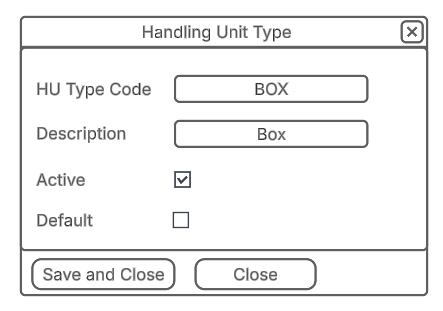
---

##### Handling unit locations

Handling unit locations are different from the warehouse locations and therefore can be defined in its own type of locations.

[![image.png](https://hugeerp10.co.za/hsofmanual/uploads/images/gallery/2026-07/scaled-1680-/6a8image.png)](https://hugeerp10.co.za/hsofmanual/uploads/images/gallery/2026-07/6a8image.png)
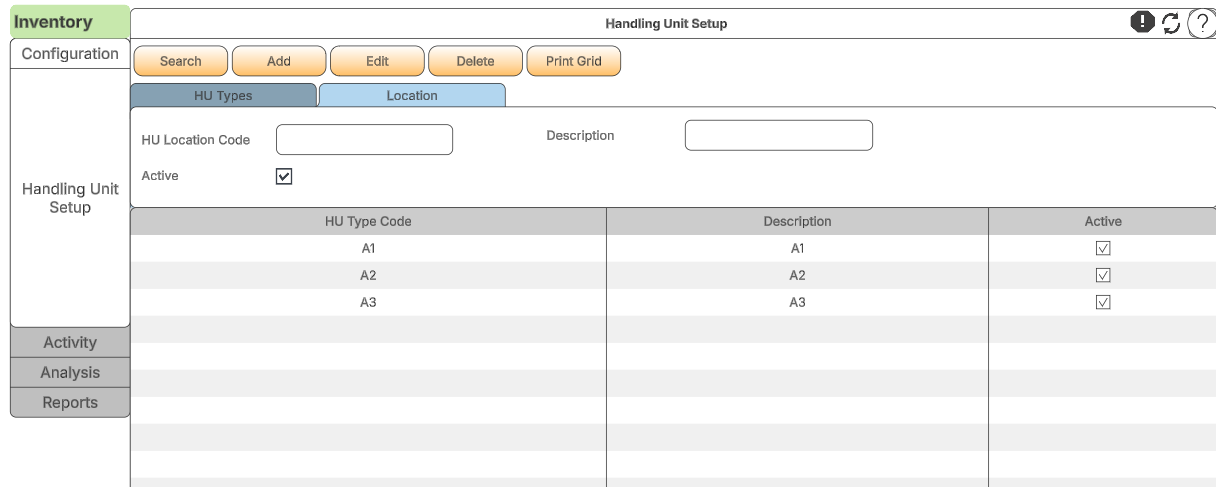
Adding or editing the Handling Unit Location

Add as many handling unit locations

[![image.png](https://hugeerp10.co.za/hsofmanual/uploads/images/gallery/2026-07/scaled-1680-/ANpimage.png)](https://hugeerp10.co.za/hsofmanual/uploads/images/gallery/2026-07/ANpimage.png)