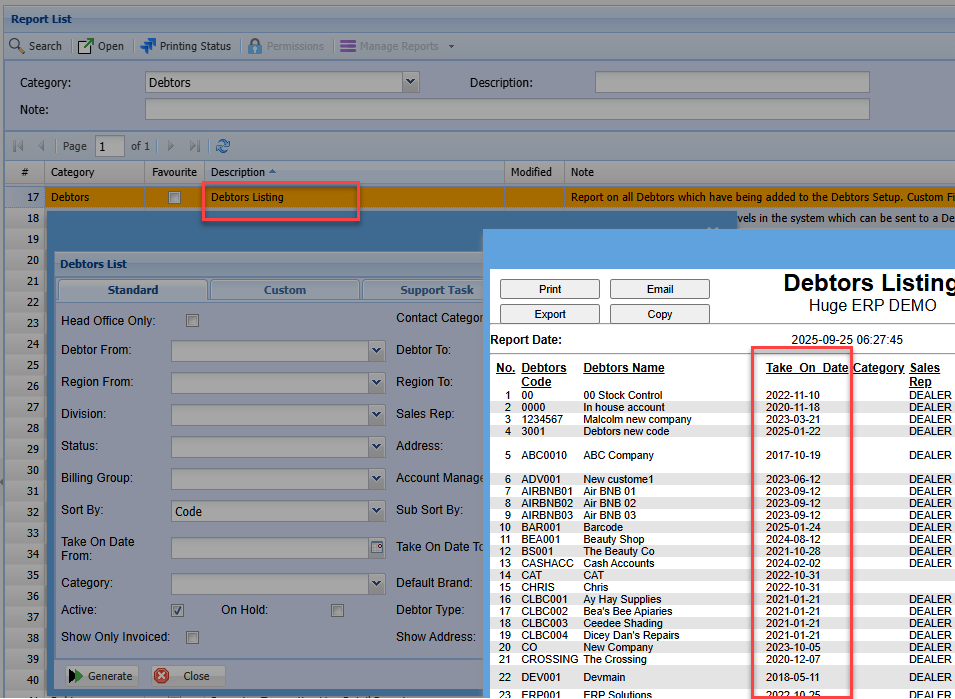
# Debtors Setup Menu

# Debtor Search

<span class="ts40"><span class="ts0">Video Training Manual 2016</span><span class="ts10"> - </span>[Click Here](https://vimeo.com/357003945)</span>

<span style="color: rgb(45, 194, 107);">**<span class="ts40">Debtors / Customer Module&gt; Configuration&gt; Debtors / Customer Setup</span>**</span>

<span class="ts0">The Debtors or Customer setup is essential and serves as a centralised repository for all relevant debtor or customer data.</span>

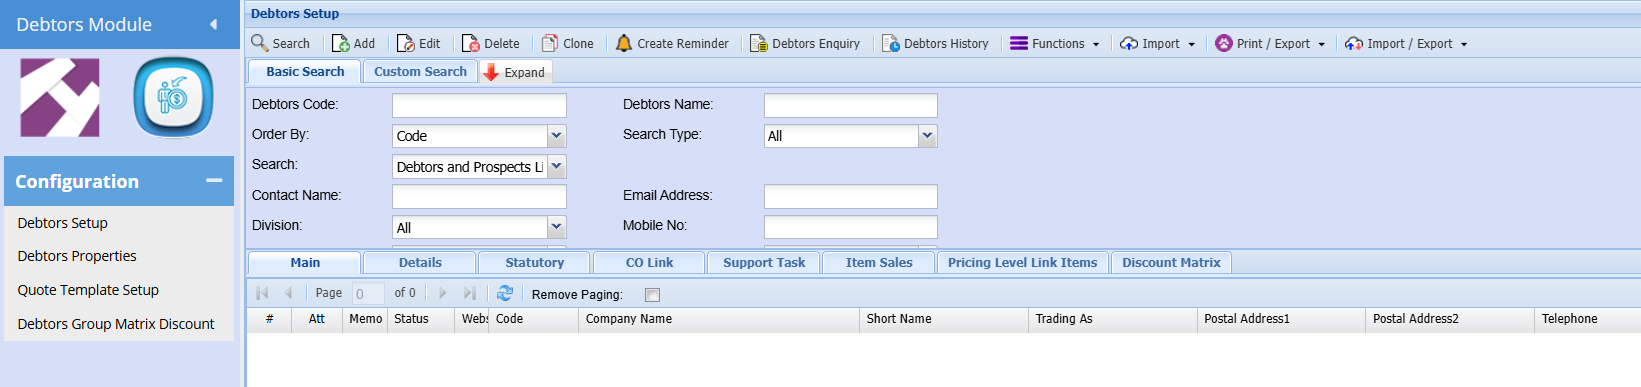
<span class="ts0">In the Debtor setup search, you will see two search tabs</span>

<table border="1" id="bkmrk-basic-search-tab-if-" style="width: 100%;"><colgroup><col style="width: 23.3547%;"></col><col style="width: 76.6453%;"></col></colgroup><tbody><tr><td>**<span class="ts0">Basic Search tab</span>**</td><td><span class="ts0">If you know the code of the Debtor or Customer or part of it you can search here</span></td></tr><tr><td>**<span class="ts0">Custom Search tab</span>**</td><td><span class="ts0">If you have setup custom fields in your debtor or customer setup, you can search for the items in this area.</span></td></tr></tbody></table>

<p class="callout info">If you leave the basic search blank, it will bring up all debtors or customer codes which will be sorted in debtor or customer code order alphabetically. </p>

<div id="bkmrk-"></div>#### <span class="ts0">System Buttons</span>

<span class="ts0">Search button allows a user to search using the Basic Search Tab and Custom Search Tab</span>

<p class="callout info"><span class="ts0">Basic Search tab, if the debtor’s code in the basic search Tab or debtor’s name is left blank, this will bring back all the debtors listed in the system sorted alphabetically. If the cursor is placed on name at the column head, this will sort the names A-Z or Z-A as preferred.</span></p>

<div id="bkmrk--1"></div>[![image.png](https://hugeerp10.co.za/hsofmanual/uploads/images/gallery/2024-11/scaled-1680-/image.png)](https://hugeerp10.co.za/hsofmanual/uploads/images/gallery/2024-11/image.png)

<span class="ts0">The Navigation Ribbon is used to action the following functions:</span>

<table border="1" id="bkmrk-search-button-the-se"><colgroup><col></col><col></col></colgroup><tbody><tr><td>**<span class="ts0">Search Button</span>**</td><td><span class="ts0">The search function will return Debtors or customer records based on the search criteria entered.</span></td></tr><tr><td>**<span class="ts0">Add Button</span>**</td><td><span class="ts0">Allows you to create a Debtor or Customer</span></td></tr><tr><td>**<span class="ts0">Edit Button</span>**</td><td><span class="ts0">Allows you to make changes to an existing debtor or customer</span></td></tr><tr><td>**<span class="ts0">Delete Button</span>**</td><td><span class="ts0">Allows you to delete an existing debtor or customer</span></td></tr><tr><td>**<span class="ts0">Clone</span>**</td><td><span class="ts0">Duplicate an existing debtor or customer</span></td></tr><tr><td>**Create a Reminder**</td><td>Allows you to create reminders</td></tr><tr><td>**<span class="ts0">Debtor Enquiry</span>**</td><td>Allows you to detailed sales of a customer or debtor</td></tr><tr><td>**<span class="ts0">Functions Drop Down</span>**</td><td>Has a list of functions that you can compete against a debtor or customer</td></tr><tr><td>**<span class="ts0">Import Dropdown</span>**</td><td><span class="ts0">Allows user to import debtor or customer details</span></td></tr><tr><td>**<span class="ts0">Print Dropdown</span>**</td><td>Allows you to print your debtors in PDF or download an excel sheet of customers or debtors details</td></tr><tr><td>**<span class="ts0">Export/ Export Drop Down</span>**</td><td>Allows you to import or export debtors or customer details</td></tr></tbody></table>

<div id="bkmrk--4">  
</div>---

#### Search Tab Option

[![image.png](https://hugeerp10.co.za/hsofmanual/uploads/images/gallery/2024-11/scaled-1680-/ITSimage.png)](https://hugeerp10.co.za/hsofmanual/uploads/images/gallery/2024-11/ITSimage.png)

<div id="bkmrk--6"></div><div id="bkmrk-there-are-six-search">There are six search tabs options </div><div id="bkmrk-main-tab-show-a-list"><table border="1"><tbody><tr><td>**Main Tab**</td><td>Show a list of all debtors or customers</td></tr><tr><td>**Details Tab**</td><td>Shows the main details of a specific debtor or customer that you are searching for</td></tr><tr><td>**Statutory Tab**</td><td>Shows statutory information of a specific debtor or customer that you are searching for</td></tr><tr><td>**CO Link**</td><td>  
</td></tr><tr><td>**Support Task**</td><td>Shows all support tasks under the specific debtor or customer that you are searching for</td></tr><tr><td>**Sales Item** </td><td>Shows all invoices against a specific debtor or customer that you are searching for</td></tr><tr><td>**Pricing Level Link Items**</td><td>Shows<span data-teams="true"><span class="ui-provider a b c d e f g h i j k l m n o p q r s t u v w x y z ab ac ae af ag ah ai aj ak" dir="ltr"> new pricing level to a customer with linked items with special pricing</span></span></td></tr><tr><td>**Discount Matrix**</td><td>Shows discount given to this particular Debtor</td></tr></tbody></table>

</div>
<p class="callout info"></p>

<span class="ts0">Custom Search tab, Custom search searches according to the category selection on the drop-down arrow and the system will bring back all that is selected on the category.</span>

[![image.png](https://hugeerp10.co.za/hsofmanual/uploads/images/gallery/2023-12/scaled-1680-/XrYimage.png)](https://hugeerp10.co.za/hsofmanual/uploads/images/gallery/2023-12/XrYimage.png)

---

#### <span class="ts0">Expand button</span>

<span class="ts0">To show more search filter criteria or Contract button to show less search filter criteria</span>

<span class="ts0">Click on Expand button</span>

[![image.png](https://hugeerp10.co.za/hsofmanual/uploads/images/gallery/2024-01/scaled-1680-/ZGIimage.png)](https://hugeerp10.co.za/hsofmanual/uploads/images/gallery/2024-01/ZGIimage.png)

<span class="ts0">Contract button</span>

[![image.png](https://hugeerp10.co.za/hsofmanual/uploads/images/gallery/2024-11/scaled-1680-/HTyimage.png)](https://hugeerp10.co.za/hsofmanual/uploads/images/gallery/2024-11/HTyimage.png)

<table border="1" id="bkmrk-debtors-code-search-" style="border-collapse: collapse; width: 100%; height: 363.156px;"><colgroup><col style="width: 27.963%;"></col><col style="width: 72.1606%;"></col></colgroup><tbody><tr style="height: 35.3906px;"><td style="height: 35.3906px;">**Debtors Code**</td><td style="height: 35.3906px;">Search on Debtors code or part of the code

</td></tr><tr style="height: 29.7969px;"><td style="height: 29.7969px;">**Order By**</td><td style="height: 29.7969px;">Select the Order you would like your report by Code, Description</td></tr><tr style="height: 29.7969px;"><td style="height: 29.7969px;">**Search**</td><td style="height: 29.7969px;">Filter by Debtors, Prospects or and opportunities</td></tr><tr style="height: 29.7969px;"><td style="height: 29.7969px;">**Contact name**</td><td style="height: 29.7969px;">Debtors main Contact Person </td></tr><tr style="height: 29.7969px;"><td style="height: 29.7969px;">**Division**</td><td style="height: 29.7969px;">If you have set up divisions for your debtors, you can pull the report for all your debtors or you can select a specific Division from the drop-down menu.</td></tr><tr style="height: 29.7969px;"><td style="height: 29.7969px;">**Region**</td><td style="height: 29.7969px;">You can pull the report for all your debtors, or you can select a specific Region from the drop-down menu if you have set up Regions for your debtors.</td></tr><tr style="height: 29.7969px;"><td style="height: 29.7969px;">**Account manager**</td><td style="height: 29.7969px;">Shows the person who is responsible for this account </td></tr></tbody></table>

---

#### <span class="ts0">Add Button</span>

<span class="ts0">To create a new Debtor/ Customer you need to click on the [Add Button](https://hugeerp10.co.za/hsofmanual/books/adm-configuration/page/add-debtor "Add Debtor")</span>

[![image.png](https://hugeerp10.co.za/hsofmanual/uploads/images/gallery/2024-11/scaled-1680-/2mEimage.png)](https://hugeerp10.co.za/hsofmanual/uploads/images/gallery/2024-11/2mEimage.png)

Add Debtor buttons

[![image.png](https://hugeerp10.co.za/hsofmanual/uploads/images/gallery/2024-11/scaled-1680-/iEHimage.png)](https://hugeerp10.co.za/hsofmanual/uploads/images/gallery/2024-11/iEHimage.png)

<table border="1" id="bkmrk-code-create-a-unique" style="border-collapse: collapse; width: 100%; height: 296px;"><colgroup><col style="width: 22.24%;"></col><col style="width: 77.7352%;"></col></colgroup><tbody><tr style="height: 29.6px;"><td style="height: 29.6px;">**Code**</td><td style="height: 29.6px;">Create a unique code for this debtor</td></tr><tr style="height: 29.6px;"><td style="height: 29.6px;">**Name**</td><td style="height: 29.6px;">Name of the Company</td></tr><tr style="height: 29.6px;"><td style="height: 29.6px;">**Trading As**</td><td style="height: 29.6px;">Name the company is trading under </td></tr><tr style="height: 29.6px;"><td style="height: 29.6px;">**Short Name** </td><td style="height: 29.6px;">Shortened version of the name </td></tr><tr style="height: 29.6px;"><td style="height: 29.6px;">**Commission**</td><td style="height: 29.6px;">Shows who gets commission on sales for this Debtor </td></tr><tr style="height: 29.6px;"><td style="height: 29.6px;">**Contacts**</td><td style="height: 29.6px;">Shows all Contacts associated with this Debtor </td></tr><tr style="height: 29.6px;"><td style="height: 29.6px;">**Print/Email Statement**</td><td style="height: 29.6px;">Shows if the Debtor would like their statement Emailed or Posted </td></tr><tr style="height: 29.6px;"><td style="height: 29.6px;">**Active**</td><td style="height: 29.6px;">Shows if this Debtor is active or inactive if not ticked</td></tr><tr style="height: 29.6px;"><td style="height: 29.6px;">**Sync to Mobile**</td><td style="height: 29.6px;">Shows on the mobile app if this is part of your package</td></tr><tr style="height: 29.6px;"><td style="height: 29.6px;">**Debtors image** </td><td style="height: 29.6px;">Shows the Company Logo which you will find if added to Attachments</td></tr><tr><td>**Debtor Type**</td><td>Shows if this Debtor is an Opportunity, Prospect, or can be promoted to an active Debtor</td></tr></tbody></table>

# Customer Enquiry

<span class="ts0">Video training Manual 2020 - </span>[Click Here](https://vimeo.com/465179192)

<span class="ts10">Video training Manual 201</span><span class="ts10">9</span><span class="ts10"> - </span>[Click Here](https://vimeo.com/376441519)

<span class="ts0">The customer inquiry window allows you to view the customer at a quick glance Information on invoices in payments.</span>

<span class="ts0">This can be accessed at the customer setup or if you edit the customer, you will also see this button.</span>

![](https://hugeerp0.co.za/csp/webhelp/topics/images/image(2525).png)

<table border="1" id="bkmrk-customer-since-date-" style="border-collapse: collapse; width: 100%;"><colgroup><col style="width: 34.6297%;"></col><col style="width: 65.4939%;"></col></colgroup><tbody><tr><td>**Customer Since**</td><td>Date the customer was opened</td></tr><tr><td>**Last Invoice Date**</td><td>Last invoice date</td></tr><tr><td>**Last Invoice Amount**</td><td>Last Invoice amount excluding Tax</td></tr><tr><td>**Last Payment Date**</td><td>Last payment date</td></tr><tr><td>**Last Payment Amount**</td><td>Last payment amount</td></tr><tr><td>**Average Days to Payment**</td><td>The system adds all the days between the Invoice Date and the payment date then divides the total by the number of payments.</td></tr><tr><td>**Highest Invoice Amount**</td><td>Highest invoice amount </td></tr><tr><td>**Highest AR Balance**</td><td>Highest last Age Analysis balance</td></tr><tr><td>**Credit Limit**</td><td>Credit limit allocated</td></tr></tbody></table>

# Debtor Functions

#### Functions Drop Down

<span style="color: rgb(45, 194, 107);">**Debtors Module&gt; Configuration&gt; Debtor Setup&gt; Functions Drop Down**</span>

This drop down defines actions against a Debtor or Customer

[![image.png](https://hugeerp10.co.za/hsofmanual/uploads/images/gallery/2023-10/scaled-1680-/4EHimage.png)](https://hugeerp10.co.za/hsofmanual/uploads/images/gallery/2023-10/4EHimage.png)

<table border="1" id="bkmrk-create-sales-lead-al" style="border-collapse: collapse; width: 100%; height: 359.2px;"><colgroup><col style="width: 27.1865%;"></col><col style="width: 72.7888%;"></col></colgroup><tbody><tr style="height: 63.2px;"><td style="height: 63.2px;">**Create Sales Lead**</td><td style="height: 63.2px;">Allows you to easily create a sales lead from a debtor or customer screen if they want more business or services without having to recapture all information that already exists within the system. </td></tr><tr style="height: 29.6px;"><td style="height: 29.6px;">**Alerts**</td><td style="height: 29.6px;">Set up an alert for a customer in the system</td></tr><tr style="height: 29.6px;"><td style="height: 29.6px;">**Target**</td><td style="height: 29.6px;">Allows you to set monthly targets for the year</td></tr><tr style="height: 29.6px;"><td style="height: 29.6px;">**Time Logging Budget**</td><td style="height: 29.6px;">Allows you to setup time logging budget</td></tr><tr style="height: 29.6px;"><td style="height: 29.6px;">**Contracts**</td><td style="height: 29.6px;">Allows you to view maintenance contracts</td></tr><tr style="height: 29.6px;"><td style="height: 29.6px;">**View Recurring Transactions**</td><td style="height: 29.6px;">Allows you to set and view recurring transactions</td></tr><tr style="height: 29.6px;"><td style="height: 29.6px;">**Mobile Sync Activate All**</td><td style="height: 29.6px;">Allows you to activate mobile sync on all debtors</td></tr><tr style="height: 29.6px;"><td style="height: 29.6px;">**Mobile Sync Deactivate All**</td><td style="height: 29.6px;">Allows you to deactivate mobile sync on all debtors</td></tr><tr style="height: 29.6px;"><td style="height: 29.6px;">**Change to Prospect**</td><td style="height: 29.6px;">Allows you to change a debtor/ customer to a prospect</td></tr><tr style="height: 29.6px;"><td style="height: 29.6px;">**Change to Opportunity**</td><td style="height: 29.6px;">Allows you to change a debtor/ customer to an opportunity</td></tr><tr style="height: 29.6px;"><td style="height: 29.6px;">**Update Debtors**</td><td style="height: 29.6px;">Allows you to update debtors/ customer properties</td></tr></tbody></table>

---

#### Create Sales Lead

Sometimes your debtors or customers switch to sales leads when there is a change in their interest or want more business from you. The button helps with easily changing the debtor/ customer to a sales lead without having to recapture information that already exists within the system. Creating a sales lead also helps with marketing and sales efforts effectively to maximise revenue and maintain a well-organised debtor/ customer database.

When the sales lead button is selected from the functions drop down the create sales lead screen will pop-up

You need to click yes to create a sales lead

[![image.png](https://hugeerp10.co.za/hsofmanual/uploads/images/gallery/2023-11/scaled-1680-/buWimage.png)](https://hugeerp10.co.za/hsofmanual/uploads/images/gallery/2023-11/buWimage.png)

<span class="ts0"> </span><span class="ts0">When you click yes it will take you directly to the created sales Lead</span>

[![image.png](https://hugeerp10.co.za/hsofmanual/uploads/images/gallery/2023-11/scaled-1680-/x0Qimage.png)](https://hugeerp10.co.za/hsofmanual/uploads/images/gallery/2023-11/x0Qimage.png)

Should you want to capture other details on the sales lead screen go to [Sales Lead Process](https://hugeerp10.co.za/hsofmanual/books/bcr-activity/page/sales-lead-process)

---

#### Alert

You can create alerts on the system that will notify you when a new client is adding a new document or editing a document for a debtor/ customer.

[![image.png](https://hugeerp10.co.za/hsofmanual/uploads/images/gallery/2023-11/scaled-1680-/kr6image.png)](https://hugeerp10.co.za/hsofmanual/uploads/images/gallery/2023-11/kr6image.png)

<table border="1" id="bkmrk-alert-number-source-" style="border-collapse: collapse; width: 100%; height: 383.734px;"><colgroup><col style="width: 26.703%;"></col><col style="width: 73.297%;"></col></colgroup><tbody><tr style="height: 29.7969px;"><td style="height: 29.7969px;">**Alert Number**</td><td style="height: 29.7969px;">After clicking save the alert number will be generated by the system</td></tr><tr style="height: 29.7969px;"><td style="height: 29.7969px;">**Source Type**</td><td style="height: 29.7969px;">Select a debtor/ customer type on the drop down</td></tr><tr style="height: 57.7812px;"><td style="height: 57.7812px;">**Document Type**</td><td style="height: 57.7812px;">Select the document type on the drop down

This is where you indicate where you want the alert to be

</td></tr><tr style="height: 29.7969px;"><td style="height: 29.7969px;">**Debtor**</td><td style="height: 29.7969px;">Select debtor/ customer on the drop down</td></tr><tr style="height: 29.7969px;"><td style="height: 29.7969px;">**Target User**</td><td style="height: 29.7969px;">Enter the user that should receive the alert when adding or editing a debtor/ customer document</td></tr><tr style="height: 29.7969px;"><td style="height: 29.7969px;">**Reference**</td><td style="height: 29.7969px;">A note that will assist you to recall what the alert</td></tr><tr style="height: 29.7969px;"><td style="height: 29.7969px;">**Notes**</td><td style="height: 29.7969px;">A detailed note to remind you why you put the alert</td></tr><tr style="height: 29.7969px;"><td style="height: 29.7969px;">**Date Time Created**</td><td style="height: 29.7969px;">Date and time will be generated by the system after you click save</td></tr><tr style="height: 57.7812px;"><td style="height: 57.7812px;">**Action On**</td><td style="height: 57.7812px;">This is when should the system send you and alert.

When adding or deleting something on the selected source and document type

</td></tr><tr style="height: 29.7969px;"><td style="height: 29.7969px;">**Name** </td><td style="height: 29.7969px;">The name of the person adding the alert</td></tr><tr style="height: 29.7969px;"><td style="height: 29.7969px;">**Active**</td><td style="height: 29.7969px;">Put a tick on if alert is active and do not put tick if the alert is not active</td></tr></tbody></table>

---

#### Targets 

Managing debtor/ customer budgets within Huge ERP system is crucial for maintaining healthy cash flow, reducing the risk of bad debt and ensuring that the debtor/customer credit policies are consistently enforced. It allows you to strike a balance between extending credit to debtors/ customers and minimising financial risk.

[![image.png](https://hugeerp10.co.za/hsofmanual/uploads/images/gallery/2023-11/scaled-1680-/Th6image.png)](https://hugeerp10.co.za/hsofmanual/uploads/images/gallery/2023-11/Th6image.png)

<table border="1" id="bkmrk-period-this-reflects" style="border-collapse: collapse; width: 100%; height: 208.578px;"><colgroup><col style="width: 28.9275%;"></col><col style="width: 71.0725%;"></col></colgroup><tbody><tr style="height: 29.7969px;"><td style="height: 29.7969px;">**Period**</td><td style="height: 29.7969px;">This reflects the month of budget</td></tr><tr style="height: 29.7969px;"><td style="height: 29.7969px;">**Start Date**</td><td style="height: 29.7969px;">The start date of the targeted budget</td></tr><tr style="height: 29.7969px;"><td style="height: 29.7969px;">**End Date**</td><td style="height: 29.7969px;">The end date of the targeted budget</td></tr><tr style="height: 29.7969px;"><td style="height: 29.7969px;">**Amount**</td><td style="height: 29.7969px;">The budgeted Amount</td></tr><tr style="height: 29.7969px;"><td style="height: 29.7969px;">**Actual Amount**</td><td style="height: 29.7969px;">The actual amount made in that period</td></tr><tr style="height: 29.7969px;"><td style="height: 29.7969px;">**Variance Amount**</td><td style="height: 29.7969px;">The budget amount minus the actual amount equals to variance amount (Difference between amount and actual amount)</td></tr><tr style="height: 29.7969px;"><td style="height: 29.7969px;">**Last Date Actuals Updated**</td><td style="height: 29.7969px;">This shows the last date the budget was updated.</td></tr></tbody></table>

---

#### Time Logging Budget

Time log budgets within Huge ERP allow you to effectively manage time-related resources, control costs, and achieve operational excellence. Time logging budgets are designed to enhance your efficiency and profitability through smart time management.

[![image.png](https://hugeerp10.co.za/hsofmanual/uploads/images/gallery/2023-11/scaled-1680-/vLHimage.png)](https://hugeerp10.co.za/hsofmanual/uploads/images/gallery/2023-11/vLHimage.png)

<table border="1" id="bkmrk-budget-qty-%3D-value-e" style="width: 79.7531%; height: 344.563px;"><colgroup><col style="width: 25.416%;"></col><col style="width: 74.584%;"></col></colgroup><tbody><tr style="height: 46.5938px;"><td style="height: 46.5938px;"><span class="ts0">Description</span></td><td style="height: 46.5938px;">Add a short heading describing the why you are creating a time logging budget</td></tr><tr style="height: 29.7969px;"><td style="height: 29.7969px;"><span class="ts0">Date From</span></td><td style="height: 29.7969px;">Add the start date of the project</td></tr><tr style="height: 29.7969px;"><td style="height: 29.7969px;"><span class="ts0">Date To</span></td><td style="height: 29.7969px;"><span class="ts0">Add the end date of the project</span></td></tr><tr style="height: 29.7969px;"><td style="height: 29.7969px;"><span class="ts0">Budget Qty</span></td><td style="height: 29.7969px;"><span class="ts0">Add the budget amount agreed on with the debtor/ customer</span></td></tr><tr style="height: 29.7969px;"><td style="height: 29.7969px;"><span class="ts0">Budget Value</span></td><td style="height: 29.7969px;"><span class="ts0">Add budget value agreed on with the debtor/ customer</span></td></tr><tr style="height: 29.7969px;"><td style="height: 29.7969px;"><span class="ts0">Adjustments</span></td><td style="height: 29.7969px;"><span class="ts0">If there are any adjustments to the budget add them here</span></td></tr><tr style="height: 29.7969px;"><td style="height: 29.7969px;"><span class="ts0">Adjustment Date</span></td><td style="height: 29.7969px;"><span class="ts0">This is the date when the adjustments were made between the two parties</span></td></tr><tr style="height: 29.7969px;"><td style="height: 29.7969px;"><span class="ts0">Incl Travel</span></td><td style="height: 29.7969px;"><span class="ts0">Put a tick on if the budget amount or value includes traveling</span></td></tr><tr style="height: 29.7969px;"><td style="height: 29.7969px;"><span class="ts0">Incl Toll Fees</span></td><td style="height: 29.7969px;">Put a tick on if the budget amount or value includes Toll fees</td></tr><tr style="height: 29.7969px;"><td style="height: 29.7969px;"><span class="ts0">Incl Disbursements</span></td><td style="height: 29.7969px;"><span class="ts0">Put a tick on if the budget amount or value includes disbursements</span></td></tr><tr style="height: 29.7969px;"><td style="height: 29.7969px;"><span class="ts0">Incl Non-Bill Qty</span></td><td style="height: 29.7969px;"><span class="ts0">Put a tick on if the budget amount or value includes Non-Bill Qty</span></td></tr></tbody></table>

---

#### Contracts

You can view all service-level agreements or contract maintenance for a debtor/ customer.

[![image.png](https://hugeerp10.co.za/hsofmanual/uploads/images/gallery/2023-11/scaled-1680-/qcwimage.png)](https://hugeerp10.co.za/hsofmanual/uploads/images/gallery/2023-11/qcwimage.png)

---

#### View Recurring Transactions

<span style="color: rgb(45, 194, 107);">**<span class="ts15">Debtors module&gt; Configuration&gt;Debtors Setup</span><span class="ts15"> &gt; View Recurring Transactions</span>**</span>

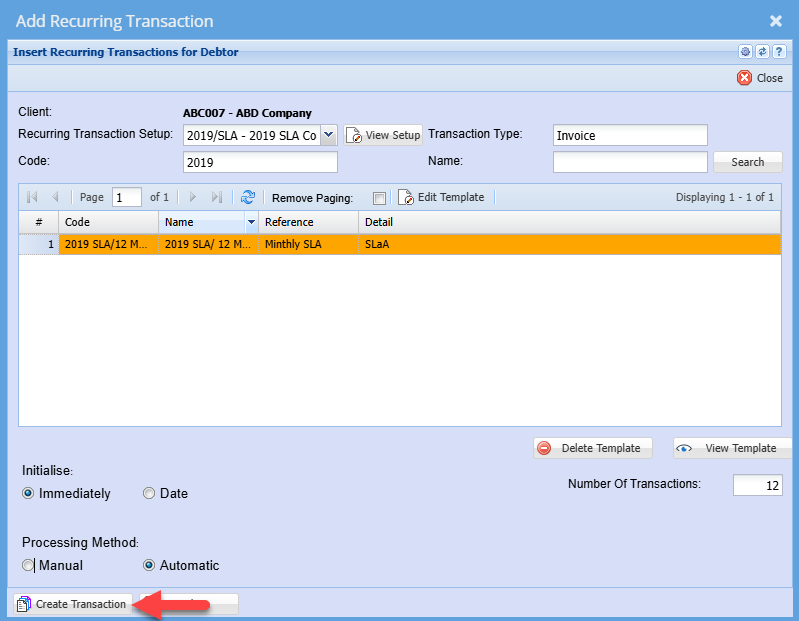
<span class="ts0">Recurring transactions provide convenience and predictability, reducing the need for manual financial management.</span>

<span class="ts0">When you click recurring transactions, it will take you to the screen below. </span><span class="ts0">To see a list of recurring transactions you need to click on search and the list will appear. </span>

[![image.png](https://hugeerp10.co.za/hsofmanual/uploads/images/gallery/2023-10/scaled-1680-/kXPimage.png)](https://hugeerp10.co.za/hsofmanual/uploads/images/gallery/2023-10/kXPimage.png)

View a detailed manual on recurring transactions [here ](https://hugeerp10.co.za/hsofmanual/books/adm-configuration/page/detailed-recurring-transactions)

---

#### Mobile Sync Activate All

Mobile to sync activate all, adds all debtors/ customers to the webatar mobile application.

[![image.png](https://hugeerp10.co.za/hsofmanual/uploads/images/gallery/2023-11/scaled-1680-/v0cimage.png)](https://hugeerp10.co.za/hsofmanual/uploads/images/gallery/2023-11/v0cimage.png)

---

#### Mobile Sync Deactivate All

Mobile sync deactivates all erases all debtors/ customers from the webatar mobile application

[![image.png](https://hugeerp10.co.za/hsofmanual/uploads/images/gallery/2023-11/scaled-1680-/XkNimage.png)](https://hugeerp10.co.za/hsofmanual/uploads/images/gallery/2023-11/XkNimage.png)

---

#### Change to Prospect

Change to Prospect allows you to update a debtor/ customer or opportunity to a prospect

[![image.png](https://hugeerp10.co.za/hsofmanual/uploads/images/gallery/2023-11/scaled-1680-/xiPimage.png)](https://hugeerp10.co.za/hsofmanual/uploads/images/gallery/2023-11/xiPimage.png)

---

#### Change To Opportunity

<span class="ts0"> </span><span class="ts0">Change to opportunity allows you to change the selected debtor/customer or prospect to opportunity</span>

[![image.png](https://hugeerp10.co.za/hsofmanual/uploads/images/gallery/2023-11/scaled-1680-/EY5image.png)](https://hugeerp10.co.za/hsofmanual/uploads/images/gallery/2023-11/EY5image.png)

---

#### Update Debtors 

You can change debtor/ customer details mentioned below under the functions drop down without having to open up the details screen

[![image.png](https://hugeerp10.co.za/hsofmanual/uploads/images/gallery/2023-11/scaled-1680-/8GZimage.png)](https://hugeerp10.co.za/hsofmanual/uploads/images/gallery/2023-11/8GZimage.png)

<table border="1" id="bkmrk-sales-rep-to-update-" style="border-collapse: collapse; width: 100%; height: 420.1px;"><colgroup><col style="width: 24.3828%;"></col><col style="width: 75.7408%;"></col></colgroup><tbody><tr style="height: 55.775px;"><td style="height: 55.775px;">**Sales Rep**</td><td style="height: 55.775px;">If you want to run a report by a specific sales rep, then you will need to select the sales rep on the drop-down menu. If you leave the sales rep on all the report will run by all sales rep.

</td></tr><tr style="height: 46.4px;"><td style="height: 46.4px;">**Division**</td><td style="height: 46.4px;">If you have set up divisions for your debtors, you can pull the report for all your debtors or you can select a specific Division from the drop-down menu.</td></tr><tr style="height: 46.4px;"><td style="height: 46.4px;">**Region**</td><td style="height: 46.4px;">You can pull the report for all your debtors, or you can select a specific Region from the drop-down menu if you have set up Regions for your debtors.</td></tr><tr style="height: 46.4px;"><td style="height: 46.4px;">**Status**</td><td style="height: 46.4px;">If you select all the report will pull all statuses. If you want to view report by status, select the status on the drop-down menu</td></tr><tr style="height: 29.7875px;"><td style="height: 29.7875px;">**Category**</td><td style="height: 29.7875px;">To generate the report, the user has to select the category from the drop-down menu</td></tr><tr style="height: 46.4px;"><td style="height: 46.4px;">**Acc Manager**</td><td style="height: 46.4px;">You can pull the report for all your debtors, or you can select a specific Account manager from the drop-down menu if you have set up Account Managers for your debtors.</td></tr><tr style="height: 29.7875px;"><td style="height: 29.7875px;">**Billing Group**</td><td style="height: 29.7875px;">Select the billing group update on the dropdown</td></tr><tr style="height: 29.7875px;"><td style="height: 29.7875px;">**Partner**</td><td style="height: 29.7875px;">Select the partner update on the dropdown</td></tr><tr style="height: 29.7875px;"><td style="height: 29.7875px;">**Default Address**</td><td style="height: 29.7875px;">Select the default address on the dropdown</td></tr><tr style="height: 29.7875px;"><td style="height: 29.7875px;">**Enforce Sales Rep**</td><td style="height: 29.7875px;">Select Yes to enforce sales rep or select No if you don't want to enforce sales rep</td></tr><tr style="height: 29.7875px;"><td style="height: 29.7875px;">**Override**</td><td style="height: 29.7875px;">Put a tick on override if you want to override a selection made on the dropdown</td></tr></tbody></table>

<span class="ts0"> </span>

# Import Drop Down Button

**<span class="ts15" style="color: rgb(45, 194, 107);">Debtors Module&gt; Configuration&gt; Debtor Setup&gt; Import Drop Down</span>**

An import dropdown is a powerful tool that organises and simplifies the process of bringing external data into Huge ERP system.

Import dropdown is essential for maintaining accurate and up-to-date debtor/customer information.

The system offers predefined import templates for common data sources, making it easier to import data consistently.

[![image.png](https://hugeerp10.co.za/hsofmanual/uploads/images/gallery/2023-11/scaled-1680-/lEzimage.png)](https://hugeerp10.co.za/hsofmanual/uploads/images/gallery/2023-11/lEzimage.png)

<div class="block0" id="bkmrk-the-import-file-need"><table class="tbl5"><tbody><tr class="row0"><td class="cell1"><span class="ts0">The import file needs to be a CSV file (Comma Delimited File) as illustrated below. Click on the Browse button and navigate to the location of the file to be imported. Select the file and click on Open. Click on Upload and follow the screen prompts. If there are any errors in the import the resulting report will display the problematic data in the import file.</span>

</td></tr></tbody></table>

</div><div class="block0" id="bkmrk-debtorcode-firstname"><table class="tbl5"><tbody><tr class="row0"><td class="cell2">**<span class="ts0">DebtorCode</span>**

</td><td class="cell3">**<span class="ts0">FirstName</span>**

</td><td class="cell4">**<span class="ts0">LastName</span>**

</td></tr><tr class="row0"><td class="cell2"><span class="ts0">ABC101</span>

</td><td class="cell3"><span class="ts0">John</span>

</td><td class="cell4"><span class="ts0">Smith</span>

</td></tr><tr class="row0"><td class="cell2"><span class="ts0">EFG101</span>

</td><td class="cell3"><span class="ts0">Susan</span>

</td><td class="cell4"><span class="ts0">Jones</span>

</td></tr><tr class="row0"><td class="cell2"><span class="ts0">KLM101</span>

</td><td class="cell3"><span class="ts0">Paul</span>

</td><td class="cell4"><span class="ts0">Phillips</span>

</td></tr><tr class="row0"><td class="cell2"><span class="ts0">XYZ101</span>

</td><td class="cell3"><span class="ts0">Karen</span>

</td><td class="cell4"><span class="ts0">Williams</span>

</td></tr></tbody></table>

</div>---

#### <span class="ts0"> Import Acct Managers</span>

[![image.png](https://hugeerp10.co.za/hsofmanual/uploads/images/gallery/2024-10/scaled-1680-/image.png)](https://hugeerp10.co.za/hsofmanual/uploads/images/gallery/2024-10/image.png)

[![image.png](https://hugeerp10.co.za/hsofmanual/uploads/images/gallery/2024-10/scaled-1680-/FlIimage.png)](https://hugeerp10.co.za/hsofmanual/uploads/images/gallery/2024-10/FlIimage.png)

---

#### Import Additional Properties

[![image.png](https://hugeerp10.co.za/hsofmanual/uploads/images/gallery/2024-10/scaled-1680-/4Goimage.png)](https://hugeerp10.co.za/hsofmanual/uploads/images/gallery/2024-10/4Goimage.png)

[![image.png](https://hugeerp10.co.za/hsofmanual/uploads/images/gallery/2024-10/scaled-1680-/Rl3image.png)](https://hugeerp10.co.za/hsofmanual/uploads/images/gallery/2024-10/Rl3image.png)

---

#### Import Legal Hand Over

[![image.png](https://hugeerp10.co.za/hsofmanual/uploads/images/gallery/2024-10/scaled-1680-/IeOimage.png)](https://hugeerp10.co.za/hsofmanual/uploads/images/gallery/2024-10/IeOimage.png)

[![image.png](https://hugeerp10.co.za/hsofmanual/uploads/images/gallery/2024-10/scaled-1680-/tyrimage.png)](https://hugeerp10.co.za/hsofmanual/uploads/images/gallery/2024-10/tyrimage.png)

<table border="1" id="bkmrk-1-click-the%C2%A0select-f" style="border-collapse: collapse; width: 100%;"><colgroup><col style="width: 4.33747%;"></col><col style="width: 95.6625%;"></col></colgroup><tbody><tr><td class="align-center">**1**</td><td>Click the **Select Files …** button to locate the CSV file to be imported.</td></tr><tr><td class="align-center">**2**</td><td>Click **Upload** to upload the CSV file into the Web Accounting file structure.</td></tr><tr><td class="align-center">**3**</td><td>Click **Import** to import the Legal Hand <span class="GramE">Over</span> Debtors as specified in the CSV file.</td></tr><tr><td class="align-center">**4**</td><td>A report will be produced on the import process. If there are any errors during the import the user will be informed of these errors in the report. All these errors need to be corrected before the import will be successful.</td></tr></tbody></table>

The CSV file requires the following columns.

Action, Debtor Code, Legal Firm Code (Creditor Code), Reference Number, Hand Over Date, Hand Over Amount, Follow-up Date and Follow-up Person

The follow-up person is that user who has been delegated to follow-up on this particular debtor’s legal hand over action with the legal firm. The follow-up person must be a registered user on the system and the column data must be the user’s First Name and the user’s Last Name (as captured in the system) separated by a space.

![](https://hugeerp0.co.za/csp/hugeerp/wab/Help/Debtors/frmImportLegalHandOver_files/image001.jpg)

Action = 1 the debtor is set as a Legal Hand Over

Compulsory columns are Action, Debtor Code, Legal Firm Code, Reference No., Follow-up Date and Follow-up Person

Action = 0 the debtor is reset and is no longer a Legal Hand Over

Compulsory columns are Action, Debtor Code, Legal Firm Code and Reference No.

---

#### Import Linked Brands

[![image.png](https://hugeerp10.co.za/hsofmanual/uploads/images/gallery/2024-10/scaled-1680-/XFKimage.png)](https://hugeerp10.co.za/hsofmanual/uploads/images/gallery/2024-10/XFKimage.png)

[![image.png](https://hugeerp10.co.za/hsofmanual/uploads/images/gallery/2024-10/scaled-1680-/Voaimage.png)](https://hugeerp10.co.za/hsofmanual/uploads/images/gallery/2024-10/Voaimage.png)

---

#### Import Recurring Transactions

[![image.png](https://hugeerp10.co.za/hsofmanual/uploads/images/gallery/2024-10/scaled-1680-/qqVimage.png)](https://hugeerp10.co.za/hsofmanual/uploads/images/gallery/2024-10/qqVimage.png)

[![image.png](https://hugeerp10.co.za/hsofmanual/uploads/images/gallery/2024-10/scaled-1680-/68Timage.png)](https://hugeerp10.co.za/hsofmanual/uploads/images/gallery/2024-10/68Timage.png)

The file to be imported must be in a CSV format.

Click on the **Select Files…** button to open the navigate window allowing the user to navigate to the file to be imported.

Once the desired file has been located either double click on the file or click the **Open** button.

Now click on the **Upload** button. If the upload was successful a window will appear confirming that the upload was successful. Click **Ok.**

The **Import** button now becomes enabled allowing the user to click on the **Import** button to import the file.

An Import Report will open displaying any errors in the import or displaying the successful import of the recurring transactions.

<p class="callout info">**Please <span class="GramE">Note: </span>**The column headings can be left in the import file providing that the heading are as per the sample below.</p>

**<u>Import File Layout</u>**

<u>All items in RED are required fields.</u>

<table border="1" cellpadding="0" cellspacing="0" class="MsoTableGrid" id="bkmrk-debtor-description-r" style="width: 100%;"><tbody><tr><td style="width: 9.39431%;" valign="top" width="73">**Debtor**

</td><td style="width: 11.9901%;" valign="top" width="85">**Description**

</td><td style="width: 10.5068%;" valign="top" width="134"><span class="SpellE">**Recurring Contract**</span>

</td><td style="width: 12.6082%;" valign="top" width="123"><span class="SpellE">**Invoice Template**</span>

</td><td style="width: 13.2262%;" valign="top" width="123"><span class="SpellE">**No Of Recurring**</span>

</td><td style="width: 10.3832%;" valign="top" width="97">**Period**

</td><td style="width: 9.02349%;" valign="top" width="84"><span class="SpellE">**Date Type**</span>

</td><td style="width: 10.1344%;" valign="top" width="83"><span class="SpellE">**StartDate**</span>

</td><td style="width: 12.8569%;" valign="top" width="132">**Type Of Recurring**

</td></tr><tr><td style="width: 9.39431%;" valign="top" width="73">Required

</td><td style="width: 11.9901%;" valign="top" width="85"> </td><td style="width: 10.5068%;" valign="top" width="134">Required

</td><td style="width: 12.6082%;" valign="top" width="123">Required

</td><td style="width: 13.2262%;" valign="top" width="123">Required

</td><td style="width: 10.3832%;" valign="top" width="97">Required

</td><td style="width: 9.02349%;" valign="top" width="84">Required

</td><td style="width: 10.1344%;" valign="top" width="83">Required

</td><td style="width: 12.8569%;" valign="top" width="132">Required

</td></tr><tr><td style="width: 9.39431%;" valign="top" width="73">Debtor Code

</td><td style="width: 11.9901%;" valign="top" width="85">Customer Name

</td><td style="width: 10.5068%;" valign="top" width="134">Contract Code

</td><td style="width: 12.6082%;" valign="top" width="123">Template Code

</td><td style="width: 13.2262%;" valign="top" width="123">Number Of Transactions

</td><td style="width: 10.3832%;" valign="top" width="97">Weekly

Monthly

Yearly

</td><td style="width: 9.02349%;" valign="top" width="84">0 / 1 / 99

</td><td style="width: 10.1344%;" valign="top" width="83">2015/03/01

Only if 0 is used

</td><td style="width: 12.8569%;" valign="top" width="132">Manual / Automatic

</td></tr></tbody></table>

**<u>Date Type</u>**

0 = Use Start Date

1 = First Day of Every Month

99 = Last Day of Every Month

---

#### Import Statutory Information

[![image.png](https://hugeerp10.co.za/hsofmanual/uploads/images/gallery/2024-10/scaled-1680-/R5Bimage.png)](https://hugeerp10.co.za/hsofmanual/uploads/images/gallery/2024-10/R5Bimage.png)

[![image.png](https://hugeerp10.co.za/hsofmanual/uploads/images/gallery/2024-10/scaled-1680-/uaKimage.png)](https://hugeerp10.co.za/hsofmanual/uploads/images/gallery/2024-10/uaKimage.png)

<span class="ts0">Click the select File Button to open the “open file dialog” which will allow you to navigate to your file in order select it.</span>

<span class="ts0">Click the Upload button to upload the file onto the server.</span>

<span class="ts0">Click the Import button to start the import process.</span>

<p class="callout info"><span class="ts0">Your file must be in a \*.CSV file format.</span></p>

<span class="ts0">If any errors are found, it will be written in the log, please correct the errors and start the import process again.</span>

<span class="ts0">Below is a template of the CSV File:</span>

<div class="block0" id="bkmrk-no-column-heading-co"><table class="tbl4" style="width: 100%;"><tbody><tr class="row1"><td class="cell12" style="width: 4.32633%;">**<span class="ts0">No</span>**

</td><td class="cell15" style="width: 24.5877%;">**<span class="ts0">Column Heading</span>**

</td><td class="cell14" style="width: 71.0859%;">**<span class="ts0">Column Data Requirements</span>**

</td></tr><tr class="row1"><td class="cell12" style="width: 4.32633%;"><span class="ts0">1</span>

</td><td class="cell15" style="width: 24.5877%;"><span class="ts0">DebtorCode</span>

</td><td class="cell14" style="width: 71.0859%;"><span class="ts0">Required</span>

</td></tr><tr class="row1"><td class="cell12" style="width: 4.32633%;"><span class="ts0">2</span>

</td><td class="cell15" style="width: 24.5877%;"><span class="ts0">ServiceItemCode</span>

</td><td class="cell14" style="width: 71.0859%;"><span class="ts0">Required</span>

</td></tr><tr class="row1"><td class="cell12" style="width: 4.32633%;"><span class="ts0">3</span>

</td><td class="cell15" style="width: 24.5877%;"><span class="ts0">SLACode</span>

</td><td class="cell14" style="width: 71.0859%;"><span class="ts0">Required</span>

</td></tr><tr class="row1"><td class="cell12" style="width: 4.32633%;"><span class="ts0">4</span>

</td><td class="cell15" style="width: 24.5877%;"><span class="ts0">TaskCode</span>

</td><td class="cell14" style="width: 71.0859%;"><span class="ts0">Required</span>

</td></tr><tr class="row1"><td class="cell12" style="width: 4.32633%;"><span class="ts0">5</span>

</td><td class="cell15" style="width: 24.5877%;"><span class="ts0">BillingRateCode</span>

</td><td class="cell14" style="width: 71.0859%;"><span class="ts0">Required</span>

</td></tr><tr class="row1"><td class="cell12" style="width: 4.32633%;"><span class="ts0">6</span>

</td><td class="cell15" style="width: 24.5877%;"><span class="ts0">Reference</span>

</td><td class="cell14" style="width: 71.0859%;"><span class="ts0"> </span>

</td></tr><tr class="row1"><td class="cell12" style="width: 4.32633%;"><span class="ts0">7</span>

</td><td class="cell15" style="width: 24.5877%;"><span class="ts0">TimeLogDate</span>

</td><td class="cell14" style="width: 71.0859%;"><span class="ts0">Required</span>

</td></tr><tr class="row1"><td class="cell12" style="width: 4.32633%;"><span class="ts0">8</span>

</td><td class="cell15" style="width: 24.5877%;"><span class="ts0">EmployeeName</span>

</td><td class="cell14" style="width: 71.0859%;"><span class="ts0">Required</span>

</td></tr><tr class="row1"><td class="cell12" style="width: 4.32633%;"><span class="ts0">9</span>

</td><td class="cell15" style="width: 24.5877%;"><span class="ts0">TimeFrom</span>

</td><td class="cell14" style="width: 71.0859%;"><span class="ts0">The time value needs to be separated by a colon. E.g. “10:00”</span>

</td></tr><tr class="row1"><td class="cell12" style="width: 4.32633%;"><span class="ts0">10</span>

</td><td class="cell15" style="width: 24.5877%;"><span class="ts0">TimeTo</span>

</td><td class="cell14" style="width: 71.0859%;"><span class="ts0">The time value needs to be separated by a colon. E.g. “ 11:00”</span>

</td></tr><tr class="row1"><td class="cell12" style="width: 4.32633%;"><span class="ts0">11</span>

</td><td class="cell15" style="width: 24.5877%;"><span class="ts0">SupportTaskCode</span>

</td><td class="cell14" style="width: 71.0859%;"><span class="ts0">Required</span>

</td></tr><tr class="row1"><td class="cell12" style="width: 4.32633%;"><span class="ts0">12</span>

</td><td class="cell15" style="width: 24.5877%;"><span class="ts0">SupportSubTaskCode</span>

</td><td class="cell14" style="width: 71.0859%;"><span class="ts0"> </span>

</td></tr><tr class="row1"><td class="cell12" style="width: 4.32633%;"><span class="ts0">13</span>

</td><td class="cell15" style="width: 24.5877%;"><span class="ts0">AddToJob</span>

</td><td class="cell14" style="width: 71.0859%;"><span class="ts0">1 / 0 - This value must be either 1 (true) or 0(false), this item must be true (1) for the rest of the fields in orange to apply.</span>

</td></tr><tr class="row1"><td class="cell12" style="width: 4.32633%;"><span class="ts0">14</span>

</td><td class="cell15" style="width: 24.5877%;"><span class="ts0">AddToJobType</span>

</td><td class="cell14" style="width: 71.0859%;"><span class="ts0">CTC / SC</span>

</td></tr><tr class="row1"><td class="cell12" style="width: 4.32633%;"><span class="ts0">15</span>

</td><td class="cell15" style="width: 24.5877%;"><span class="ts0">JobNumber</span>

</td><td class="cell14" style="width: 71.0859%;"><span class="ts0">Required</span>

</td></tr><tr class="row1"><td class="cell12" style="width: 4.32633%;"><span class="ts0">16</span>

</td><td class="cell15" style="width: 24.5877%;"><span class="ts0">EmployeeRate</span>

</td><td class="cell14" style="width: 71.0859%;"><span class="ts0">Rate 1 / Rate 2 / Rate 3</span>

</td></tr><tr class="row1"><td class="cell12" style="width: 4.32633%;"><span class="ts0">17</span>

</td><td class="cell15" style="width: 24.5877%;"><span class="ts0">ChargeTravelFees</span>

</td><td class="cell14" style="width: 71.0859%;"><span class="ts0">1 / 0 - This value must be either 1 (true) or 0(false), this item must be true (1) for the rest of the fields in green to apply.</span>

</td></tr><tr class="row1"><td class="cell12" style="width: 4.32633%;"><span class="ts0">18</span>

</td><td class="cell15" style="width: 24.5877%;"><span class="ts0">TravelBillType</span>

</td><td class="cell14" style="width: 71.0859%;"><span class="ts0">Distance / Time</span>

</td></tr><tr class="row1"><td class="cell12" style="width: 4.32633%;"><span class="ts0">19</span>

</td><td class="cell15" style="width: 24.5877%;"><span class="ts0">TravelDistanceRate</span>

</td><td class="cell14" style="width: 71.0859%;"><span class="ts0">Required</span>

</td></tr><tr class="row1"><td class="cell12" style="width: 4.32633%;"><span class="ts0">20</span>

</td><td class="cell15" style="width: 24.5877%;"><span class="ts0">TravelDistanceStart</span>

</td><td class="cell14" style="width: 71.0859%;"><span class="ts0">Required</span>

</td></tr><tr class="row1"><td class="cell12" style="width: 4.32633%;"><span class="ts0">21</span>

</td><td class="cell15" style="width: 24.5877%;"><span class="ts0">TravelDistanceEnd</span>

</td><td class="cell14" style="width: 71.0859%;"><span class="ts0">Required</span>

</td></tr><tr class="row1"><td class="cell12" style="width: 4.32633%;"><span class="ts0">22</span>

</td><td class="cell15" style="width: 24.5877%;"><span class="ts0">TravelTimeRate</span>

</td><td class="cell14" style="width: 71.0859%;"><span class="ts0">Required</span>

</td></tr><tr class="row1"><td class="cell12" style="width: 4.32633%;"><span class="ts0">23</span>

</td><td class="cell15" style="width: 24.5877%;"><span class="ts0">TravelTime</span>

</td><td class="cell14" style="width: 71.0859%;"><span class="ts0">This item is in hours. For 1HR 30MIN please enter 1.5 as a decimal value.</span>

</td></tr><tr class="row1"><td class="cell12" style="width: 4.32633%;"><span class="ts0">24</span>

</td><td class="cell15" style="width: 24.5877%;"><span class="ts0">TravelItemCode</span>

</td><td class="cell14" style="width: 71.0859%;"><span class="ts0">Required</span>

</td></tr><tr class="row1"><td class="cell12" style="width: 4.32633%;"><span class="ts0">25</span>

</td><td class="cell15" style="width: 24.5877%;"><span class="ts0">ChargeTollFees</span>

</td><td class="cell14" style="width: 71.0859%;"><span class="ts0">1 / 0 - This value must be either 1 (true) or 0(false), this item must be true (1) for the rest of the fields in blue to apply.</span>

</td></tr><tr class="row1"><td class="cell12" style="width: 4.32633%;"><span class="ts0">26</span>

</td><td class="cell15" style="width: 24.5877%;"><span class="ts0">TollFeeAmount</span>

</td><td class="cell14" style="width: 71.0859%;"><span class="ts0">Required</span>

</td></tr><tr class="row1"><td class="cell12" style="width: 4.32633%;"><span class="ts0">27</span>

</td><td class="cell15" style="width: 24.5877%;"><span class="ts0">TollFeeItemCode</span>

</td><td class="cell14" style="width: 71.0859%;"><span class="ts0">Required</span>

</td></tr><tr class="row1"><td class="cell12" style="width: 4.32633%;"><span class="ts0">28</span>

</td><td class="cell15" style="width: 24.5877%;"><span class="ts0">Note</span>

</td><td class="cell14" style="width: 71.0859%;"><span class="ts0"> </span>

</td></tr></tbody></table>

</div>---

#### Import Time Log Employee Defaults

[![image.png](https://hugeerp10.co.za/hsofmanual/uploads/images/gallery/2024-10/scaled-1680-/ejYimage.png)](https://hugeerp10.co.za/hsofmanual/uploads/images/gallery/2024-10/ejYimage.png)

[![image.png](https://hugeerp10.co.za/hsofmanual/uploads/images/gallery/2024-10/scaled-1680-/kWPimage.png)](https://hugeerp10.co.za/hsofmanual/uploads/images/gallery/2024-10/kWPimage.png)

Click the select File Button to open the “open file dialog” which will allow you to navigate to your file in order select it.

Click the Upload button to upload the file onto the server.

Click the Import button to start the import process.

<p class="callout info">**Please Note:** Your file must be in a \*.CSV file format.</p>

If any errors are found, it will be written in the log, please correct the errors and start the import process again.

Below is a template of the CSV File:

<table align="left" border="1" cellpadding="0" cellspacing="0" class="MsoNormalTable" id="bkmrk-no-column-heading-co-1" style="width: 612px;" width="661"><tbody><tr><td nowrap="nowrap" style="width: 36.9219px;" width="67">**No**

</td><td nowrap="nowrap" style="width: 156.344px;" width="144">**Column Heading**

</td><td style="width: 417.734px;" width="450">**Column Data Requirements**

</td></tr><tr><td nowrap="nowrap" style="width: 36.9219px;" width="67">1

</td><td nowrap="nowrap" style="width: 156.344px;" width="144">Employee Login

</td><td style="width: 417.734px;" width="450">Required

</td></tr><tr><td nowrap="nowrap" style="width: 36.9219px;" width="67">2

</td><td nowrap="nowrap" style="width: 156.344px;" width="144">SLA Code

</td><td style="width: 417.734px;" width="450">Required

</td></tr><tr><td nowrap="nowrap" style="width: 36.9219px;" width="67">3

</td><td nowrap="nowrap" style="width: 156.344px;" width="144">Task Code

</td><td style="width: 417.734px;" width="450">Required

</td></tr><tr><td nowrap="nowrap" style="width: 36.9219px;" width="67">4

</td><td nowrap="nowrap" style="width: 156.344px;" width="144">Billing Rate Code

</td><td style="width: 417.734px;" width="450">Required

</td></tr><tr><td nowrap="nowrap" style="width: 36.9219px;" width="67">5

</td><td nowrap="nowrap" style="width: 156.344px;" width="144">Service Item Code

</td><td style="width: 417.734px;" width="450">Required

</td></tr><tr><td nowrap="nowrap" style="width: 36.9219px;" width="67">6

</td><td nowrap="nowrap" style="width: 156.344px;" width="144">Debtor Code

</td><td style="width: 417.734px;" width="450">Required from the debtors Setup screen

Not required when editing a specific debtor

</td></tr></tbody></table>

---

#### Import Time Log Global Budget

[![image.png](https://hugeerp10.co.za/hsofmanual/uploads/images/gallery/2024-10/scaled-1680-/2WHimage.png)](https://hugeerp10.co.za/hsofmanual/uploads/images/gallery/2024-10/2WHimage.png)

<span class="ts0">Click the select File Button to open the “open file dialog” which will allow you to navigate to your file in order select it.</span>

<span class="ts0">Click the Upload button to upload the file onto the server.</span>

<span class="ts0">Click the Import button to start the import process.</span>

<span class="ts0">Please Note:</span>

<p class="callout info"><span class="ts0">Your file must be in a \*.CSV file format.</span></p>

<span class="ts0">If any errors are found, it will be written in the log, please correct the errors and start the import process again.</span>

<span class="ts0">Below is a template of the CSV File:</span>

<div class="block0" id="bkmrk-no-column-heading-co-2"><table class="tbl4"><tbody><tr class="row1"><td class="cell12">**<span class="ts0">No</span>**

</td><td class="cell13">**<span class="ts0">Column Heading</span>**

</td><td class="cell14">**<span class="ts0">Column Data Requirements</span>**

</td></tr><tr class="row1"><td class="cell12"><span class="ts0">1</span>

</td><td class="cell13"><span class="ts0">Date From</span>

</td><td class="cell14"><span class="ts0">Required</span>

</td></tr><tr class="row1"><td class="cell12"><span class="ts0">2</span>

</td><td class="cell13"><span class="ts0">Date To</span>

</td><td class="cell14"><span class="ts0">Required</span>

</td></tr><tr class="row1"><td class="cell12"><span class="ts0">3</span>

</td><td class="cell13"><span class="ts0">Description</span>

</td><td class="cell14"><span class="ts0">Required</span>

</td></tr><tr class="row1"><td class="cell12"><span class="ts0">4</span>

</td><td class="cell13"><span class="ts0">Budget Quantity</span>

</td><td class="cell14"><span class="ts0">Required only if no budget Value has been provided</span>

</td></tr><tr class="row1"><td class="cell12"><span class="ts0">5</span>

</td><td class="cell13"><span class="ts0">Budget Value</span>

</td><td class="cell14"><span class="ts0">Required only if no budget Quantity has been provided</span>

</td></tr><tr class="row1"><td class="cell12"><span class="ts0">6</span>

</td><td class="cell13"><span class="ts0">Paid Extra</span>

</td><td class="cell14"><span class="ts0"> </span>

</td></tr><tr class="row1"><td class="cell12"><span class="ts0">7</span>

</td><td class="cell13"><span class="ts0">Date Paid</span>

</td><td class="cell14"><span class="ts0">Required only if Paid Extra</span>

</td></tr><tr class="row1"><td class="cell12"><span class="ts0">8</span>

</td><td class="cell13"><span class="ts0">Include Travel</span>

</td><td class="cell14"><span class="ts0">0/1</span>

</td></tr><tr class="row1"><td class="cell12"><span class="ts0">9</span>

</td><td class="cell13"><span class="ts0">Include Toll Fees</span>

</td><td class="cell14"><span class="ts0">0/1</span>

</td></tr><tr class="row1"><td class="cell12"><span class="ts0">10</span>

</td><td class="cell13"><span class="ts0">Include Disbursements</span>

</td><td class="cell14"><span class="ts0">0/1</span>

</td></tr><tr class="row1"><td class="cell12"><span class="ts0">11</span>

</td><td class="cell13"><span class="ts0">Memo</span>

</td><td class="cell14"><span class="ts0"> </span>

</td></tr><tr class="row1"><td class="cell12"><span class="ts0">12</span>

</td><td class="cell13"><span class="ts0">Debtor Code</span>

</td><td class="cell14"><span class="ts0">Required from the main debtor search screen, not when editing a specific debtor</span>

</td></tr></tbody></table>

</div>---

#### Import VCF to new customer

[![image.png](https://hugeerp10.co.za/hsofmanual/uploads/images/gallery/2024-10/scaled-1680-/OP4image.png)](https://hugeerp10.co.za/hsofmanual/uploads/images/gallery/2024-10/OP4image.png)

[![image.png](https://hugeerp10.co.za/hsofmanual/uploads/images/gallery/2024-10/scaled-1680-/1dgimage.png)](https://hugeerp10.co.za/hsofmanual/uploads/images/gallery/2024-10/1dgimage.png)

---

#### Import Linked Inventory

[![image.png](https://hugeerp10.co.za/hsofmanual/uploads/images/gallery/2024-10/scaled-1680-/UJOimage.png)](https://hugeerp10.co.za/hsofmanual/uploads/images/gallery/2024-10/UJOimage.png)

[![image.png](https://hugeerp10.co.za/hsofmanual/uploads/images/gallery/2024-10/scaled-1680-/wAVimage.png)](https://hugeerp10.co.za/hsofmanual/uploads/images/gallery/2024-10/wAVimage.png)

# Print Export Drop Down

<span class="ts0">Print and Export customer data</span>

[![image.png](https://hugeerp10.co.za/hsofmanual/uploads/images/gallery/2024-10/scaled-1680-/Z60image.png)](https://hugeerp10.co.za/hsofmanual/uploads/images/gallery/2024-10/Z60image.png)

---

#### Print

<span class="ts0">Prints the customer list based on the search criteria</span>

<span class="ts0"> </span>![](https://hugeerp0.co.za/csp/webhelp/topics/images/image(31).png)

# Debtors Setup Import

<span lang="EN-US" style="mso-ansi-language: EN-US;"> To import multiple new debtors/customers accounts into the database, follow the below procedure:</span>

<span style="color: rgb(45, 194, 107);">**<span lang="EN-US" style="mso-ansi-language: EN-US;">Go to Debtors/Customer Module&gt; Configuration&gt; Debtor/Customer Setup&gt; Import/ Export Drop Down</span>**</span>

1. <span lang="EN-US" style="mso-ansi-language: EN-US;">Click the Import/ Export Drop down</span>
2. <span lang="EN-US" style="mso-ansi-language: EN-US;">Select Debtor/Customer Import/Export</span>

[![image.png](https://hugeerp10.co.za/hsofmanual/uploads/images/gallery/2023-12/scaled-1680-/Pvwimage.png)](https://hugeerp10.co.za/hsofmanual/uploads/images/gallery/2023-12/Pvwimage.png)

<span style="mso-no-proof: yes;"></span>

<span lang="EN-US" style="mso-ansi-language: EN-US;">You can then delete the existing debtors/ customers and use the template to populate the information of the new debtors/ customers you wish to add into the system</span>

[![image.png](https://hugeerp10.co.za/hsofmanual/uploads/images/gallery/2023-12/scaled-1680-/cxUimage.png)](https://hugeerp10.co.za/hsofmanual/uploads/images/gallery/2023-12/cxUimage.png)

<table border="1" id="bkmrk-export-you-can-click" style="border-collapse: collapse; width: 100%; height: 271.969px;"><colgroup><col style="width: 23.9802%;"></col><col style="width: 76.0198%;"></col></colgroup><tbody><tr style="height: 46.5938px;"><td style="height: 46.5938px;">**Export**</td><td style="height: 46.5938px;"><span lang="EN-US" style="mso-ansi-language: EN-US;">You can click the Export button which will return the existing debtors/ customers listing into the required template for import</span></td></tr><tr style="height: 29.7969px;"><td style="height: 29.7969px;">**Import Using ID**</td><td style="height: 29.7969px;">Using this import will use the ID to import the Data</td></tr><tr style="height: 46.5938px;"><td style="height: 46.5938px;">**Select &amp;Upload File**</td><td style="height: 46.5938px;"><span lang="EN-US" style="mso-ansi-language: EN-US;">Click the **Select File** Button to open your file explorer: search and select the import file you saved in the above step.</span></td></tr><tr style="height: 29.7969px;"><td style="height: 29.7969px;">**Verify**</td><td style="height: 29.7969px;"><span lang="EN-US" style="mso-ansi-language: EN-US;">Click the Verify button to check for any errors on the import file</span></td></tr><tr style="height: 29.7969px;"><td style="height: 29.7969px;">**Import**</td><td style="height: 29.7969px;">Allows you to be able to import debtors/ Customers to the system</td></tr></tbody></table>

<span style="mso-no-proof: yes;">![](https://hugeerp10.co.za/hsofmanual/uploads/images/gallery/2023-12/embedded-image-pjbr5bll.png)</span>

1. <span lang="EN-US" style="mso-ansi-language: EN-US;">Once you have the worksheet populated with the respective new debtors’ details, save the file as a normal Excel file.</span>
2. You should get a successful result returned. If not, correct the file, resave the file and retry the Verify
3. If there are any errors when you click, verify then you can click on report to see what is causing issues
4. Once Verify is successful, click the Import Button
5. Then click the report button below import to check if all Debtors/ Customers were loaded accordingly
6. When all results are successful, and you are happy with the report
7. Your new debtors have now been uploaded into the system, and you can search for them in the normal manner.

# Add Debtor

Adding in a new Debtor or customer, tabs below defined

#### Details Tab

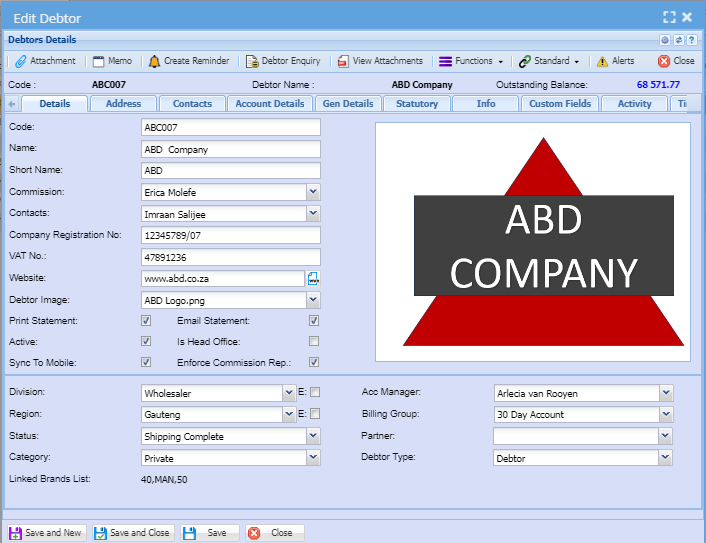
Debtors/ Customer details contain information about the debtor.

The user has to enter all essential information of a debtor or customer on this tab

<p class="callout info">After adding all information about a debtor or customer always remember to click save.</p>

---

[![image.png](https://hugeerp10.co.za/hsofmanual/uploads/images/gallery/2023-10/scaled-1680-/4Ccimage.png)](https://hugeerp10.co.za/hsofmanual/uploads/images/gallery/2023-10/4Ccimage.png)

<table border="1" id="bkmrk-debtors-code-this-is" style="width: 104.198%; height: 798.775px;"><tbody><tr style="height: 102.55px;"><td style="width: 24.8393%; height: 102.55px;">**<span class="ts0">Debtors Code</span>**</td><td style="width: 75.1359%; height: 102.55px;"><span class="ts0">This is a unique code that identifies the debtor</span>

<span class="ts0">This code needs to be filled in or the customers/ debtors information will give you an error when trying to save. </span>

<span class="ts0">The code is also used for exports.</span>

</td></tr><tr style="height: 29.7875px;"><td style="width: 24.8393%; height: 29.7875px;">**<span class="ts0">Name</span>**</td><td style="width: 75.1359%; height: 29.7875px;"><span class="ts0">Enter a legal customer or debtor name that will appear on all documents. </span></td></tr><tr style="height: 29.7875px;"><td style="width: 24.8393%; height: 29.7875px;">**<span class="ts0">Short Name</span>**</td><td style="width: 75.1359%; height: 29.7875px;"><span class="ts0">Short name that the company uses for a client</span></td></tr><tr style="height: 46.5875px;"><td style="width: 24.8393%; height: 46.5875px;">**<span class="ts0">Commission</span>**</td><td style="width: 75.1359%; height: 46.5875px;"><span class="ts0">This is a drop down and only shows commission structures set up under System Configuration Module</span></td></tr><tr style="height: 46.5875px;"><td style="width: 24.8393%; height: 46.5875px;">**<span class="ts0">Contacts</span>**</td><td style="width: 75.1359%; height: 46.5875px;"><span class="ts0">This is a drop-down and only shows contact names that have been entered from the contacts tab.</span></td></tr><tr style="height: 29.7875px;"><td style="width: 24.8393%; height: 29.7875px;">**<span class="ts0">Company Registration No</span>**</td><td style="width: 75.1359%; height: 29.7875px;"><span class="ts0">This is the company registration number</span></td></tr><tr style="height: 29.7875px;"><td style="width: 24.8393%; height: 29.7875px;">**<span class="ts0">VAT / GST No</span>**</td><td style="width: 75.1359%; height: 29.7875px;"><span class="ts0">This is the tax number for the customer if the company is VAT / GST vendor</span></td></tr><tr style="height: 29.7875px;"><td style="width: 24.8393%; height: 29.7875px;">**<span class="ts0">Customs Client No (CCN)</span>**</td><td style="width: 75.1359%; height: 29.7875px;"><span class="ts0">The Import / Export code</span></td></tr><tr style="height: 29.7875px;"><td style="width: 24.8393%; height: 29.7875px;">**<span class="ts0">Website</span>**</td><td style="width: 75.1359%; height: 29.7875px;"><span class="ts0">Enter the website of the company</span></td></tr><tr style="height: 29.7875px;"><td style="width: 24.8393%; height: 29.7875px;">**<span class="ts0">Debtor Image</span>**</td><td style="width: 75.1359%; height: 29.7875px;"><span class="ts0">This is the image that has been added under the attachment e.g. company logo</span></td></tr><tr style="height: 39.375px;"><td style="width: 24.8393%; height: 39.375px;">**<span class="ts0">Division</span>**</td><td style="width: 75.1359%; height: 39.375px;"><span class="ts0">The down arrow allows a selection according to the division the debtor is categorized into</span></td></tr><tr style="height: 37.375px;"><td style="width: 24.8393%; height: 37.375px;">**Status**</td><td style="width: 75.1359%; height: 37.375px;"><span class="ts0">Shows the debtor or customer status</span></td></tr><tr style="height: 57.6px;"><td style="width: 24.8393%; height: 57.6px;">**Region**</td><td style="width: 75.1359%; height: 57.6px;">The drop-down menu facilitates the selection process based on the debtor's categorization within their respective region.

</td></tr><tr style="height: 46.4px;"><td style="width: 24.8393%; height: 46.4px;">**<span class="ts0">Category</span>**</td><td style="width: 75.1359%; height: 46.4px;"> This drop-down menu facilitates the selection process based on the debtor's or customer category based on the categories that that have been added to the drop down. </td></tr><tr style="height: 46.4px;"><td style="width: 24.8393%; height: 46.4px;">**<span class="ts0">Acc Manager</span>**</td><td style="width: 75.1359%; height: 46.4px;">The drop down shows a list of accounts managers and only the account manager for the customer or debtor needs to be selected. </td></tr><tr style="height: 80px;"><td style="width: 24.8393%; height: 80px;">**<span class="ts0">Billing Group</span>**</td><td style="width: 75.1359%; height: 80px;"><span class="ts0">The drop down shows the types of billing groups within the organization and only the right billing group should be selected for the debtor or customer.</span>

<span class="ts0">For example, billing groups can be categorized as monthly or annually </span>

</td></tr><tr style="height: 29.7875px;"><td style="width: 24.8393%; height: 29.7875px;">**<span class="ts0">Partner</span>**</td><td style="width: 75.1359%; height: 29.7875px;">Select the business partner for the debtor or customer on the drop down. </td></tr><tr style="height: 57.6px;"><td style="width: 24.8393%; height: 57.6px;">**<span class="ts0">Debtor type</span>**</td><td style="width: 75.1359%; height: 57.6px;"><span class="ts0">The drop down shows different debtor types whether it is a debtor/ customer or a prospect. </span>

<span class="ts0">Select the correct debtor type on the drop down. </span>

</td></tr></tbody></table>

<span class="ts0">Details tab tick boxes explained</span>

<p class="callout info"><span class="ts0">Tick boxes are pretty simple to use. If the box is ticked this means yes and if a box is not ticked this means no. </span></p>

<table border="1" id="bkmrk-print-statement-put-" style="border-collapse: collapse; width: 100%; height: 177.6px;"><colgroup><col style="width: 25.3337%;"></col><col style="width: 74.6416%;"></col></colgroup><tbody><tr style="height: 29.6px;"><td style="height: 29.6px;">**Print Statement**</td><td style="height: 29.6px;">Put a tick if the statements will be printed</td></tr><tr style="height: 29.6px;"><td style="height: 29.6px;">**Active**</td><td style="height: 29.6px;">Put a tick if a debtor is active</td></tr><tr style="height: 29.6px;"><td style="height: 29.6px;">**Sync to Mobile**</td><td style="height: 29.6px;">Put a tick if you want the customer to be synced to your Webatar App (Mobile App) </td></tr><tr style="height: 29.6px;"><td style="height: 29.6px;">**Email Statement**</td><td style="height: 29.6px;">Put a tick if the email Statement</td></tr><tr style="height: 29.6px;"><td style="height: 29.6px;">**Is Head Office**</td><td style="height: 29.6px;">Put a tick if Consolidate Branch Statements at Head Office Level is required</td></tr><tr style="height: 29.6px;"><td style="height: 29.6px;">**Enforce Commission Rep**</td><td style="height: 29.6px;">Put a tick if you want to enforce sales rep commission against a customer or debtor</td></tr></tbody></table>

---

#### <span class="ts0">Address Tab</span>

The designated area for debtor address information facilitates the input of data and provides the user with convenient options to replicate the address, including the use of buttons labeled "Same as Physical," "Same as Postal," and "Same as Delivery."

A user can add multiple addresses on the debtor's or customer grid if they have multiple locations.

[![image.png](https://hugeerp10.co.za/hsofmanual/uploads/images/gallery/2023-10/scaled-1680-/biaimage.png)](https://hugeerp10.co.za/hsofmanual/uploads/images/gallery/2023-10/biaimage.png)

<table border="1" id="bkmrk-insert-address-butto" style="width: 100.494%; height: 88.8px;"><colgroup><col style="width: 28.6713%;"></col><col style="width: 71.304%;"></col></colgroup><tbody><tr style="height: 29.6px;"><td style="height: 29.6px;">**<span class="ts0">Add</span>**</td><td style="height: 29.6px;"><span class="ts0">Used to add a new address on the grid if a customer/ debtor has multiple customers.</span></td></tr><tr style="height: 29.6px;"><td style="height: 29.6px;">**<span class="ts0">Edit</span>**</td><td style="height: 29.6px;"><span class="ts0">Used to edit customer address on the grid debtor/ customer has multiple addresses </span></td></tr><tr style="height: 29.6px;"><td style="height: 29.6px;">**<span class="ts0">Delete</span>**</td><td style="height: 29.6px;"><span class="ts0">Used to delete addresses on the grid if a debtor or customer has multiple addresses</span></td></tr></tbody></table>

<table border="1" id="bkmrk-physical-enter-the-p" style="border-collapse: collapse; width: 100%; height: 418.4px;"><colgroup><col style="width: 28.5467%;"></col><col style="width: 71.4286%;"></col></colgroup><tbody><tr style="height: 35.2px;"><td style="height: 35.2px;">**Physical**

</td><td style="height: 35.2px;">Enter the physical address or legal entity address for a debtor/ customer</td></tr><tr style="height: 29.6px;"><td style="height: 29.6px;">**Postal**</td><td style="height: 29.6px;">Enter the postal address for a debtor/customer</td></tr><tr style="height: 29.6px;"><td style="height: 29.6px;">**Delivery**</td><td style="height: 29.6px;">Enter the delivery address for the debtor/ customer </td></tr><tr style="height: 29.6px;"><td style="height: 29.6px;">**Default Address**</td><td style="height: 29.6px;">This is the address that will populate on all debtor/customer documents</td></tr><tr style="height: 29.6px;"><td style="height: 29.6px;">**Address Line 1**</td><td style="height: 29.6px;">This can be a street name or the name of the business park</td></tr><tr style="height: 29.6px;"><td style="height: 29.6px;">**Address Line 2**</td><td style="height: 29.6px;">Suburb or street if line 1 consists of a business park name or estate</td></tr><tr style="height: 29.6px;"><td style="height: 29.6px;">**Address Line 3**</td><td style="height: 29.6px;">Enter the city name for a debtor/customer</td></tr><tr style="height: 29.6px;"><td style="height: 29.6px;">**Address Line 4**</td><td style="height: 29.6px;">Enter the province name for a debtor/ customer</td></tr><tr style="height: 29.6px;"><td style="height: 29.6px;">**Address Postal Code**</td><td style="height: 29.6px;">Enter the postal code for a debtor/customer </td></tr><tr style="height: 29.6px;"><td style="height: 29.6px;">**Country**</td><td style="height: 29.6px;">Select the country that the debtor or customer is in</td></tr><tr style="height: 57.6px;"><td style="height: 57.6px;">**GPS Coords**</td><td style="height: 57.6px;">Enter the GPS coordinates for the debtor/customer

One can use the button for locate on map, however this needs to be set up first

</td></tr><tr style="height: 29.6px;"><td style="height: 29.6px;">**Plus Code**</td><td style="height: 29.6px;">Enter the plus code for the debtor/ customer which can be found on Google map search</td></tr><tr style="height: 29.6px;"><td style="height: 29.6px;">**User defined Address grid**</td><td style="height: 29.6px;">This is where you will a list of addresses if a debtor/customer has multiple addresses </td></tr></tbody></table>

Buttons to define the address

<table border="1" id="bkmrk-same-as-physical-add" style="border-collapse: collapse; width: 100%; height: 223.563px;"><colgroup><col style="width: 28.1773%;"></col><col style="width: 71.798%;"></col></colgroup><tbody><tr style="height: 29.7969px;"><td style="height: 29.7969px;">**Same as Physical Address**</td><td style="height: 29.7969px;">When in an address section, use this button to copy the physical address </td></tr><tr style="height: 29.7969px;"><td style="height: 29.7969px;">**Same as Postal**</td><td style="height: 29.7969px;">When in an address section, use this button to copy the postal address</td></tr><tr style="height: 29.7969px;"><td style="height: 29.7969px;">**Same as Delivery**</td><td style="height: 29.7969px;">When in an address section, use this button to copy the delivery address</td></tr><tr style="height: 46.5938px;"><td style="height: 46.5938px;">**Copy to All**</td><td style="height: 46.5938px;">This button is used to copy addresses to be the same as all three addresses (Postal, physical and delivery addresses)</td></tr><tr style="height: 57.7812px;"><td style="height: 57.7812px;">**Get Location**</td><td style="height: 57.7812px;">Use this button to get your GPS location and plus code

This needs to be set up first

</td></tr><tr style="height: 29.7969px;"><td style="height: 29.7969px;">**Locate on Map**</td><td style="height: 29.7969px;">Click on this button to open up Google Maps to view the location of the company</td></tr></tbody></table>

---

<span style="color: rgb(34, 34, 34); font-family: var(--font-heading, var(--font-body)); font-size: 1.666em; font-weight: 400;">Contact Tab</span>

Contact details section is dedicated

<span class="ts0">In this Field you will insert the customers Contact details</span>

<span class="ts0">these could be the generic company information.</span>

[![image.png](https://hugeerp10.co.za/hsofmanual/uploads/images/gallery/2023-10/scaled-1680-/aUZimage.png)](https://hugeerp10.co.za/hsofmanual/uploads/images/gallery/2023-10/aUZimage.png)


Add or Edit Customer Contact Person Details

[![image.png](https://hugeerp10.co.za/hsofmanual/uploads/images/gallery/2023-10/scaled-1680-/8Jcimage.png)](https://hugeerp10.co.za/hsofmanual/uploads/images/gallery/2023-10/8Jcimage.png)

Debtor or Customer Fields

<table border="1" id="bkmrk-name-enter-the-conta" style="border-collapse: collapse; width: 100%; height: 564.5px;"><colgroup><col style="width: 24.5983%;"></col><col style="width: 75.4017%;"></col></colgroup><tbody><tr style="height: 29.7969px;"><td style="height: 29.7969px;">**Name**</td><td style="height: 29.7969px;">Enter the contact person's first name </td></tr><tr style="height: 29.7969px;"><td style="height: 29.7969px;">**Surname**</td><td style="height: 29.7969px;">Enter the contact person's surname</td></tr><tr style="height: 29.7969px;"><td style="height: 29.7969px;">**Post Title**</td><td style="height: 29.7969px;">Enter the contact person's work title </td></tr><tr style="height: 29.7969px;"><td style="height: 29.7969px;">**Telephone**</td><td style="height: 29.7969px;">Enter the contact person's work telephone number</td></tr><tr style="height: 57.7812px;"><td style="height: 57.7812px;">**Cell Phone**</td><td style="height: 57.7812px;">Enter the contact person's work or personal cellphone number.

This is optional

</td></tr><tr style="height: 29.7969px;"><td style="height: 29.7969px;">**Additional Number**</td><td style="height: 29.7969px;">Enter the contact person's additional telephone number or cellphone number if applicable</td></tr><tr style="height: 46.5938px;"><td style="height: 46.5938px;">**Category**</td><td style="height: 46.5938px;">This drop-down menu facilitates the selection process based on the contact person's categories that have been added to the drop down. </td></tr><tr style="height: 57.7812px;"><td style="height: 57.7812px;">**Email Address**</td><td style="height: 57.7812px;">Enter the contact person's email address.

The email address is compulsory to be able to send communication from the system

</td></tr><tr style="height: 29.7969px;"><td style="height: 29.7969px;">**Title**</td><td style="height: 29.7969px;">Select the contact person's tile on the drop down </td></tr><tr style="height: 29.7969px;"><td style="height: 29.7969px;">**Gender**</td><td style="height: 29.7969px;">Select the contact person's gender on the drop-down menu</td></tr><tr style="height: 57.7812px;"><td style="height: 57.7812px;">**ID Number**</td><td style="height: 57.7812px;">Enter the contact person's identity document if applicable

This is optional

</td></tr><tr style="height: 29.7969px;"><td style="height: 29.7969px;">**Contact Image**</td><td style="height: 29.7969px;"> Select the contact person's image if added to the list of attachments</td></tr><tr style="height: 29.7969px;"><td style="height: 29.7969px;">**Date of Birth**</td><td style="height: 29.7969px;">Enter the contact person's date of birth if applicable</td></tr><tr style="height: 29.7969px;"><td style="height: 29.7969px;">**Fax Number**</td><td style="height: 29.7969px;">Enter the contact person's fax number if applicable</td></tr><tr style="height: 46.5938px;"><td style="height: 46.5938px;">**No Email Reason**</td><td style="height: 46.5938px;">If a contact person has given a reason for not wanting to be included to the mailing list, write down the reason why before clicking on do not bulk email. </td></tr></tbody></table>

Contact Details Debtor or Customer Tick boxes

<p class="callout info"><span class="ts0">Tick boxes are pretty simple to use. If the box is ticked this means yes and if a box is not ticked this means no. </span></p>

<table border="1" id="bkmrk-south-african-id-put" style="border-collapse: collapse; width: 100%; height: 288.75px;"><colgroup><col style="width: 25.3413%;"></col><col style="width: 74.6587%;"></col></colgroup><tbody><tr style="height: 29.7969px;"><td style="height: 29.7969px;">**South African ID**</td><td style="height: 29.7969px;">Put a tick if the contact person has provided a South African Identity Number.</td></tr><tr style="height: 29.7969px;"><td style="height: 29.7969px;">**Active**</td><td style="height: 29.7969px;">Put a tick if the contact person is active</td></tr><tr style="height: 29.7969px;"><td style="height: 29.7969px;">**Statement SMS**</td><td style="height: 29.7969px;">Put a tick if a contact person should receive statements via SMS</td></tr><tr style="height: 29.7969px;"><td style="height: 29.7969px;">**Debit Order SMS**</td><td style="height: 29.7969px;">Put a tick if a contact person should receive debit order notifications via SMS</td></tr><tr style="height: 80.1719px;"><td style="height: 80.1719px;">**Do Not Bulk Email**</td><td style="height: 80.1719px;">Put a tick if the recipient does not want to receive bulk emails.

Remember to put a note confirming why the recipient does not want to receive bulk emails.

If you do not put a reason, then the system will ask for a password.

</td></tr><tr style="height: 29.7969px;"><td style="height: 29.7969px;">**Statement Email**</td><td style="height: 29.7969px;">Put a tick on if you want the recipient to receive statements via Email</td></tr><tr style="height: 29.7969px;"><td style="height: 29.7969px;">**Debit Order Email**</td><td style="height: 29.7969px;">Put a tick if the recipient wants to receive debit order notifications via Email</td></tr><tr style="height: 29.7969px;"><td style="height: 29.7969px;">**Document Email**</td><td style="height: 29.7969px;">Put a tick if the recipient would like to receive documents from the system such as invoices and quotes via Email</td></tr></tbody></table>

Contact Details Debtor or Customer Buttons

<table border="1" id="bkmrk-e-mail-update-compan" style="border-collapse: collapse; width: 100%; height: 175.156px;"><colgroup><col style="width: 26.5788%;"></col><col style="width: 73.4212%;"></col></colgroup><tbody><tr style="height: 57.7812px;"><td style="height: 57.7812px;">**e-Mail**</td><td style="height: 57.7812px;">Allows user to send email directly from the system

The email address opens up on a user's mailbox without having to leave the system

</td></tr><tr style="height: 29.7969px;"><td style="height: 29.7969px;">**Update Company**</td><td style="height: 29.7969px;">The update company button allows user to update the company details</td></tr><tr style="height: 57.7812px;"><td style="height: 57.7812px;">**Set as the default contact**</td><td style="height: 57.7812px;">Make a contact person a primary contact

This is the contact person that will appear on the documents and the details tab screen

</td></tr><tr style="height: 29.7969px;"><td style="height: 29.7969px;">**Update Documents**</td><td style="height: 29.7969px;">Allows contact person to be updated on all open invoices </td></tr></tbody></table>

Edit or Add Contact Details Additional Tab

[![image.png](https://hugeerp10.co.za/hsofmanual/uploads/images/gallery/2023-10/scaled-1680-/8D5image.png)](https://hugeerp10.co.za/hsofmanual/uploads/images/gallery/2023-10/8D5image.png)

<table border="1" id="bkmrk-department-salary-em" style="border-collapse: collapse; width: 100%; height: 238.375px;"><colgroup><col style="width: 28.5547%;"></col><col style="width: 71.4453%;"></col></colgroup><tbody><tr style="height: 29.7969px;"><td style="height: 29.7969px;">**Department**</td><td style="height: 29.7969px;">Enter the contact person's department</td></tr><tr style="height: 29.7969px;"><td style="height: 29.7969px;">**Salary**</td><td style="height: 29.7969px;">Enter the contact person's salary</td></tr><tr style="height: 29.7969px;"><td style="height: 29.7969px;">**Employment Date**</td><td style="height: 29.7969px;">Enter the contact person's salary date</td></tr><tr style="height: 29.7969px;"><td style="height: 29.7969px;">**Employer**</td><td style="height: 29.7969px;">Enter the name of the employer</td></tr><tr style="height: 29.7969px;"><td style="height: 29.7969px;">**Delivery Date**</td><td style="height: 29.7969px;">Enter delivery date if applicable</td></tr><tr style="height: 29.7969px;"><td style="height: 29.7969px;">**Deal**</td><td style="height: 29.7969px;">  
</td></tr><tr style="height: 29.7969px;"><td style="height: 29.7969px;">**Note**</td><td style="height: 29.7969px;">Add any notes related to the contact person</td></tr><tr style="height: 29.7969px;"><td style="height: 29.7969px;">**Division**</td><td style="height: 29.7969px;">Add the division that the contact person belongs to</td></tr><tr><td>**Pay Type**</td><td>Add the contact person's pay type</td></tr><tr><td>**Pay Date**</td><td>Enter the contact person's pay date</td></tr><tr><td>**Activated Date**</td><td>confirm the activated date for a contact person</td></tr></tbody></table>

---

#### Account Details Tab

<span class="ts0">This is the account details information of the Debtor Because of our security you may want to lock down this tab to users if they do not have security access to the debtor.</span>

[![image.png](https://hugeerp10.co.za/hsofmanual/uploads/images/gallery/2023-10/scaled-1680-/DQIimage.png)](https://hugeerp10.co.za/hsofmanual/uploads/images/gallery/2023-10/DQIimage.png)

<table border="1" id="bkmrk-default-currency-if-" style="width: 100%; height: 1432.06px;"><colgroup><col style="width: 28.801%;"></col><col style="width: 71.199%;"></col></colgroup><tbody><tr style="height: 102.562px;"><td style="height: 102.562px;">**<span class="ts0">Default Currency</span>**</td><td style="height: 102.562px;"><span class="ts0">If you are working with multi-currency customers, this allows you to select the default currency to work with on that customer. </span>

<span class="ts0">Note: Once the first transaction has been posted against the currency you cannot change the currency</span>

</td></tr><tr style="height: 32.5938px;"><td style="height: 32.5938px;">**<span class="ts0">Pricing Level</span>**</td><td style="height: 32.5938px;"><span class="ts0">The dropdown only shows pricing structures setup under System Configuration Module</span></td></tr><tr style="height: 46.5938px;"><td style="height: 46.5938px;">**<span class="ts0">Discount</span>**</td><td style="height: 46.5938px;"><span class="ts0">This field is only used as an information indicator of what discount rate you would discount the customer for</span></td></tr><tr style="height: 29.7969px;"><td style="height: 29.7969px;">**<span class="ts0">Discount Matrix</span>**</td><td style="height: 29.7969px;"><span class="ts0">Select the correct type of discount for a customer or debtor on the drop down</span></td></tr><tr style="height: 29.7969px;"><td style="height: 29.7969px;">**<span class="ts0">Rating</span>**</td><td style="height: 29.7969px;"><span class="ts0">Open text box to comment on the customer example Excellent Rating, Good rating</span></td></tr><tr style="height: 29.7969px;"><td style="height: 29.7969px;">**<span class="ts0">Statement type</span>**</td><td style="height: 29.7969px;">Select the correct statement type on the drop down</td></tr><tr style="height: 31.5938px;"><td style="height: 31.5938px;">**<span class="ts0">Exclude from Bank Exports</span>**</td><td style="height: 31.5938px;"><span class="ts0">Put a tick on if a user should be excluded from bank exports</span>

<span class="ts0">By default this check box is unchecked. When exporting Debtor Details, Transaction Details or Debtor Age Analysis to text files via the Bank File Export facility found under Debtor Report List. This check box will either include or exclude the debtor into the exported data.</span>

</td></tr><tr style="height: 29.7969px;"><td style="height: 29.7969px;">[**<span class="ts0">On Hold Tick</span>**](https://hugeerp10.co.za/hsofmanual/books/adm-configuration/page/on-hold "On Hold ")</td><td style="height: 29.7969px;"><span class="ts0">Put a tick on to put the customer on hold</span></td></tr><tr style="height: 29.7969px;"><td style="height: 29.7969px;">**<span class="ts0">On Hold Reason</span>**</td><td style="height: 29.7969px;"><span class="ts0">Add a reason why the customer is put on hold</span></td></tr><tr style="height: 29.7969px;"><td style="height: 29.7969px;">[**<span class="ts0">Legal Handover</span>**](https://hugeerp10.co.za/hsofmanual/books/adm-configuration/page/legal-handover)</td><td style="height: 29.7969px;"><span class="ts0">This is when you give the account to lawyers due to the account not being paid. </span></td></tr><tr style="height: 29.7969px;"><td style="height: 29.7969px;">**<span class="ts0">Enable Statement Note</span>**</td><td style="height: 29.7969px;"><span class="ts0">This will allow a user to put a note by putting a tick in a box</span></td></tr><tr style="height: 29.7969px;"><td style="height: 29.7969px;">**<span class="ts0">Statement Note</span>**</td><td style="height: 29.7969px;"><span class="ts0">This is a note that a user can add to the debtor's statement</span></td></tr><tr style="height: 80.1719px;"><td style="height: 80.1719px;">**<span class="ts0">Statement Stationery</span>**</td><td style="height: 80.1719px;"><span class="ts0">This is usually a copy of a statement customized for a debtor or customer based on their needs.</span>

<span class="ts0">It usually has minor changes to the original copy used across the system. </span>

</td></tr><tr style="height: 29.7969px;"><td style="height: 29.7969px;">**Overdue**  
</td><td style="height: 29.7969px;"><span class="ts0">The amount that is in arrears</span></td></tr><tr style="height: 29.7969px;"><td style="height: 29.7969px;">**<span class="ts0">Last Payment &amp; Date</span>**</td><td style="height: 29.7969px;"><span class="ts0">Shows, when last the account, was settled</span></td></tr><tr style="height: 29.7969px;"><td style="height: 29.7969px;">**<span class="ts0">Last Invoice &amp; Date</span>**</td><td style="height: 29.7969px;"><span class="ts0">Shows when last the customer was invoiced</span></td></tr><tr style="height: 29.7969px;"><td style="height: 29.7969px;">**<span class="ts0">Ageing</span>**</td><td style="height: 29.7969px;"><span class="ts0">This is selecting on date of the statement or date of the invoice</span></td></tr><tr style="height: 29.7969px;"><td style="height: 29.7969px;">**<span class="ts0">Account terms</span>**</td><td style="height: 29.7969px;"><span class="ts0">Select the terms of your customer in the drop-down</span></td></tr><tr style="height: 29.7969px;"><td style="height: 29.7969px;">**<span class="ts0">Tax Type</span>**</td><td style="height: 29.7969px;"><span class="ts0">Select the correct tax type on the drop down</span></td></tr><tr style="height: 31.5938px;"><td style="height: 31.5938px;">**Payment Terms**</td><td style="height: 31.5938px;">Select the correct payment term on the drop down</td></tr><tr style="height: 29.7969px;"><td style="height: 29.7969px;">**<span class="ts0">Enforce Credit Limit</span>**</td><td style="height: 29.7969px;"><span class="ts0">Putting a tick in, will be enforcing a credit limit or it could be just an indicator</span></td></tr><tr style="height: 63.3906px;"><td style="height: 63.3906px;">**<span class="ts0">Credit Limit</span>**</td><td style="height: 63.3906px;"><span class="ts0">This is a field to enter the credit limit of a customer. This field is only used as an information indicator of what interest rate you would charge the customer for overdue accounts</span></td></tr><tr style="height: 46.5938px;"><td style="height: 46.5938px;">**<span class="ts0">T/C Invoice</span>**</td><td style="height: 46.5938px;"><span class="ts0">Select the right terms and conditions that should reflect on the customer or debtor's invoice</span></td></tr><tr style="height: 46.5938px;"><td style="height: 46.5938px;">**<span class="ts0">T/C Credit Note</span>**</td><td style="height: 46.5938px;"><span class="ts0">Select the right terms and conditions that should reflect on the customer or debtor's Credit note</span></td></tr><tr style="height: 102.562px;"><td style="height: 102.562px;">**<span class="ts0">Quote Template</span>**</td><td style="height: 102.562px;"><span class="ts0">It’s a copy of a completed quote</span>

<span class="ts0">This is usually a copy of a quote customized for a debtor or customer based on their needs.</span>

<span class="ts0">It usually has minor changes to the original copy used across the system. </span>

</td></tr><tr style="height: 80.1719px;"><td style="height: 80.1719px;">**Sales Order Template**</td><td style="height: 80.1719px;"><span class="ts0">This is usually a copy of a sales order customized for a debtor or customer based on their needs.</span>

<span class="ts0">It usually has minor changes to the original copy used across the system. </span>

</td></tr><tr style="height: 80.1719px;"><td style="height: 80.1719px;">**<span class="ts0">Invoice Template</span>**</td><td style="height: 80.1719px;"><span class="ts0">This is usually a copy of an invoice customized for a debtor or customer based on their needs.</span>

<span class="ts0">It usually has minor changes to the original copy used across the system. </span>

</td></tr><tr style="height: 80.1719px;"><td style="height: 80.1719px;">**<span class="ts0">Credit Note Template</span>**</td><td style="height: 80.1719px;"><span class="ts0">This is usually a copy of a credit note customized for a debtor or customer based on their needs.</span>

<span class="ts0">It usually has minor changes to the original copy used across the system. </span>

</td></tr><tr style="height: 80.1719px;"><td style="height: 80.1719px;">**Delivery Note Template**</td><td style="height: 80.1719px;"><span class="ts0">This is usually a copy of a delivery note customized for a debtor or customer based on their needs.</span>

<span class="ts0">It usually has minor changes to the original copy used across the system. </span>

</td></tr><tr style="height: 80.1719px;"><td style="height: 80.1719px;">**Delivery Note 2 Template**</td><td style="height: 80.1719px;"><span class="ts0">This is usually a copy of a delivery note 2 customized for a debtor or customer based on their needs.</span>

<span class="ts0">It usually has minor changes to the original copy used across the system. </span>

</td></tr></tbody></table>

Buttons

<table border="1" id="bkmrk-hand-over-details-in" style="border-collapse: collapse; width: 100%;"><colgroup><col style="width: 28.8027%;"></col><col style="width: 71.1973%;"></col></colgroup><tbody><tr><td>**Hand Over Details**</td><td>This is where a user puts the details of why they are handing over a debtor or customer</td></tr><tr><td style="height: 29.7969px;">**<span class="ts0">Interest Setup</span>**</td><td style="height: 29.7969px;"><span class="ts0">Where the interest against the customer or debtor is setup</span></td></tr></tbody></table>

---

#### General Details Tab

This is a designated area for debtor or customer banking details.

[![image.png](https://hugeerp10.co.za/hsofmanual/uploads/images/gallery/2023-10/scaled-1680-/DvDimage.png)](https://hugeerp10.co.za/hsofmanual/uploads/images/gallery/2023-10/DvDimage.png)

<table border="1" id="bkmrk-account-number-debto" style="width: 100%; height: 739.797px;"><colgroup><col style="width: 30.771%;"></col><col style="width: 69.229%;"></col></colgroup><tbody><tr style="height: 35.3906px;"><td style="height: 35.3906px;">**<span class="ts0">Account Type</span>**</td><td style="height: 35.3906px;"><span class="ts0">Select the kind of account on the drop down</span>

</td></tr><tr style="height: 57.7812px;"><td style="height: 57.7812px;">**<span class="ts0">Account Holder</span>**</td><td style="height: 57.7812px;"><span class="ts0">Name the account holder in most cases if it is a company account, the account holder is usually the name of the company</span>

</td></tr><tr style="height: 33.75px;"><td style="height: 33.75px;">**Bank**</td><td style="height: 33.75px;">Add bank name of a debtor or customer</td></tr><tr style="height: 57.7812px;"><td style="height: 57.7812px;">**<span class="ts0">Account Number</span>**</td><td style="height: 57.7812px;"><span class="ts0">Debtors account number</span>

<span class="ts0">Account Type of account that the debtor holds i.e. Current account</span>

</td></tr><tr style="height: 29.7969px;"><td style="height: 29.7969px;">**<span class="ts0">Branch</span>**</td><td style="height: 29.7969px;"><span class="ts0">Branch code of the particular bank that the debtor or customer uses</span></td></tr><tr style="height: 29.7969px;"><td style="height: 29.7969px;">**<span class="ts0">Branch Code</span>**</td><td style="height: 29.7969px;"><span class="ts0">Add Branch code </span></td></tr><tr style="height: 29.7969px;"><td style="height: 29.7969px;">**<span class="ts0">Swift Code</span>**</td><td style="height: 29.7969px;"><span class="ts0">Add swift code - this is a unique code for every bank</span></td></tr><tr style="height: 29.7969px;"><td style="height: 29.7969px;">**<span class="ts0">IBAN</span>**</td><td style="height: 29.7969px;"><span class="ts0">Add the debtor or customer's international bank account number</span></td></tr><tr style="height: 29.7969px;"><td style="height: 29.7969px;">**<span class="ts0">Debit Order</span>**</td><td style="height: 29.7969px;"><span class="ts0">When putting a tick in the box, allows a debit order</span></td></tr><tr style="height: 80.1719px;"><td style="height: 80.1719px;">**<span class="ts0">Debit order Day</span>**</td><td style="height: 80.1719px;"><span class="ts0">The day the money will be debited from a customer’s account</span>

<span class="ts0">Once Off Debit Order the debit order can be done once or by putting the tick in the box or continuously without a tick</span>

</td></tr><tr style="height: 35.3906px;"><td style="height: 35.3906px;">**<span class="ts0">Duration</span>**</td><td style="height: 35.3906px;"><span class="ts0">The period that debit order should be deducted for. This is usually in months</span>

</td></tr><tr style="height: 35.3906px;"><td style="height: 35.3906px;">**<span class="ts0">Instalment</span>**

</td><td style="height: 35.3906px;"><span class="ts0">The amount to be deducted from the bank every month</span>

</td></tr><tr style="height: 35.3906px;"><td style="height: 35.3906px;">**<span class="ts0">Plan ID</span>**</td><td style="height: 35.3906px;"><span class="ts0">Add plan ID</span>

</td></tr><tr style="height: 35.3906px;"><td style="height: 35.3906px;">**<span class="ts0">Repayment</span>**</td><td style="height: 35.3906px;"><span class="ts0">Add how much needs to be paid</span>

</td></tr><tr style="height: 35.3906px;"><td style="height: 35.3906px;">**<span class="ts0">Activation Fee</span>**</td><td style="height: 35.3906px;"><span class="ts0">Add the amount to activate the debit order</span>

</td></tr><tr style="height: 29.7969px;"><td style="height: 29.7969px;">**<span class="ts0">Credit Card Number</span>**</td><td style="height: 29.7969px;"><span class="ts0">Add the debtor's or customer's credit card number</span></td></tr><tr style="height: 29.7969px;"><td style="height: 29.7969px;">**<span class="ts0">Expiry Date</span>**</td><td style="height: 29.7969px;"><span class="ts0">Add credit card's expiry date</span></td></tr><tr style="height: 29.7969px;"><td style="height: 29.7969px;">**<span class="ts0">Security Code</span>**</td><td style="height: 29.7969px;"><span class="ts0">Add a card verification value (CVV) is a 3 or 4 security code usually found at the back of a credit card</span></td></tr><tr style="height: 29.7969px;"><td style="height: 29.7969px;">**<span class="ts0">Employee Category</span>**</td><td style="height: 29.7969px;"><span class="ts0">Select the employee category on the drop down</span></td></tr><tr style="height: 29.7969px;"><td style="height: 29.7969px;">**<span class="ts0">BankIT Intelligence Keywords</span>**</td><td style="height: 29.7969px;"><span class="ts0">Add keywords for a statement to remember the debtor or customer </span></td></tr><tr><td>**<span class="ts0">Exclude from BankIT</span>**</td><td><span class="ts0">Add a tick if the debtor or customer should be excluded from BankIT</span></td></tr></tbody></table>

Buttons

<table border="1" id="bkmrk-load-card-details-up" style="border-collapse: collapse; width: 100%;"><colgroup><col style="width: 25.3413%;"></col><col style="width: 74.6587%;"></col></colgroup><tbody><tr><td>**Load Card Details**</td><td>Click on Load Card details to add credit card details</td></tr><tr><td>**Update Card Details**</td><td>Click update Card details after adding credit card details.</td></tr></tbody></table>

---

#### Statutory Tab

The fields on the statutory tab can be altered to fit the organisation's needs.

These requirements may vary depending on your jurisdiction and the nature of your business.

[![image.png](https://hugeerp10.co.za/hsofmanual/uploads/images/gallery/2023-10/scaled-1680-/Juoimage.png)](https://hugeerp10.co.za/hsofmanual/uploads/images/gallery/2023-10/Juoimage.png)

<table border="1" id="bkmrk-company-reg-number-a" style="border-collapse: collapse; width: 100%; height: 476.75px;"><colgroup><col style="width: 26.1112%;"></col><col style="width: 74.0124%;"></col></colgroup><tbody><tr style="height: 29.7969px;"><td style="height: 29.7969px;">**Company Reg Number**</td><td style="height: 29.7969px;">Add debtor or customer company registration number </td></tr><tr style="height: 29.7969px;"><td style="height: 29.7969px;">**Income Tax Number**</td><td style="height: 29.7969px;">Add debtor or customers' Income tax</td></tr><tr style="height: 29.7969px;"><td style="height: 29.7969px;">**VAT Number**</td><td style="height: 29.7969px;">Add the customer or debtor VAT/GST number</td></tr><tr style="height: 29.7969px;"><td style="height: 29.7969px;">**UIF Registration Number**</td><td style="height: 29.7969px;">Add debtor or customer UIF Registration Number</td></tr><tr style="height: 29.7969px;"><td style="height: 29.7969px;">**PAYE Registration Number**</td><td style="height: 29.7969px;">Add debtor's or customer's pay as you earn number</td></tr><tr style="height: 29.7969px;"><td style="height: 29.7969px;">**WC Registration Number**</td><td style="height: 29.7969px;">Add the debtor or customer's work compensation number</td></tr><tr style="height: 29.7969px;"><td style="height: 29.7969px;">**SDL Registration Number**</td><td style="height: 29.7969px;">Add debtor's or customer's skills development levy number</td></tr><tr style="height: 29.7969px;"><td style="height: 29.7969px;">**BEE Accreditation Level**</td><td style="height: 29.7969px;">Select the debtor's or customer's BEE accreditation level on the drop down</td></tr><tr style="height: 29.7969px;"><td style="height: 29.7969px;">**Route**</td><td style="height: 29.7969px;"> </td></tr><tr style="height: 29.7969px;"><td style="height: 29.7969px;">**Other Registrations**</td><td style="height: 29.7969px;">If a company has multiple company numbers they can be added on the registrations fields</td></tr><tr style="height: 29.7969px;"><td style="height: 29.7969px;">**Target for the Year**</td><td style="height: 29.7969px;">The targetted amount for the financial year-end</td></tr><tr style="height: 29.7969px;"><td style="height: 29.7969px;">**Registration Date**</td><td style="height: 29.7969px;">Add registration data</td></tr><tr style="height: 29.7969px;"><td style="height: 29.7969px;">**BEE Score**</td><td style="height: 29.7969px;">Select the correct BEE score on the drop down</td></tr><tr style="height: 29.7969px;"><td style="height: 29.7969px;">**Annual Returns**</td><td style="height: 29.7969px;">Add actual SARS returns</td></tr><tr style="height: 29.7969px;"><td style="height: 29.7969px;">**Year End Date**</td><td style="height: 29.7969px;">Select financial year-end date on the drop down</td></tr><tr style="height: 29.7969px;"><td style="height: 29.7969px;">**VAT Category**</td><td style="height: 29.7969px;">Select the correct VAT/GST number on the drop down</td></tr></tbody></table>

---

#### Info Tab

Info Tab is mainly used for document passwords.

[![image.png](https://hugeerp10.co.za/hsofmanual/uploads/images/gallery/2023-10/scaled-1680-/ndpimage.png)](https://hugeerp10.co.za/hsofmanual/uploads/images/gallery/2023-10/ndpimage.png)

<table border="1" id="bkmrk-%C2%A0-21" style="border-collapse: collapse; width: 100%; height: 786.407px;"><colgroup><col style="width: 27.0685%;"></col><col style="width: 72.9315%;"></col></colgroup><tbody><tr style="height: 29.7969px;"><td style="height: 29.7969px;">**Information**</td><td style="height: 29.7969px;">Add any additional information regarding documents</td></tr><tr style="height: 29.7969px;"><td style="height: 29.7969px;">**Sync to Web Shop**</td><td style="height: 29.7969px;">Put a tick if details debtor's or customer information needs to sync to Web Shop</td></tr><tr style="height: 29.7969px;"><td style="height: 29.7969px;">**Inter-Company Account**</td><td style="height: 29.7969px;">Put a if a debtor or customer has an Inter-Company Account</td></tr><tr style="height: 29.7969px;"><td style="height: 29.7969px;">**Limit Branches**</td><td style="height: 29.7969px;">Put a tick to limit branches</td></tr><tr style="height: 29.7969px;"><td style="height: 29.7969px;">**External ID**</td><td style="height: 29.7969px;">Add debtor or customer ID if applicable</td></tr><tr style="height: 57.7812px;"><td style="height: 57.7812px;">**Commission Invoice**</td><td style="height: 57.7812px;">Choose the right commission for the invoice

Choose between item commission percentage or Item commission rate.

</td></tr><tr style="height: 80.1719px;"><td style="height: 80.1719px;">**PDF Quote Password**</td><td style="height: 80.1719px;">Add a PDF Quote password

This password will be used by a debtor or customer to open a PDF Quotation document on their side

</td></tr><tr style="height: 80.1719px;"><td style="height: 80.1719px;">**PDF Sales Order Password**</td><td style="height: 80.1719px;">Add a PDF Sales Order password

This password will be used by a debtor or customer to open a PDF Sales order document on their side

</td></tr><tr style="height: 80.1719px;"><td style="height: 80.1719px;">**PDF Invoice Password**</td><td style="height: 80.1719px;">Add a PDF Invoice password

This password will be used by a debtor or customer to open a PDF Invoice document on their side

</td></tr><tr style="height: 80.1719px;"><td style="height: 80.1719px;">**PDF Credit Note Password**</td><td style="height: 80.1719px;">Add a PDF Credit Note password

This password will be used by a debtor or customer to open a PDF Credit Note document on their side

</td></tr><tr style="height: 80.1719px;"><td style="height: 80.1719px;">**PDF Statement Password**</td><td style="height: 80.1719px;">Add a PDF Statement password

This password will be used by a debtor or customer to open a PDF Statement document on their side

</td></tr><tr style="height: 29.7969px;"><td style="height: 29.7969px;">**SMS Invoice**</td><td style="height: 29.7969px;">Put a tick on to SMS invoices</td></tr><tr style="height: 29.7969px;"><td style="height: 29.7969px;">**Cell 1**</td><td style="height: 29.7969px;">Put a primary cell number to SMS invoices</td></tr><tr style="height: 29.7969px;"><td style="height: 29.7969px;">**Cell 2**</td><td style="height: 29.7969px;">Put a secondary cell number to SMS Invoices</td></tr><tr style="height: 29.7969px;"><td style="height: 29.7969px;">**SMS statement**</td><td style="height: 29.7969px;">Put a tick to SMS statements to a customer or debtor</td></tr><tr style="height: 29.7969px;"><td style="height: 29.7969px;">**Cell 1**</td><td style="height: 29.7969px;">Put a primary cell number to SMS Statements</td></tr><tr style="height: 29.7969px;"><td style="height: 29.7969px;">**Cell 2**</td><td style="height: 29.7969px;">Put a secondary cell number to SMS Statements</td></tr></tbody></table>

---

#### Custom Fields Tab

This tab is a versatile and fully customizable feature within the debtor or customer setup. It is designed to empower businesses with the flexibility to tailor their debtor or customer setup according to their unique needs. This tab offers a dynamic interface that allows users to configure and display debtor data, metrics, and insights in a way that best serves the debtor or customer's needs.

[![image.png](https://hugeerp10.co.za/hsofmanual/uploads/images/gallery/2023-10/scaled-1680-/kg1image.png)](https://hugeerp10.co.za/hsofmanual/uploads/images/gallery/2023-10/kg1image.png)

---

#### Activity Tab

The activity tab helps a debtor or customer to view all activities against a debtor or customer.

Put a tick on any activity that you want to show on the grid for example if you only want to view reminders and memos only put a tick on reminders and memos.

[![image.png](https://hugeerp10.co.za/hsofmanual/uploads/images/gallery/2023-10/scaled-1680-/WD8image.png)](https://hugeerp10.co.za/hsofmanual/uploads/images/gallery/2023-10/WD8image.png)

<table border="1" id="bkmrk-%C2%A0-29" style="border-collapse: collapse; width: 100%; height: 59.5938px;"><colgroup><col style="width: 28.5803%;"></col><col style="width: 71.5433%;"></col></colgroup><tbody><tr style="height: 29.7969px;"><td style="height: 29.7969px;">**Order by**</td><td style="height: 29.7969px;">Select the order you want to view grid by</td></tr><tr style="height: 29.7969px;"><td style="height: 29.7969px;">**Date From**</td><td style="height: 29.7969px;">Select state date</td></tr><tr><td>**Date To**</td><td>Select to date</td></tr></tbody></table>

---

#### Time Logging Tab

Time logging Tab streamlines the management of time and travel dedicated to debtor or customer-related activities and projects.

[![image.png](https://hugeerp10.co.za/hsofmanual/uploads/images/gallery/2023-10/scaled-1680-/fm6image.png)](https://hugeerp10.co.za/hsofmanual/uploads/images/gallery/2023-10/fm6image.png)

<table border="1" id="bkmrk-charge-travel-fees-c" style="border-collapse: collapse; width: 100%; height: 616.484px;"><colgroup><col style="width: 22.7441%;"></col><col style="width: 77.2559%;"></col></colgroup><tbody><tr style="height: 35.3906px;"><td style="height: 35.3906px;">**Charge Travel Fees**</td><td class="cell70" style="height: 35.3906px;"><span class="ts0">Tick if Travel Fees are to be charged</span>

</td></tr><tr style="height: 29.7969px;"><td style="height: 29.7969px;">**Charge Toll Fees**</td><td class="cell69" style="height: 29.7969px;"> <span class="ts0">Tick if Toll Fees are to be charged</span></td></tr><tr style="height: 35.3906px;"><td style="height: 35.3906px;">**Travel Bill Type**</td><td class="cell70" style="height: 35.3906px;"><span class="ts0">Select either Distance or Time Charged</span>

</td></tr><tr style="height: 35.3906px;"><td style="height: 35.3906px;">**Distance Rate**</td><td class="cell70" style="height: 35.3906px;"><span class="ts0">A distance value to be used in the calculations of a traveled billing value</span>

</td></tr><tr style="height: 35.3906px;"><td style="height: 35.3906px;">**Travel Item**</td><td class="cell70" style="height: 35.3906px;"><span class="ts0">Select the appropriate inventory item for travel</span>

</td></tr><tr style="height: 35.3906px;"><td style="height: 35.3906px;">**Toll Fees Item**</td><td class="cell70" style="height: 35.3906px;"><span class="ts0">Select the appropriate inventory item for toll fees</span>

</td></tr><tr style="height: 29.7969px;"><td style="height: 29.7969px;">**Toll Value**</td><td class="cell69" style="height: 29.7969px;">type the amount for tollgates</td></tr><tr style="height: 29.7969px;"><td style="height: 29.7969px;">**Non Billable**</td><td style="height: 29.7969px;">Put a tick if billable</td></tr><tr style="height: 29.7969px;"><td style="height: 29.7969px;">**GPS Longitude**</td><td style="height: 29.7969px;">Measures the distance going east or west</td></tr><tr style="height: 29.7969px;"><td style="height: 29.7969px;">**Contract**</td><td style="height: 29.7969px;">Select a contract for the debtor or customer</td></tr><tr style="height: 35.3906px;"><td style="height: 35.3906px;">**Task**</td><td class="cell66" style="height: 35.3906px;"><span class="ts0">Select the desired task</span>

</td></tr><tr style="height: 35.3906px;"><td style="height: 35.3906px;">**Billing Rate**</td><td class="cell66" style="height: 35.3906px;"><span class="ts0">Select the desired Billing Rate</span>

</td></tr><tr style="height: 29.7969px;"><td style="height: 29.7969px;">**Potential Billing Rate**</td><td class="cell65" style="height: 29.7969px;"> Select the potential billing rate on the drop down</td></tr><tr style="height: 29.7969px;"><td style="height: 29.7969px;">**Service Item**</td><td style="height: 29.7969px;">Select the correct service item on the drop down</td></tr><tr style="height: 35.3906px;"><td style="height: 35.3906px;">**Time Rate**</td><td class="cell70" style="height: 35.3906px;"><span class="ts0">A time value to be used in the calculations of a time travelled billing value</span>

</td></tr><tr style="height: 35.3906px;"><td style="height: 35.3906px;">**Time Travelled**</td><td class="cell70" style="height: 35.3906px;"><span class="ts0">Time duration of the journey</span>

</td></tr><tr style="height: 29.7969px;"><td style="height: 29.7969px;">**Distance To**</td><td class="cell69" style="height: 29.7969px;"> Enter the ending distance</td></tr><tr style="height: 29.7969px;"><td style="height: 29.7969px;">**GPS Latitude**</td><td style="height: 29.7969px;">Measures the distance going North or South</td></tr><tr style="height: 29.7969px;"><td style="height: 29.7969px;">**Grid**</td><td style="height: 29.7969px;">A list of Timelogs against a debtor or customer</td></tr></tbody></table>

#### Keyboard quick keys

Quick keys help access functions using the keyboard

Used with Alt + Letter

<table border="1" id="bkmrk-search-alt-%2B-s-searc" style="width: 100%;"><tbody><tr><td style="width: 15.8484%;">Attachmen**<span style="text-decoration: underline;">t</span>**</td><td style="width: 8.69955%;">Alt + t</td><td style="width: 75.4282%;">Opens the Attchment window.</td></tr><tr><td style="width: 15.8484%;"><span style="text-decoration: underline;">**M**</span>emo</td><td style="width: 8.69955%;">Alt + m</td><td style="width: 75.4282%;">Opens the Memo window</td></tr><tr><td style="width: 15.8484%;">Create **R**eminder</td><td style="width: 8.69955%;">Alt + r</td><td style="width: 75.4282%;">Creates a reminder for the Debtor</td></tr><tr><td style="width: 15.8484%;">Debtor Enqu**<span style="text-decoration: underline;">i</span>**ry</td><td style="width: 8.69955%;">Alt + i</td><td style="width: 75.4282%;">Opens the Debtor Enquiry window</td></tr><tr><td style="width: 15.8484%;">Vie<span style="text-decoration: underline;">**w**</span> Attachments</td><td style="width: 8.69955%;">Alt + w</td><td style="width: 75.4282%;">Opens a view window displaying a list of attachments, each attachment can be viewed individually</td></tr><tr><td style="width: 15.8484%;">**F**unctions</td><td style="width: 8.69955%;">Alt + f</td><td style="width: 75.4282%;">Focus on the button</td></tr><tr><td style="width: 15.8484%;">Tab Detail</td><td style="width: 8.69955%;">Alt + 1</td><td style="width: 75.4282%;">Detail Tab</td></tr><tr><td style="width: 15.8484%;">Tab Stepping</td><td style="width: 8.69955%;">Alt + 2</td><td style="width: 75.4282%;">Pressing Alt + 2 repeatedly will step through all the tabs e.g. Details, Address, Contact Person etc.</td></tr></tbody></table>

# Debtors Setup Functions

Debtors setup functions and debtors setup search functions are similar.

Some functions allow one to open up in the search, while others allow opening up in the debtors setup window

[![image.png](https://hugeerp10.co.za/hsofmanual/uploads/images/gallery/2024-10/scaled-1680-/M5yimage.png)](https://hugeerp10.co.za/hsofmanual/uploads/images/gallery/2024-10/M5yimage.png)

---

#### Set Time Log defaults

Set the defaults for this customer for time logs

These defaults come from the CRM module - Contract Maintenance

[![image.png](https://hugeerp10.co.za/hsofmanual/uploads/images/gallery/2024-10/scaled-1680-/g9Rimage.png)](https://hugeerp10.co.za/hsofmanual/uploads/images/gallery/2024-10/g9Rimage.png)

Sets the customer to the defaults under Contract maintenance

[![image.png](https://hugeerp10.co.za/hsofmanual/uploads/images/gallery/2024-10/scaled-1680-/JB8image.png)](https://hugeerp10.co.za/hsofmanual/uploads/images/gallery/2024-10/JB8image.png)

---

#### Target

See more information on Target in this section - [Target information manual](https://hugeerp10.co.za/hsofmanual/books/adm-configuration/page/debtor-functions#bkmrk-targets%C2%A0)

---

#### Contract Setup

See more information on Contract Setup in this section - [Contract Setup information manual](https://hugeerp10.co.za/hsofmanual/books/adm-configuration/page/debtor-functions#bkmrk-contracts)

# Standard Drop Down

#### <span class="ts15">Standard Drop Down</span>

<span style="color: rgb(45, 194, 107);">**<span class="ts15">Debtors Module&gt; Configuration&gt; Debtors Setup &gt;</span><span class="ts15">Edit Debtor&gt; Standard</span>**</span>

[![image.png](https://hugeerp10.co.za/hsofmanual/uploads/images/gallery/2023-10/scaled-1680-/5wsimage.png)](https://hugeerp10.co.za/hsofmanual/uploads/images/gallery/2023-10/5wsimage.png)

<table border="1" id="bkmrk-debtor-settings-comp" style="border-collapse: collapse; width: 100%; height: 255.172px;"><colgroup><col style="width: 32.7464%;"></col><col style="width: 67.2536%;"></col></colgroup><tbody><tr style="height: 46.5938px;"><td style="height: 46.5938px;">**Debtor Settings**</td><td style="height: 46.5938px;">Allows a user to tick a tick to suppress the autoload of allocations line on GL cash book</td></tr><tr style="height: 29.7969px;"><td style="height: 29.7969px;">**Company Profile Branches**</td><td style="height: 29.7969px;">Allows you to select branches to be attached to the debtor/ customer</td></tr><tr style="height: 29.7969px;"><td style="height: 29.7969px;">**Branch Link (Tick Is Head Office First)**</td><td style="height: 29.7969px;">Allows you to group debtors/ customers under their head office company</td></tr><tr style="height: 29.7969px;"><td style="height: 29.7969px;">**Branch Ledger Accounts**</td><td style="height: 29.7969px;">Allows you to manage branch setup</td></tr><tr style="height: 29.7969px;"><td style="height: 29.7969px;">**Linked Brands**</td><td style="height: 29.7969px;">Allows you to link brands to a debtor/ customer</td></tr><tr style="height: 29.7969px;"><td style="height: 29.7969px;">**Support Task**</td><td style="height: 29.7969px;">Allows you to link support tasks to a debtor/ customer</td></tr><tr style="height: 29.7969px;"><td style="height: 29.7969px;">**Linked Inventory**</td><td style="height: 29.7969px;">Allows you to link inventory items to a debtor/ customer</td></tr><tr style="height: 29.7969px;"><td style="height: 29.7969px;">**Linked UOM**</td><td style="height: 29.7969px;">Allows you to link unit of measure to a debtor/ customer</td></tr></tbody></table>

---

#### Debtor Settings

##### Suppress Autoload of Allocation Lines on GL Cashbook

Put a tick to suppress autoload of allocation lines on the general ledger cash book

Leave a tick off if you do not wish to suppress autoload of allocation lines on the general ledger cash book

[![image.png](https://hugeerp10.co.za/hsofmanual/uploads/images/gallery/2023-11/scaled-1680-/6wKimage.png)](https://hugeerp10.co.za/hsofmanual/uploads/images/gallery/2023-11/6wKimage.png)

---

##### Margin check and enforce

Margin check and enforce checks sales documents for minimum margin on overall sales document

1. Invoice
2. Quote
3. Sales Order
4. Job Usage invoice
5. Job Percentage invoice

[![image.png](https://hugeerp10.co.za/hsofmanual/uploads/images/gallery/2023-12/scaled-1680-/mPZimage.png)](https://hugeerp10.co.za/hsofmanual/uploads/images/gallery/2023-12/mPZimage.png)

**Margin check**

Margin check is per debtor, but set at the system configuration

Margin check, is on Save and process with warning message

<table border="1" id="bkmrk-save-brings-up-a-war" style="border-collapse: collapse; width: 100%;"><colgroup><col style="width: 19.5378%;"></col><col style="width: 80.4622%;"></col></colgroup><tbody><tr><td>**Save**</td><td>Brings up a warning message to say that this document is trading under margin</td></tr><tr><td>**Process**</td><td>Brings up a warning message to say that this document is trading under margin but with a Continue or Cancel</td></tr></tbody></table>

**Enforce Margin**

Authorised Sales Margin users are setup at the user setup

<table border="1" id="bkmrk-process-brings-up-a-" style="border-collapse: collapse; width: 100%;"><colgroup><col style="width: 20.5556%;"></col><col style="width: 79.568%;"></col></colgroup><tbody><tr><td>**Process**</td><td>Brings up a warning message to say that this document is trading under margin, but with a continue or cancel</td></tr><tr><td>**Continue**</td><td>Requires that an additional supervisor must authorises the invoice

</td></tr></tbody></table>

[![image.png](https://hugeerp10.co.za/hsofmanual/uploads/images/gallery/2024-10/scaled-1680-/lgRimage.png)](https://hugeerp10.co.za/hsofmanual/uploads/images/gallery/2024-10/lgRimage.png)

**System Configuration default settings**

Set defaults for all new debtors to be setup as

1. Creating a new debtor
2. Creating a customer from Webatar mobile app

[![image.png](https://hugeerp10.co.za/hsofmanual/uploads/images/gallery/2024-10/scaled-1680-/EC8image.png)](https://hugeerp10.co.za/hsofmanual/uploads/images/gallery/2024-10/EC8image.png)

**Sales Margin Supervisor setup**

Setup user to allow to override enforce margin on process of sales document

[![image.png](https://hugeerp10.co.za/hsofmanual/uploads/images/gallery/2023-12/scaled-1680-/eHXimage.png)](https://hugeerp10.co.za/hsofmanual/uploads/images/gallery/2023-12/eHXimage.png)

---

#### Company Profile Branches

<span class="ts0">This part shows debtors branches.</span>

<span class="ts0">On the left you will see a list of available Braches and to be able to select a branch you need to move it to the right. </span>

<span class="ts0">To move branch to the right you need to highlight it and click on add branch or double click on it</span>

[![image.png](https://hugeerp10.co.za/hsofmanual/uploads/images/gallery/2023-11/scaled-1680-/VBpimage.png)](https://hugeerp10.co.za/hsofmanual/uploads/images/gallery/2023-11/VBpimage.png)

Buttons

<table border="1" id="bkmrk-add-branch-button-us" style="width: 88.8889%; height: 59.3907px;"><colgroup><col style="width: 26.4316%;"></col><col style="width: 73.5684%;"></col></colgroup><tbody><tr style="height: 29.5938px;"><td style="height: 29.5938px;">**<span class="ts0">Add Branch </span>**</td><td style="height: 29.5938px;"><span class="ts0">First, highlight the branch you want to move to the right or want to activate then click add branch</span>

<span class="ts0">If you don't want to click add branch you can double-click the branch you want to select or move across</span>

</td></tr><tr style="height: 29.7969px;"><td style="height: 29.7969px;">**<span class="ts0">Delete Branch</span>**</td><td style="height: 29.7969px;"><span class="ts0">Removes branch from the right column to the left column </span><span class="ts0">or double click on the selected branch to deactivate it</span>

</td></tr></tbody></table>

---

#### Branch Link (Tick Is Head Office First)

<span class="ts0">Tick on denotes - Head office</span>

<span class="ts0">Links Branches to the head office</span>

<span class="ts0"> [![image.png](https://hugeerp10.co.za/hsofmanual/uploads/images/gallery/2023-11/scaled-1680-/Hi5image.png)](https://hugeerp10.co.za/hsofmanual/uploads/images/gallery/2023-11/Hi5image.png)</span>

<table border="1" id="bkmrk-add-button-to-add-de" style="border-collapse: collapse; width: 100%;"><colgroup><col style="width: 27.2099%;"></col><col style="width: 72.8889%;"></col></colgroup><tbody><tr><td>**Add Button**</td><td><span class="ts0">To add debtors/customers associated with the branch you need to click on the select a debtor/ customer drop down</span>

<span class="ts0">Click on the debtor/ customer that you want to add then click add</span>

</td></tr><tr><td>**Grid**</td><td>A list of branches associated with the head office will appear on the grid</td></tr></tbody></table>

---

#### Branch Ledger Accounts

<span class="ts0">It’s where debtor’s internal branches are setup for movement of transactions.</span>

![](https://hugeerp0.co.za/csp/webhelp/topics/images/image(453).png)

<table border="1" id="bkmrk-branch-select-a-bran" style="width: 100%;"><colgroup><col style="width: 26.0831%;"></col><col style="width: 73.9169%;"></col></colgroup><tbody><tr><td>**<span class="ts0">Branch</span>**</td><td><span class="ts0">Select a branch</span></td></tr><tr><td>**<span class="ts0">Is a Branch</span>**</td><td><span class="ts0">If it’s a branch the box will be ticked</span></td></tr><tr><td>**<span class="ts0">Sales Account</span>**</td><td><span class="ts0">Sales account should be selected for the movement of transactions between the branches</span></td></tr><tr><td>**<span class="ts0">Cost of Sales Account</span>**</td><td><span class="ts0">Cost of Sales account should be selected for the movement of transactions between the branches</span></td></tr></tbody></table>

---

#### Support Task

[![image.png](https://hugeerp10.co.za/hsofmanual/uploads/images/gallery/2023-11/scaled-1680-/vVVimage.png)](https://hugeerp10.co.za/hsofmanual/uploads/images/gallery/2023-11/vVVimage.png)

<table border="1" id="bkmrk-small-arrow-pointing" style="border-collapse: collapse; width: 100%; height: 120px;"><colgroup><col style="width: 26.8519%;"></col><col style="width: 73.2717%;"></col></colgroup><tbody><tr style="height: 29.7875px;"><td style="height: 29.7875px;">**Small Arrow Pointing Right**</td><td style="height: 29.7875px;">Highlight a support task you want to move across and click the small arrow to do so</td></tr><tr style="height: 29.7875px;"><td style="height: 29.7875px;">**Big Arrow Pointing Right**</td><td style="height: 29.7875px;">Move all support tasks from available to the selected side</td></tr><tr style="height: 29.7875px;"><td style="height: 29.7875px;">**Small Arrow Pointing Left**</td><td style="height: 29.7875px;">Deactivate one support task by highlighting it and moving it across to the available side </td></tr><tr style="height: 29.7875px;"><td style="height: 29.7875px;">**Big Arrow Pointing Left**</td><td style="height: 29.7875px;">Deactivate all support tasks by moving them across to the available side</td></tr></tbody></table>

---

#### Linked Inventory

Click on the dropdown to select the inventory items you want to link to a debtor/ customer

[![image.png](https://hugeerp10.co.za/hsofmanual/uploads/images/gallery/2023-11/scaled-1680-/Ieqimage.png)](https://hugeerp10.co.za/hsofmanual/uploads/images/gallery/2023-11/Ieqimage.png)

Buttons

<table border="1" id="bkmrk-add-select-the-inven" style="border-collapse: collapse; width: 100%; height: 59.2px;"><colgroup><col style="width: 24.4653%;"></col><col style="width: 75.51%;"></col></colgroup><tbody><tr style="height: 29.6px;"><td style="height: 29.6px;">**Add**</td><td style="height: 29.6px;">Select the inventory items you want to link to a debtor/ customer then click add</td></tr><tr style="height: 29.6px;"><td style="height: 29.6px;">**Delete**</td><td style="height: 29.6px;">To delete a inventory item linked to a debtor/ customer, select a debtor/ customer then click delete button</td></tr></tbody></table>

---

#### Linked UOM

This is where you link a unit of measure associated with a client

[![image.png](https://hugeerp10.co.za/hsofmanual/uploads/images/gallery/2023-11/scaled-1680-/6egimage.png)](https://hugeerp10.co.za/hsofmanual/uploads/images/gallery/2023-11/6egimage.png)

<table border="1" id="bkmrk-small-arrow-pointing-1" style="border-collapse: collapse; width: 100%; height: 120px;"><colgroup><col style="width: 26.8519%;"></col><col style="width: 73.2717%;"></col></colgroup><tbody><tr style="height: 29.7875px;"><td style="height: 29.7875px;">**Small Arrow Pointing Right**</td><td style="height: 29.7875px;">Highlight unit of measure you want to move across and click the small arrow to do so</td></tr><tr style="height: 29.7875px;"><td style="height: 29.7875px;">**Big Arrow Pointing Right**</td><td style="height: 29.7875px;">Move all unit of measures from available to the selected side</td></tr><tr style="height: 29.7875px;"><td style="height: 29.7875px;">**Small Arrow Pointing Left**</td><td style="height: 29.7875px;">Deactivate one unit of measure by highlighting it and moving it across to the available side </td></tr><tr style="height: 29.7875px;"><td style="height: 29.7875px;">**Big Arrow Pointing Left**</td><td style="height: 29.7875px;">Deactivate all unit of measures by moving them across to the available side</td></tr></tbody></table>

# Recurring Debtors Invoice Setup

The recurring debtor setup consists of three steps:

1. <span lang="EN-NZ" style="mso-ascii-font-family: Calibri; mso-ascii-theme-font: minor-latin; mso-hansi-font-family: Calibri; mso-hansi-theme-font: minor-latin; mso-bidi-font-family: Calibri; mso-bidi-theme-font: minor-latin; mso-ansi-language: EN-NZ; mso-fareast-language: EN-NZ;">Create contract</span>
2. <span lang="EN-NZ">Create invoice template</span>
3. <span lang="EN-NZ">Apply to debtor</span>

#### <span lang="EN-NZ" style="mso-ascii-font-family: Calibri; mso-ascii-theme-font: minor-latin; mso-hansi-font-family: Calibri; mso-hansi-theme-font: minor-latin; mso-bidi-font-family: Calibri; mso-bidi-theme-font: minor-latin; mso-ansi-language: EN-NZ; mso-fareast-language: EN-NZ;">Step 1: Creating Contract</span>

<span style="color: rgb(45, 194, 107);">**<span lang="EN-NZ" style="mso-ascii-font-family: Calibri; mso-ascii-theme-font: minor-latin; mso-hansi-font-family: Calibri; mso-hansi-theme-font: minor-latin; mso-bidi-font-family: Calibri; mso-bidi-theme-font: minor-latin; mso-ansi-language: EN-NZ; mso-fareast-language: EN-NZ;">Go to Systems configuration&gt; General menu&gt; Recurring Transactions</span>**</span>

[![image.png](https://hugeerp10.co.za/hsofmanual/uploads/images/gallery/2024-04/scaled-1680-/8Ebimage.png)f](https://hugeerp10.co.za/hsofmanual/uploads/images/gallery/2024-04/8Ebimage.png)

To set up the contract

[![image.png](https://hugeerp10.co.za/hsofmanual/uploads/images/gallery/2024-04/scaled-1680-/4Gzimage.png)](https://hugeerp10.co.za/hsofmanual/uploads/images/gallery/2024-04/4Gzimage.png)

<table border="1" id="bkmrk-code-enter-code-desc" style="border-collapse: collapse; width: 100%; height: 342.387px;"><colgroup><col style="width: 28.3024%;"></col><col style="width: 71.6976%;"></col></colgroup><tbody><tr style="height: 31.1875px;"><td style="height: 31.1875px;">**Code**</td><td style="height: 31.1875px;"><span lang="EN-NZ" style="font-size: 11.0pt; font-family: 'Calibri',sans-serif; mso-ascii-theme-font: minor-latin; mso-hansi-theme-font: minor-latin; mso-bidi-theme-font: minor-latin; mso-ansi-language: EN-NZ; mso-fareast-language: EN-NZ;">Enter Code</span></td></tr><tr style="height: 29.6px;"><td style="height: 29.6px;">**Description**</td><td style="height: 29.6px;">Enter a description</td></tr><tr style="height: 46.4px;"><td style="height: 46.4px;">**Long Description**</td><td style="height: 46.4px;">The long description can be the same as the description but has functionality for additional information</td></tr><tr style="height: 29.6px;"><td style="height: 29.6px;">**Active**</td><td style="height: 29.6px;">Put the tick on if the recurring transaction should be in use or is active</td></tr><tr style="height: 57.6px;"><td style="height: 57.6px;">**Transaction Period Setup**</td><td style="height: 57.6px;">Select the date you wish the monthly invoice to be created or generated on

This can be either on the last day/ first day or on a specific day of the month

</td></tr><tr style="height: 29.6px;"><td style="height: 29.6px;">**Number of Transactions**</td><td style="height: 29.6px;">Enter the number of invoices to be created.

This can be looked at as the terms of the contract

<span lang="EN-GB" style="font-size: 11.0pt; font-family: 'Calibri',sans-serif; mso-ascii-theme-font: minor-latin; mso-hansi-theme-font: minor-latin; mso-bidi-theme-font: minor-latin;">Enter the number of invoices to be created. (usually the contract term, eg. 6. 12, 24)</span>

</td></tr></tbody></table>

---

#### Step 2: Creating Invoice Template

The next step will be to create an invoice template

To create an invoice template, one needs to capture the invoice to begin with

Capture an invoice, to capture an invoice [click here](https://hugeerp10.co.za/hsofmanual/books/bdm-activity/page/add-invoice "Creating Invoice Template")

Once the invoice details have been captured and saved, click the functions drop down

Select Convert to Invoice Template as shown below:

[![image.png](https://hugeerp10.co.za/hsofmanual/uploads/images/gallery/2024-05/scaled-1680-/neWimage.png)](https://hugeerp10.co.za/hsofmanual/uploads/images/gallery/2024-05/neWimage.png)

After, clicking Convert to Invoice Template the screen below will pop up

[![image.png](https://hugeerp10.co.za/hsofmanual/uploads/images/gallery/2024-04/scaled-1680-/ixQimage.png)](https://hugeerp10.co.za/hsofmanual/uploads/images/gallery/2024-04/ixQimage.png)

<table border="1" id="bkmrk-code-enter-the-code-" style="border-collapse: collapse; width: 100%;"><colgroup><col style="width: 22.008%;"></col><col style="width: 77.992%;"></col></colgroup><tbody><tr><td>**Code**</td><td>Enter the code for your invoice template

</td></tr><tr><td>**Description**</td><td>Enter the description for your invoice template</td></tr></tbody></table>

Click Continue

This will now complete the creation of your invoice template

---

#### Step 3: Apply To Debtor/Customer

<span class="ts15">To apply debtor, follow these steps</span>

<span class="ts15">Go to Debtor/ Customer Module&gt; Configuration then search for the customer to whom you want to apply the recurring transaction to </span>

<span class="ts15">Once you find the debtor, go to the functions drop down then click View Recurring Transactions</span>

[![image.png](https://hugeerp10.co.za/hsofmanual/uploads/images/gallery/2024-04/scaled-1680-/zhCimage.png)](https://hugeerp10.co.za/hsofmanual/uploads/images/gallery/2024-04/zhCimage.png)

---

##### <span class="ts0">Summary Tab</span>

<span class="ts0">When you click View Recurring Transactions it will take you to the screen below:</span>

<p class="callout info"><span class="ts0"> </span><span class="ts0">To see a list of recurring transactions, click on search, and the list will appear. </span></p>

[![image.png](https://hugeerp10.co.za/hsofmanual/uploads/images/gallery/2023-11/scaled-1680-/DAZimage.png)](https://hugeerp10.co.za/hsofmanual/uploads/images/gallery/2023-11/DAZimage.png)

Or, click add to create a new recurring transaction

[![image.png](https://hugeerp10.co.za/hsofmanual/uploads/images/gallery/2023-11/scaled-1680-/6jyimage.png)](https://hugeerp10.co.za/hsofmanual/uploads/images/gallery/2023-11/6jyimage.png)
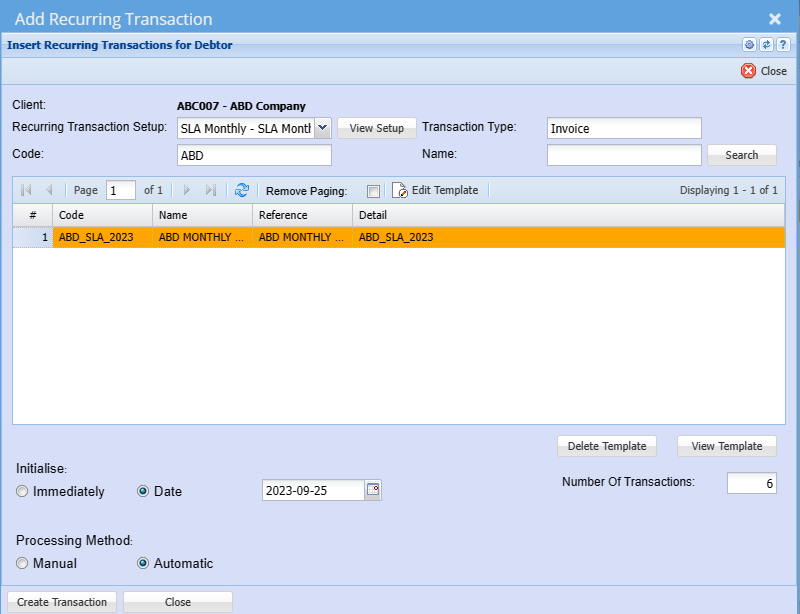
<table border="1" id="bkmrk-client-client-name-w"><colgroup><col></col><col></col></colgroup><tbody><tr><td>**Client**</td><td>The client's name will pop-up</td></tr><tr><td>**Recurring Transaction Setup**</td><td>Select the recurring transaction setup on the dropdown</td></tr><tr><td>**Code**</td><td>Enter the code for the template that you want to use</td></tr><tr><td>**Transaction Type**</td><td>Add the type of transaction </td></tr><tr><td>**Edit Template**</td><td>This button allows you to change the template code or description</td></tr><tr><td>**Grid**</td><td>The grid shows a list of available templates when you click search</td></tr><tr><td>**Initialise**</td><td>Choose if you want the recurring transaction to be effective immediately or on a specific date</td></tr><tr><td>**Processing Method**</td><td>Choose a processing criteria</td></tr><tr><td>**Number of Transactions**</td><td>Enter the number of transactions you want to</td></tr></tbody></table>

Buttons

<table border="1" id="bkmrk-view-setup-this-butt"><colgroup><col></col><col></col></colgroup><tbody><tr><td>**View Setup**</td><td>This button allows you to view, add or edit recurring transaction setup</td></tr><tr><td>**Delete Template**</td><td>This button will enable you to delete a template</td></tr><tr><td>**View Template**</td><td>This button will enable you to view and edit a template

</td></tr></tbody></table>

Click Add Transactions

[![image.png](https://hugeerp10.co.za/hsofmanual/uploads/images/gallery/2024-05/scaled-1680-/Yatimage.png)](https://hugeerp10.co.za/hsofmanual/uploads/images/gallery/2024-05/Yatimage.png)

Select the recurring transaction you wish to set up

[![image.png](https://hugeerp10.co.za/hsofmanual/uploads/images/gallery/2024-05/scaled-1680-/Ul8image.png)](https://hugeerp10.co.za/hsofmanual/uploads/images/gallery/2024-05/Ul8image.png)

<span lang="EN-GB" style="mso-no-proof: yes;">Select the Recurring Transaction Setup: This is the Recurring Contract description you created in Step 1 </span>

<span lang="EN-GB" style="mso-no-proof: yes;">Select the Transaction Type: This will typically be invoiced</span>

<span lang="EN-GB" style="mso-no-proof: yes;">Select the required invoice template</span>

<span lang="EN-GB" style="mso-no-proof: yes;">This is the template created in step 2</span>

<span lang="EN-GB" style="mso-no-proof: yes;">Enter the code or description and click search</span>

<span lang="EN-GB" style="mso-no-proof: yes;">Click once on the template on the grid to select - It will be highlighted in orange</span>

<span lang="EN-GB" style="mso-no-proof: yes;">Leave the initialise setting on immediately</span>

<span lang="EN-GB" style="mso-no-proof: yes;">Select whether the processing method is to be processed manually or automatically</span>

<p class="callout info"><span lang="EN-GB" style="mso-no-proof: yes;">Automatic processing will result in the invoice automatically processing and no edits will be made </span></p>

<p class="callout info"><span lang="EN-GB" style="mso-no-proof: yes;">Selecting manual processing will result in the monthly recurring invoice status. For the invoice to be changed from recurring to preparation status this will need to be done manually.</span></p>

<span lang="EN-GB" style="mso-no-proof: yes;">You can make the changes required before processing the invoice manually. </span>

<span lang="EN-GB" style="mso-no-proof: yes;">Once the above selections have been entered, click the Create Transactions Button.</span>

[![image.png](https://hugeerp10.co.za/hsofmanual/uploads/images/gallery/2024-05/scaled-1680-/S4Eimage.png)](https://hugeerp10.co.za/hsofmanual/uploads/images/gallery/2024-05/S4Eimage.png)

<span lang="EN-GB" style="mso-no-proof: yes;">Then Click Yes.</span>

[![image.png](https://hugeerp10.co.za/hsofmanual/uploads/images/gallery/2024-05/scaled-1680-/aSZimage.png)](https://hugeerp10.co.za/hsofmanual/uploads/images/gallery/2024-05/aSZimage.png)

---

##### Detail Tab

This is where you find your detailed recurring transaction details

[![image.png](https://hugeerp10.co.za/hsofmanual/uploads/images/gallery/2023-11/scaled-1680-/tKlimage.png)](https://hugeerp10.co.za/hsofmanual/uploads/images/gallery/2023-11/tKlimage.png)
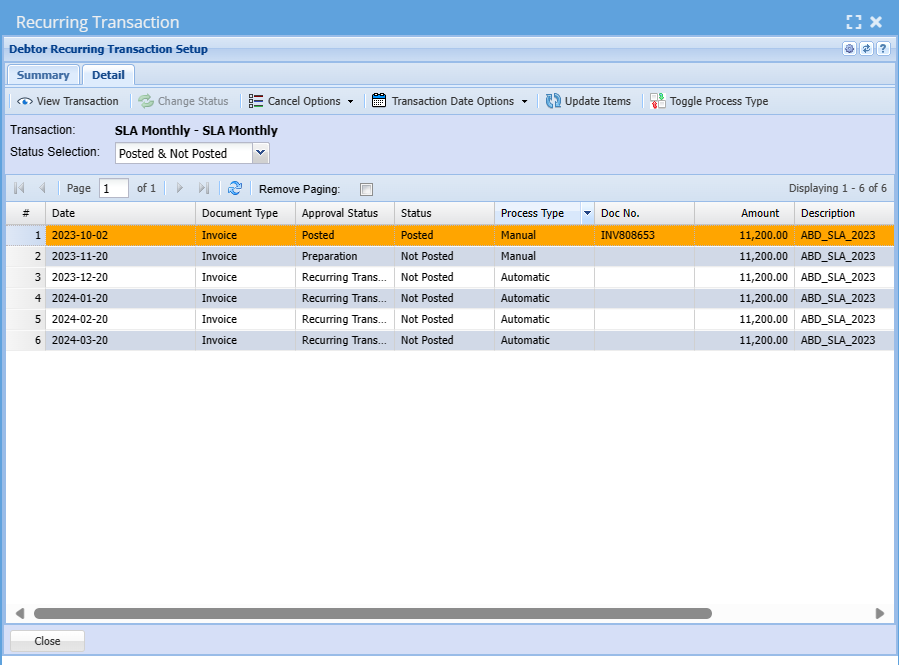
<table border="1" id="bkmrk-view-transaction-thi"><colgroup><col></col><col></col></colgroup><tbody><tr><td>**View Transaction** </td><td>This tab allows you to view a detailed invoice

If the invoice is not yet processed, you can make changes to the invoice it will allow you to save and close.

</td></tr><tr><td>**Change Status**</td><td>When a transaction status is read as Recurring transactions you cannot process it.

To be able to process the transaction you need to change the status to preparation

To change the status from recurring transaction to preparation you need to click on the change status button

</td></tr><tr><td>**Cancel Options Drop Down**</td><td>You are allowed to cancel a single recurring transaction or all on the dropdown

You can also reinstate a single transaction or all transactions

</td></tr><tr><td>**Transaction Date Options Drop Down**</td><td>You can change a date or update dates.

First, you need to edit the date on a transaction then click change or update

</td></tr><tr><td>**Update Items**</td><td>You can add a new line or delete a line on one item then select update item so that all items can be updated.

</td></tr><tr><td>**Toggle Process Type**</td><td>Allows you to change Process type from manual to automatic and vice versa</td></tr><tr><td>**Grid**</td><td>Shows a quick overview of the transaction

</td></tr></tbody></table>

---

#### To Apply Automatic Increases (Escalation)

In the event where the recurring contract stipulates an annual increase or needs to be amended you will the click on the invoice where the amendment needs to start from and edit the invoice detail or value

[![image.png](https://hugeerp10.co.za/hsofmanual/uploads/images/gallery/2024-05/scaled-1680-/xzTimage.png)](https://hugeerp10.co.za/hsofmanual/uploads/images/gallery/2024-05/xzTimage.png)

Double click to open the invoice line

Amend the prices and or details

[![image.png](https://hugeerp10.co.za/hsofmanual/uploads/images/gallery/2024-05/scaled-1680-/0cgimage.png)](https://hugeerp10.co.za/hsofmanual/uploads/images/gallery/2024-05/0cgimage.png)

Once the invoice has been adjusted as required, Click Save

Click on the functions Dropdown

Click update recurring

[![image.png](https://hugeerp10.co.za/hsofmanual/uploads/images/gallery/2024-05/scaled-1680-/bi7image.png)](https://hugeerp10.co.za/hsofmanual/uploads/images/gallery/2024-05/bi7image.png)

The window below will be displayed, where you can opt to update either the invoice header or the information on the invoice line

[![image.png](https://hugeerp10.co.za/hsofmanual/uploads/images/gallery/2024-05/scaled-1680-/peiimage.png)](https://hugeerp10.co.za/hsofmanual/uploads/images/gallery/2024-05/peiimage.png)

[![image.png](https://hugeerp10.co.za/hsofmanual/uploads/images/gallery/2024-05/scaled-1680-/W8cimage.png)](https://hugeerp10.co.za/hsofmanual/uploads/images/gallery/2024-05/W8cimage.png)

<span lang="EN-GB" style="font-size: 11.0pt; font-family: 'Calibri',sans-serif; mso-ascii-theme-font: minor-latin; mso-hansi-theme-font: minor-latin; mso-bidi-theme-font: minor-latin; mso-no-proof: yes;">  
</span>

<span lang="EN-GB" style="font-size: 11.0pt; font-family: 'Calibri',sans-serif; mso-ascii-theme-font: minor-latin; mso-hansi-theme-font: minor-latin; mso-bidi-theme-font: minor-latin;"></span>

# Recurring Update Default Contact Person for Emailing

<span class="ts0">Update can be done on the invoice document or template or customer setup contact person</span>

<span class="ts0"><span style="color: rgb(45, 194, 107);">**<span class="ts15">Debtors </span><span class="ts15">Module</span><span class="ts15">&gt; </span><span class="ts15">Configuration</span><span class="ts15">&gt; </span><span class="ts15">Debtors Setup&gt; Edit Debtor&gt; Contact Person&gt; Add</span>**</span></span>

[![image.png](https://hugeerp10.co.za/hsofmanual/uploads/images/gallery/2024-05/scaled-1680-/75pimage.png)](https://hugeerp10.co.za/hsofmanual/uploads/images/gallery/2024-05/75pimage.png)

<span class="ts0">There are two option</span>

<table border="1" id="bkmrk-1.-all-open-recurrin" style="border-collapse: collapse; width: 100.123%;"><colgroup><col style="width: 52.2018%;"></col><col style="width: 47.7744%;"></col></colgroup><tbody><tr><td> **<span class="ts0">All Open Recurring</span>**</td><td>**<span class="ts0">All Open Preparation</span>**</td></tr><tr><td><span class="ts0">This will update all contracts with all unprocessed recurring invoices</span></td><td><span class="ts0">Updates all invoices that are in preparation</span></td></tr><tr><td><span class="ts0">Does not change processed documents</span></td><td>  
</td></tr><tr><td><span class="ts0">Updates all invoice templates for this customer</span></td><td> </td></tr></tbody></table>

After clicking update documents you will see the screen below:

[![image.png](https://hugeerp10.co.za/hsofmanual/uploads/images/gallery/2024-05/scaled-1680-/JXEimage.png)](https://hugeerp10.co.za/hsofmanual/uploads/images/gallery/2024-05/JXEimage.png)

Select a document you want to update and put a tick on the option you want to update

Once, complete click continue

and the screen below will appear notifying you that the update has been completed successfully

[![image.png](https://hugeerp10.co.za/hsofmanual/uploads/images/gallery/2024-05/scaled-1680-/OZcimage.png)](https://hugeerp10.co.za/hsofmanual/uploads/images/gallery/2024-05/OZcimage.png)

---

#### <span class="ts0">To access Contacts Via debtors documents</span>

<span class="ts0">Go to an open document</span>

<span class="ts0">After, accessing the invoice you wish to view, or you have added go to the Address Tab of document</span>

<span class="ts13">C</span><span class="ts0">lick on View button</span>

[![image.png](https://hugeerp10.co.za/hsofmanual/uploads/images/gallery/2024-05/scaled-1680-/xb2image.png)](https://hugeerp10.co.za/hsofmanual/uploads/images/gallery/2024-05/xb2image.png)

To edit, add or delete a contact person click on the view button,

It will take you to the screen below:

[![image.png](https://hugeerp10.co.za/hsofmanual/uploads/images/gallery/2024-05/scaled-1680-/qMrimage.png)](https://hugeerp10.co.za/hsofmanual/uploads/images/gallery/2024-05/qMrimage.png)

<table border="1" id="bkmrk-add-click-this-butto" style="border-collapse: collapse; width: 100%;"><colgroup><col style="width: 17.6735%;"></col><col style="width: 82.3265%;"></col></colgroup><tbody><tr><td>**Add**</td><td>Click this button to add a new contact</td></tr><tr><td>**Edit**</td><td>Click this button to edit an existing debtor contact persons</td></tr><tr><td>**Delete**</td><td>Click this button to delete an existing contact persons</td></tr></tbody></table>

# Linked Brands

Linked Brands allows you to link product brands to a specific debtor or customer.

if your inventory items are inked to brands and the item is invoiced, the Brand is automatically linked to the debtor along with the invoice date. This indicates the date the brand was first purchased.

You can also link brands to a debtor manually.

To link a brand to a debtor manually, search for the required debtor and click on the standards drop down.

Select Linked Brands

[![image.png](https://hugeerp10.co.za/hsofmanual/uploads/images/gallery/2024-01/scaled-1680-/YOCimage.png)](https://hugeerp10.co.za/hsofmanual/uploads/images/gallery/2024-01/YOCimage.png)

Click once on the required brand on the left and then click the Arrow to move the Brand to the Selected box on the right.

Alternatively, double click on the required Brand.

[![image.png](https://hugeerp10.co.za/hsofmanual/uploads/images/gallery/2024-01/scaled-1680-/PPcimage.png)](https://hugeerp10.co.za/hsofmanual/uploads/images/gallery/2024-01/PPcimage.png)

You will note the brand moves to the Selected grid on the right and the date the link was done is populated.

[![image.png](https://hugeerp10.co.za/hsofmanual/uploads/images/gallery/2024-01/scaled-1680-/ZKcimage.png)](https://hugeerp10.co.za/hsofmanual/uploads/images/gallery/2024-01/ZKcimage.png)

If the Brand linked is thereafter delinked from the debtor, then the date will be removed as well.

# Branch Link Process

<span lang="EN-US" style="mso-ansi-language: EN-US;">Linking Debtor branch accounts to Head office account</span>

<span lang="EN-US" style="mso-ansi-language: EN-US;">Debtor sub-accounts are clients that have multiple branches or outlets where the invoice is generated against the specific branch and payment is made by the Head office or main account</span>

<span lang="EN-US" style="mso-ansi-language: EN-US;">Debtor statements can thus be generated for the head office account with details of purchases by the individual branches</span>

<span lang="EN-US" style="mso-ansi-language: EN-US;">To setup and link debtor accounts to a main account:</span>

<span style="color: rgb(45, 194, 107);">**<span lang="EN-US" style="mso-ansi-language: EN-US;">Go to debtor Module&gt; Configuration&gt; Debtor Setup</span>**</span>

<span lang="EN-US" style="mso-ansi-language: EN-US;">Create a debtor account for each individual branch including the main head office account</span>

<span lang="EN-US" style="mso-ansi-language: EN-US;">On the head office account setup, select or activate the “is Head office” tick box</span>

<span lang="EN-US" style="mso-ansi-language: EN-US;">Close the account setup and reopen or edit</span>

<span lang="EN-US" style="mso-ansi-language: EN-US;">Click the Standard Dropdown</span>

<span style="mso-no-proof: yes;">![](https://hugeerp10.co.za/hsofmanual/uploads/images/gallery/2024-04/embedded-image-n5ulcm6o.png)  
</span>

<span lang="EN-US" style="mso-ansi-language: EN-US;">Select Branch Link</span>

<span lang="EN-US" style="mso-ansi-language: EN-US;">Enter the debtor code of the sub-account or branch account</span>

<span lang="EN-US" style="mso-ansi-language: EN-US;">Click add</span>

<span style="mso-no-proof: yes;">![](https://hugeerp10.co.za/hsofmanual/uploads/images/gallery/2024-04/embedded-image-rkceofiu.png)  
</span>

<span lang="EN-US" style="mso-ansi-language: EN-US;">Enter the next branch account and click add</span>

<span lang="EN-US" style="mso-ansi-language: EN-US;">Once all branch accounts have been linked:</span>

<span lang="EN-US" style="mso-ansi-language: EN-US;">Click save and close</span>

<span lang="EN-US" style="mso-ansi-language: EN-US;"></span>

# Debtors ERROR saving

Debtors Error saving a new customer

The system does not allow a Debtors code to be

1. Duplicated
2. Blank
3. Space in Code (Must be a valid code)

<p class="callout warning">Invalid Code has been entered.</p>

Blank or space is entered in code, this is not allowed

[![image.png](https://hugeerp10.co.za/hsofmanual/uploads/images/gallery/2023-10/scaled-1680-/R02image.png)](https://hugeerp10.co.za/hsofmanual/uploads/images/gallery/2023-10/R02image.png)
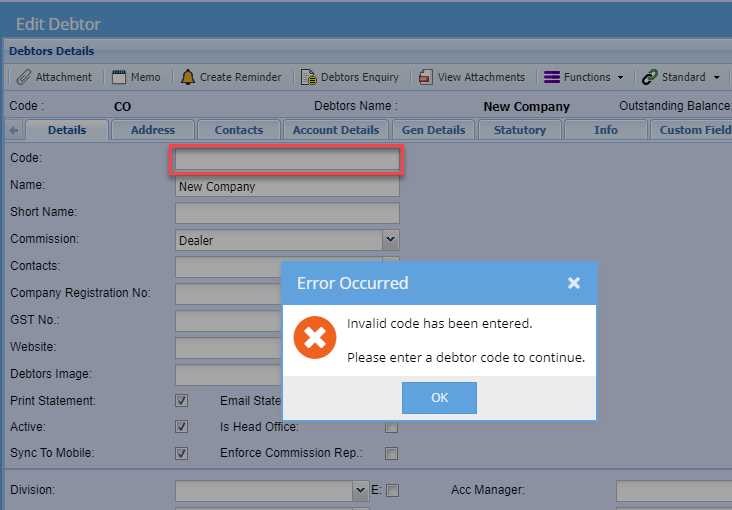
# Debtors created date

When the customer is created, the system logs the date it was created.

There are several places to find the created date.

1. User Access Report
2. Debtors export
3. Debtor enquiry
4. Debtors listing report

User Access

[![image.png](https://hugeerp10.co.za/hsofmanual/uploads/images/gallery/2025-09/scaled-1680-/2Bpimage.png)](https://hugeerp10.co.za/hsofmanual/uploads/images/gallery/2025-09/2Bpimage.png)
Debtors Export

[![image.png](https://hugeerp10.co.za/hsofmanual/uploads/images/gallery/2025-09/scaled-1680-/jzZimage.png)](https://hugeerp10.co.za/hsofmanual/uploads/images/gallery/2025-09/jzZimage.png)
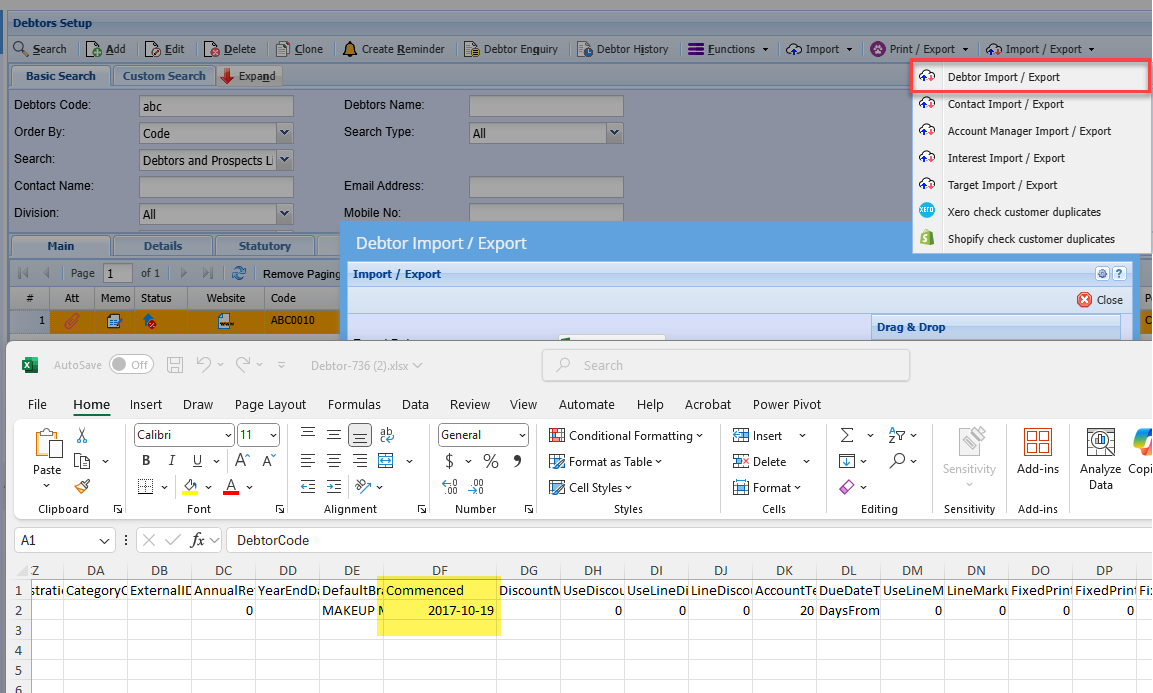
Debtors enquiry

[![image.png](https://hugeerp10.co.za/hsofmanual/uploads/images/gallery/2025-09/scaled-1680-/zzTimage.png)](https://hugeerp10.co.za/hsofmanual/uploads/images/gallery/2025-09/zzTimage.png)

Debtors listing report

[![image.png](https://hugeerp10.co.za/hsofmanual/uploads/images/gallery/2025-09/scaled-1680-/GNBimage.png)](https://hugeerp10.co.za/hsofmanual/uploads/images/gallery/2025-09/GNBimage.png)