Additional Debtors Properties Menu
- Additional Debtors Properties Search
- Debtors Additional Properties
- Category Setup
- Invoice Group Setup
- Sales Item Map
- Billing Group
- Additional Debtor Property Import
- Credit Reason
- Shipping Terms
- Shipping Methods
- Payment Terms
Additional Debtors Properties Search
This is where additional debtor’s properties are added or amended.
If you wish to link debtors to Divisions, Regions and Invoice groups, this is where you would set up these respective properties.
To create a new Division for example, click the relevant Tab and click the insert button
Video Training Manual 2016 - Click Here
Debtors Module> Configuration> Add. Debtors Properties
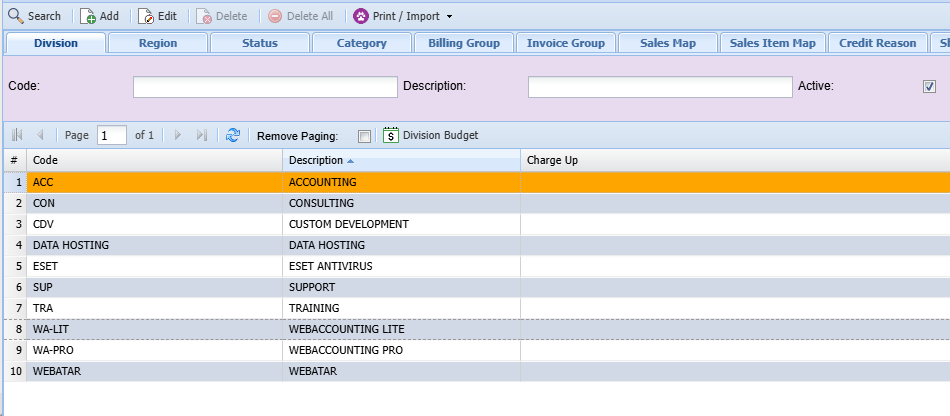
| Search | Searches all the divisions either by code or description. |
| Add | Allows to create a new division |
| Edit | Allows changes on the existing division |
| Division Tab | Shows a list of all divisions |
| Region Tab | shows a list of regions |
| Status Tab | Shows Status of something in the process. |
| Invoice Group Tab | Invoice Groups |
| Sales Map Tab | shows movement of transaction in the divisions. |
Debtors Additional Properties
The system caters for the categorization of master data as well as transactions.
Additional properties are used for these categorizations.
Several fields in the system can be used for categorization purposes such as Division, Region, Category, Billing group, etc.
The categories are Company-specific and as such can be defined by your company.
Should you wish to use these properties, you will need to first decide on whether you need to use a single category or multiple categories
Once you have decided how many levels of categorization you require, you will choose which of the properties best suit your requirements.
if you have different branches, you could use Division as a means to distinguish transactions from one branch versus another
Or if you wish to differentiate your Clients by account terms, you could use billing Group Property
To add debtors/customers additional properties go to:
Debtors Module> Configuration> Add Debtor Properties
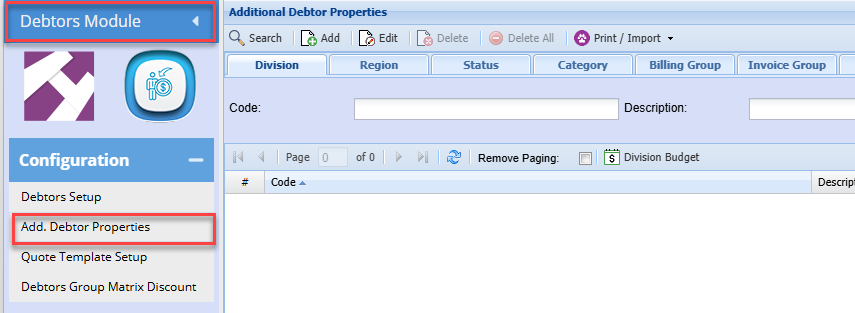
- Click on the Tab related to the respective Property you decided to use
- Click Add Button
- Enter a Code
- Enter a Description
- Click Save and Close or Save and New to add another option
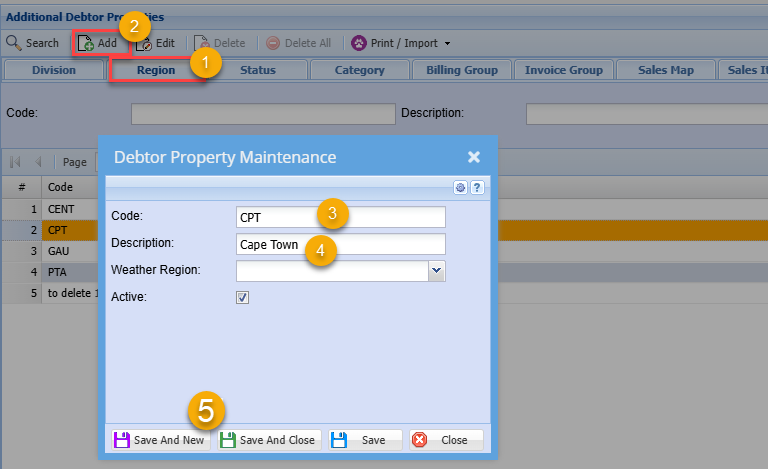
Once you have added all the required options, you can click on another Tab, eg. Region and add the required option in a similar manner
Should you now wish to set default Divisions and Regions against the debtors, you can go to the Debtor Setup and edit the respective Debtor
Configuration> Debtors Setup>
Enter the Debtor code or name
Click Search
Edit the Debtor Setup
Click the Division Drop Down Arrow
Select the required Division this debtor is to be allocated to
Do the same with Region..
You do not need to use multiple of the properties. Should you choose, to only use one of the properties, this is fine
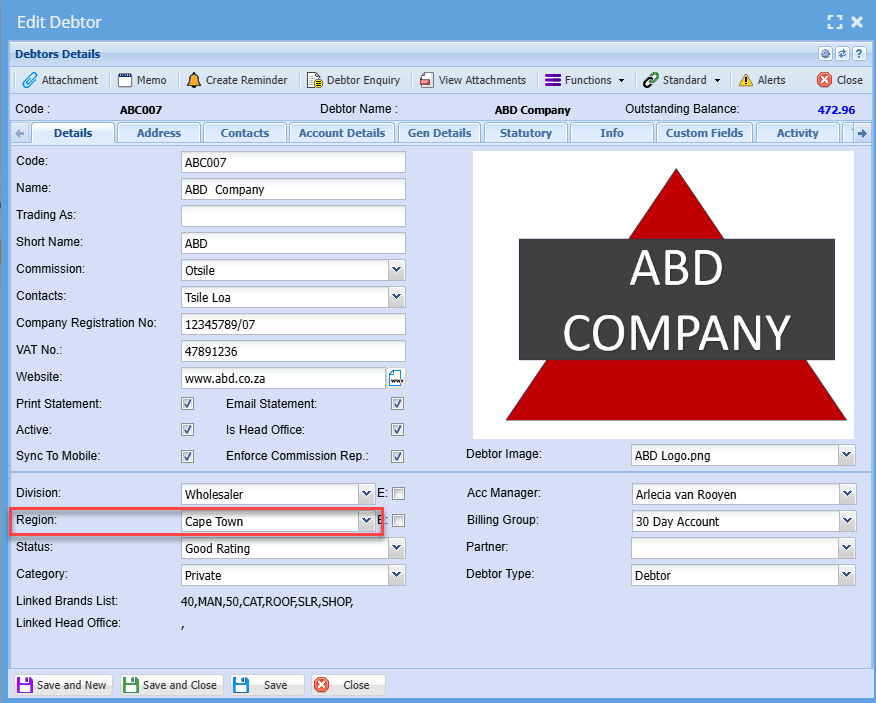
Click Save and Close
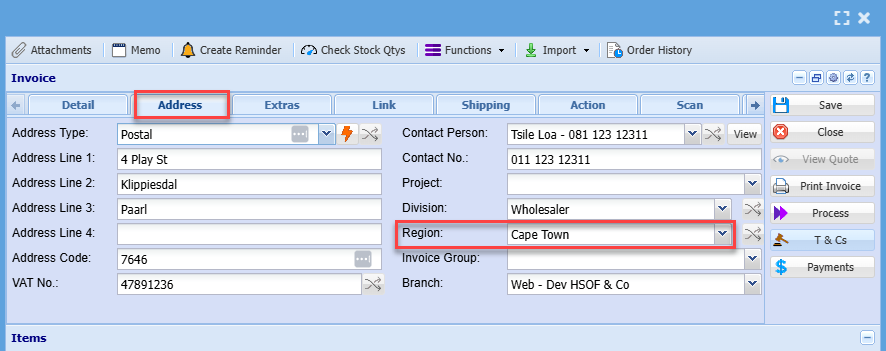
This now sets the default properties on this debtor and when capturing transactions, the user does not need to remember to select the Division/ Region
When you capture a transaction, invoice as an example, you will note the Division/ Region automatically is populated
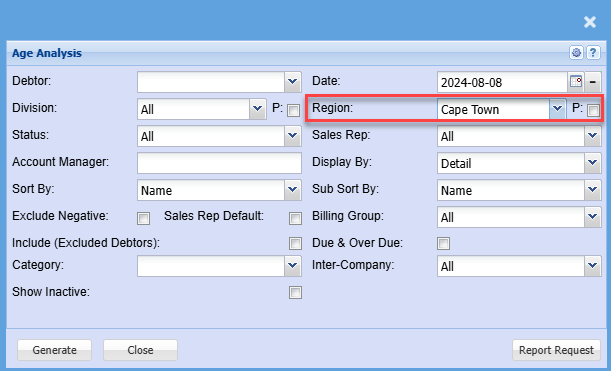
These filtering options can also be used to filter reports
You can generate the Debtors Age Analysis for only these filters
Category Setup
To be able to select a category from debtor setup or to update debtors import the category needs to be created first
This is where the category is created
To add or edit a category go to:
Debtors module> Configuration> Add. Debtor Properties> Category Tab
Click the Category Tab
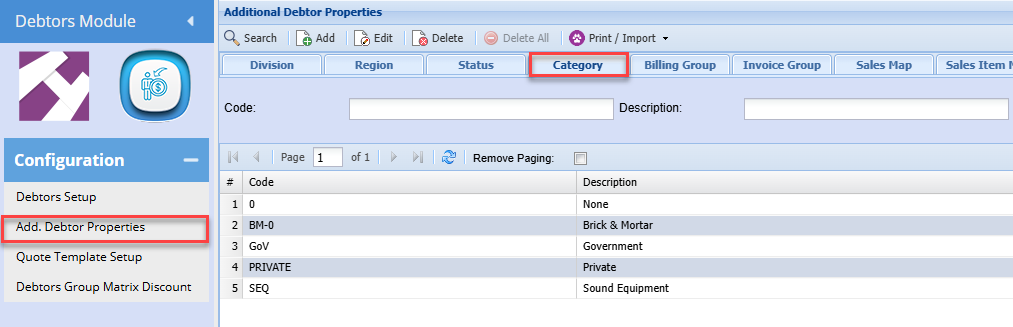
Click Add (To create a new Category)

| Code | Enter a Category Code |
| Description | Enter a Category Description |
Click Save and close
To edit an existing Category, Highlight the required Category and Click Edit
Invoice Group Setup
Invoice group allows you to group and identify certain invoices in order to run detailed reports
To setup invoice group go to:
Debtors Module> Configuration> Add. Debtor Properties> Invoice Group Tab
Click add to create a new invoice group or click Edit to edit an existing invoice group
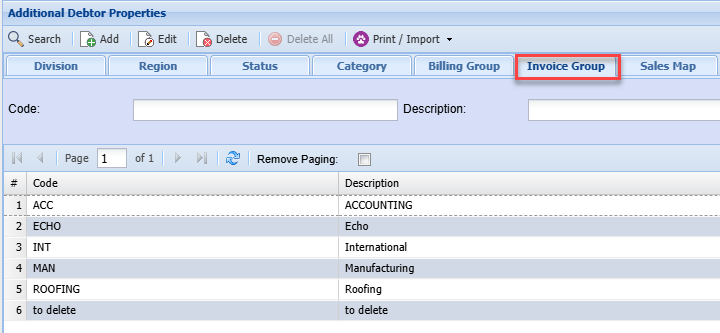
The screen below will appear
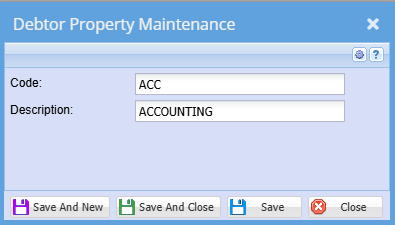
| Code | Enter invoice group code |
| Description | Enter invoice group description |
This will allow you to be able to select the group type when adding a new debtor/ customer or updating a debtor/ customer
Sales Item Map
For every stock item you can choose which account it can post to
If you have ten items on an invoice and 1 is selected with sales item mapping it will not follow the posting of an invoice but it will follow the setup done on item mapping
This manual shows one how to set up Sales Item Mapping
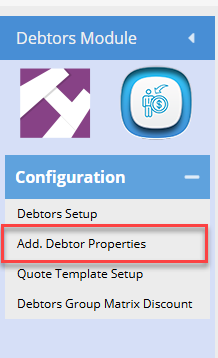
Go to Debtors Module > Configuration > Add. Debtor Properties
Click on the tab for Sales Item Map and click on Search to check the current setup of Sales Item Mappings.
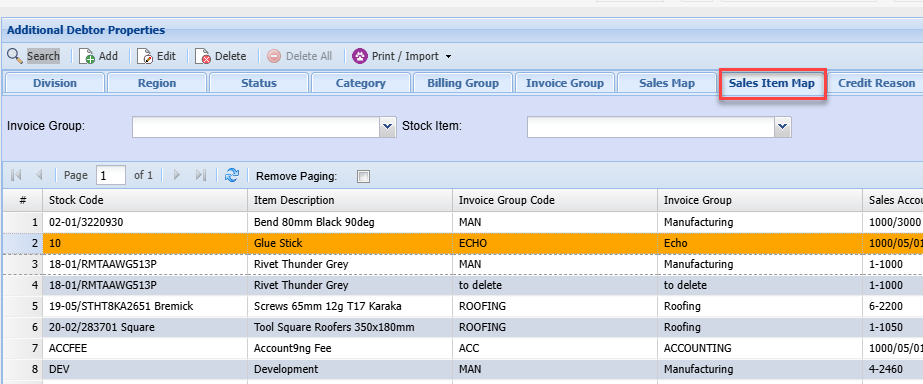
If Mapping does not exist or a new one is to be created
Click on the Add button to add a new Sales Item Map
Input the relevant field mappings required
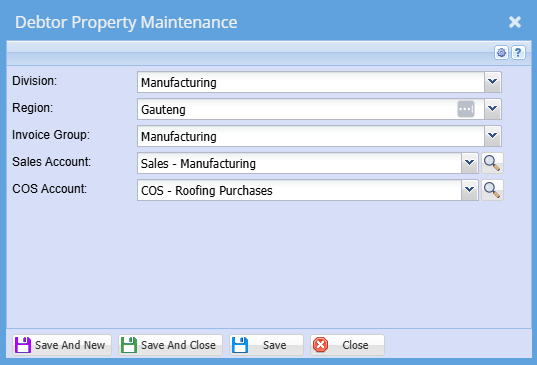
Field definitions
| Invoice Group |
Select the relevant Invoice group category This can also be found under the Invoice Group Tab |
| Stock Item | This is the service line item which is shown on the lines of the invoice |
| Sales Account | Insert the relevant sales ledger account |
Once Setup the Mappings will appear on the grid
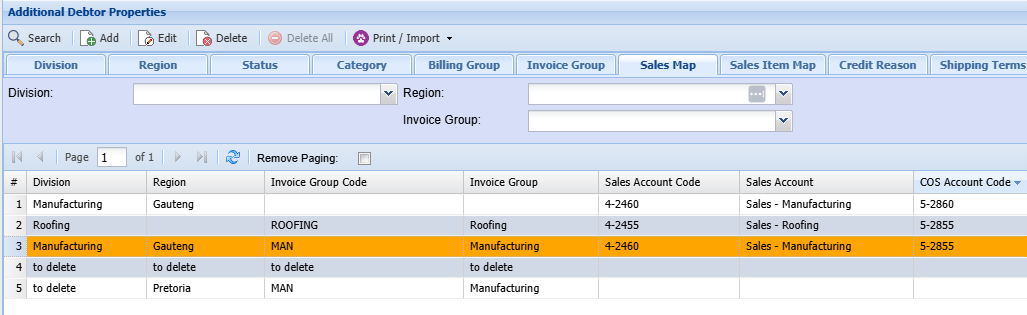
The Invoice layout shows you which data the system looks at to execute the mapping rule
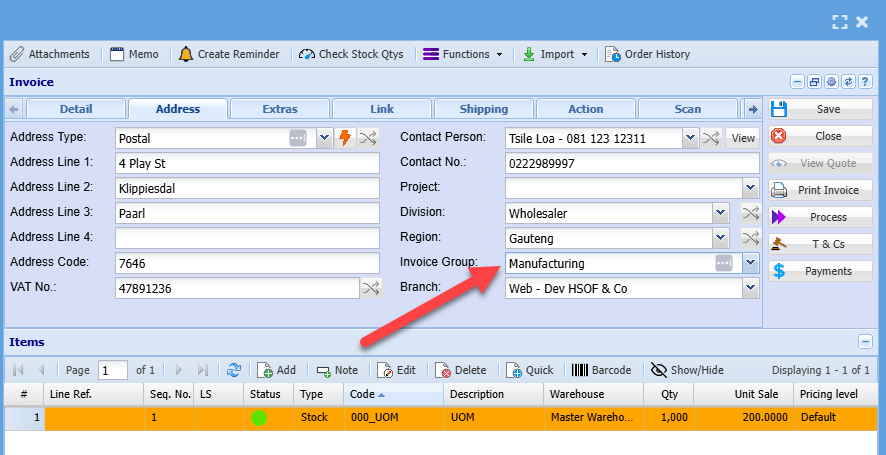
Therefore, the result will be as follows
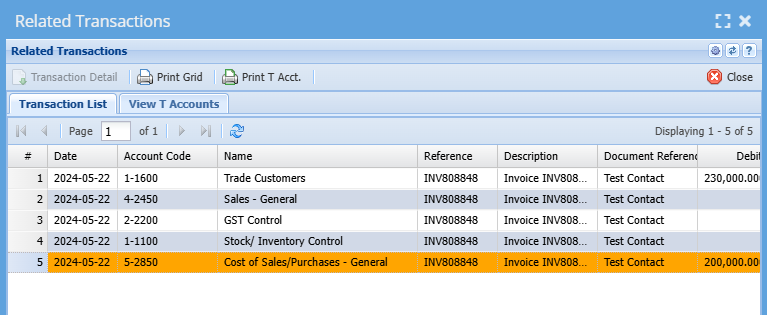
Troubleshooting Revenue Unallocated
This happens when there is no Sales Item Mapping Link
You can check in the following places
- Invoice line detail
- Related Transactions
- Income Statement detail lines
|
Invoice line detail |
Check the invoice lines and then check on the Sales Item Mapping section to see if you have matches. If not, you will need to setup |
| Related Transactions | When this occurs one must check the invoice line details |
| Income statement (Financial Performance) reports | Run the report and print to screen |
If you have amounts in the Revenue – Unallocated GL ledger, it means there are sales mappings missing
Therefore, the system will default to the default GL Links setup account.
Check the details of the invoices that make up the Revenue – Unallocated by clicking on the name to get the details.
You will now see all the invoices that make up the value of the sales revenue posting.
Now click on the Reference line of one of the invoices to see the details of the invoice
Go and check the following information on the invoice
Invoice Group + Service Code = GL Account (Sales Mapping setup)
Go and check the Sales Item Mapping grid to see if the Map exists, if not create a new one.
Once mapping is setup, next import or manual invoice will follow the sales item mapping rule.
Existing Revenue – unallocated posting in books. You must clear this account with a General Ledger Journal and allocate the values to the relevant Sales Revenue accounts.
One needs to check on a monthly basis that this account does not have any values.
Billing Group
Allows you to group and identify certain invoices in order to run and analyse information later.
Debtors Module> Add. Debtors Properties> Billing Group Tab> Add/Edit
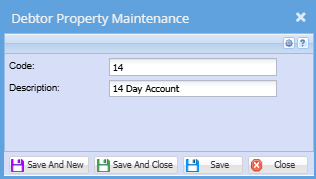
| Code | Enter a billing group code |
| Description | Enter billing Group description |
Additional Debtor Property Import
Debtors Module> Configuration> Add. Debtor Properties
Populate your data in Excel into the below template:
.png)
The input in the Division, Region, Status and Category fields is always the respective field code, not the description on the field setup. (this is the code on the setup above)
Once the file has been compiled, save the file as a CSV (comma Delimited) file
Upload Process:
Log onto the company
Go to Debtors Module> Configuration> Debtor Setup
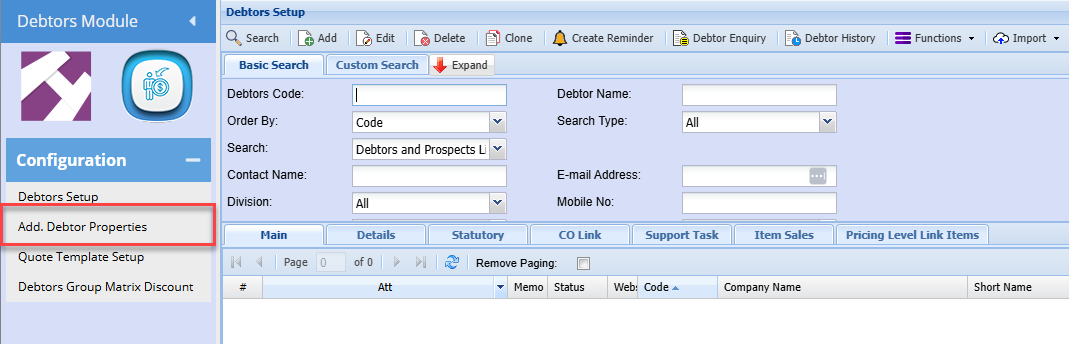
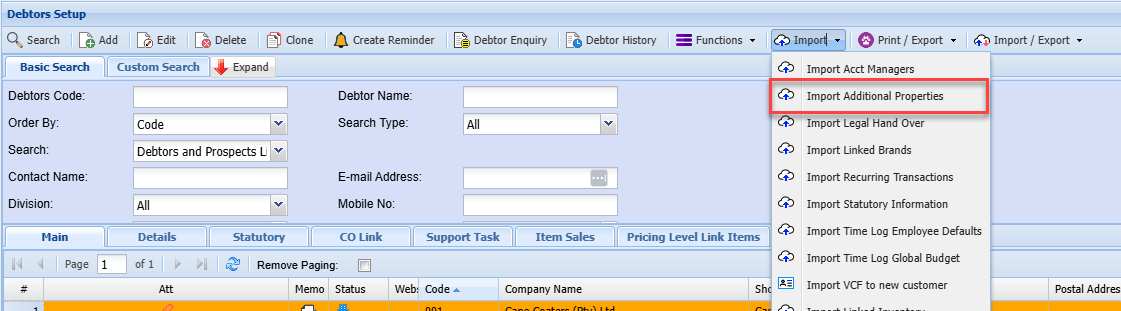
Click on the Import Tab dropdown arrow
Select “Import Additional Properties”
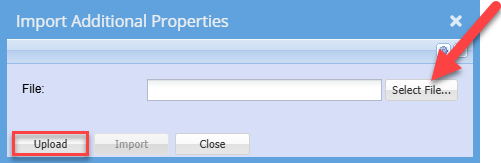
Search for the file that you saved earlier
Click Upload
The below Message will be displayed (assuming the import file is correctly formatted)
.png)
Click OK
Click Import
.png)
The system will verify the details on your file, e.g. All account codes exist, and all category codes exist
If all is OK, the file will be imported and all respective debtor accounts updated accordingly.
If errors are received, these will be listed.
Make the necessary corrections on your import file and resave the file
Then retry the import as per the above process
Credit Reason
To be able to select a credit reason on credit notes credit reasons applicable to your business needs to be created first
To add or edit a credit reason go to:
Debtors module> Configuration> Add. Debtor Properties> Credit Reason
Click the tab Credit Reason
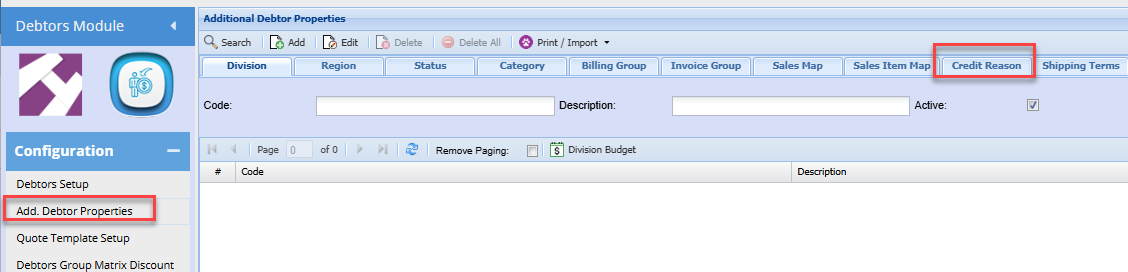
Click Add to create a new Credit Reason
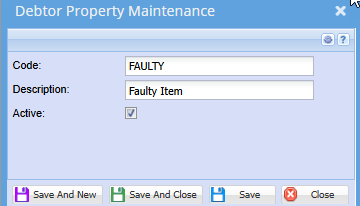
Enter a Code and Description
Click Save and close or,
Save and New to add another Credit reason
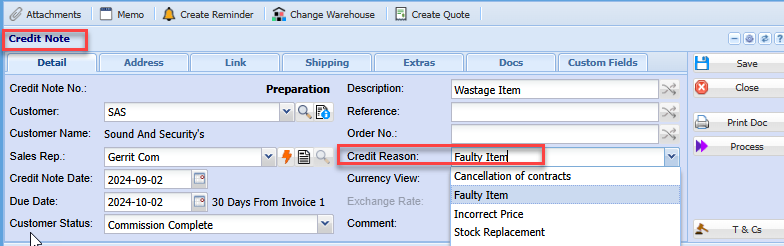
Once all reasons have been setup, this will allow the user to select the applicable reason for the credit note when capturing a credit note.
Shipping Terms
To be able to select shipping terms on sales documents, the respective options need to be setup
To add or edit a shipping term go to:
Debtors module> Configuration> Add. Debtor Properties
Click the tab Shipping Terms
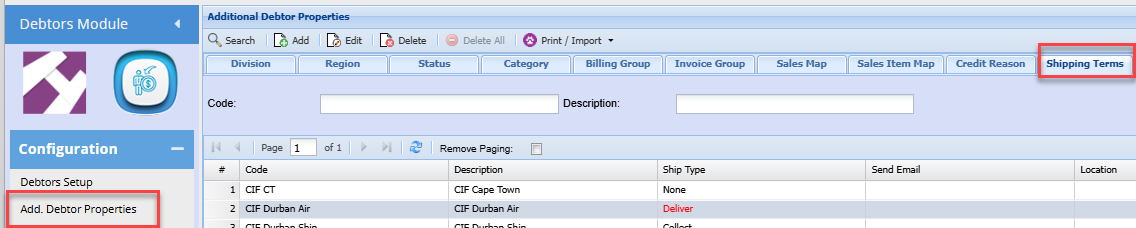
Click Add To create a new Shipping term
Enter a Code and Description
Click Save and Close or,
Save and New to add another Shipping Term
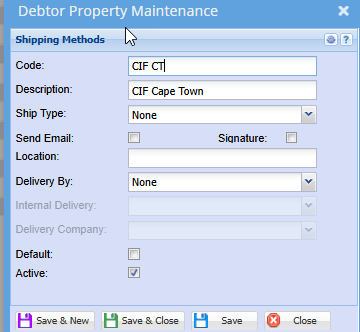
if you have a particular shipping term that us used majority of the time, you can set this term as a default. The default shipping term will then pre-populate on sales documents
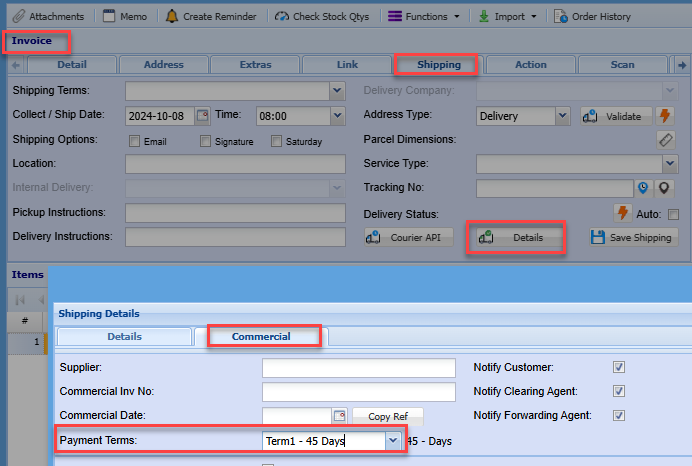
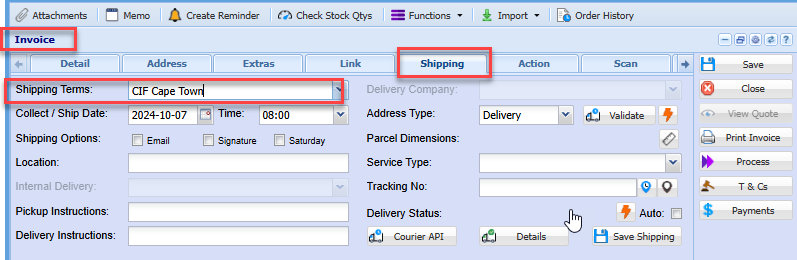
The shipping term is found on sales documents > Shipping tab
Shipping Methods
To be able to select shipping methods on sales documents, the respective options need to be setup
To add or edit a shipping methods go to:
Debtors module> Configuration> Add. Debtor Properties
Click the tab Shipping Methods

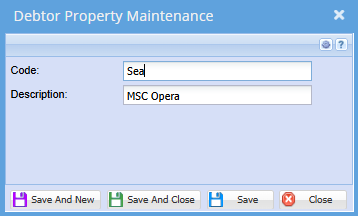
Click Add To create a new Shipping Method
Enter a Code and Description
Click Save and Close or,
Save and New to add another Shipping Method
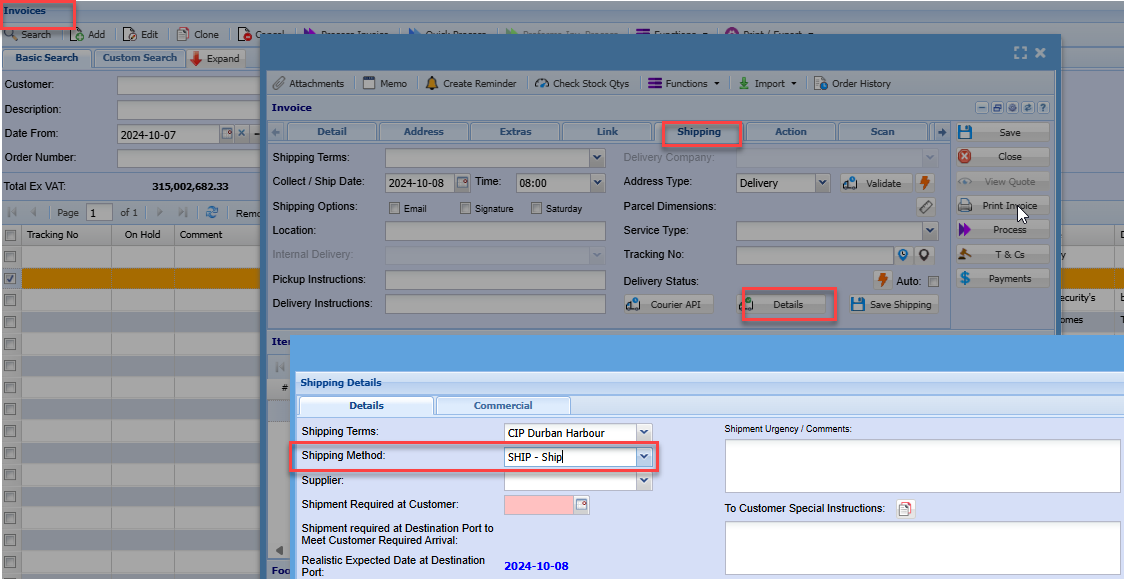
The shipping method is found on sales documents > Shipping tab
Click the Details button
Payment Terms
Debtors will typically have account terms such as COD, 30 days, 60 days etc. for accounts to be settled.
There are however instances where you may wish to allow an exception to these terms and apply special payment terms for specific purchases or you may have certain pre-defined custom terms. in such cases you can use the payment terms option.
To add or edit payment terms go to:
Debtors module> Configuration> Add. Debtor Properties> Payment Terms
Click the tab Payment Terms

Click Add (To create a new Category)
Enter a Code and Description
Click Save and close or,
Save and New to add another Payment term
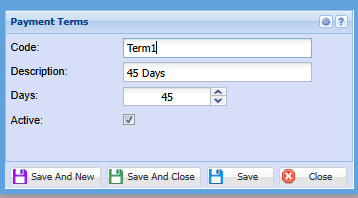
These payment terms options can be found on the sales documents, shipping tab