Contract Maintenance Menu
Contract Maintenance Setup
Video Training Manual 2016 - Click Here
The Time logging setup is done under the contract maintenance menu
There are 3 setups required:
- The contract
- The tasks
- Service items
- Billing Rates
Once these have been setup, you will need to link these to one another
CRM Module> Configuration> Contract Maintenance
Contract Task setup
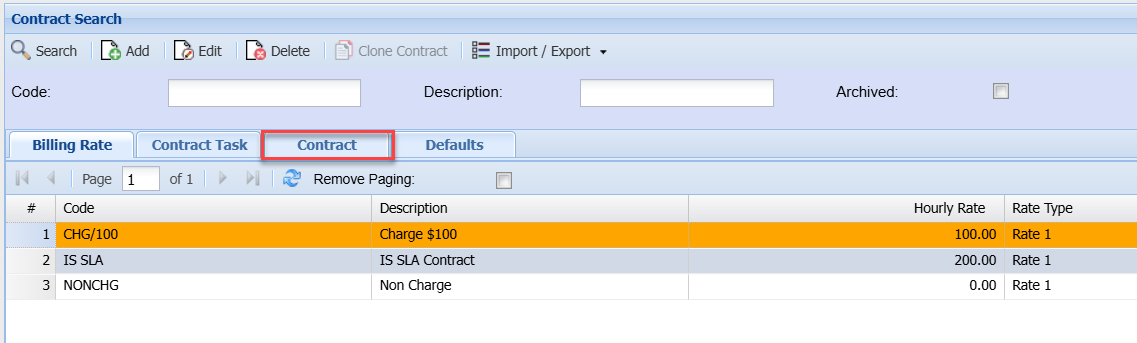
Click the Contract Tab
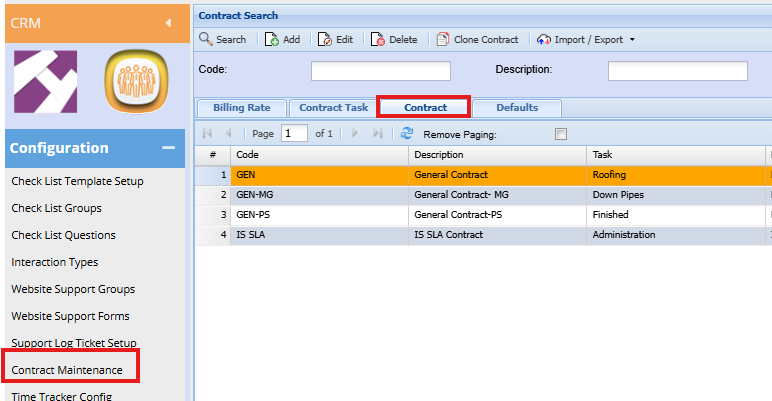
| Add | To create a new Contract |
| Edit | To edit existing contracts |
| Code | Enter a code for the Contract |
| Description | Enter a description for contract |
| Archived | This is used to flag obsolete contracts that are no longer in use. we do not allow them to be deleted due to audit trails and historic time logs that may have the contract linked |
Billing Rate Tab
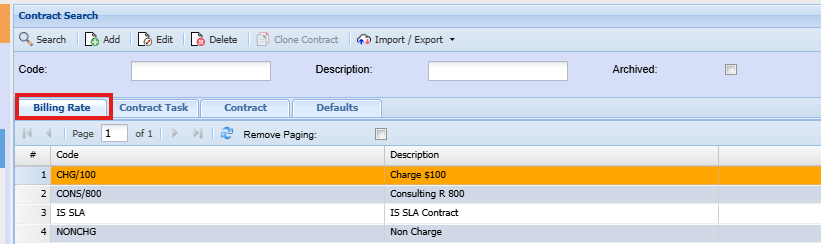
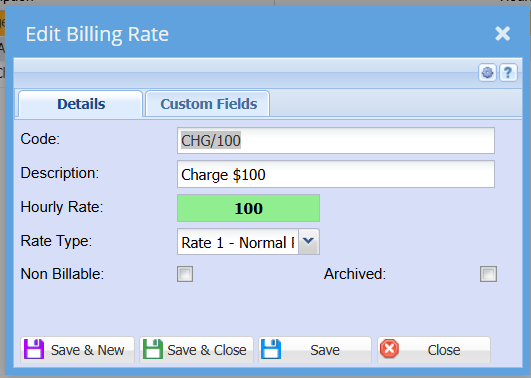
| Add | To add a new billing rate |
| Edit | To edit an existing rate |
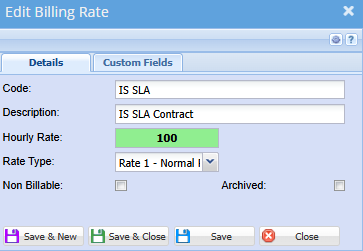
| Code | Enter SLA or billing rate code |
| Description | Enter brief description of SLA or billing rate |
| Hourly Rate | Enter the amount billed per hour |
| Rate Type | Select the billing rate tye on the drop down |
| Non Billable | Put a tick of an SLA is non billable |
| Archived | If the archived box is ticked, the billing rate will be achieved |
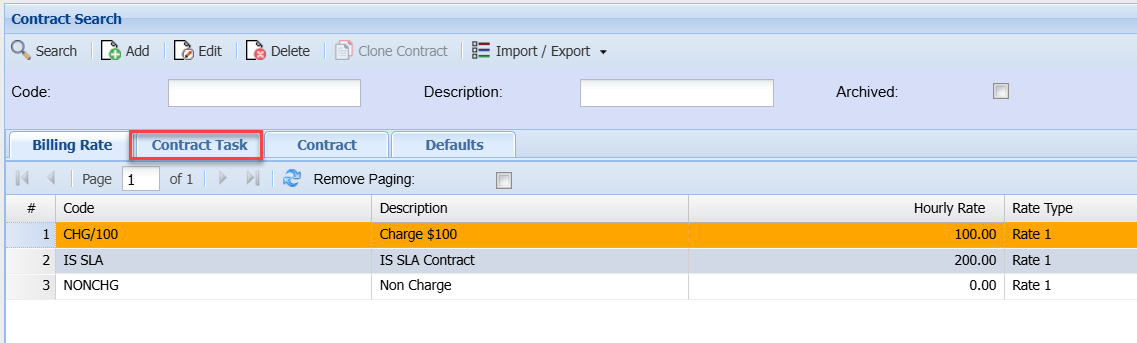
Contract Task Tab
Video training Manual 2016 - Click Here
Click the Contract Task Tab
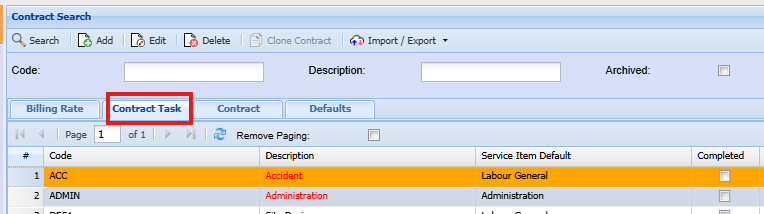
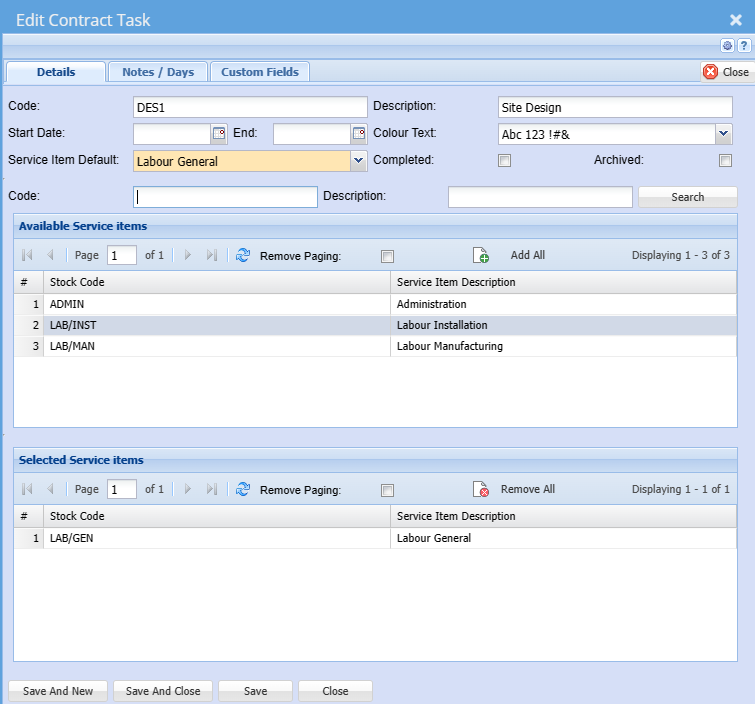
| Add | To add a new task |
| Edit | To edit an existing task |
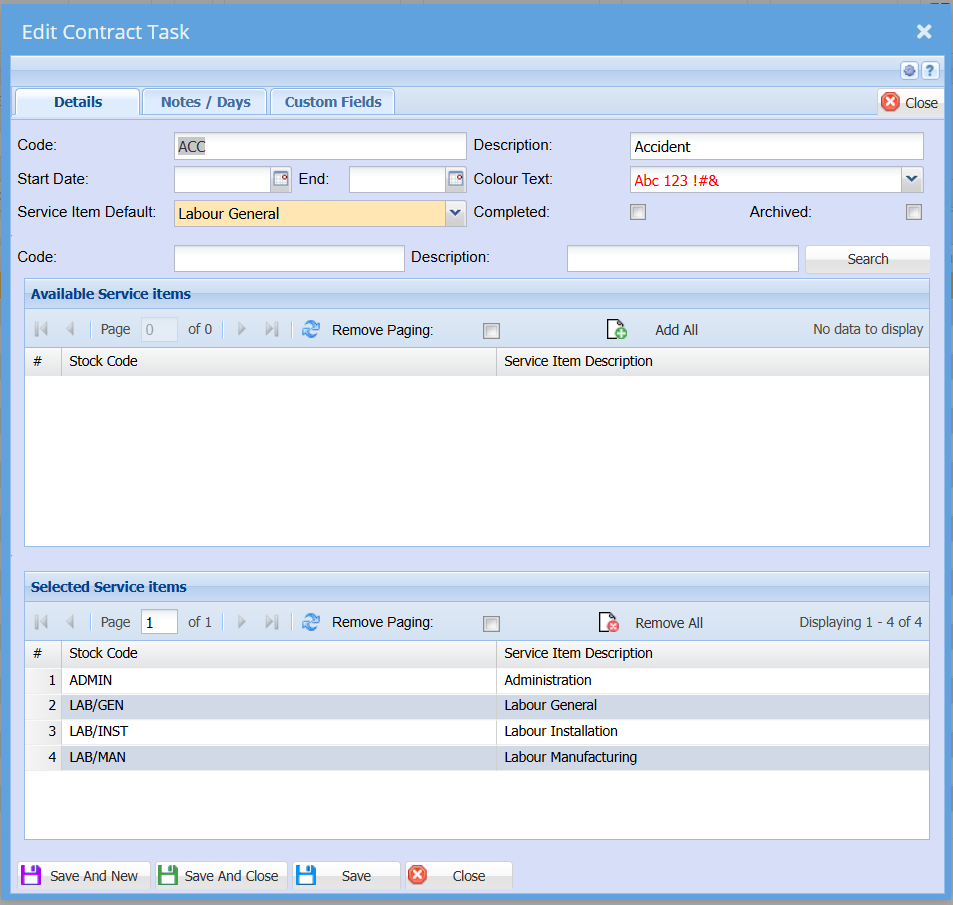
| Code | Enter an code for the task |
| Description | Enter a task description or name |
| Start Date | The date could be set to a year if the tasks are to be reviewed yearly - Not mandatory |
| End | The date could be set to a year if the tasks are to be reviewed yearly - Not Mandatory |
| Colour Text | you can enter colour codes to differentiate the different tasks |
| Service Item Default | This field allows the default service to be chosen from the selected list |
| Completed | |
| Archived | If the archived box is ticked, the billing rate will be achieved |
| Code | This field allows the user to search for an existing service item code |
| Description | This field allows the user to search for an existing service using the description |
| Available Service Items Grid | These will be the available service items that can be selected to be used in the service item for billing purposes |
| Selected Service Items Grid | These are the service items selected from the above list that will be available for use |
The date could be set to a year if the tasks are to be reviewed yearly
| Search | Search button to populate the available service item list |
| Add All | Allows the user to add existing items |
| Remove All | Allows the user to remove all selected items |
Note/Days
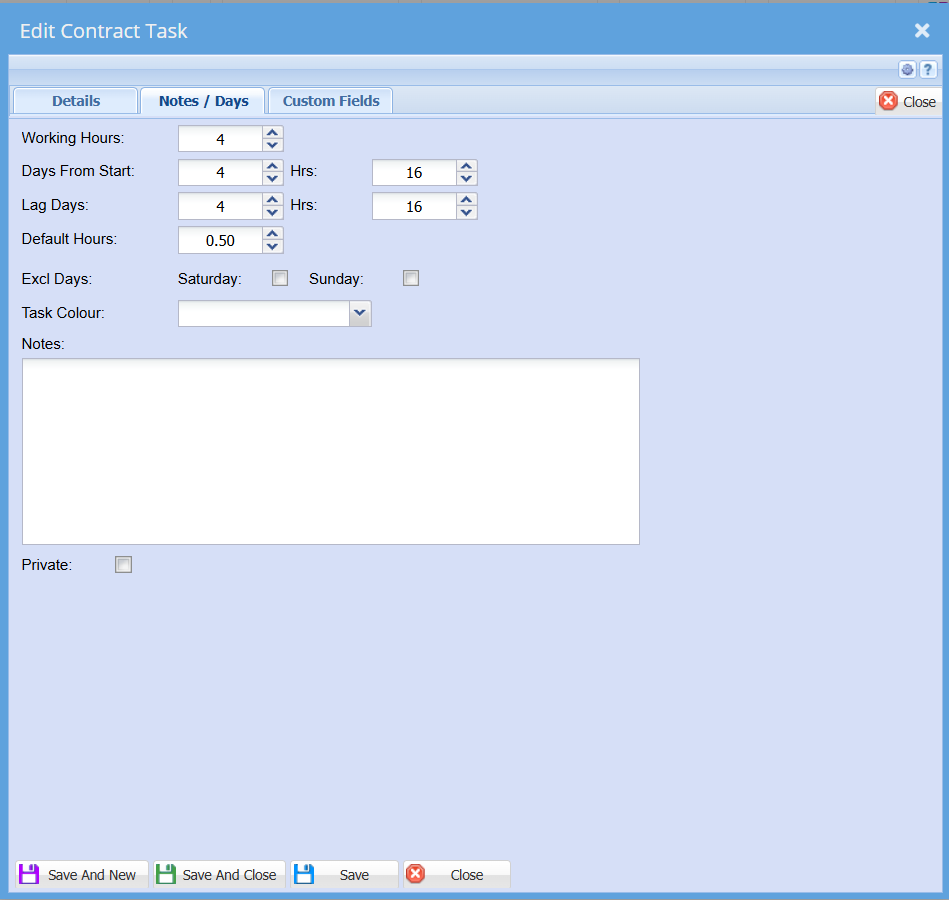
These fields define the working day hours
these details are not mandatory to complete. they are typically used for scheduling
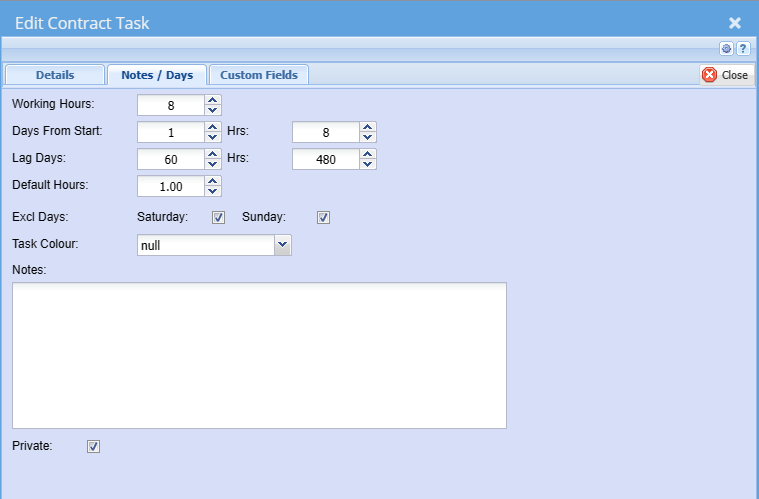
| Working Hours | |
| Days From Start | |
| Hrs | |
| Lag Days | |
| Hrs | |
| Default Hours | |
| Excl Days | |
| Text Colour | |
| Notes | Users can add notes for internal use |
| Private |
Link Contract to Tasks & billing rates
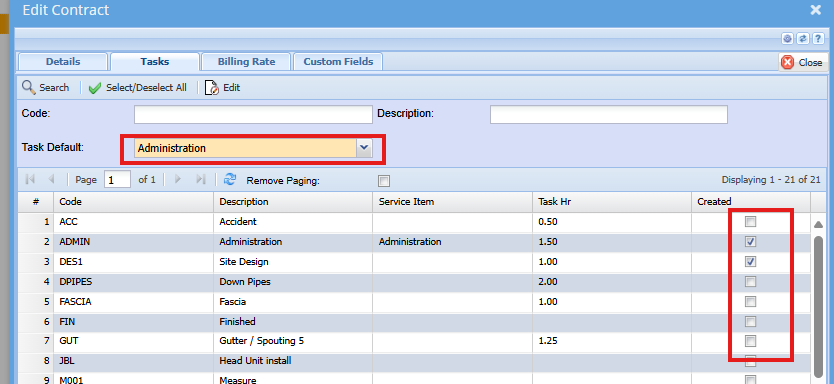
Click the Contract tab
Click edit to edit the contract
Click the task tab
Activate the relevant task for the specific contract
Select the default task
Save and close
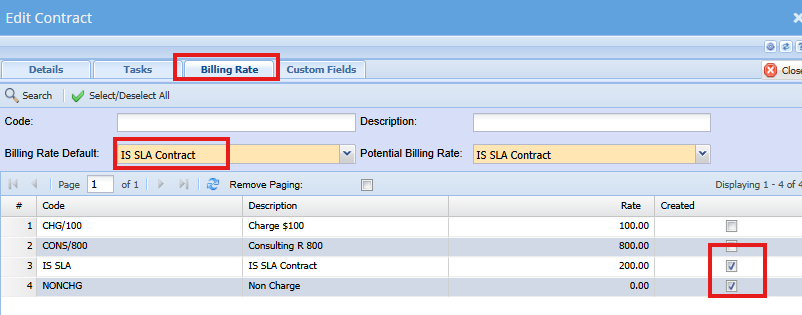
Click the Billing Rate tab
Activate the relevant rates for the task and select the default rate
Save and Close
Defaults Tab
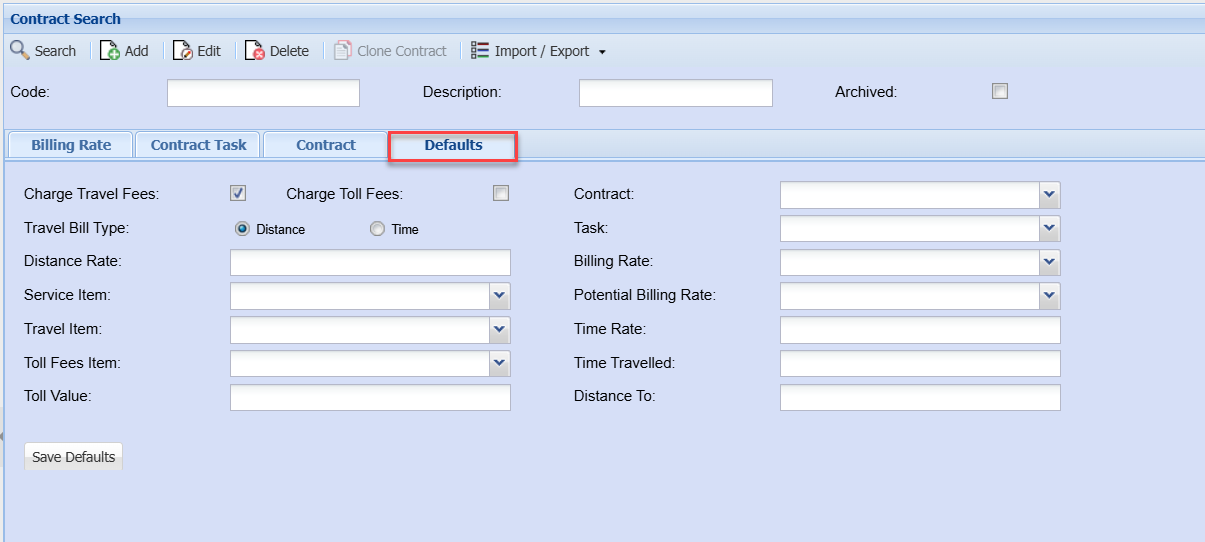
This tab allows one to set certain defaults, so the user does not have to complete all these fields when capturing the time logs.
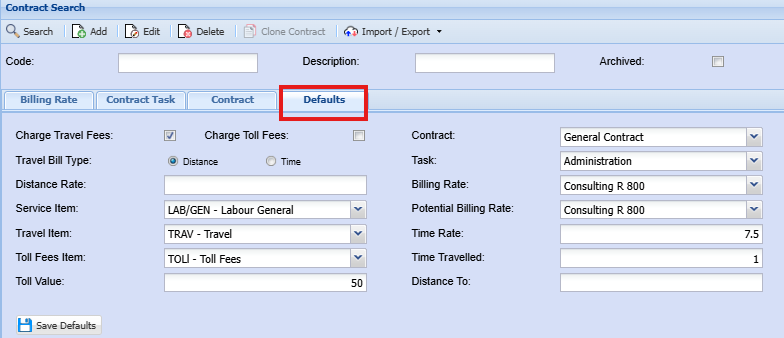
| Charge Travel Fees | This will set the default to always charge travel. Tick off will set default to off, indicating no travel charges. user can manually tick the box on time log capture if applicable. |
| Charge Toll Fees | This will set the default to always charge toll fees. Tick off will set default to off, indicating no toll fees charges. user can manually tick the box on time log capture if applicable. |
| Travel Bill Type | Sets the default to charge travel based on distance or time travelled |
| Distance Rate | Rate per kilometer |
| Service Item | this is the default service item related to the task selected for the contract |
| Travel Item | Service item for travel |
| Toll Fees item | Service item for toll fees |
| Toll Value | default Toll price |
| Contract | Default contract. this can be set per user on the user profile setup as well |
| Task | Default task related to the contract |
| Billing Rate | Default billing rate to pull through |
| Potential Billing Task | Default potential billing rate |
| Time Rate | Travel time default rate |
| Time Travelled | Travel time default, eg. 1 = 1 hour |
| Distance To |
Add Contract
Billing Rate
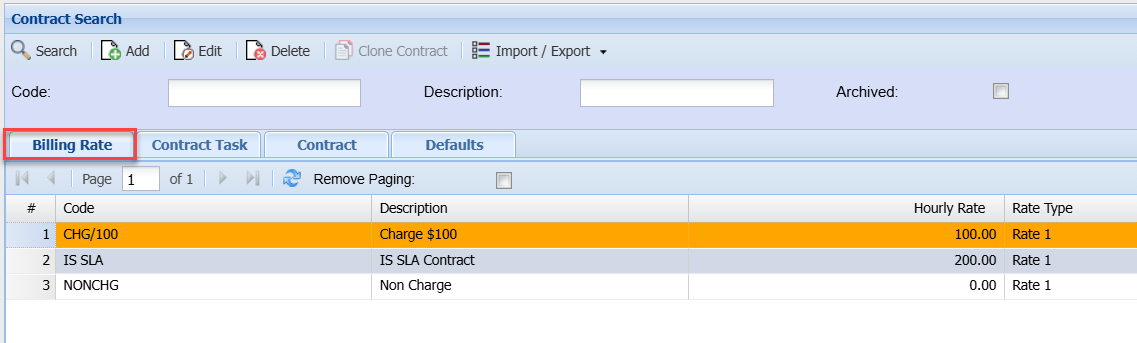
Adding Billing Rate
Contract Task
Adding Contract Task
Contract
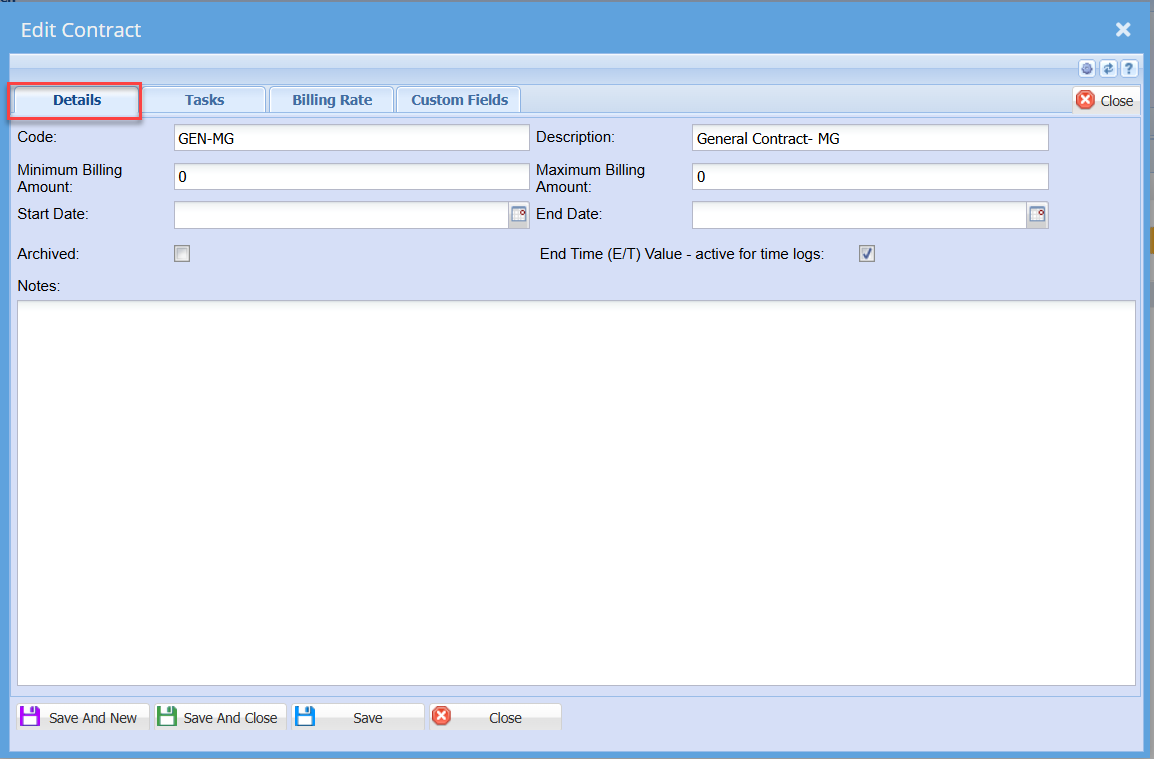
This is where the contract between the provider of a service and the user’ details is created.
It has five tabs and four buttons
Detail Tab – The code and description are important to fill in.
Code – Code of the SLA
Short Description – brief description of the SLA
Minimum Billing Amount – minimum amount the customer and the service provider agree upon
Maximum Billing Amount – maximum amount the customer and the service provider agree upon
Start Date – beginning of the SLA started
End Date – The end of SLA
Archived – SLA will go to archives if the box is ticked
Notes Tab – customer notes regarding SLA
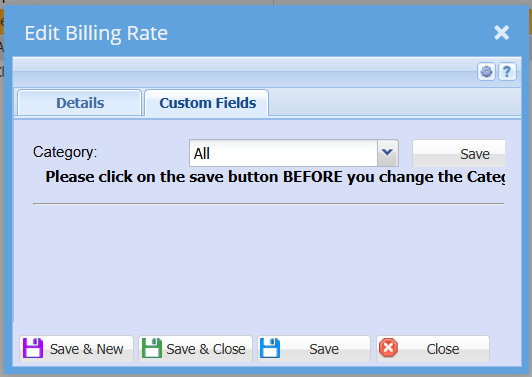
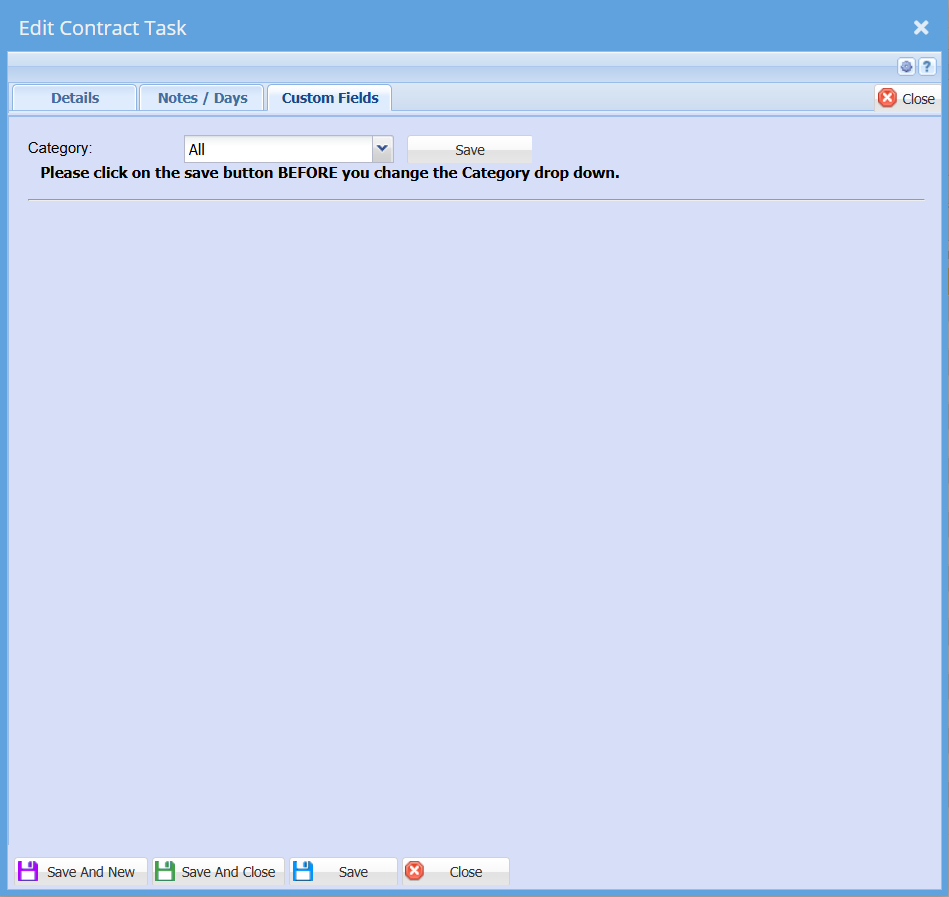
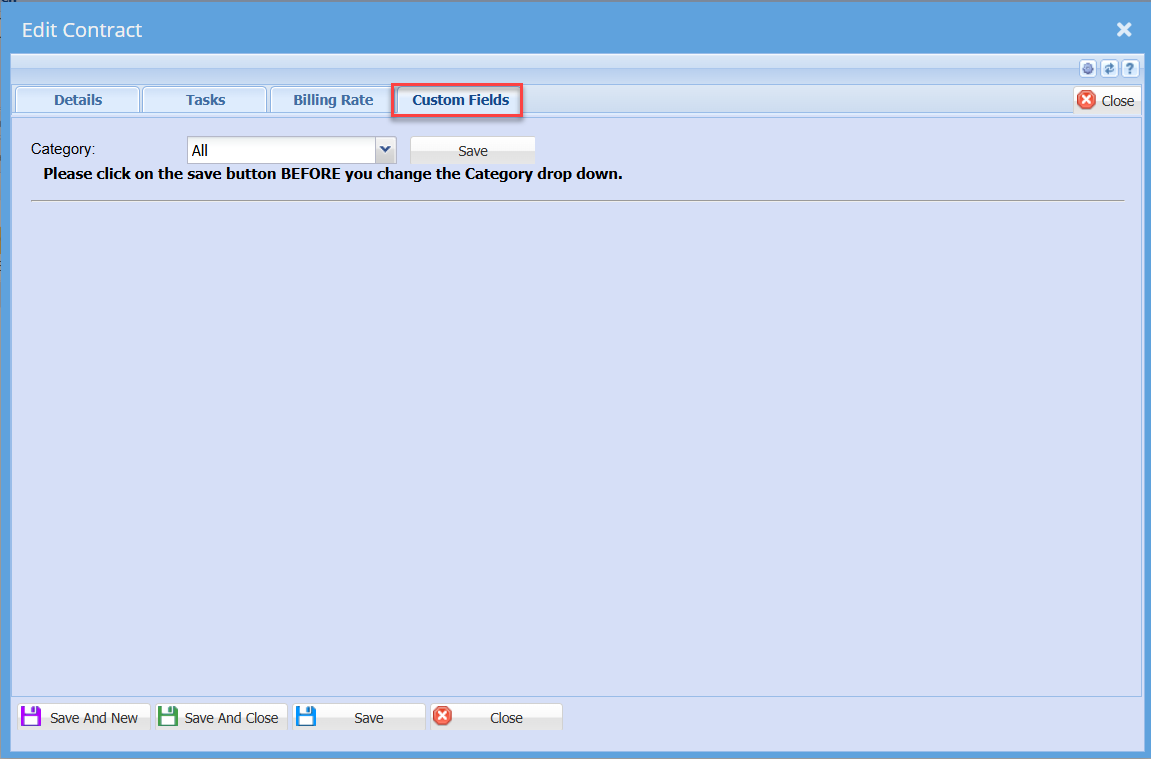
Custom Fields – a user can select from the category
Task Tab
This displays the list of tasks that can be selected for this user contract
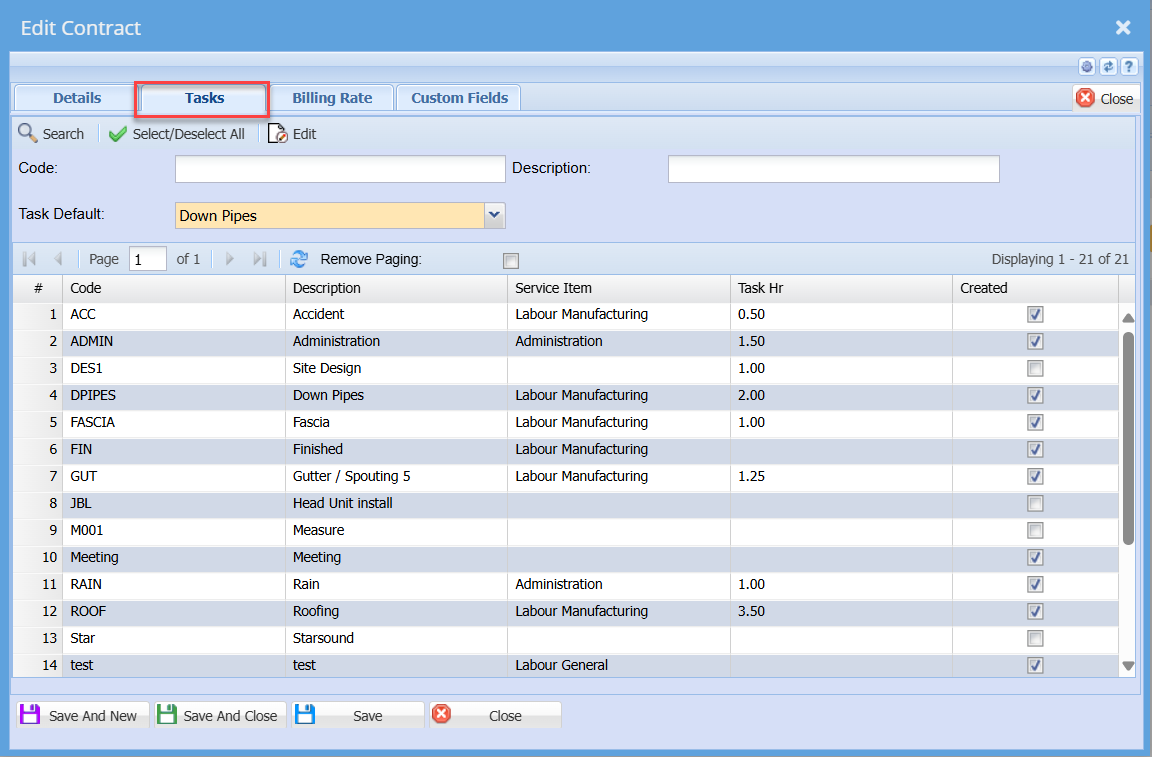
Select /Deselect All button – selects all available tasks or unselect all the tasks
Billing Rates Tab
SLA rates selection
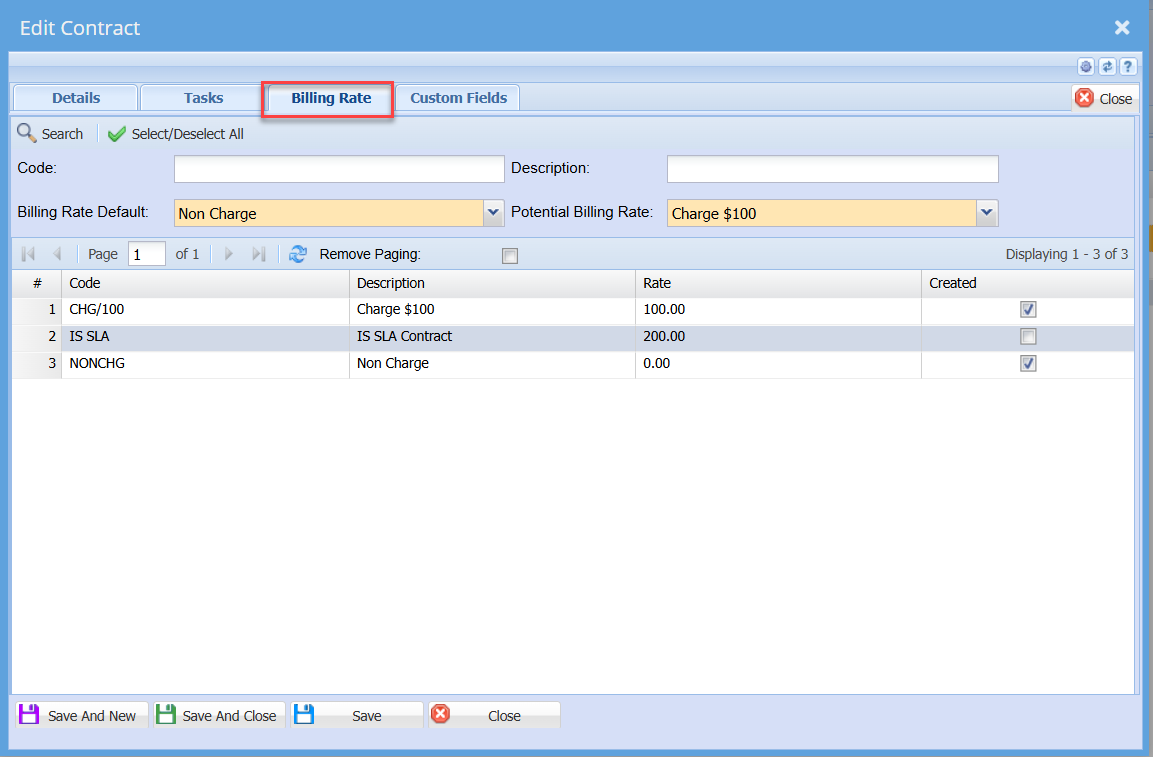
Select / Deselect All button – Selects all available billing rates or unselect all billing rates
Billing Rate Default - Select from the list the defaulting billing rate when this contract is selected
Potential billing rate - Select from the the list the defaulting potential billing rate when this contract is selected
Custom Fields Tab
Defaults
Import /Export Contract
.png)
The file to be imported must be in a CSV format.
Click on the Select Files… button to open the navigate window allowing the user to navigate to the file to be imported.
Once the desired file has been located either double click on the file or click the Open button.
Now click on the Upload button. If the upload was successful a window will appear confirming that the upload was successful. Click Ok.
The Import button now becomes enabled allowing the user to click on the Import button to import the file.
An Import Report will open displaying any errors in the import or displaying the successful import status.
Please Note :
The column headings can be left in the import file providing that the heading are as per the sample below.
Import File Layout
All items in RED are required fields.
|
No |
Heading |
Value |
|
1 |
Code |
CONTRACT001 |
|
2 |
Description |
Contract Description 001 |
|
3 |
Minimum Billing Rate |
1000 |
|
4 |
Maximum Billing Rate |
3000 |
|
5 |
Start Date |
2015-09-11 |
|
6 |
End Date |
2016-09-11 |
|
7 |
Archived |
0 |
|
8 |
Notes |
This is a note |
|
9 |
Task Default |
Task Code |
|
10 |
Billing Rate Default |
Billing Rate Code |
|
11 |
Tasks List |
Task Code|Task Code|Task Code |
|
12 |
Billing Rate List |
Billing Rate Code| Billing Rate Code |