ACM Configuration
- Creditors Setup Menu
- Creditors Setup
- Creditors Setup Import/Export
- Add Creditor
- Creditors Status
- Procurement - Standard Operating Procedure (SOP)
- Creditors ERROR saving
- Additional Creditor Properties Menu
- Creditors Email Mailing List Menu
Creditors Setup Menu
Creditors Setup
This is where the user creates a new Creditor or search for existing ones
Creditors > Configuration > Creditors Setup

| Search | to search for a creditor |
| Add | to create a new creditor. |
| Edit | to make changes onto an existing creditor. |
| Delete | to delete an existing creditor provided the creditor has no transactions linked to it. |
| Clone | to clone an existing creditor |
| Create Reminder | Allows a user to interact with the creditor via sms or email and only if the contact person has an email address for emailing and cell number for sms. |
| Creditor History |
Basic Search Tab
This contains basic filtering options to find a creditor
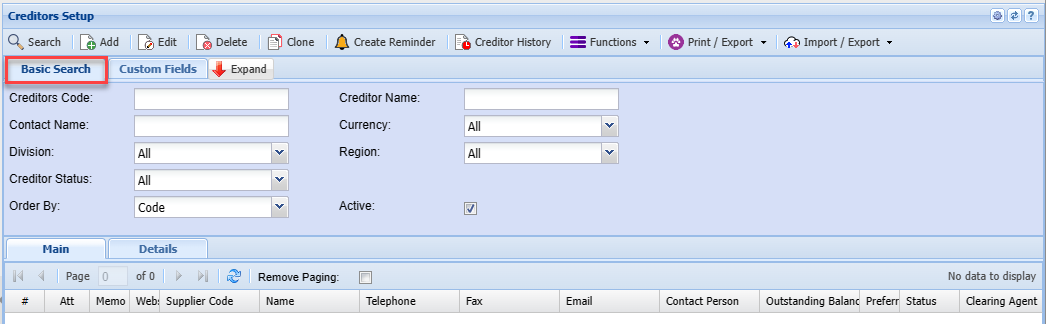
| Creditors Code | |
| Contact Name | |
| Division | |
| Creditor Status | |
| Order By | |
| Creditor Name | |
| Currency | |
| Region | |
| Active Tick |
Custom Fields Tab
Search by custom fields which have been setup for creditor filtering
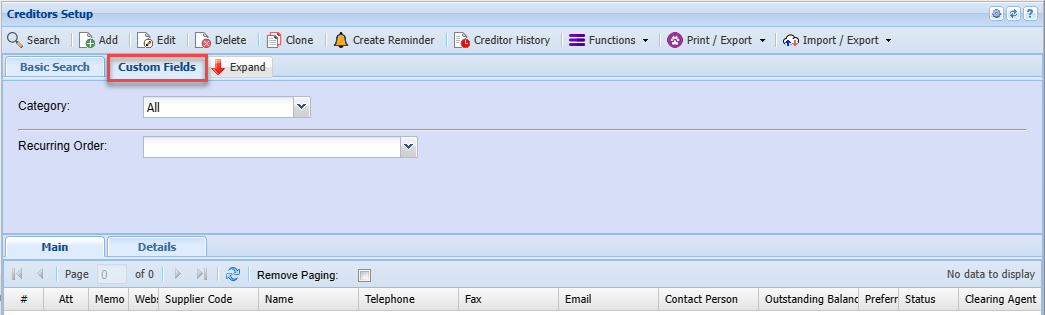
| Category | |
| Recurring Order |
Functions dropdown
Alerts
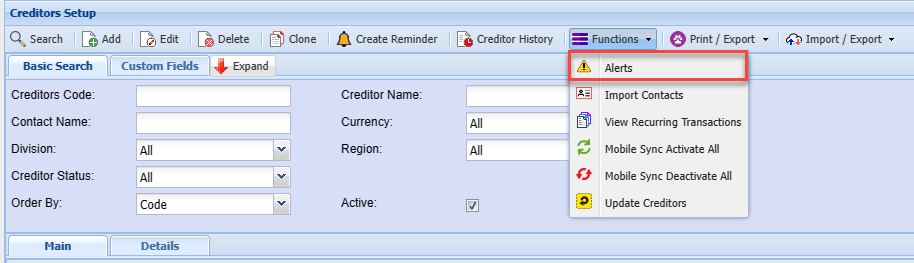
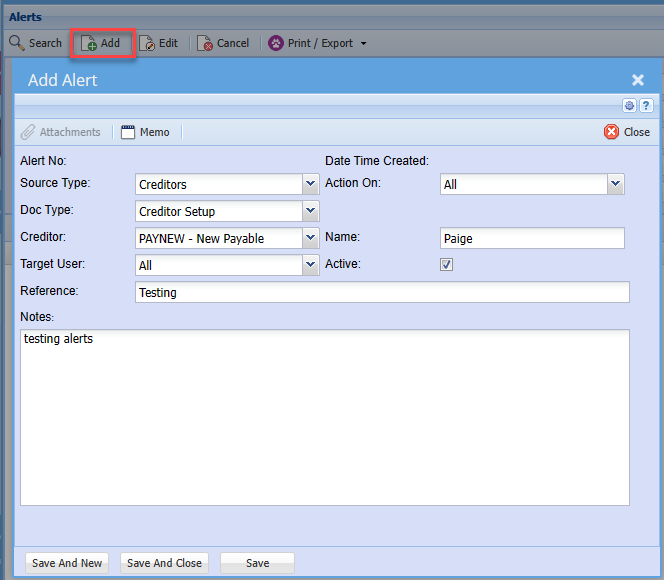
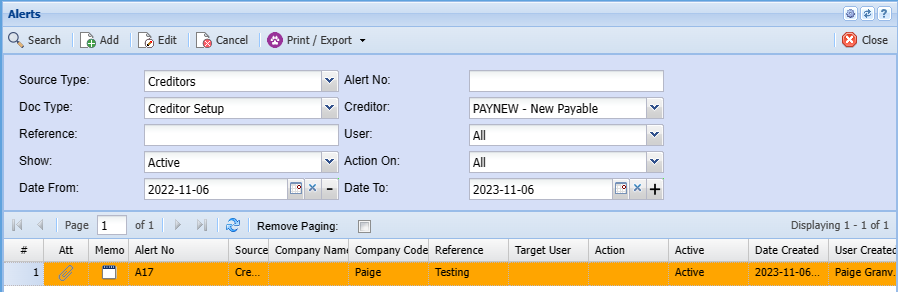
Clicking Add will allow you to add a new Alert
| Source Type | |
| Doc Type | |
| Creditor | |
| Target User | |
| Reference | |
| Action On | |
| Name | |
| Active | |
| Note |
Once you have filled in the information, you can press save or save and new to create a new one
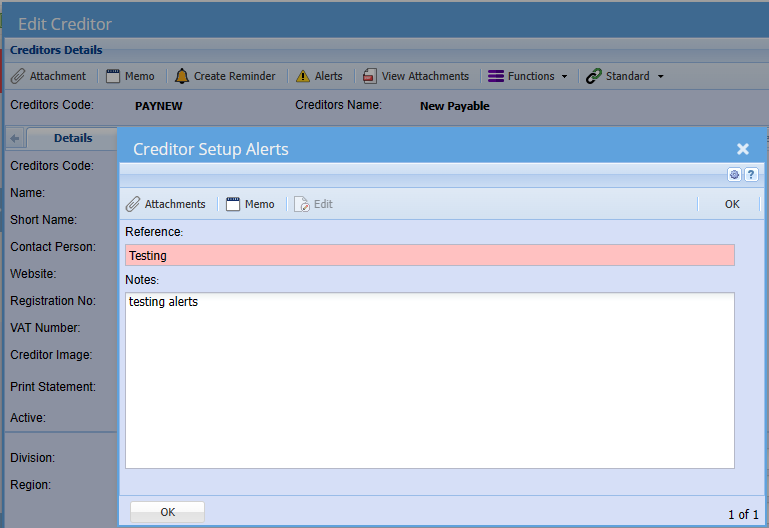
Your Alert will then pop up when you open your Creditor
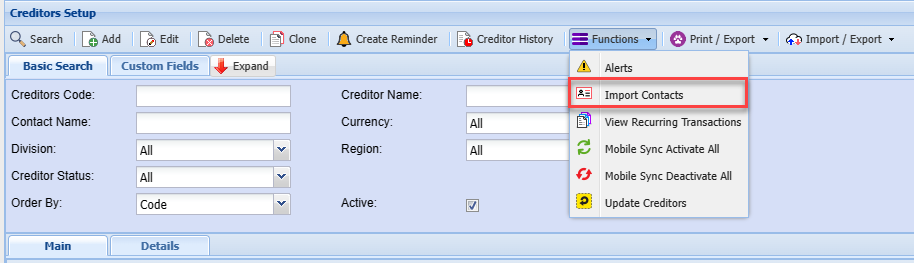
Import Contacts
The file containing the Creditor Contacts must be in a CSV format.
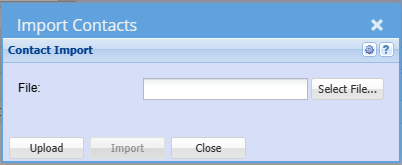
The column heading can be left in the CSV file the import program makes allowance for them. Please ensure that the spelling is as per the sample below.
Fields as follows;
.png)
To avoid the cell phone number from losing the leading zero type an apostrophe and then the cell number e.g. ‘0798102541 Excel then treats this as letters and not numbers.
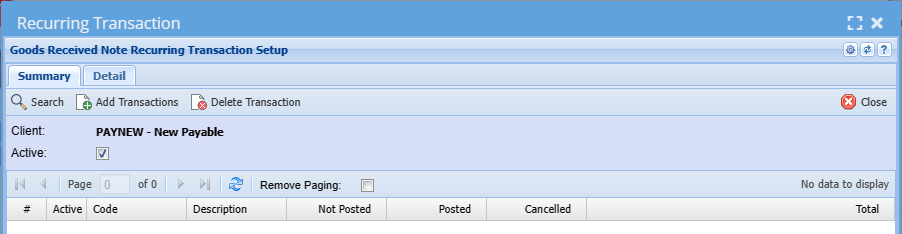
View Recurring Transactions
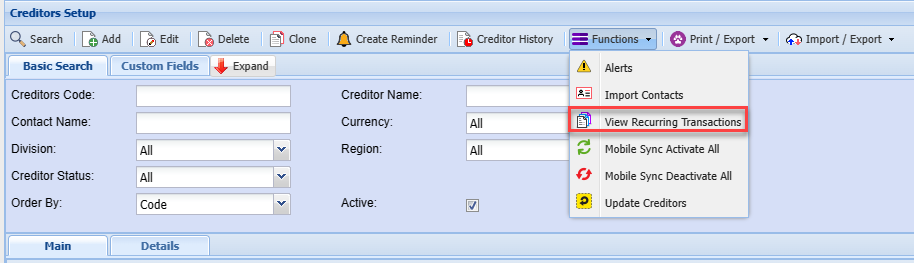

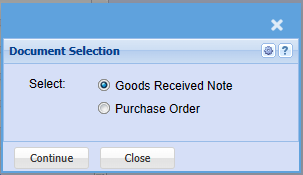
| Good Received Note | |
| Purchase Order |
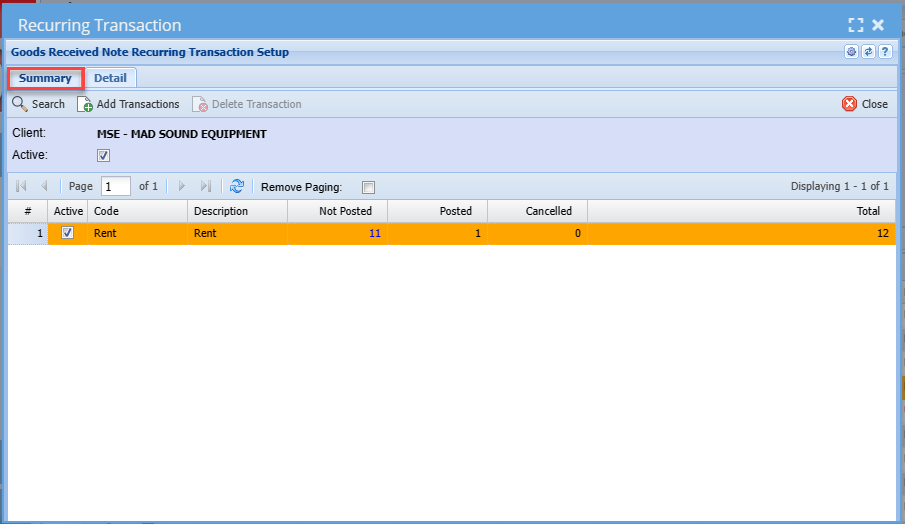
| Search | |
| Add Transactions | |
| Delete Transactions | |
| Active Tick |
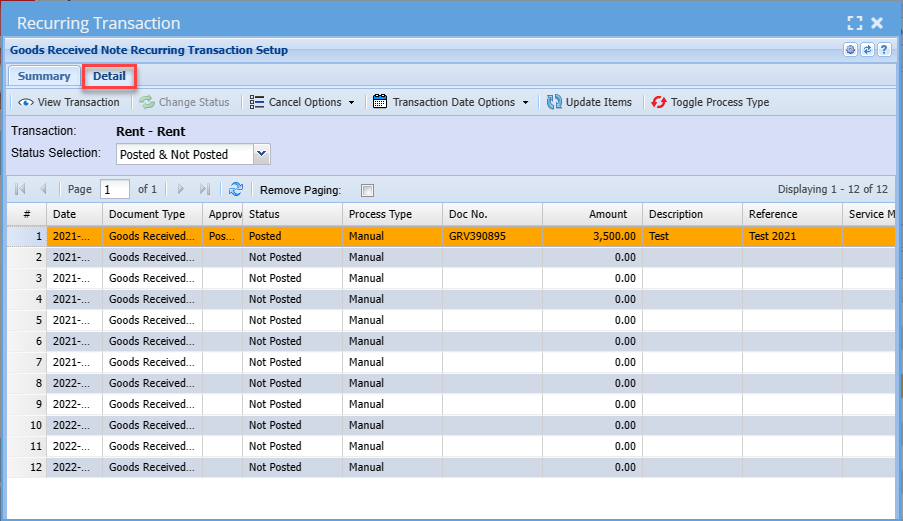
| View Transaction | |
| Change Status | |
| Update Items | |
| Toggle Process Type |
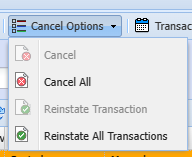
| Cancel | |
| Cancel All | |
| Reinstate Transactions | |
| Reinstate All Transactions |
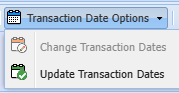
| Change Transaction Dates | |
| Update Transaction Dates |
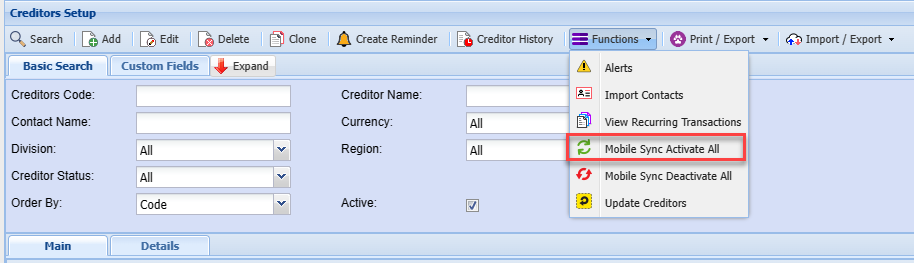
Mobile Sync Activate All
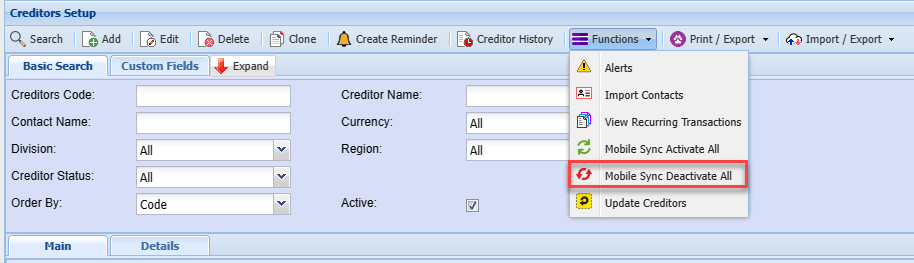
Mobile Sync Deactivate All
Update Creditors
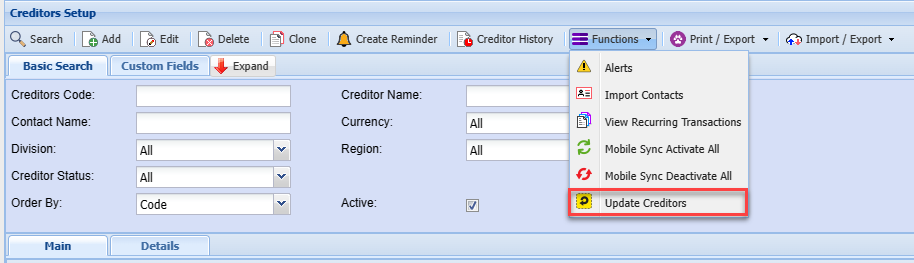
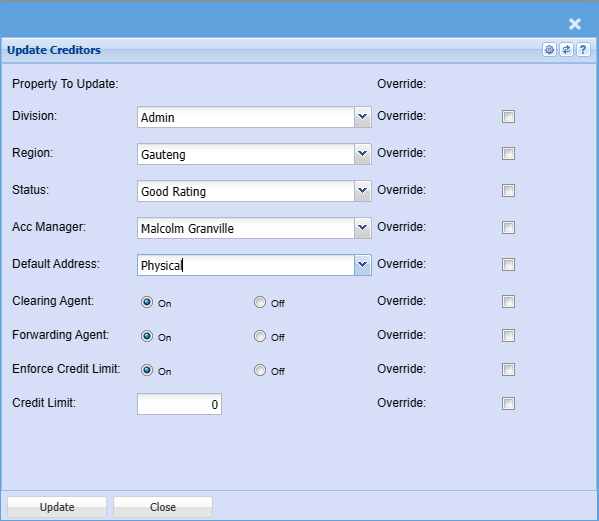
| Division | |
| Region | |
| Status | |
| Acc Manager | |
| Default Address | |
| Clearing Agent | |
| Forwarding Agent | |
| Enforce Credit Limit | |
| Credit Limit | |
| Override Ticks |
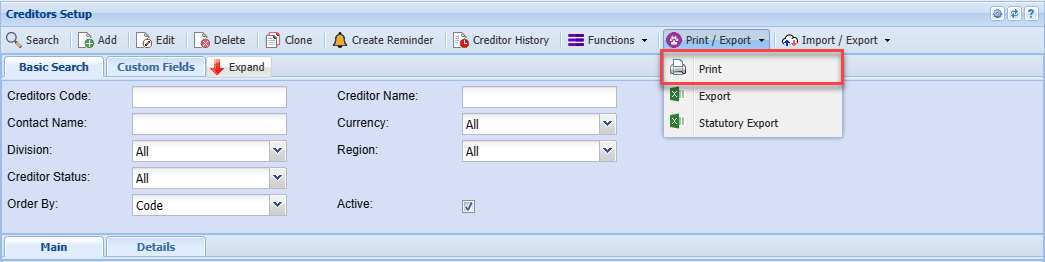
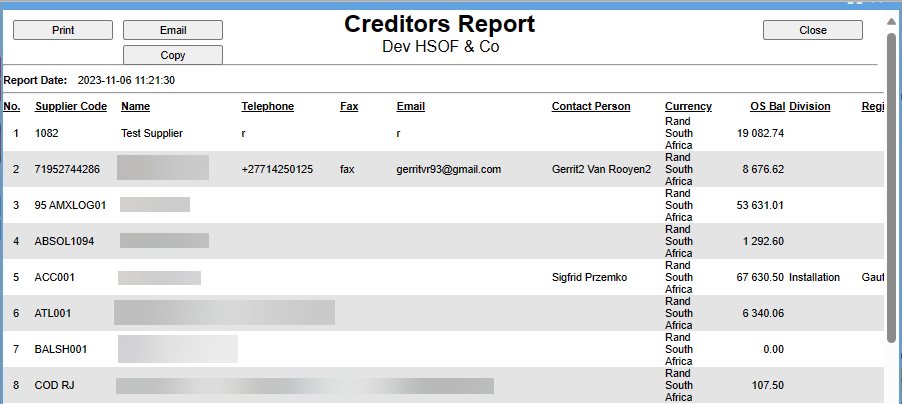
Print / Export dropdown
Export
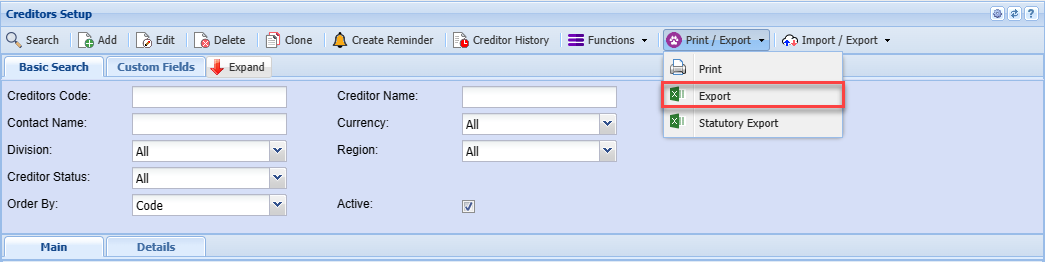
Statutory Export

Main Tab
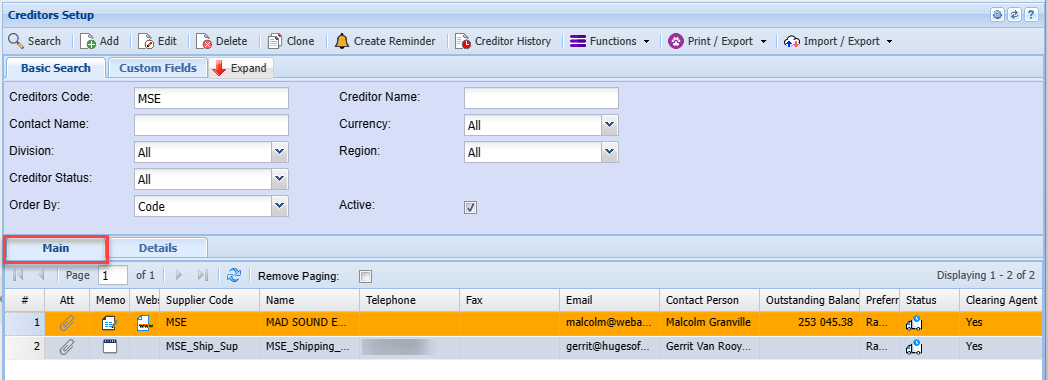
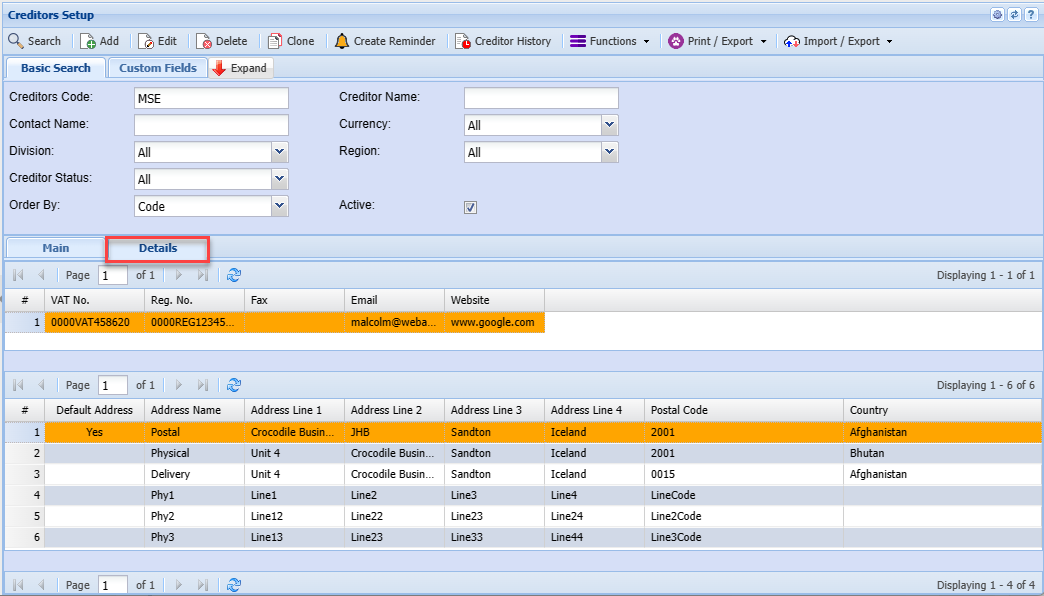
Details Tab
Allows you to see more details on the creditor you have selected
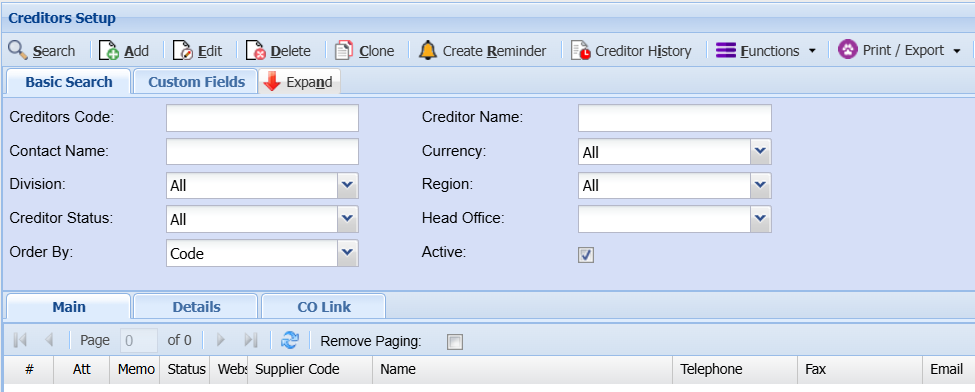
Keyboard quick keys
Quick keys help access functions using the keyboard
Used with Alt + Letter
| Search | Alt + s | Search for Debtors |
| Add | Alt + a | Add a new Debtor |
| Edit | Alt + e | Edits the Debtor that is highlighted |
| Delete | Alt + d | Deletes the Debtor that is highlighted |
| Clone | Alt + c | Clones the highlighted Debtor |
| Expand / Contract | Alt + n | Expands / Contracts the header section of the window |
| Create Reminder | Alt + r | Creates a reminder to highlighted Debtor |
| Debtor Enquiry | Alt + q | Opens up the Debtor enquiry screen for highlighted Debtor |
| Debtor History | Alt + i | Opens up the Debtor analysis screen for highlighted Debtor |
| Functions | Alt + f | Focus on the button |
| Tab Basic Search | Alt + 1 | Basic Search |
| Tab Custom Search | Alt + 2 | Custom Search |
| Tab Main | Alt + 3 | Main Search Grid |
| Alt + 4 | Pressing Alt + 4 repeatedly will step through all the tabs e.g. Detail, Statutory etc. |
Creditors Setup Import/Export
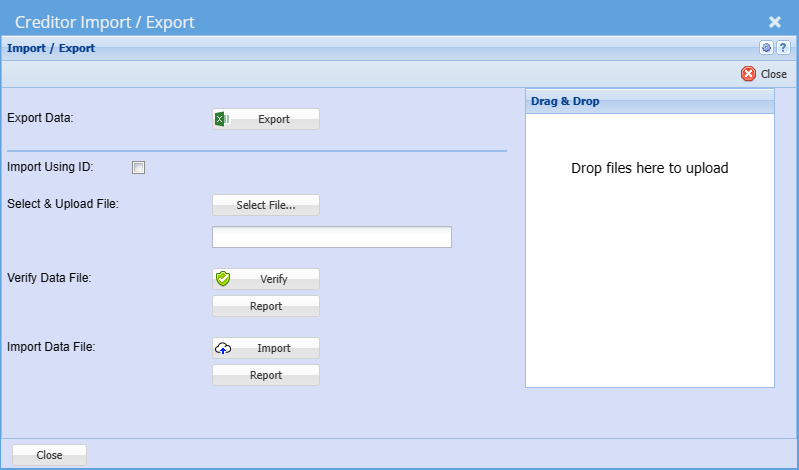
Creditor Import / Export
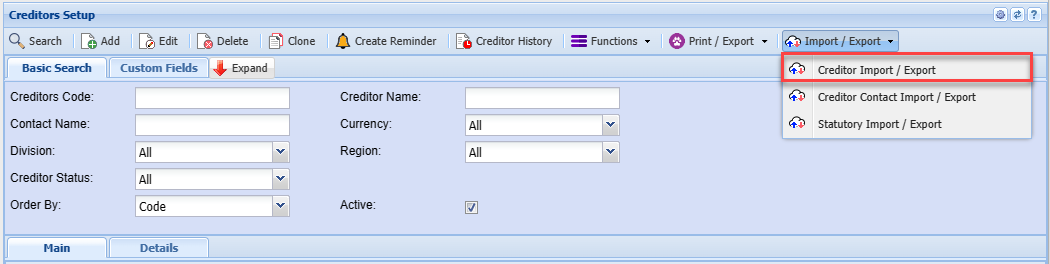
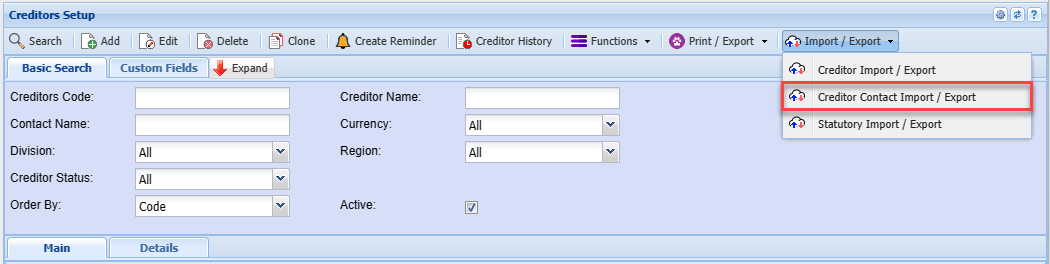
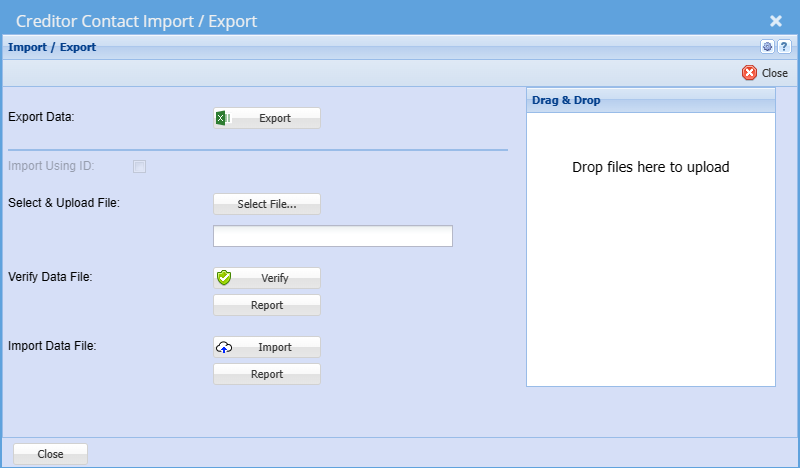
Creditor Contact Import / Export
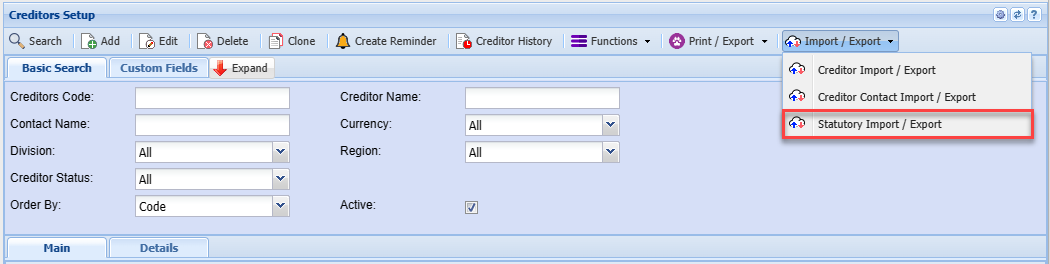
Statutory Import / Export
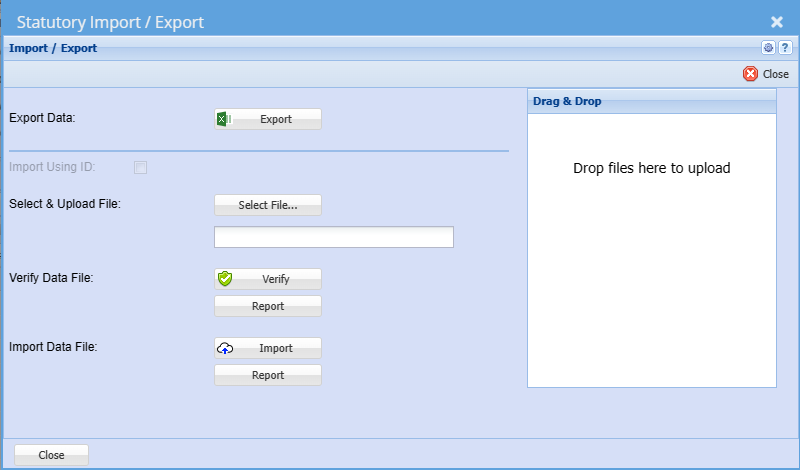
Add Creditor
Adding or Editing a new Creditor / Supplier.
This has many tabs and sections to be filled in.
To create a new Creditor or edit and existing Creditor:
Go to: Creditors Module> Configuration> Creditors Setup
To edit an existing Creditor click the Edit Button or to add a new Creditor Click the Add Button

Details Tab
In this section add the basic information for the Creditor
Minimum details are Creditor Code and Name
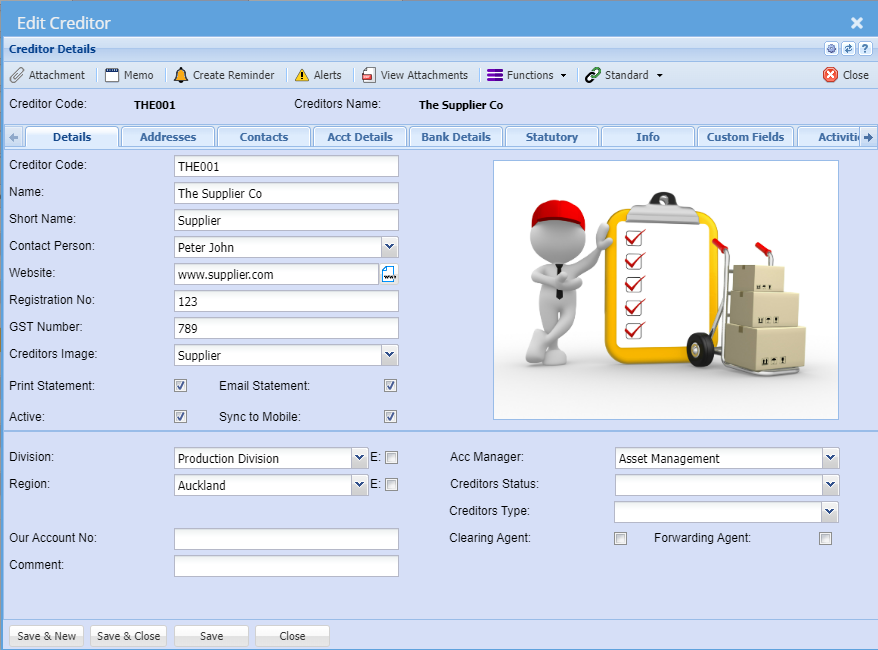
| Creditors Code |
Create a unique code that identifies the supplier/creditor. The Code field can be Alfa Numeric. Recommend: If using only numbers for the code, do not start the code with the number zero (0), as this may cause complications when exporting data.
|
| Name |
Enter the name of the supplier/creditor. This will ideally be the registered name of the Creditor. The Name field can be Alfa Numeric and over 500 Characters long |
| Short Name | This is essentially a shortened form of the supplier company name, e.g.: ABI |
| Contact Person | This is a drop down and only shows contact Names which has being entered from the Contact Persons tab: A default contact person can be added against the Supplier |
| Website | Enter the website address for the Supplier |
| Registration No | Enter the registration number for the Supplier |
| VAT Number | Enter the VAT number for the Supplier (if applicable). |
| Creditor Image |
This drop down will only shows Images which have being uploaded as attachments. Select an image for the creditor to show on the right |
Tick the boxes “Print Statement and Email Statement. This allows for statements (Remittance Advise) to be generated and emailed directly to the Creditor/ Supplier.
| Active | Indicates and sets the Creditor as an active creditor. Should you no longer deal with the particular Creditor and do not want to see the creditor on searches, then remove the tick on this box |
| Sync to Mobile | This tick allows for the particular Creditor to be sync to the Webatar Mobile App |
Creditors can be categorized by using one or more of the following fields:
Division, Region, Creditor Type, Creditor Status
These fields are user defined as such options can be added to suite your companies specific requirements.
| Division | Could be used for differentiating creditors specific to different branches of the organization |
| Region | Could be used for Geographic region the creditor is located |
| Our Account No. | |
| Comment | |
| Acc Manager | |
| Creditor Status | |
| Creditor Type | Could be used for the type of supplier, i.e. Raw Materials, Consumables, etc. |
| Clearing Agent Tick | |
| Forwarding Agent Tick |
Once you have entered the above information, click the save button for the Address and Contacts Tabs to be activated.
Note: All the above fields are not mandatory by default. The creditor Code and Name are minimum requirements
Attachments
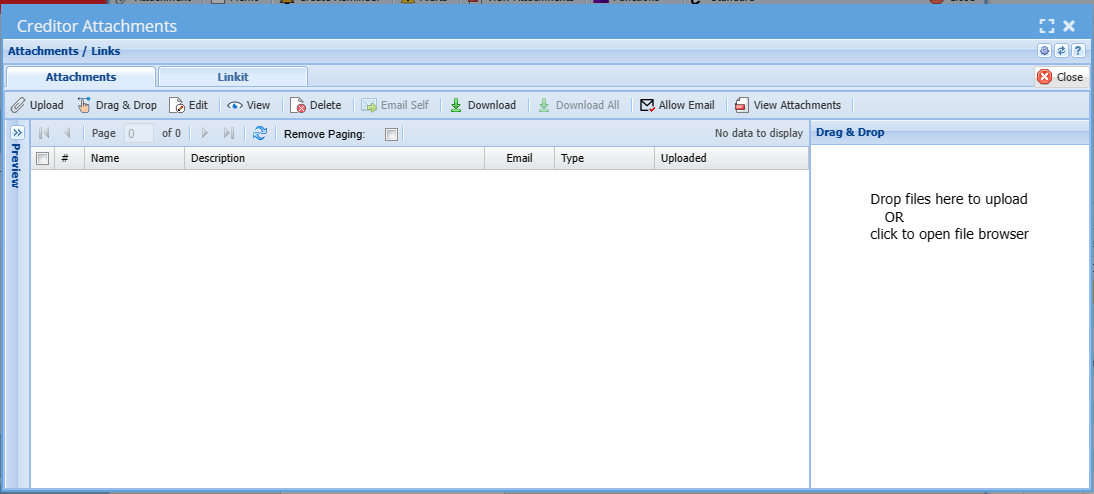
In this tab we allow for unlimited amount of uploads of documents to be attached to the Creditor. You can attach pictures, Excel sheets, Word and PDF Documents and any file you wish.

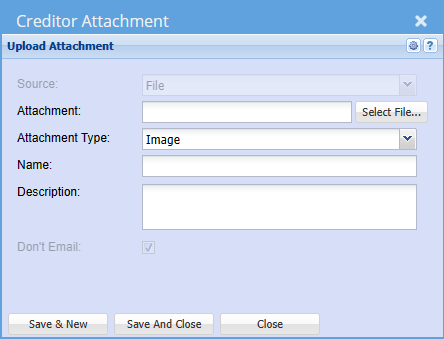
When you click on the Attachments Button the following will come up. You can then drag & drop or upload any documents required.
Memo
Should there be any information or comments related to the Credit that you wish to note for users to access and be aware of, you can enter this information on the memo note
Memo notes are Date and time stamped and also logs the user how added the Memo

Address Tab
Fill in the Physical, Postal and Delivery addresses in the Address Tab. There are buttons called “Same as Physical” etc., once the Postal area button is clicked, it will copy all the details from the Physical Address to the Postal address.
The system also allows the entering of multiple Delivery addresses. All addresses created can be selected at the time of the documents i.e. Purchase Orders.
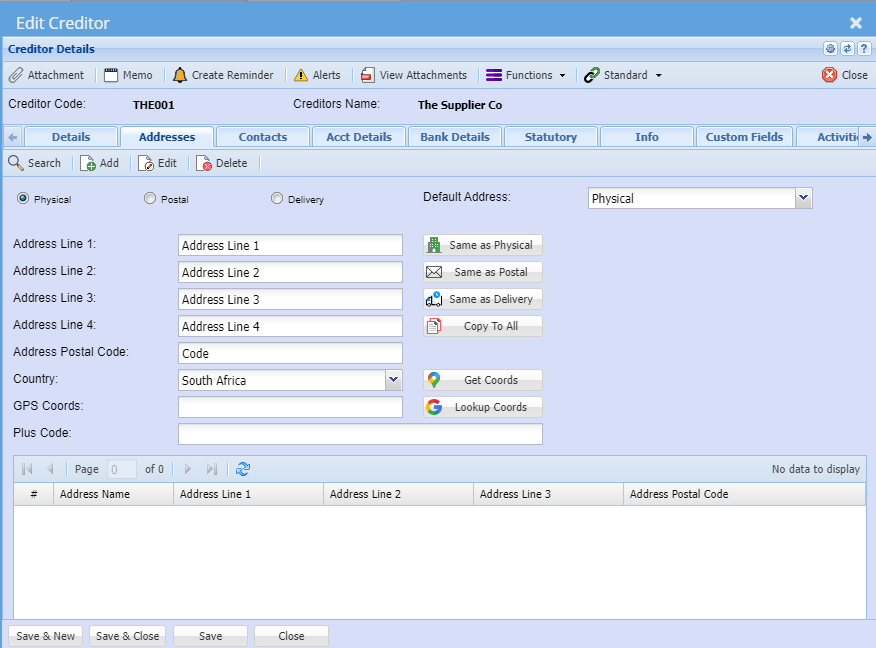
| Physical | Physical address default setting |
| Postal | |
| Delivery | |
| Default Address | This can be selected to be used whenever a document is created, you can override the address selection at the document level. |
| Address Line 1 | |
| Address Line 2 | |
| Address Line 3 | |
| Address Line 4 | |
| Address Postal Code | |
| Country | |
| GPS Coords | |
| Plus Code | |
| User defined address grid |
| Same as Physical | |
| Same as Postal | |
| Same as Delivery | |
| Copy to All | |
| Get Coords | |
| Lookup Coords |
Contacts Tab
In this tab you can create all the relevant people who work for this company, including all their details.
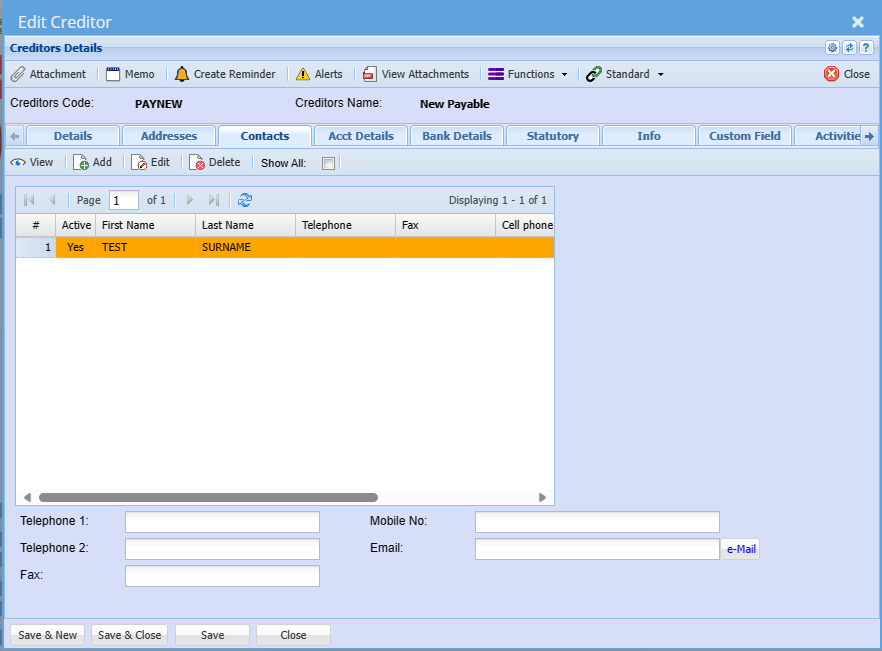
| View button | to view the contact |
| Add button | to add a new contact |
| Edit button | to edit the contact |
| Delete button | to delete the contact person |
| Show All Tick |
| Telephone 1 | |
| Telephone 2 | |
| Fax | |
| Mobile No | |
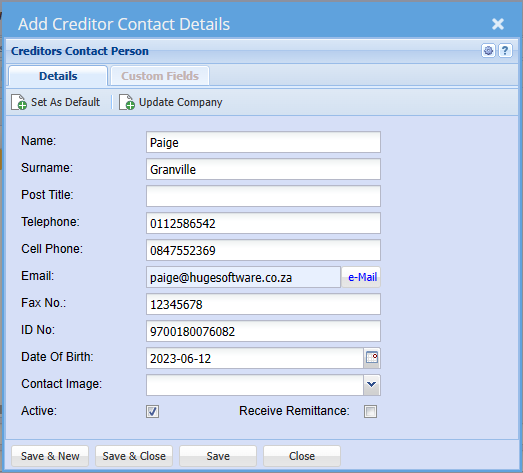
Enter the contact persons First Name, Surname, Contact Numbers and email address:
You can add the addition details if preferred
If the particular Contact person being added is the default contact for this particular Creditor, you can click the Update Company and Set as Default button, which saves you from recapturing these details as default contacts
| Receive Remittance |
Ticking this box implies that the particular Contact can receive remittance advises when emailed from the system. |
Recommended that the contact person’s email addresses are captured as this will save the
User from manually having to type the email each time documents are emailed from the system.
Account Details Tab
The account details tab stores all the specific account information related to this creditor
Important information about the Creditor can be added in the Account Details. For purposes of security, lock down this tab as a precaution against users who should not have access to these details.
When doing a Goods Received Note for example a message will appear to the user that the account is on hold and will give the reason for it.
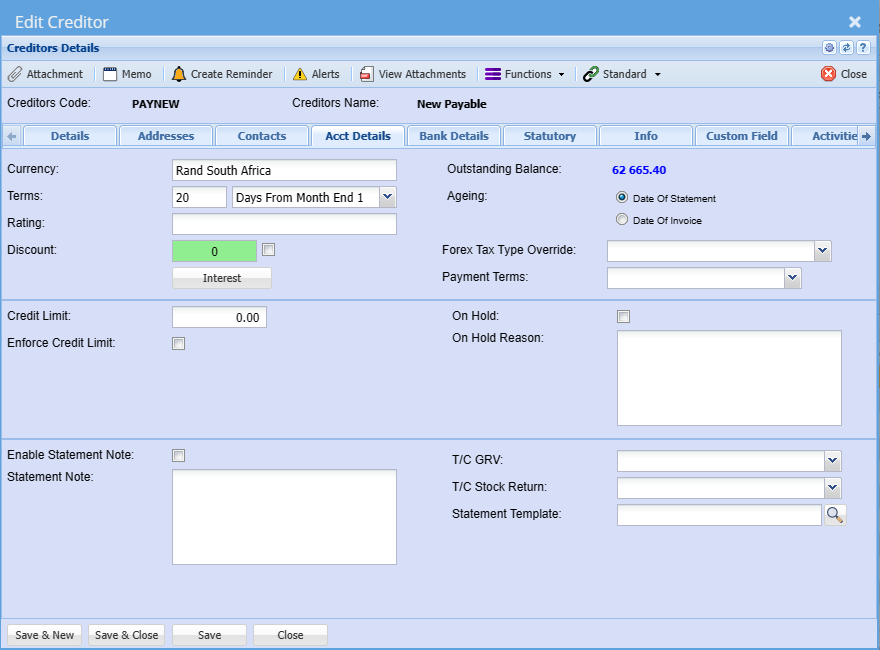
| Currency | The system caters for Multicurrency. As such one can setup a foreign creditor account and all values could then be in USD, Euro etc. When working with multi-currency Suppliers, you can select the default currency to work with on that Supplier. Note - Once the first transaction has been posted against the currency you cannot change the currency. |
| Account Terms |
Select the terms of your Supplier in the drop down. This is the account payment terms that the organization has with the creditor, e.g. COD, 30 Days, 60 Days, etc. Note: The account terms set here will determine and auto populate the due dates on Purchase orders. |
| Rating | |
| Discount | Used as an indication of discount rates received from the Supplier. Should the creditor always allow a discount percentage to all purchases made, you can set this on the discount field and the discount percentage will then pull through to all purchase Orders created. |
| Outstanding Balance | This is the running balance of the Supplier irrespective of transaction dates. |
| Aging | We allow for aging of Date of Statement and Date of Invoice per Creditor. This is the ageing method for outstanding accounts is the terms calculated from Date of Invoice or Month End (Statement) Date. |
| Forex Tax Type Override |
This field is only used for Foreign Creditors where the default GRV VAT type will not apply You can select Non-VAT or Import VAT here, which will pull through to order and prevent users from erroneously selecting GRV VAT. For local Creditors, you will leave this blank |
| Payment Terms | |
| Credit Limit | This field is used to enter the purchasing limit from a Supplier. This could be enforced or used as an indicator. You can enter a purchase limit value and select to enforce the limit or not if this limit is reached, the system will notify the user that the credit limit will be exceeded and provide option to continue (depending on if limit is enforced or not) |
| Enforce Credit limit | Tick this check box if you want to enforce the credit limit indicated in the Credit limit box. |
| On Hold | Tick this box to put the Supplier account on hold. Should you wish to not deal with a particular supplier but do not want to de activate the creditor, you can set the Creditor on hold, which will prevent any orders from being processed. |
| On Hold Reason | Put in a reason for putting the Supplier on hold. |
| Enable Statement Note | |
| Statement Note | If you tick the box and put a message in the Statement text box, this message will appear on this Supplier’s statement only. If you have added a global message under System Configuration Module – Administration Company Profiles both messages will appear on the statement |
|
T/C GRV |
|
| T/C Stock Return | |
| Statement Template |
Bank Details Tab
Put in all the information of the Creditor’s bank details.
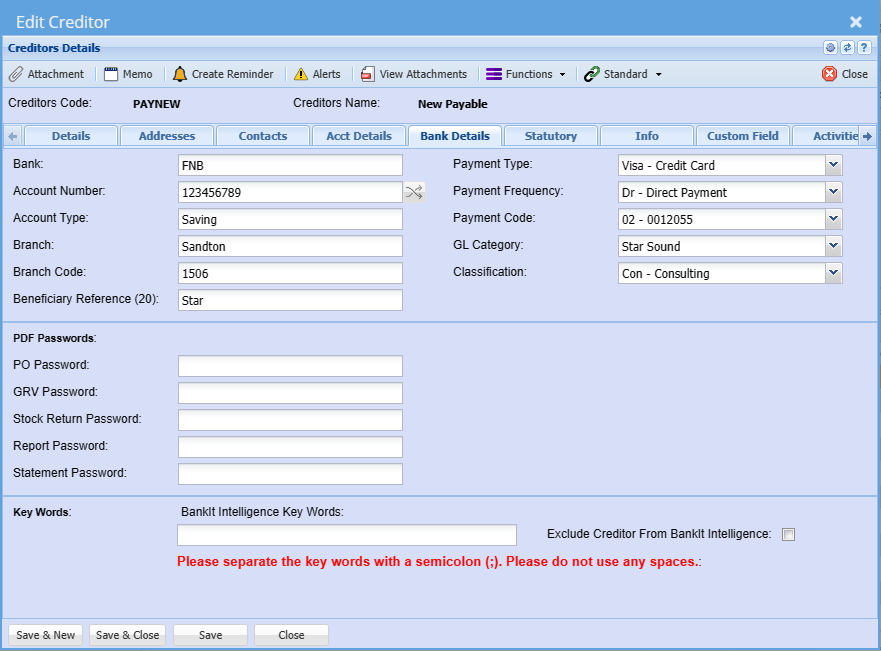
| Bank | Name of the bank of the Supplier |
| Account Number | Account number of the Supplier |
| Account Type | The type of account the Supplier has example, Current or Savings etc. |
| Branch | The Branch name of the bank of the Supplier |
| Branch Code | The branch code of the bank of the Supplier |
| Beneficiary Reference (20) | |
| Payment Type | |
| Payment Frequency | |
| Payment Code | |
| GL Category | |
| Classification | |
| PDF Passwords | PDF passwords allow passwords to be attached to the various documents for security purposes. Only give the passwords to the Supplier so he can open the documents. If the fields are left blank, the PDF will just open. We have split PDF passwords to various document types so each document can be directed to various people in the organization. |
| Note | When a document is generated with the PDF password it cannot be changed on that specific document when it was created. You can however change PDF passwords every month, but it is a good idea to write all passwords down for the specific months. |
| PO Password | |
| GRV Password | |
| Stock Return Password | |
|
Report Password |
|
| Statement Password | |
| Key Words | This fields allows for specific words which appear on Bank statement entries and is used on the BankIT intelligence feature in the system |
Note: When a document is generated with the PDF password it cannot be changed on that specific document when it was created. You can however change PDF passwords every month, but it is a good idea to write all passwords down for the specific months.
Statutory Tab
This tab caters for entering the BEE details of the Creditor
You can also set reminders, whereby the system will send an email reminder to the dedicated user when the BEE certificate is due to expire.
The Registration 1 to Registration 5 fields are customizable to the organization’s preference
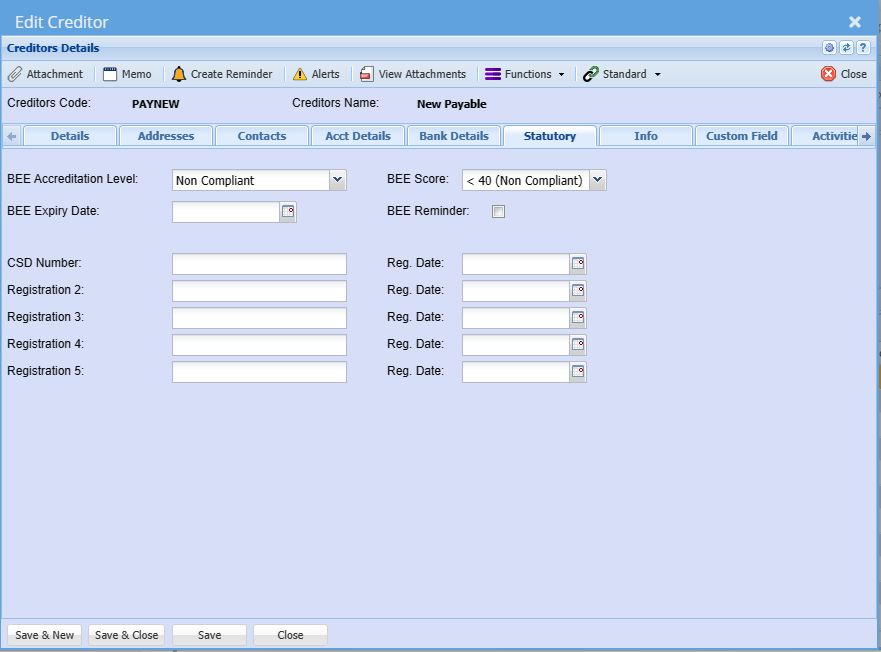
| BEE Accreditation Level | |
| BEE Expiry Date | |
| CSD Number | |
| Registration 2 | |
| Registration 3 | |
| Registration 4 | |
| Registration 5 | |
| BEE Score | |
| BEE Reminder | |
| Reg. Date |
Info Tab
This tab allows you to insert any additional notes against the company.
You can also set additional indicators as per the respective tock boxes.
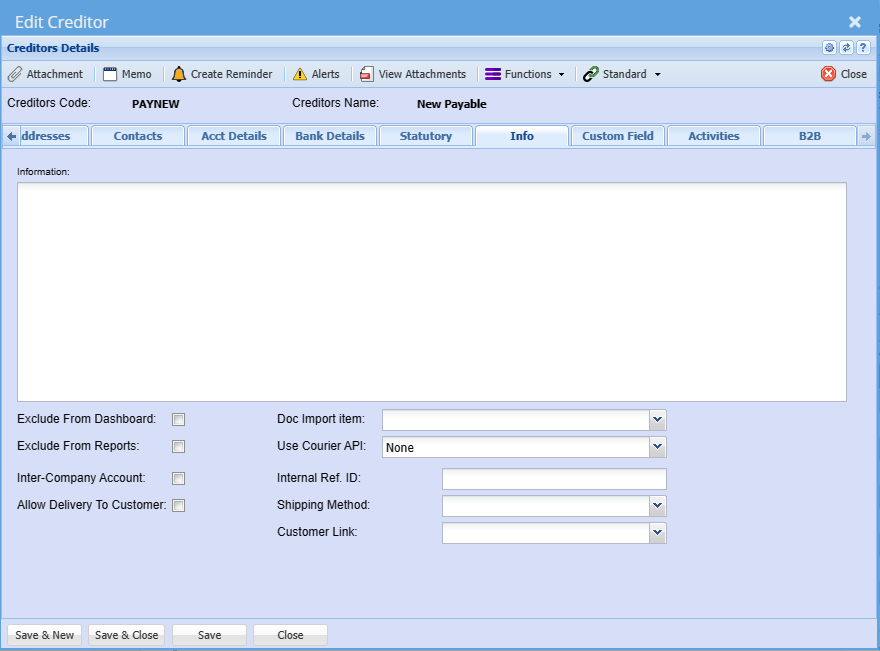
| Information | |
| Exclude From Dashboard | |
|
Exclude From Reports |
|
| Inter-Company Account | This identifies the creditor as an intercompany Supplier and as such can be excluded from certain reports if need be. |
| Allow Delivery To Customer | |
| Doc Import Item | |
| Use Courier API | |
| Internal Ref. ID | This is where one can enter a unique identifier of the creditor that may apply to a third-party application. |
| Shipping Method | This allows you to select the default shipping method for this creditor so as not to select on each document |
| Customer Link |
Custom Field Tab
Under the Custom Fields tab, this is where you can insert predefined user fields. Add as many custom fields as you require for additional information.
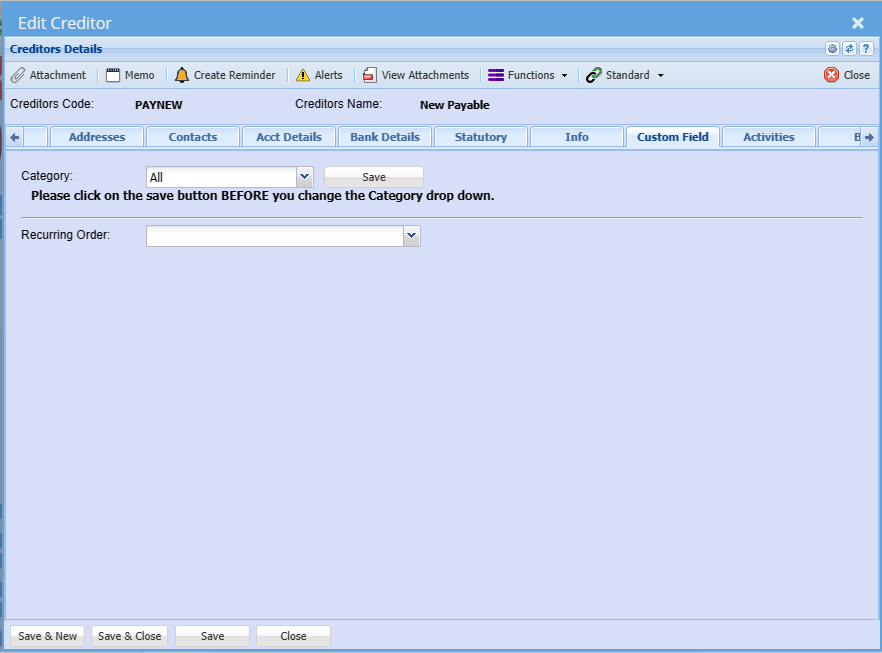
| Category | |
| Recurring Order |
Activities Tab

| Choice: Activity - Interaction | |
| Search | |
| View | |
| Print / Export | |
| Document Types | |
| Date From | |
| Interaction Type | |
| Date To |
B2B Tab

Functions dropdown
Branches
Should you be running multi-branches you can select the branch that this Supplier is linked to.
When searching users will then only see the Creditors linked to the branch they have access to.
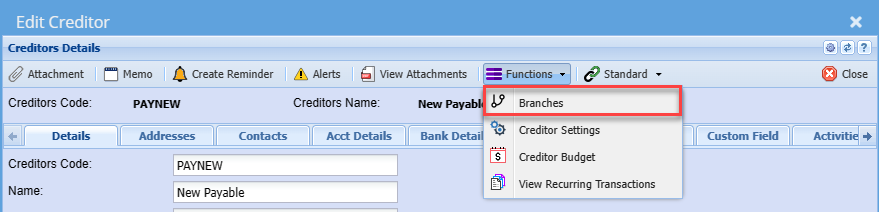
Move the branch to the right for access

The right-hand column is the selected branch, i.e. Branches the Creditor is linked to and users with access to these selected branches will then be able to search select these creditors
You can have multiple branches linked to a Creditor
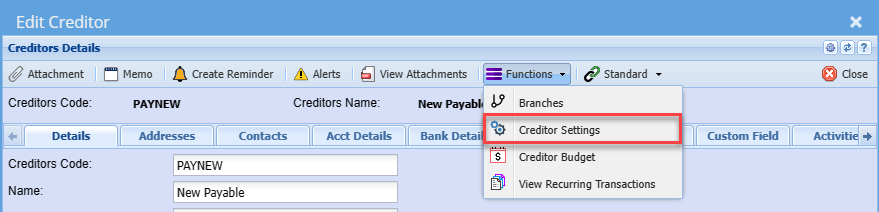
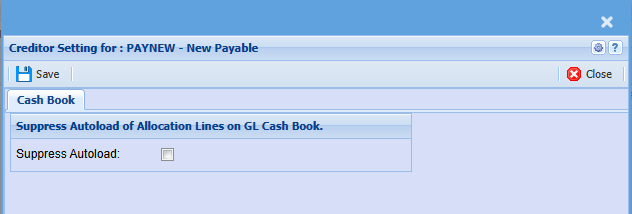
Creditors Settings
Creditor Budget
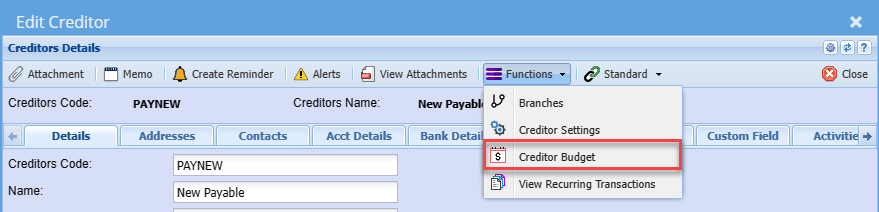
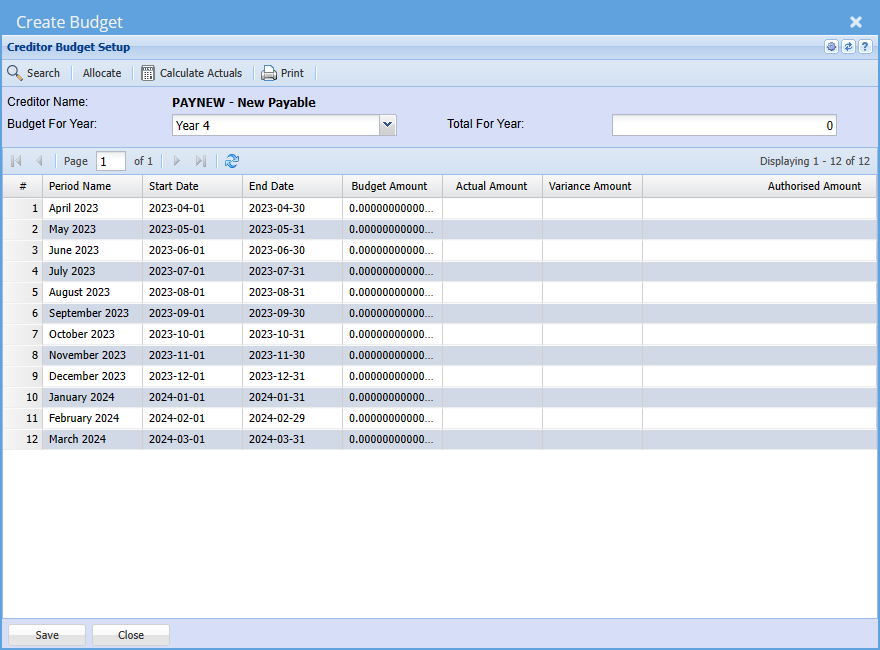
| Search | |
| Allocate | |
| Calculate Actuals | |
View Recurring Transactions
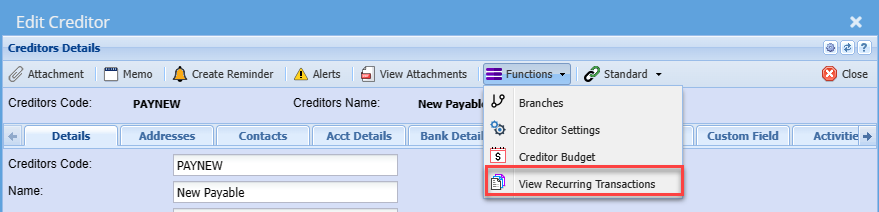
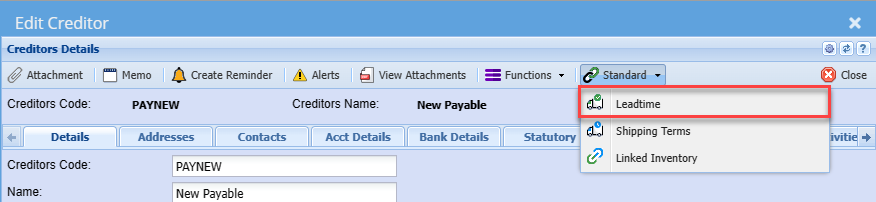
Standard Dropdown
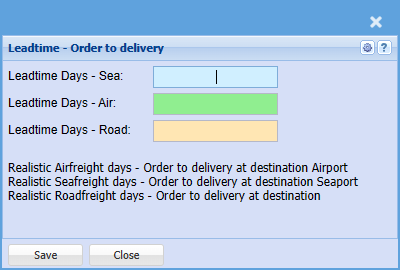
Leadtime
Shipping Terms

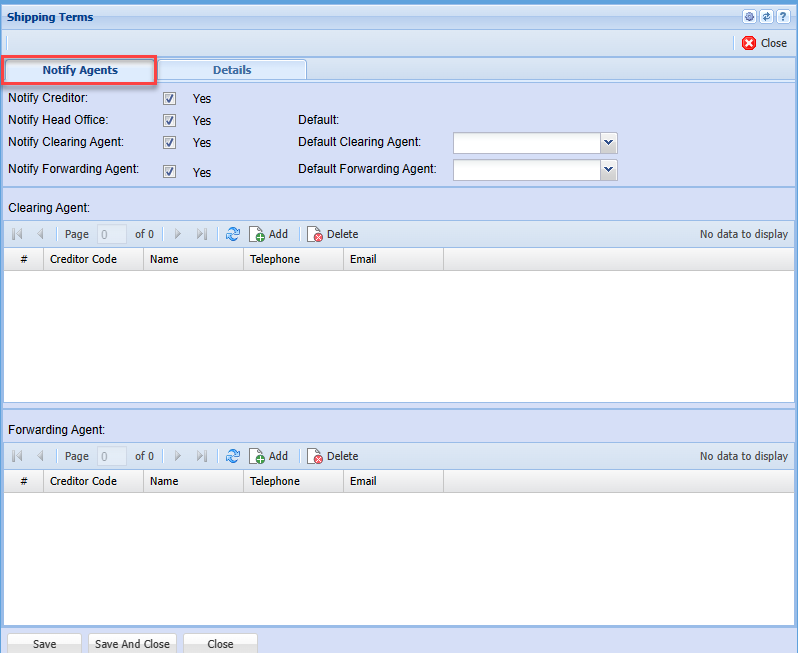
| Notify Creditor | |
| Notify Head Office | |
| Notify Clearing Agent | |
| Notify Forwarding Agent | |
| Default | |
| Default Clearing Agent | |
| Default Forwarding Agent |
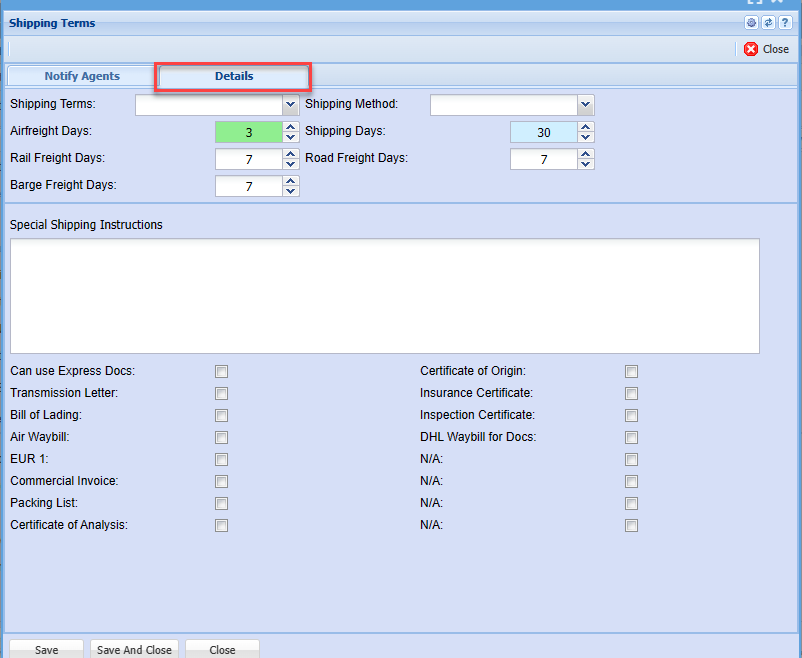
| Shipping Terms | |
| Airfreight Days | |
| Rail Freight Days | |
| Barge Freight Days | |
| Shipping Method | |
| Shipping Days | |
| Road Freight Days | |
| Special Shipping Instructions | |
| Can use Express Docs Tick | |
| Transmission Letter Tick | |
| Bill of Lading Tick | |
| Air Waybill Tick | |
| EUR 1 Tick | |
| Commercial Invoice Tick | |
| Packing List Tick | |
| Certificate of Analysis Tick | |
| Certificate of Origin Tick | |
| Insurance Certificate Tick | |
| Inspection Certificate Tick | |
| DHL Waybill for Docs Tick | |
| N/A Ticks |
Linked Inventory


Click Add and fill in the information
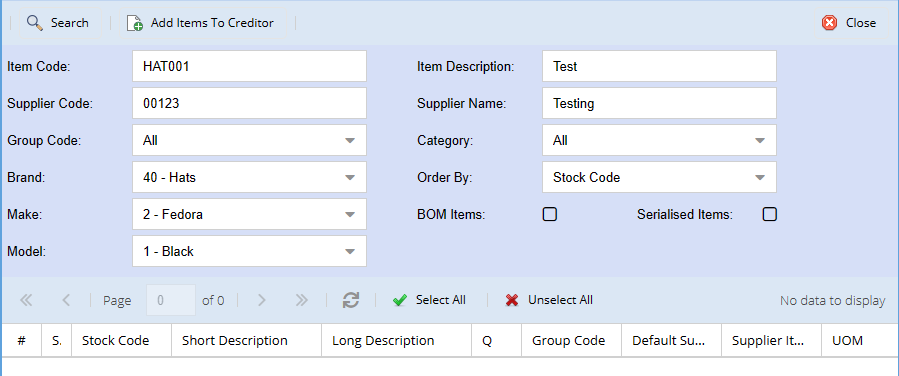
| Add Items To Creditor | |
| Item Code | |
| Supplier Code | |
| Group Code | |
| Brand | |
| Make | |
| Model | |
| Item Description | |
| Supplier Name | |
| Category | |
| Order By | |
| BOM Items Tick | |
| Serialized Items Tick |
Energy Defaults
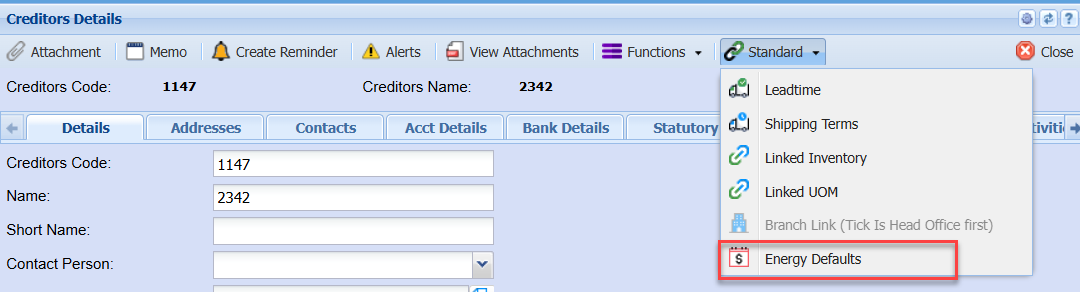
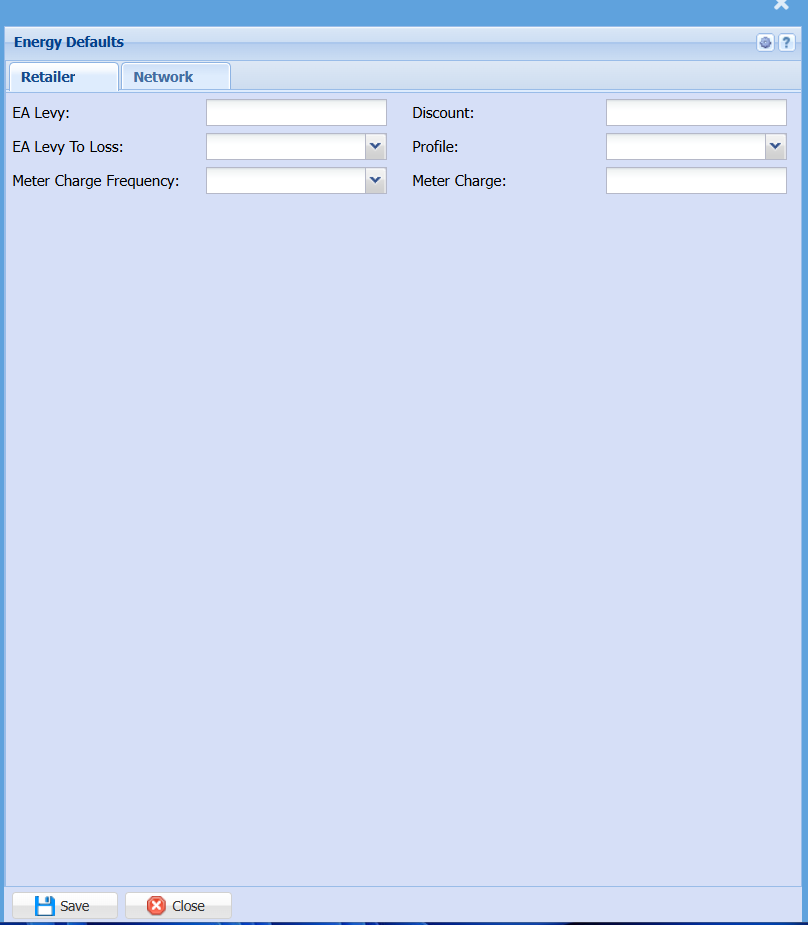
Creditors Status
Creditors / Supplier Status
The Creditors / Supplier status icons are defined as follows:
|
Icon |
Details |
|
|
Active |
|
|
Clearing or Forwarding Agent |
|
|
Enforce Credit Limit |
|
|
On Hold |
|
|
Non Active |
.png)
.png)
.png)
.png)
.png)
.png)
Procurement - Standard Operating Procedure (SOP)
Purpose
The purpose of the operating procedure is to provide detailed instructions on how to carry out a task so that any team member can carry out the task correctly every time. The operating procedure also assists in ensuring that all new employees receive the same training. The operating procedure eliminates the guesswork from day-to-day operations and assists employees understand the processes, policies and procedures associated with their jobs. Ultimately, the purpose of the Operating procedure, and adherence to the procedures allows for a logical and continued link between different processes within the organization resulting in reduced errors, time savings on daily processing, greater capturing accuracy, more accurate and easily accessible analytics, adherence to compliance and governance.
Scope
This procedure will apply to:
Job Costing (Project) management processes
The full Procurement cycle and processes
- Objectives
o Eliminate manual processes being performed outside of the ERP
o To maintain the quality of data and transaction processing
o To serve as a training document for training users on the processes
o To facilitate consistent conformance to quality system requirements
o To provide guidelines and a bases for accurate and timely data collections/ reporting
o Ensure compliance of the process as well achieving governance
- Procedure
5.1 Procurement Process Flow Chart


5.2 Process Steps
|
1 |
Receive Enquiry |
|
2 |
Source Supplier |
|
3 |
Request for Supplier Quote (RFQ) |
|
4 |
Award/ Approve Quote |
|
5 |
Capture Purchase Order |
|
6 |
Attach Supplier Quote |
|
7 |
Request PO Authorization |
|
8 |
PO Authorization |
|
9 |
Attach Authorization |
|
10 |
Order |
|
11 |
Receive Stock / Part Receive Stock |
|
12 |
Complete Receive Stock to GRV/ Delivery Note |
|
13 |
Attach Supplier Invoice/ Delivery Note |
|
14 |
Process Goods Received Voucher (GRV) |
Creditors ERROR saving
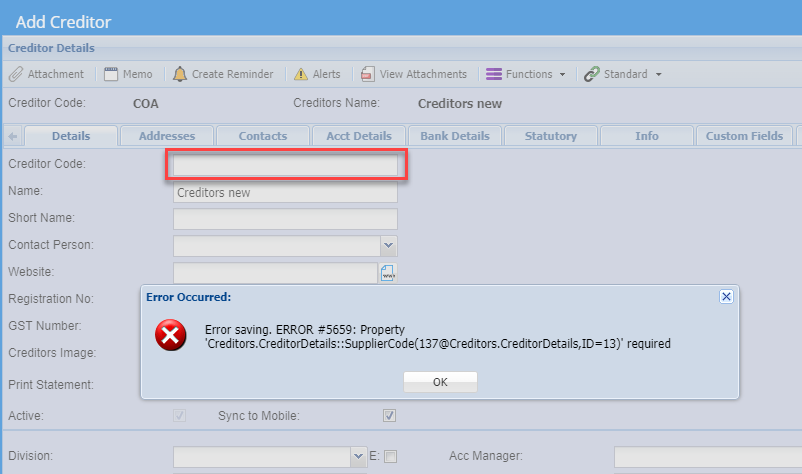
Creditors Error saving a new supplier
The system does not allow a Creditors code to be:
| 1 |
Duplicated |
| 2 |
Blank |
| 3 |
Space in Code (Must be a valid code) |
Error Saving. ERRPR #5659: Property
Blank or space is entered in code, this is not allowed
Additional Creditor Properties Menu
Additional Creditor Properties
Creditors Module>Configuration > Add Creditor Properties
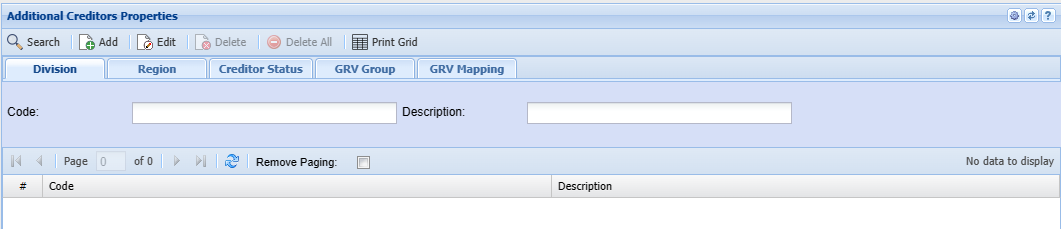
Additional Creditors Properties Help
This form allows the user to set up Divisions, Regions, Creditor Statuses as well as GRV Groups and Mappings.
| Add | Depending on the selected tab, this will allow the user to add divisions, regions, Creditor Statuses, GRV Groups and GRV Mappings |
| Edit | Depending on the selected tab, this will allow the user to edit divisions, regions, Creditor Statuses, GRV Groups and GRV Mappings |
| Delete | Depending on the selected tab, this will allow the user to delete divisions, regions, Creditor Statuses, GRV Groups and GRV Mappings |
| Delete All | this will allow the user to delete all the GRV Mapping items |
Print Grid Button
Print the creditors additional property grid
Enabled on the GRV Mapping tab
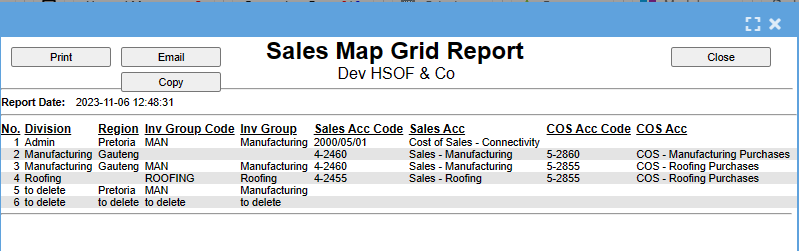
Division Tab
Search by entering the Code or the description
Click Add to add new Division

| Code | |
| Description | |
| Active | |
| Charge Up Job Time |
Region Tab
Search by entering the Code or the description
Click Add to add a new Region
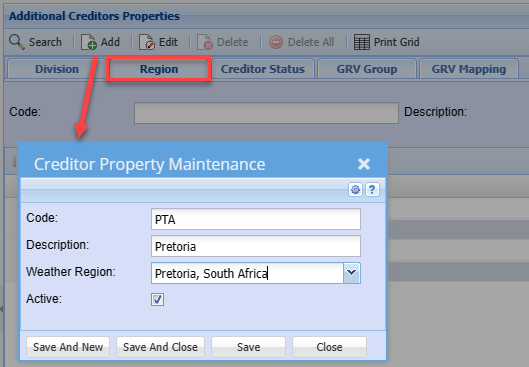
| Code | |
| Description | |
| Weather Region | |
| Active Tick |
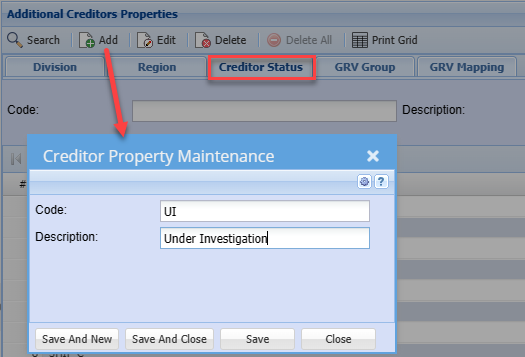
Creditor Status Tab
Search by entering the Code or the description
Click Add to add a new Creditor Status
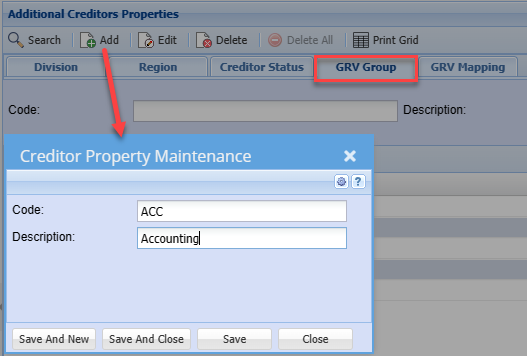
GRV Group Tab
Search by entering the Code or the description
Click Add to add a new GRV Group
GRV Mapping Tab
Allows the user to search by selecting Division, Region and GRV Group from the drop-down arrow.
Click Add to add a new GRV Mapping
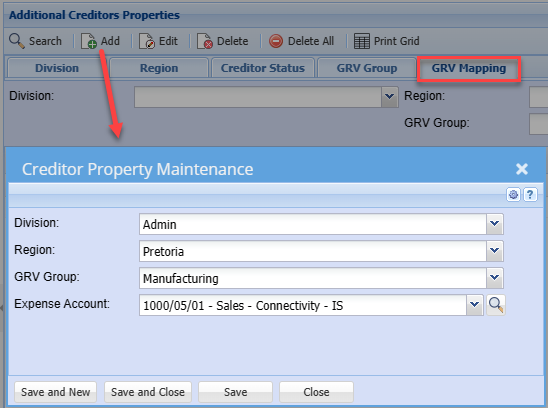
| Division | |
| Region | |
| GRV Group | |
| Expense Account |
Creditors Email Mailing List Menu
Add Creditors Email Mailing List
Add Supplier Bulk E-mailing List
Creditors> Configuration> Email mailing List
- Click "Add"
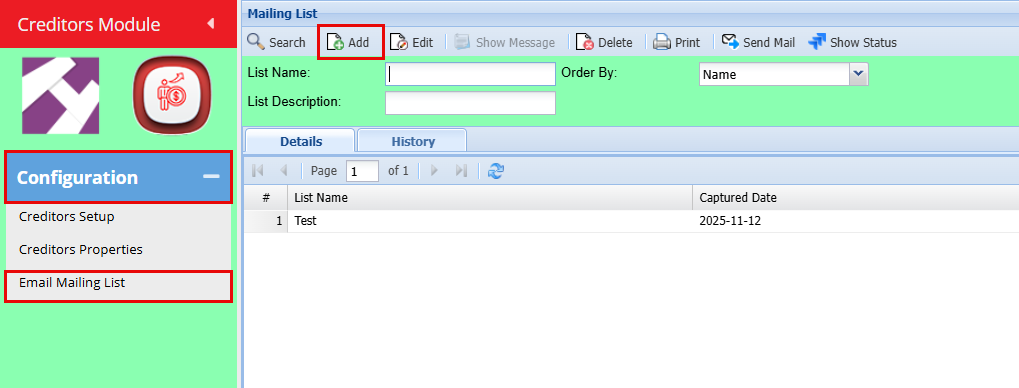
- Add the Mailing List Name and a Description
- Click "Save"
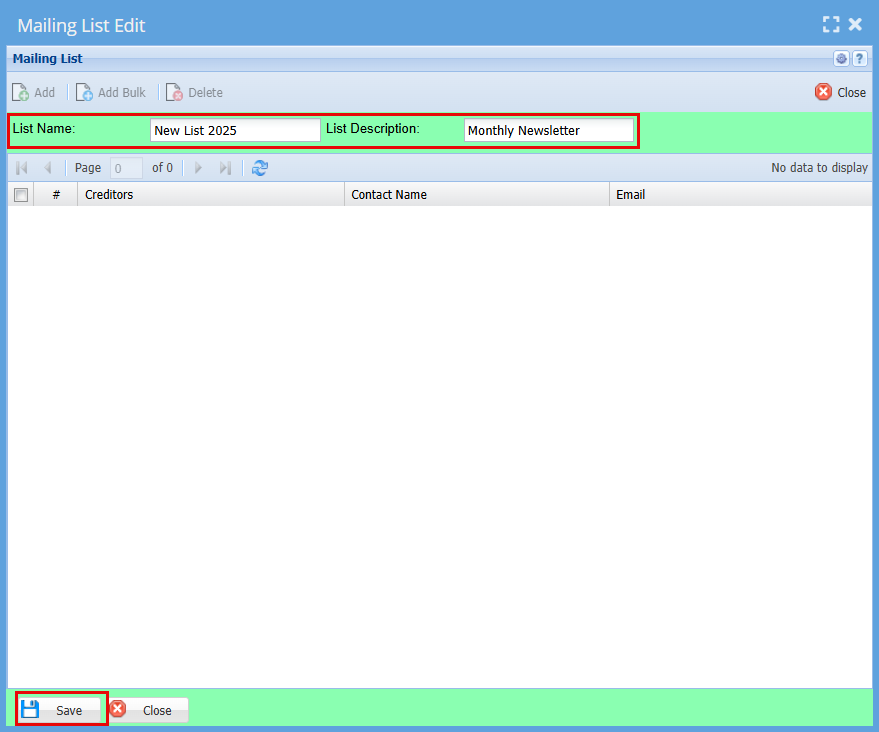
| List Name | Enter a name or code for your list |
| List Description | Enter a description for the list |
| Add | Add button opens up Creditors setup function that allows you to select from your supplier contact the email to add on the list. |
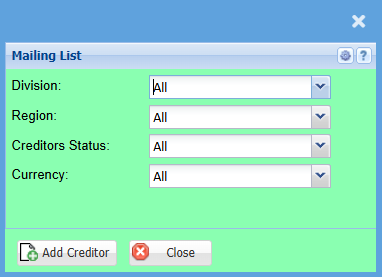
Once you click "Add" you will have the below screen open.
- Select your preferred Creditors you would like to email by using the drop-down menus, if you want to send it to all, leave the selection as "All"
- Click "Add Creditors"
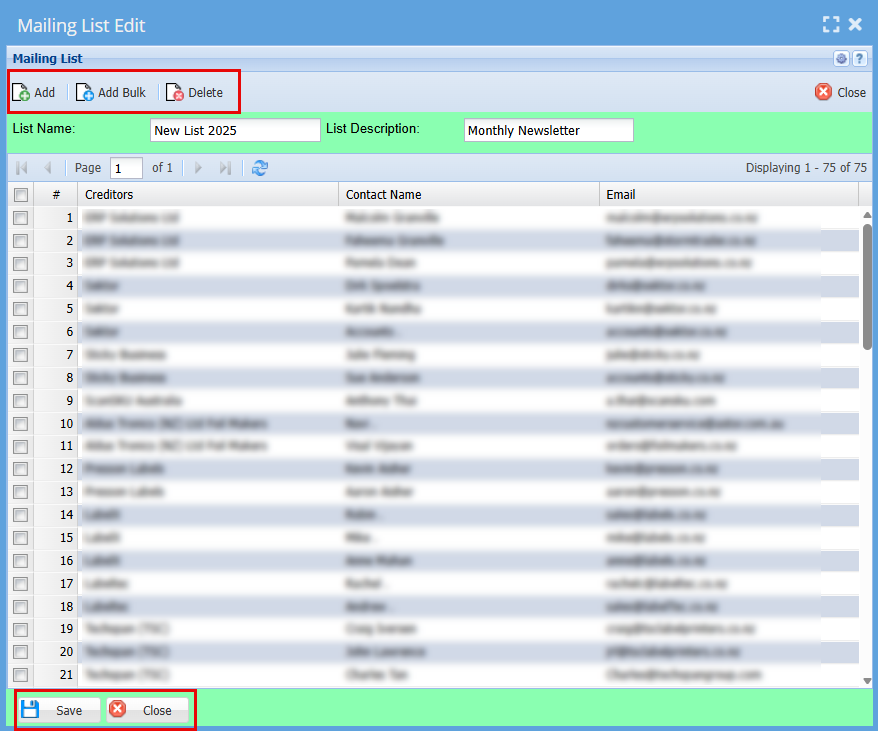
By clicking "Add Creditors" the system will create your mailing list.
Here you can "Add" more creditors and can "Delete" the ones you want to remove.
Click "Save"
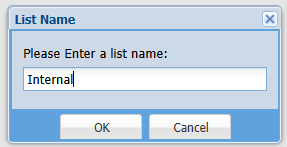
You will be prompted to Name this list
- Click "Ok"
- Click "Close"
Creating and Send Bulk Mail to Creditors
Process Email
.png)
Process mailing list is the part that allows a user to prepare the message to be sent. It has five buttons
On the white screen, that’s where the message detail is going to be and can be formatted according to users' preference
| Subject | Message subject |
| List | The drop-down arrow allows a user to select the one list but while the tree search allows a multiple of email lists |
| Help | gives the header and a must Copy the bottom part to the header and the message will be read “Dear [ContactFirstName]” when processing |
| Attachment | allows a user to attach either a document or picture related to the message and has five buttons |
| Process | Processes the email |