AAT Configuration
- Asset Groups
- Asset Actions Setup
- Asset Condition
- Asset Locations
- Policy Setup
- Incident Setup
- Additional Menus
- Fixed Asset GL Setup
- Asset Tracker Issue To Users
- Email Notification
Asset Groups
Asset Groups Setup
This is ideal for setting up various types of groups for your Asset items.
These groups are used in Asseet Fixed assets to group all fixed assets into a single General Ledger Journal.
Meaning you can create a group called vehicles fixed assets. Assign all your fixed assets to this group.
When the depreciation journal is created, it will group all those fixed assets into one General Ledger Journal.
.png)
Asset Actions Setup
Asset Actions Setup
Setup the various actions that can occur against an Asset for Asset item
To set an action against an asset go to
Asset Tracker Module> Configuration> Asset Action
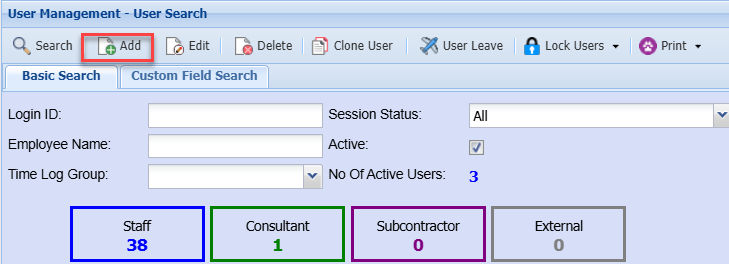
Then click add and the screen below will appear. To edit an asset action, highlight the asset action you want to edit then click edit
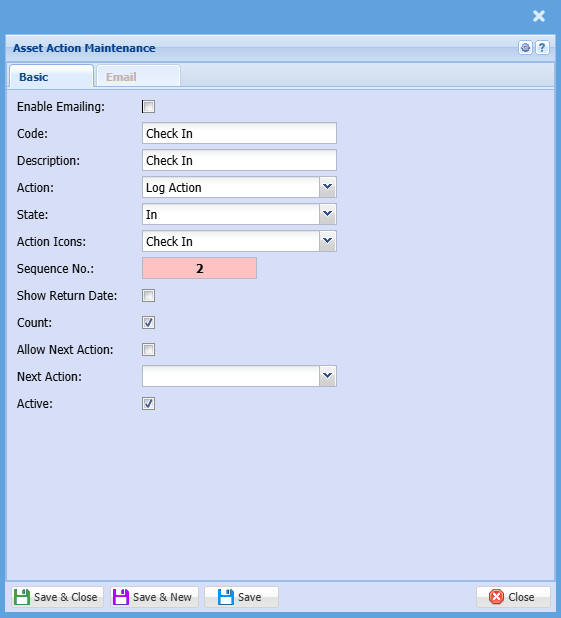
| Enable Emailing | Put a tick on to enable emailing |
| Code | Enter a code for the action |
| Description | Enter a description for the action |
| Action | Various actions can be done on an asset, log action, invoice, credit note, checklist, support log |
| State | There are four states to which an asset can be assigned, in, pending all, out and Disposed |
| Action icons | Set up an icon for the action |
| Sequence No | This is the sort order for the action drop down (You may want more frequently used actions at the top of the list) |
| Show return date |
This should be off for any state that is 'in' and should be on for any state that is 'out'. When this is off, selecting an action will not save the return date. |
| Count | Put a tick on if you want the system to automatically count your assets |
| Allow Next Action | Put this tick on to allow next action |
| Next Action | Select the next action on the drop down menu selection |
| Active | Put a tick if it is an active action, and do not put a tick if it is inactive |
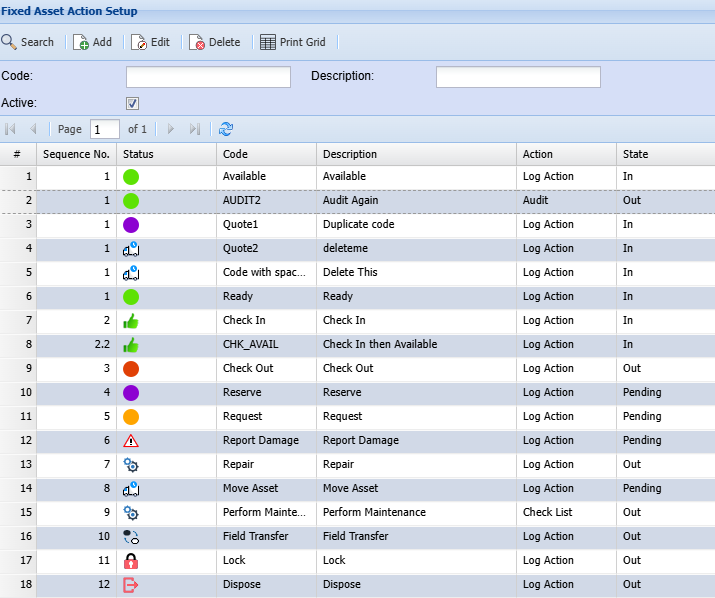
Asset Action Grid
Go through the various actions and clean up the actions that you will not be using
We recommend the following actions remain in the system:
- Available
- Check-In
- Check Out
- Dispose (Works when you write off the asset and creates a stock level adjustment)
- Sell (This works when you sell the asset and create an invoice)
- Audit (Users this when you create your fixed asset audit, it will mark the items as being audited)
- Bookin (Works with booking in feature in job costing)
- .Bookout (Works with booking out feature in job costing)
Asset Condition
TrackIT Asset Condition
Set up various conditions that you would like to apply to each of your asset items
.png)
Asset Locations
TrackIT Asset Locations
Set up various locations for your asset items
.png)
Policy Setup
Policy Control setup
Video training manual 202112 - Click Here
Setup policies for the company
.png)
Policy Group
Create a policy group for various groups of policies other than the Division and Region
Click on the Policy Group button to create groups
.png)
Add groups
Assign a code and description for your group
.png)
Add Policy
Create a new policy with attachments.
.png)
Incident Setup
Incident Setup
This is where one can setup all the various incidents in the system.
Below is some examples of Incident types
.png)
Additional Menus
Debtors Setup
This is where the user creates a new Debtor or search for an existing one
System buttons:
Search button allows a user to search using Basic Search Tab and Custom Search Tab
At the top of the screen under the Debtors Setup heading, there are 5 buttons and three drop down lists
.png)
Expand button – to shown more search filter criteria or Contract button to show less search filter criteria
Add button– to create a new Debtor.
Edit button –to make changes onto an existing Debtor.
Delete button – to delete an existing Debtor provided the Debtor has no transactions linked to it.
Print Export Drop Down allows one to select from the following options:
Print button - print all the debtors listed in the system sorted alphabetically
Export Debtors button exports debtors list to Excel spread sheet.
Export Contacts button – exports Contacts to an Excel spread sheet
Import Drop Down allows one to select from the following options:
Import Contacts –Import from the Excel sheet to the system
Import Acct Managers – Accounts can be imported onto the system from the excel spread sheet.
Import Legal Hand Over – Legal Hand Over documents can be imported in CSV format
Extras Drop Down allows one to select from the following options:
Service Level Agreements –Link Service Level Agreement to a Debtor
View Reoccurring Transactions – See what Reoccurring Transactions have been linked to the Debtor.
Basic Search tab, if the debtor’s code in the Basic search Tab or debtor’s name is left blank, this will bring back all the debtors listed in the system sorted alphabetically. If the cursor is placed on Name at the column head, this will sort the names A-Z or Z-A as preferred.
Custom Search tab, Custom search searches according to the category selection on the drop down arrow and the system will bring back all that is selected on the category
This functionality is currently not active
Creditors Setup
This is where the user creates a new Creditor or search for existing.
.png)
System buttons
Search button allows a user to search using Basic Search Tab and Custom Search Tab
Basic Search Tab - if the creditor’s code in the basic search fields and other fields are left blank, this will bring back all the creditor’s listed in the system sorted alphabetically. If the cursor is placed on Name at the column head, this will sort the names A-Z or Z-A as preferred.
Custom Search, Custom search searches according to the category selection on the drop down arrow
Main Tab – shows a list of all creditors added on the system
Details Tab – shows details of selected creditor
Address Tab – shows the selected creditors address
Contacts Tab – shows creditor’s contacts
Standard Tab, has four buttons
Insert – to create a new creditor.
Amend –to make changes onto an existing creditor.
Delete – to delete an existing creditor provided the creditor has no transactions linked to it.
Insert Note – Allows a user to interact with the creditor via sms or email and only if the contact person has an email address for emailing and cell number for sms.
Print Tab has two buttons
Print button allows a user to print all the creditor’s listed in the system sorted alphabetically
Export button - to exports creditors list to excel spread sheet.
Import Tab has one buttons
Import Contacts button –Import from the excel sheet to the system
Inventory Setup Help
We cater for three types of Inventory in the inventory setup:
.png)
Stock Item: This would be physical stock such as a ruler. This is typically your Inventory items
Service: This is not a physical stock item e.g. labour. This in not typically included in the stock ledger account.
Custom: This is similar to a service item, an example would be Sub Contractors.
Basic Search Tab: allows the user to search by entering information on the following fields, if nothing is entered when searching; the system will pull out all inventory items
Item Code: search stock item by entering the code
Item Description: search for a stock item by entering the item description
Supplier Item Code: search stock item by entering the supplier item code or the name of the supplier
Branch: to select the branch and other fields from the drop down arrows
Active: it the box is ticked, then the system will search for only active inventory items
Custom Search Tab: allows the user to search items by selecting the category from the drop down arrow
Grid Edit Tab: allows the user to edit the selected item without amending
Main Tab: shows a list of inventory items
Cost Price Tab: shows a cost price of a selected item
Supplier Cost Price Tab: shows a supplier cost price of a selected item
Stock Available Tab: allows the user to view stock details from different warehouses
Serial Number Tab: shows serial numbers for the selected item
Standard Tab
Add button: to create an inventory item
Edit button; to view or make changes on an existing item
Delete button: to delete a selected inventory item.
Clone button: clone the selected Inventory Item.
Update Mark-up button: Updates the mark-up of the selected Inventory Item.
Bin Location Import button: to import bin location
Print Tab
Print button: prints the selected Inventory Item.
Basic Export button: Exports the currently selected Inventory Item into an Excel file.
Master Export button: to export complete list of inventory items to excel spread sheet. Please not that this does not use the search criteria.
Units Of Measure Setup
Trackit> Configuration>Unit of Measure
.png)
Unit of measure is used as a standard for measurement of the physical quantity
Standard Tab has four buttons:
Add button: to add unit of measure
Edit button: to view or make changes on the existing unit of measure
Delete button: the delete button allows you to remove the currently selected Unit of Measure.
Print Grid button: to print inventory unit of measures’ list
Fixed Asset GL Setup
Fixed Asset Setup
General ledger Fixed asset setup
Setup the Fixed Asset Tab of the Fixed Asset cost account
.png)
Create the fixed asset inventory item
.png)
Check that the tick is on for Allow to TrackIT
.png)
Check minimum balance for transactions is setup
.png)
Check that Fixed Asset automatic schedule journal is active
This is to ensure that the Fixed Asset Journal is run each night
.png)
Setup TrackIT group codes in order to group fixed assets together on one journal
Similar type fixed assets
.png)
Fixed Asset Incoming
In order to bring in a Fixed Asset, use the GRV document to do this
Create a GRV / Purchase Invoice to bring in the Fixed Asset.
If you are bringing in a fixed asset that is for an opening balance.
Suggestion is to make the VAT / GST as zero because the Tax has already been taken into account.
For take on, take the date back to the date that you want the fixed asset to run.
.png)
Create the Serial number for the item
Enter the Brought into use date and residual value
.png)
GRV ledger entries are updated with the fixed asset cost
.png)
TrackIT item created
.png)
TrackIT Fixed Asset information updated
.png)
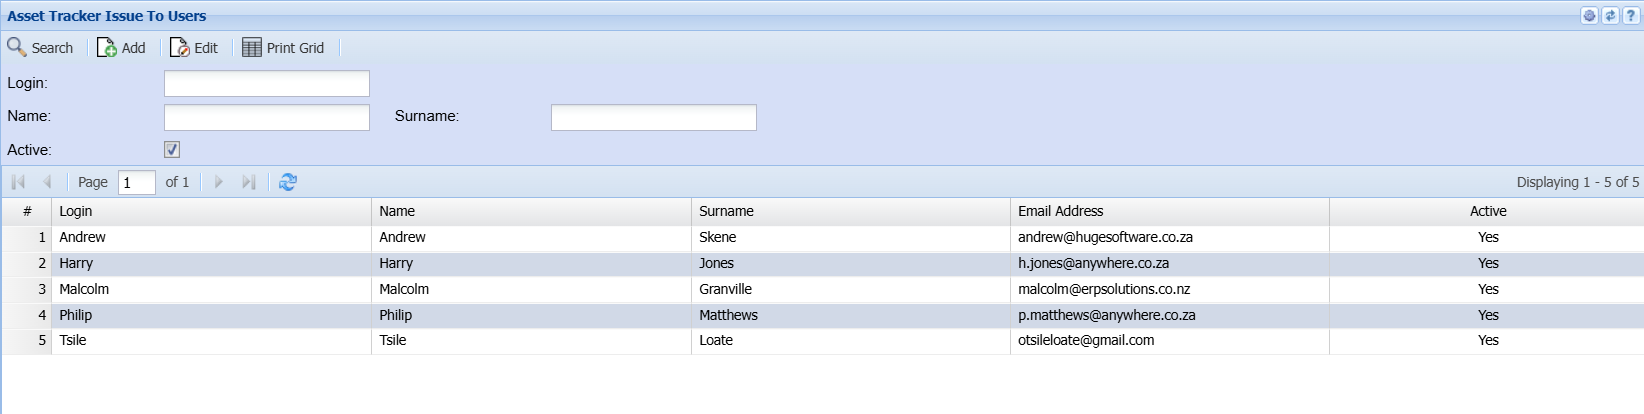
Asset Tracker Issue To Users
Issue To Users
Email Notification
Email Notification Setup [WIP]
Setting up of multiple letters to action to customer contact.
Multiple template letters
Link template letter to an action
Actions as follows:
- Multiple Asset actions added eg
- check out - Flag on to run Return date emails
- check in - Flag off to Not run Return date emails
- Other actions
- Multiple email out based on X number of days before and after check return Date
- Letter out X number of days after check out No 1
- Letter out X number of days after check out No 2
- Asset return date, letter out three days before return day
- Letter X number of days after Return Date
- Letter X number of days after Return Date No 2
- Letter X number of days after Return Date No 3
- Letter on day of Return Date
Ensure we have a flag active on asset for letters out
Ensure that there is a flag to log check out to run
Setup Schedule task to be run each day to check all schedules
Notes
- Add in an Asset Action that puts the flag on for email in or out
- Check that we are able to put in data replacement
- Contact first name and last name
- Company name
- Stock item code and description
- Add an additional tab to allow internal user to be copied in the email
Asset and Actions setup
Settings for the following areas need to be setup in order for the email to go out.
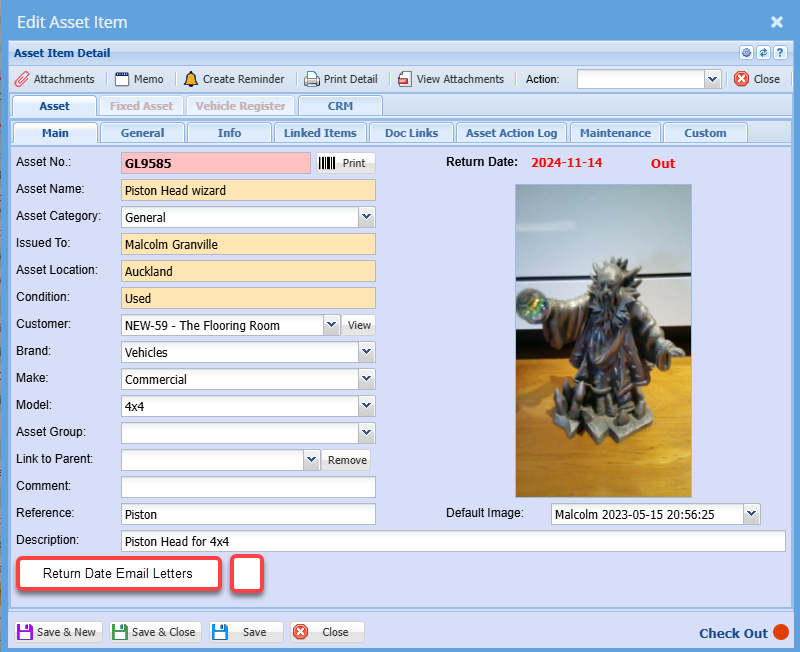
Asset Setup
| Return Date Email Letters | Enable this function for this asset to activate Return Date email letters |
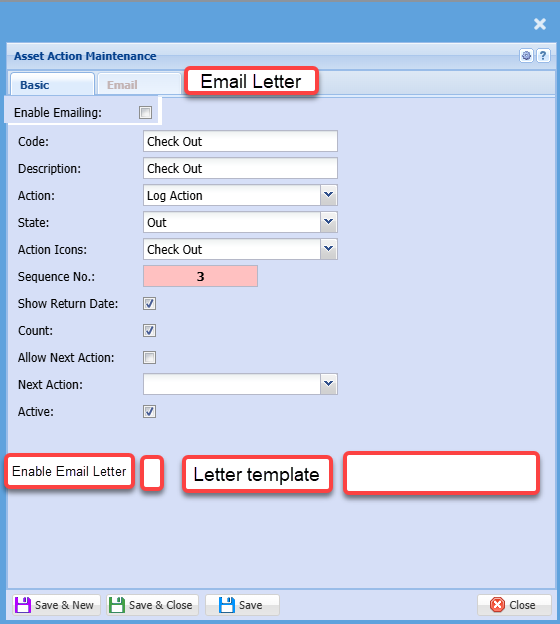
Action setup
When the Enable Email letter is active, then send out an email to the customer contact with the specific letter template.
If an internal user is set to also receive the email, then copy the internal user.
If the company does not have a contact or the contact does not have an email, then no email goes out to customer or internal user.
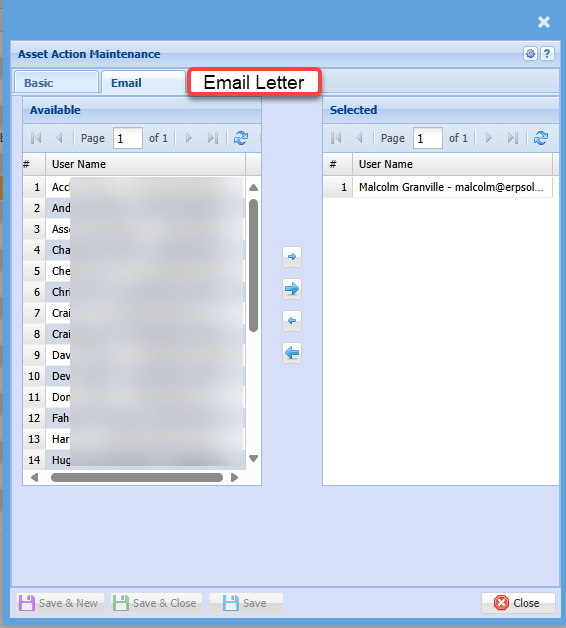
Email letter tab
Email letter tab becomes active if the Enable email letter is ticked / active.
This lists all internal users
Asset Email Letter Templates
Setup multiple letters to be sent out
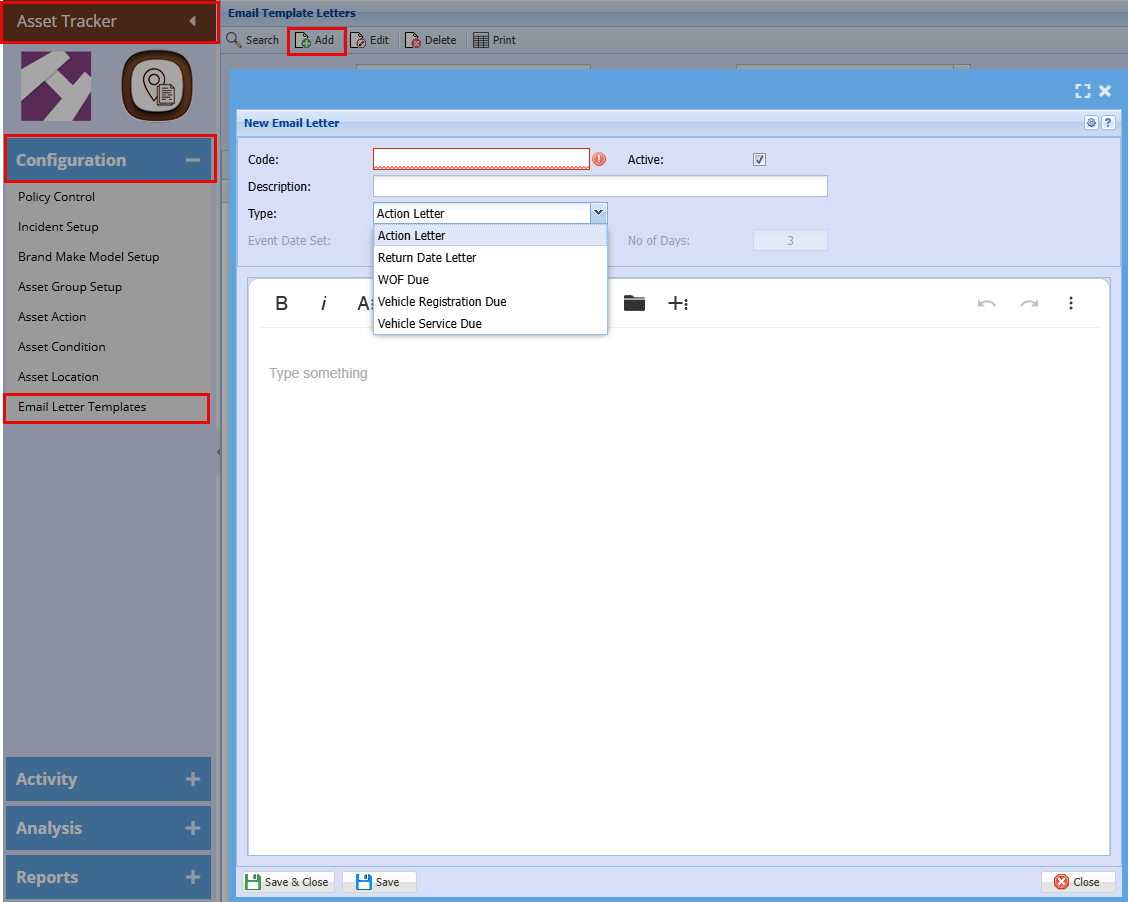
Asset Tracker > Configuration > Email Letter Template

Add / Edit Email Letter
The Email that is sent out must be embedded into the email with the Description of the Letter for the Header of the email.
Sencha latest version makes use of a text editor, see if we can use that to make up the letters.
This allows formatting and pictures to be embedded.
Placeholders
Placeholders can be added to the templates to be substituted with the values they reference when the email is sent.
For a piece of text to be identified as a valid placeholder and substitued it needs to be:
- On the same line
- Enclosed in square brackets
- Not contain embedded square brackets
- Less than 100 characters, including spaces and punctuation and excluding the square brackets, in length
- Match one of the placeholders in the table below. Spaces, punctuation and letter case are ignored. For example
[CustomerContactFullName]or[CUSTOMER_CONTACT_FULL_NAME]will match theCustomer Contact (Full Name)placeholder. The spaces and punctuation are optional and for readability only.
| Placeholders |
Substitution |
Notes |
|
|
The first and last name of the Customer Contact separated by a space. |
1, 2 |
|
|
The first name of the Customer Contact. | 1, 2 |
|
|
The mobile number of the Customer Contact. | |
|
|
The telephone number of the Customer Contact. | |
|
|
The email address of the Customer Contact. | |
|
|
The description of the Action completed for the Action. For example "Check Out" | |
|
|
The code of the Action completed for the Action. May match the description. For example "Check Out" | |
|
|
A list of Assets for which the action is completed for. Each item in the list is the Asset Number, followed by a dash and then the Asset Name. |
|
|
|
A list of the names of the Assets for which the action is completed for. | |
|
|
The number of assets for which the action is completed for. | |
|
|
The total count of all the assets for which the action is completed for. | |
|
|
The company name of the customer | 1 |
|
|
The Return or Due Date of the asset in YYYY-MM-DD format. If there is more than one asset in the email then the first is selected. |
|
|
|
The Return or Due Date of the Asset in D/M/YYY or D/MM/YYYY format (New Zealand) If there is more than one asset in the email then the first is selected. |
|
|
|
The number of days before or after the return or due date If there is more than one asset in the email then the first is selected. |
|
|
|
The warrant of fitness date if the email template type is selected as "WOF Due". This should be the same as "Asset Due Date". If there is more than one vehicle in the email then the first is selected. |
3 |
|
|
The vehicle registration date if the email template is selected as "Vehicle Registration Due". This should be the same as "Asset Due Date". If there is more than one vehicle in the email then the first is selected. |
3 |
|
|
If the asset is a vehicle then the Vehicle registration number as set in the Vehicle Register form for the asset. |
3 |
|
|
If the asset is a vehicle the Description as set in the Vehicle Register form for the asset. If there is more than one vehicle in the email then then each subsequent item is preceded by a comma or "and" for the last item. |
3 |
|
|
The number of vehicle assets in the email | 3 |
Notes
- Used in CRM Email Templates also [WIP]
- For CRM Email Template this placeholder can be substituted by value for the Company Branch contact person depending on the mailing list set up. [TBD]
- Requires the asset to be marked as a vehicle.
Activate Asset mail out
Return Date
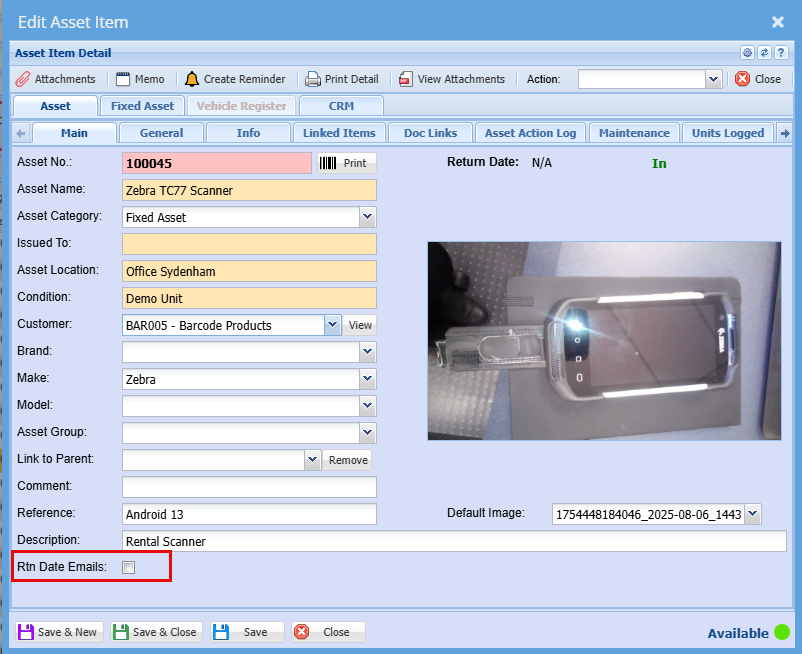
Asset Module > Action > "Main" Tab
- To activate the Mail out for each item the “Return Date Email” checkbox needs to be ticked at bottom of the Asset Main page, tick the “Return Date Email” checkbox to activate this mail‑out.
Asset Return Date Scheduler
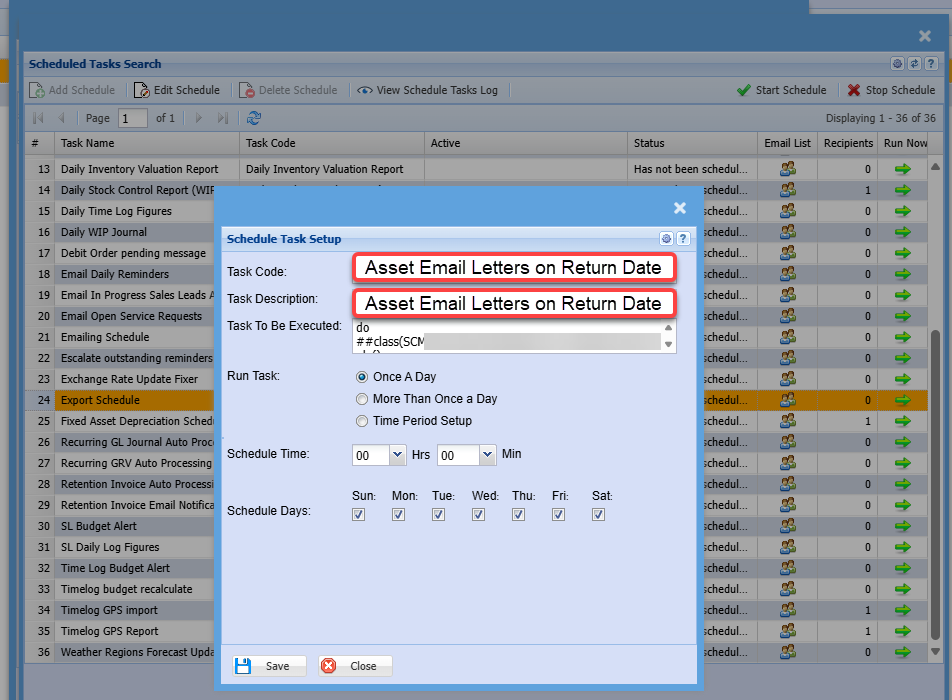
Setup a new schedule to run checks on due letters that are active on assets that are in an out status and have a return date.